Due to an apparent shortage of Buckeyes, and since I'm one of the "dang Yankees" who came to Texas (thanks to Uncle Sam) and decided to stay (originally from Ohio), I've decided to build a coop just for that breed and try my hand at raising them - not hatchery-scale, just a small addition to my mixed flock, but want to keep the breed intact. Anyway, getting ready to start building the coop - they'll be here 06/08 - I have a brooding box for them, but need to get their "Boudoir" up and ready! So, after looking at dozens of coops in here, and searching for pre-built (the prices are unreal!) big enough to hold a couple dozen chickens, I've completed my plans, and am about to start construction. Thought I'd keep a running log of it in here.
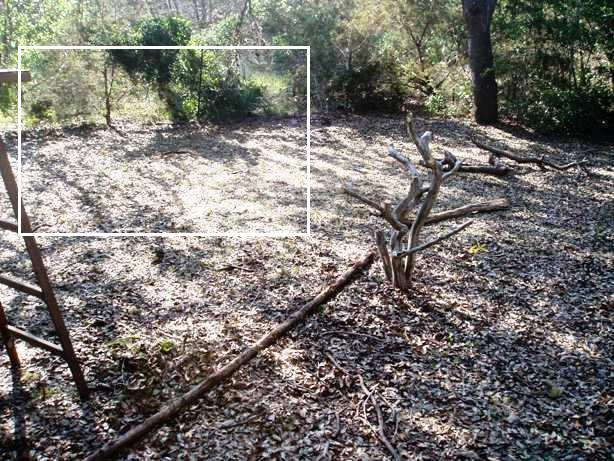
To start with, here'e the area where the coop and run are going to be placed:

The back of the house will be against that rear fenceline, with the run coming towards that natural roost out in the yard. The current coop/run are to the left - you can see the ladder, left where I was working on the roof! The whole area you see - which is about 25' x 50' - will be fenced (06/19 - maybe not...the girls all seem to stay pretty much within that area without the fencing, and don't have any issues returning to the coop at dusk), and the kids will have access to the "free range yard" every other day - alternating with the kids that are in the current coop - that way, I can keep the Buckeye line intact.
Yesterday, I had a friend of mine at work cut 6' long 4" x4" into 2' long posts - these will be used to raise the new henhouse off the ground. I'll add pics as we complete each stage. If I can figure out how to use the scan function on my printer, I'll add the plans at some point!
**************************************
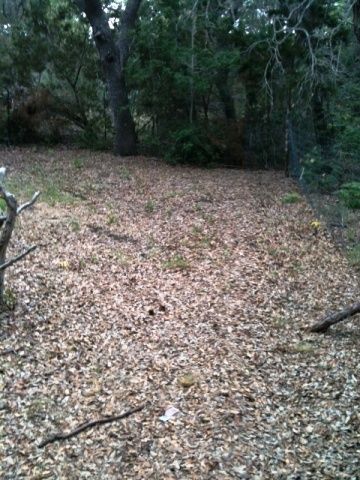
06/19 - CHANGE OF PLANS: Well, I decided to move the new coop to a different area of the yard:
Just a little flatter, and I'll face the front of the coop towards the house so we can watch the activity - the rear of the coop will be along that tree line, and the run will extend outwards 16' towards where I'm standing with the camera. I also went and picked up the coop kit today!
Hopefully, I'll officially get started on the pallet coop tomorrow! Finally! The babies are 1 1/2 weeks old, and growing quickly! 12 new Buckeye chicks will need a larger home pretty quickly! I'll take a couple pics of them tomorrow and bring that up-to-date! 2 of them are supposed to be roos, but only one came with its noggin marked, so we shall see! Won't be selling all of their eggs - going to keep them segregated from the rest of the girls and try raising them - on a very small scale!
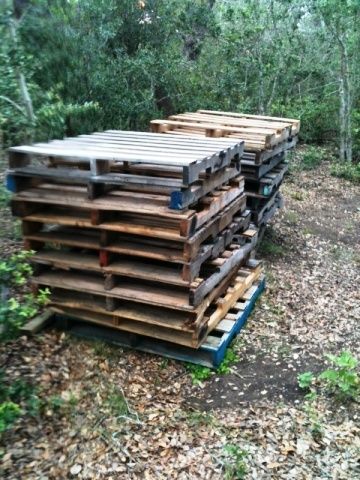
I also have been concerned about how to put together a pallet raised floor so that I could walk around inside the coop without worrying about it collapsing. Didn't want to get free pallets, then spend a bunch of time and money building a frame for the floor (couldn't figure out how to raise it), so I'm just going to do like I did with the Mixed Up Motel and let the ground be the floor! Just have to take some extra precautions against critters. I'll update every time I make some progress - and many thanks to the many people who have posted their coops - a great help in making the decision to use pallets, both to save money and to repurpose! Total cost of the coop kit...$00.00!
***************************************
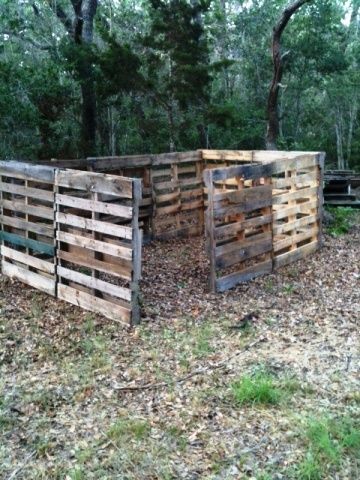
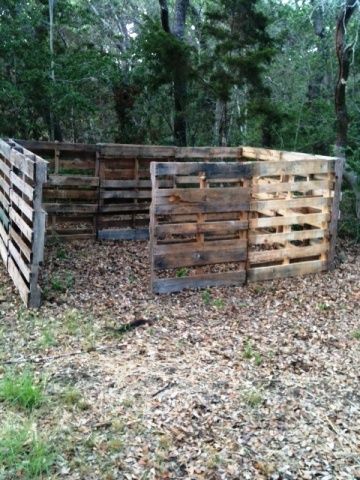
06/21 - CHECKING THE FOOTPRINT
Haven't been feeling so great this week, but thought I'd at least check the footprint. I experimented with standing the pallets on end or on the side, and decided on end was just fine! Interior dimensions are going to be just shy of 70SF - plenty of room for my 13 Buckeyes! Doesn't look like much, but it'll come together...
The opening is for a people door - but I might move the opening to the center, then when the run ic complete, remove the door completely. Open to suggestions...
*********************************************
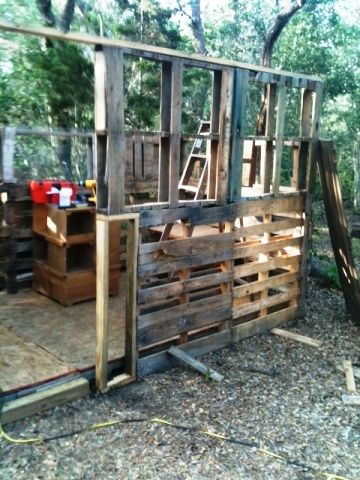
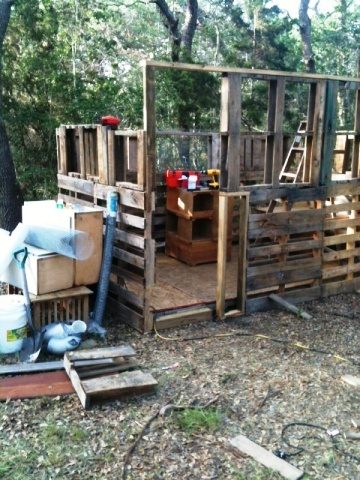
06/23 - STARTING THE SIDING
Thought I'd see how the siding is going to work out before I got too far:
Building inspectors showed up while I was getting started - this is the interior inspection team...
And the exterior inspection team. Didn't hear any complaints, so I kept working.
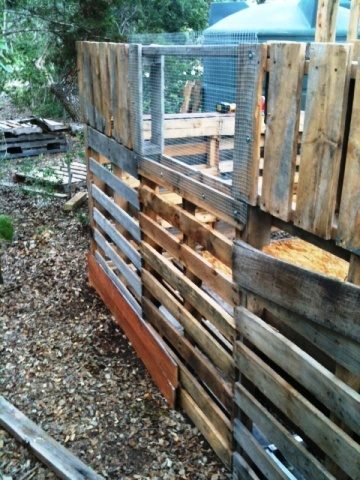
I left the bottom 2 rows and the top row empty for now - going to install 2' wide hardware cloth under the bottom rows, and bend it away from the coop, then cover it with dirt and local rocks (plenty of those!) - will make it more landscape decorative and give the birds more protection. Above the end of the pallet will be 2' of "open" wall - all chicken wire - making the interior height about 6' - going to 7' on the front for the roof slope. The bottom of the chicken wire will be installed under the top row of the siding for better security.
The siding is used fence boards from a fence that was taken down at work. I'm using deck screws (carefully) to attach the siding to the pallets...have to be careful not to drive the screw all the way through - the siding isn't up against a pallet board in all places, and I'm using 3" screws to get to the pallet 2x4s. The pallets are attached to each other with 3" deck screws. Someone suggested this next idea somewhere in their coop design...it's much easier to pre-drill holes in these old pallets - the screws just won't do it on their own! Make sure the drill bit is slightly smaller than the diameter of the screw, and don't drill it completely so the end of the screw bites into the wood.
Except for screws, still no cost! This just might work!
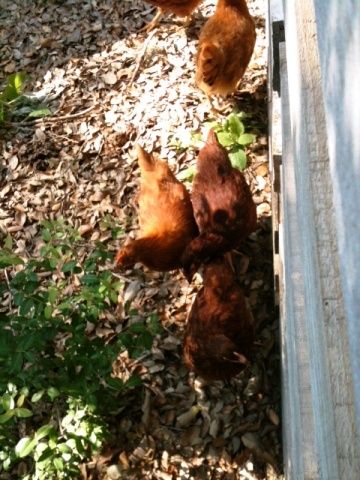
As requested, here are some of the kids waiting for their new home - just the lighter ones - the darker ones are Ameracaunas that belong to a friend of mine.
They're 2 weeks old, and just itching to get out of the brooder! I'll get the coop done over the next couple of weeks, and move them into larger quarters. Then I'll get the run done, and they'll have access to even more space.
******************************************
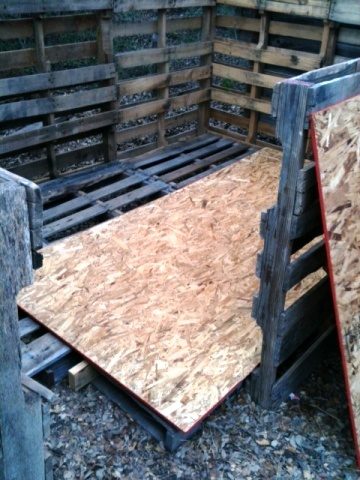
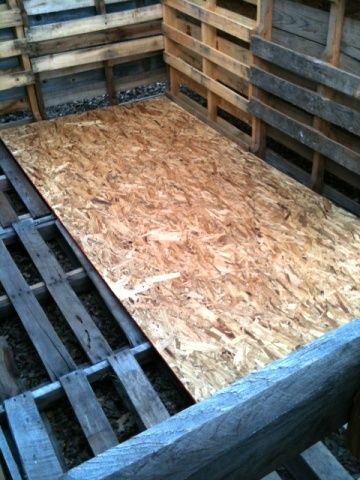
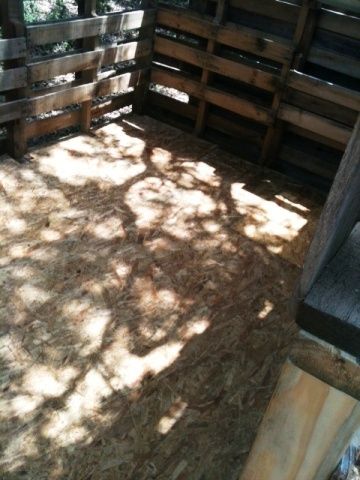
07/10 - FLOOR ALMOST ADDED - AND A NEW NESTING BOX SETUP
Between not feeling well and supressing heat the last couple of weeks, haven't gotten a lot done...but I decided to add a floor rather than just using the ground...makes for easier cleanup. Got started on that:
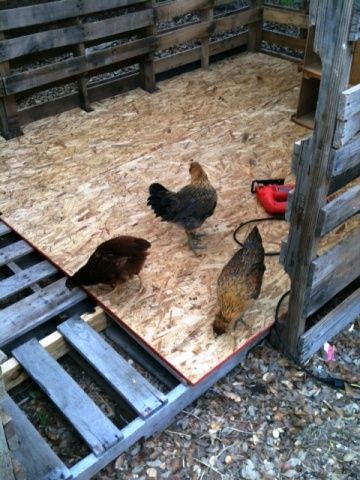
As you can see, I laid pallets on the ground, and I'm covering them with OSB sheets, attached to the pallets with deck screws. Here's part of my thinking...a dryer floor if and when it rains again to any degree. Plus, if a critter does manage to dig under an outer wall, it'll end up underneath the floor instead of inside the coop! With the pallets blocking access, and the OSB attached with deck screws, the inside of the coop will be virtually impenetrable from underneath!
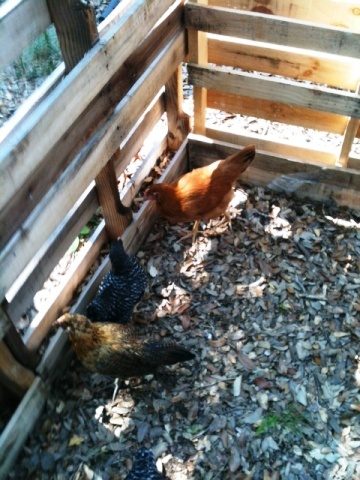
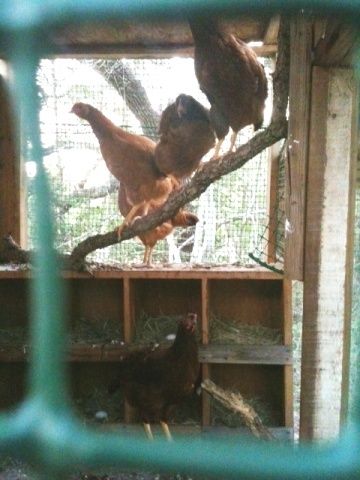
You have to watch out for building inspectors, even out here in the country! Maggie (on the left) and a couple of the Ameracaunas were on duty, and made a surprise visit - they seemed to approve:
I also managed to add hardware cloth to the rear window, and got a little start on the rear siding:
And I added a new nesting box setup,
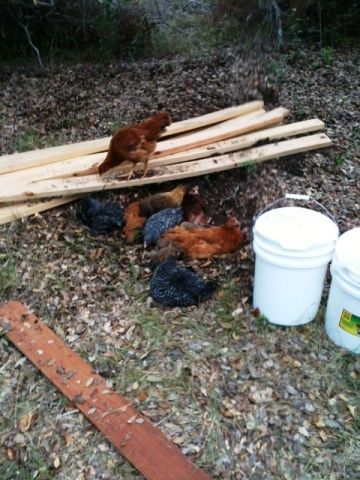
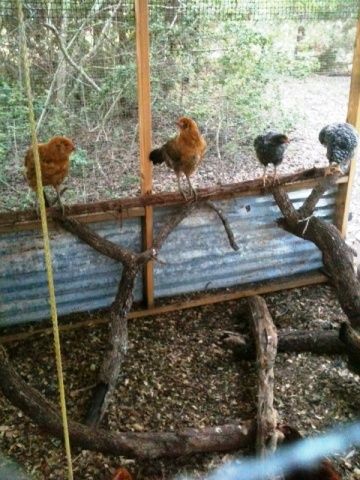
While this was going on, some of the other girls decided to relax:
You can't really tell, but there are 10 hens there! One of them started a dust bath, and the others added to the size of the hole - I guess it was a great spot! The 5-gallon buckets you see will be used for an automatic watering system in the new coop.
It rained yesterday, and is supposed to rain all this week...we need the rain here in central Texas, but I sure do need to get the coop done - the babies are getting too big for their brooder!
*************************************************************
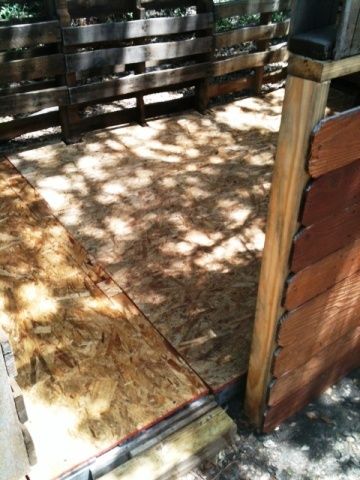
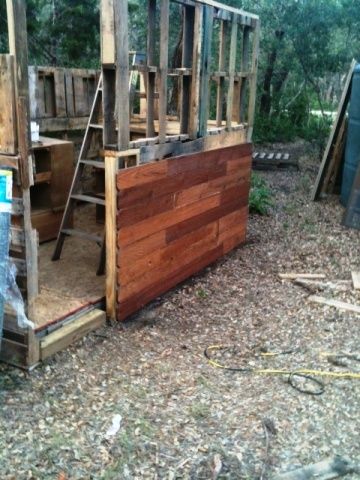
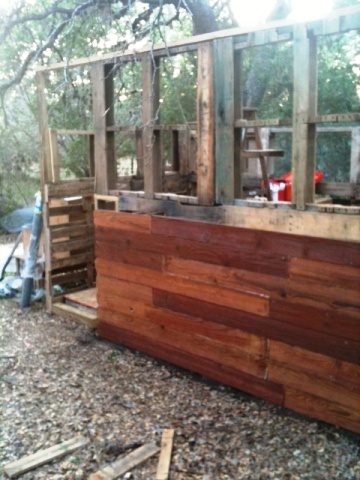
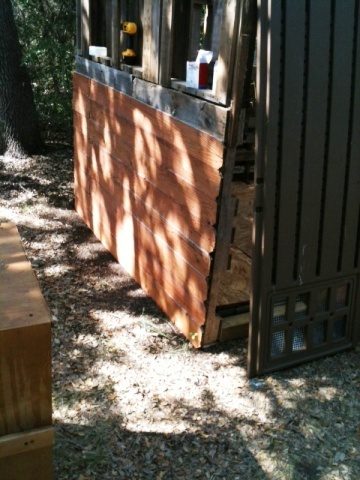
07/16 - GETTING VERY CLOSE TO COMPLETION!
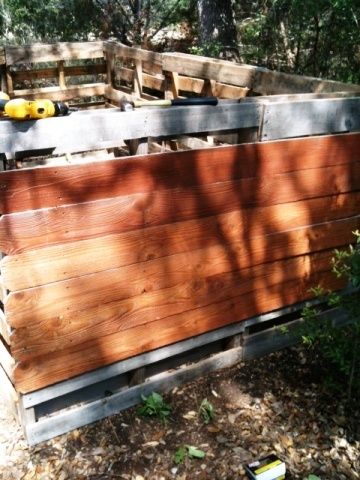
OK...the floor is complete and has been sealed with Thompson's:
All the siding (except 1 more row covering the bottom of soon-to-be installed chicken wire) is on the front wall - here's what was:
And here's what is (still need to add chicken wire to the top half...and a door:
The ends walls are done except for framing to accept the sloped roof, then chicken wire:
As of today, the rear wall siding is almost complete. Still have to add a sloped roof and a door, then the kids can be moved from the brooder! I'll add "completed" pics, hopefully later this week. After the coop is done, I'll add poop trays made from 1/2 pallets, a PVC automatic feeding system, and an automatic watering system based on a rain collection 5-gallon bucket outside the coop...feel like I'm missing something.
While I was working on things, the big girls wore themselves out supervising - they went back into their coop earlier than usual, and started roosting before the sun went down all the way!
Just another hard day at work...
By the way...except for hardware cloth, chicken wire, 2 OSB sheets, and some 2x4s, everything is recycled/repurposed - primarily used pallets from my local feed storeand boards from a fence that a local company dismantled and gave me! Total cost so far for the previously-mentioned stuff: just a hair over $60! NOTE: I needed 8' 2x4s for a door frame/door and the roof - the local Ace Hardware had "bowed" 2x4x12s for 50 cents each! They are bowed only about 2-3 feet from one end - cut off, I have what I need - for 50 cents each! You might want to check your local Ace Hardware or small-box lumber store and see what they have in their "trash" lumber!
*************************************************************
07/26 - PROGRESS! ALMOST COMPLETE!
The baby Buckeyes are getting so big so quickly, and I almost have the Buckeye Boudoir complete! The roof and door have been added, as well as a gutter on the rear wall for the soon-to-be installed automatic waterer:
Before the door was added
The door added - made of 1/2 sheet of reused tin roofing and hardware cloth, with a few new 2x4s
A reused 8' gutter - also have some used downspout that will be added
A shot of the roof from inside - obviously reused tin roofing.
I also installed the automatic feeder...if I did this right, the two upright PVC pipes will be filled with feed, which will, by gravity, keep the horizontal pipe with the troughs cut in filled - no roosting on the feeder, and should be less waste! Have to figure out a non-roosting way to "cover" the troughs to protect the feed from inblown rain (assuming we ever get any more rain here in central Texas!) - thinking about just a 6" wide piece of roofing suspended above the trough.
The trough openings
The funnel, by the way, is simply stored there for a minute
Now I just need to add chicken wire on the top half of both ends and above the door (hopefully during the next few days), and I can move the ever-growing chicks into their new home! Then the automatic waterer and a run, and it'll be complete! No more updates until then...have a great day!
************************************************************************
08/09 - COMPLETE AND NOW INHABITED!
Except for a few "cosmetic" things and an automatic watering system (no rush - no rain!) the Boudoir is complete, and the Buckeyes are now residing in their new home!
Decided to paint the metal part of the door for decorative reasons.
The big girls tested and passed the auto feeder!
Across the coop from the door - the roost extends above what will be the nesting boxes, extending across the back wall and one end - a total of 16' of roost. Working on a used pallet poop tray, whiah will be at the level of the top of the nesting boxes - almost ready.
Decided to use an old stepladder for easy access to the roost - they haven't quite figured that out yet, except for Maggie, who's older and used to getting to the roosts from the Mixed Up Motel.
A little better shot of the roost and nesting boxes. Total approximate cost - primarily for hardware cloth, chicken wire and a few necessary 2x4s: just a hair over $73.00! And since they're going to free-range (yard contained - 25' x 50') there's no additional cost for a run!
There are plenty more pics if anyone wants any - detailed type stuff.
Thanks for all the input in BYC for helping get to this completion!

**************************************
06/19 - CHANGE OF PLANS: Well, I decided to move the new coop to a different area of the yard:

I also have been concerned about how to put together a pallet raised floor so that I could walk around inside the coop without worrying about it collapsing. Didn't want to get free pallets, then spend a bunch of time and money building a frame for the floor (couldn't figure out how to raise it), so I'm just going to do like I did with the Mixed Up Motel and let the ground be the floor! Just have to take some extra precautions against critters. I'll update every time I make some progress - and many thanks to the many people who have posted their coops - a great help in making the decision to use pallets, both to save money and to repurpose! Total cost of the coop kit...$00.00!
***************************************
06/21 - CHECKING THE FOOTPRINT
Haven't been feeling so great this week, but thought I'd at least check the footprint. I experimented with standing the pallets on end or on the side, and decided on end was just fine! Interior dimensions are going to be just shy of 70SF - plenty of room for my 13 Buckeyes! Doesn't look like much, but it'll come together...
*********************************************
06/23 - STARTING THE SIDING
Thought I'd see how the siding is going to work out before I got too far:
The siding is used fence boards from a fence that was taken down at work. I'm using deck screws (carefully) to attach the siding to the pallets...have to be careful not to drive the screw all the way through - the siding isn't up against a pallet board in all places, and I'm using 3" screws to get to the pallet 2x4s. The pallets are attached to each other with 3" deck screws. Someone suggested this next idea somewhere in their coop design...it's much easier to pre-drill holes in these old pallets - the screws just won't do it on their own! Make sure the drill bit is slightly smaller than the diameter of the screw, and don't drill it completely so the end of the screw bites into the wood.
Except for screws, still no cost! This just might work!
As requested, here are some of the kids waiting for their new home - just the lighter ones - the darker ones are Ameracaunas that belong to a friend of mine.
******************************************
07/10 - FLOOR ALMOST ADDED - AND A NEW NESTING BOX SETUP
Between not feeling well and supressing heat the last couple of weeks, haven't gotten a lot done...but I decided to add a floor rather than just using the ground...makes for easier cleanup. Got started on that:
You have to watch out for building inspectors, even out here in the country! Maggie (on the left) and a couple of the Ameracaunas were on duty, and made a surprise visit - they seemed to approve:
I also managed to add hardware cloth to the rear window, and got a little start on the rear siding:
And I added a new nesting box setup,
While this was going on, some of the other girls decided to relax:
It rained yesterday, and is supposed to rain all this week...we need the rain here in central Texas, but I sure do need to get the coop done - the babies are getting too big for their brooder!
*************************************************************
07/16 - GETTING VERY CLOSE TO COMPLETION!
OK...the floor is complete and has been sealed with Thompson's:
All the siding (except 1 more row covering the bottom of soon-to-be installed chicken wire) is on the front wall - here's what was:
And here's what is (still need to add chicken wire to the top half...and a door:
The ends walls are done except for framing to accept the sloped roof, then chicken wire:
As of today, the rear wall siding is almost complete. Still have to add a sloped roof and a door, then the kids can be moved from the brooder! I'll add "completed" pics, hopefully later this week. After the coop is done, I'll add poop trays made from 1/2 pallets, a PVC automatic feeding system, and an automatic watering system based on a rain collection 5-gallon bucket outside the coop...feel like I'm missing something.

While I was working on things, the big girls wore themselves out supervising - they went back into their coop earlier than usual, and started roosting before the sun went down all the way!
Just another hard day at work...
By the way...except for hardware cloth, chicken wire, 2 OSB sheets, and some 2x4s, everything is recycled/repurposed - primarily used pallets from my local feed storeand boards from a fence that a local company dismantled and gave me! Total cost so far for the previously-mentioned stuff: just a hair over $60! NOTE: I needed 8' 2x4s for a door frame/door and the roof - the local Ace Hardware had "bowed" 2x4x12s for 50 cents each! They are bowed only about 2-3 feet from one end - cut off, I have what I need - for 50 cents each! You might want to check your local Ace Hardware or small-box lumber store and see what they have in their "trash" lumber!
*************************************************************
07/26 - PROGRESS! ALMOST COMPLETE!
The baby Buckeyes are getting so big so quickly, and I almost have the Buckeye Boudoir complete! The roof and door have been added, as well as a gutter on the rear wall for the soon-to-be installed automatic waterer:
Before the door was added
The door added - made of 1/2 sheet of reused tin roofing and hardware cloth, with a few new 2x4s
A reused 8' gutter - also have some used downspout that will be added
A shot of the roof from inside - obviously reused tin roofing.
I also installed the automatic feeder...if I did this right, the two upright PVC pipes will be filled with feed, which will, by gravity, keep the horizontal pipe with the troughs cut in filled - no roosting on the feeder, and should be less waste! Have to figure out a non-roosting way to "cover" the troughs to protect the feed from inblown rain (assuming we ever get any more rain here in central Texas!) - thinking about just a 6" wide piece of roofing suspended above the trough.
The trough openings
The funnel, by the way, is simply stored there for a minute
************************************************************************
08/09 - COMPLETE AND NOW INHABITED!
Except for a few "cosmetic" things and an automatic watering system (no rush - no rain!) the Boudoir is complete, and the Buckeyes are now residing in their new home!
Decided to paint the metal part of the door for decorative reasons.
The big girls tested and passed the auto feeder!
Across the coop from the door - the roost extends above what will be the nesting boxes, extending across the back wall and one end - a total of 16' of roost. Working on a used pallet poop tray, whiah will be at the level of the top of the nesting boxes - almost ready.
Decided to use an old stepladder for easy access to the roost - they haven't quite figured that out yet, except for Maggie, who's older and used to getting to the roosts from the Mixed Up Motel.
A little better shot of the roost and nesting boxes. Total approximate cost - primarily for hardware cloth, chicken wire and a few necessary 2x4s: just a hair over $73.00! And since they're going to free-range (yard contained - 25' x 50') there's no additional cost for a run!


There are plenty more pics if anyone wants any - detailed type stuff.
Thanks for all the input in BYC for helping get to this completion!