I finally have the new tractor/coop 90% done. Tomorrow I will start on the second 90%.

I wanted a hoop coop for various reasons, weight being the biggest issue with any chicken tractor. I am also constrained by two gates in the fence that are about 40" wide, so the tractor had to be limited to about 36" wide.
Total size is just over 8 feet long by just over 3 feet wide. They will have a 30'x7' run dedicated for their use when not tractoring.
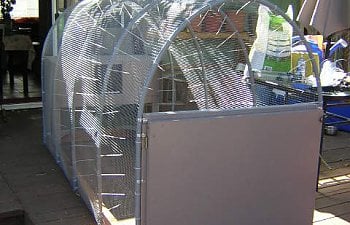
Lets start with the basic materials list. 3x8 frame made from pressure treated 2x4s. Braced the corners with some 1x4 to prevent wracking while tractoring. The hoops are 10' length 1/2" PVC electrical conduit. It was cheaper and is UV rated for outdoor use.
I used 1/2 inch Hardware cloth covering the hoops. Home Depot had 48" wide x 25' long rolls for $68. I would have preferred to use Red Brand 1" heavy duty fencing but no one around here seems to carry anything but the 2"x4"
I ripped some 2x4s in half for framing the Man door and the nest box. I also used some 1x4 for the bottom lip of the nest box. All the flat surfaces are 1/4" tempered hardboard. I had a few sheets around. Primed everything and then painted with two coats of some leftover house paint.
Now I am sure that some of you have noticed that my zip ties are white and not the UV rated black. A friend gave me a bag of 1000 a while back so that it what I used. Most of them will be covered by the roof anyway.
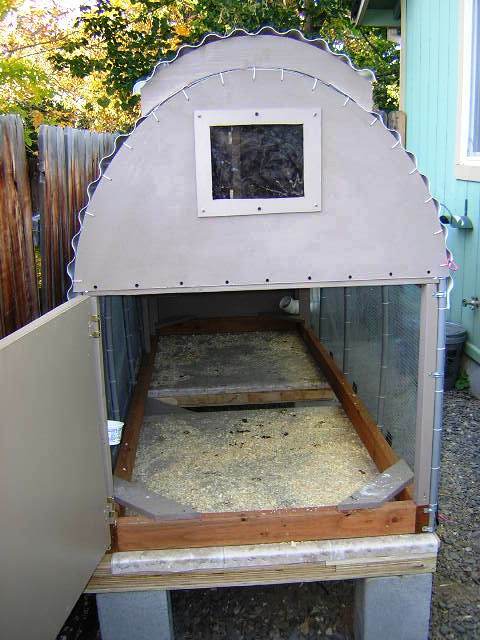
The area just over the nesting box works as a bit of extra storage for the odds and ends and has a door that covers the open area to keep the wind off the roost.
The Roofing is 3 panels of Tuftex 26" x 8' SeaCoaster Trans White Roof Panel from Lowes. Of course a coop needs plenty of ventilation so I vented the top about 3 inches up.
When it gets seriously cold I can easily limit the amount of open airflow but still keep up ventilation.
Fergus is jealous!
Time to go pick up the chickens! A very wonderful friend gave me 4 Buff Orpingtons. They are about 18 months old.
I ended up grabbing a 2x10 and cutting out arced roof supports for the vented roof. It looks much nicer than the blocks and will be much more structurally sound.
I still have a lot to do but it will keep them safe and secure for now. You cannot see it but there is a string of LED lights strung along the roof for light and wheels mounted under the nesting box to make tractoring easier. The wheels are mounted on the inside of the frame so I could still roll through the gates.
Yay for Harbor Freight!
Speaking of which...
these are great. Just remove the bracket add a few washers and it is perfect for spanning a 2x4. Saved me from buying all the hardware needed to make an axle.
More details are here.
Happy Girls! They all left me eggs by the end of the first day!
You will also notice the PVC feeder has now been installed under the nesting box. It has to come off to go through the gates but that is easy. Also from here you can see the wheels.
Poultry nipples are coming soon as well. I am using a dog bowl until they get here.
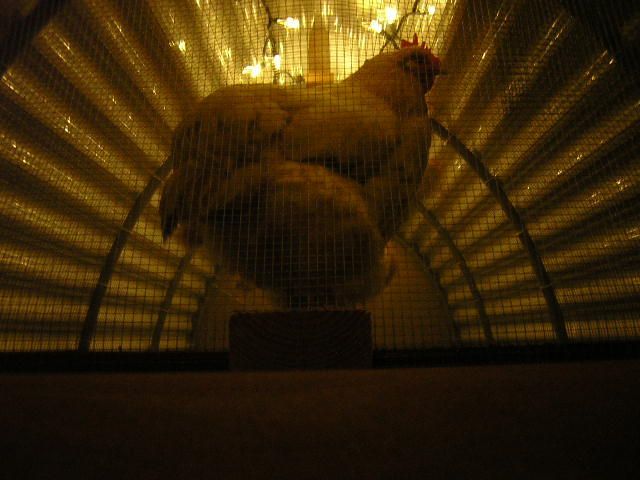
A peep inside with the lights on. I don't think Fanny was too happy about the blast of cold air I let in but she still managed a nice pose.
I added a plexiglass window so I could peep at them on the roost. A second window will go in the access door on the far side. I also figured out that the roost needed to be moved a bit over from center. It was a bit tight for the girls to get up. Moving it over has made it much easier for them.
Also you will notice that I got my watering nipples in. The jug is tied in place so they can't knock it over. I spent all morning trying to get them to drink from the darn nipple and they just looked at me like I was a moron. Then later that afternoon I was cleaning in the run when they come in from the back yard and I hear a click-clicking noise. They are all lined up taking turns drinking from the nipple!
Stupid birds!
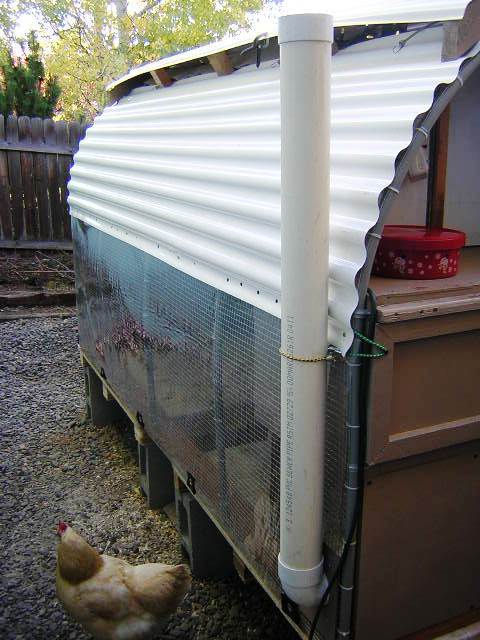
Several things to see here. First I built a base for the coop to sit on for the winter since it will not be tractoring till spring. The girls get to go out of the 7x30 run and free range in the back yard everyday. They love it so much they charge the gate every time I get near it.
Next, you will see one of my PVC feeders attached to the side. This is the 4th incarnation of the PVC feeder. Mostly just fine tuning and I have an extra one for outside the coop.
There is a shot of the nesting box. I noticed I didn't get one in before. The girls randomly choose a side to lay on for the day.
Finally you will notice that I have added clear vinyl roll up windows on the bottom half of the coop. I used 20mil clear vinyl from the fabric store. This is the same stuff they use for Jeep soft top windows. This allows me to keep the weather out and makes it easy to control ventilation. The last shot shows that they are easy to pull up out of the way


I wanted a hoop coop for various reasons, weight being the biggest issue with any chicken tractor. I am also constrained by two gates in the fence that are about 40" wide, so the tractor had to be limited to about 36" wide.
Total size is just over 8 feet long by just over 3 feet wide. They will have a 30'x7' run dedicated for their use when not tractoring.
Lets start with the basic materials list. 3x8 frame made from pressure treated 2x4s. Braced the corners with some 1x4 to prevent wracking while tractoring. The hoops are 10' length 1/2" PVC electrical conduit. It was cheaper and is UV rated for outdoor use.
I used 1/2 inch Hardware cloth covering the hoops. Home Depot had 48" wide x 25' long rolls for $68. I would have preferred to use Red Brand 1" heavy duty fencing but no one around here seems to carry anything but the 2"x4"
I ripped some 2x4s in half for framing the Man door and the nest box. I also used some 1x4 for the bottom lip of the nest box. All the flat surfaces are 1/4" tempered hardboard. I had a few sheets around. Primed everything and then painted with two coats of some leftover house paint.


Now I am sure that some of you have noticed that my zip ties are white and not the UV rated black. A friend gave me a bag of 1000 a while back so that it what I used. Most of them will be covered by the roof anyway.
The area just over the nesting box works as a bit of extra storage for the odds and ends and has a door that covers the open area to keep the wind off the roost.


The Roofing is 3 panels of Tuftex 26" x 8' SeaCoaster Trans White Roof Panel from Lowes. Of course a coop needs plenty of ventilation so I vented the top about 3 inches up.
When it gets seriously cold I can easily limit the amount of open airflow but still keep up ventilation.
Fergus is jealous!


Time to go pick up the chickens! A very wonderful friend gave me 4 Buff Orpingtons. They are about 18 months old.
I ended up grabbing a 2x10 and cutting out arced roof supports for the vented roof. It looks much nicer than the blocks and will be much more structurally sound.
I still have a lot to do but it will keep them safe and secure for now. You cannot see it but there is a string of LED lights strung along the roof for light and wheels mounted under the nesting box to make tractoring easier. The wheels are mounted on the inside of the frame so I could still roll through the gates.
Yay for Harbor Freight!
Speaking of which...
 these are great. Just remove the bracket add a few washers and it is perfect for spanning a 2x4. Saved me from buying all the hardware needed to make an axle.
More details are here.


Happy Girls! They all left me eggs by the end of the first day!
You will also notice the PVC feeder has now been installed under the nesting box. It has to come off to go through the gates but that is easy. Also from here you can see the wheels.
Poultry nipples are coming soon as well. I am using a dog bowl until they get here.
A peep inside with the lights on. I don't think Fanny was too happy about the blast of cold air I let in but she still managed a nice pose.

I added a plexiglass window so I could peep at them on the roost. A second window will go in the access door on the far side. I also figured out that the roost needed to be moved a bit over from center. It was a bit tight for the girls to get up. Moving it over has made it much easier for them.
Also you will notice that I got my watering nipples in. The jug is tied in place so they can't knock it over. I spent all morning trying to get them to drink from the darn nipple and they just looked at me like I was a moron. Then later that afternoon I was cleaning in the run when they come in from the back yard and I hear a click-clicking noise. They are all lined up taking turns drinking from the nipple!


Several things to see here. First I built a base for the coop to sit on for the winter since it will not be tractoring till spring. The girls get to go out of the 7x30 run and free range in the back yard everyday. They love it so much they charge the gate every time I get near it.
Next, you will see one of my PVC feeders attached to the side. This is the 4th incarnation of the PVC feeder. Mostly just fine tuning and I have an extra one for outside the coop.
There is a shot of the nesting box. I noticed I didn't get one in before. The girls randomly choose a side to lay on for the day.


Finally you will notice that I have added clear vinyl roll up windows on the bottom half of the coop. I used 20mil clear vinyl from the fabric store. This is the same stuff they use for Jeep soft top windows. This allows me to keep the weather out and makes it easy to control ventilation. The last shot shows that they are easy to pull up out of the way