The Rubber Chicken Coop

As of 5/2210: Still to come: nesting boxes, wire-enclosed ramp, hardware cloth around base.
From the Beginning:
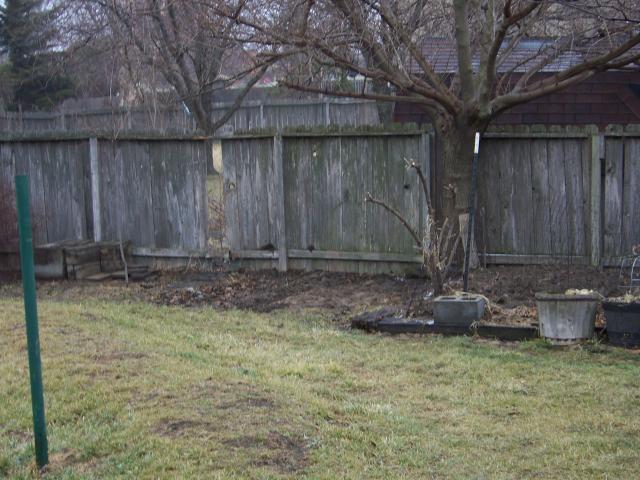
The Site: An ordinary suburban Kansas backyard, complete with patchy grass, privacy fence, & mulberry tree.
March 28: Removed the kids' old sand box from the shady site; still have to remove the weedy shrub seen in front of the tree trunk, as well as the railroad ties outlining the (now too shady) old garden site, and level the area.
Construction, Step One:
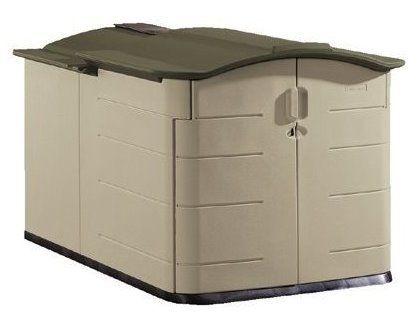
Buy horizontal Rubbermaid shed designed for storing riding mowers, bicycles, etc. (on clearance!) I like that it's made of plastic (so: easy to clean) and I like its double-wall construction, which I think will help insulate it. It's approximately 4' x 6' x 4' high, which should work for the three chickens I plan to start with.
Step Two:
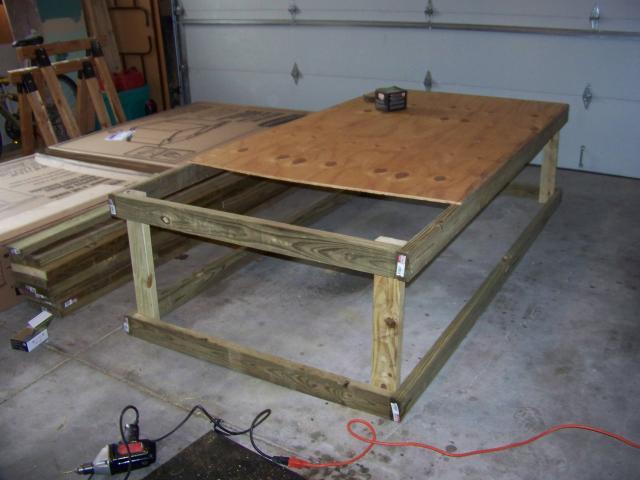
Build base to raise shed off ground. Base is 4' x 8' x 2' high and made of treated 2x4s. Below left is my original design in progress. I consulted with y'all on BYC and with my builder relatives, and the consensus was that it wasn't going to be strong enough. So I beefed it up by doubling the 2x4 posts (and using 2x6s on the ends) and putting the joists on regulation 16" centers instead of the 19" centers I was trying to get away with.
I also decided to actually measure the shed's width and discovered that it's actually 54" wide, not just the nominal 4' wide I was using. So I had to remove the plywood, which I had nailed on really firmly. What's that quip, "Measure twice, cut once?" Well, I hadn't even measured once -- how dumb was that?!
Below right is the beefed--up version, almost finished. The plywood is primed for painting because it's not exterior plywood.
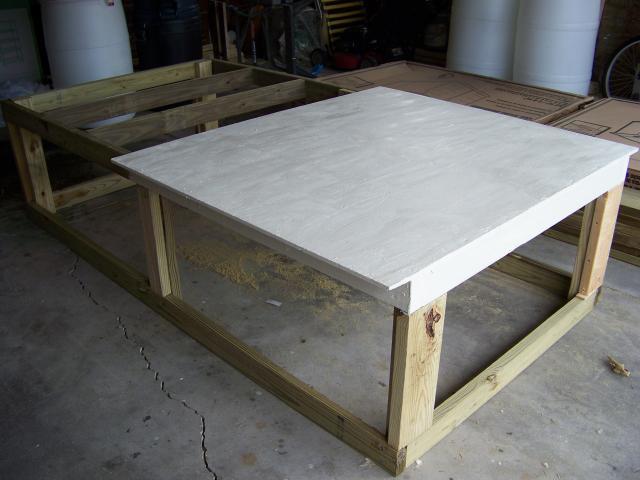
I eventually decided to add diagonal bracing for additional strength.
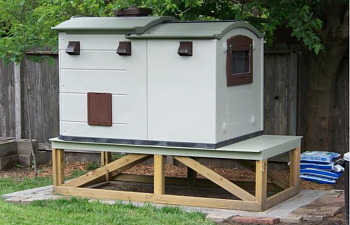
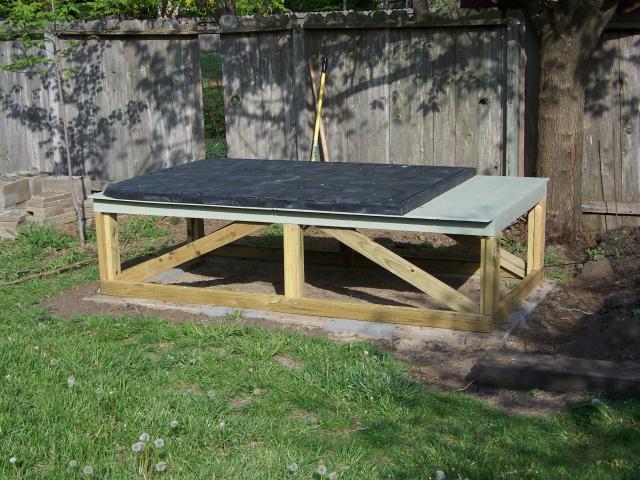
Here it is on the leveled site, painted and with the shed base bolted down:
The base sits on 8"x16"x2" concrete pavers on a leveled-sand base.
The underneath area has a sand-and-dirt mixture, to which I will add ashes and diatomaceous earth,
for the chickens to dust-bathe in and ingest for grit.
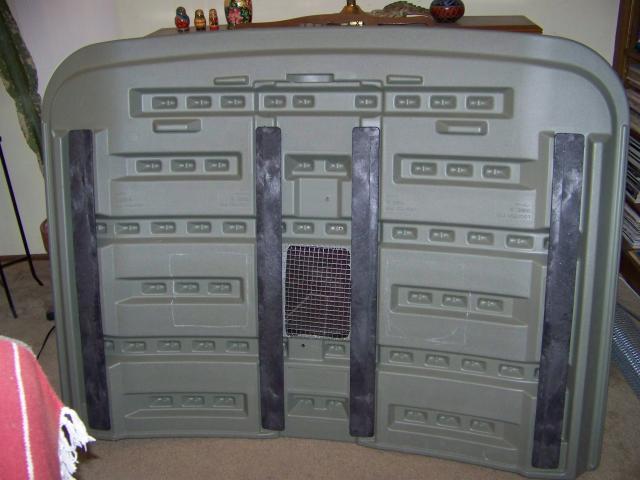
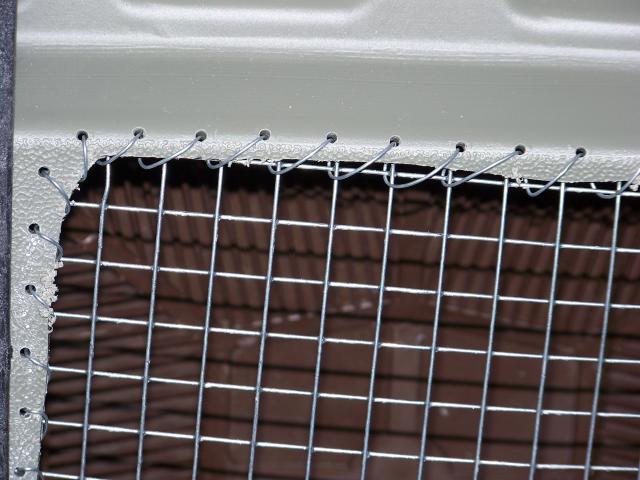
Step Three: Add ventilation openings to shed. First, a standard roof vent in one-half of the sliding shed roof:The right-hand lower photo, below, shows detail of how I attached the hardware cloth varmint-proofing. I "sewed" it on by drilling small holes all around the inside edge of the opening, and using the wire the hardware cloth was wrapped in as "thread."

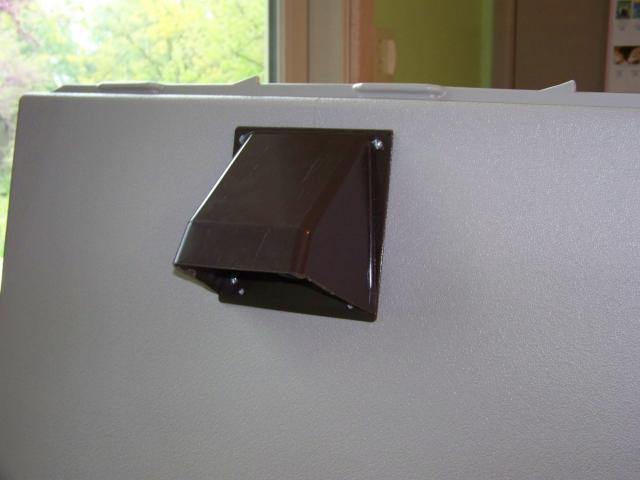
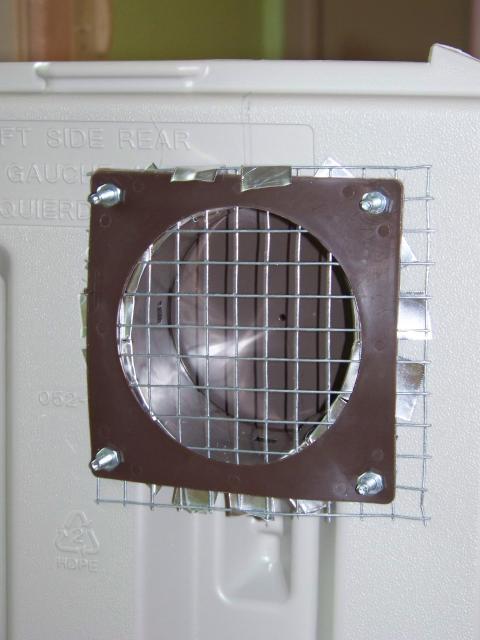
I added six vents of the type used for dryer exhaust at the top of the walls. I got them from an online source for about half what they cost at Home Depot or Lowe's. They come with a metal cylinder about 14 inches long, meant to go through and exterior wall; I cut it down to about 4 inches for the shed's 2-inch thick walls. The image at right shows how I lined each of them with hardware cloth. The vents have a flap which normally hangs in the closed position; in order to keep them open most of the time, I added an (exterior-grade) velcro patch to the top of the flap and the underside of the hood.
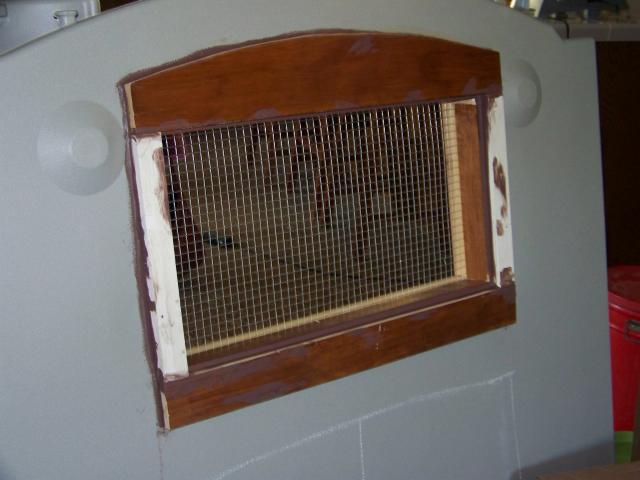
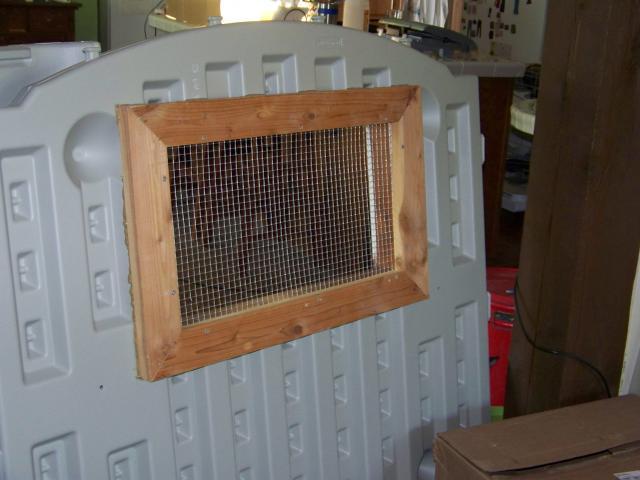
Step Four: Next, I added a window, for both light and ventilation. It's constructed of scrap lumber and attached with construction adhesive, and it's also lined with hardware cloth. (Left: outside view, before painting; right: inside view.) I had never built anything like a window frame before and learned that I didn't really do it "right," so I hope it stands up OK. I caulked thoroughly around the outside of the frame.
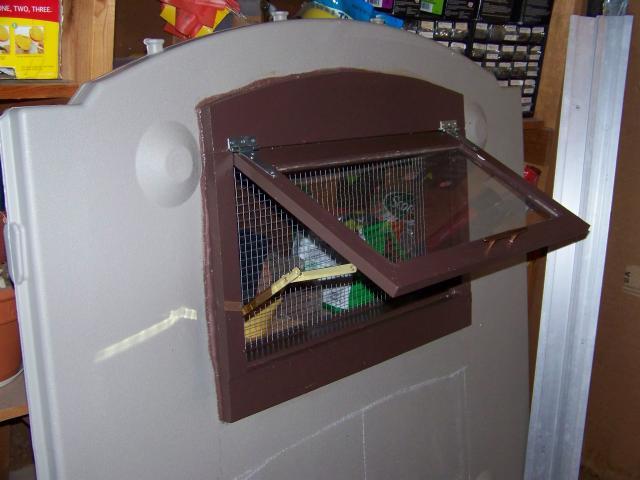
I wanted an openable window, so then I had to build a framed window pane, which was also above my skill level. This time I did some research online and ended up cutting a 1/2' groove with my circular saw in the narrow edge of a length of 1"x2". Luckily, this exactly fit the thickness of the plexiglass pane I cut! I then used my simple manual miter box to cut the 45° angles I needed, and assembled the frame with wood glue around the pane, held in place with a long bungee cord around the edge like a rubber band. I stapled the joints on both sides, and so far it seems quite sturdy.The photo below shows the completed window, painted, hung on some hinges I found around the house, with a bracket to hold the window open at an angle, and a handle that was leftover from some other project. I'm thinking of adding a triangle of plastic sheeting on each side of the window to help keep out the rain (and it would fold in when the window's closed).
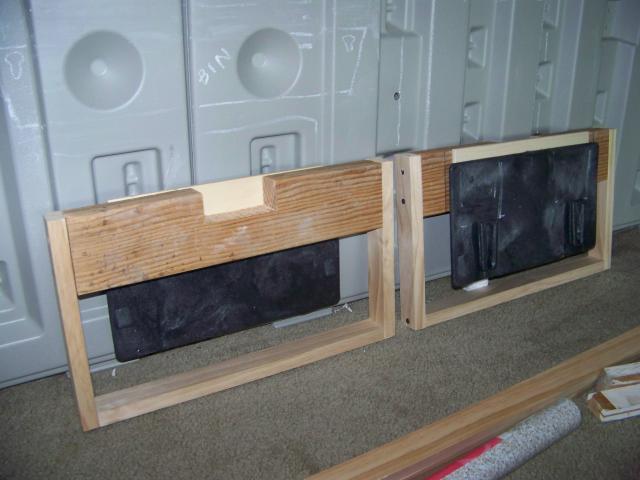
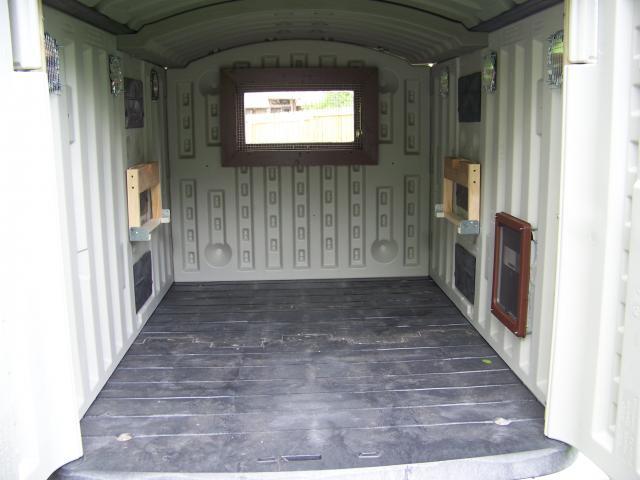
Step Five: Roost & poop board support. The side walls of the shed are in two pieces, each held together by 3 of these heavy black plastic pieces which slide into slots on the inside of the walls. You can see them in the interior shot of the assembled coop farther below. Instead of trying to attach the roost supports directly to the shed's double walls, I decided to use the sturdy black connector pieces. Below you can see both sides of the design I came up with: wide slot on top for the 2x4 roost, and a frame to suspend the poop board underneath it.
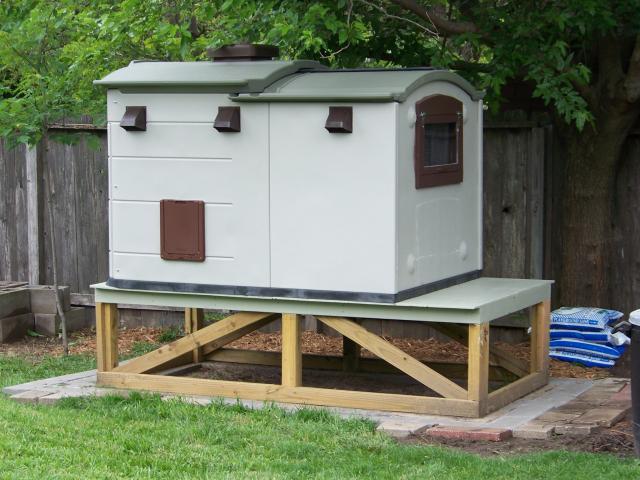
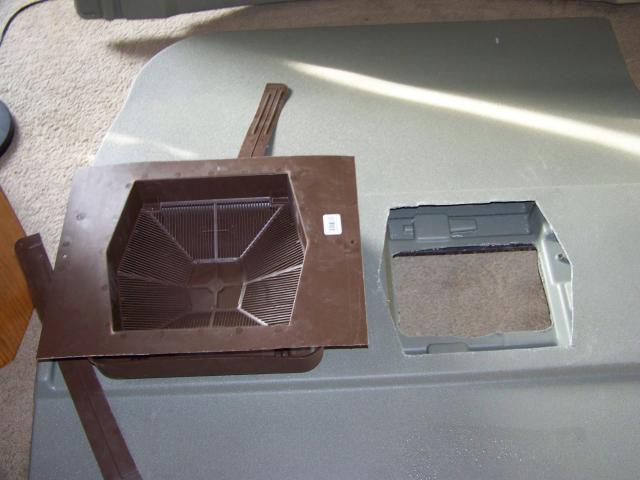
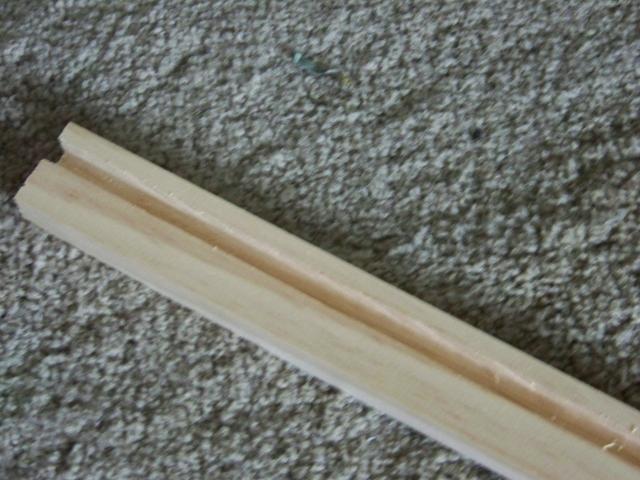
Step Six: Pop door. I bought a dog door with a lockable panel, in brown to match the rest of the coop trim. It was relatively easy to install, just as you would in an exterior door. I caulked around and inside it, and used some expandable foam stuff to cover a couple of gaps in the provided plastic liner. Below you can see the installed pop door and the roost/poop board support installed on the black plastic wall connectors. The brackets on the bottom of the roost support assembly will hold removable rails for the poop board, and I will cut a slot in one side wall to pull the poop board out for cleaning. The closeup below right shows the grooved 1"x2" poop-board railing. Not having a router, I ended up cutting the slot by repeatedly sawing down the length of the 1"x2" with my circular saw, and then chiseling out the remaining wood bits with a screwdriver!
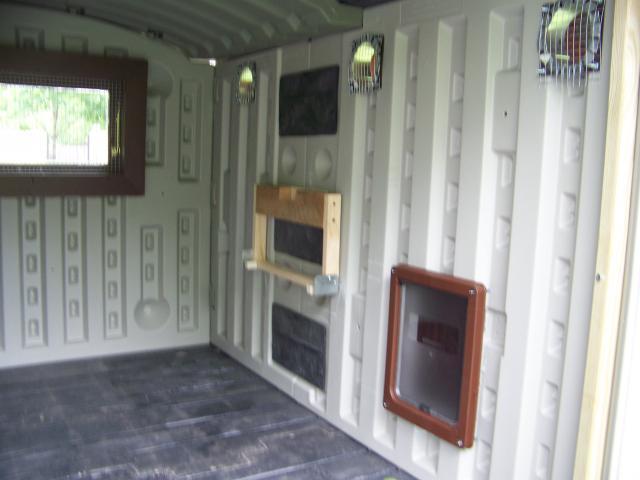
Below is another shot of the assembled exterior on its base (the doors on the left end of the coop open fully for cleaning), and a view of the interior with the door wide open.
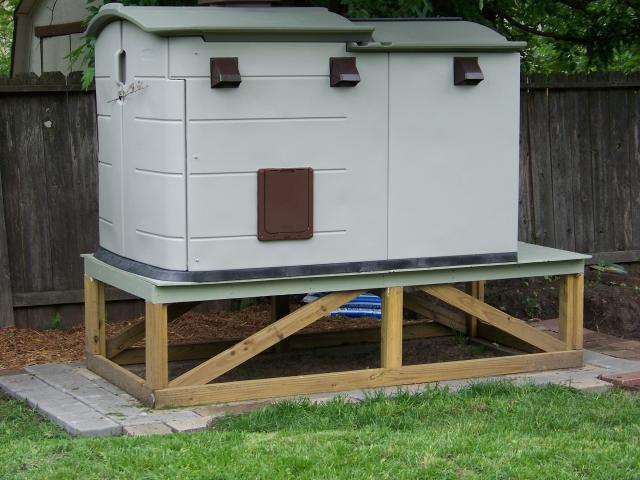
Still to come: nesting boxes, which will sit on the right end of the coop platform, hardware cloth enclosing the base (with an openable gate on one end), and a wire-enclosed ramp from the pop door to under the coop. I plan to use the Fort-Knox-secure coop only at night and when we are away for a few days. For their usual ranging area, I plan to fence in a larger area to keep them and the dogs away from each other, and I hope to keep it hawk-safe by stringing CDs around the top of the fence. And when the dogs are secured and I'm out with the chickens, I plan to let them have access to the whole (privacy-fenced) back yard.
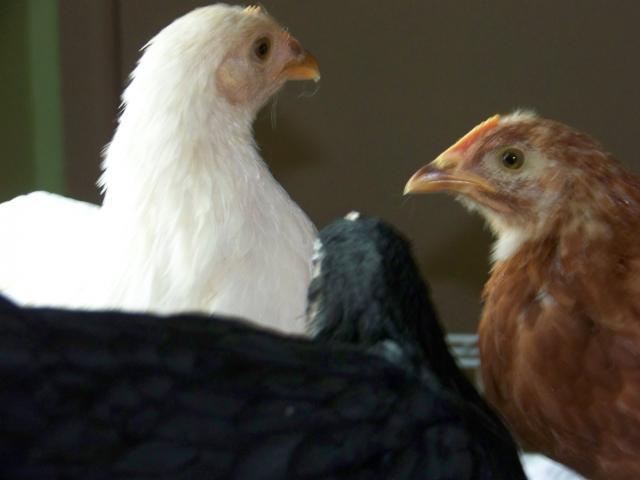
Oh, and here's a recent picture of my three girls, who are still living in a large wire dog crate in my kitchen:
Anne is the light-colored Amber sex-link (she's kind of an apricots-and-cream color -- very pretty).
Emily is the brownish-red one, a golden sex-link (she's the tamest, & will roost on my shoulder.)
Charlotte is my Black Australorp (very bossy).
They're about 8 weeks old.