THE "SMALL SPACE, BIG STYLE" CITY COOP

I once started a thread on the BYC message board asking, “Is a chicken coop ever really finished?” It was, in part, a rhetorical question. Most posters echoed our sentiment that, of course it’s never finished; don’t even expect that! Rick (aka DH) worked the entire summer on our coop, modifying it as we learned what our chickens needed and what worked for us in managing and caring for them. Here, then, is a description of our process and photos of our coop. We hope it will be useful to other newbies keeping very small flocks of chickens in urban backyards.
Our coop is a variation of Dennis Harrison-Noonan’s Playhouse Coop. His coop is featured here on BYC and he has two videos on YouTube here and here. Rick says Dennis provided great instructions for framing out the pen and coop. He especially liked Dennis’ ideas for using scraps of plywood as gussets to join the wall frame, and for using hinges to secure the wall frame to the base. The modifications we made are primarily to increase space and decrease poop detail.
PEN
Frame, Base, & Fencing
Rick built the frame according to Dennis’ specs, but set it on a base of bricks at the corners and middle of each wall. Dennis’ plans call for putting wire fencing on the floor of pen and cutting out a circle in the center. We instead used 1/4” hardware cloth, secured it to the outside base of the pen, and buried it 18 inches deep. Hardware cloth was probably the single most expensive material we purchased for the coop and burying it that deep was a real chore. However, we think it’s money and time well-spent to protect our birds from predators and keep them from digging their way to freedom. For some reason, our hens love to dig big holes at the base of the fence. I suspect they find bugs under the wood frame. But they could be giving predators a head start on digging in, if we didn’t have a foot and a half of hardware cloth buried into the ground.
You can scrounge wood and other materials for the coop. For example, we got small quantities of roofing materials inexpensively from someone we contacted on Craigslist. But don’t skimp on the hardware cloth! Rural people with large flocks may be able to risk losing a hen or two now and then. But those of us in the city with tiny flocks have to vigilantly protect our precious few birds. Even in the city, in our neighborhood at least, there are plenty of predators, including raccoons.
Addition to Pen
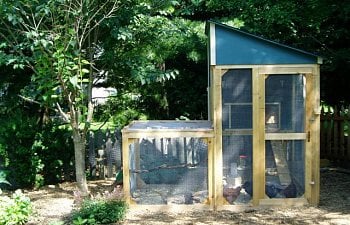
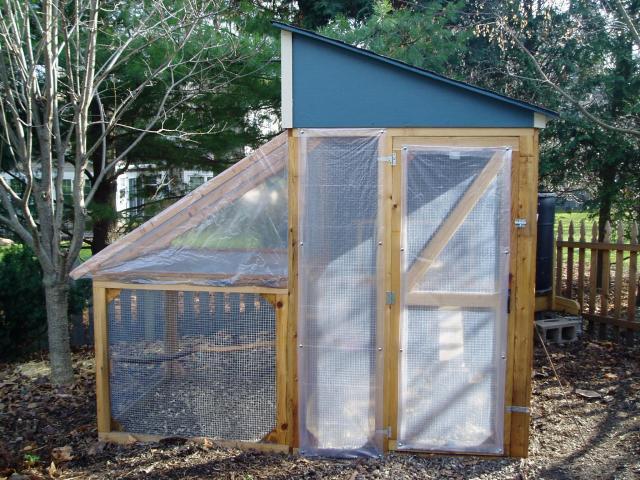
The run in Dennis’ design is 4x8 feet which he says is sufficient for 3-4 large birds. The Virginia Tech Cooperative Extension agrees, recommending 8 square feet per bird in the outside run. But it just looked too small, especially once you account for space taken up by the feeder, waterer, ladder up to the coop, and the fact that we can’t allow them to free range in the yard (although we do get them out every day either in a tractor or temporary netting). So Rick built the addition, the square pen on the left of the photo, and put in an outside roost for the birds. They loved it and during the summer, all four would often perch there in a row.
However, we’re now in the process of changing this addition to the pen. As you can see in the photo above, Rick is planning to angle the top. He also plans to cover it with plexiglass. We originally left that section of the pen covered only with hardware cloth and filled it with sand for good drainage. However, we found that even sand can get really wet during long rainy spells, and if it’s raining hard, the hens restrict themselves to the covered area. We also noticed that the birds no longer hang out on that roost and we think it’s because they have less head room now they’re full-size. We’ve also learned that it’s kind of a pain to rake out that pen because the roof is low. So the idea here is to raise the roost, give the hens (and ourselves) more headspace, offer protection from rain and snow, yet still allow light in this section of the pen. Also, the angled cover will allow snow to slide off in winter.
Winterization
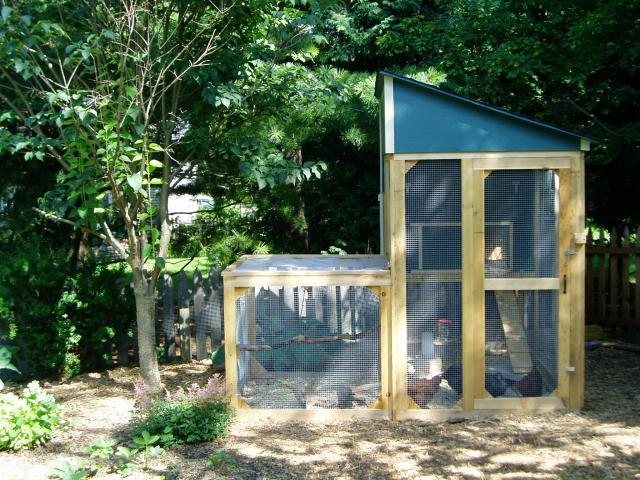
After talking with our poultry extension specialist, and posting with patandchickens here on BYC (thanks, Pat!) we decided to cover the north and west sides of the pen with plastic during winter. (The photo above was taken before the two sides of the square pen were covered.) The goal here is to provide a wind break and keep most snow from blowing into the pen. Rick used cloth-to-wood RV and boat snap fasteners to attach the plastic to the wood frame of the pen. That way we can easily remove the plastic in the spring and reuse it the next season.
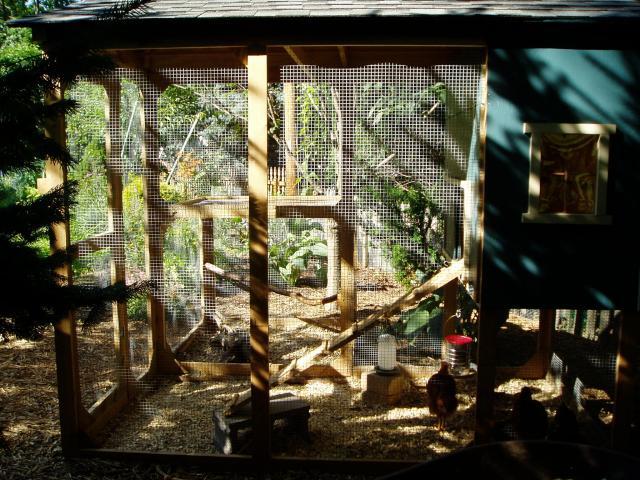
Finally, we also tried to maximize floor space inside the pen by using a wall mounted baby pig feeder and waterer. (I always say our chickens “eat like pigs,” so why not??
) I was frustrated that chicken waterers go from pint-sized to five gallon size with nothing in-between. Those large round fountains and feeders are great for large flocks in sizable pens – many chickens can circle them and have access to food and water at the same time. However, we city chicken keepers are usually limited to just a few hens (four in Madison, Wisconsin). So it makes no sense to waste space in small urban backyard coops with large containers. (Side view of pen below.)
ROOF
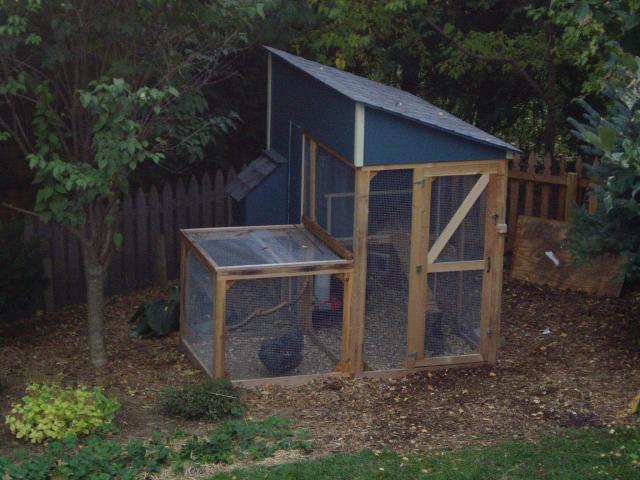
Once we added the pen on the side, we had to change the style of roof. Dennis’ design has a standing seam metal gabled roof. Rick had always planned to build a plywood and shingle roof, mainly to cut down on expenses. Now he changed the roof from gabled to shed-style, angled to drain away from the (previously) uncovered side pen.
ROOSTBOX
Design
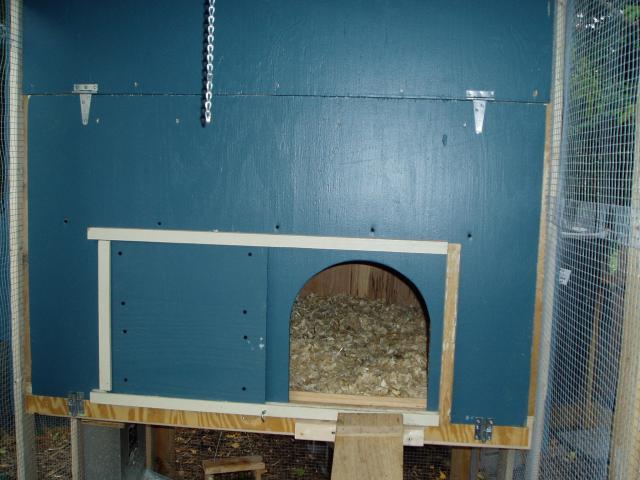
Next, we decided to change the roost box. Dennis has a clever design for the front of this that you can see in the YouTube video. It folds down on hinges to create another roosting place for the birds in warmer weather. However, once I saw all the bird poop on it, I knew immediately we would omit this feature. Many of my coop design and maintenance preferences involve reducing the amount of time I will spend cleaning poop. (It’s for this reason also that I decided we would not have the coop roost bar extend over the roof of the nest box, as seen in Dennis’ video. There is no way I want to be scraping crap off additional surfaces.)
In Dennis’ design, the front of the roost box can be detached to allow easier access for cleaning by removing the four screws holding it in place. I didn’t want to have to bring out power tools to clean the coop, so Rick designed a front that lifts up on hinges, and has a hook that I place in a chain loop on the ceiling of the run to hold it open while I work.
Although the original plans do not call for insulation, Rick insulated the walls with cardboard covered by ¼ inch plywood. He also added the window in the back and expanded the roost box (originally 2’ deep x 4’ wide) one foot forward into the pen. As with the pen, although the original design is adequate, allowing the 1.5 – 2 square feet recommended per bird, it just looked too small. It works fine for now, we thought, when all they do is sleep there, but what about winter, when they might spend more time inside?
Roost & Droppings Tray
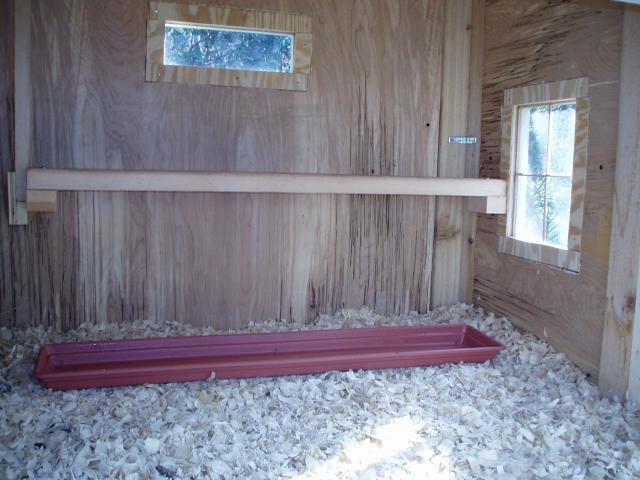
The roost is a 2x4 with rounded edges so the hens can sit on their feet and protect their toes from frostbite in winter. We originally intended to attach the droppings tray to the roost, but have found that it works just fine as it is. I place it under their roost in the evening when I go in to tend to them. In the morning I remove it, dump the droppings into the compost bin behind the coop, hose off the tray (which is just a plastic plant pot tray from the garden center), and store it in the rafters of the pen to keep it out of the way during the day.
I took this photo and am writing this article on November 20th, and so far, except during the night, the girls still spend very little time in the roost box. Because of this, and because I daily remove the night droppings, it stays very clean. Note also that we intentionally put the largest window on the south side of the coop. Our neighbor has a deciduous tree on the other side of the fence. So the coop is shaded in summer and gets lots of light (on sunny days, anyway) in winter.
The only change I would make is to move the roost bar just a couple of inches away from the back wall. We can’t do that now because of the placement of the window. During summer, the birds all roosted with their faces to the wall and left their droppings in a neat line beneath the roost. Now, they often roost end to end, with some hens facing the wall and some away from it. So we put another droppings tray against the back wall. However, they are larger now and closer to the wall than we anticipated. So they occasionally leave a skid mark on the back wall. Since I spot clean daily (having got that idea from LynneP here on BYC), it still stays very clean. I’m hoping this doesn’t become a bigger problem in winter. As I said earlier, one of my major goals is reducing the number of surfaces from which I have to clean poop!
Ventilation
The original design of the roost box includes two ventiliation holes above the roost into the space between the roof of the coop and the roof of the pen. After reading about the importance of ventilation in winter, I became concerned about whether we had enough ventiliation. (Neither of the windows open.) I showed these photos to our poultry extension specialist and he advised leaving the pop door open during winter for added ventilation. Nevertheless, we plan on increasing ventilation next summer. We left the pop door open day and night this past summer and the chickens seemed to be fine. However, we had an unusually cool summer. So next summer Rick will cut a narrow, horizontal “window” in the front of the roost box above the hinges. He’ll cover it with hardware cloth. The following winter, he’ll close it up for the season.
NESTBOX
Dennis’ design includes an egg door on the side of the coop and a nest box inside the roost box. To maximize floor space in the roost box, Rick built the nest box on the outside wall of the coop. He included a removable tray for easy cleaning. One design principle I learned from Pam at Mad City Chickens is to make everything removable so you can take it to a water source for cleaning, rather than hauling water to the coop. For this reason, our ladder and perch are also removable.
All the sources I read claimed that one nest box for every four chickens is sufficient. Once our hens started laying, we began to doubt this. It seemed like they were lining up in the roost box, bawking at the one in the nest to do it or get off the box! Or maybe they were just curious. At this point, it seems like one nest box is working out alright. They’re all laying in it and most days we get an egg from each of them. It’s a good thing, too, because I don’t know where we’d put a second nest box!
So, there you have it – our “small space, big style” city coop and pen. If I had it to do over again, I’d make it twice as big as the original plans. Then again, maybe it’s best things worked out as they did. We were forced to work with what we had and found ways to maximize our space. We’d love to hear your comments, thoughts, and suggestions.
I once started a thread on the BYC message board asking, “Is a chicken coop ever really finished?” It was, in part, a rhetorical question. Most posters echoed our sentiment that, of course it’s never finished; don’t even expect that! Rick (aka DH) worked the entire summer on our coop, modifying it as we learned what our chickens needed and what worked for us in managing and caring for them. Here, then, is a description of our process and photos of our coop. We hope it will be useful to other newbies keeping very small flocks of chickens in urban backyards.
Our coop is a variation of Dennis Harrison-Noonan’s Playhouse Coop. His coop is featured here on BYC and he has two videos on YouTube here and here. Rick says Dennis provided great instructions for framing out the pen and coop. He especially liked Dennis’ ideas for using scraps of plywood as gussets to join the wall frame, and for using hinges to secure the wall frame to the base. The modifications we made are primarily to increase space and decrease poop detail.
PEN
Frame, Base, & Fencing
Rick built the frame according to Dennis’ specs, but set it on a base of bricks at the corners and middle of each wall. Dennis’ plans call for putting wire fencing on the floor of pen and cutting out a circle in the center. We instead used 1/4” hardware cloth, secured it to the outside base of the pen, and buried it 18 inches deep. Hardware cloth was probably the single most expensive material we purchased for the coop and burying it that deep was a real chore. However, we think it’s money and time well-spent to protect our birds from predators and keep them from digging their way to freedom. For some reason, our hens love to dig big holes at the base of the fence. I suspect they find bugs under the wood frame. But they could be giving predators a head start on digging in, if we didn’t have a foot and a half of hardware cloth buried into the ground.
You can scrounge wood and other materials for the coop. For example, we got small quantities of roofing materials inexpensively from someone we contacted on Craigslist. But don’t skimp on the hardware cloth! Rural people with large flocks may be able to risk losing a hen or two now and then. But those of us in the city with tiny flocks have to vigilantly protect our precious few birds. Even in the city, in our neighborhood at least, there are plenty of predators, including raccoons.
Addition to Pen
The run in Dennis’ design is 4x8 feet which he says is sufficient for 3-4 large birds. The Virginia Tech Cooperative Extension agrees, recommending 8 square feet per bird in the outside run. But it just looked too small, especially once you account for space taken up by the feeder, waterer, ladder up to the coop, and the fact that we can’t allow them to free range in the yard (although we do get them out every day either in a tractor or temporary netting). So Rick built the addition, the square pen on the left of the photo, and put in an outside roost for the birds. They loved it and during the summer, all four would often perch there in a row.
However, we’re now in the process of changing this addition to the pen. As you can see in the photo above, Rick is planning to angle the top. He also plans to cover it with plexiglass. We originally left that section of the pen covered only with hardware cloth and filled it with sand for good drainage. However, we found that even sand can get really wet during long rainy spells, and if it’s raining hard, the hens restrict themselves to the covered area. We also noticed that the birds no longer hang out on that roost and we think it’s because they have less head room now they’re full-size. We’ve also learned that it’s kind of a pain to rake out that pen because the roof is low. So the idea here is to raise the roost, give the hens (and ourselves) more headspace, offer protection from rain and snow, yet still allow light in this section of the pen. Also, the angled cover will allow snow to slide off in winter.
Winterization
After talking with our poultry extension specialist, and posting with patandchickens here on BYC (thanks, Pat!) we decided to cover the north and west sides of the pen with plastic during winter. (The photo above was taken before the two sides of the square pen were covered.) The goal here is to provide a wind break and keep most snow from blowing into the pen. Rick used cloth-to-wood RV and boat snap fasteners to attach the plastic to the wood frame of the pen. That way we can easily remove the plastic in the spring and reuse it the next season.

Finally, we also tried to maximize floor space inside the pen by using a wall mounted baby pig feeder and waterer. (I always say our chickens “eat like pigs,” so why not??

ROOF
Once we added the pen on the side, we had to change the style of roof. Dennis’ design has a standing seam metal gabled roof. Rick had always planned to build a plywood and shingle roof, mainly to cut down on expenses. Now he changed the roof from gabled to shed-style, angled to drain away from the (previously) uncovered side pen.
ROOSTBOX
Design
Next, we decided to change the roost box. Dennis has a clever design for the front of this that you can see in the YouTube video. It folds down on hinges to create another roosting place for the birds in warmer weather. However, once I saw all the bird poop on it, I knew immediately we would omit this feature. Many of my coop design and maintenance preferences involve reducing the amount of time I will spend cleaning poop. (It’s for this reason also that I decided we would not have the coop roost bar extend over the roof of the nest box, as seen in Dennis’ video. There is no way I want to be scraping crap off additional surfaces.)
In Dennis’ design, the front of the roost box can be detached to allow easier access for cleaning by removing the four screws holding it in place. I didn’t want to have to bring out power tools to clean the coop, so Rick designed a front that lifts up on hinges, and has a hook that I place in a chain loop on the ceiling of the run to hold it open while I work.
Although the original plans do not call for insulation, Rick insulated the walls with cardboard covered by ¼ inch plywood. He also added the window in the back and expanded the roost box (originally 2’ deep x 4’ wide) one foot forward into the pen. As with the pen, although the original design is adequate, allowing the 1.5 – 2 square feet recommended per bird, it just looked too small. It works fine for now, we thought, when all they do is sleep there, but what about winter, when they might spend more time inside?
Roost & Droppings Tray
The roost is a 2x4 with rounded edges so the hens can sit on their feet and protect their toes from frostbite in winter. We originally intended to attach the droppings tray to the roost, but have found that it works just fine as it is. I place it under their roost in the evening when I go in to tend to them. In the morning I remove it, dump the droppings into the compost bin behind the coop, hose off the tray (which is just a plastic plant pot tray from the garden center), and store it in the rafters of the pen to keep it out of the way during the day.
I took this photo and am writing this article on November 20th, and so far, except during the night, the girls still spend very little time in the roost box. Because of this, and because I daily remove the night droppings, it stays very clean. Note also that we intentionally put the largest window on the south side of the coop. Our neighbor has a deciduous tree on the other side of the fence. So the coop is shaded in summer and gets lots of light (on sunny days, anyway) in winter.
The only change I would make is to move the roost bar just a couple of inches away from the back wall. We can’t do that now because of the placement of the window. During summer, the birds all roosted with their faces to the wall and left their droppings in a neat line beneath the roost. Now, they often roost end to end, with some hens facing the wall and some away from it. So we put another droppings tray against the back wall. However, they are larger now and closer to the wall than we anticipated. So they occasionally leave a skid mark on the back wall. Since I spot clean daily (having got that idea from LynneP here on BYC), it still stays very clean. I’m hoping this doesn’t become a bigger problem in winter. As I said earlier, one of my major goals is reducing the number of surfaces from which I have to clean poop!
Ventilation
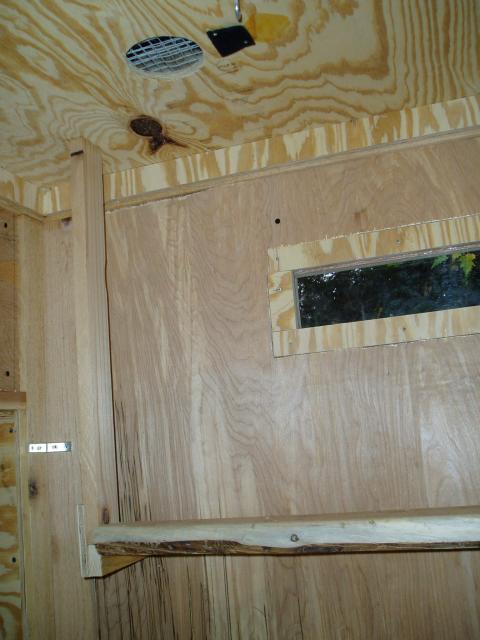
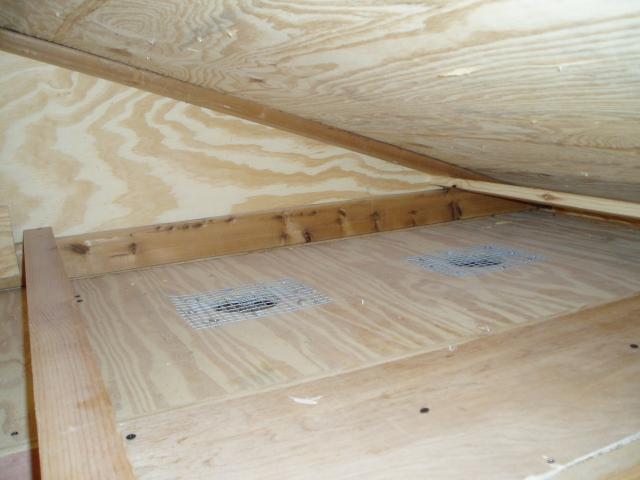
The original design of the roost box includes two ventiliation holes above the roost into the space between the roof of the coop and the roof of the pen. After reading about the importance of ventilation in winter, I became concerned about whether we had enough ventiliation. (Neither of the windows open.) I showed these photos to our poultry extension specialist and he advised leaving the pop door open during winter for added ventilation. Nevertheless, we plan on increasing ventilation next summer. We left the pop door open day and night this past summer and the chickens seemed to be fine. However, we had an unusually cool summer. So next summer Rick will cut a narrow, horizontal “window” in the front of the roost box above the hinges. He’ll cover it with hardware cloth. The following winter, he’ll close it up for the season.
NESTBOX
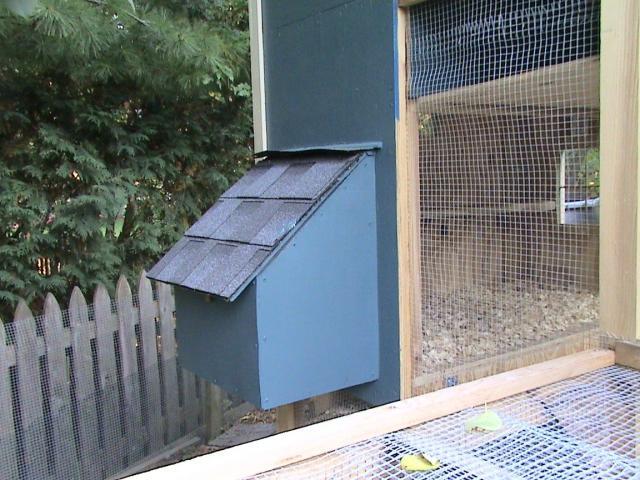
Dennis’ design includes an egg door on the side of the coop and a nest box inside the roost box. To maximize floor space in the roost box, Rick built the nest box on the outside wall of the coop. He included a removable tray for easy cleaning. One design principle I learned from Pam at Mad City Chickens is to make everything removable so you can take it to a water source for cleaning, rather than hauling water to the coop. For this reason, our ladder and perch are also removable.
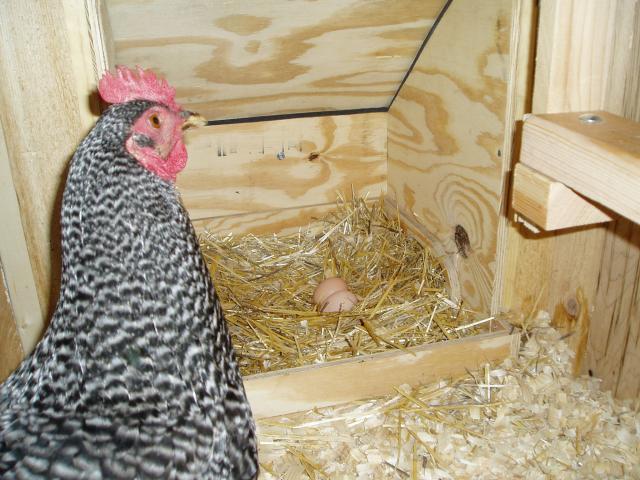
All the sources I read claimed that one nest box for every four chickens is sufficient. Once our hens started laying, we began to doubt this. It seemed like they were lining up in the roost box, bawking at the one in the nest to do it or get off the box! Or maybe they were just curious. At this point, it seems like one nest box is working out alright. They’re all laying in it and most days we get an egg from each of them. It’s a good thing, too, because I don’t know where we’d put a second nest box!
So, there you have it – our “small space, big style” city coop and pen. If I had it to do over again, I’d make it twice as big as the original plans. Then again, maybe it’s best things worked out as they did. We were forced to work with what we had and found ways to maximize our space. We’d love to hear your comments, thoughts, and suggestions.