I decided for a weekend project, I would build an incubator. I went to Lowe’s, TSC, and Petco to get supplies. I spent about $200.00 total. The Zilla Thermostat I purchased at Petco was $49.95.
Lowes:
1. (6) 2’ x 2’ x ¼” plywood
2. (6) 1” x 2” x 8’ boards
3. (2) 8” x 10” plexiglass
4. (1) 3/8” threaded rod
5. 3/8” flat washers & nuts
6. (1) ¼” threaded rod
7. ¼” flat washers & nuts
8. (2) dimmer switches & (1) double light switch box
9. 12” x 18” piece of stainless steel
10. #6 1” screws
11. #6 1 ½” screws
12. 1 3/8” screw eye
13. (Pack of 6) ¾” poly foam
14. (4) 1 ½” x 1 ½” corner metal
15. (4) metal repair strips
16. (2) window latches
17. (2) hinges
18. Dual outdoor light fixture & (2) 60 watt flood lights
19. Roll of door strip seal
TSC:
Wire cloth
Petco:
Zilla 1000 watt thermostat
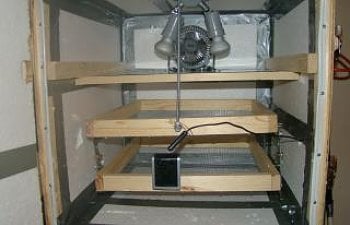
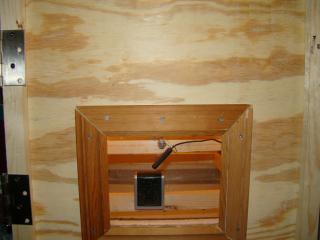
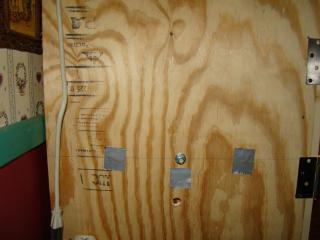
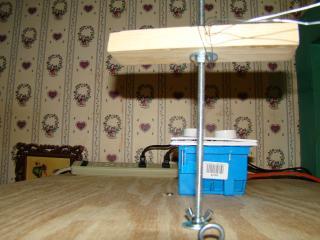
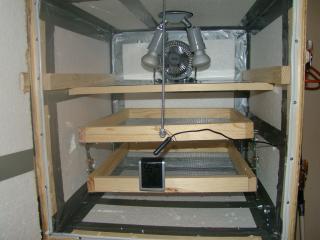
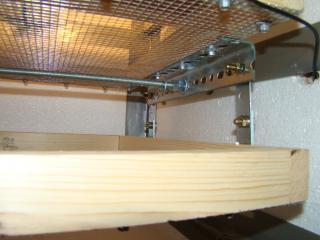
The outside measurements are 2’ x 2’. I stared out building the frame with the 1” x 2” boards. I attached the bottom, top, and both side panels. I then trimmed the front and back panels. I attached the back panel. I used liquid nails to attach the poly foam to the inside of the panels. I drilled a hole for the fan cord in the back. I drilled a hole in the top for the wiring from the light fixture. I attached the light fixture. I then built a shelf 12” wide and attached it to 1” x 2” boards. I attached the fan to the shelf. I placed the shelf and frame inside and attached with screws. I made the frame for the egg trays 18” X 18”. I attached the wire cloth to the tray frames with roofing screws. I attached the metal corner frames to the trays while placing the wire cloth. I attached the metal repair strips to the metal frame. I drilled a hole in the sides to place the 3/8” thread rod through. I started two nuts on the rod after placing it through one side. I then pushed it through the corner metal placing two more nuts. I placed two more nuts on the rod before pushing it through the other corner metal. I placed two more nuts on the rod before pushing it through the other side. I placed two nuts on the rod on both side on the outside. This is time consuming because you have to keep adjusting the nuts as you go. I then centered the trays and tightened the nuts against the corner metal. I drilled a hole through the top. I placed an eye on the top tray facing the front. I then pushed the ¼” rod down and secured it to the eye on the tray. I did this so I could turn the trays without having to open the door. I placed an eye on the top near the hole. I placed a wing nut on the rod at the top to tilt the trays toward the back. I attached a piece of wire to the handle I made out of 1” x 2” so when I loosen the wing nut, I can push down on the rod to tilt the trays forward. When the handle is down where I want it, I secure the wire to the eye to hold it in place. I drilled three 7/8” holes in each side between the trays for fresh air. I used heavy duty extension cord wire to wire the lights and placed a plug on the end to plug into the thermostat. I attached an eye on the side to hold the Zilla Thermostat. I trimmed the front panel for the door. I cut a hole for the plexiglass. I used a plexiglass panel on the outside and inside. I cut the poly foam and attached to the door. I attached 1” x 2” around the outside of the door. I placed the hinges on and then the window latches. I then used the rope style door seal around the inside of the door.
I didn’t really have any plans other than just in my head.
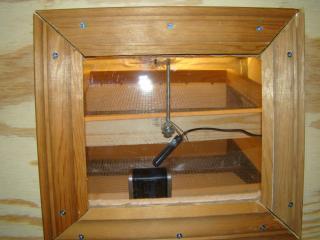
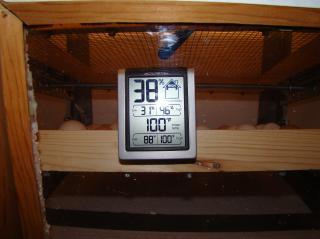
To my surprise everything worked when I was finished. The temperature is holding at 100 degrees without any fluctuation. The humidity is holding at 35% to 41% without any water.
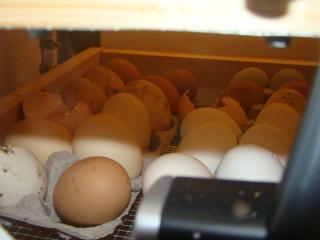
I couldn't wait any longer so I set 36 eggs just to try my luck at incubating for the first time.
So here are the pictures of the finished product. I didn’t take any while I was working.

Update: 04-17-2010
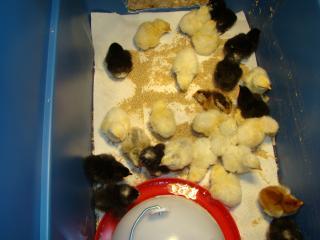
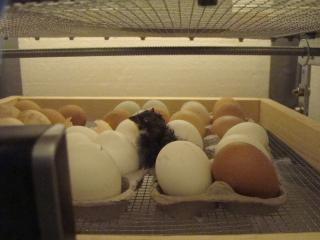
It works. It is day 20 and the hatch has started. So far three have hatched and several more have pipped.
Update: 04-19-2010
85% Hatch Rate - This is the 1st time I have ever used an incubator.