- Thread starter
- #21
Our Super Coop is nearly complete. Tim papered the roof.

Put on shingles and siding.

Installed ventilation
 \
\
And then it was time to work on the interior. The exterior won't be painted til Spring.

He put in a shelf that covers most of the area above the coop half of the structure. There are ventilation gaps on either side.

Here you can see the ventilation.

Now it's time to install the roosts and section off the two sides of the building. At least temporarily. A major winter storm was moving in so we had just a couple of days to get it done.

The area over the coop will be for storage.

I stapled up some kitchen towels to cut drafts from the windows until I can fix a permanent solution. We attached only one of the permanent roosts, a 2x4 8ft long board that runs from the east to the west walls. Then we added a few secured boards for more roosting areas until we can get the other two roosts installed. The storm was bearing down on us, so we had to hurry.

The ramp is way too steep, we'll have to figure that out later. The girls spent the first night in their new coop and after some stressful maneuvering for a spot on the roosts, they all settled in nicely. We hadn't cut the door into the run yet, so they were going in and out thru the door I will be using to access the coop from inside the shed. I can't wait to not have to bend over and struggle inside a tiny coop just to get to the eggs, much less clean it. Plus, when it's raining, I won't have my lower half getting soaked while my upper half is in under the coop roof. I'll stay nice and dry and will be able to visit my girls for as long as I want. It might even be nice to listen to the rain on the roof.

Here is my access door. It's an old storm door we picked up at Restore. The bottom and the top sections of the glass window have screens. The glass can move up or down to expose the screen and add to the ventilation. We had to fix the walls with tarp until we have time to build the walls with wire and a nice frame. Until then, this helps them keep warm and keeps them out of Tim's boxes of screws.

I brought my patio chair inside the coop for Kris. She loves to sit on that chair, and I thought that would make her, being a turkey and much larger than the others, more comfortable and avoid any power struggles on the roosting bars until we can get her permanent roost built. It takes up more room than I wanted, but, it will do for now. She is getting accustomed to sharing the coop with the chickens. It seems to be working, so, fingers crossed. We cut the coop door but we haven't attached the cabinet door we will be using on it, so, we brace a board against it at night to secure the coop. I put the nesting boxes (buckets) on either end of the coop, and after some first day jitters, they are all laying their eggs in their new home.

Four bags of pine shavings so far, I think I need at least two more to achieve the depth I want.


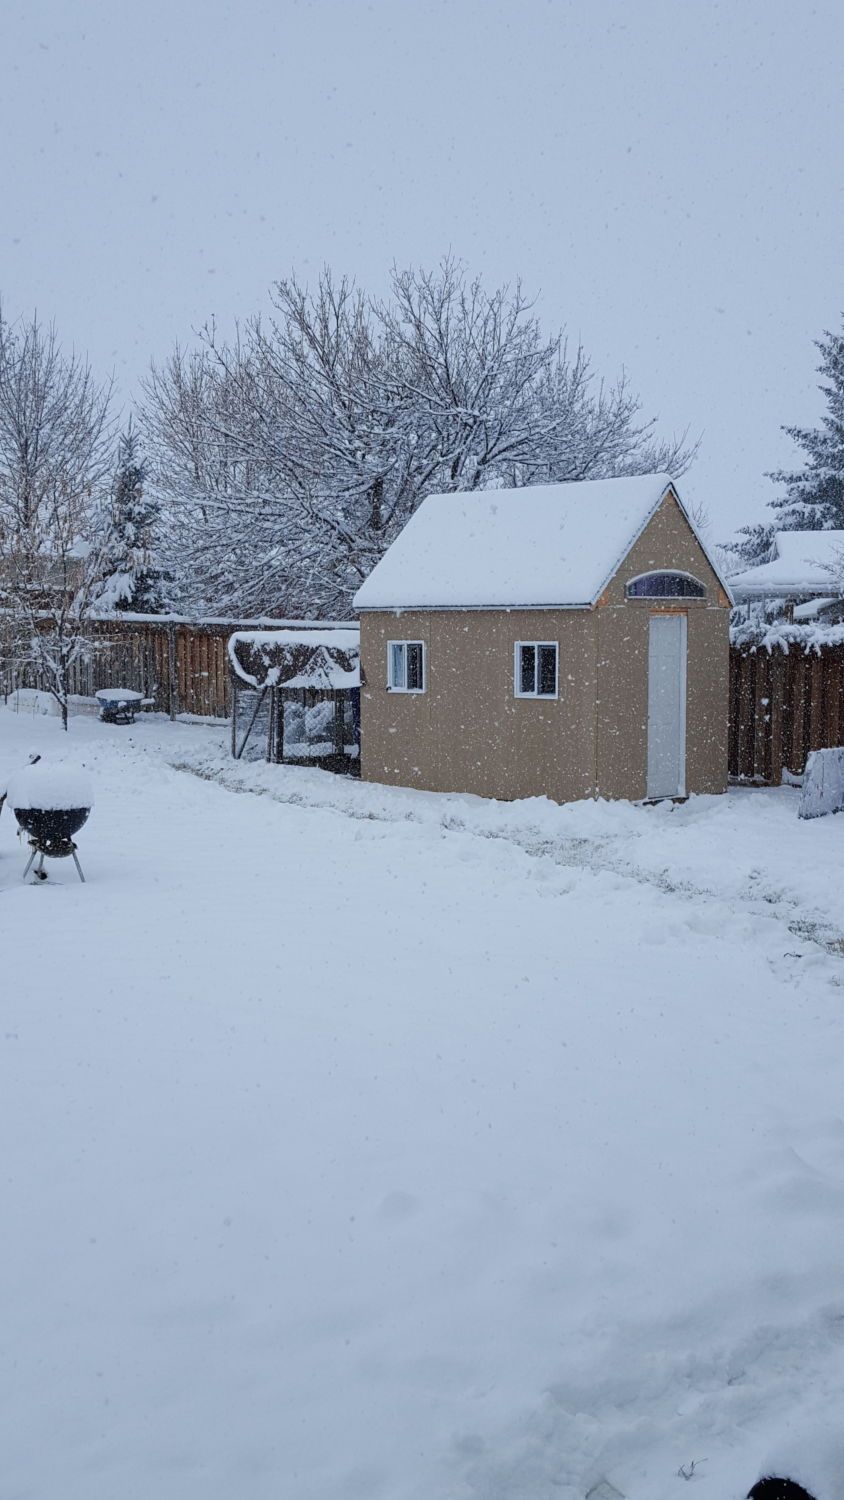
And then the snow came. We had barely pushed the old run against the back of the coop and attached the tarps when it started to get cold and wet, and the clouds were looming. We plan to make the finished run almost twice as long and a bit wider, but, this will have to do for now. Of course we keep a path shoveled for them to get around to their favorite places in the yard, and to find some grass here and there. The snow fell all night, and by morning we had six inches on the ground and more still coming all day long. The girls were none too happy about it, and spent most of the day either in the run or in the coop. I'm so glad they are able to move around the coop so freely. That was my goal for them when the weather was bad.
You can just make out my buff orpington, Tikka, watching the snow fall from the safety of her nice dry run.
Next up, the finishing touches.

Put on shingles and siding.
Installed ventilation
And then it was time to work on the interior. The exterior won't be painted til Spring.
He put in a shelf that covers most of the area above the coop half of the structure. There are ventilation gaps on either side.
Here you can see the ventilation.
Now it's time to install the roosts and section off the two sides of the building. At least temporarily. A major winter storm was moving in so we had just a couple of days to get it done.
The area over the coop will be for storage.
I stapled up some kitchen towels to cut drafts from the windows until I can fix a permanent solution. We attached only one of the permanent roosts, a 2x4 8ft long board that runs from the east to the west walls. Then we added a few secured boards for more roosting areas until we can get the other two roosts installed. The storm was bearing down on us, so we had to hurry.
The ramp is way too steep, we'll have to figure that out later. The girls spent the first night in their new coop and after some stressful maneuvering for a spot on the roosts, they all settled in nicely. We hadn't cut the door into the run yet, so they were going in and out thru the door I will be using to access the coop from inside the shed. I can't wait to not have to bend over and struggle inside a tiny coop just to get to the eggs, much less clean it. Plus, when it's raining, I won't have my lower half getting soaked while my upper half is in under the coop roof. I'll stay nice and dry and will be able to visit my girls for as long as I want. It might even be nice to listen to the rain on the roof.
Here is my access door. It's an old storm door we picked up at Restore. The bottom and the top sections of the glass window have screens. The glass can move up or down to expose the screen and add to the ventilation. We had to fix the walls with tarp until we have time to build the walls with wire and a nice frame. Until then, this helps them keep warm and keeps them out of Tim's boxes of screws.
I brought my patio chair inside the coop for Kris. She loves to sit on that chair, and I thought that would make her, being a turkey and much larger than the others, more comfortable and avoid any power struggles on the roosting bars until we can get her permanent roost built. It takes up more room than I wanted, but, it will do for now. She is getting accustomed to sharing the coop with the chickens. It seems to be working, so, fingers crossed. We cut the coop door but we haven't attached the cabinet door we will be using on it, so, we brace a board against it at night to secure the coop. I put the nesting boxes (buckets) on either end of the coop, and after some first day jitters, they are all laying their eggs in their new home.
Four bags of pine shavings so far, I think I need at least two more to achieve the depth I want.
And then the snow came. We had barely pushed the old run against the back of the coop and attached the tarps when it started to get cold and wet, and the clouds were looming. We plan to make the finished run almost twice as long and a bit wider, but, this will have to do for now. Of course we keep a path shoveled for them to get around to their favorite places in the yard, and to find some grass here and there. The snow fell all night, and by morning we had six inches on the ground and more still coming all day long. The girls were none too happy about it, and spent most of the day either in the run or in the coop. I'm so glad they are able to move around the coop so freely. That was my goal for them when the weather was bad.
You can just make out my buff orpington, Tikka, watching the snow fall from the safety of her nice dry run.
Next up, the finishing touches.


