Converting Garden Shed into Coop for 12 Chickens

Kcarp03

Chirping
May 17, 2016
58
2
71
NorthWest Arkansas - Fayetteville
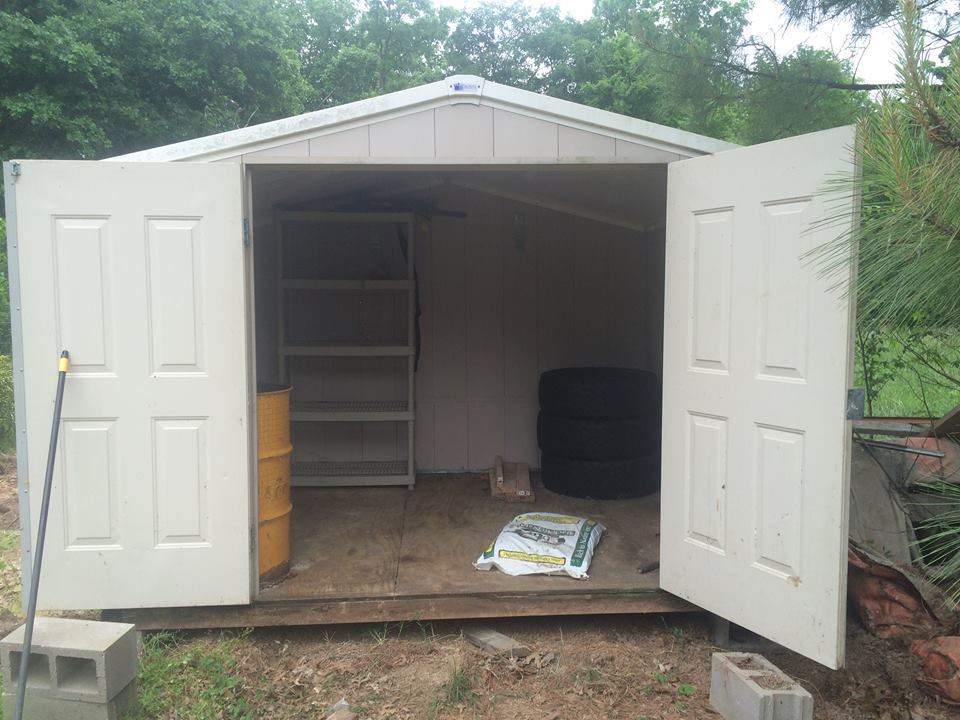
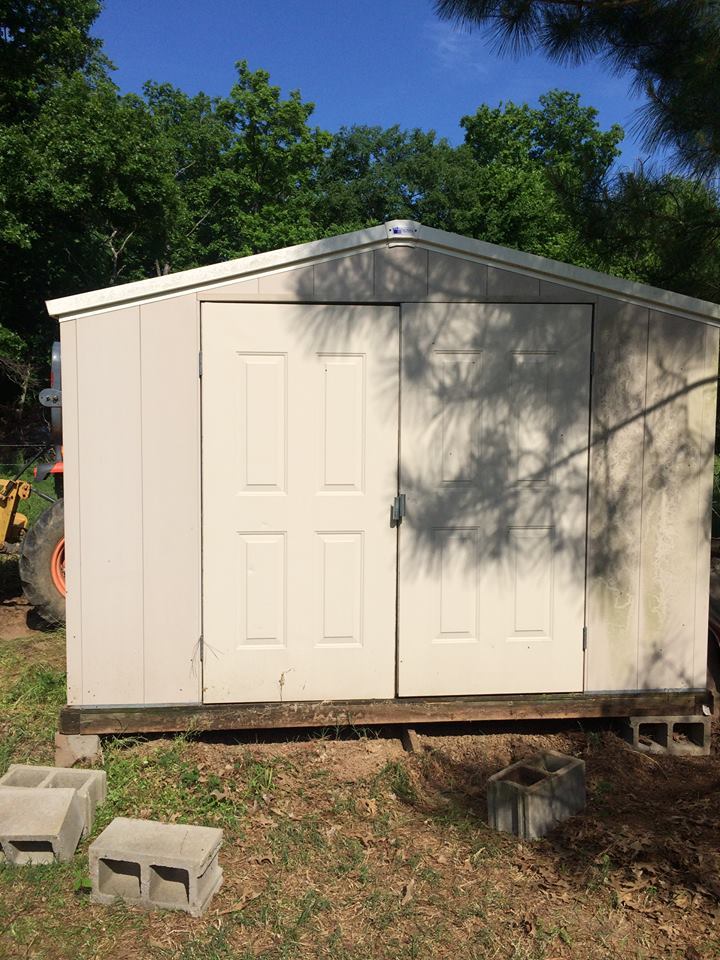
Newbie here! Hubby surprised me with 12 baby chicks almost 2 weeks ago, so now I'm scrambling to figure out the Coop for them. We have a Garden/Tool(heavy plastic) shed that we built from a kit probably 8 years ago and decided we'd convert it into their Coop. We have raised it up on 1 layer of blocks right now & will add another layer of block. It's 6 x 8 and from most info I've read, it should be ok for 12 chickens? The doors face West, we'll be building the run facing North, due to Husband is afraid if we try to move the Shed around, it will tear it up. We have a line of Pine Trees just to the South of it, so we can't build the run on the South end unless we cut down a lot of trees, which we don't want to do. How many windows should we cut out for ventilation? Should roost be on the back wall opposite big doors or on South Side? Any other specific tips/info for converting?


Last edited:
Okay...here's my two cents:

First off - congrats! On the chicks AND on having a nice shed like that available!! That's soooo convenient and so easy to convert.

I'd put the roosts along the back wall (east wall), simply because it'll be easier (can just run a 2x4 wall to wall...or two stair-stepped if needed by the time they're grown). Do a search on dropping boards and see if they interest you - simple to set up and really keeps your coop cleaner/saves bedding. Plus you can place feeders/waterers/nest boxes beneath the dropping boards without poop issues - so conserves space. Can you tell I love using dropping boards?? LOL!

Cutting out a small pop door opening on whichever wall you choose for the run will be simple...hinge and latch a small door for it...or you can put it in a track with a pulley type system - not sure what floats your boat.

I would suggest cutting out two decent sized windows on opposing walls to catch breezes during hot summers. Cover them with hardware cloth (screws and fender washers work well to secure hw cloth). I would also cut out 2 smaller openings up HIGH, on a wall/walls that don't face winter wind. That way you can cover the windows in winter to prevent drafts (plexiglass screwed over window openings works great), but still have ventilation. You do want air exchange, but you don't want cold wind blowing on your roosting chickens. Either wire or vent covers over the vent openings...
@teach1rusl Thank you for your input, I really appreciate the tips! I've seen several coops with the dropping boards, I think it's a great idea, saves on cleaning & space. Should the roost be up about 4 feet off the floor or higher? I have B Australorps, Buff Orps, GL Wyandottes & B Sexlinks, 3 of each breed. And I figure the nesting boxes will be put on South wall as the North wall will have the pop door.
 
It really depends on whether you'll be using a ramp/ladder or not as to how high you place your roosts. In my "big girl" coop (similar breeds to yours) my dropping boards are probably about 24" off the floor - I wanted it to be easy to reach beneath for feeders/waterers. My 2x4 roosts are stepped, because of the space I had to work with. So the first one is about 8" above the dropping board and the next one (recesses back about a foot) is a foot or so higher. I still use a ramp. Higher roosts would be fine, as long as you give them a ramp/ladder.

I think they get UP at that height easily enough, but it's hard on the heavy bodied breeds' legs when jumping down...especially as they age. Plus, in our coop, because of the way I ran the roosts, the other wall is less than 4 ft. from the edge of the dropping board, so that makes it trickier for flying down easily too. If I'd run them the other way, with far more clearance, maybe it wouldn't be as much of an issue???

Here's what I was attempting to describe...

 
If you are concerned about attaching the roost to the walls (we were, on our metal shed/coop) you could always just stack a couple cinder blocks end to end and rest your roost on top or through those. My roost is actually only one cinder block high and has a landscaping timber across in one direction and a 2x4 cut to 4 ft the other, making an L. They sometimes knock the 2 x 4 down, but have never been able to budge the landscaping timber. This is all temporary (for the last 3 years) for me, as my new coop is almost done. Maybe not ideal, but it works and the chickens don't complain.
 
@teach1rusl - ok that makes sense, I've read they like to roost up high, but yeah...how hard is it to get back down. so Drop board about 2 ft & then the roost another foot up & we should have room to put a ramp if needed. Thanks for the visual aid also! :)
@MistyMountain - we hadn't even discussed yet how to put up the roosts, so setting 2 x 4's on something raised up is a good idea & we do have extra blocks, or we have some shelving, we might be able to modify/convert...hmmm. Thanks for the tips!
 
We have a Garden/Tool(heavy plastic) shed that we built from a kit probably 8 years ago and decided we'd convert it into their Coop. We have raised it up on 1 layer of blocks right now & will add another layer of block.
I am jealous. Your coop has way more possibilities with much less work to convert.


I have a 4x8 metal coop (3 levels) had it for years. I insulated it with Styrofoam and cover the insulation with the veneer off of interior doors. Warm in winter and cool in summer with plenty of air circulation. Predator proof (as long as I remember to close up the doors) and rodent free. I kept as many as 26 birds in three level coop with no problems and they stayed in the coop all winter never venturing outside hardly ever. I scraped the metal doors in favour of hinged wooden door. Metal doors were impossible due to freezing litter in the tracks.


Last edited:
@Hokum Coco Thanks for posting pics of your set up! I'm thankful we had that shed also, because I was at a loss on where to start honestly!

We set up a bigger area in our Garage last night for them, I can't believe how fast they've grown. We took 2, 8 ft pcs of paneling, made a big V, with the wide part butted up against the Garage door,(the whole width of the door) so they now have 5x the space. We put a wooden flower box in there that had dirt in it & 2 wooden baskets, which they've already discovered they can roost on or lay in, because I put shavings in the baskets. They are some happy little Cheeps right now! I'm excited to get their Coop modified & run built, we'll be working more on it this weekend.
 
Hello neighbor!!! That shed should make a really nice coop. The basics to consider are the roosts, nests, feeders and waterer. You'll also need to consider where you are going to store the feed, extra bedding, treats etc... Other things to consider are some windows for light and ventilation. 6x8 is a good size but it will fill up fast when you start outfitting it with those things. Every coop needs some permanent ventilation as well. Approx. 1 sq.ft. of permanent ventilation per chicken. Lots of great ideas in the coop section here at BYC.

For permanent ventilation we have openings covered with 1/2" hardware cloth at the top of the front and rear walls.

Rear wall...

26655847771_a20a0cfa23_c.jpg


Front wall...


25864467224_8e115b9035_c.jpg


We decided to make a poop tray under the roosts. It's has stall freshener, Sweet PDZ on it. It acts like a giant litter box. Works well.

26793241491_edfdd470fc_c.jpg


The babies took right to it.

26828966202_eeed076ba9_c.jpg


To save space I built nest boxes that slide under the poop tray. I've taken them out until they are needed.

26775232181_1f8a536370_c.jpg


I built feeders from PVC pipe and a waterer from a 5 gallon bucket with horizontal poultry nipples.


27016467165_93d12a3aca_c.jpg


27016469725_a342af41fd_c.jpg


I was able to steal some room from my compressor room that shares a common wall with the coop for storage.

26587898710_af458cbca2_c.jpg


26602112910_8b57a14f06_c.jpg


Most of what I have done I found on BYC, YouTube or elsewhere on the net. Tons of great info out there. Let me know if there is anything I can do to help. Above all have fun!! We've so enjoyed the babies!! These is a link to our coop build in my signature if you'd like to check it out.
 
Last edited:
@TerryH. Wow, that is an awesome coop!! Thanks for posting all the pics, it gives me some great ideas! I love the PVC pipe feeders, definitely want to incorporate those. I had read somewhere that when they are adults that you won't want to keep the food in the coop at all times? We also plan on putting in a droppings board under the roosts for sure! We have a big shop building just 30 ft from the Coop, so will probably use it for extra storage. So for 12 Chickens, 4-6 nesting boxes?
 

New posts New threads Active threads

Back
Top Bottom