BoyankaTheBuff
In the Brooder
We got 6 chicks at the end of March, and after they grew out of the brooder this summer, we housed them in kind of a junky old coop that we got for free off craigslist. It was not very serviceable, especially for winter, and when I was researching coop designs I came across the open air poultry house posts on this forum and immediately knew that this was the one I needed to make. Our home is on a 5,000 square foot city lot. After reading the book I decided to make the 6x10' version.

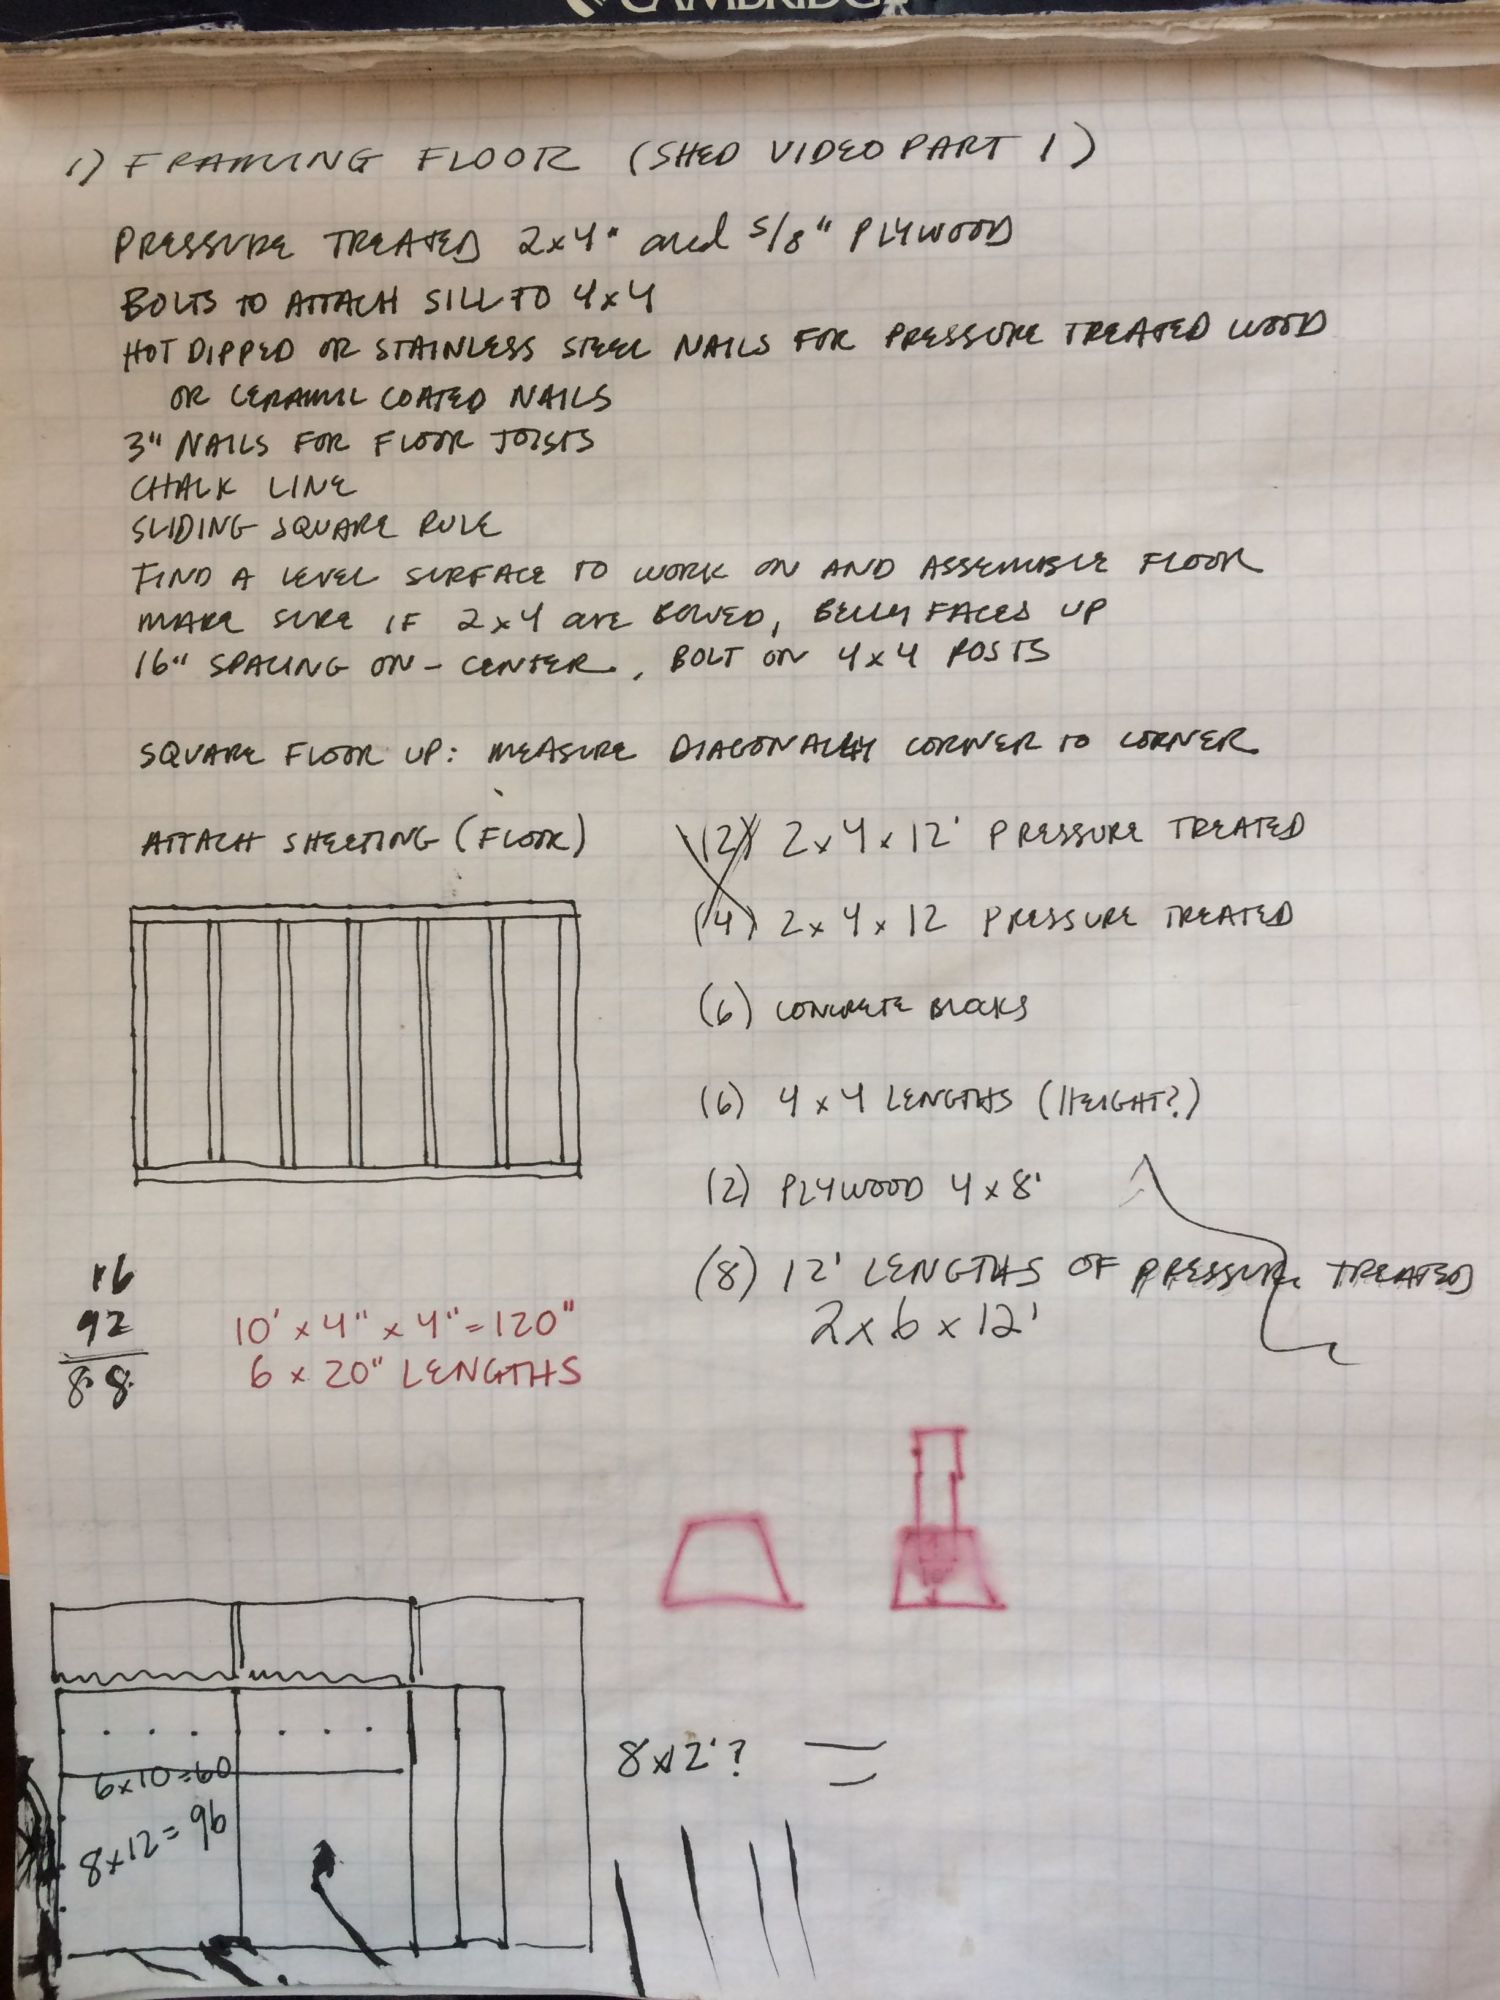
This was my first construction project EVER! I had hardly even used a circular saw before this. I had no idea how to go from the basic elevation drawings in the book to a three dimensional structure, so I started watching a youtube video series on how to build a shed, taking notes on what kinds of lumber/material they used, construction methods, tools that would be needed, etc.
Here's a link to the series, from Youtube channel called House Improvements. They are very straightforward and don't assume that you know a lot about building.
How To Build A Shed Video Series
Here are some of the notes I made while watching the videos:


I started gathering as much free material as I could. I put a call out to friends for any extra lumber or materials lying about that they wished to get rid of. They came through for me big time. Then I went to the salvage yard a few miles away and bought a bunch of reused lumber- stuff from old house tear-downs, things like that. At $2 for a perfectly good 2x4, I was having great luck finding stuff I could use. I also got my door and windows there pretty cheap.
For the foundation I bought new treated lumber and elevated it on cement blocks. (There was a big flower bed in this spot before, so first we had to level and compact that.) Below photo taken 10/13/2016 (we got a very late start but luckily had some amazing weather this fall which allowed us to work till just a week ago) Our goal was to be move-in ready before Thanksgiving cause we were leaving town for a week. The shadow in the foreground is from the duplex to the south of us, photo taken in late afternoon. This spot actually gets a lot of sun.

helpers:

Working from the elevation drawing in the book, keeping the same proportions, I made my own more detailed version. I made a big list of all the various pieces of lumber I had and their dimensions so that I could make a reasonable plan for cuts (the circled numbers correspond to pieces on the list, it was how I kept track of what I had / hadn't used). One change I made was to put the human door on the west side, simply because it's more in line with the traffic pattern from the house and would make access easier in the winter. The East and West windows I chose are slightly larger than what's in the book too, cause that's how big the windows that I found were. Plus, big windows = more sunshine.

I made drawings for the front and back elevations too, but they aren't as exciting looking.
The framing went pretty smoothly except for the fact that lots of the salvage lumber was SO dry and dense that we had to drill pilot holes for many nails. A pain. I should have listened to the guy in the video and bought the nail gun first. Looking back, if I could do one thing differently with this project, I'd do it with a nail gun. I did gain a little more proficiency in swinging a hammer though. No thumbs were injured.
Framing going up:
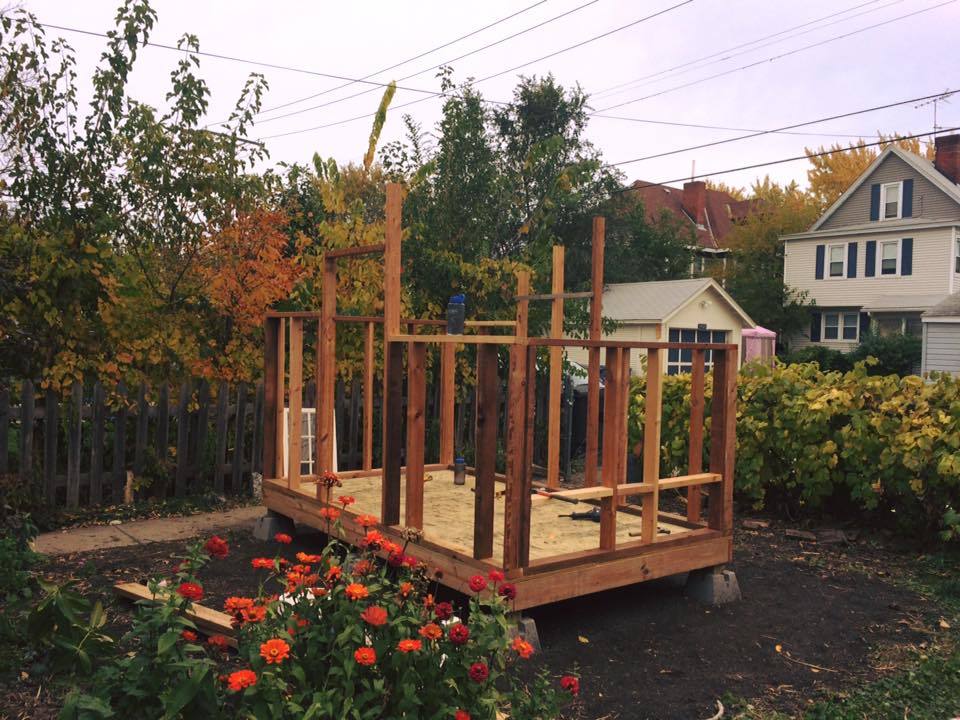
My favorite thing about these pictures is watching the zinnias in the foreground slowly fading
 To the right, you can see the grape vine that our chickens are obsessed with.

Finally adding sheathing and roof!

Windows and hardware cloth. At this point I felt like it was sooooooooo close to being almost done. Haha! What did I know. My husband and I were both working on it every chance we got, and all day long on days off. He did quite a solid amount of labor with me on this project. Days are getting so much shorter. We are putting our four year old in front of the tv so she won't bother us and eating pizza for dinner, only coming in for the night when it's dark. I didn't include pizza money in my chicken coop budget. I should have.
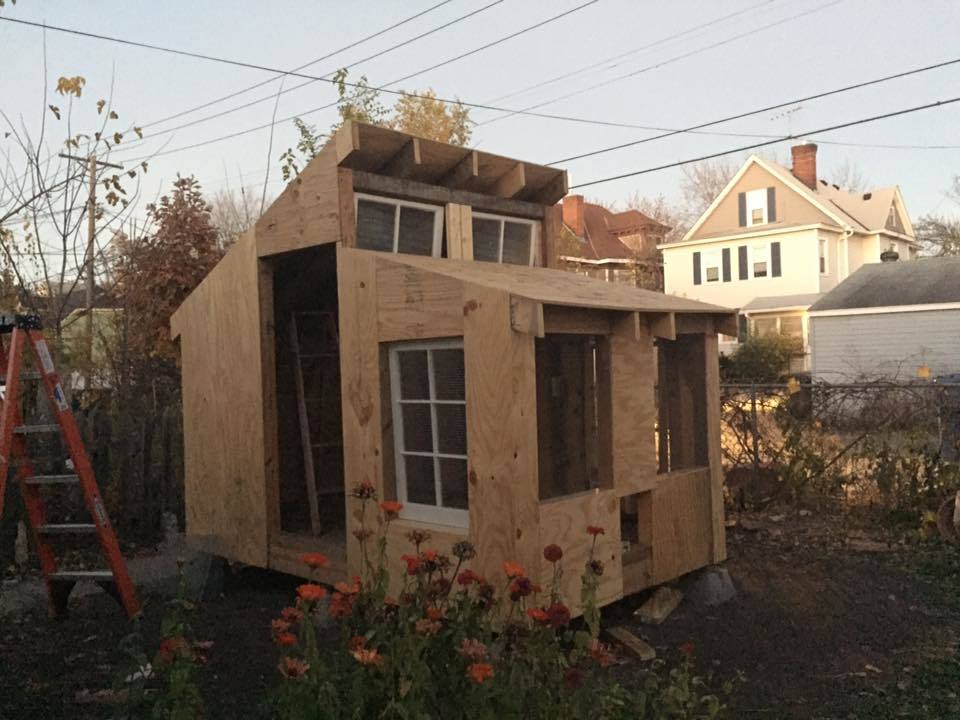
We added house wrap and some trim, anticipating putting up lap siding. The monitor windows open in. Since there's a bit of a roof overhang already, I figured it wouldn't matter terribly, and would be easier to open from the inside.

The human door was a three-panel interior door. I sawed the top panel off. Perfect fit!
Below and above, you can see the (open) pop hole and front (south) wall to the right. I painted inside with semi gloss exterior paint, nice and bright and easy to keep clean, and painted the floor with Blackjack #57 rubberized coating per JackE's suggestion. This was an ordeal. The hardware store special ordered a gallon for us, and when I opened it at home, it was like a solid chunk of tar in a translucent black slurry. It must have been sitting for a long time. They had to put it in the paint shaker for like 15 minutes, eventually smoothed out. I tried to roll it on with a roller, but that did not go well - it dried SO quickly and didn't spread out well. The roller I was using probably had too thick of a nap. Ended up using a cheap 4" paint brush with stubby bristles and had to really work it into the floor to get a good thick coating. I had filled in a bunch of cracks earlier with wood filler type compound, so it looks pretty smooth now. It looks great, and never smelled bad (the paint was worse.) One gallon covered the whole floor.

Below is what it looks like at the moment. Well, imagine this plus about 8" of fresh powder in the last 24 hours, much prettier than the bare dirt shown here:

I got the tar paper and shingles up, some drip edge, all the trim is on almost all trim painted. Green shingles to match the house. I nailed the shingles on during the very last decent day we had for being outside (it was about 30 degrees, super windy - tolerable except for the bare hands part AND being up on top of the roof) and I have a big stack of hardie board lap siding (leftovers from someone's project) waiting to go on. Just need a few decent days to do that. We're in the deep freeze for now.
The pop door has cabinet hinges on the top so when flipped up it stays up on its own. We are pretty consistently home around dusk, but I have serious automated door envy $$$. Someday.
Still unfinished: build stairs to the human door. Make a ramp for the pop door (we put a little stump in front of it that they can hop down to.) Trim the dang shingles so the overhang is even. Further weatherproof gaps around the windows and doors. Add the siding. Pavers in front of the human door that connect to the sidewalk. Plantings or boxes around the coop. Build nicer roosts with a poop deck and construct nesting boxes. There's a little bit more hardware to add to the inside. And, finally, add a mirror and some other goofy stuff. Husband picked up a xylophone for them from the thrift store.
Bird bath heater has been doing an ok job of keeping things flowing; single digit lows for the last few days. Birds seem really happy!

Having a little snack on the veranda:

Not a beautiful photo, but here's the current roost setup on the north wall. Now that it's in use, I realize that top roost may be a bit close to the wall, although it doesn't stop them all from crowding together on it. The black tree bucket is something I had in my garage that is working ok as a temporary nesting box. I put a couple bricks beside it to wedge it into place. Eventually, I would like to set up nesting boxes along the back wall, safely sheltered below a poop deck, and then roosts above that. I believe that was part of the intended original design for this coop. If anyone has a similar setup I'd love to see it!
I will be sure to update this post once things start moving along again. I look forward to making improvements as I learn more.
This was my first construction project EVER! I had hardly even used a circular saw before this. I had no idea how to go from the basic elevation drawings in the book to a three dimensional structure, so I started watching a youtube video series on how to build a shed, taking notes on what kinds of lumber/material they used, construction methods, tools that would be needed, etc.
Here's a link to the series, from Youtube channel called House Improvements. They are very straightforward and don't assume that you know a lot about building.
How To Build A Shed Video Series
Here are some of the notes I made while watching the videos:
I started gathering as much free material as I could. I put a call out to friends for any extra lumber or materials lying about that they wished to get rid of. They came through for me big time. Then I went to the salvage yard a few miles away and bought a bunch of reused lumber- stuff from old house tear-downs, things like that. At $2 for a perfectly good 2x4, I was having great luck finding stuff I could use. I also got my door and windows there pretty cheap.
For the foundation I bought new treated lumber and elevated it on cement blocks. (There was a big flower bed in this spot before, so first we had to level and compact that.) Below photo taken 10/13/2016 (we got a very late start but luckily had some amazing weather this fall which allowed us to work till just a week ago) Our goal was to be move-in ready before Thanksgiving cause we were leaving town for a week. The shadow in the foreground is from the duplex to the south of us, photo taken in late afternoon. This spot actually gets a lot of sun.
helpers:
Working from the elevation drawing in the book, keeping the same proportions, I made my own more detailed version. I made a big list of all the various pieces of lumber I had and their dimensions so that I could make a reasonable plan for cuts (the circled numbers correspond to pieces on the list, it was how I kept track of what I had / hadn't used). One change I made was to put the human door on the west side, simply because it's more in line with the traffic pattern from the house and would make access easier in the winter. The East and West windows I chose are slightly larger than what's in the book too, cause that's how big the windows that I found were. Plus, big windows = more sunshine.
I made drawings for the front and back elevations too, but they aren't as exciting looking.
The framing went pretty smoothly except for the fact that lots of the salvage lumber was SO dry and dense that we had to drill pilot holes for many nails. A pain. I should have listened to the guy in the video and bought the nail gun first. Looking back, if I could do one thing differently with this project, I'd do it with a nail gun. I did gain a little more proficiency in swinging a hammer though. No thumbs were injured.
Framing going up:
My favorite thing about these pictures is watching the zinnias in the foreground slowly fading
Finally adding sheathing and roof!
Windows and hardware cloth. At this point I felt like it was sooooooooo close to being almost done. Haha! What did I know. My husband and I were both working on it every chance we got, and all day long on days off. He did quite a solid amount of labor with me on this project. Days are getting so much shorter. We are putting our four year old in front of the tv so she won't bother us and eating pizza for dinner, only coming in for the night when it's dark. I didn't include pizza money in my chicken coop budget. I should have.
We added house wrap and some trim, anticipating putting up lap siding. The monitor windows open in. Since there's a bit of a roof overhang already, I figured it wouldn't matter terribly, and would be easier to open from the inside.
The human door was a three-panel interior door. I sawed the top panel off. Perfect fit!
Below and above, you can see the (open) pop hole and front (south) wall to the right. I painted inside with semi gloss exterior paint, nice and bright and easy to keep clean, and painted the floor with Blackjack #57 rubberized coating per JackE's suggestion. This was an ordeal. The hardware store special ordered a gallon for us, and when I opened it at home, it was like a solid chunk of tar in a translucent black slurry. It must have been sitting for a long time. They had to put it in the paint shaker for like 15 minutes, eventually smoothed out. I tried to roll it on with a roller, but that did not go well - it dried SO quickly and didn't spread out well. The roller I was using probably had too thick of a nap. Ended up using a cheap 4" paint brush with stubby bristles and had to really work it into the floor to get a good thick coating. I had filled in a bunch of cracks earlier with wood filler type compound, so it looks pretty smooth now. It looks great, and never smelled bad (the paint was worse.) One gallon covered the whole floor.
Below is what it looks like at the moment. Well, imagine this plus about 8" of fresh powder in the last 24 hours, much prettier than the bare dirt shown here:
I got the tar paper and shingles up, some drip edge, all the trim is on almost all trim painted. Green shingles to match the house. I nailed the shingles on during the very last decent day we had for being outside (it was about 30 degrees, super windy - tolerable except for the bare hands part AND being up on top of the roof) and I have a big stack of hardie board lap siding (leftovers from someone's project) waiting to go on. Just need a few decent days to do that. We're in the deep freeze for now.
The pop door has cabinet hinges on the top so when flipped up it stays up on its own. We are pretty consistently home around dusk, but I have serious automated door envy $$$. Someday.
Still unfinished: build stairs to the human door. Make a ramp for the pop door (we put a little stump in front of it that they can hop down to.) Trim the dang shingles so the overhang is even. Further weatherproof gaps around the windows and doors. Add the siding. Pavers in front of the human door that connect to the sidewalk. Plantings or boxes around the coop. Build nicer roosts with a poop deck and construct nesting boxes. There's a little bit more hardware to add to the inside. And, finally, add a mirror and some other goofy stuff. Husband picked up a xylophone for them from the thrift store.
Bird bath heater has been doing an ok job of keeping things flowing; single digit lows for the last few days. Birds seem really happy!
Having a little snack on the veranda:
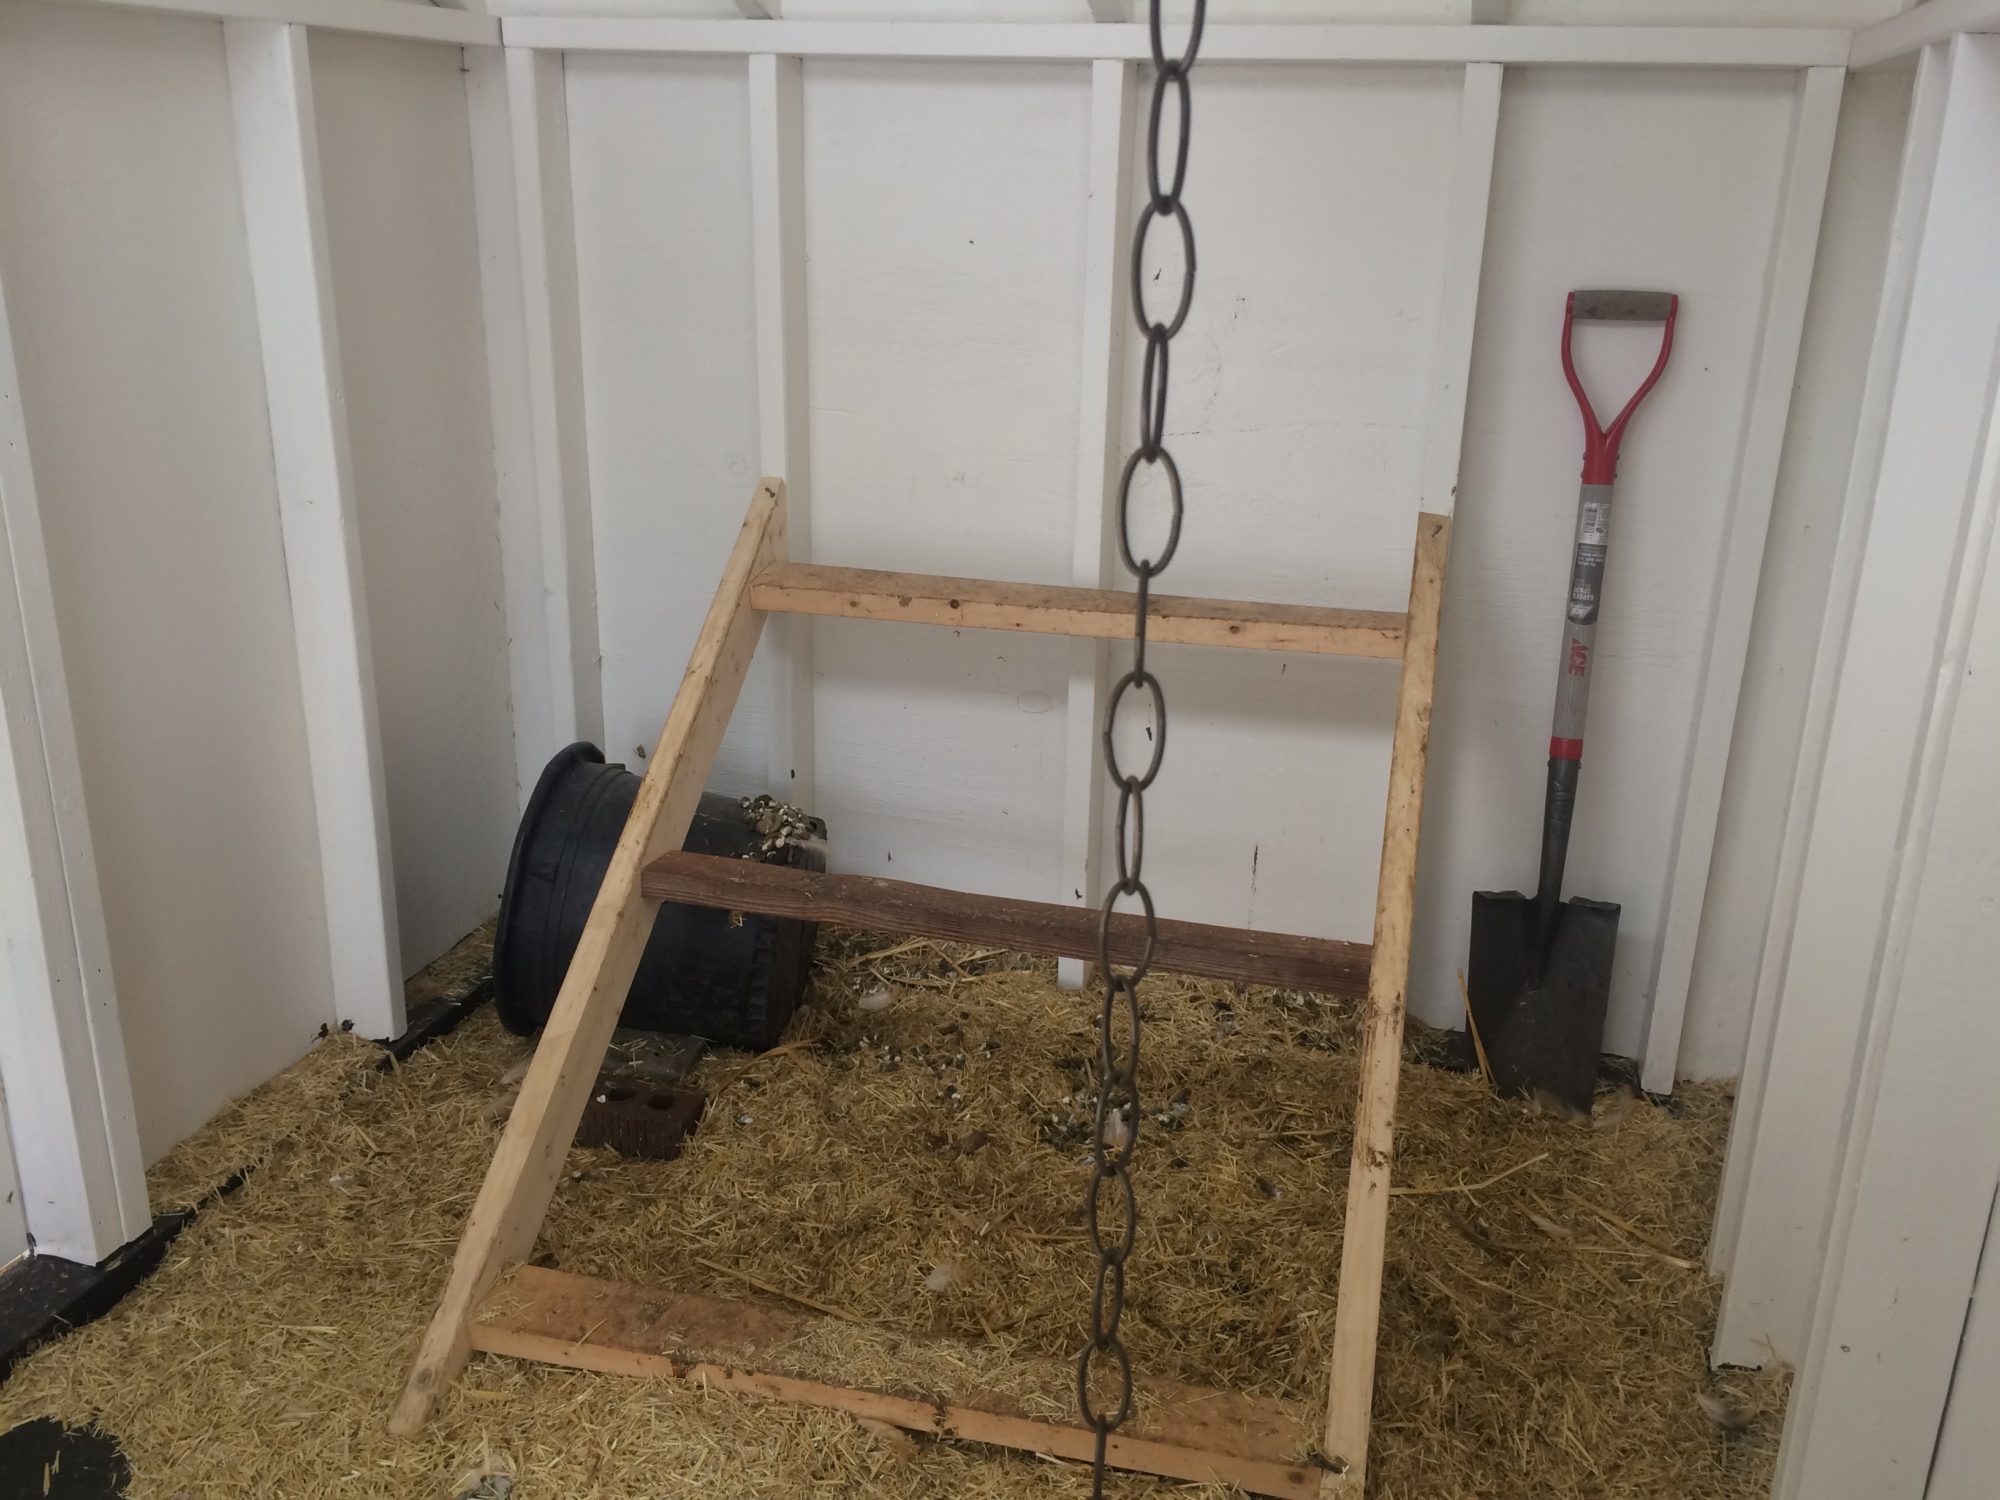
Not a beautiful photo, but here's the current roost setup on the north wall. Now that it's in use, I realize that top roost may be a bit close to the wall, although it doesn't stop them all from crowding together on it. The black tree bucket is something I had in my garage that is working ok as a temporary nesting box. I put a couple bricks beside it to wedge it into place. Eventually, I would like to set up nesting boxes along the back wall, safely sheltered below a poop deck, and then roosts above that. I believe that was part of the intended original design for this coop. If anyone has a similar setup I'd love to see it!
I will be sure to update this post once things start moving along again. I look forward to making improvements as I learn more.


") how many chickens is a 6 x 10 design for? And may I ask a personal question? What did this cost?
how many chickens is a 6 x 10 design for? And may I ask a personal question? What did this cost?


