Spiritof76
In the Brooder
- Nov 13, 2016
- 12
- 1
- 14
I thought I would share some ideas for a feeder and waterers I have been using that serve me well on time, and have saved me some $$ on the electric bill. Its winter here in upstate NY and of course freezing water is a big issue. I am also one who is always looking to save on the electric bill, so wattage cutting is always desirable.
I use two kinds of waterers as I have my garden (its winter so its not in use) that is a temp. run/ coop for a bunch of cockrels I have and my main coop which homes my hens. I say two different setups because I use a metal watering can and a 5 gallon bucket.
The 5 Gallon bucket: Contents, wattage, and approx cost
1. Wattage: 90W total- Can heat water up to 80 degrees
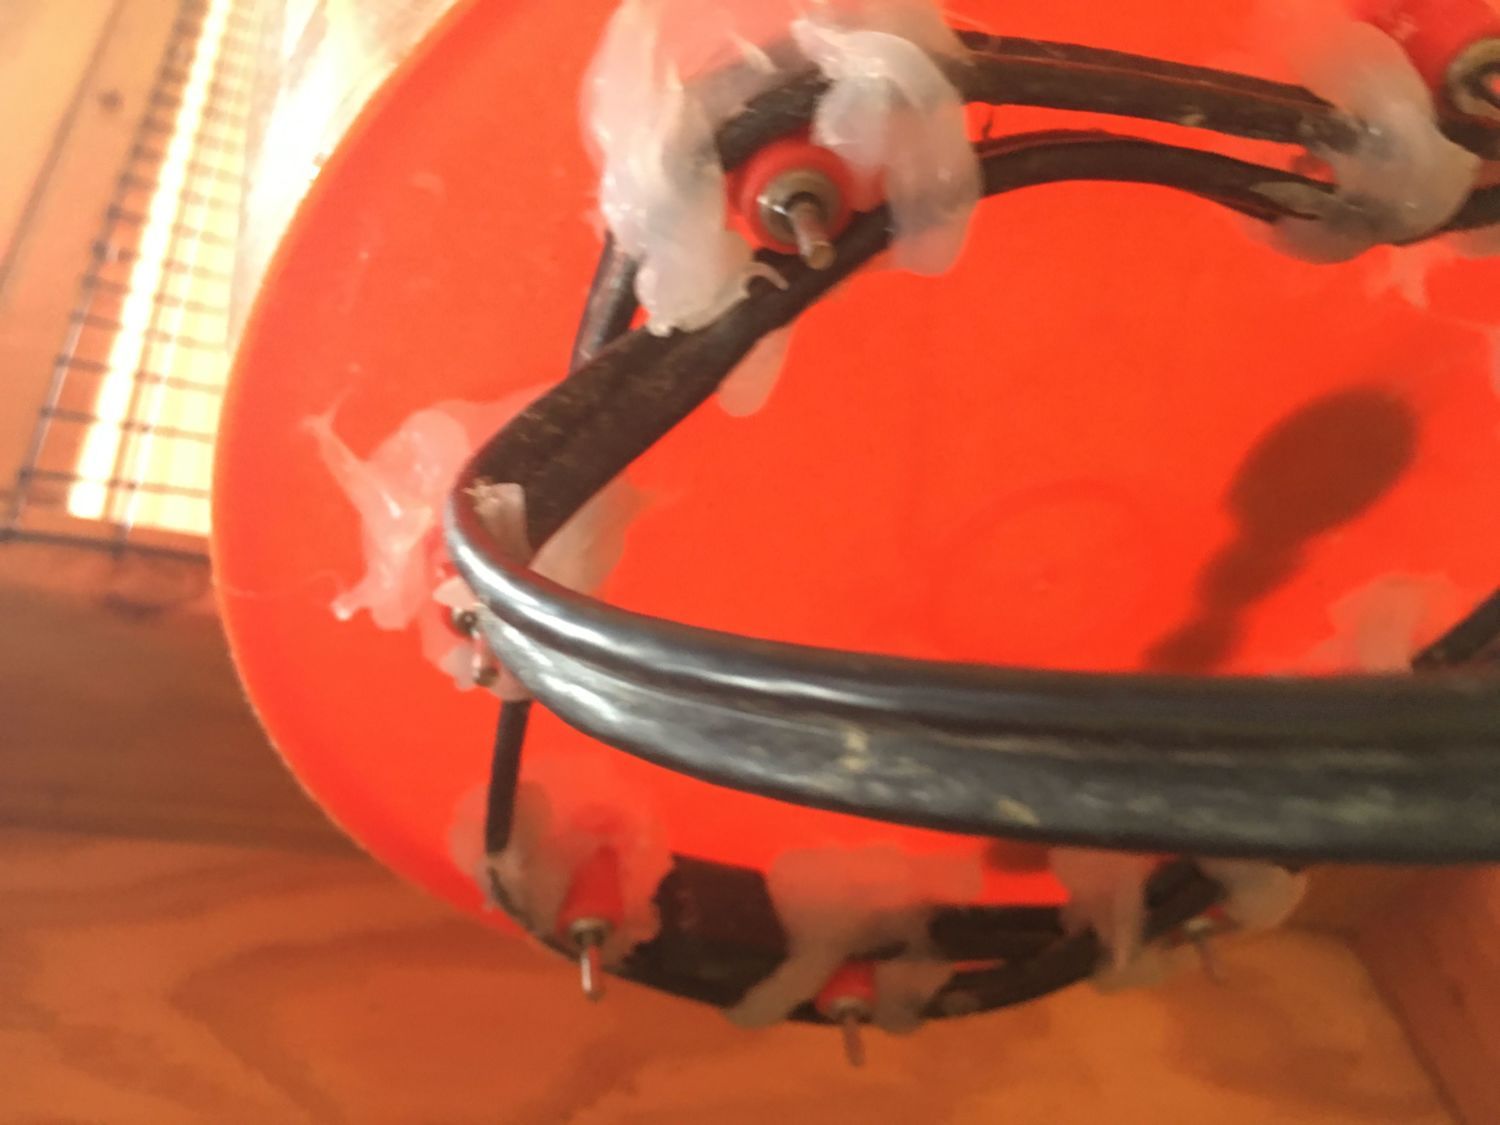
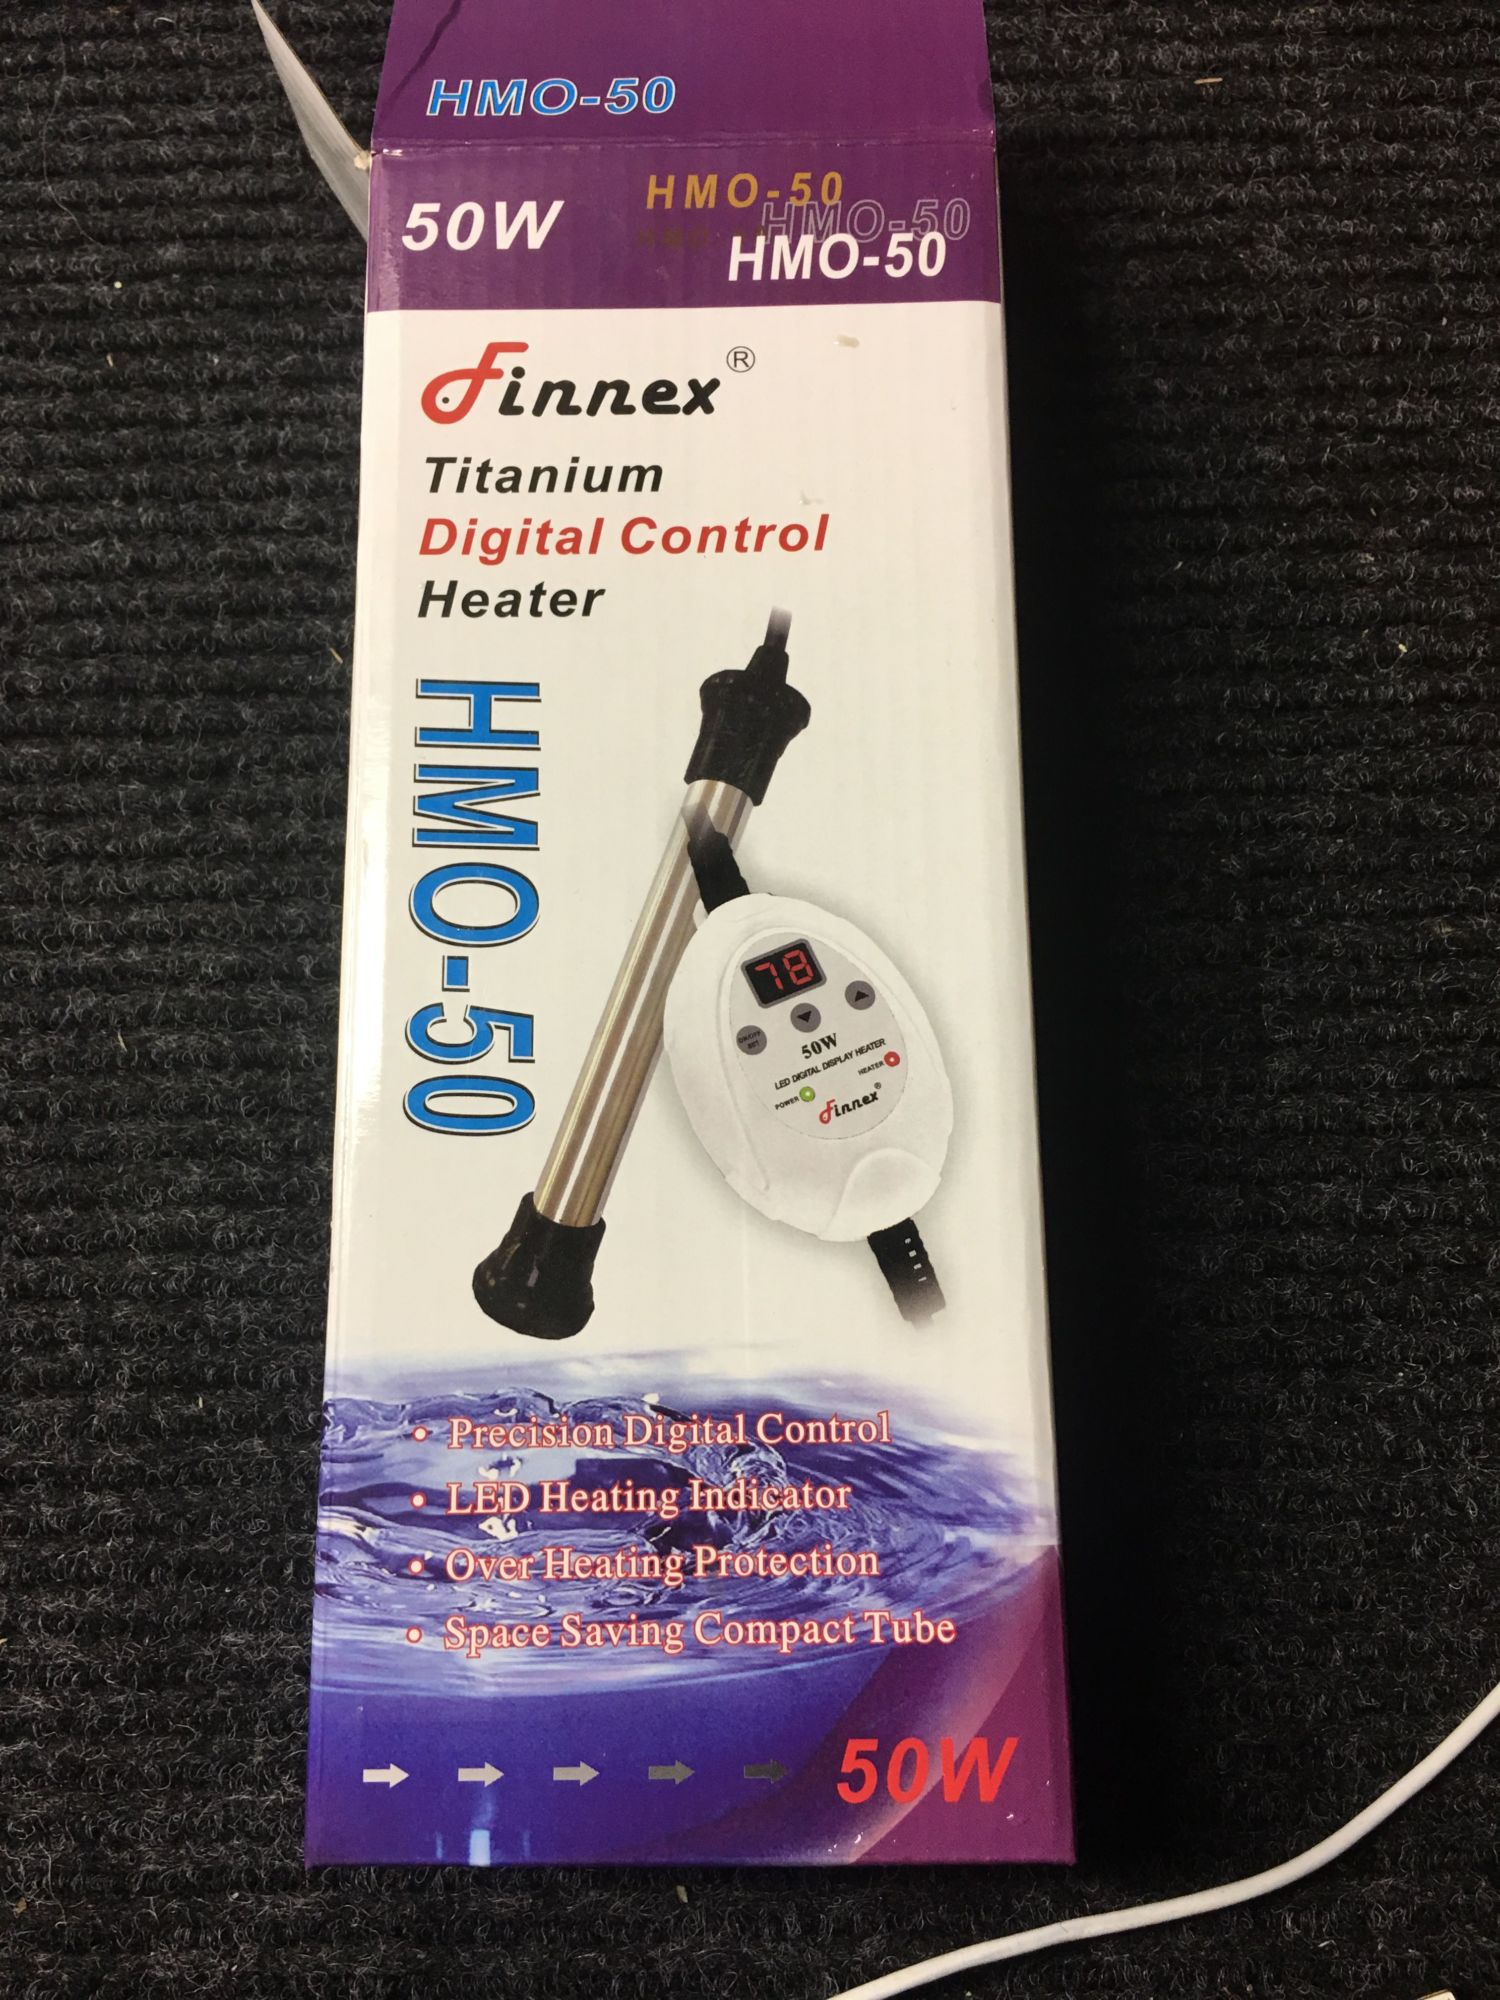
2. Contents: a. 5 Gal. Bucket (home depot) ($5) b. Finnex 50W Titanium drop in water heater ($30) c. Nipple feeders ($3) d. Frost King 40W pipe heater- 3ft long (home depot) ($25) d. Silicone tube ($4)
So the build is easy, but does take two days to complete. You may be able to do it in 1
If you look at the pics, I took the pipe heater and wrapped it around the watering nipples. I did one pass in one day with silicone and clamps to hold it in place, and then I let it dry for a day. I did the second pass the next day.
Obviously the drop in heater was a simple drop in and cover to keep the water clean.
** You might be able to just use the drop in heater and keep the water warm enough to keep the nipple feeders defrosted. I have yet to try this, but it might just work. Let me know if you try it and if you were successful or not.
***UPDATE**
Since this post I decided to unplug the 40watt heater coil and have had success with the heater keeping things (including nipple feeders) defrosted at 16 degrees with the coop open, and 9 at night with the coop closed.
I suggest lowering your energy costs and trying to achieve success WITHOUT the coil to start. Add if needed!


The Watering Can: Contents, wattage, and approx cost
1. Wattage: 50W total- Can heat water up to 80 degrees
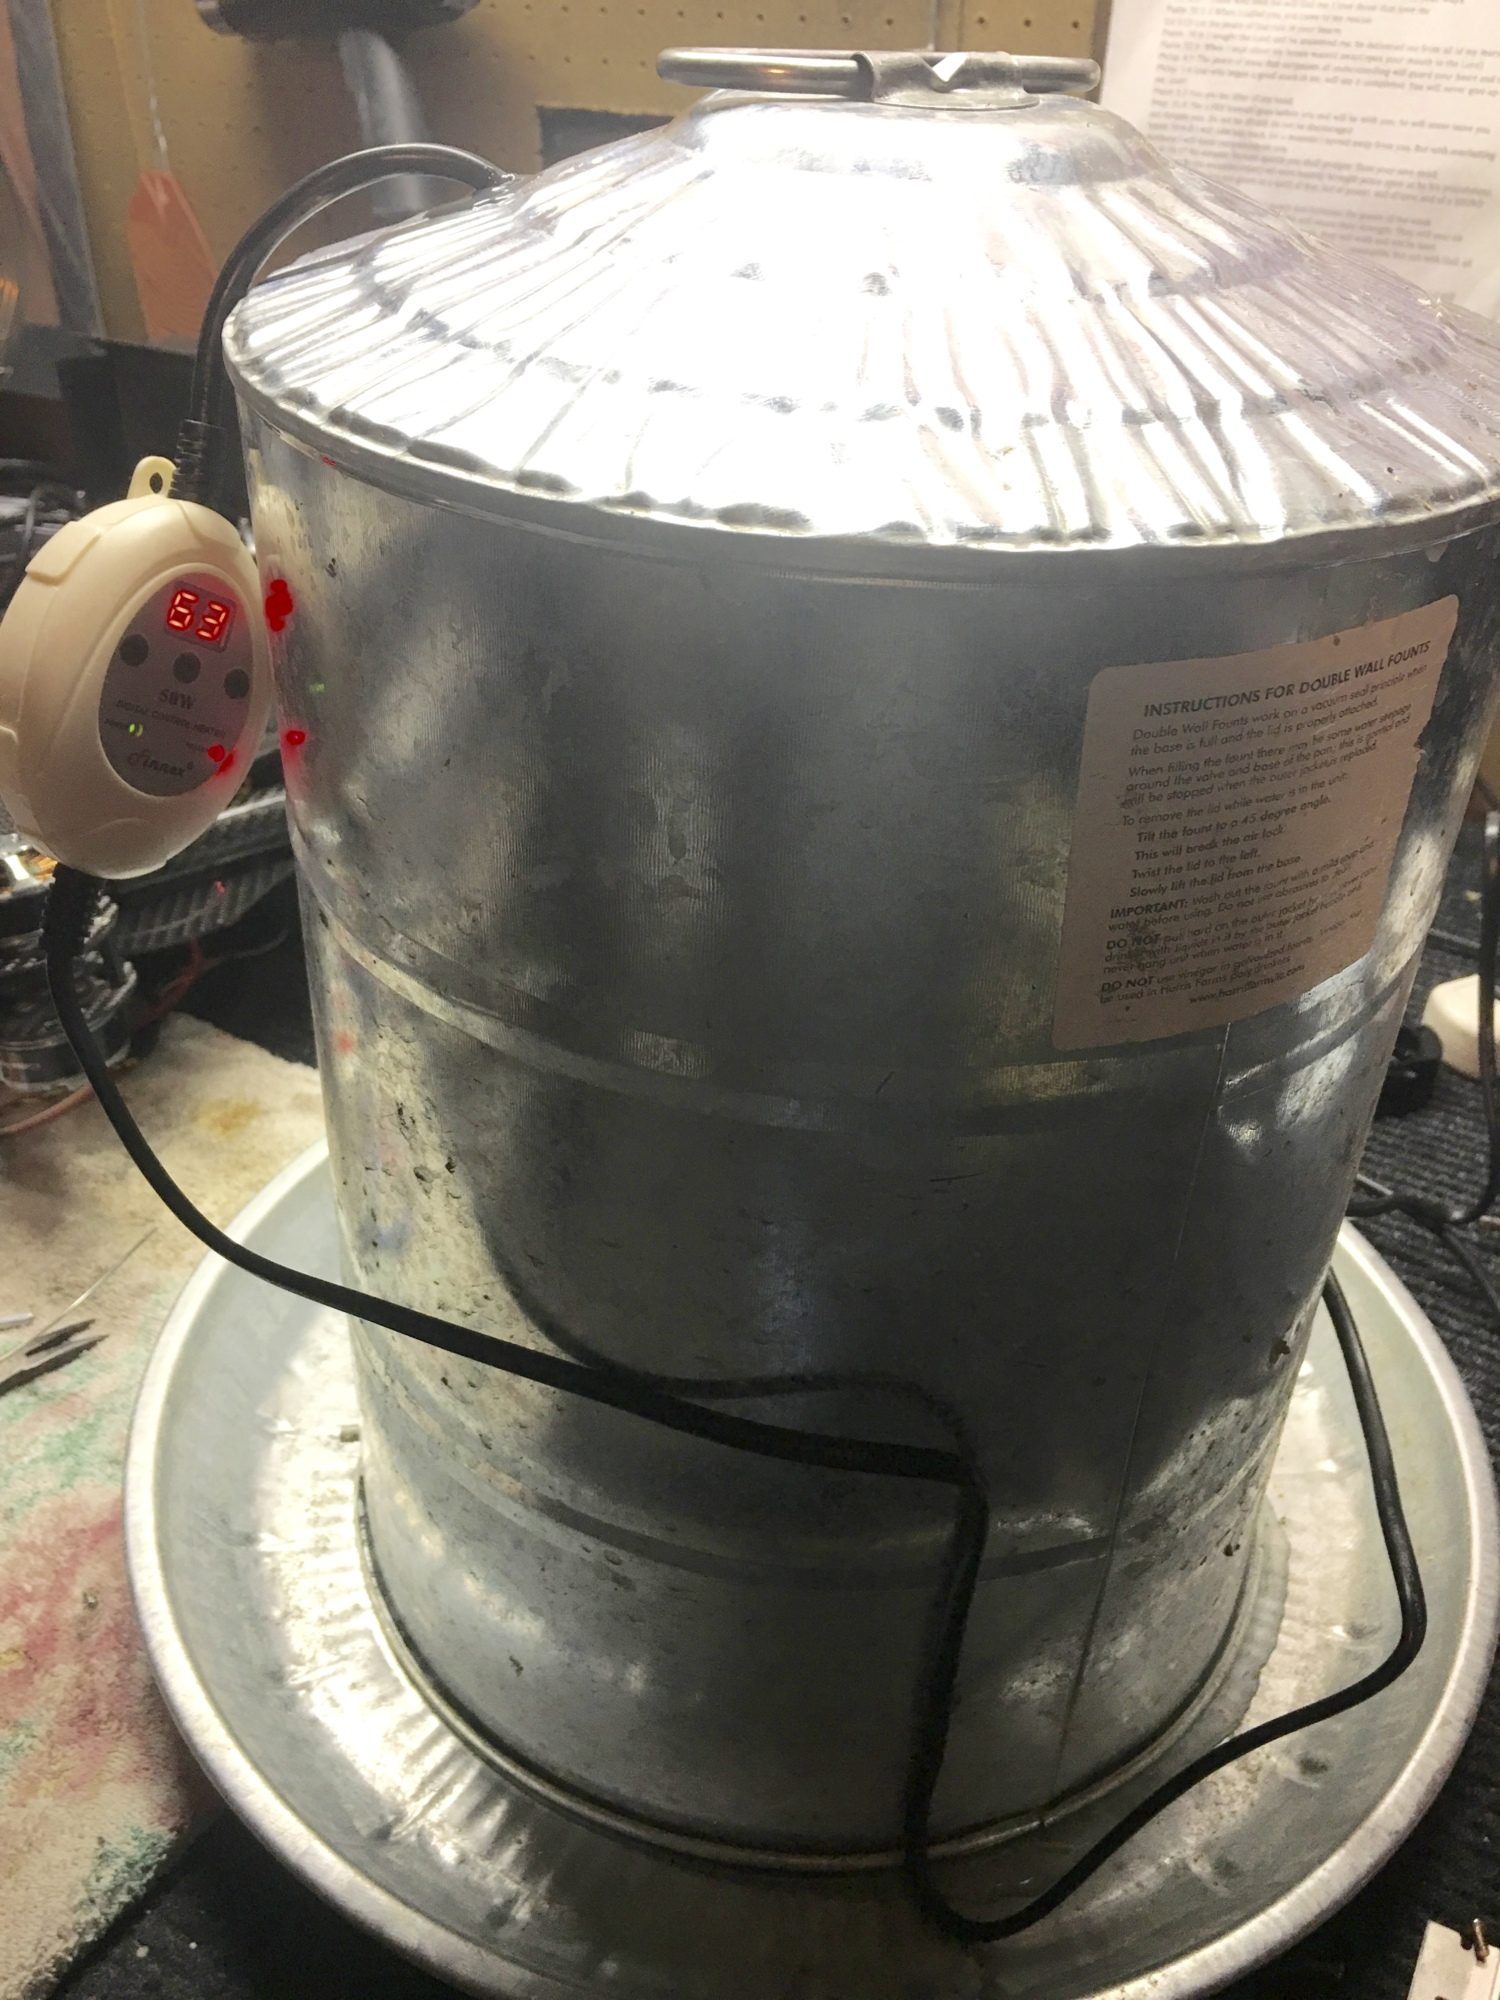
2. Contents: a. 5 Gal. Metal Watering Can ($35) b. Finnex 50W Titanium drop in water heater ($30)
This setup was a little more tricky and requires soldering skills in order to get the job done, but for 50W its worth the effort if you can do it.
First step was to unscrew the control unit of the drop heater, remove the power wires with a soldering gun, drill a hole on the top of the can (3/8 I believe) and then run the wires through and resolder. Once that is done, screw the main unit back together and silicone the hole where the wire runs through the can. Most of these cans use pressure to keep the water in, so making sure the hole is plugged is important.
***Take pictures of where the wires go if you decide to desolder/solder. This way, you know where they go back.***


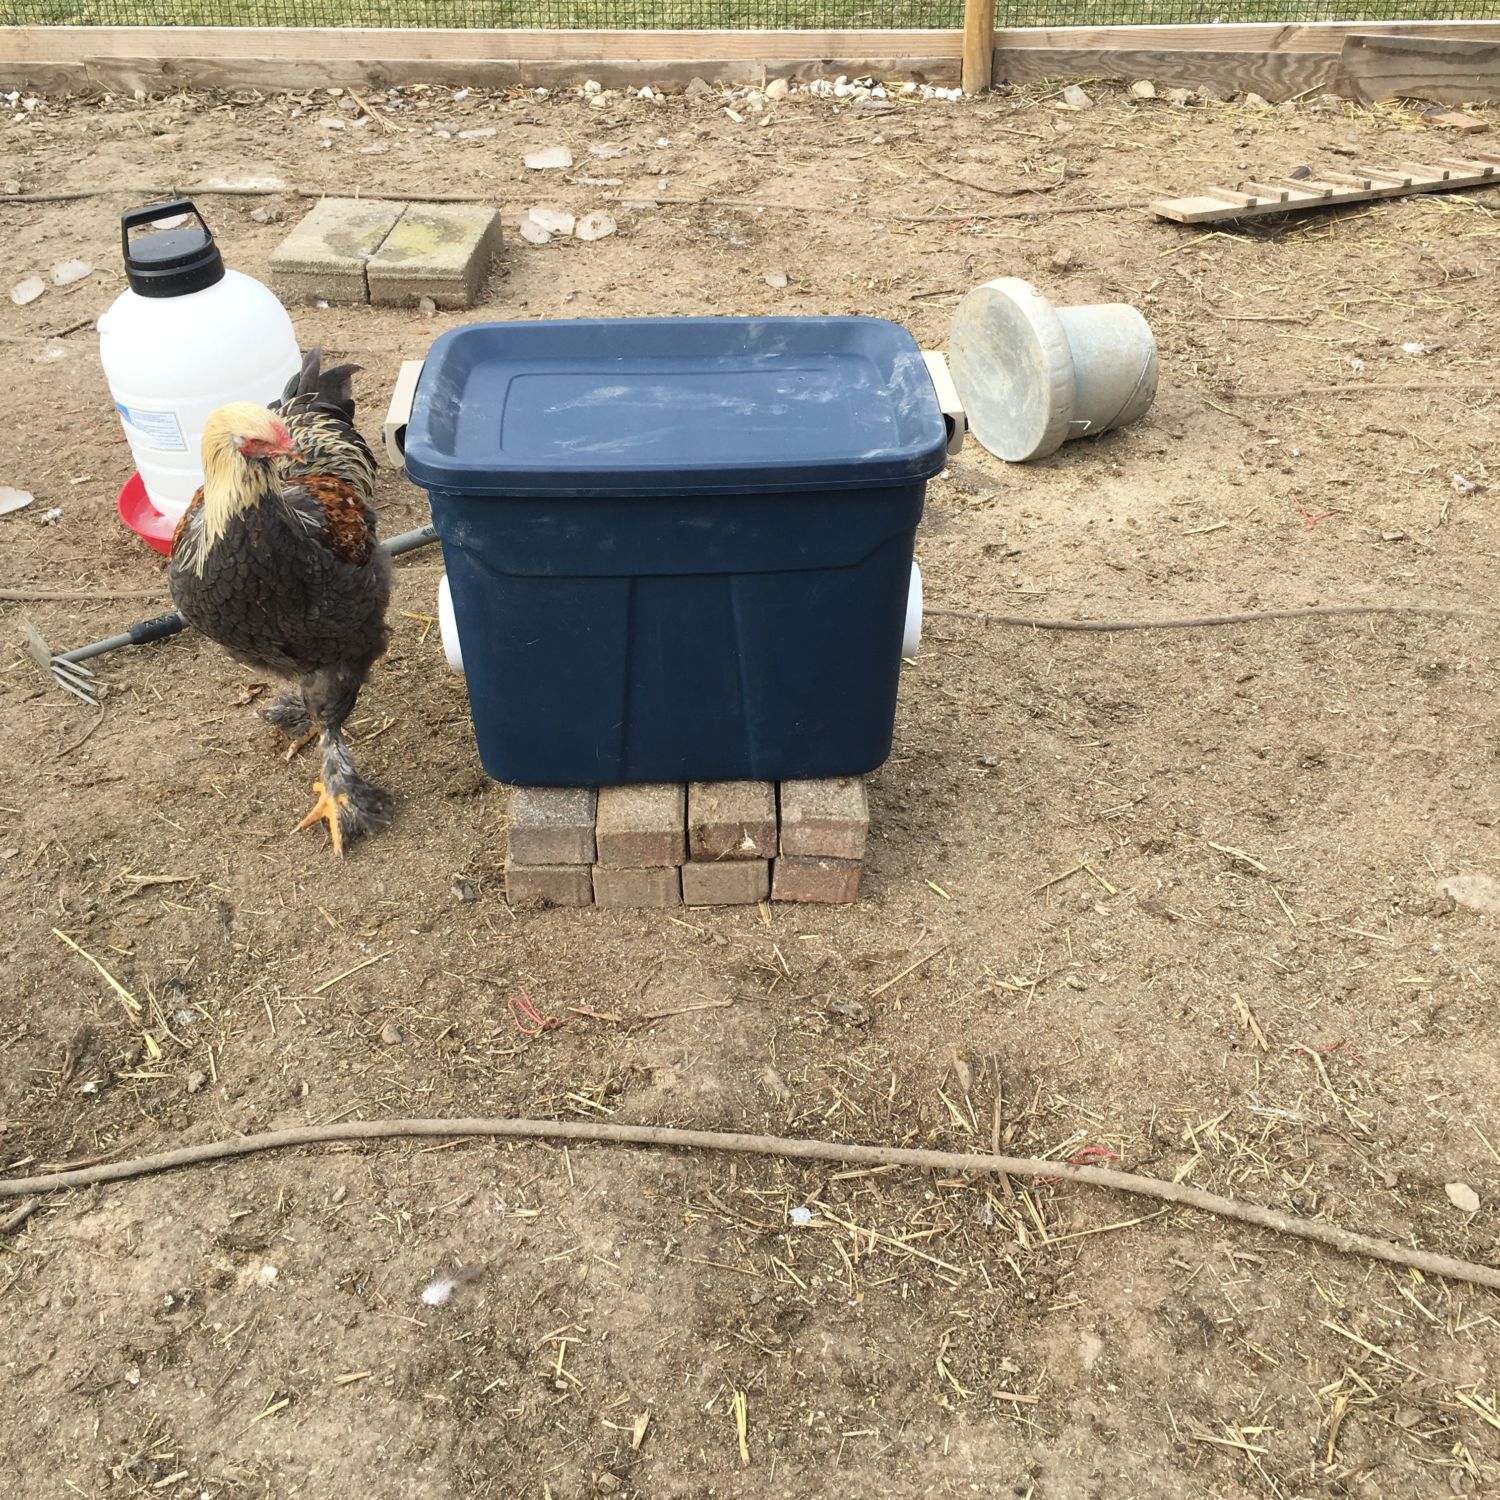
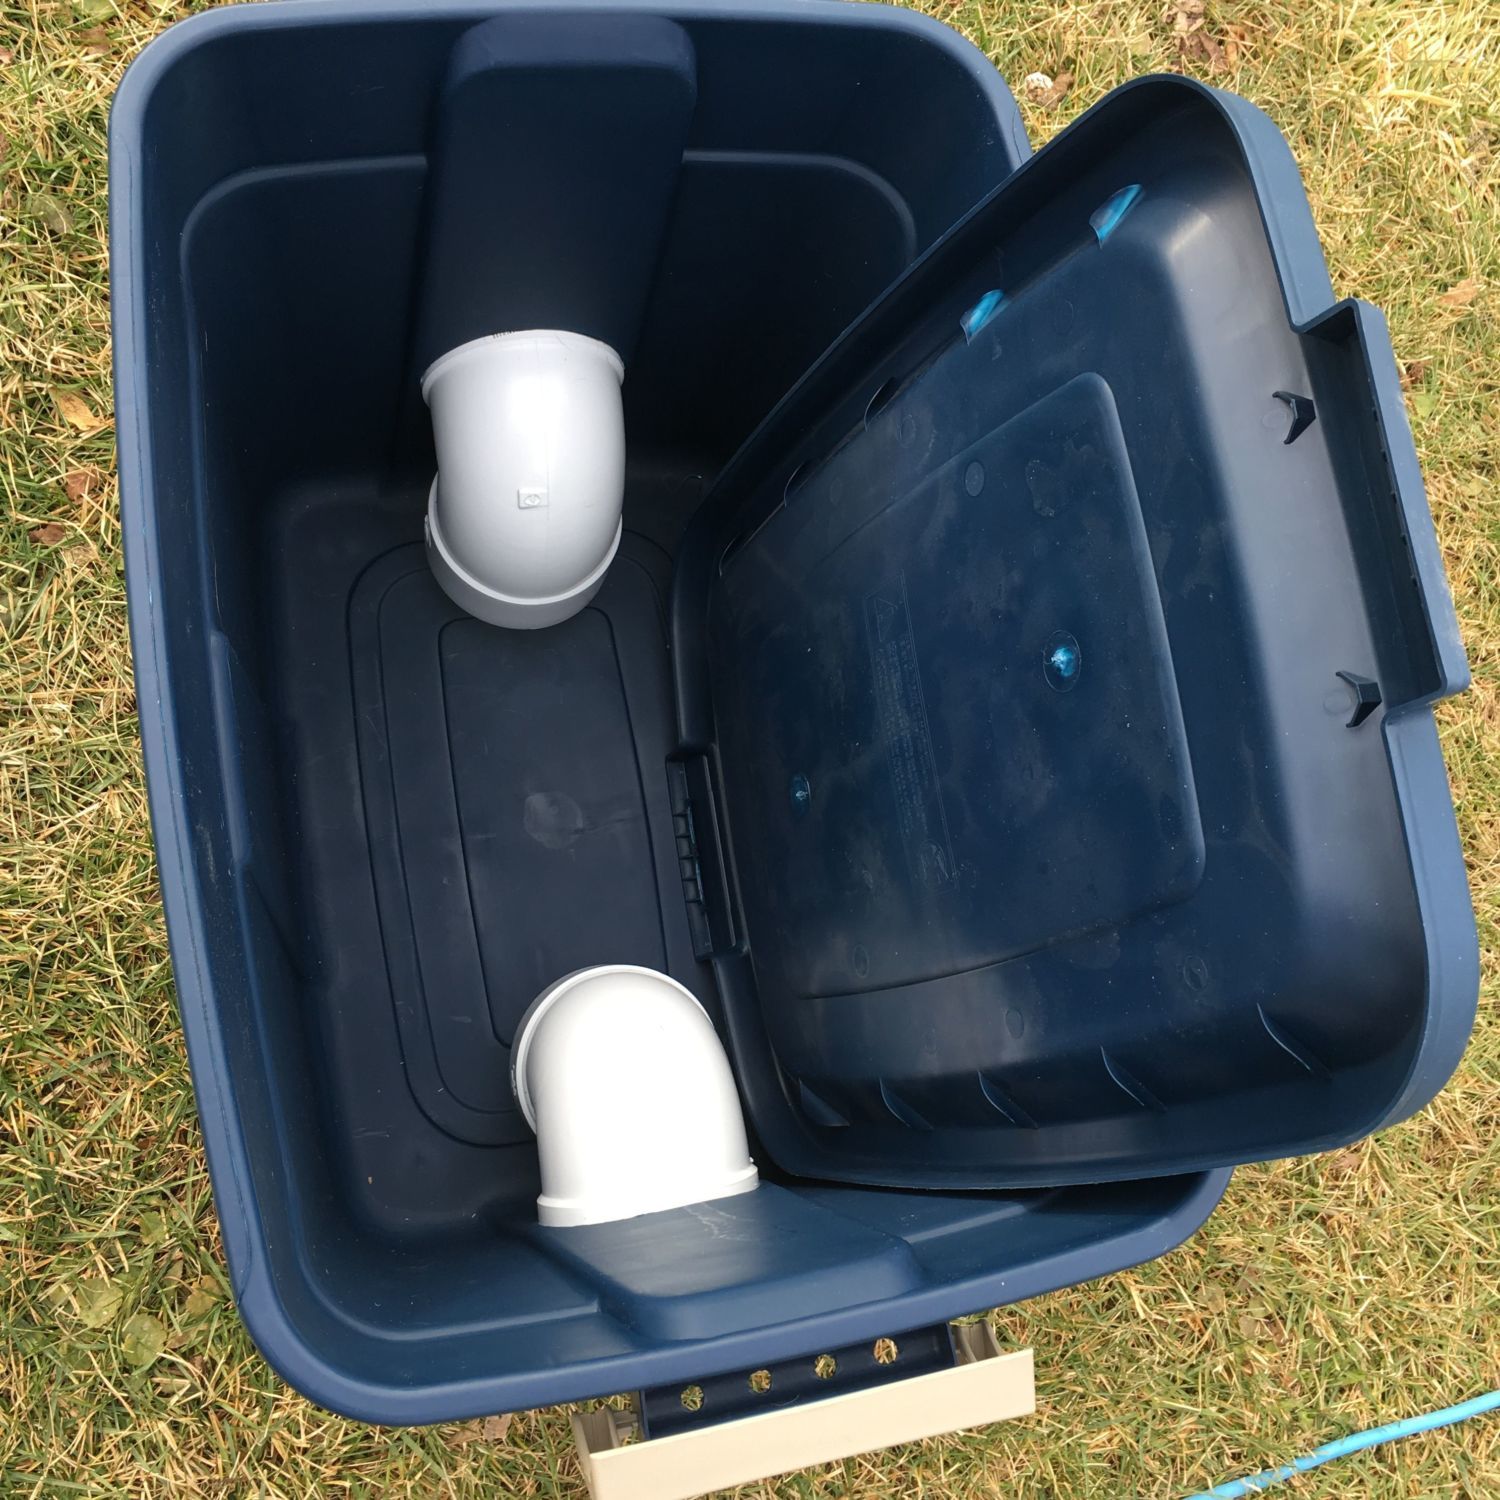
The Feeder. This is based on a concept already being sold in 5 gal. bucket form. I decided to take the 5 gal. bucket idea and turn it into a 13 gal Tote. The less I need to do daily to feed and water the birds, the better.
**Whatever tote you decide to use, make sure the material is quite thick and somewhat flexible otherwise it will crack when flexing in order to put PVC pipe in and become useless.** This brand I bought was at Lowes, FYI.
Tote: Cost, and materials needed:
1. 13 Gal. Tote- ($13)
2. 2x 4 inch PVC Elbows ($4 ea)
3. Some silicone to seal around the PVC opening
The way I did this was to take the elbows, place the opening on the sides about 5-7 inches from the bottom. Just make sure that you will have at least 1-2 inches of clearance for the elbow when it is inside so that the birds have access to the feed. (Use your own measurements) and then draw around the opening as your guide for what you will cut. I used a razor blade to slowly scar the plastic around in a circle and they I cut down the middle of the circle and made an opening. After I did this, I was able to stick my fingers through the tote and slowly pull the scarred plastic away from the tote. If you do this correctly, you will get close to a perfect circle. You may need to shave some material down, just be sure to not shave too much. Use this video and follow the instructions on how to score and peel from 1:16 to 1:38
Once you are done making your opening, fit the pvc elbow and silicone around the elbow. Wait a day and you are done.
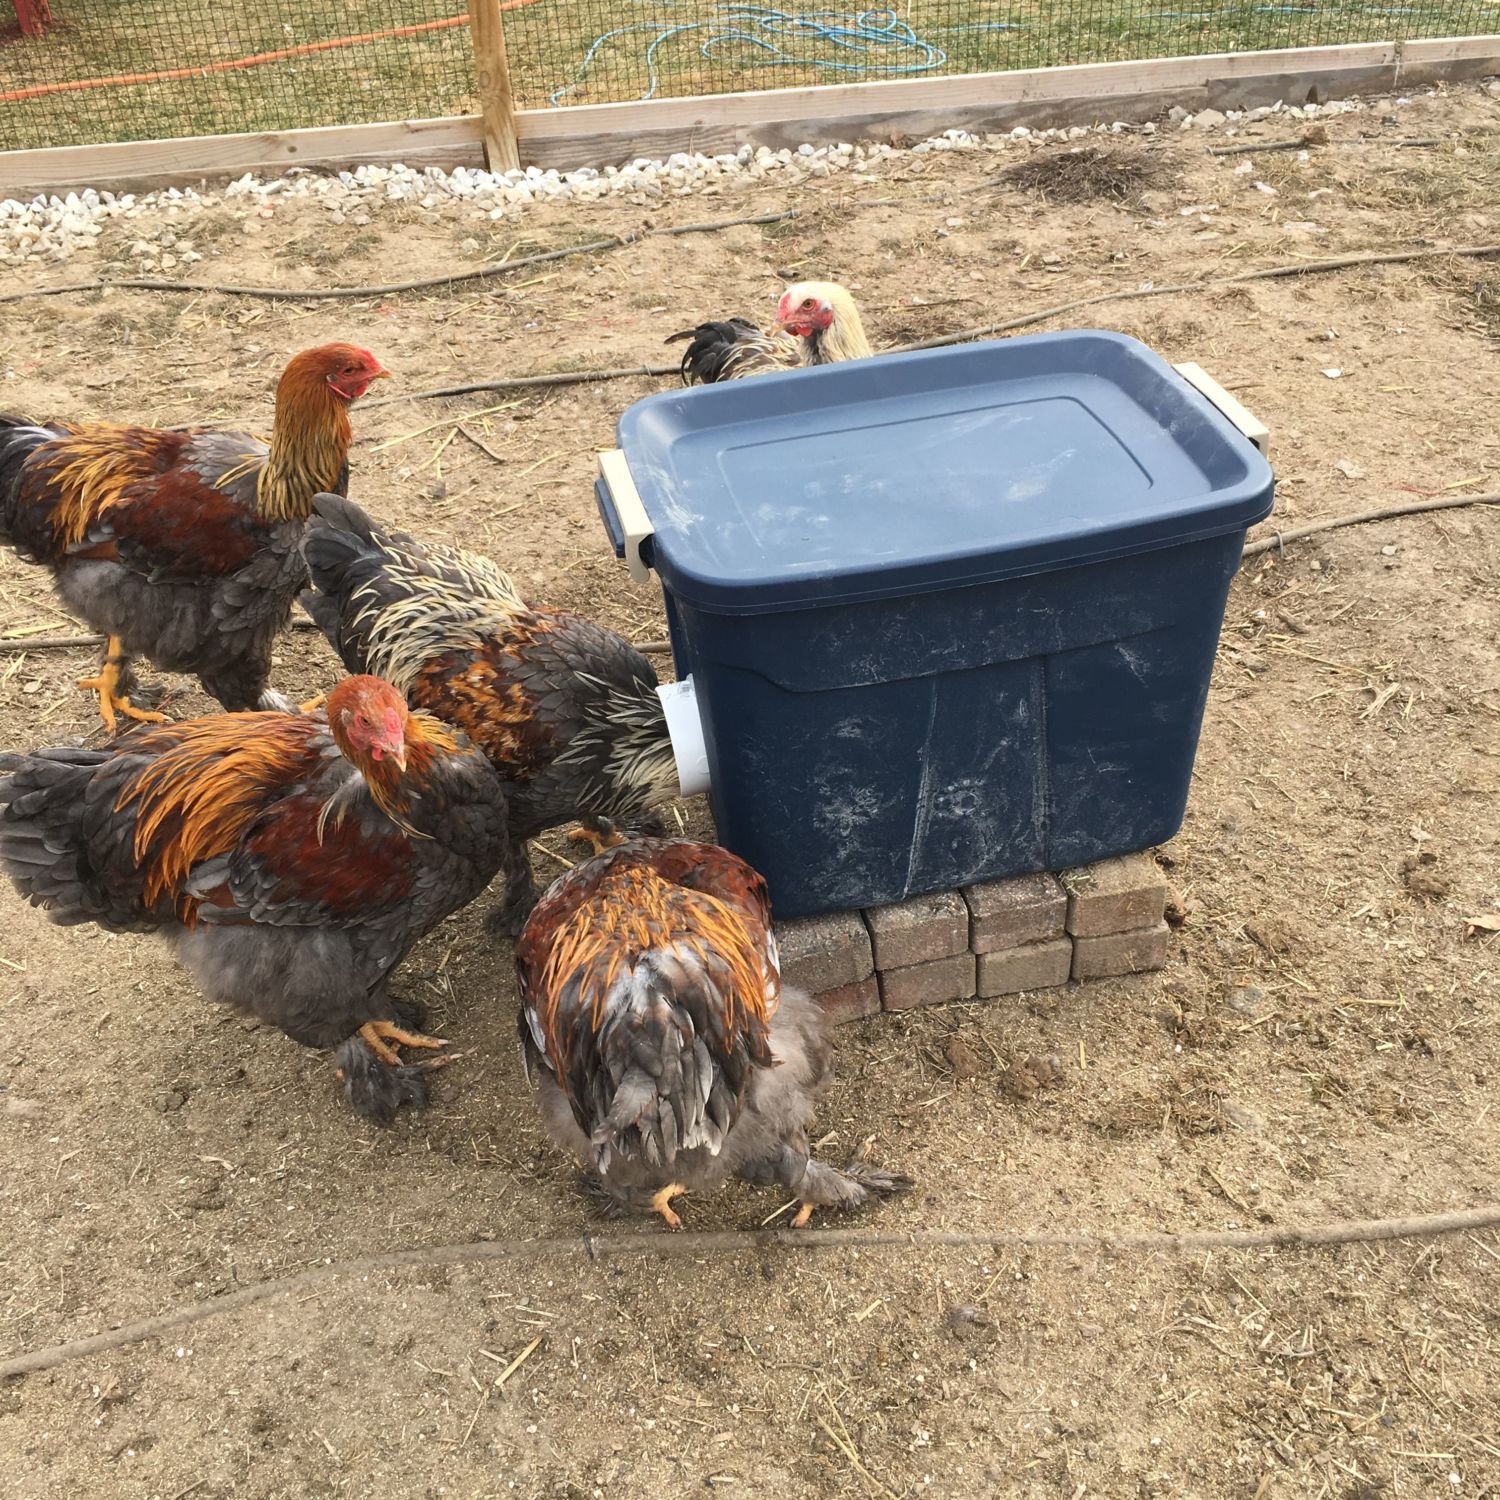
This feeder filled fed my 13 roos for about 3 weeks or so. My 18 hens about the same.
**Make sure to protrude the PVC elbow opening out at least 1.5-2 inches so there is cover from rain/snow
**If you look closely, you will see that I have used bricks to elevate the tote. My birds are all adults, but yours may not be. Adjust accordingly.
Hope these ideas are helpful!
 ,
,

I use two kinds of waterers as I have my garden (its winter so its not in use) that is a temp. run/ coop for a bunch of cockrels I have and my main coop which homes my hens. I say two different setups because I use a metal watering can and a 5 gallon bucket.
The 5 Gallon bucket: Contents, wattage, and approx cost
1. Wattage: 90W total- Can heat water up to 80 degrees
2. Contents: a. 5 Gal. Bucket (home depot) ($5) b. Finnex 50W Titanium drop in water heater ($30) c. Nipple feeders ($3) d. Frost King 40W pipe heater- 3ft long (home depot) ($25) d. Silicone tube ($4)
So the build is easy, but does take two days to complete. You may be able to do it in 1
If you look at the pics, I took the pipe heater and wrapped it around the watering nipples. I did one pass in one day with silicone and clamps to hold it in place, and then I let it dry for a day. I did the second pass the next day.
Obviously the drop in heater was a simple drop in and cover to keep the water clean.
** You might be able to just use the drop in heater and keep the water warm enough to keep the nipple feeders defrosted. I have yet to try this, but it might just work. Let me know if you try it and if you were successful or not.
***UPDATE**
Since this post I decided to unplug the 40watt heater coil and have had success with the heater keeping things (including nipple feeders) defrosted at 16 degrees with the coop open, and 9 at night with the coop closed.
I suggest lowering your energy costs and trying to achieve success WITHOUT the coil to start. Add if needed!
The Watering Can: Contents, wattage, and approx cost
1. Wattage: 50W total- Can heat water up to 80 degrees
2. Contents: a. 5 Gal. Metal Watering Can ($35) b. Finnex 50W Titanium drop in water heater ($30)
This setup was a little more tricky and requires soldering skills in order to get the job done, but for 50W its worth the effort if you can do it.
First step was to unscrew the control unit of the drop heater, remove the power wires with a soldering gun, drill a hole on the top of the can (3/8 I believe) and then run the wires through and resolder. Once that is done, screw the main unit back together and silicone the hole where the wire runs through the can. Most of these cans use pressure to keep the water in, so making sure the hole is plugged is important.
***Take pictures of where the wires go if you decide to desolder/solder. This way, you know where they go back.***
The Feeder. This is based on a concept already being sold in 5 gal. bucket form. I decided to take the 5 gal. bucket idea and turn it into a 13 gal Tote. The less I need to do daily to feed and water the birds, the better.
**Whatever tote you decide to use, make sure the material is quite thick and somewhat flexible otherwise it will crack when flexing in order to put PVC pipe in and become useless.** This brand I bought was at Lowes, FYI.
Tote: Cost, and materials needed:
1. 13 Gal. Tote- ($13)
2. 2x 4 inch PVC Elbows ($4 ea)
3. Some silicone to seal around the PVC opening
The way I did this was to take the elbows, place the opening on the sides about 5-7 inches from the bottom. Just make sure that you will have at least 1-2 inches of clearance for the elbow when it is inside so that the birds have access to the feed. (Use your own measurements) and then draw around the opening as your guide for what you will cut. I used a razor blade to slowly scar the plastic around in a circle and they I cut down the middle of the circle and made an opening. After I did this, I was able to stick my fingers through the tote and slowly pull the scarred plastic away from the tote. If you do this correctly, you will get close to a perfect circle. You may need to shave some material down, just be sure to not shave too much. Use this video and follow the instructions on how to score and peel from 1:16 to 1:38
Once you are done making your opening, fit the pvc elbow and silicone around the elbow. Wait a day and you are done.
This feeder filled fed my 13 roos for about 3 weeks or so. My 18 hens about the same.
**Make sure to protrude the PVC elbow opening out at least 1.5-2 inches so there is cover from rain/snow
**If you look closely, you will see that I have used bricks to elevate the tote. My birds are all adults, but yours may not be. Adjust accordingly.
Hope these ideas are helpful!
Last edited:
