Thanks for the tips. Chicks will be a new adventure for us. Withh three dogs and two cats in the house it's going to be tricky. As long as the 5yo keeps the doors shut we should be okay.
Susan, Yours was one of the ones I saw on the brooder pics that give me the idea. Loved it. I was tinking clear but do you think 15 chicks (normal size) would work in that size?
How old were yours when you moved them out?
thanks again all for your great info once again.
I am with you Henrietta I think this is a great inexpensive way to do this temp housing.
wonderful ideas all you smarty chickies
the webcam is great. what camera model are you using?
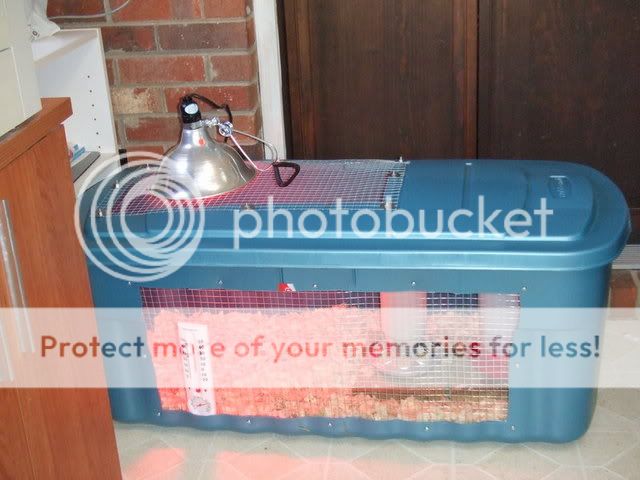
I made my brooder out of the largest rubbermaid container I could find. It measures approx 4 ft long by 2.5 feet across and 2.5 feet high. I've got my 10 silkies in there now - they are 10 days old and have plenty of room. Also, it is VERY easy to clean - the container is nice and slick on the inside, so nothing really sticks. Plus you can disinfect it very easily, and the hardware cloth keeps the pine shavings INSIDE and not all over the house. With the lid on, I don't have to worry about escapees OR my dogs getting too interested in the chicks.
Total cost of the brooder less than $30 - a lot cheaper than a dog crate or other bought cage. The container was about $18 at Lowes. The washers were $6 and about $4 for the bolts.
I then took a very sharp utility knife and cut rectangular openings in one side and in the top. I like the chicks to be able to see out and not think the world is 4 solid walls. PLUS I worry about adequate ventiliation with a plastic container on all 4 sides. This way the air can flow freely up and out the top as the air warms, bringing in air through the side opening.
I drilled approprite sized holes around the openings I cut, and used fender washers and 3/4" nuts and bolts to secure 1/2" hardware cloth to the openings.
It is working great! I just set the brooder light on top of the lid on the open area and the temps have stayed nice and warm. I am using an 85wt small sized red floodlight in the brooder lamp. The brooder is in my house which is around 70 deg. constantly. The regular heat lamp (250wt) was WAY too hot - it threatened to melt the rubbermad container and was over 110 degrees in just a min.
Anyway, here's a pic. Also in my signature line below is a link to my chickNcam and you can see the brooder from the inside view.
As you can see- I just rearranged chicks and there are a few too many in this one- I will be getting a larger one in a few days.
This is the one we start ours out in. Then they go to a bigger one, exactly the same.
I cut the holes with tin snips (scissors or an exacto knife would work fine too). Then I cut the hardware cloth just a little bit bigger. I silicone mine in.
Also, we cut a small branch and screw it in for them to roost on- they usually don't- but I like them to have the option to.
Hi I made a tote brooder too. I have 7 chicks in mine but I think it may be getting crowded. My chicks will be 5 weeks next week. Do I need a larger brooder or can I use a dog crate. I have a kitty too so the tote works great.
 Thanks for the tips. Chicks will be a new adventure for us. Withh three dogs and two cats in the house it's going to be tricky. As long as the 5yo keeps the doors shut we should be okay.