
Preface:
All coops thus far have been wood and wire tractors and one lowe's play house that was pre-cut. Skill level (1-10) was probably 2.
This project in particular was all made possible by the contents of this box which I was lucky enough to be able to find about 6 years ago:
It's an all in one unit that does EVERYTHING!

For the coop....we started with a plan:
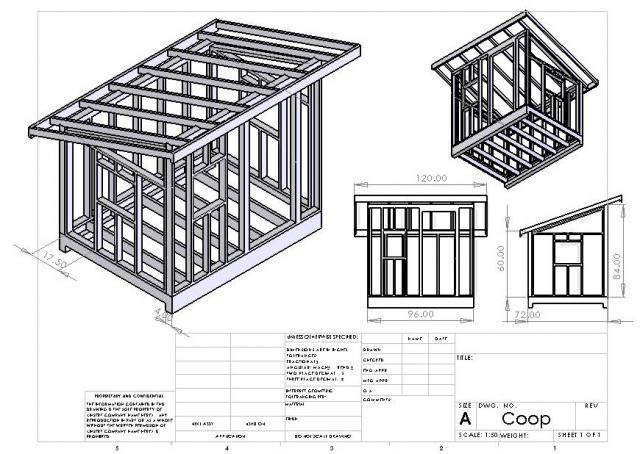
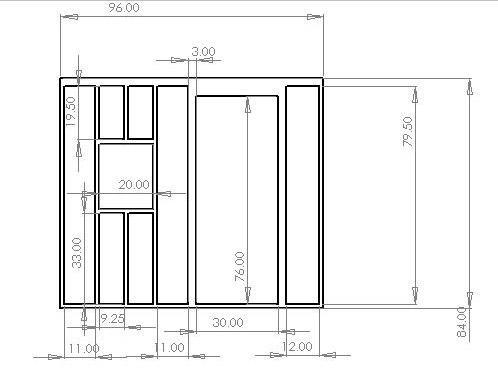
Front
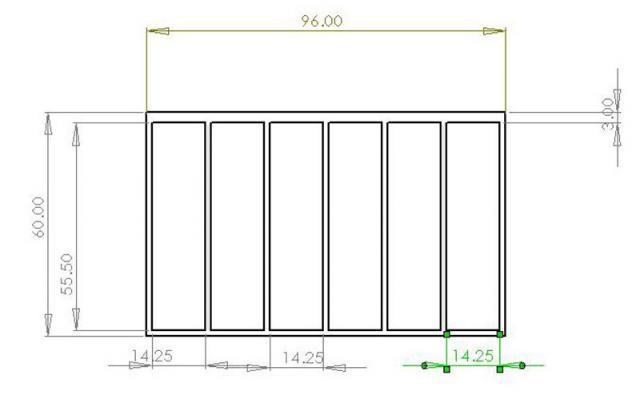
Back
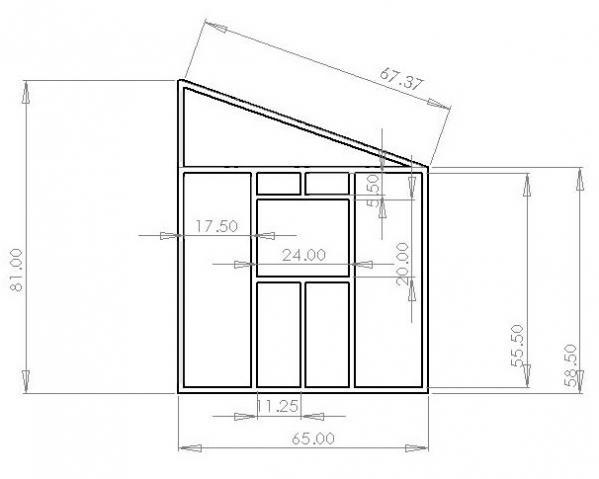
Sides
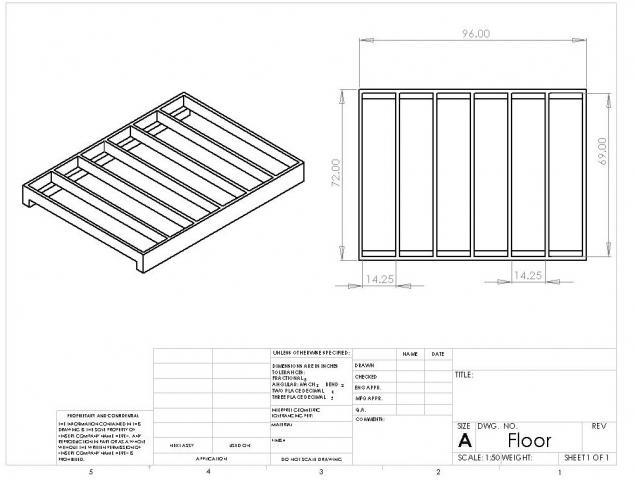
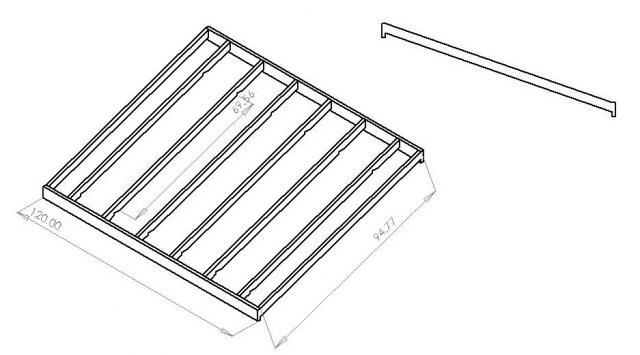
Floor
Roof
Supples mostly bought from Lowe's. They were VERY helpful in moving pieces and loading the truck!
It is a 6x8 shed with a 4 in 12 roof.
5 ft tall in the back, 7ft tall in the front.
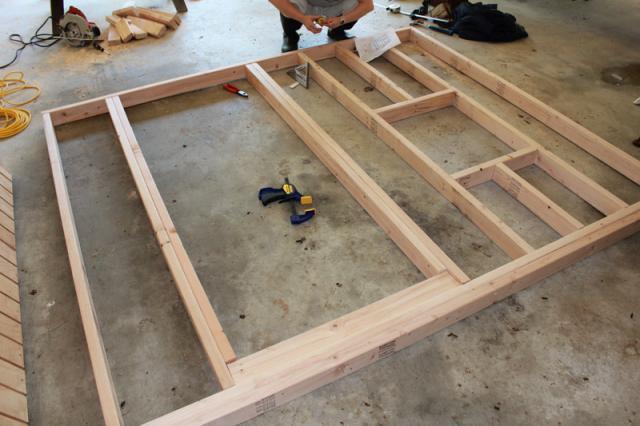
Floors are made of 2x6's on skids, 16 on center.
Load bearing walls are 16 on center. (Front and back)
16x20 windows on 3 sides.
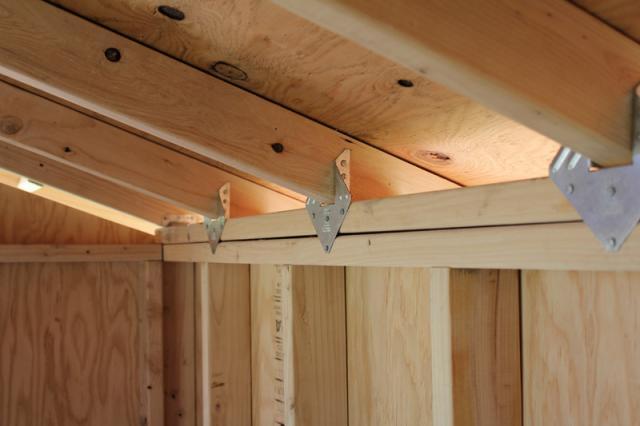
Rafters are 2x4's and attached with strong ties.
Roof has 12 inch overhang on sides, 14 in front, 7 in back... to best optimize a full length 2x4x8.
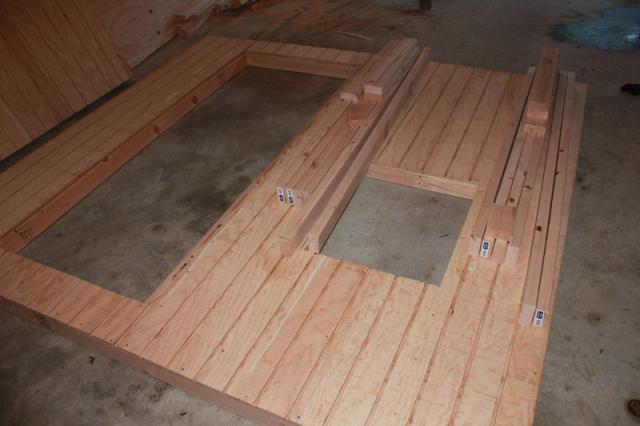
Exterior 1/2 ply on floor is sturdy with 16OC floors.
Walls are all wood T1-11.
Planning and supply collecting time ~10 hours?
Then started to build:
Floor. 2x6x8's.
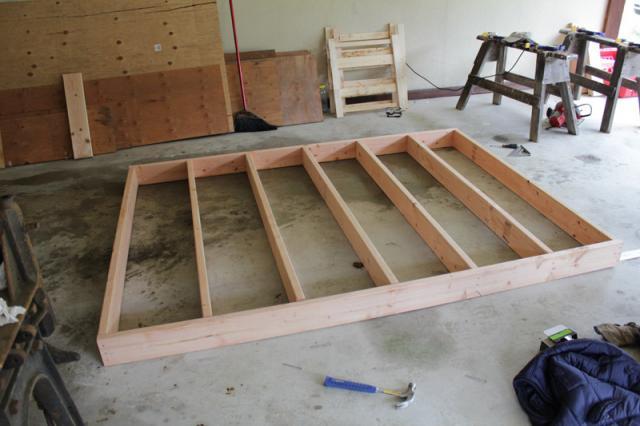
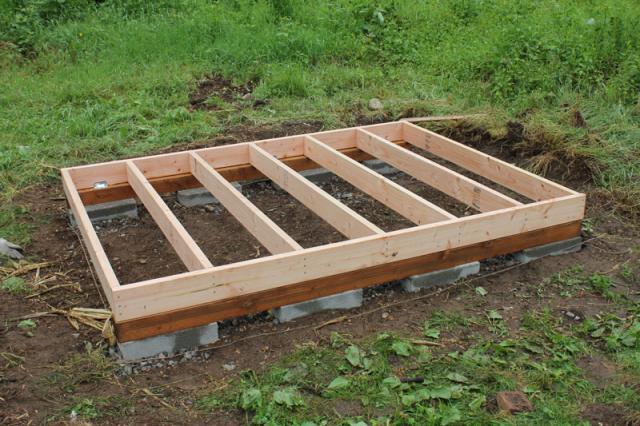
Foundation with floor on skids and blocks. Not a high wind area so I hope it does not move.
Front wall framing
Front wall with siding
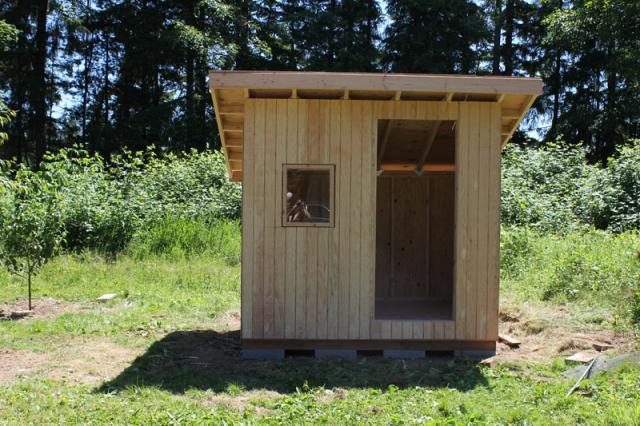
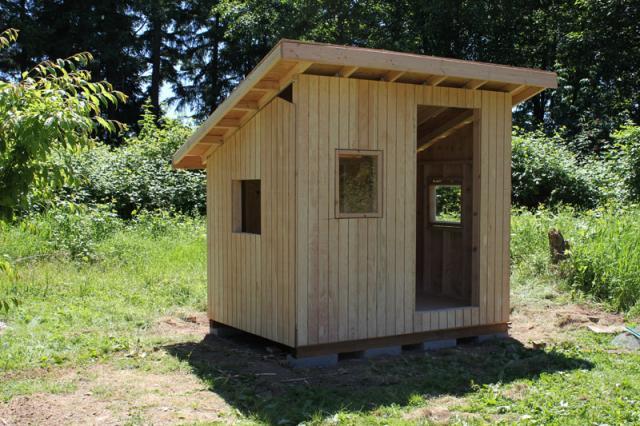
Front, sides, and back up
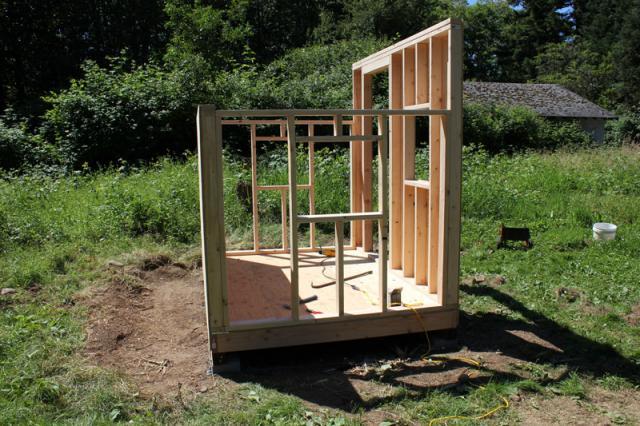
End of day two of building

Rafters
End of building on break, out of time!
Total time thus far on feet working on the building: ~24 solid hours not including breaks.
What is left to do:
1) Make the 3rd window
2) Make a door
3) Finish nailing all pieces on
4) Paint interior and exterior
5) Felt and shingle the roof
6) Add the trim and paint it
7) Cover all ventilation holes with wire
8) Make nest boxes and roosts.
Est 24-36 solid standing hours to finish.
UPDATE
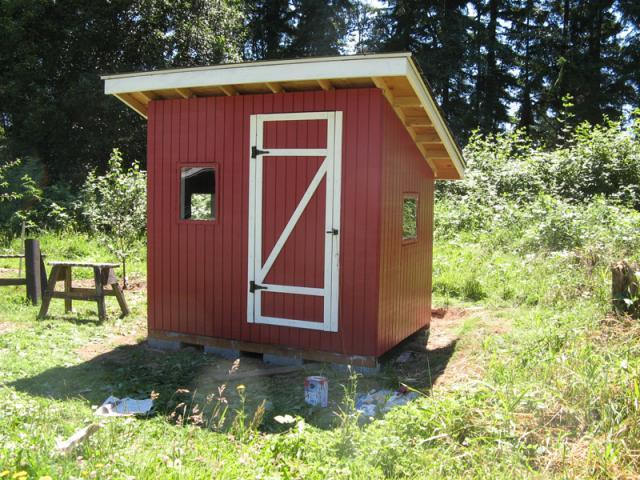
Three more days working and here is the result so far! All the ply is nailed in every 6 inches on edges and every 12 inches otherwise. All gaps caulked or puttied prior to painting. The painting part takes a good amount of time because of all the waiting for the primer to dry, then the first coat to dry, then second coat to dry. Rain on one of the three days slowed down progress too. Yes... rain happens this time of year in WA. LOL
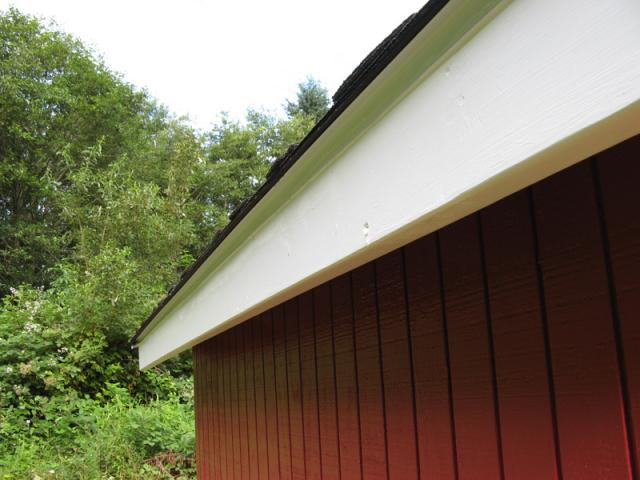
Apple-a-day Red exterior red with white trim.
Bright interior door makes it obvious the door is still open at night. Don't close it behind you though... the release string to the latch isn't installed yet!!!
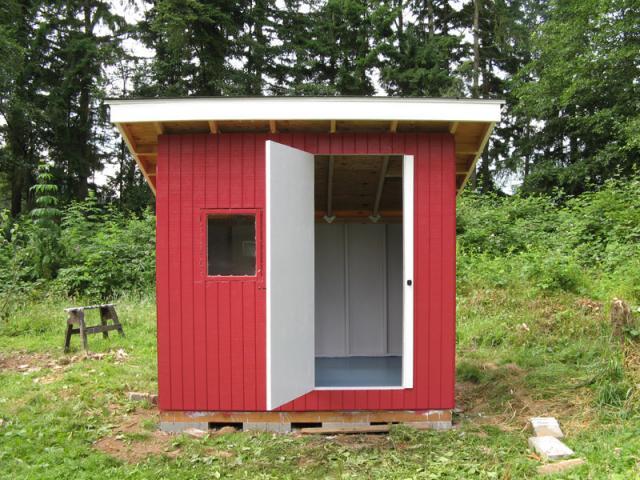
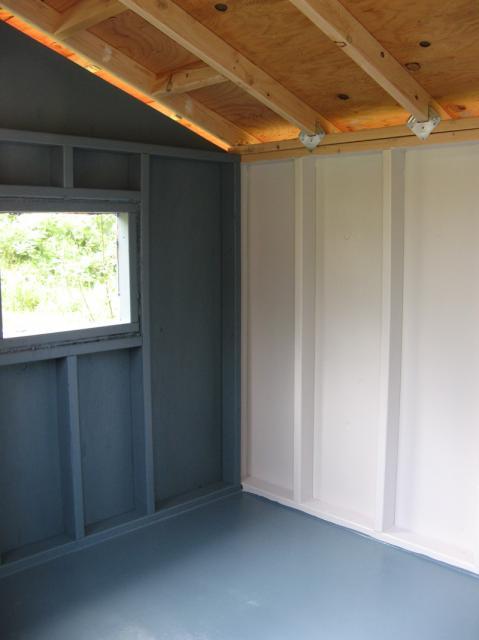
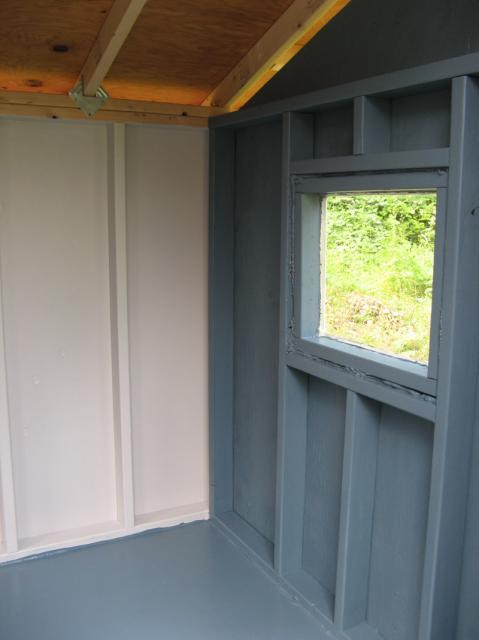
Interior walls and floor painted.
Drip edges and roof installed. Used Certanteed Presidential Shake TL Lifetime Shingles. Dang things are thick, hard to cut, and really really really heavy.

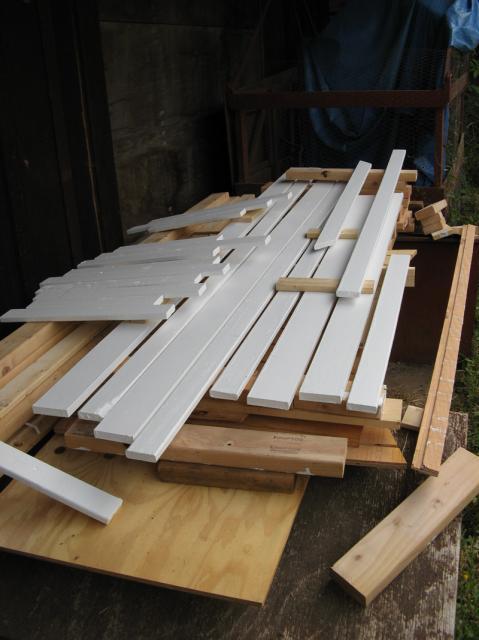
And here is the trim ready to install.
What is left...
1) Even out shingles on roof
2) Install and finish trim
3) Touch up paint anything requied
4) Build and install roost
5) Build and install nest box
The building inspectors have already made their dust bath just behind the building and dusted the wet paint with fine dirt... Guess they like to bathe in privacy and help customize their coop.

I want to make a raised nest box, but my chickens have spent the last 12 years laying on ground floor nests... with my luck they will lay all their eggs under any nest boxes.
Update #2!
Made a nest box, put together roosts, made a feeder, and installed the chickens!
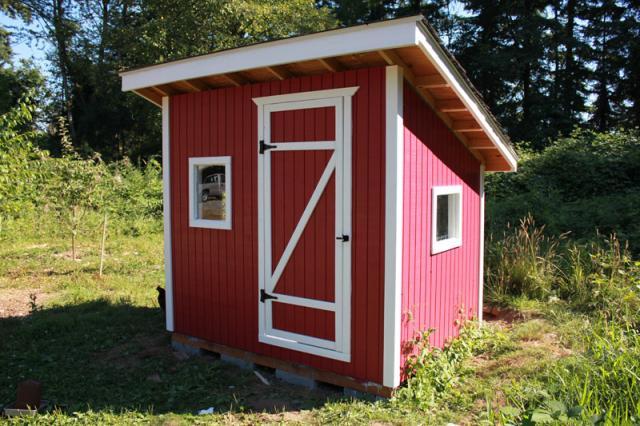
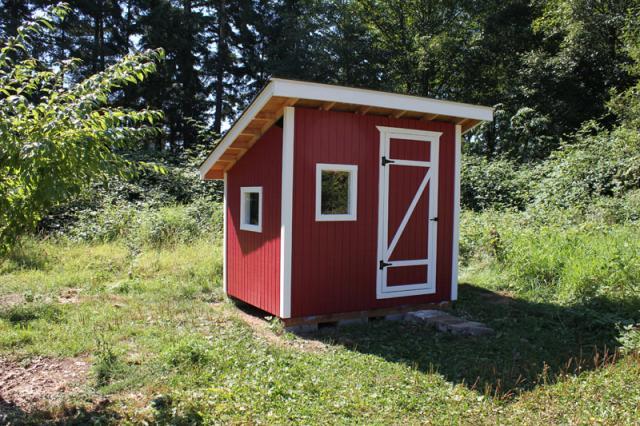
Finished coop!
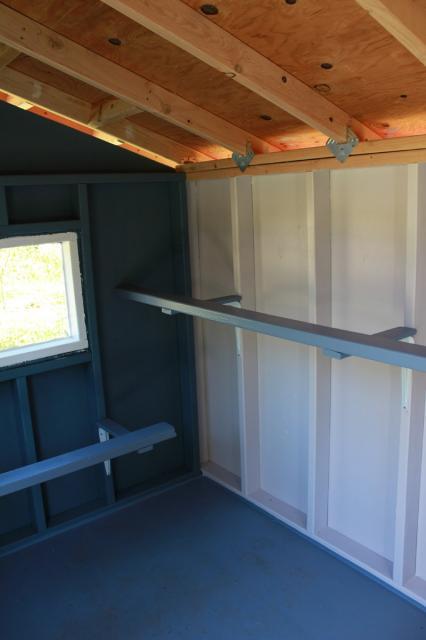
Installed roosts:
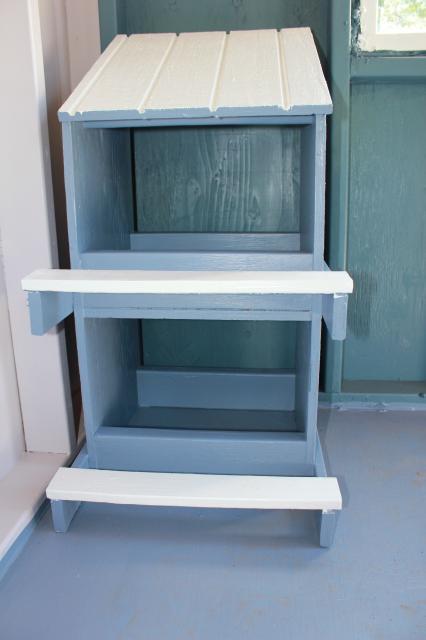
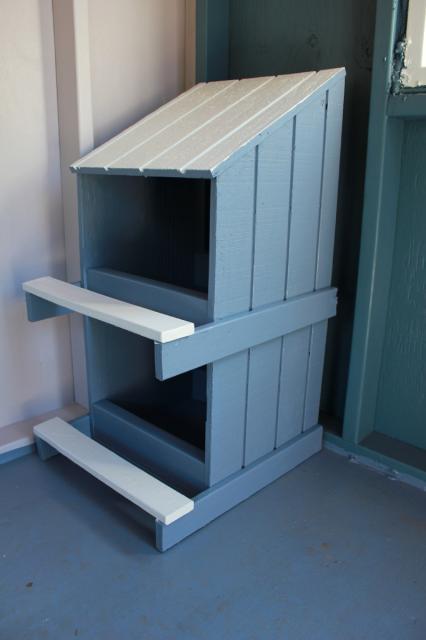
Nest box:
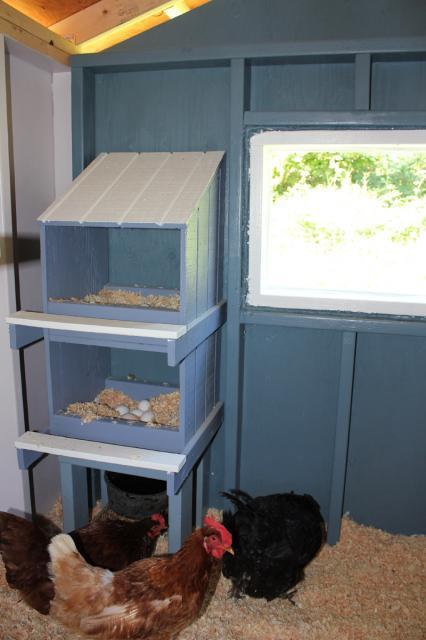
Nest box installed and in use:
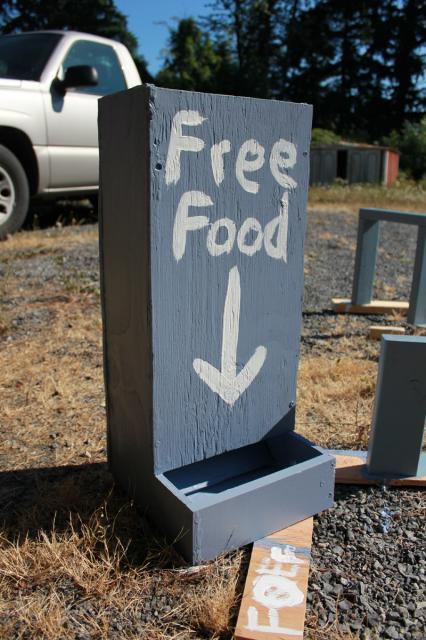
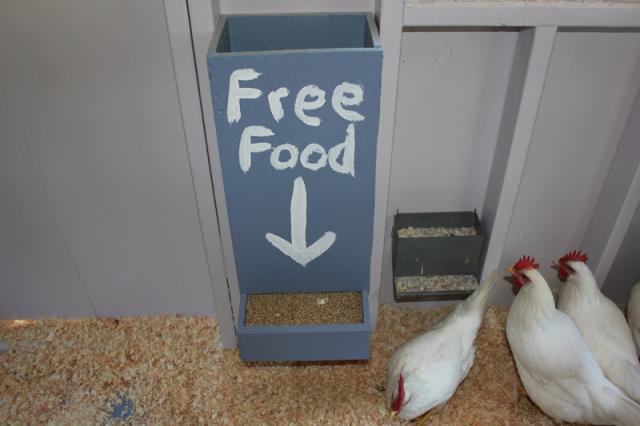
Feeder:
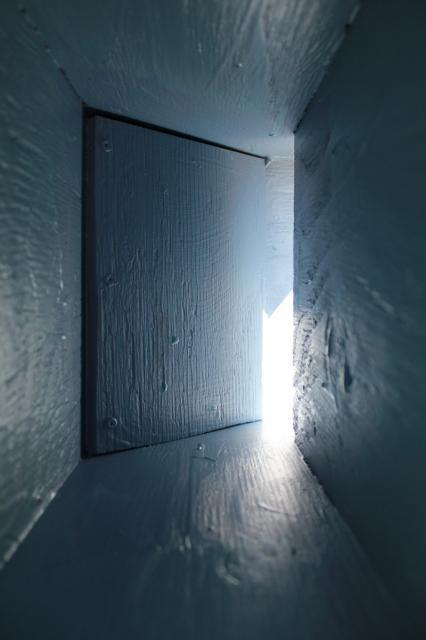
Inside feeder bottom slant so food comes out:
Feeder installed:
One last thing left... a watering solution!
All coops thus far have been wood and wire tractors and one lowe's play house that was pre-cut. Skill level (1-10) was probably 2.
This project in particular was all made possible by the contents of this box which I was lucky enough to be able to find about 6 years ago:
It's an all in one unit that does EVERYTHING!
For the coop....we started with a plan:
Front
Back
Sides
Floor
Roof
Supples mostly bought from Lowe's. They were VERY helpful in moving pieces and loading the truck!
It is a 6x8 shed with a 4 in 12 roof.
5 ft tall in the back, 7ft tall in the front.
Floors are made of 2x6's on skids, 16 on center.
Load bearing walls are 16 on center. (Front and back)
16x20 windows on 3 sides.
Rafters are 2x4's and attached with strong ties.
Roof has 12 inch overhang on sides, 14 in front, 7 in back... to best optimize a full length 2x4x8.
Exterior 1/2 ply on floor is sturdy with 16OC floors.
Walls are all wood T1-11.
Planning and supply collecting time ~10 hours?
Then started to build:
Floor. 2x6x8's.
Foundation with floor on skids and blocks. Not a high wind area so I hope it does not move.
Front wall framing
Front wall with siding
Front, sides, and back up
End of day two of building
Rafters
End of building on break, out of time!
Total time thus far on feet working on the building: ~24 solid hours not including breaks.
What is left to do:
1) Make the 3rd window
2) Make a door
3) Finish nailing all pieces on
4) Paint interior and exterior
5) Felt and shingle the roof
6) Add the trim and paint it
7) Cover all ventilation holes with wire
8) Make nest boxes and roosts.
Est 24-36 solid standing hours to finish.
UPDATE
Three more days working and here is the result so far! All the ply is nailed in every 6 inches on edges and every 12 inches otherwise. All gaps caulked or puttied prior to painting. The painting part takes a good amount of time because of all the waiting for the primer to dry, then the first coat to dry, then second coat to dry. Rain on one of the three days slowed down progress too. Yes... rain happens this time of year in WA. LOL
Apple-a-day Red exterior red with white trim.
Bright interior door makes it obvious the door is still open at night. Don't close it behind you though... the release string to the latch isn't installed yet!!!
Interior walls and floor painted.
Drip edges and roof installed. Used Certanteed Presidential Shake TL Lifetime Shingles. Dang things are thick, hard to cut, and really really really heavy.
And here is the trim ready to install.
What is left...
1) Even out shingles on roof
2) Install and finish trim
3) Touch up paint anything requied
4) Build and install roost
5) Build and install nest box
The building inspectors have already made their dust bath just behind the building and dusted the wet paint with fine dirt... Guess they like to bathe in privacy and help customize their coop.
I want to make a raised nest box, but my chickens have spent the last 12 years laying on ground floor nests... with my luck they will lay all their eggs under any nest boxes.
Update #2!
Made a nest box, put together roosts, made a feeder, and installed the chickens!
Finished coop!
Installed roosts:
Nest box:
Nest box installed and in use:
Feeder:
Inside feeder bottom slant so food comes out:
Feeder installed:
One last thing left... a watering solution!
