- May 12, 2014
- 152
- 302
- 206
I had wanted chickens for a long time and it's very difficult to purchase a suitable chicken coop for our climate in the high rockies of Colorado. I also have wanted a greenhouse. We tried a greenhouse kit last summer that we inherited from my husband's grandfather. It was not a fun experience. In the fall when it started getting really windy we were out many nights in our robes and slippers chasing panels across the yard with flashlights. We decided that we could build a stronger greenhouse to withstand the wind and we could use the panels from the aluminum frame greenhouse kit. This spring I asked my husband if we could have chickens. He told me he could either build a chicken coop or a greenhouse. I said, "why can't we have both?" I designed the building, which is actually two separate buildings put together. And my hubby built it for me this spring. We are renting a house, so we had to make structures that are movable.
We tried to use as much reclaimed materials as we could. We used the greenhouse panels from the kit. I found shingles for the coop roof, windows, a door, and all the door hardware at a Habitat for Humanity Restore. And we scavenged some 2x4's from my dad's garage remodel. The rest we purchased new.
For my design I decided to have the people entrance into the coop through the greenhouse. The winter months are brutal where we live and it will hopefully be nice to go in through a protected space to take care of the chickens. Also, since I don't think we will be able to grow anything in the harsh winter months, the greenhouse space will give the chickens a little more room to move about and hopefully be a little happier when it's nasty outside.
In mid April I purchased the first of the materials, and we were off to a good start. The kids thought it was awesome!

The coop floor is 4 feet by 6 feet, and the greenhouse is 6 feet by 8 feet. The platforms are 2x6 construction on 16 inch centers. We used floor joist brackets to make things sturdy. The floor is fully insulated and sealed up. We built all the walls on 24 inch centers because the greenhouse panels were that wide, so to keep everything consistent. The building ended up a little taller overall than I had originally thought it would be because I didn't account for the thickness of the platforms. The inside of the coop at the peak is about 5'10", the short side is about 4 feet. And our greenhouse is about 8 feet at the peak inside and 6 at the short side. I wish I had made the coop just a few inches taller inside. I'm 5'9" and can just stand up in there. It's ok, but a little taller would have been better.

My husband thought he could just slap the buildings together in a weekend and surprise me for mother's day. I knew better.
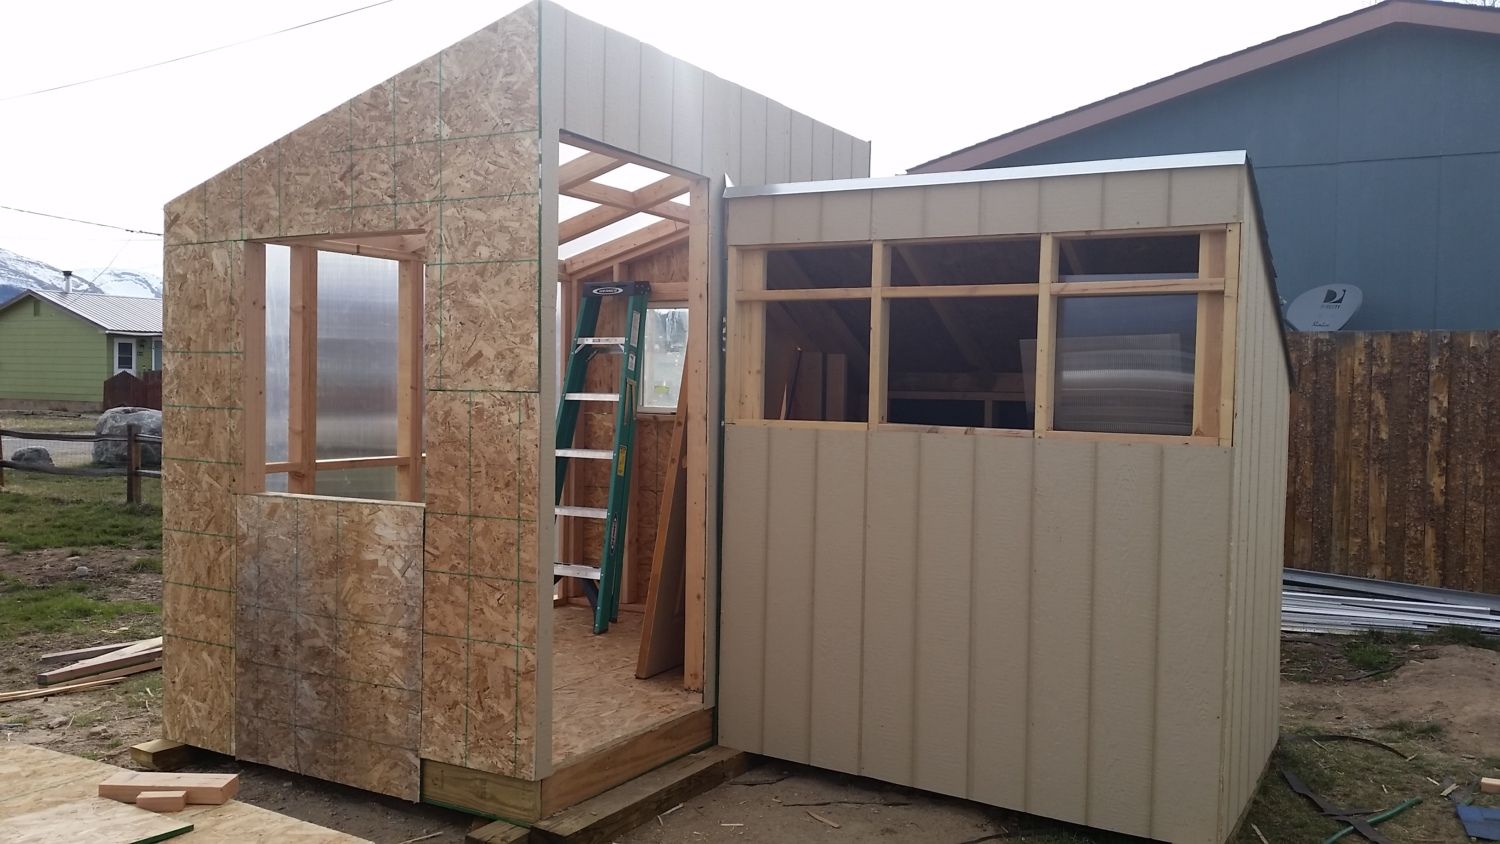
We had a pretty good start.... Then the weather decided not to cooperate and it put our project on hold.

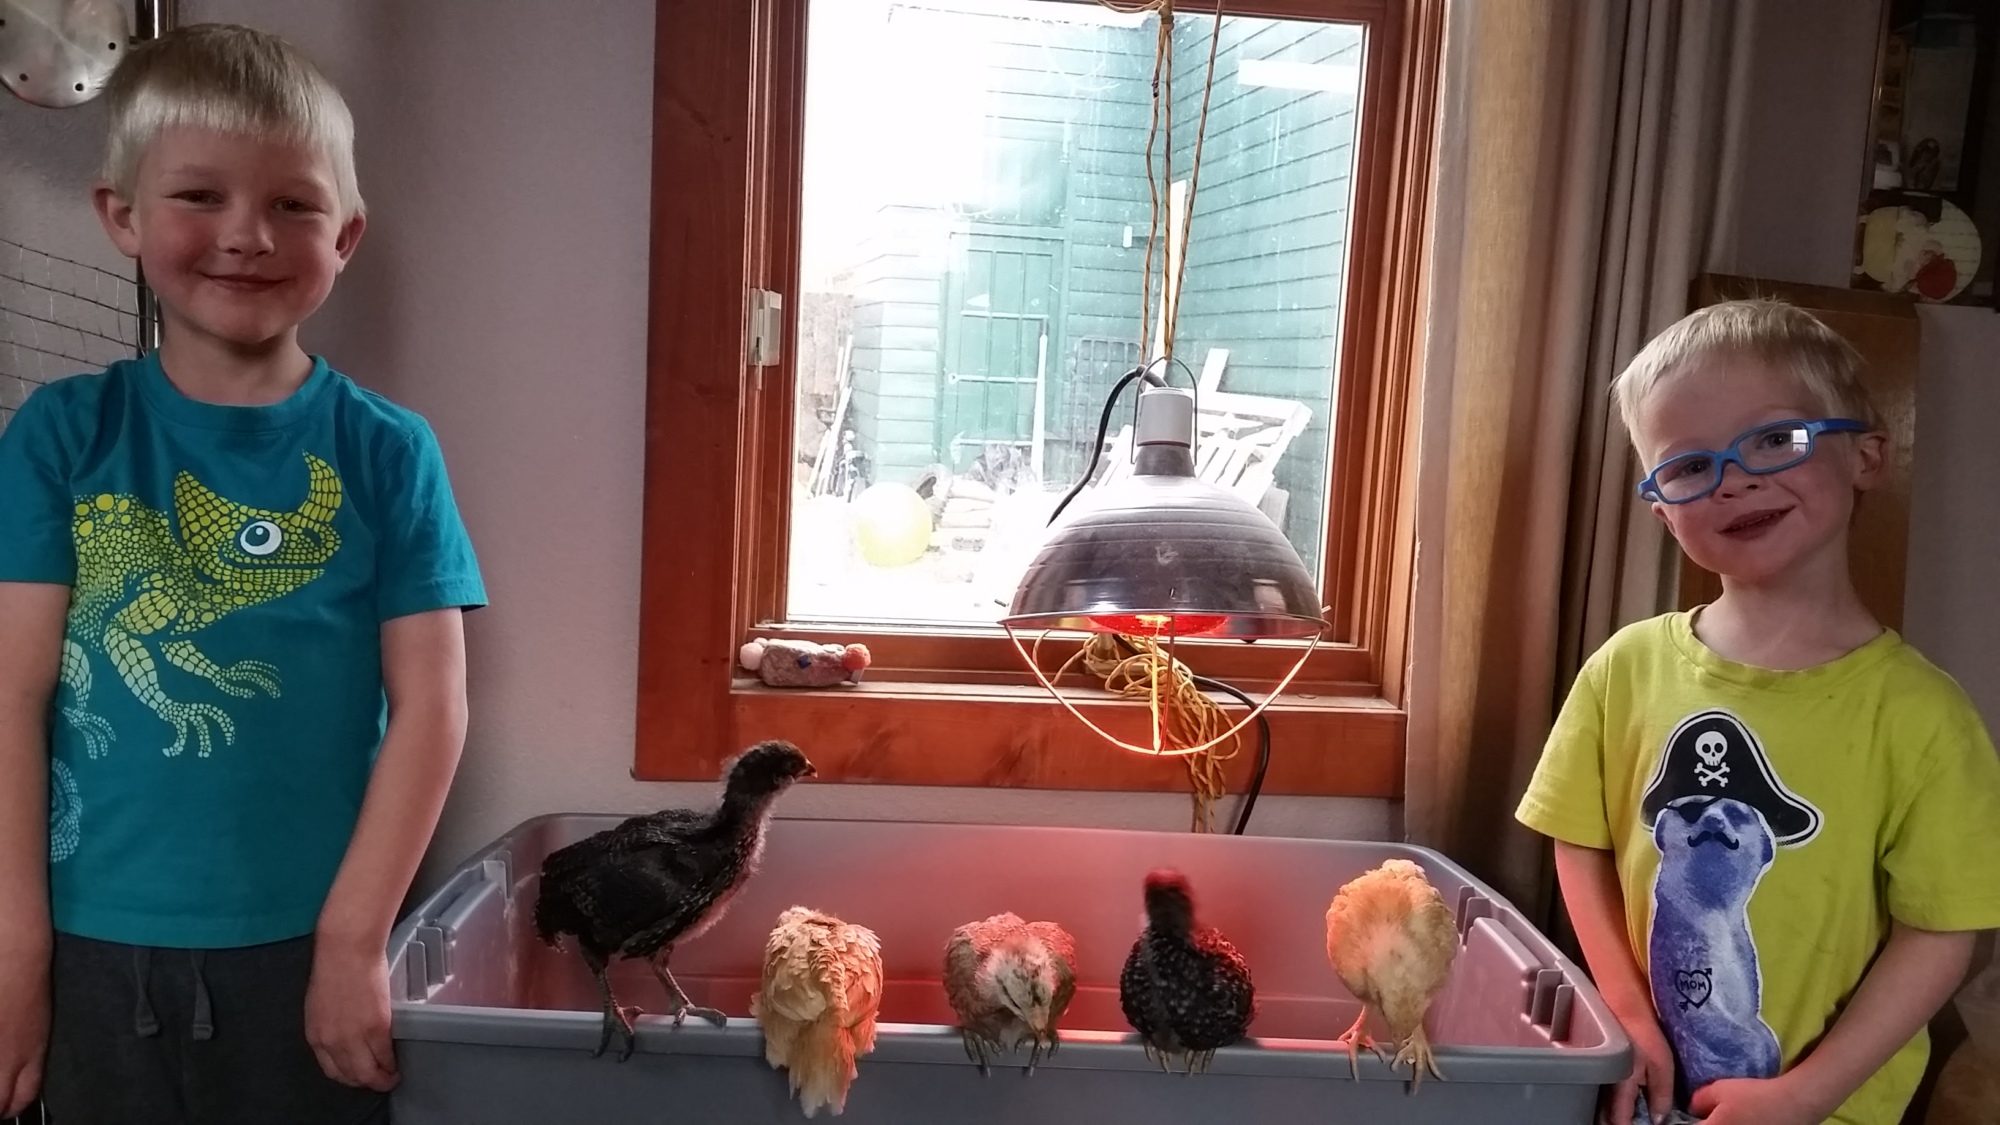
Meanwhile, our chickees were living in a plastic bin in our laundry room and growing up quick!
We insulated the entire coop and greenhouse with fiberglass insulation. We put two greenhouse panels sandwiching the 2x4's across the front of the coop for some natural light and to warm the coop up in the winter months. Above the greenhouse panel are three vents across the entire front on hinges. We used 1/2 inch hardware mesh on the inside of the vents to keep the chickens in and any critters out. The siding is "smart siding" from Lowes that is already primed. It was pretty easy to work with.


The greenhouse has panels inside and panels outside, which hopefully will help insulate things when it starts getting colder out.

The boys helped paint the inside of the coop, but then they got bored and I finished the rest.

I painted the coop/greenhouse inside and out before we put up the trim. I was amazed how much trim it took. We trimmed all the panels and corners using pine furring. It was relatively cheap and looks nice. Here is our coop/greenhouse finished. My mom said it looks too nice to be a coop! I love how it turned out.


We installed beautiful hardwood flooring in the chicken coop and greenhouse... just kidding. It's sheet vinyl flooring made to look like wood. I wanted something waterproof to make everything easier to clean. It looks pretty though. We still have yet to install the threshold.

The coop door my husband made from the leftover plywood and 2x4's. We also insulated it with leftover fiberglass insulation.


My husband wired the coop and greenhouse separately and they attach to one plug in the back. Then we just run an extension cord to the house. He put an outlet in the ceiling of the coop, so we can plug in a heater for the water and we installed an "under cabinet" light just inside the coop door. The greenhouse has a jelly jar light wired to a switch and two outlets that are high up on the wall so we can run fans or heaters as needed.
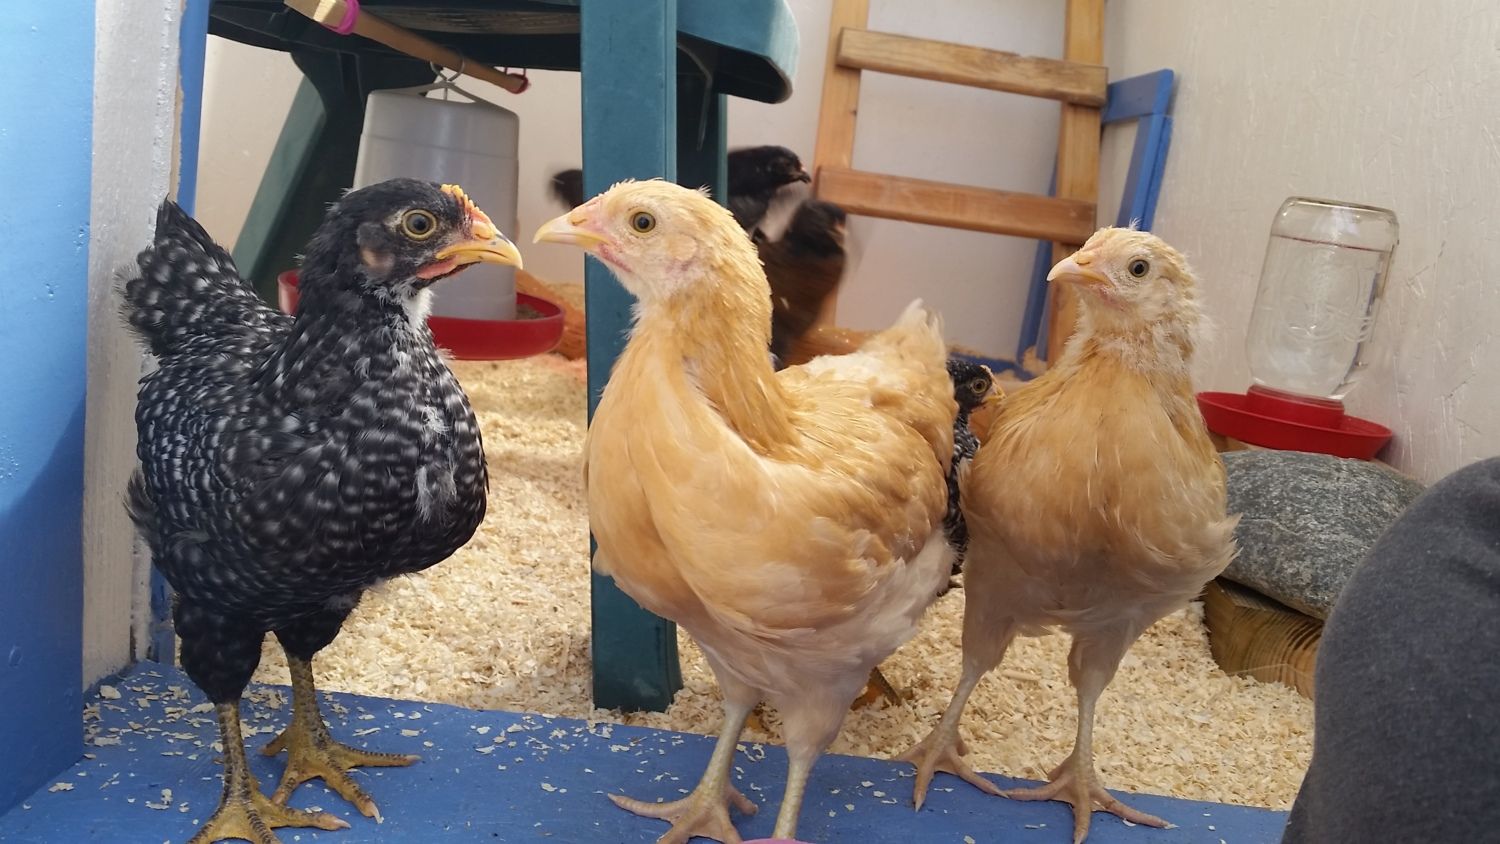
Move in day! I think the ladies were happy to get out of the plastic bin!

We put in a plastic garden chair to hang the feeder from underneath and for the chickens to perch on until we got everything else finished. You can see the setup in the background of the picture above it.

I built nest boxes from the leftover scraps of siding and trim. Each box is 12 inches cubed, and 2 boxes per unit. It was a fun, easy project, but took a lot more screws that I had originally planned.

One of our buff Orpingtons had to come check them out.
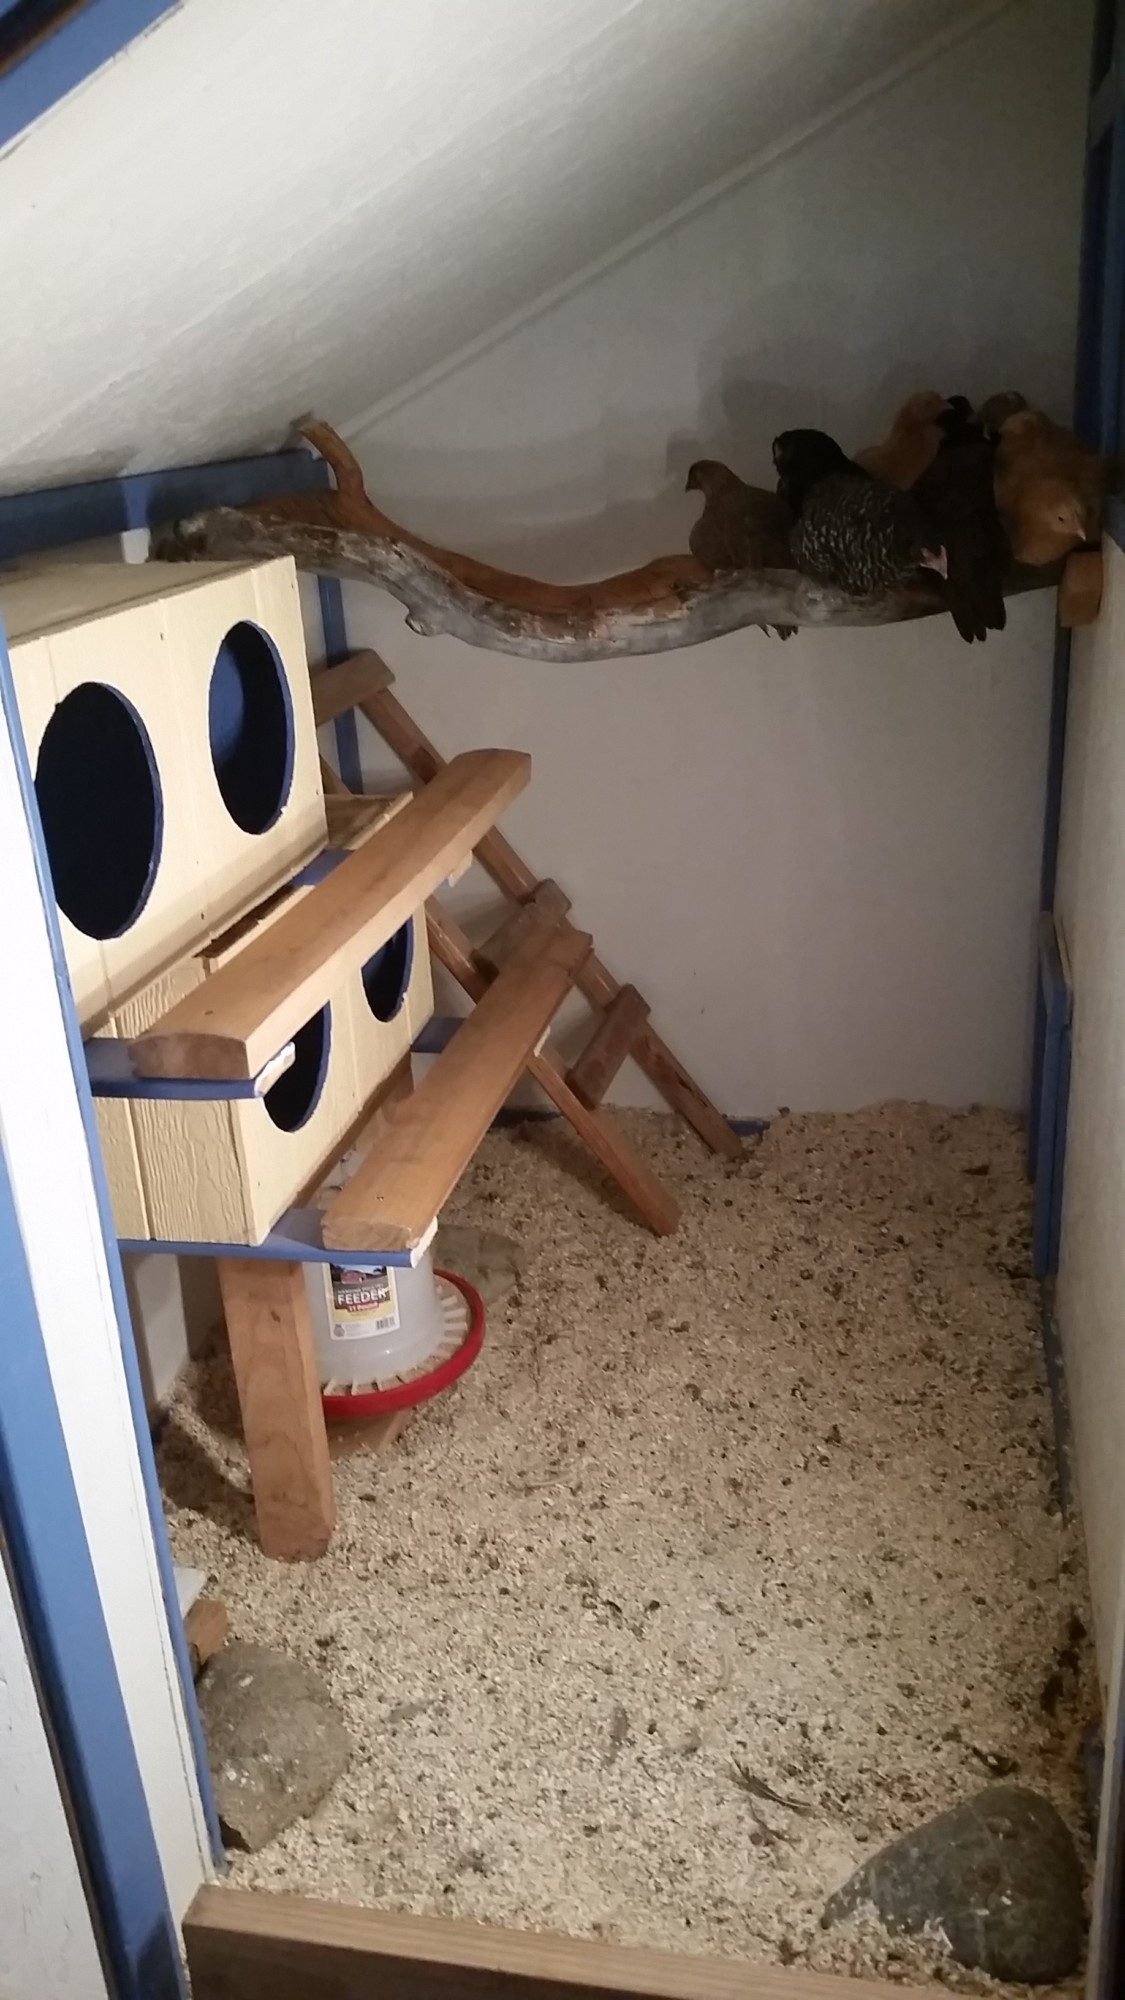
Here they are painted and installed. I found a couple of boards that were rounded for the perches. I think they were from some log siding. They worked pretty nicely. I attached them to the bottom of the nest boxes with the leftover trim pieces. To mount the nest boxes I screwed them into a couple studs on the wall, but then I added a couple legs to support the weight. They are pretty heavy. For the roosts, I found some dead, dried aspen logs at a friend's house. I attached them just using some wood blocks to support them and a screw through the logs to hold them in place. I have 2 roosts about a foot apart and a foot away from the wall.

After that I built this food hopper to mount to the wall. I wanted the girls to have as much space as possible to walk around in the coop. I found the plans online. It's about 2 feet tall, 18 inches wide and 6 inches deep. I had to move the angled front panel down 2 inches because the chickens were wasting too much food! You can also see better how I attached the roosts from this angle.

A bit later I added a pulley system to open and close the chicken door from the outside because it got old crawling into the coop to open and close the door. So far they have not pecked the blue cord.

Here is our coop today. I added a 2x6 for the chickens to get up and down from the roosts. It is not attached to anything, just sitting on the top of the angled piece on the feeder, right in that gap.
Eventually I have plans to make a poop catcher under the roosts out of some old canvas my hubby has. And also we are going to add a water bucket with horizontal nipples under the closest nest box. That will be in before winter, but right now we have a big waterer outside next to the coop.
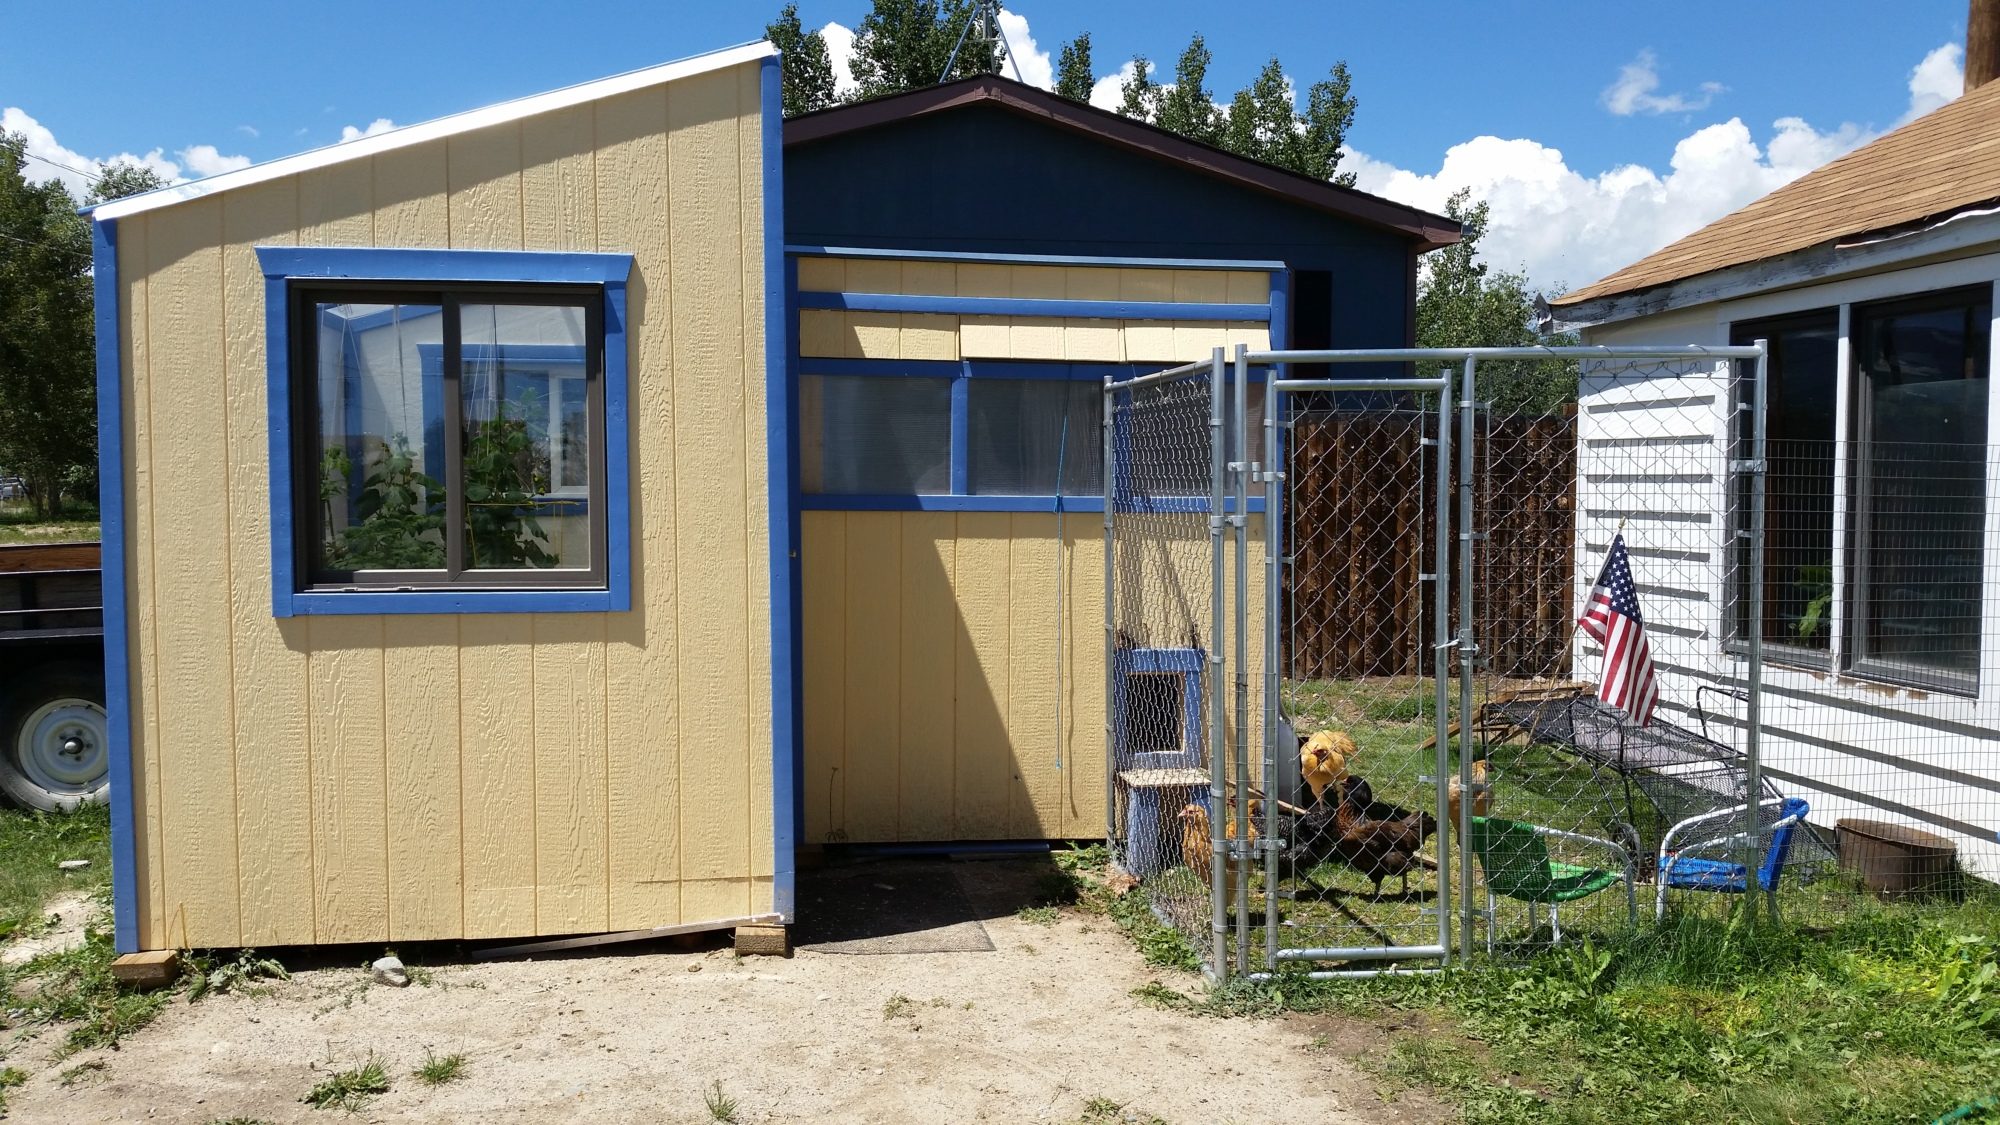
Here is the outside today. We purchased some dog kennel panels, one with a gate, one without to enclose the front of the chicken yard. We had to make it removable, so when we leave we can take it with us. Otherwise, I would have done things a little different. We still have some work to do on our enclosure before winter. In the back there is a privacy fence and we attached some thick wire fencing between that and the back of the coop. Then we have a piece of wire fencing between the house and the back fence. We covered the whole back area of the run with bird netting I picked up on clearance. So far, so good! And I've put wire fencing 1 foot deep in the ground all along the privacy fence. We have quite a few fox, owls, and hawks around where we live.

Happy chickens!
We tried to use as much reclaimed materials as we could. We used the greenhouse panels from the kit. I found shingles for the coop roof, windows, a door, and all the door hardware at a Habitat for Humanity Restore. And we scavenged some 2x4's from my dad's garage remodel. The rest we purchased new.
For my design I decided to have the people entrance into the coop through the greenhouse. The winter months are brutal where we live and it will hopefully be nice to go in through a protected space to take care of the chickens. Also, since I don't think we will be able to grow anything in the harsh winter months, the greenhouse space will give the chickens a little more room to move about and hopefully be a little happier when it's nasty outside.
In mid April I purchased the first of the materials, and we were off to a good start. The kids thought it was awesome!
The coop floor is 4 feet by 6 feet, and the greenhouse is 6 feet by 8 feet. The platforms are 2x6 construction on 16 inch centers. We used floor joist brackets to make things sturdy. The floor is fully insulated and sealed up. We built all the walls on 24 inch centers because the greenhouse panels were that wide, so to keep everything consistent. The building ended up a little taller overall than I had originally thought it would be because I didn't account for the thickness of the platforms. The inside of the coop at the peak is about 5'10", the short side is about 4 feet. And our greenhouse is about 8 feet at the peak inside and 6 at the short side. I wish I had made the coop just a few inches taller inside. I'm 5'9" and can just stand up in there. It's ok, but a little taller would have been better.
My husband thought he could just slap the buildings together in a weekend and surprise me for mother's day. I knew better.
We had a pretty good start.... Then the weather decided not to cooperate and it put our project on hold.
Meanwhile, our chickees were living in a plastic bin in our laundry room and growing up quick!
We insulated the entire coop and greenhouse with fiberglass insulation. We put two greenhouse panels sandwiching the 2x4's across the front of the coop for some natural light and to warm the coop up in the winter months. Above the greenhouse panel are three vents across the entire front on hinges. We used 1/2 inch hardware mesh on the inside of the vents to keep the chickens in and any critters out. The siding is "smart siding" from Lowes that is already primed. It was pretty easy to work with.
The greenhouse has panels inside and panels outside, which hopefully will help insulate things when it starts getting colder out.
The boys helped paint the inside of the coop, but then they got bored and I finished the rest.
I painted the coop/greenhouse inside and out before we put up the trim. I was amazed how much trim it took. We trimmed all the panels and corners using pine furring. It was relatively cheap and looks nice. Here is our coop/greenhouse finished. My mom said it looks too nice to be a coop! I love how it turned out.
We installed beautiful hardwood flooring in the chicken coop and greenhouse... just kidding. It's sheet vinyl flooring made to look like wood. I wanted something waterproof to make everything easier to clean. It looks pretty though. We still have yet to install the threshold.
The coop door my husband made from the leftover plywood and 2x4's. We also insulated it with leftover fiberglass insulation.
My husband wired the coop and greenhouse separately and they attach to one plug in the back. Then we just run an extension cord to the house. He put an outlet in the ceiling of the coop, so we can plug in a heater for the water and we installed an "under cabinet" light just inside the coop door. The greenhouse has a jelly jar light wired to a switch and two outlets that are high up on the wall so we can run fans or heaters as needed.
Move in day! I think the ladies were happy to get out of the plastic bin!
We put in a plastic garden chair to hang the feeder from underneath and for the chickens to perch on until we got everything else finished. You can see the setup in the background of the picture above it.
I built nest boxes from the leftover scraps of siding and trim. Each box is 12 inches cubed, and 2 boxes per unit. It was a fun, easy project, but took a lot more screws that I had originally planned.
One of our buff Orpingtons had to come check them out.
Here they are painted and installed. I found a couple of boards that were rounded for the perches. I think they were from some log siding. They worked pretty nicely. I attached them to the bottom of the nest boxes with the leftover trim pieces. To mount the nest boxes I screwed them into a couple studs on the wall, but then I added a couple legs to support the weight. They are pretty heavy. For the roosts, I found some dead, dried aspen logs at a friend's house. I attached them just using some wood blocks to support them and a screw through the logs to hold them in place. I have 2 roosts about a foot apart and a foot away from the wall.
After that I built this food hopper to mount to the wall. I wanted the girls to have as much space as possible to walk around in the coop. I found the plans online. It's about 2 feet tall, 18 inches wide and 6 inches deep. I had to move the angled front panel down 2 inches because the chickens were wasting too much food! You can also see better how I attached the roosts from this angle.
A bit later I added a pulley system to open and close the chicken door from the outside because it got old crawling into the coop to open and close the door. So far they have not pecked the blue cord.
Here is our coop today. I added a 2x6 for the chickens to get up and down from the roosts. It is not attached to anything, just sitting on the top of the angled piece on the feeder, right in that gap.
Eventually I have plans to make a poop catcher under the roosts out of some old canvas my hubby has. And also we are going to add a water bucket with horizontal nipples under the closest nest box. That will be in before winter, but right now we have a big waterer outside next to the coop.
Here is the outside today. We purchased some dog kennel panels, one with a gate, one without to enclose the front of the chicken yard. We had to make it removable, so when we leave we can take it with us. Otherwise, I would have done things a little different. We still have some work to do on our enclosure before winter. In the back there is a privacy fence and we attached some thick wire fencing between that and the back of the coop. Then we have a piece of wire fencing between the house and the back fence. We covered the whole back area of the run with bird netting I picked up on clearance. So far, so good! And I've put wire fencing 1 foot deep in the ground all along the privacy fence. We have quite a few fox, owls, and hawks around where we live.
Happy chickens!


