Upcycled coop from pallets

jaseyboy1986

In the Brooder
5 Years
Aug 7, 2014
60
8
48
Norfolk, UK
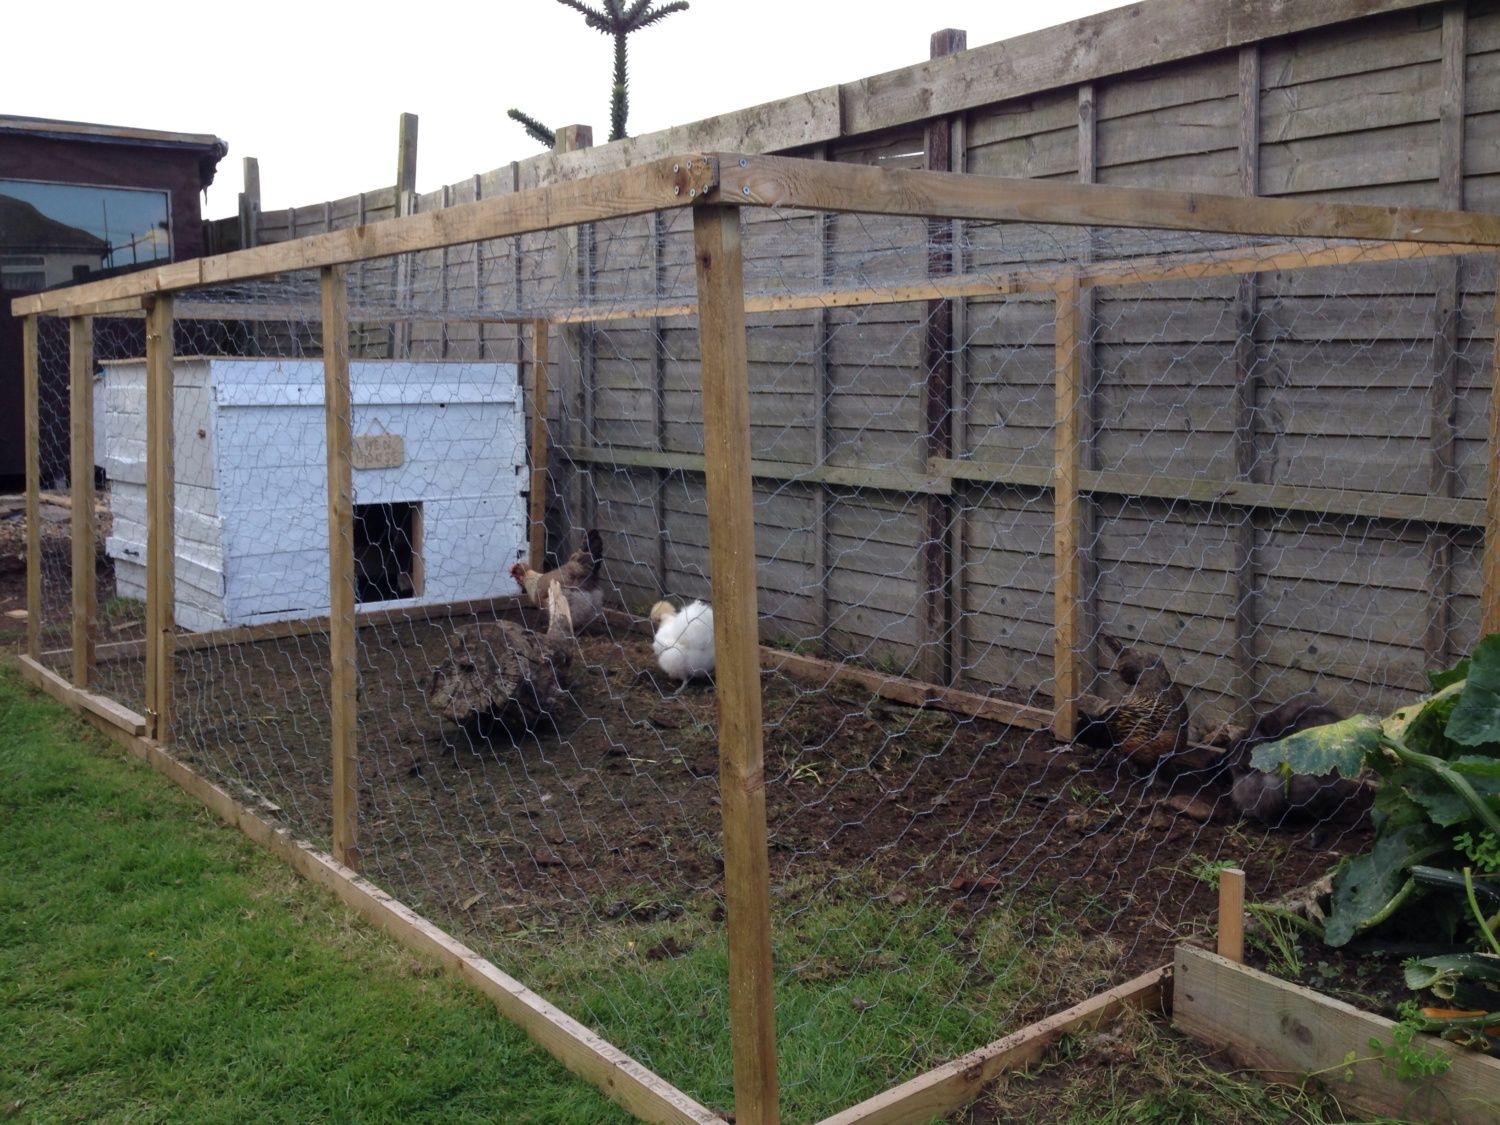
I like the idea of re-using old unused materials to create something useful so I decided to build a new coop from scratch out of old pallets. The idea from the start was to create a shabby chic style coop that was clearly upcycled and the raw materials were still recognisable to add charm to my project.

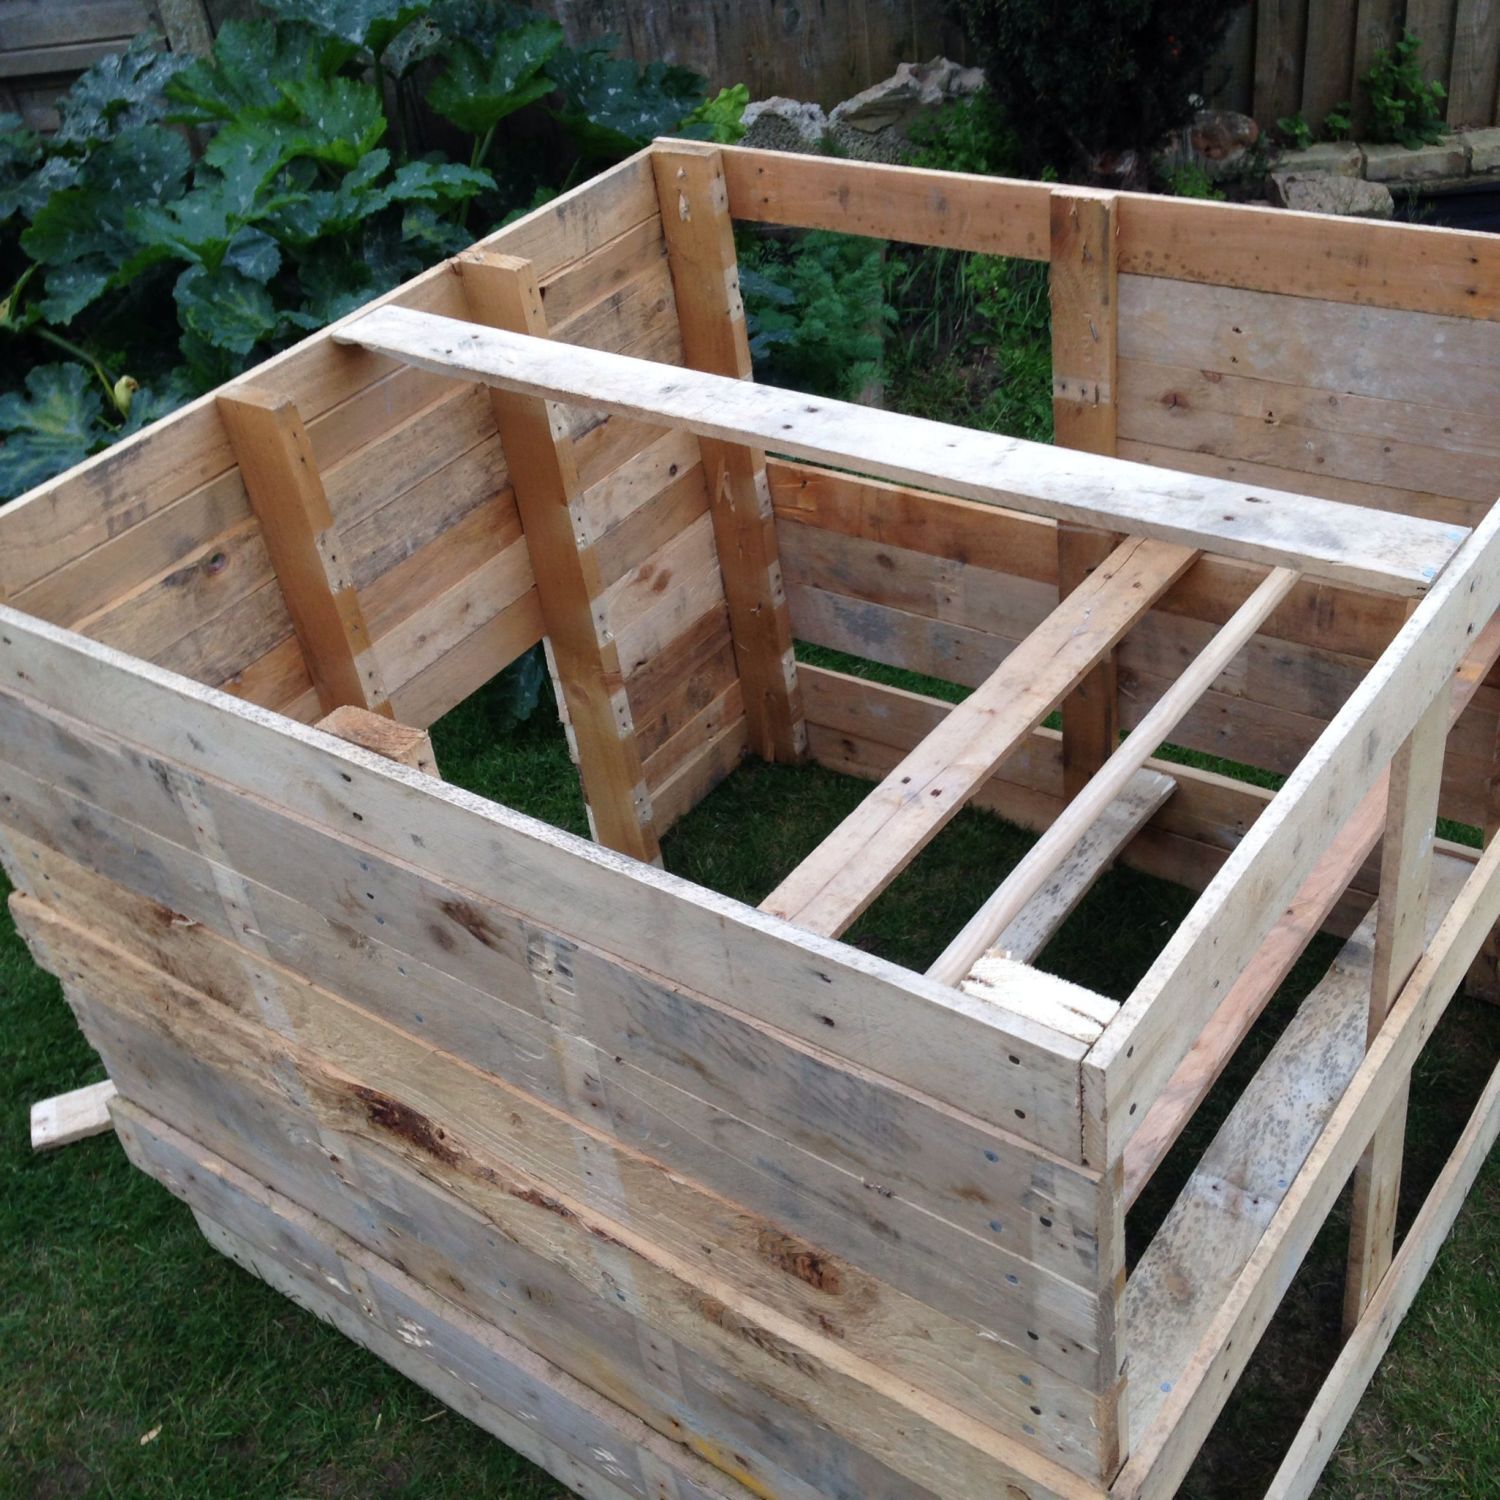
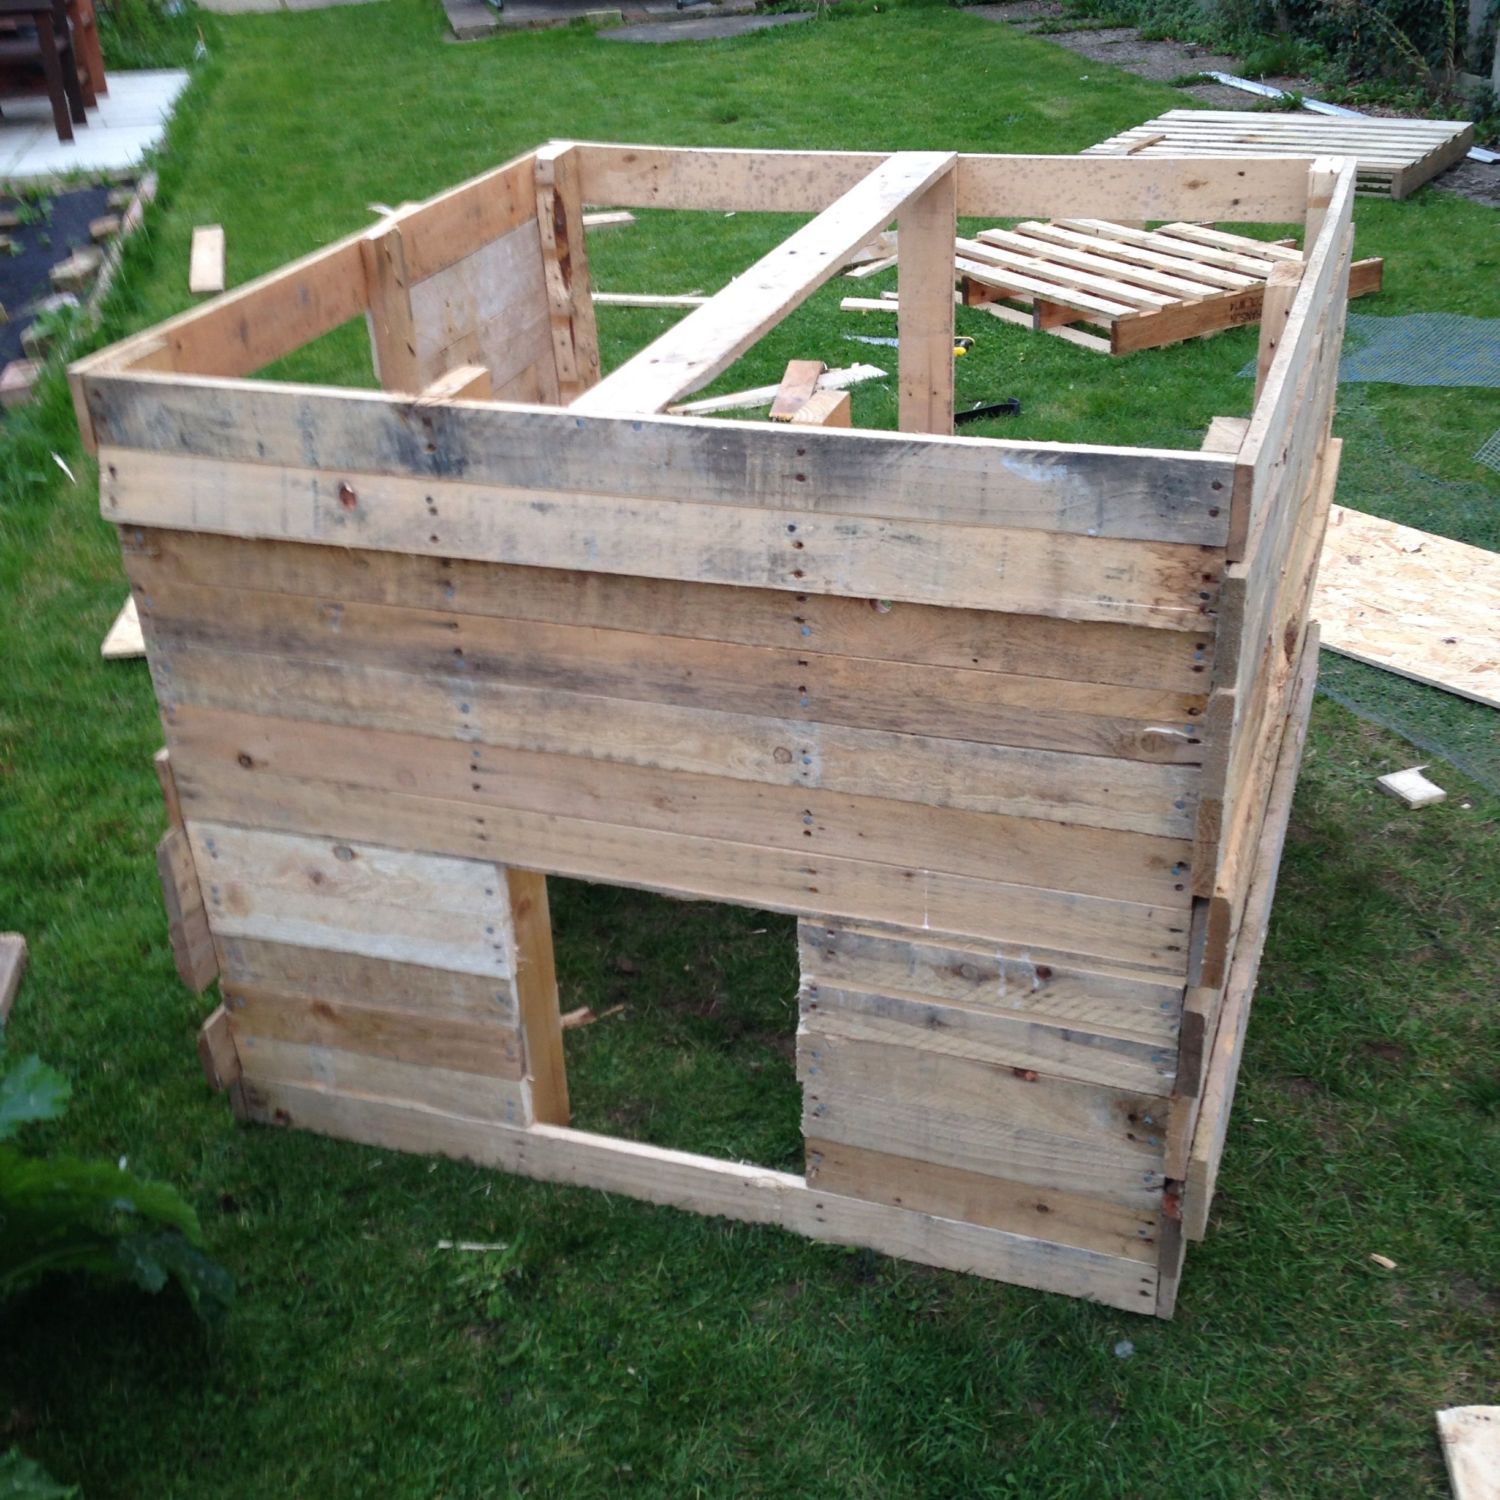
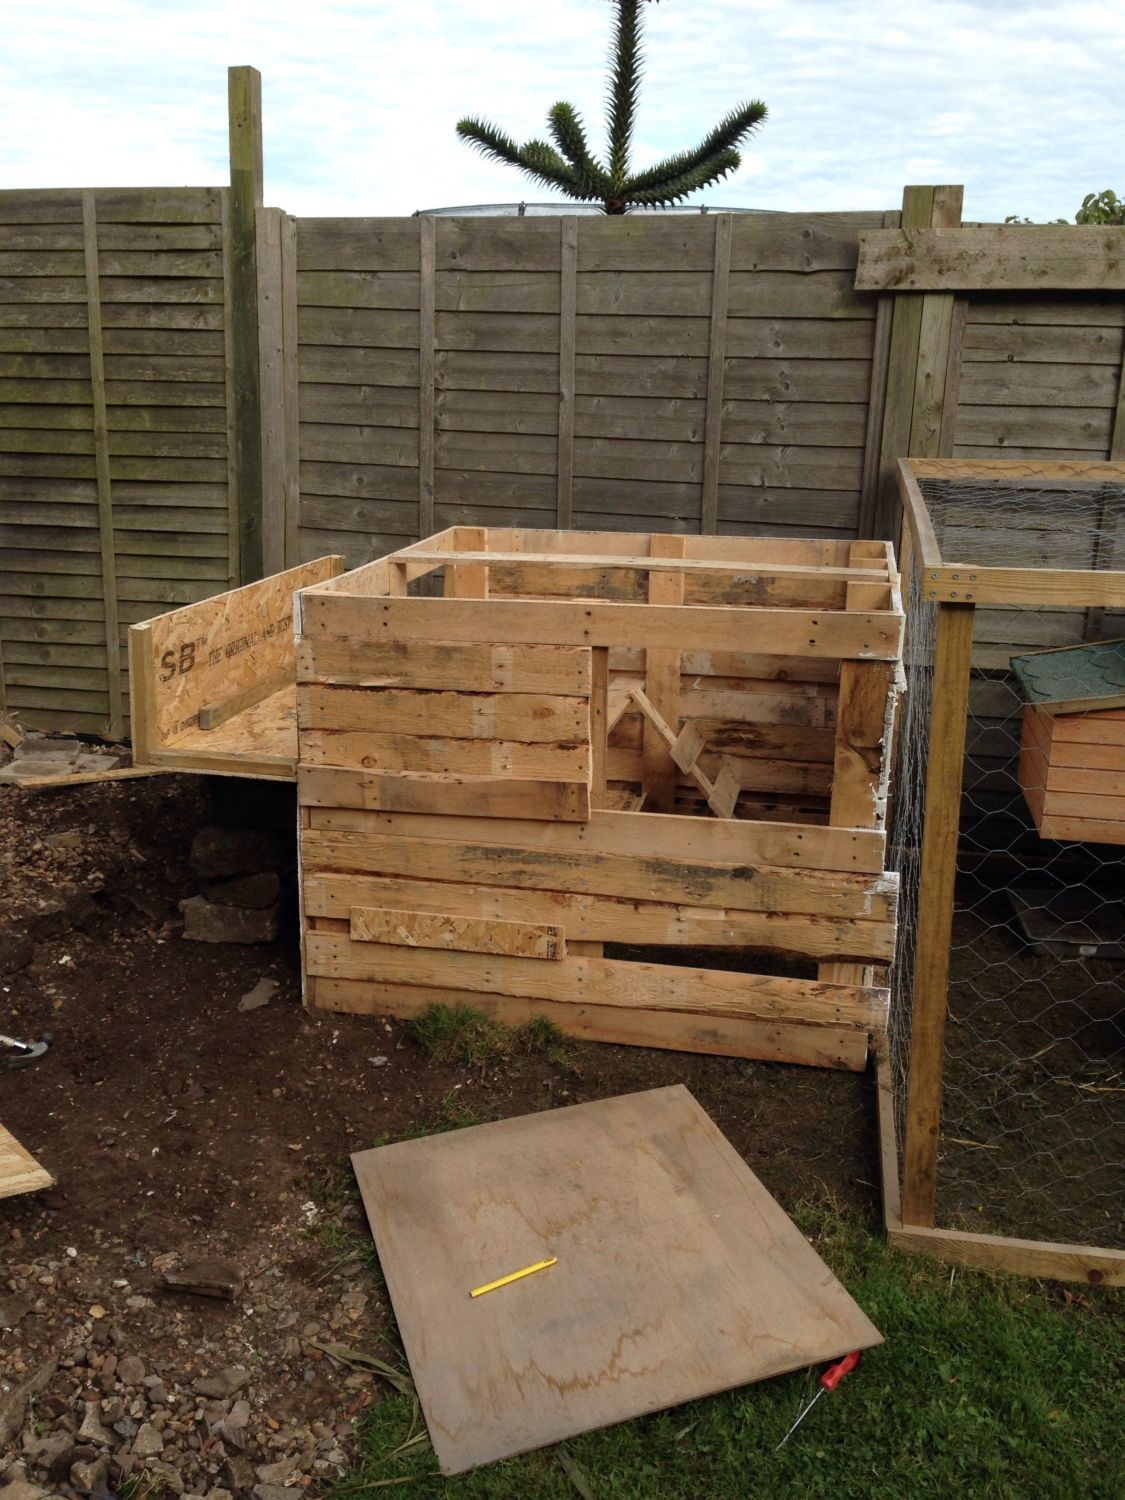
I started out with several pallets which were very difficult to pry apart and built the wooden frame. I even managed to re-use the nails from the pallets.
400

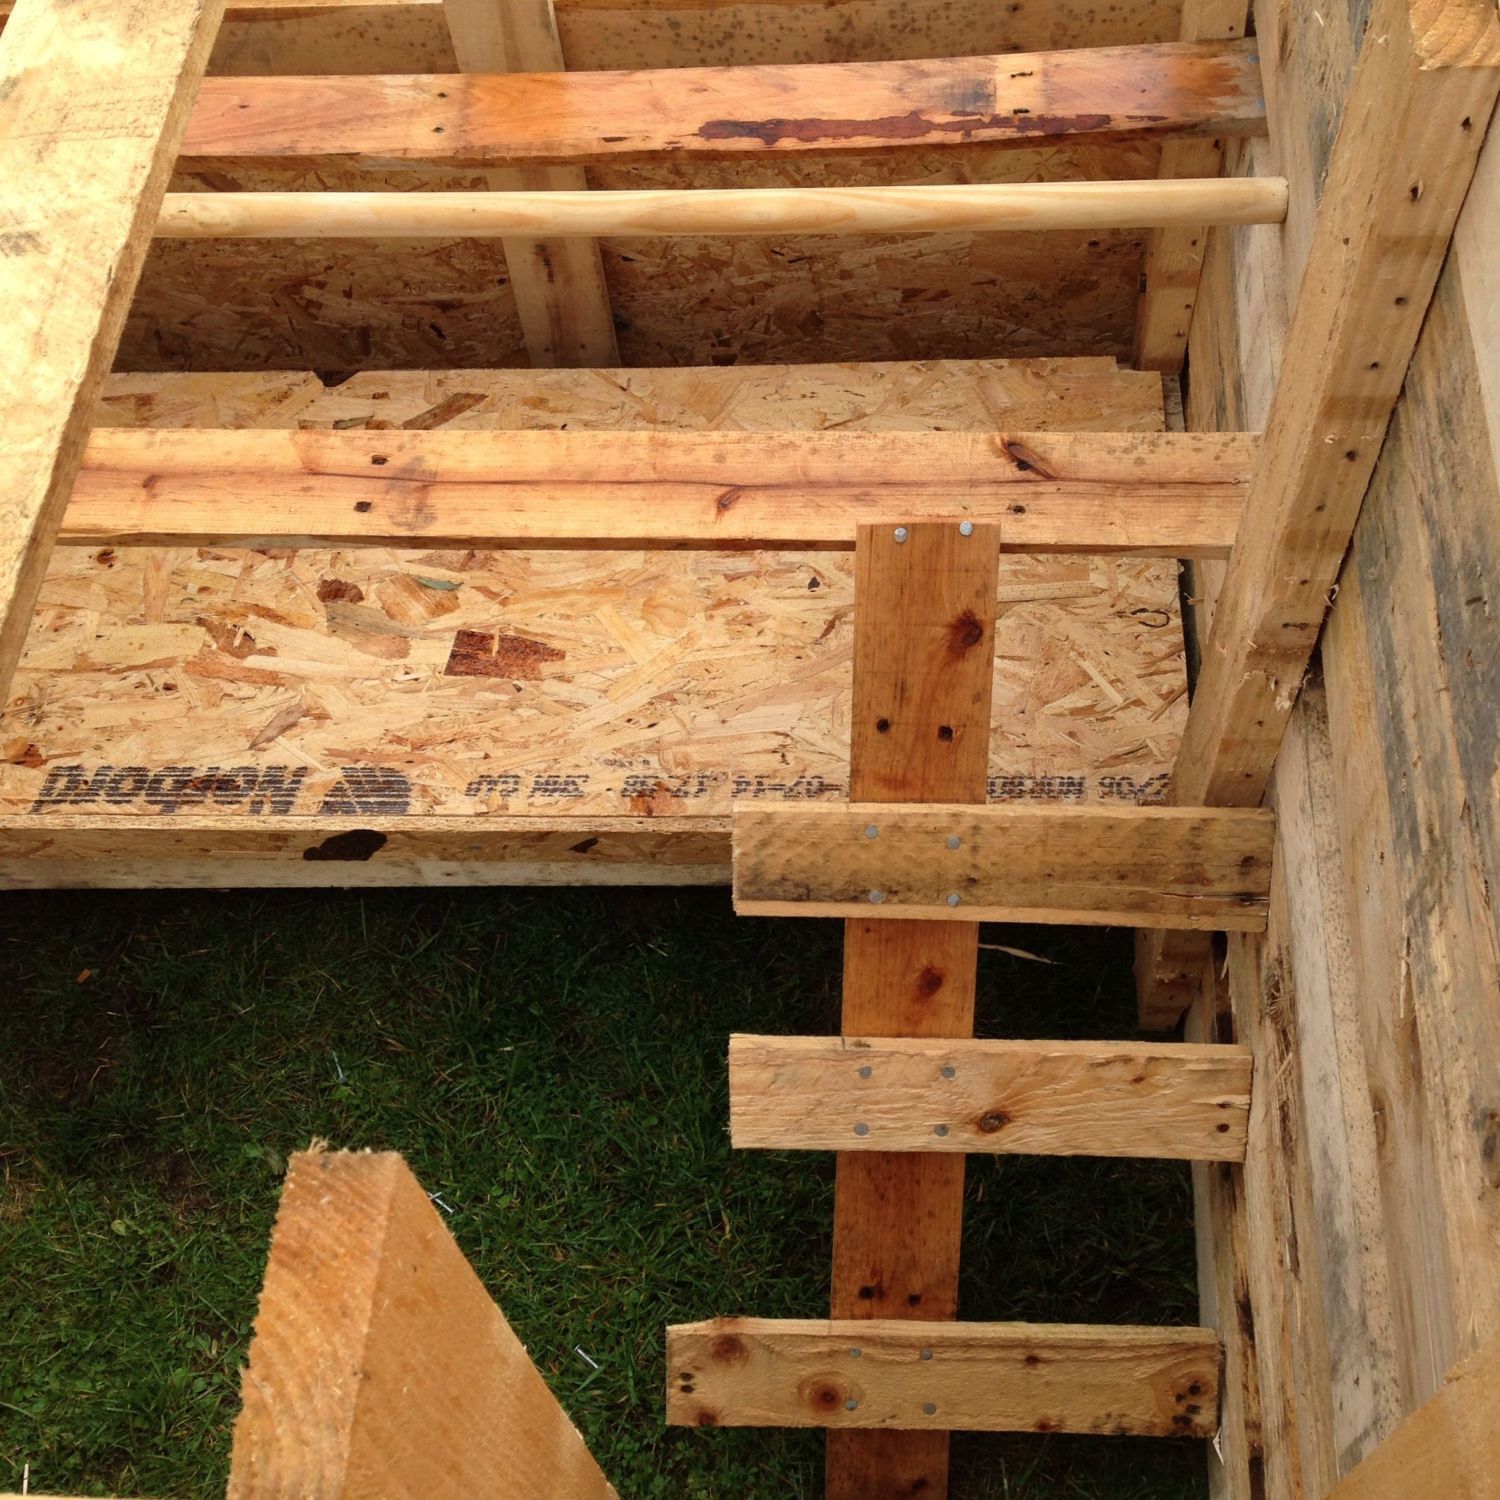
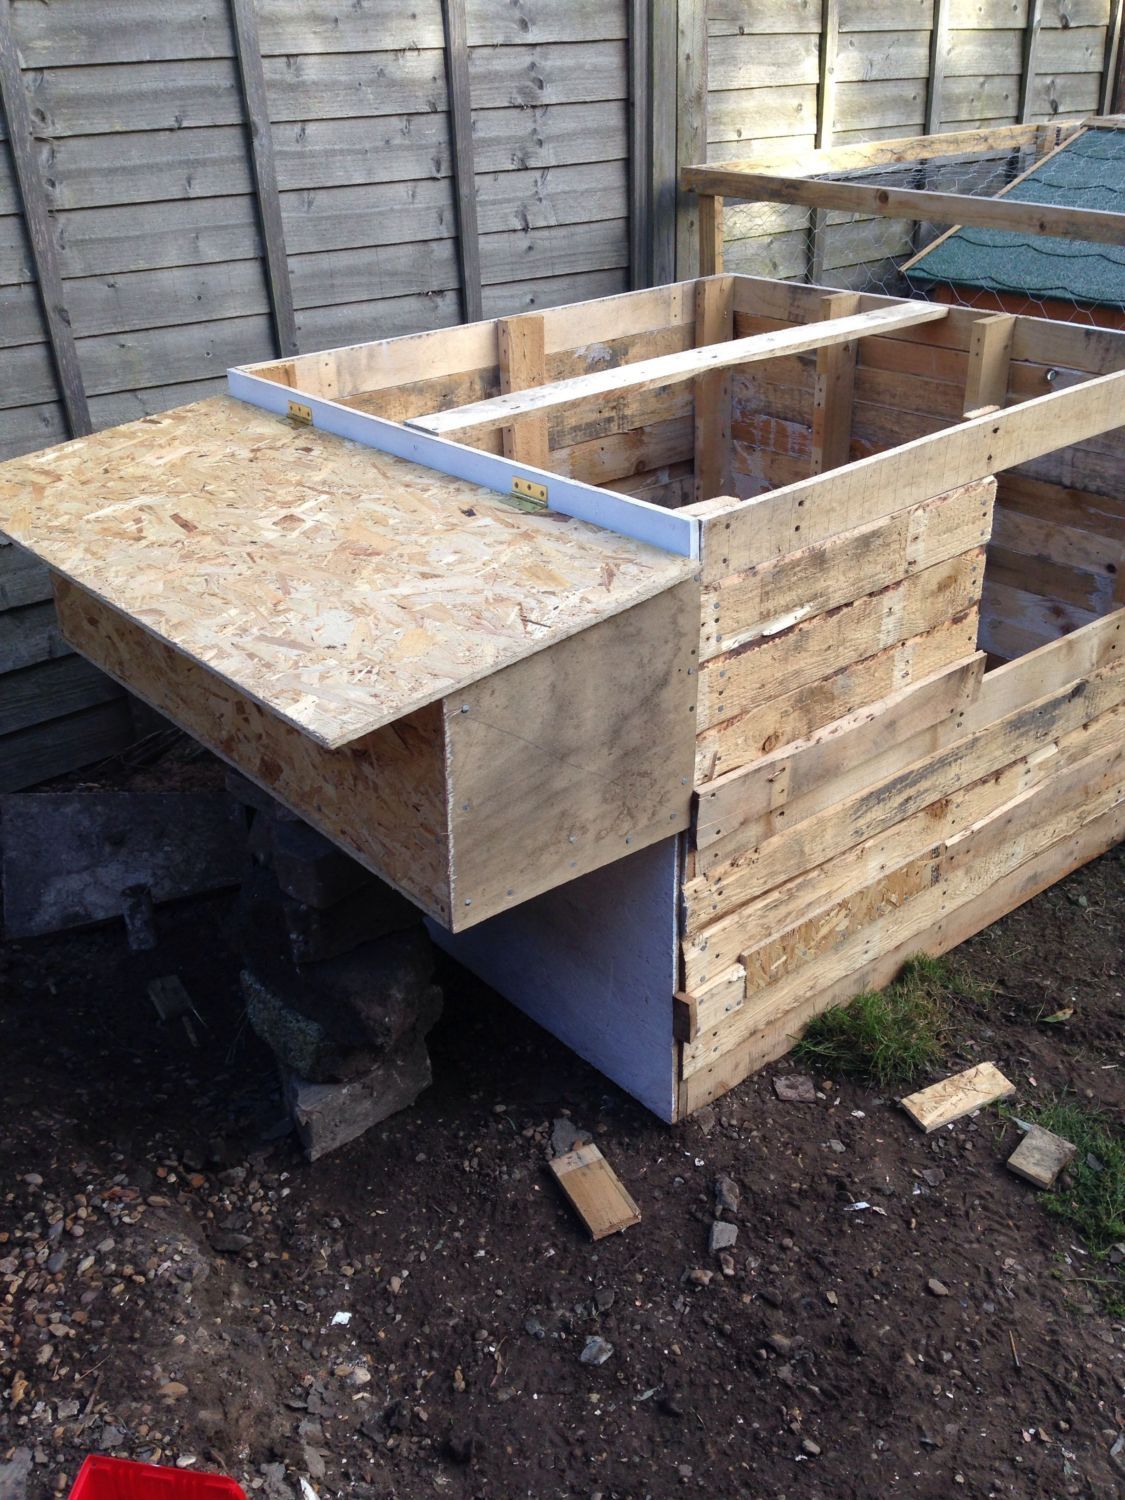
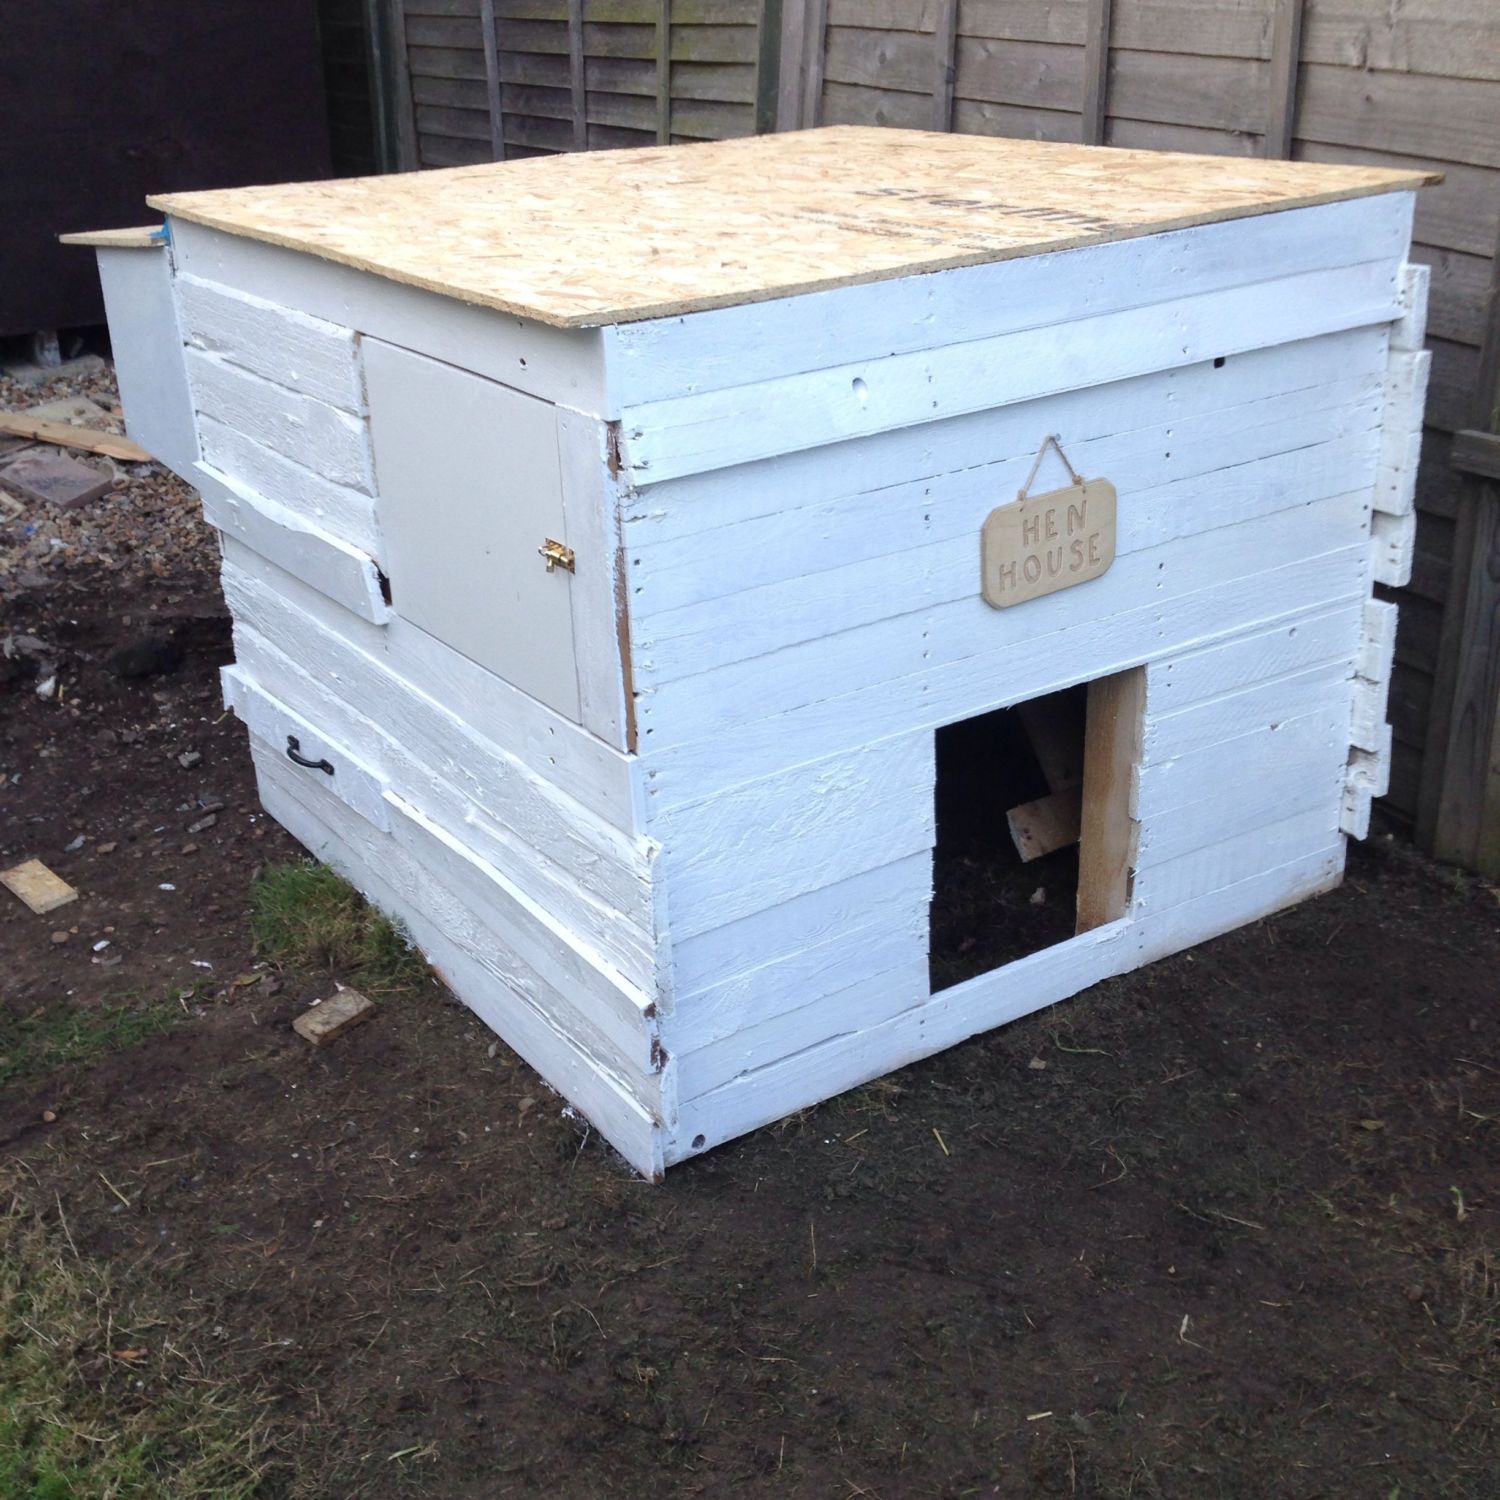
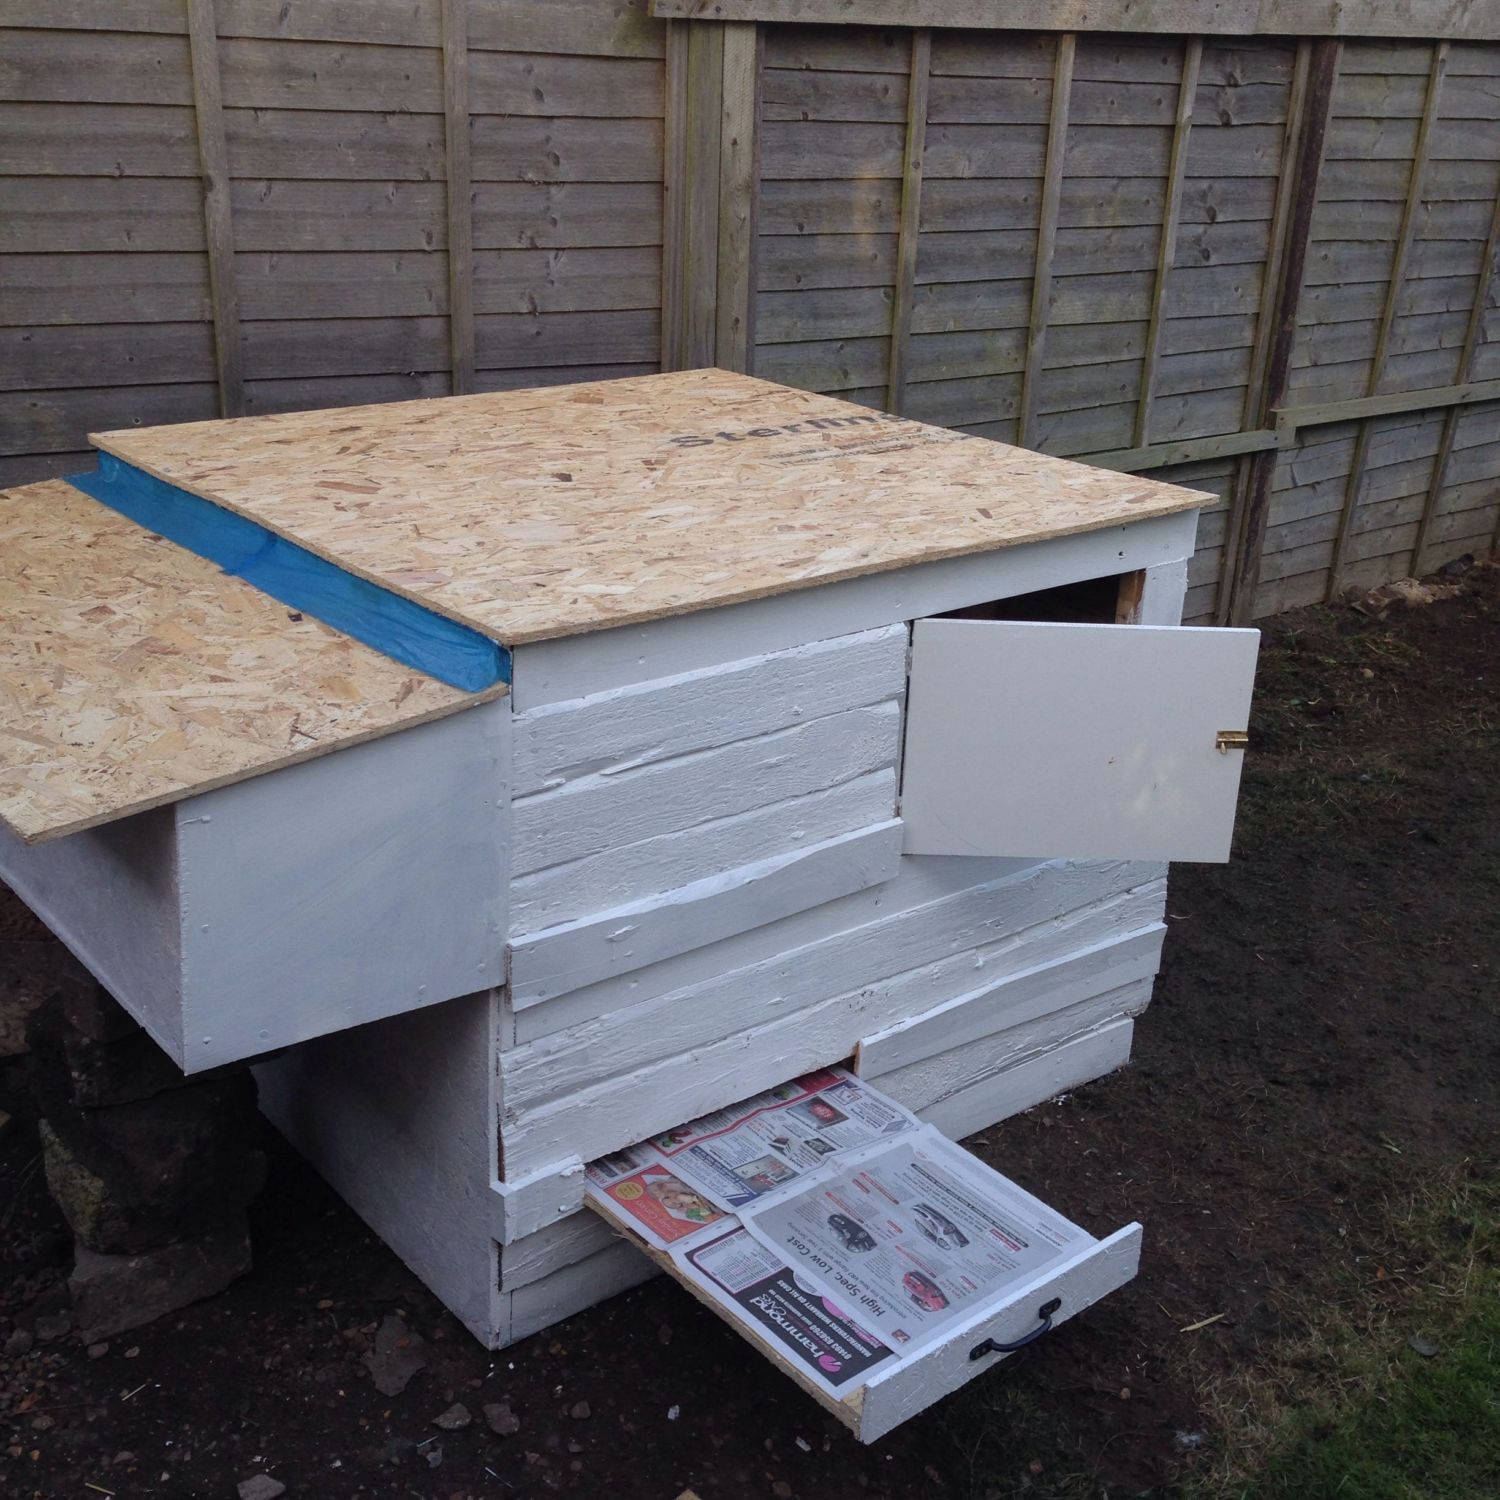
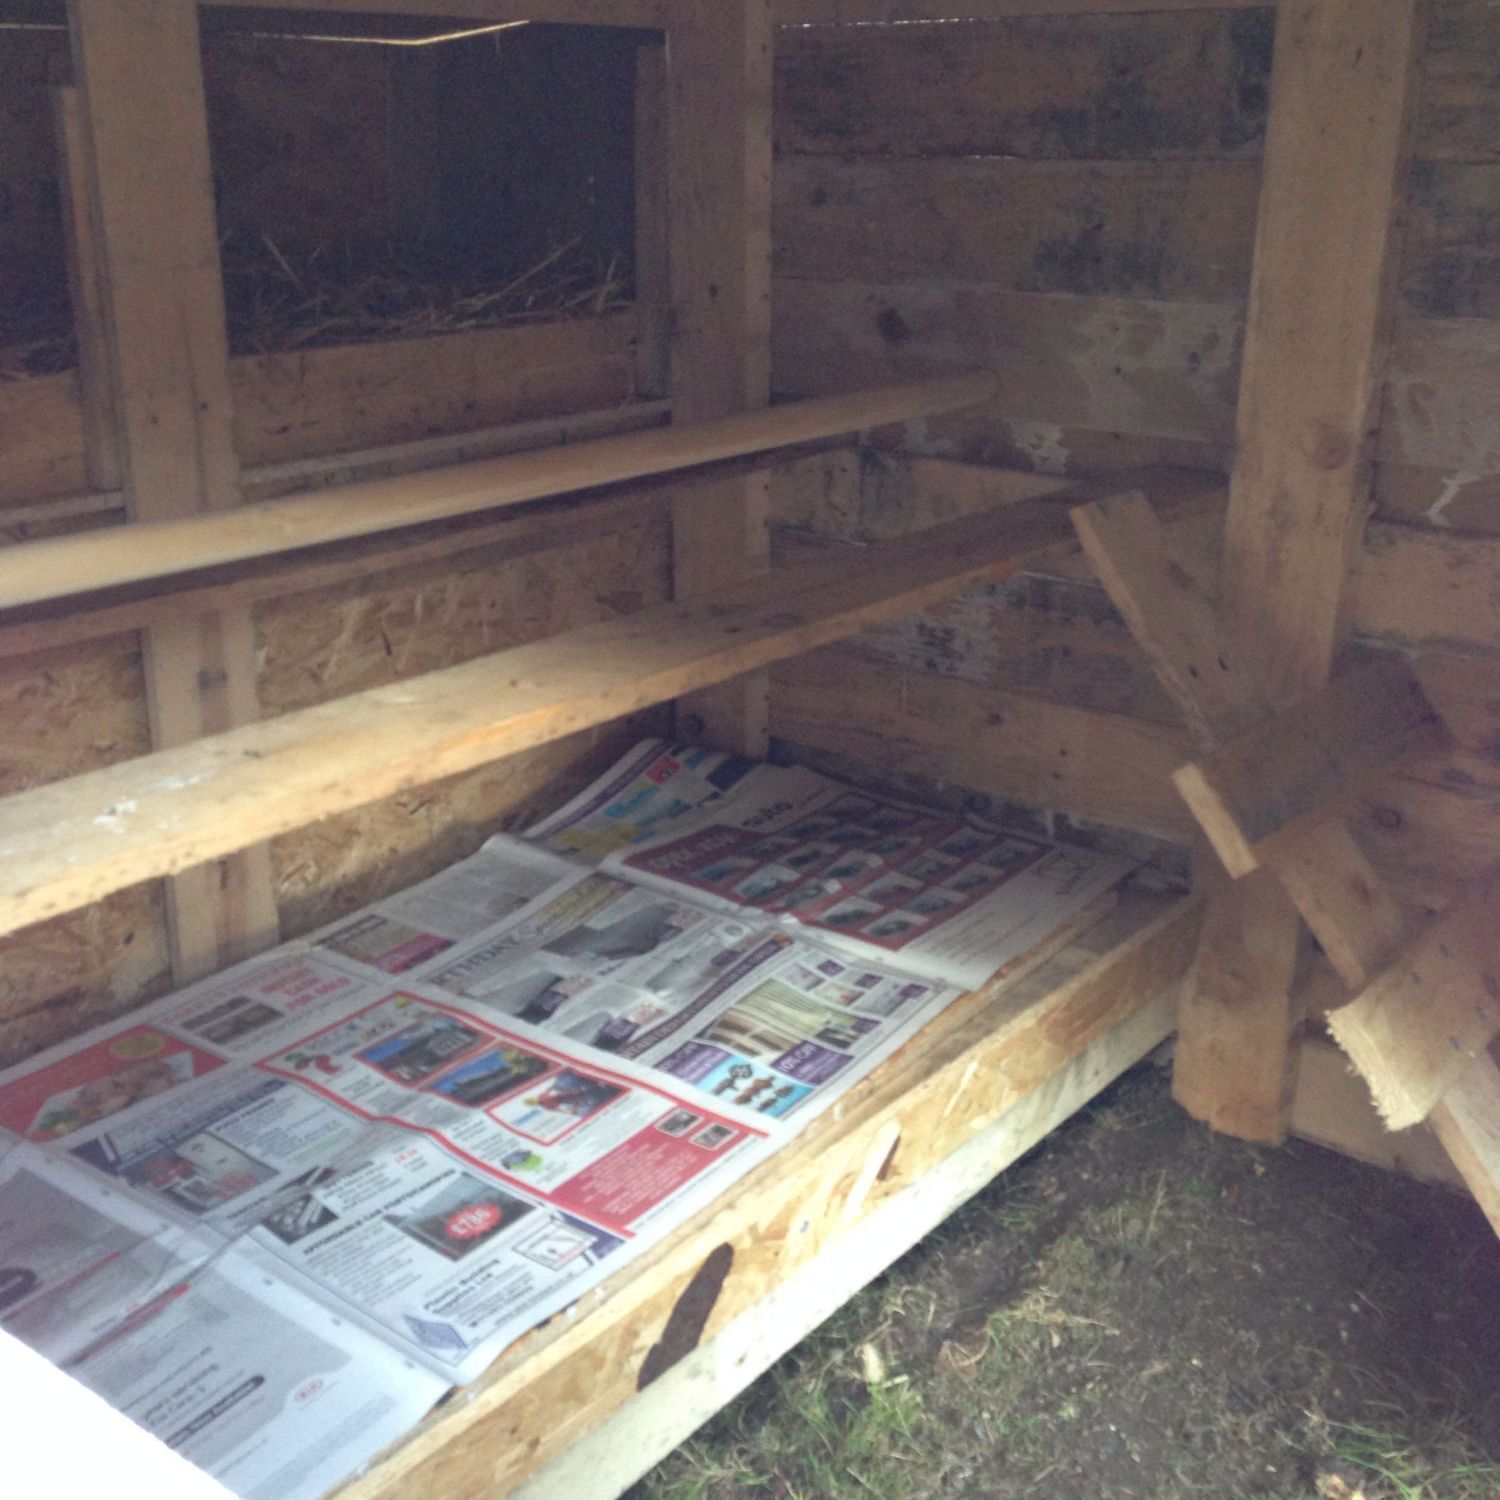
Next, I added the wooden slats for the sides leaving room for a door. I built a frame for a droppings board to slide in and out of and a perch from an old broom handle.
400

400

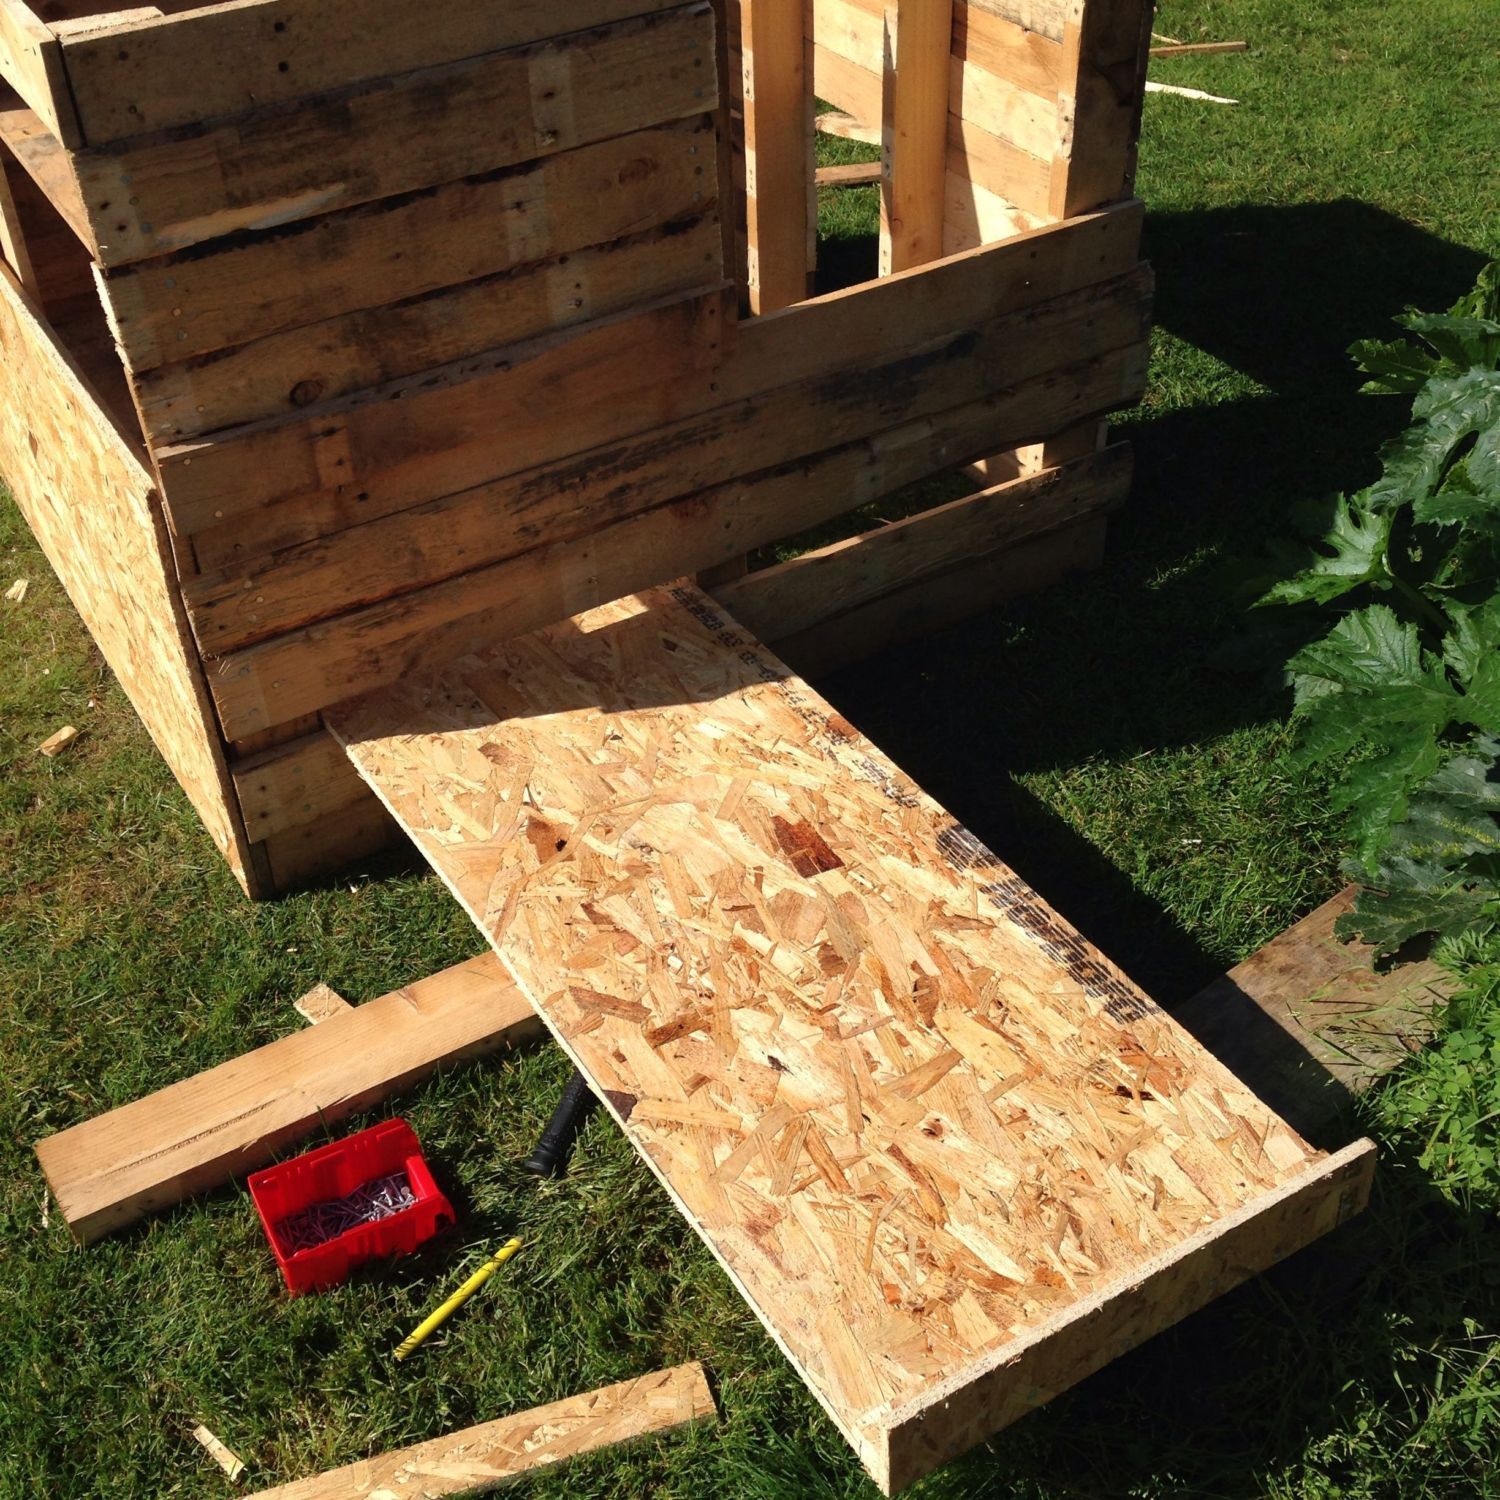
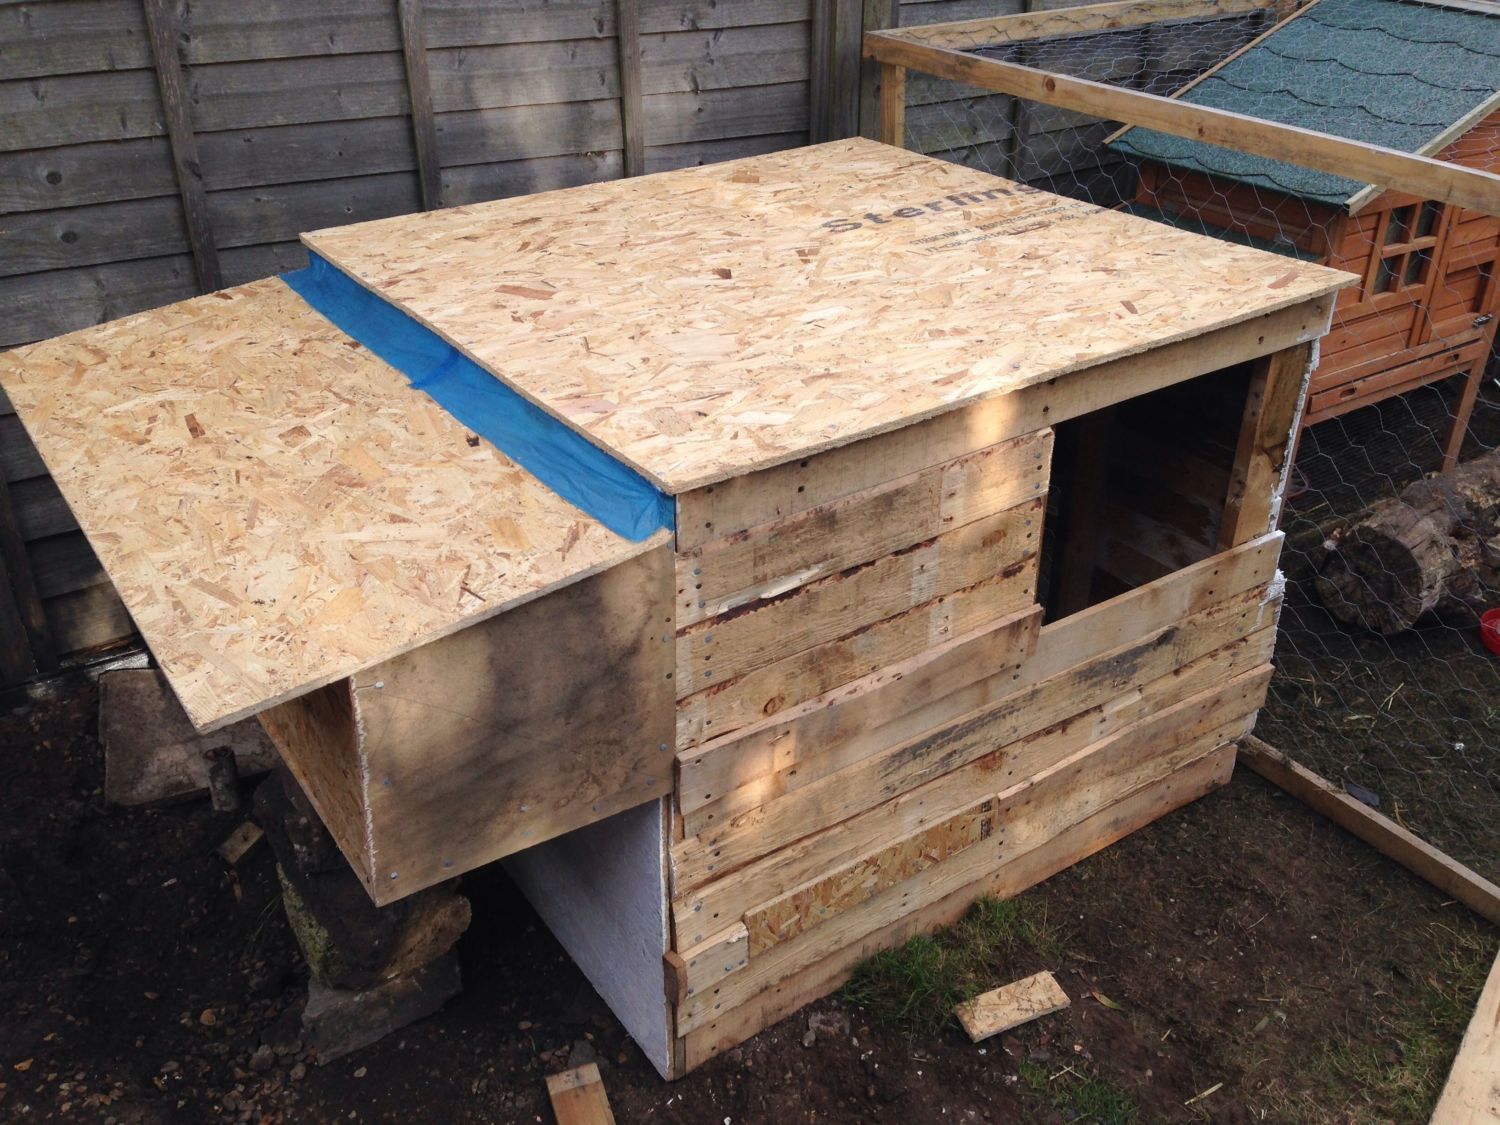
Then I created the droppings board from some OSB board.
400

Then I made a ladder.
400

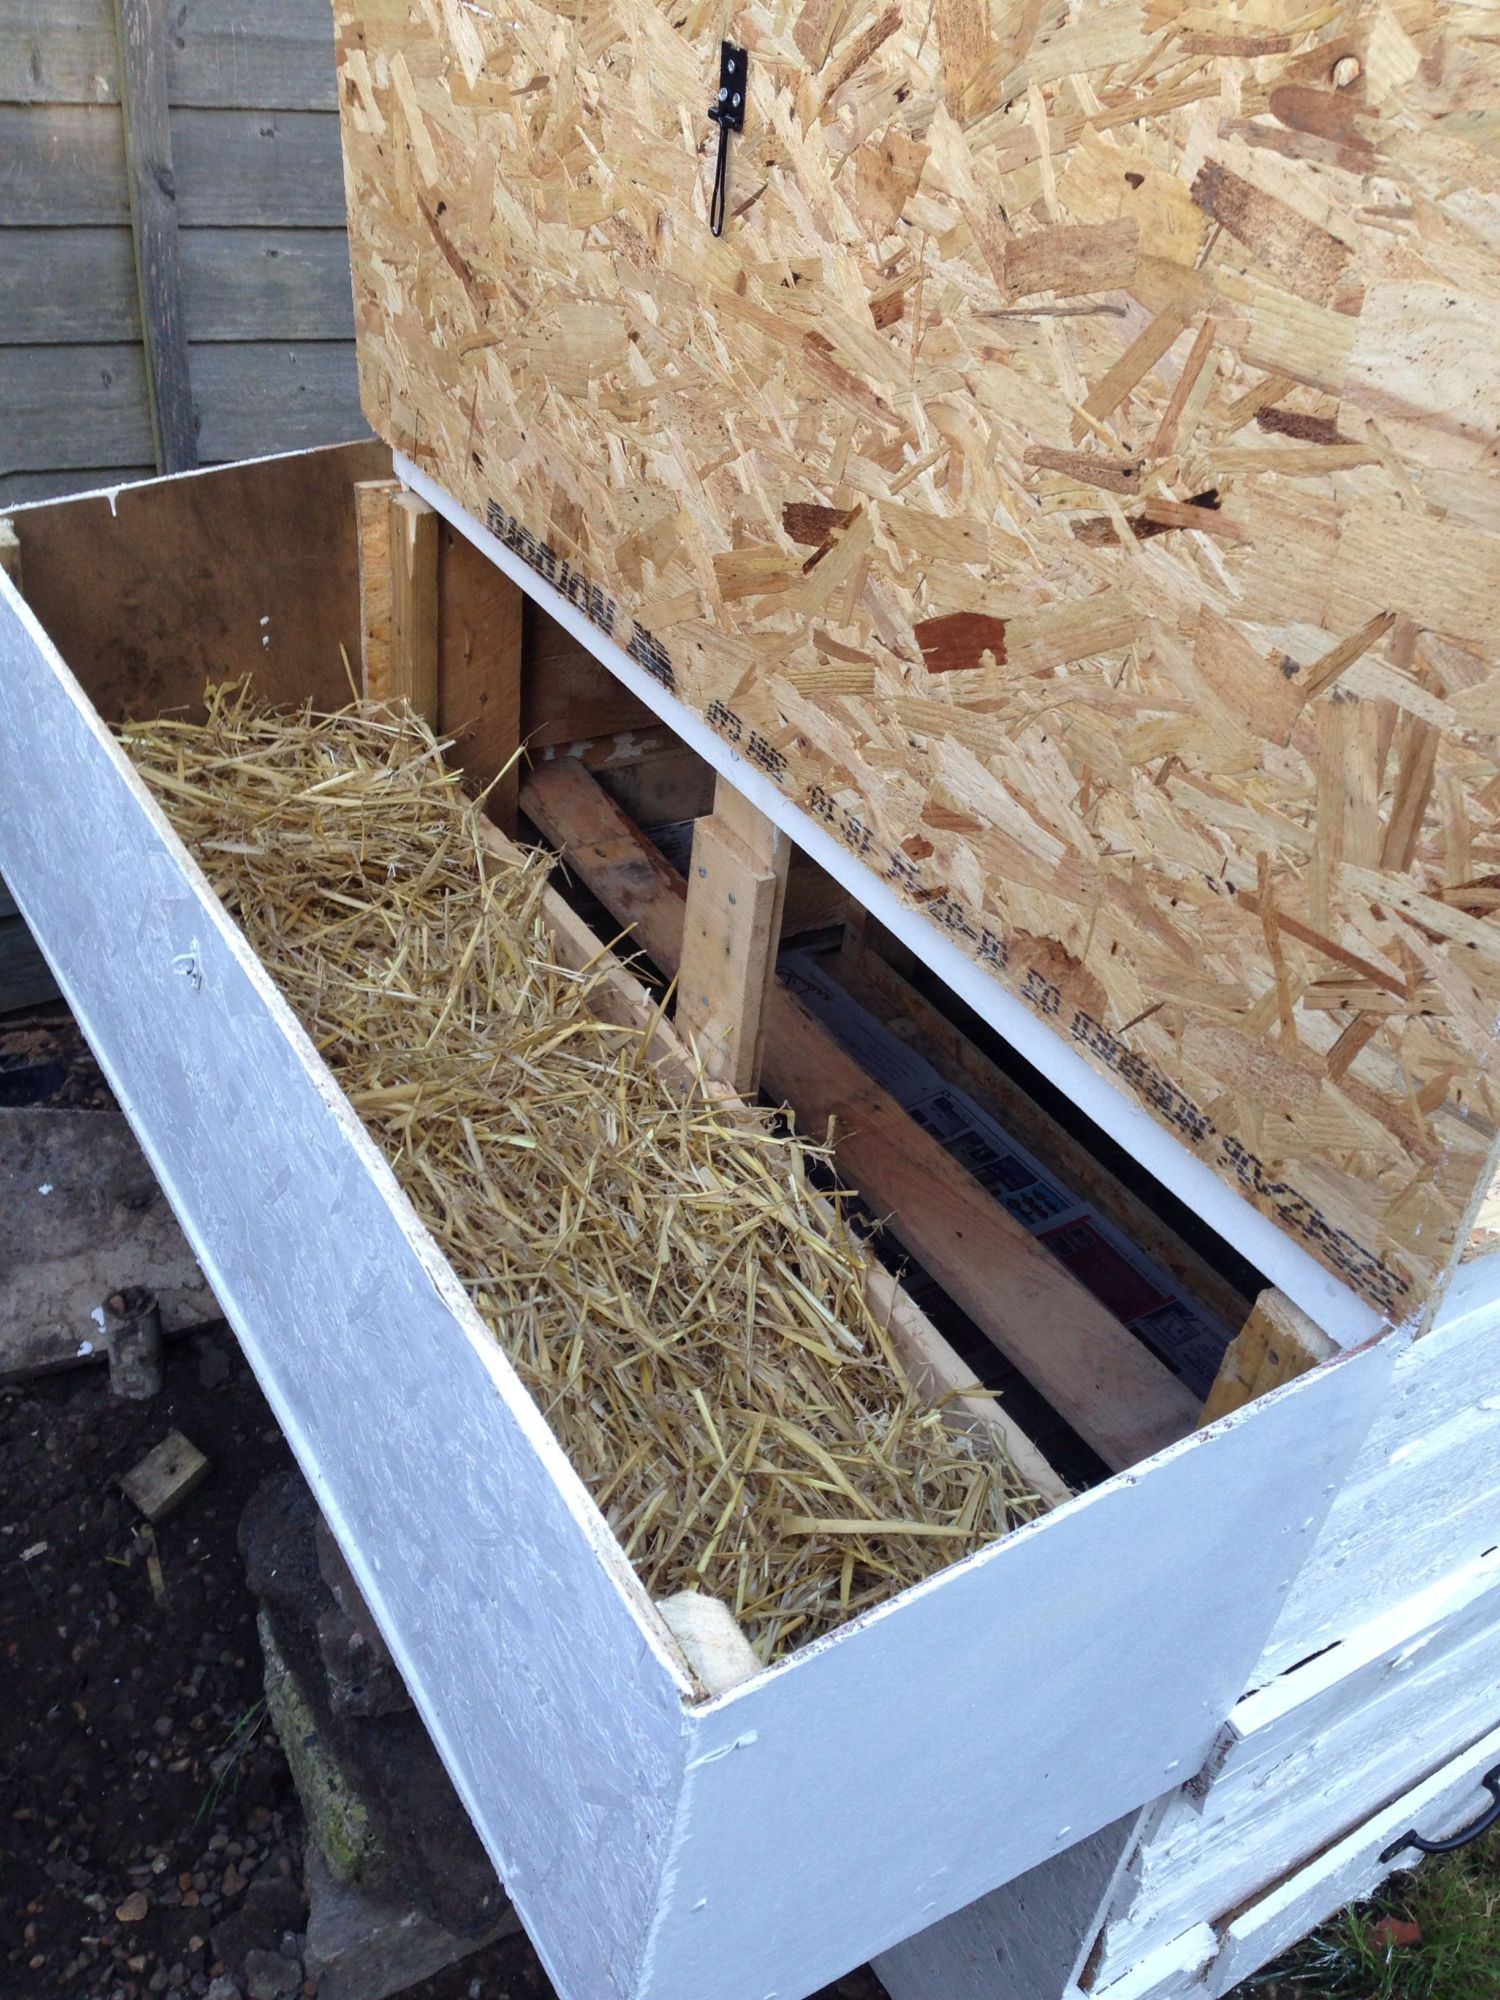
I built a nest box on the back with some more board.
400

400

400

400

400

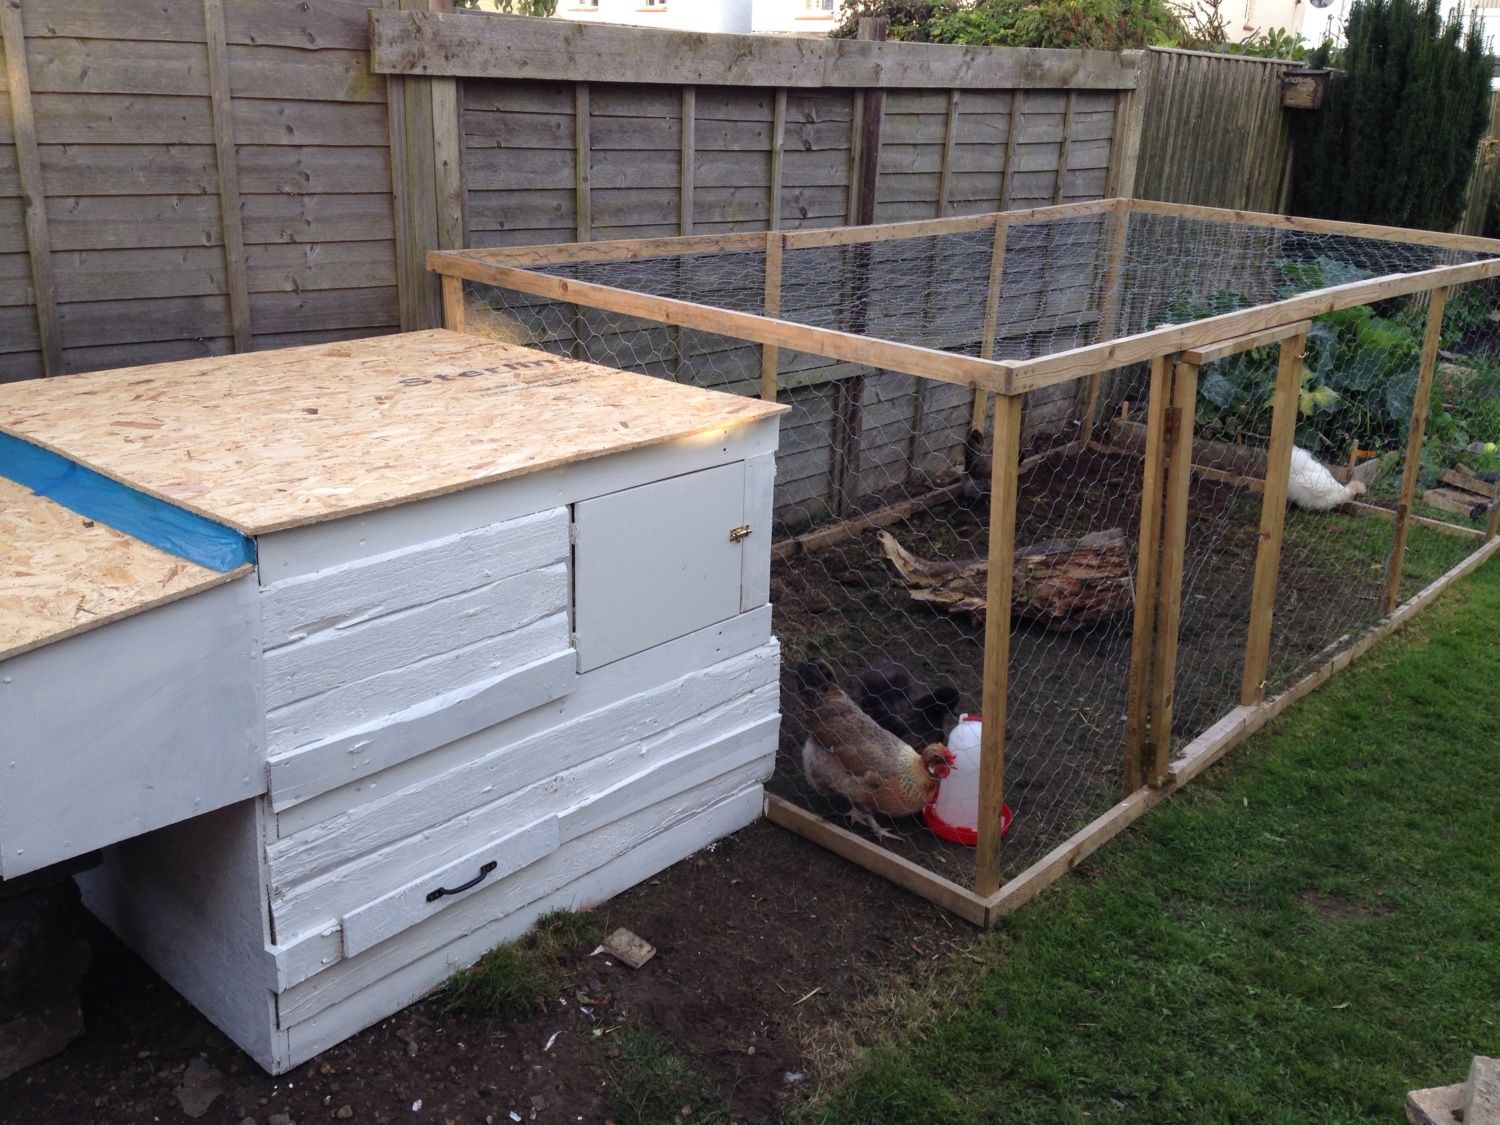
Then finally, my wife painted it white to give it a new lease of life.
400

400

400

400

400


It took me a long time but it was worth it!
 
Great job! Is the entire roof or back wall hinged? I couldn't tell from the pics. If not, is the only access you have to the inside thought that little door and pull out poop board? (By the way... I really like the slide out poop board idea.)

Also, you're probably going to hear this a lot, but you need some serious ventilation added. Think about ways you could do that without much re-do. (Ie remove some if the top siding panels, cut hole, etc.)

Great job on what you've accomplished!


Thank you. The roof is fastened on and the only entry point is through the side door which is large enough for me to reach inside. The sloped roof on the nest box is hinged to allow easy access to the eggs.
On the topic of ventilation, I thought maybe as the front open gap door is always open this would be enough to vent odours etc? Should I create a gap on either side to allow air flow? Maybe this would be better.
 
The more ventilation the better. My pallet coop is going to have 4 4"x4" openings under the room, and same on the back wall....and small vents on both side walls up high.
 
Great looking coop you have there. I am also completing the finishing touches to pallet coop. Great to see a few people are also thinking about these materials, hate to see them go into landfill. Pallets are everywhere and mostly for free, some I looked at were quite dodgy, lots of wood splits and only just hanging together with the odd badly placed nail. The house down the road from me was throwing away a couple of wooden crates used for tiles and after a hunt around my local industrial park managed to find the perfectly sized pallet as a base and used a second pallet to make the first one solid.

I built a roof out of mostly off cuts from a house renovation to form an A-framed roof to keep the weather out and help with ventilation.

You can see that the crate itself is made with cheap inferior timber and if left out in the weather it would only last a year or two so I collected old hardwood fence palings from my area and over a few weeks slowly overlapped them to form a rigid insulating cladding. As well as a few other little tweaks and ladder made from mostly old tree branches, this little house is a happy sleeping area for 9 hens.

There is a double door, one for the chooks and one for me to clean out the house and collect eggs. Inside is a shelf for roosting and a cardboard box for laying (which is not adequate). You'll see I have added a vent at the top with another at the rear, there is also ventilation from under the eaves. Still to be added is a laying box to be inserted into the left hand side, still trying to figure this one out. The cost was mostly for wood screws, pine log piers, rapidset concrete and the translucent roofing material, probably about a $100 in total.
 
Great looking coop you have there. I am also completing the finishing touches to pallet coop. Great to see a few people are also thinking about these materials, hate to see them go into landfill. Pallets are everywhere and mostly for free, some I looked at were quite dodgy, lots of wood splits and only just hanging together with the odd badly placed nail. The house down the road from me was throwing away a couple of wooden crates used for tiles and after a hunt around my local industrial park managed to find the perfectly sized pallet as a base and used a second pallet to make the first one solid. I built a roof out of mostly off cuts from a house renovation to form an A-framed roof to keep the weather out and help with ventilation. You can see that the crate itself is made with cheap inferior timber and if left out in the weather it would only last a year or two so I collected old hardwood fence palings from my area and over a few weeks slowly overlapped them to form a rigid insulating cladding. As well as a few other little tweaks and ladder made from mostly old tree branches, this little house is a happy sleeping area for 9 hens. There is a double door, one for the chooks and one for me to clean out the house and collect eggs. Inside is a shelf for roosting and a cardboard box for laying (which is not adequate). You'll see I have added a vent at the top with another at the rear, there is also ventilation from under the eaves. Still to be added is a laying box to be inserted into the left hand side, still trying to figure this one out. The cost was mostly for wood screws, pine log piers, rapidset concrete and the translucent roofing material, probably about a $100 in total.
That's fantastic, I love the design of it and really like the way you've raised it off the ground. The idea of the ventilation windows at the top is brilliant. I think I'll make a few openings in mine too and cover them with some air vents. You've done a really good job!
 

New posts New threads Active threads

Back
Top Bottom