Beak le Coop
It all started with the idea that it would be nice to have fresh eggs...and here's what happened next:
I found this wonderful website after doing some searches and began to learn more about
chickens than I ever thought was possible. After contacting our city to clarify what was
allowed--we can have 5 pullets (no roosters) as long as they are 25 feet from our
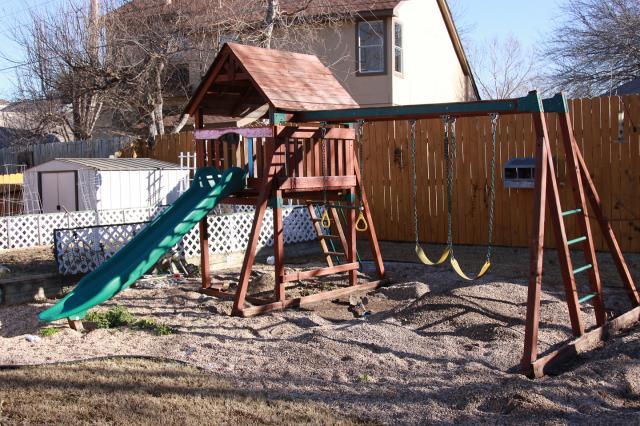
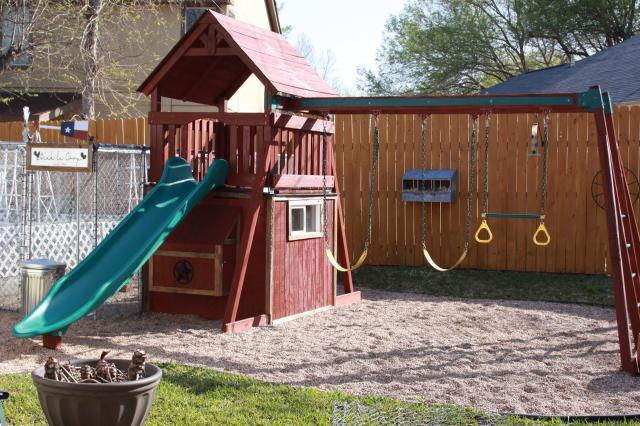
neighbors' house. Ok, now on to the next step--a coop. Our daughter has a playscape
and the sandbox portion was no longer being used. We decided this could be our coop.
Maybe not the easiest thing to do, but workable.

On January 22nd, I called the feed store to find out i they had chicks and they had
received a large order that included all the breeds we wanted. That evening we came
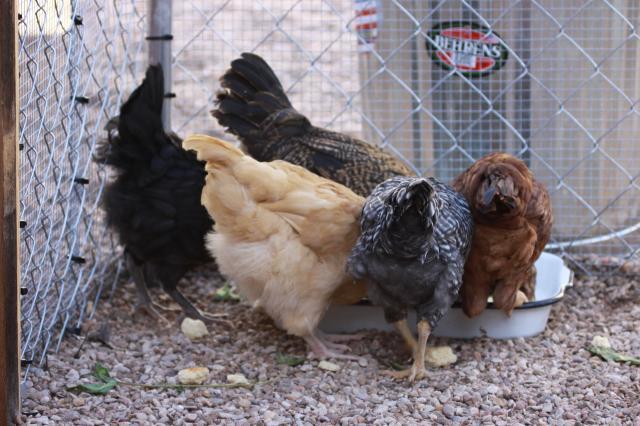
home with a Rhode Island Red (Lucy), Easter Egger (Ethel), Barred Rock (Beatrix),
Black Australorp (Gertrude) and Buff Orpington (Daffodil). As adorable as those
cute little fuzzy butts were, we found that they were growing quickly! We had these
chicks in our living room, then in the dining room & finally in the garage. I knew we had
to come up with a design (quickly) that would work in the space that we had available.
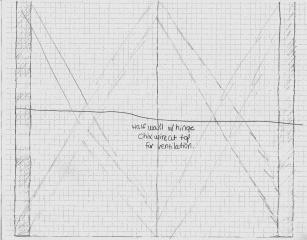
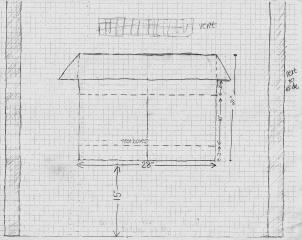
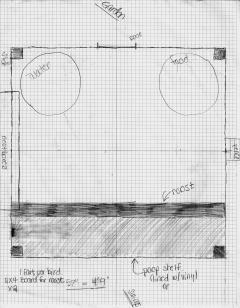
After poring over all the designs on this board & reading the message boards feverishly
I began to come up with some ideas on how to bring the coop to reality. Below are the
initial drawings that I used as a basis to explain this "plan" to my husband:
I found this wonderful website after doing some searches and began to learn more about
chickens than I ever thought was possible. After contacting our city to clarify what was
allowed--we can have 5 pullets (no roosters) as long as they are 25 feet from our
neighbors' house. Ok, now on to the next step--a coop. Our daughter has a playscape
and the sandbox portion was no longer being used. We decided this could be our coop.
Maybe not the easiest thing to do, but workable.
On January 22nd, I called the feed store to find out i they had chicks and they had
received a large order that included all the breeds we wanted. That evening we came
home with a Rhode Island Red (Lucy), Easter Egger (Ethel), Barred Rock (Beatrix),
Black Australorp (Gertrude) and Buff Orpington (Daffodil). As adorable as those
cute little fuzzy butts were, we found that they were growing quickly! We had these
chicks in our living room, then in the dining room & finally in the garage. I knew we had
to come up with a design (quickly) that would work in the space that we had available.
After poring over all the designs on this board & reading the message boards feverishly
I began to come up with some ideas on how to bring the coop to reality. Below are the
initial drawings that I used as a basis to explain this "plan" to my husband:


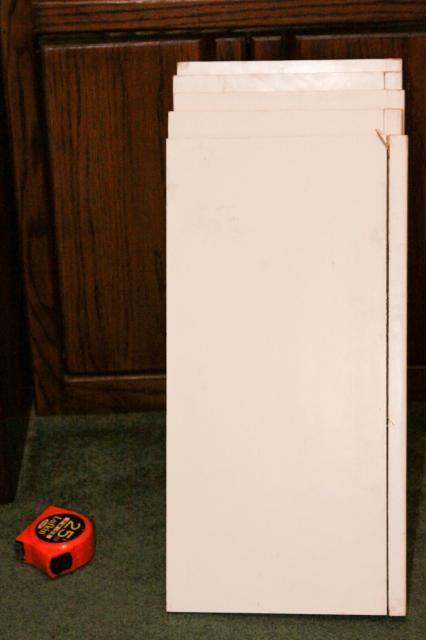
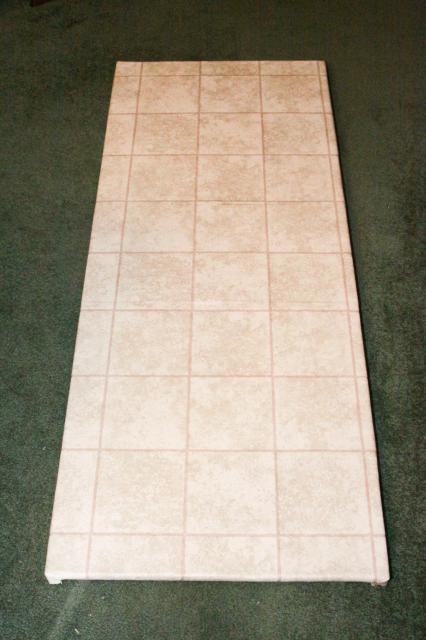
Until the weather warmed up enough I decided it was time to construct the poop board.
After visiting the Habitat Restore and finding some cabinet shelves I decided they would
work great for the poop board. Here's what they looked like before and after they were
put together and covered with vinyl:
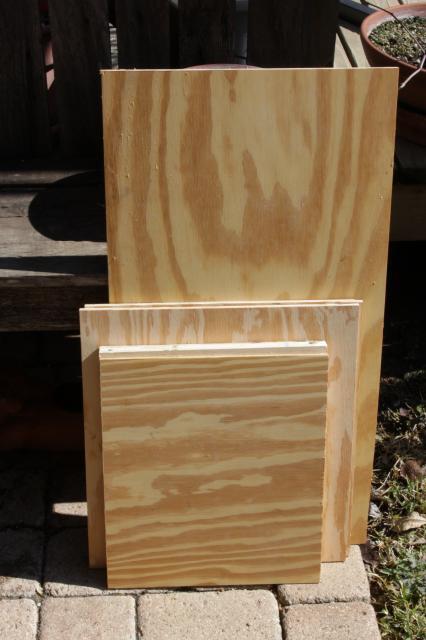
Itching to get more done I decided to put together the nest box in our living room. It kind
of evolved as it went, but here are the pictures of it before it was stained and put together:
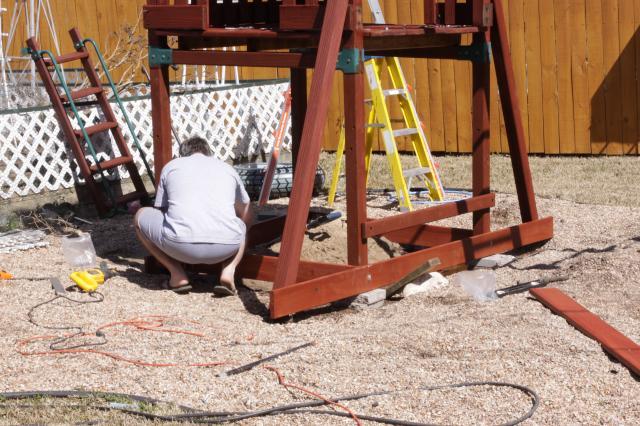
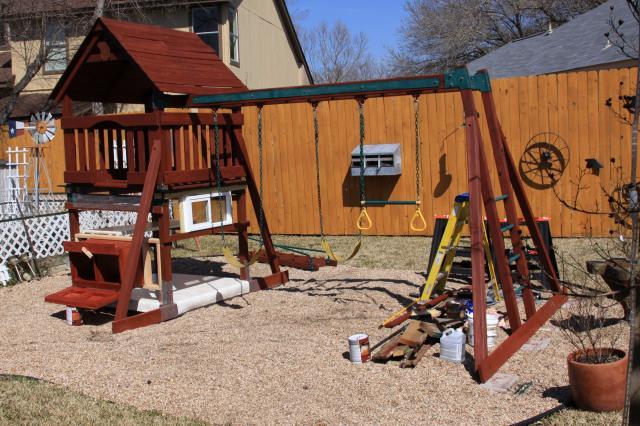
With the weather getting better it was time to get serious. First things first my husband
pressure washed the whole playscape and a few days later I covered everything with
2 coats of stain. This is 9 years old and it's in pretty good shape, but the support beams
on the ground had to be replaced with pressure treated wood. After that we had to
move the whole structure over a foot or so in order to have enough room for the run
between the coop and the garden.
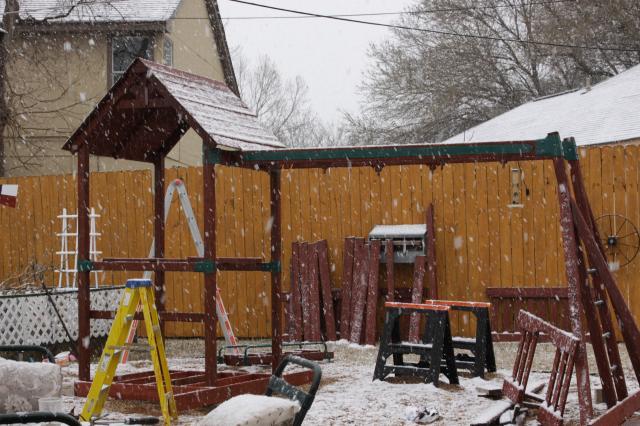
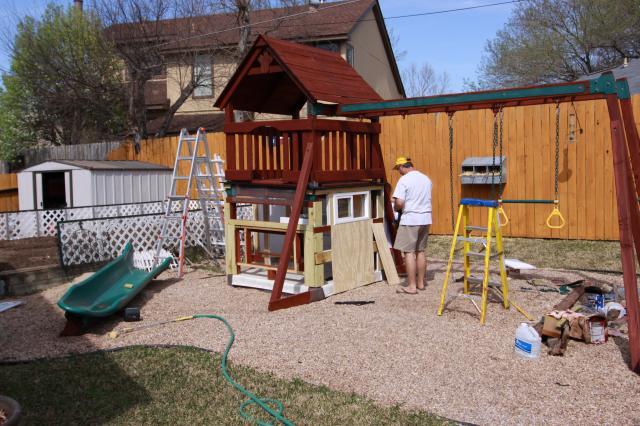
In Central Texas you never know what February weather will be like, but as you can see
sometimes it includes snow!!! At this point we had moved the structure over and had
removed the railing around the playhouse portion along with the flooring of the playhouse
in order to create a coop roof.
I had to design a "flat" roof to go under the playhouse flooring beams. I used flashing
around the four corner posts and used silicone caulk to seal them before the "flat" roof
was covered with an asphalt based sealant. We had placed the coop structure on concrete
bricks and angled the whole thing with a pitch so that rain will run towards the swings &
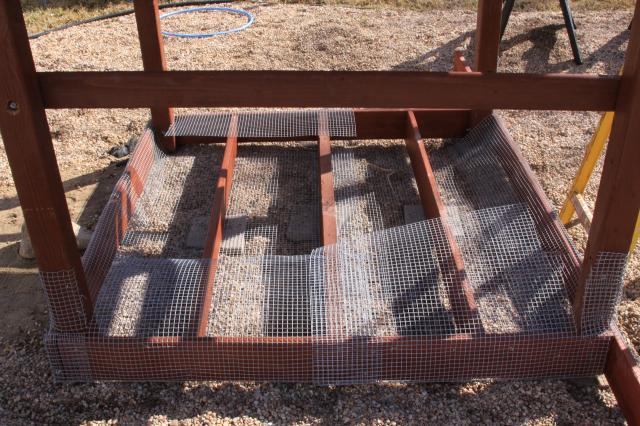
away from the garden side. Before putting flooring down for the coop we completely
covered the bottom with hardware cloth to keep pesky critters from digging under
and chewing through the floor.
Once the "roof"(covered with asphalt) and floor (covered with vinyl) made from 1/2 inch
plywood were installed I put the playhouse beams and playhouse railings back in place.
In the picture below you'll also see the window I found on Craigslist that was the perfect
size for the project. It was installed "backwards" so it can be opened and closed from
outside the coop. On the inside it is covered with hardware cloth to keep out the critters.
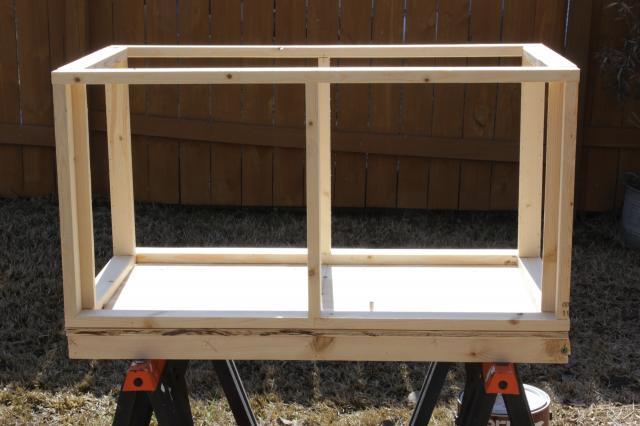
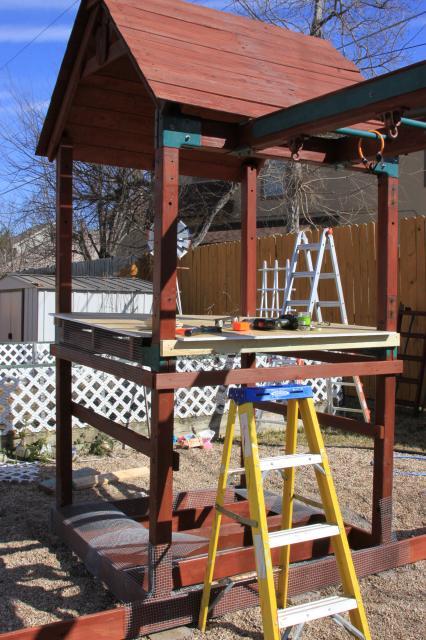
Also I created a framework for the nestbox that will sit below the slide when it's back in
its place. I'm definitely not a carpenter, but where there's a will there's a way!
We struggled with days of rain and worked on weekends when the weather allowed.
When rain was predicted we'd have to bring our tools back into the house and we had
a great helper! Our dining room tended to look like a junkroom at a hardware store.

Once those steps were done I really needed my husband's help with the walls and
how to design the doors. The coop is different from our original drawings, but it's
works better with the way it is currently designed. It was really helpful to read
what did and didn't work as others designed their coops. Special thanks for the
inspiring info from nwmud's Red Roost Inn (doors), mags2009 (coop), swimmom's
Little Urban Coop and Gunslinger's coop--I saved these links and referred back
to them frequently.
Fortunately I had a great helper in staining the coop walls (Note the quality control
supervisor in the background!)

It was finally time to set the nestbox in place. It's finally starting to look like a coop!

Here are the coop doors with the approval of the quality control supervisor
(good supervisor, but we just can't get him to pick up any tools!) On the right
you can see the vinyl covered floor and the vinyl covered poop board that rests
on boards so it can slide back & forth for easier cleaning. The poop board can
be removed for deeper cleaning.
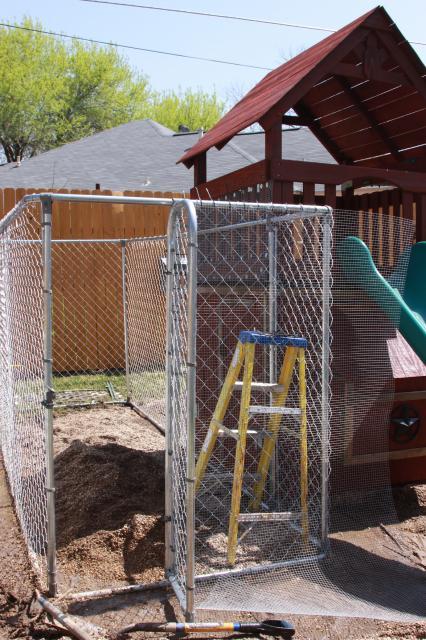
With the coop in place it was time for a run. After seeing a chainlink run
(thanks Iowa Roo Mom) we decided it would be easier to construct & just
might prevent a divorce! We love each other, but working on what we call
"divorce projects" can be a little taxing. We found the 2-in-1 run from
Tractor Supply and the 5x15x6 dimensions were perfect for our space.
We originally brought home another run from TS, but found that it was only
10x10x6 and could not be configured like we needed. So at our 3rd TS store
we were able to exchange it for what we needed. We will use gravel in the
run area because when it rains the whole area can quickly become wet and
swampy--this should keep the girls' feet dry. As you can see we ran hardware
cloth from the top to the bottom and out on the ground about 2 feet. After
staking the hardware cloth to the ground we covered it with gravel & this
should really help with keeping any predators out. We saw a possum not too
long ago with a bunch of babies and we wouldn't be surprised if coons are
around as well. Our yard has a 6 foot fence in the front and on the sides,
but an 8 foot fence along the back.
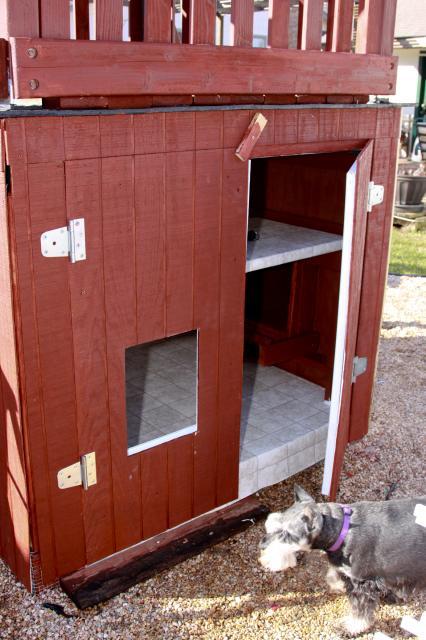
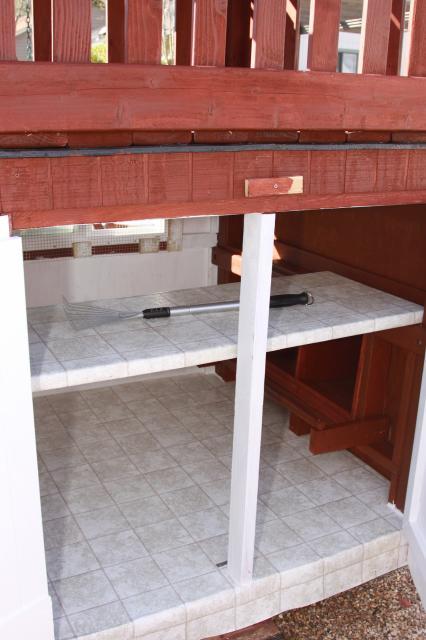
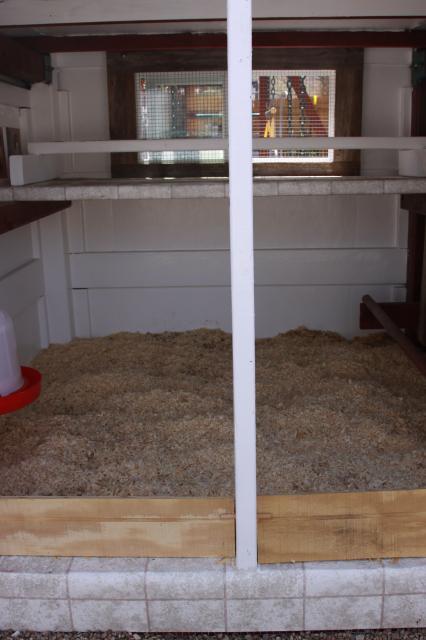
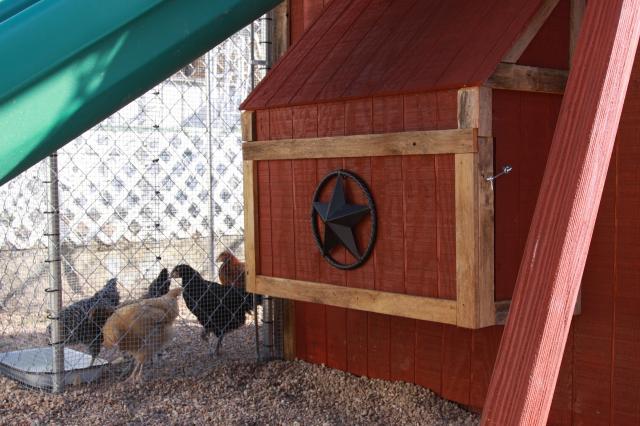
Left and right side of the coop with the doors open--removable roost board is now
on the poop board, mini rake hangs on the right, artwork is up, waterer hangs on a
swivel hook and shavings have been put on the floor--almost ready for chickens!
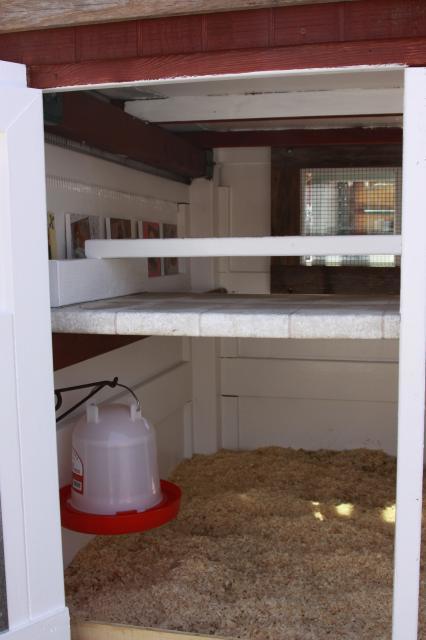
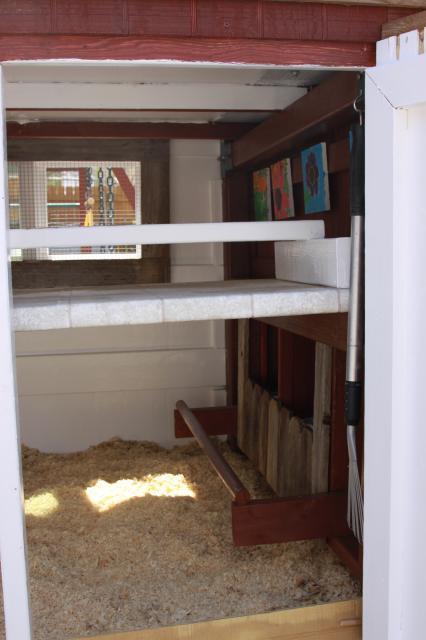
I put scrap pieces of siding at the front of the coop to prevent shavings from
exiting the coop when the doors are opened. I was having a hard time coming
up with ideas at this point, but I used dowels to hold the boards in place and
they can be removed so that the coop can be easily swept out when it is time
for a deep cleaning.
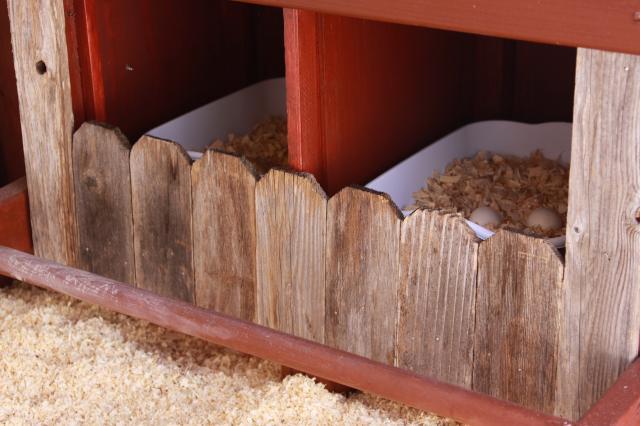
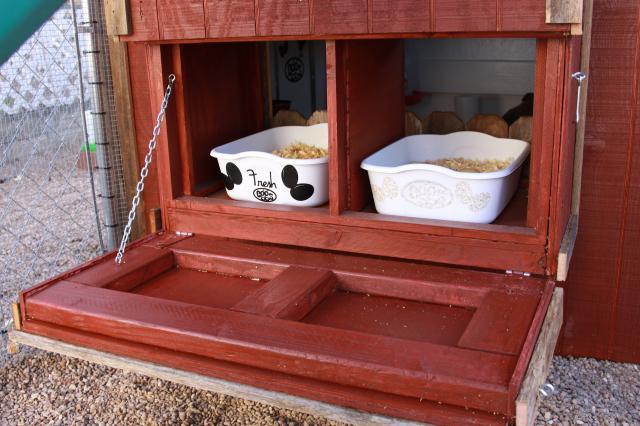
Below is picture of the nestbox with barnwood trim to make it a little cozier.
I used plastic bins I found at the dollar store inside the nestbox. They can be
easily removed for cleaning. They are filled with shavings and ceramic eggs so
that they'll get the idea where to lay when the time comes.
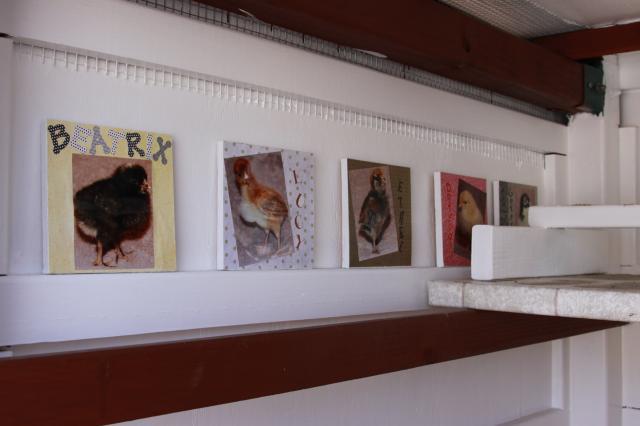
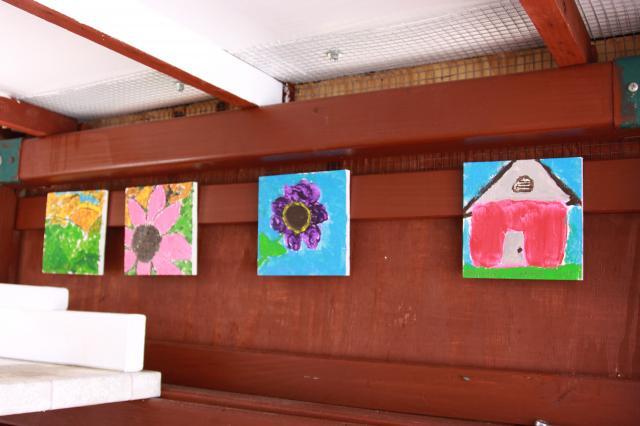
Below are the artwork projects we created for our coop. On the left are their
"baby" pictures and on the right is the original artwork made by my daughter.
We used scrap pieces of wood since there was a lot to choose from.
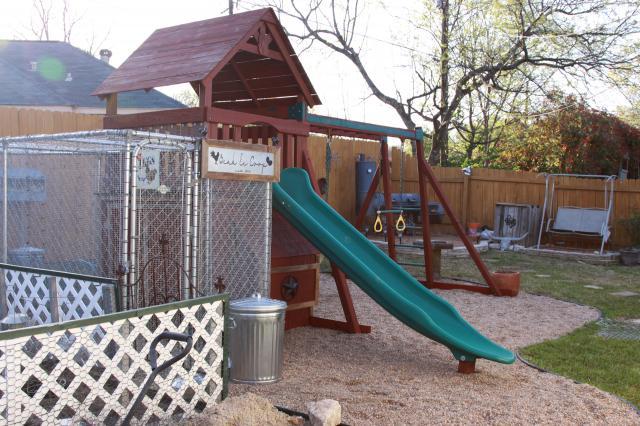
Finally the coop is done! The barnwood trim is up & it's looking like we wanted.
It feels good for the girls to be out of the garage and in their new home.
It is also a good feeling to have the playscape back in shape for playing.
The playhouse, slide, swings & monkey bars are still able to be used.

Looking from the front side of the garden back over the run, coop & my husband's
bbq pit in the corner. He makes some great bbq--I'm very lucky!
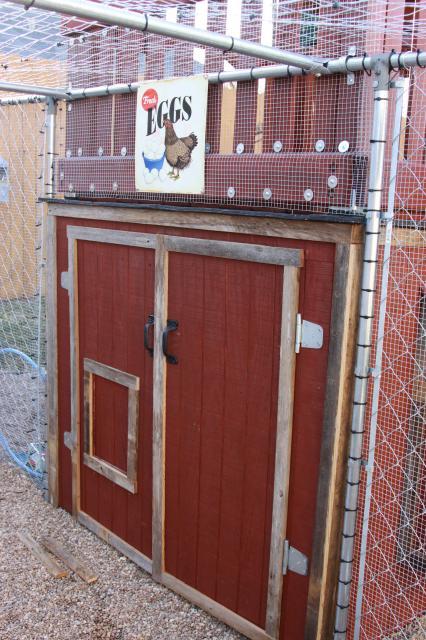
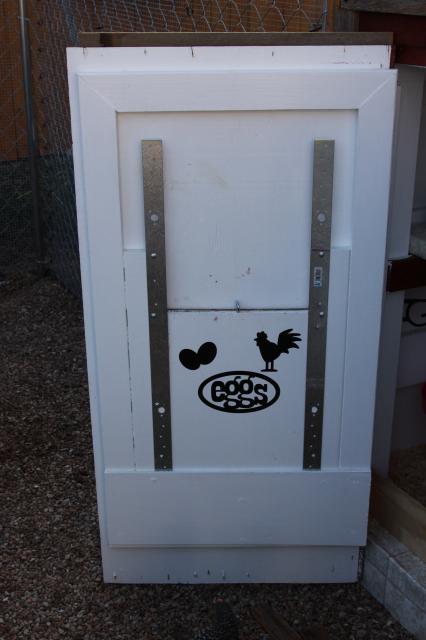
Here's a better view of the coop doors, pop door, the run and inspiring "eggs" sign
for the girls. We ran hardware cloth up the playhouse railing and anchored it with
screws and washers (thanks cherylcohen's Omelet Ranch) instead of those
frustrating staples. We used garden wire over the top of the run to keep out
hawks. Later on we plan to put a roof over part of the run, but we're not sure
what we want to use and we're just glad to have it done at this point. Also a
little artwork at the end of the run.

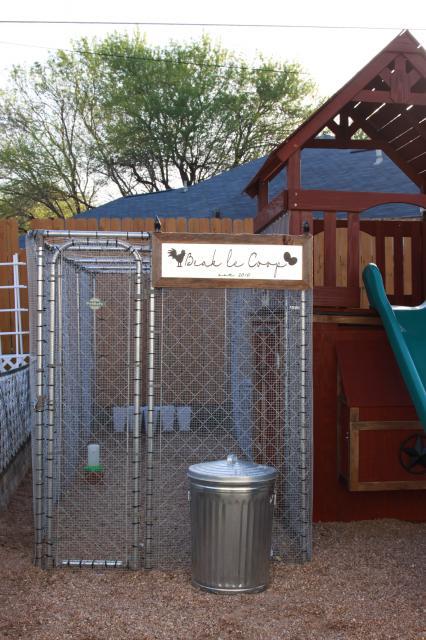
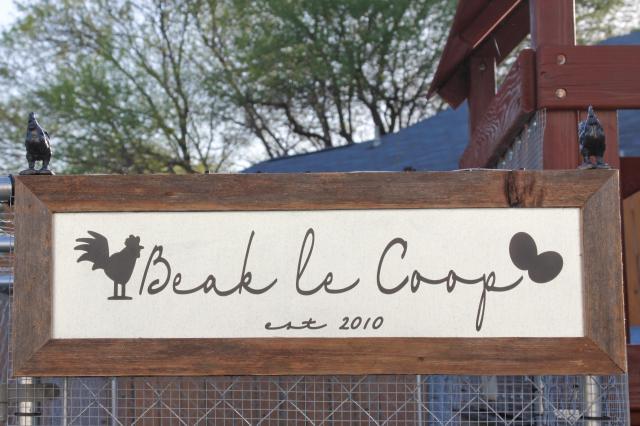
Here's looking at the entrance to the run/coop with the "Beak le Coop" sign.
The sign was made from vinyl cut from my Cricut die cutting machine and put
on flashing. My husband created the barnwood frame & added the roosters.
I keep food in the galvanized can in the front of the run and the bedding is
kept in another on the back side since it won't be needed as much. I've got
some scarlet runner beans that I will plant to provide beans and shade, but
I've got to build a barnwood planter first.
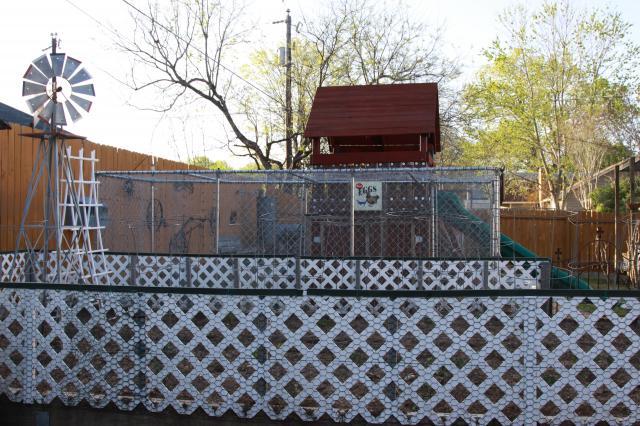
View that shows the garden, run, coop/playhouse the yard towards the bbq pit.
The garden is "in" and we're hoping for a better garden this year than last
(excessive record-breaking heat wave that cooked all the plants).
The compost bin sits at the front of the garden and is easily accessible to add
what the chickens produce!
Closeup of the nestbox & the girls in the run. For right now we have hook & eye
closures on both sides of the nestbox--both of them have to be opened before
the door can swing down. Also below is a picture of the nestbox opened with
the decorated nesting bins.
Below is a picture of the pop door and the track that's used to slide it
up and down (we added a hook, s hook, pulley and coated wire so that it can
be opened and closed on the outside of the coop). The door drops down into
a recessed area so that it cannot be lifted from the outside even if a predator
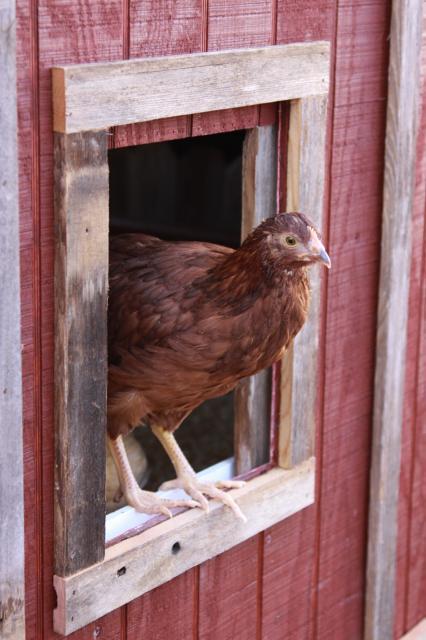
should get into the run. On the right is Lucy coming out of the pop door for
the first time.
View from our deck towards the coop/playscape, run & garden.
The End (or rather the beginning...can't wait til the eggs arrive!)
Things I would change or do differently:
1) Don't use 1x2 strips for the framework of the nestbox. The wood is too soft
and splits easily
2) Wait til my daughter was ready to give up the playhouse/slide portion.
It would have been a whole lot easier to build!
3) We will add some sort of roof over the run later
So far the coop & run is working out well and we're enjoying it and the girls!
