Our converted shed coop (What not to do)
I'm having trouble with my pictures but here goes
So here is the story of our coop. I had been bugging my husband for chickens for a couple of years and finally "we" decided to get some.
I found out about these chickens that lay green eggs and that was the point of no return
we ordered meat chickens and found some easter eggers and a few silkies to make some broodies
We were some of those people that got the chicks before the coop. I like to call it coop insurance
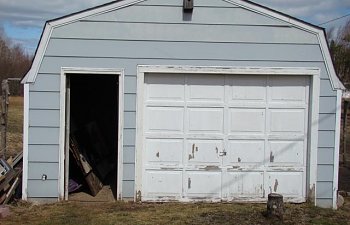
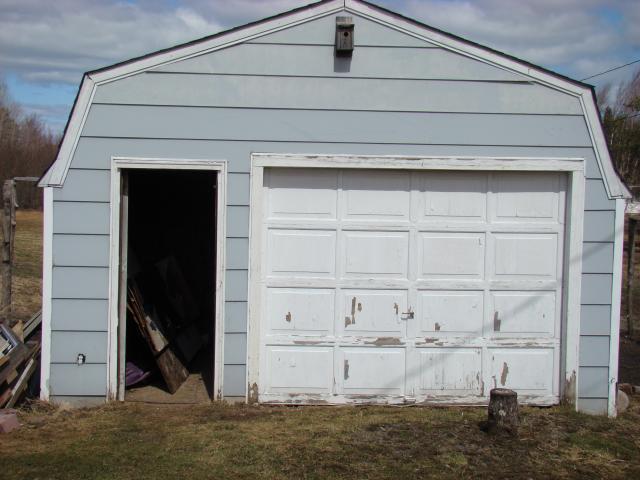
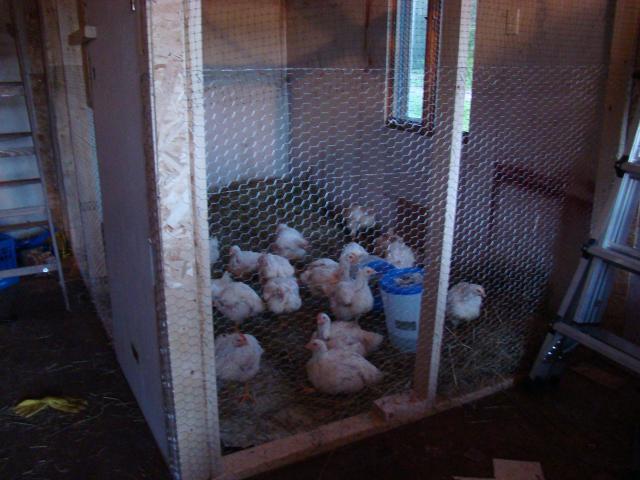
this is our shed. It has seen better days but I think we may still get some use out of it
the coop itself is 6X10 and the summer coop is bigger...I don't think we ever measured that one.
this construction is really just practice since the shed is basically falling apart.
We really would like something sitting on concrete. and of course it will have to be bigger to accomodate more chickens
So here is the story of our coop. I had been bugging my husband for chickens for a couple of years and finally "we" decided to get some.
I found out about these chickens that lay green eggs and that was the point of no return
we ordered meat chickens and found some easter eggers and a few silkies to make some broodies
We were some of those people that got the chicks before the coop. I like to call it coop insurance
this is our shed. It has seen better days but I think we may still get some use out of it
the coop itself is 6X10 and the summer coop is bigger...I don't think we ever measured that one.
this construction is really just practice since the shed is basically falling apart.
We really would like something sitting on concrete. and of course it will have to be bigger to accomodate more chickens

this picture is just a rough drawing of what it looks like inside
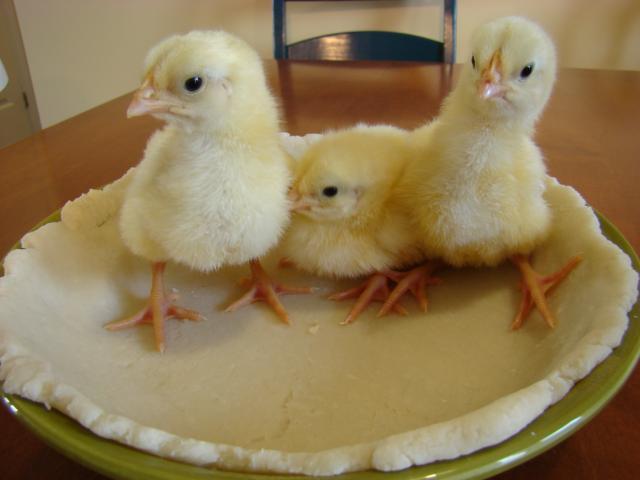
The fuzzy butts when they arrived:

the meat kings
the easter eggers
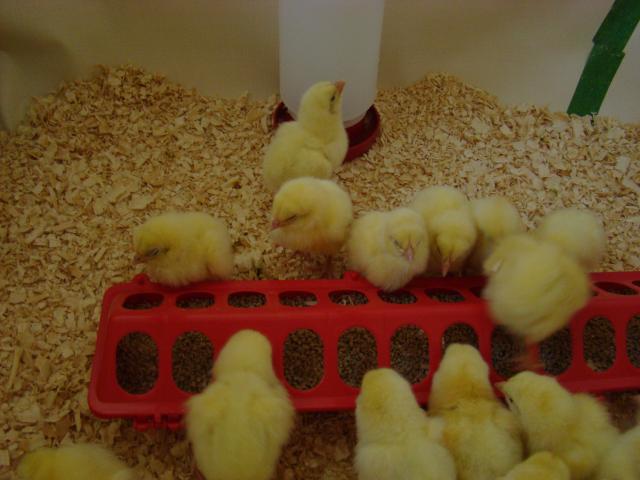
the meat kings
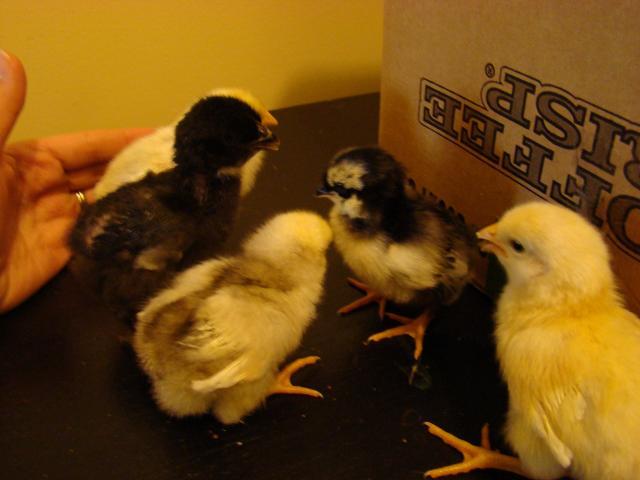
the easter eggers
the dirty work is not fun but I just love seing all that meat in my freezer
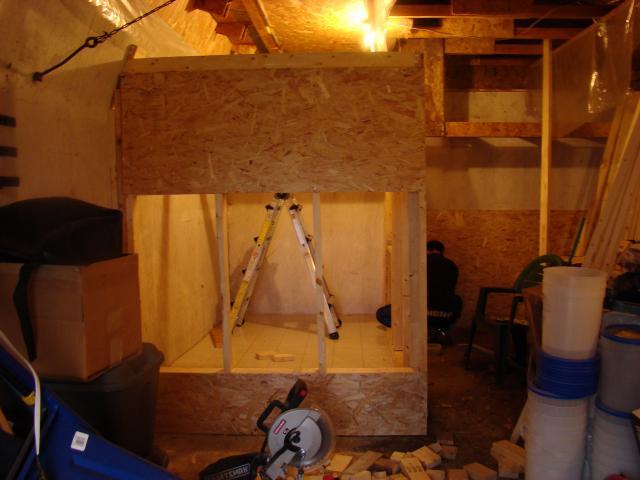
The coop going up:
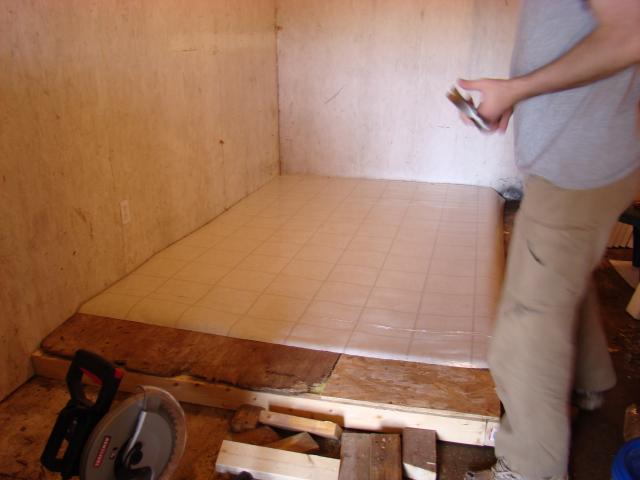
the floor, our shed's 4 walls were already insulated so we went ahead and insulated the floor. at the very least, because there is no foundation,
it will keep things from sneeking in. and I will never regret vynil flooring.it makes cleaning so much easier. and save your flooring
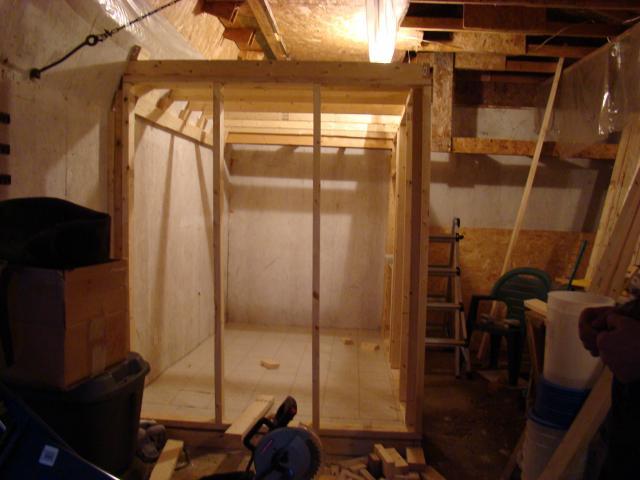
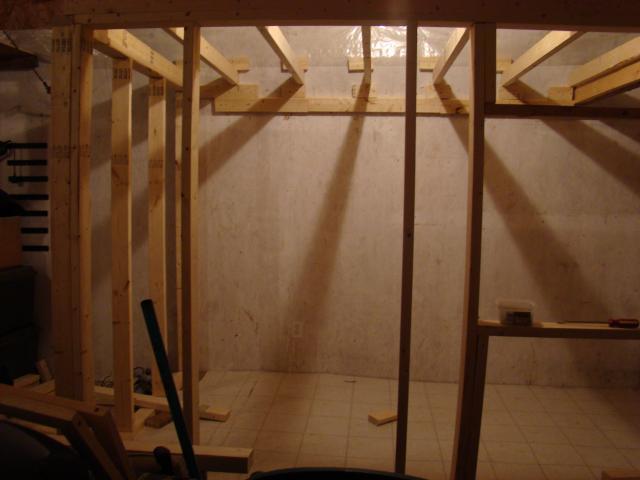
Walls going up. the light above the coop became the coop's main light
view of the door and inside window, notice all the fancy construction, haha
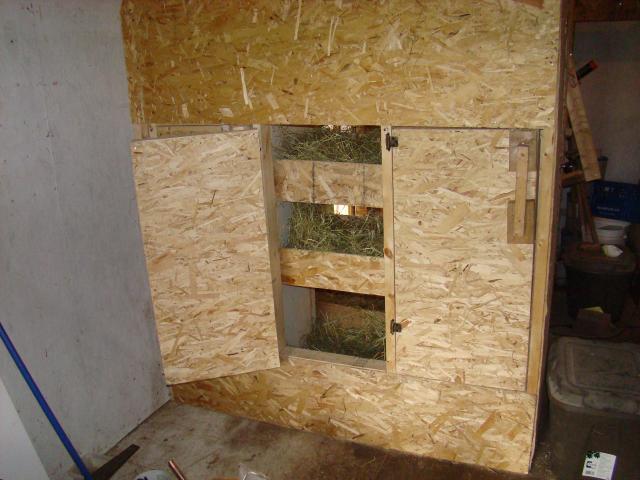
The egg doors in progress. on the exterior wall there will be an exit door for the chickens and a recycled window
the egg doors in action. this is neet but it needs to be straight or leveled. the last door against the wall hardly opens.
It's so hard to open the handle keeps coming off
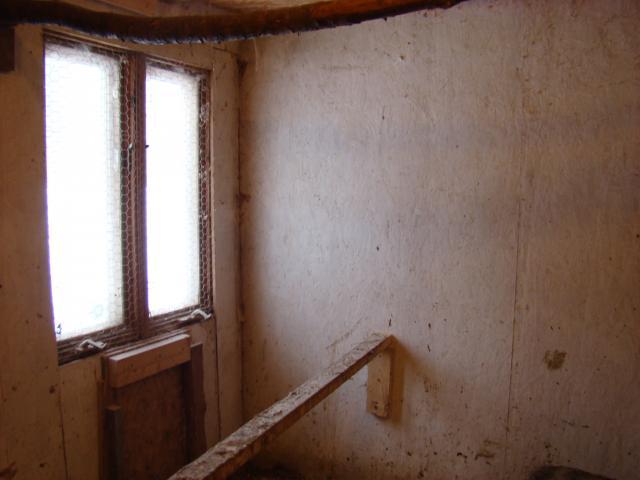
the other side of the egg doors. looking back this is overkill for the couple of hens that we had. Even when the coop was totally overcrowded we only ever found eggs in 3 boxes.
they did switch around alot but never used them all. Hind sight, measure the size of the coop, figure out how many hens it will hold comfortably, and make 1 box for every 4 hens
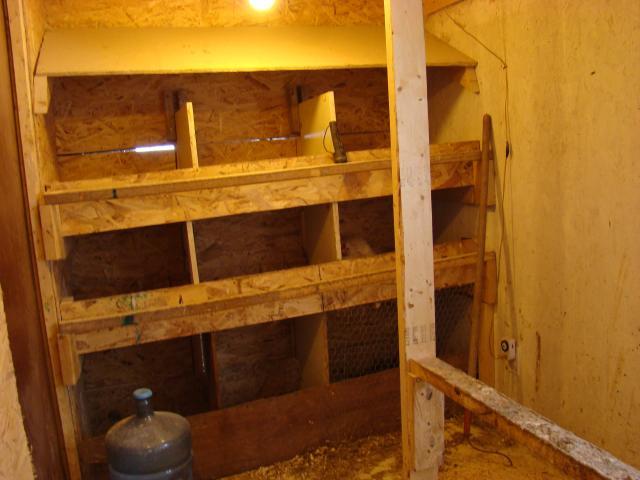
ooh you can see my light timer there too. very hand. And my very determined broody hen in the second level. She has been sitting there for 2 months straight. I think she will be a great mother as soon as I get those chicks.
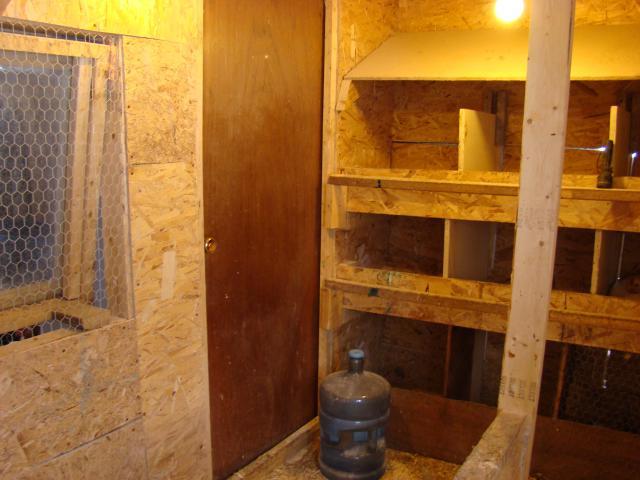
A view of the door. The water jug. during the winter we had to keep the water in the coop so it would not freeze.
We have yet to come up with a better watering plan. You don't see it but it's just a bucket of water on the floor
We don't have water going to the shed and the hose freezes in the winter
So although we were told not to go crazy on the insulation the water did not freeze as long as it was in the coop.
We need counseling in the ventilation department though
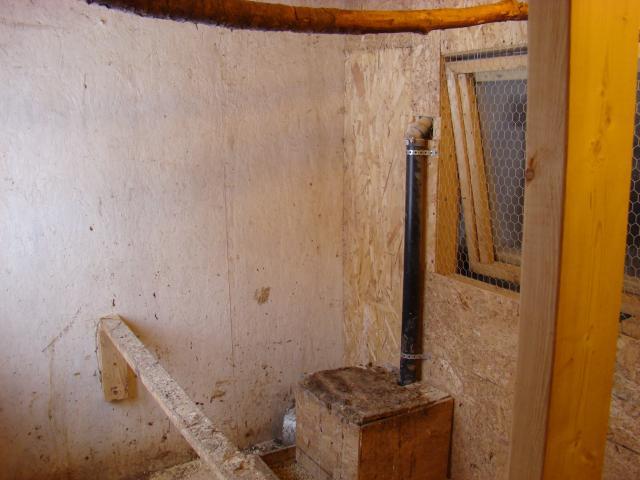
Our version of the frankin feeder. this didn't pass the winter months because we have ventilation or humidity issues
the food gets damp and clogs the pipping.
the top roost. I thought I was doing the hens a favor by adding an actual branch thinking "what would a hen do in the wild"
I don't think Ive ever heard of a wild hen, Duh, haha. what I shouldve done is get a 2x3 or 2x4 so they can keep their toes warm.
this would be the recycled window and the chicken door. the top roost and the second lower roost was added due to over crowding.
It's a terrible setup in the sense that
#1 you should not over crowd.
#2 there is no way to put in a poop board because they don't run in the same direction.
#3 we can't really move around in there. it makes it harder to catch a hen when needed and you run the risk of getting pooped on
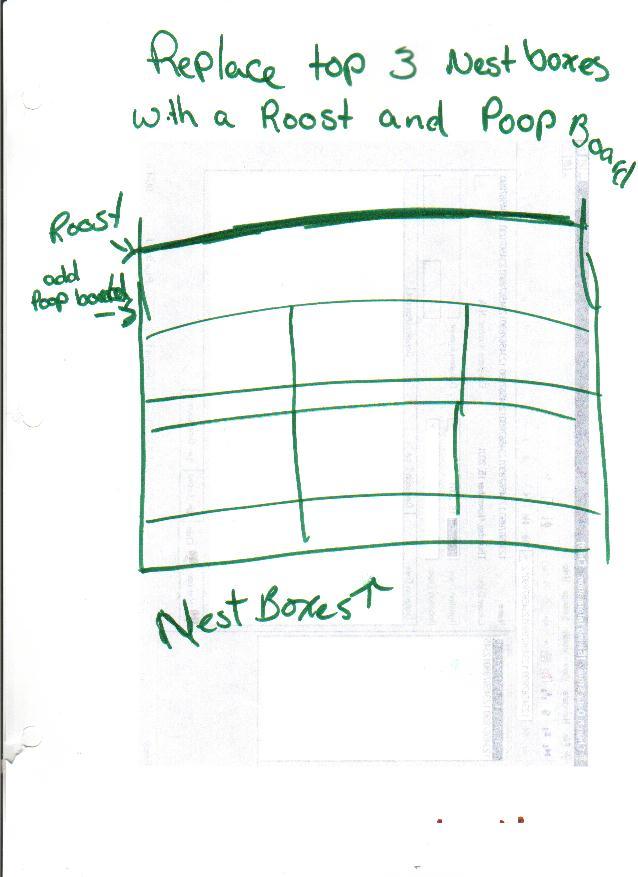
the next picture is how I plan to fix this
Sorry for the not so fancy drawing
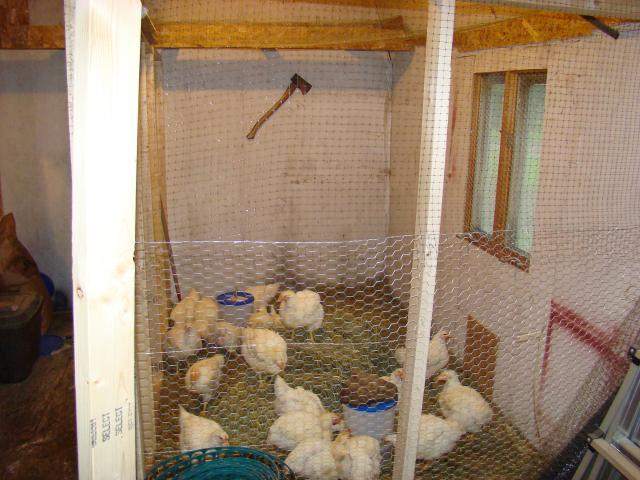
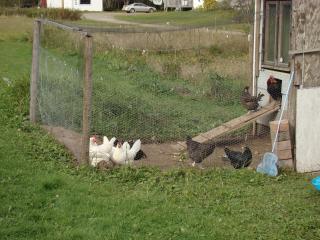
and this is the summer/meat coop. just a couple of 2x4's holding up some wire. The ax is really a reminder for us
that they are not pets and don't need names
we will close it in this summer and get some delawares to put in it
and we will put all the meat chickens in a tractor. this will be alot easier to keep clean
another angle of the summer coop. by the time we got the summer coop done the meats were all grown up
a look at the run
the egg doors in action. this is neet but it needs to be straight or leveled. the last door against the wall hardly opens.
It's so hard to open the handle keeps coming off
the other side of the egg doors. looking back this is overkill for the couple of hens that we had. Even when the coop was totally overcrowded we only ever found eggs in 3 boxes.
they did switch around alot but never used them all. Hind sight, measure the size of the coop, figure out how many hens it will hold comfortably, and make 1 box for every 4 hens
ooh you can see my light timer there too. very hand. And my very determined broody hen in the second level. She has been sitting there for 2 months straight. I think she will be a great mother as soon as I get those chicks.
A view of the door. The water jug. during the winter we had to keep the water in the coop so it would not freeze.
We have yet to come up with a better watering plan. You don't see it but it's just a bucket of water on the floor
We don't have water going to the shed and the hose freezes in the winter
So although we were told not to go crazy on the insulation the water did not freeze as long as it was in the coop.
We need counseling in the ventilation department though
Our version of the frankin feeder. this didn't pass the winter months because we have ventilation or humidity issues
the food gets damp and clogs the pipping.
the top roost. I thought I was doing the hens a favor by adding an actual branch thinking "what would a hen do in the wild"
I don't think Ive ever heard of a wild hen, Duh, haha. what I shouldve done is get a 2x3 or 2x4 so they can keep their toes warm.
this would be the recycled window and the chicken door. the top roost and the second lower roost was added due to over crowding.
It's a terrible setup in the sense that
#1 you should not over crowd.
#2 there is no way to put in a poop board because they don't run in the same direction.
#3 we can't really move around in there. it makes it harder to catch a hen when needed and you run the risk of getting pooped on
the next picture is how I plan to fix this
Sorry for the not so fancy drawing
and this is the summer/meat coop. just a couple of 2x4's holding up some wire. The ax is really a reminder for us
that they are not pets and don't need names
we will close it in this summer and get some delawares to put in it
and we will put all the meat chickens in a tractor. this will be alot easier to keep clean
another angle of the summer coop. by the time we got the summer coop done the meats were all grown up
a look at the run
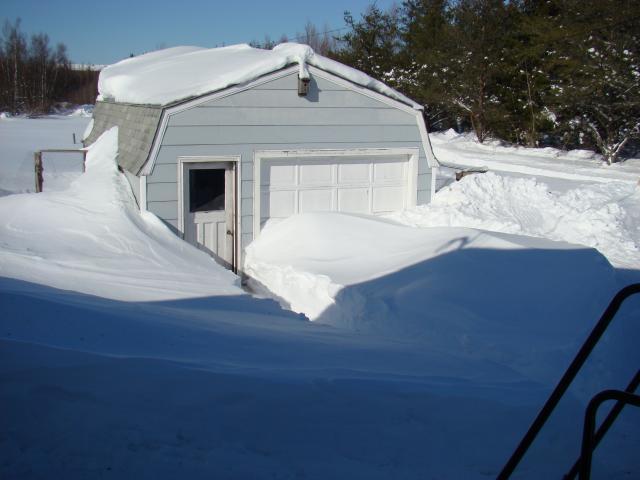
Winter in Canada. Picture me 5 feet tall, lugging a 5 gallon jug of water to the coop. Hubby does that for me now
")
When is a coop ever done?
-We still need to figure out an automatic watering solution.
-I need a bigger feeder for those 2 day trips we keep taking
-we are working on closing up the summer coop this season
-we are adding a small brooder/breeding extension for the broody hen, and for chick additions
Things I would change:
-we should have painted the coop inside out. it would make it last longer and if you use light colors would boost the lighting when its most needed in the winter months
-the feeder would not be fed by a pvc pipe but would be built through the wall with an opening to the shed so that I could fill it up from the outside the coop
and the feeder needs to have a slanted top to the birds can't sit/poop on it
-the window does not open wide enough for my liking. makes poor ventilation in the summer
-I need to change that roost around
Overall I am very satisfied with my coop. I just wish I had more of them haha
What this cost us for the 2 coops:
Windows-free found in garbage
doors-free found in garbage
nestboxes-free was my friends old kitchen cabinets
posts for run-40$ 4$/post we did 2 runs with it
chicken wire- ~60$ for a roll
Light netting to cover top part of run-30$ did 2 runs
lumber ~200$
nails were 100
insolation-leftover from our basement
timer-bought on sale 7$
light for timer- was a lamp thrown in garbage
tools ~300 and some for the mitre saw
heat lamp 30$