The idea of getting some chickens started to get tossed around last fall. We had just bought a house with 4 acres and thought chickens would be a lot of fun to have around. Not to mention having fresh eggs. When winter started my husband starting clearing some of our land for a garden. With in a few month we extended the project to include clearing some land for a chicken coop.

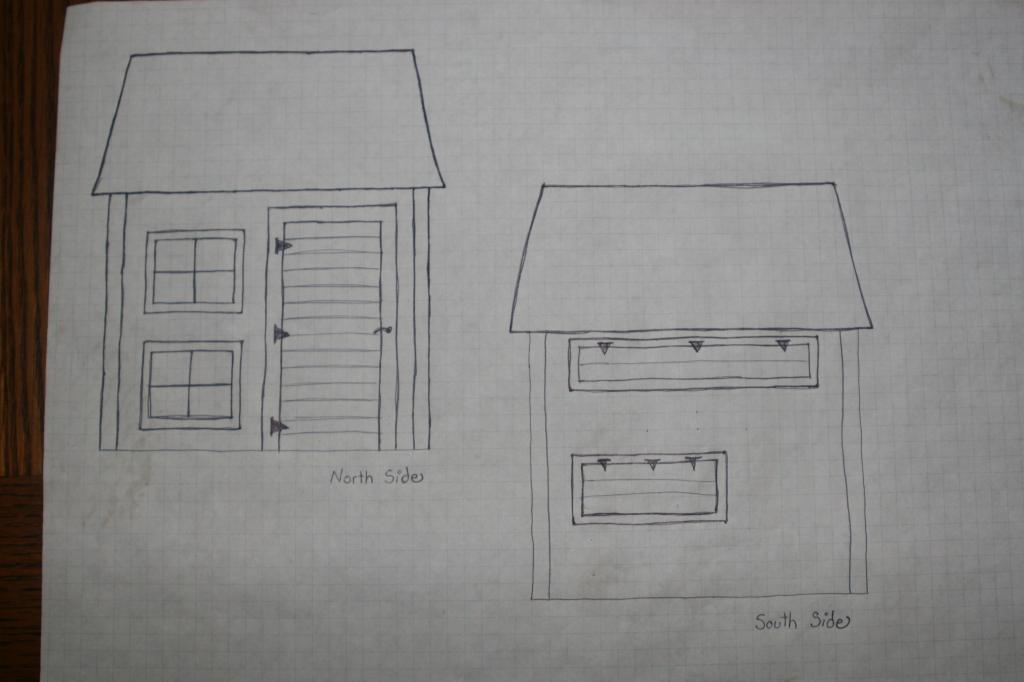
I spent some time on the BYC website looking at other coops and reading about things that worked and did not work for other people. Once the land was clear and all the wood was stacked my husband and I came up with these plans for what we wanted our coop to look like.
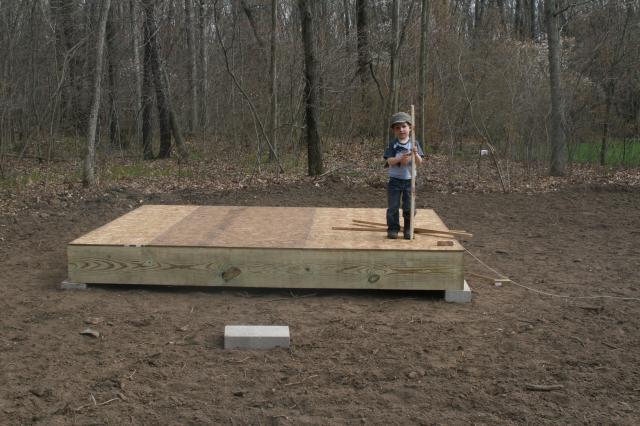
We decided to make a 8 x 10 coop. We thought that we would start off with 10 chickens, and a 8 x 10 would give us some room to get a few more. We figured 4 square feet per chicken. So our coop could hold 20 chickens.
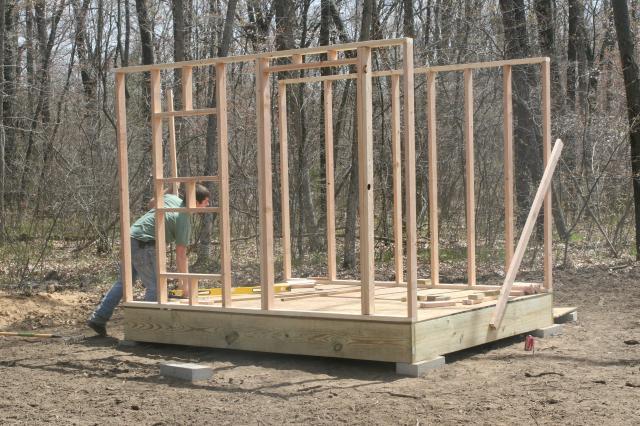
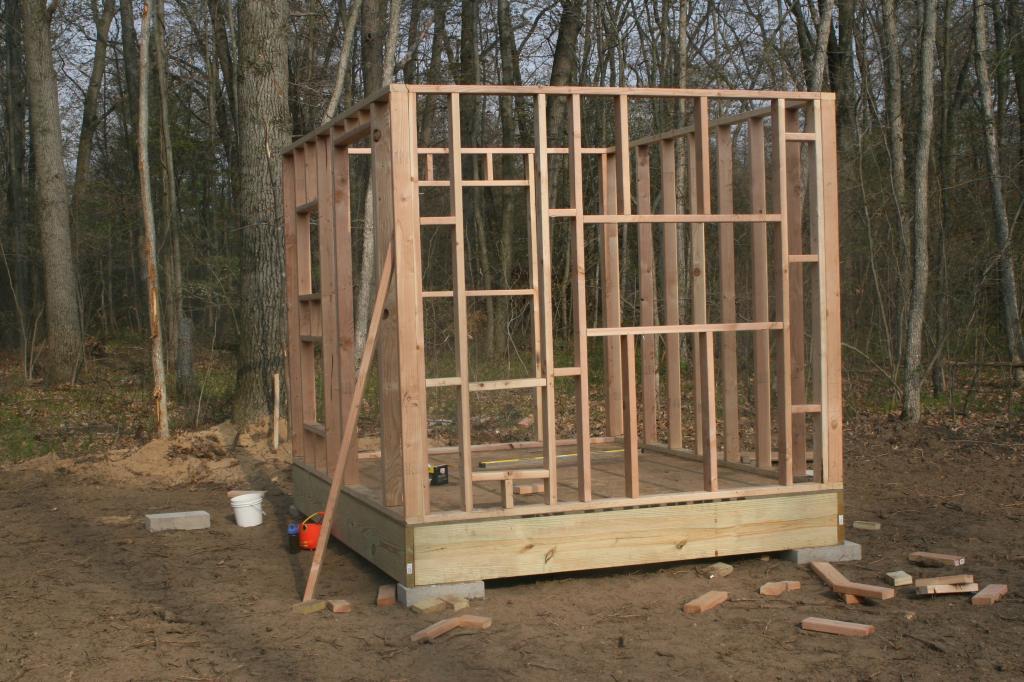
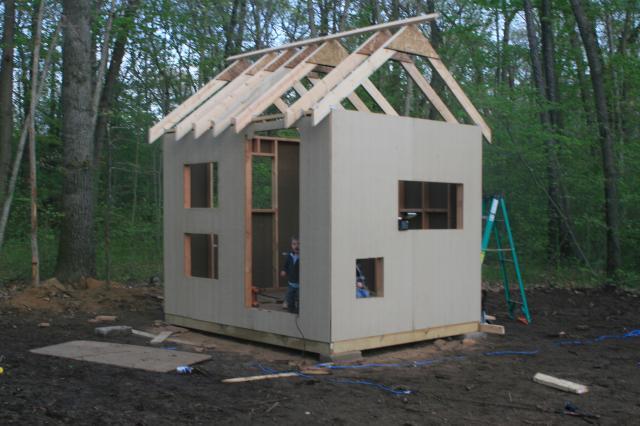
We used 2 x 12 to frame out the floor. We wanted to make sure it is off the ground to keep it out of the dirt and water. We put down 9/32 OSB for the floor. When is came to framing the wall they are 7'6" tale
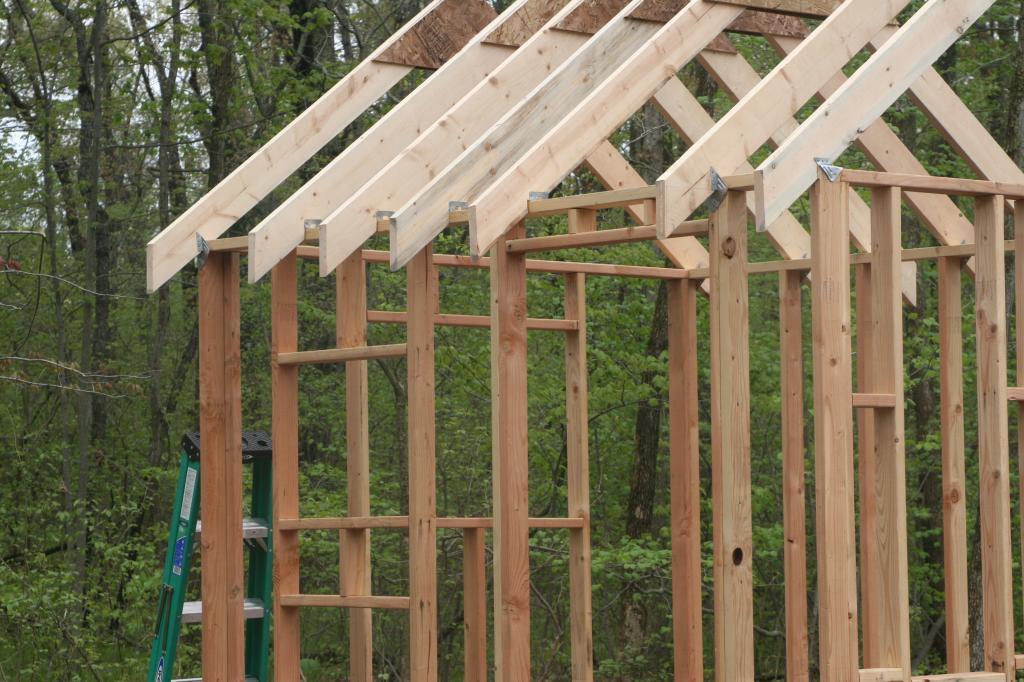
My husband made his own trusses. The reason being is we did not want the trusses to go across the ceiling and have the birds use that as a roost. Living in michigan we do get a lot of snow so we want it to be strong enough to support the snow. We uses 2 by 6 to make the trusses. We cut them at angle we thought would give us the pitch that looked good (37 degrees). Then we used left over OSB to brace the top to give it support. To attach it to the walls we cut a notch in the 2 by 6 and attached it with hurricane ties.
Once all the framing was done my husband put up the walls. We used exterior panel board already primed. My husband cut out the windows,door, and vents with his router. It make a little mess but was really easy.
Next came the roof. We put in a ridge vent to help take some of the heat of the coop. I was concerned about having enough ventilation. I did not want to have to go out and cut more ventilation after the coop was all finished. After the roof was done, we put up cedar shingles on 2 sides in the peak. I painted them a copper orange color.
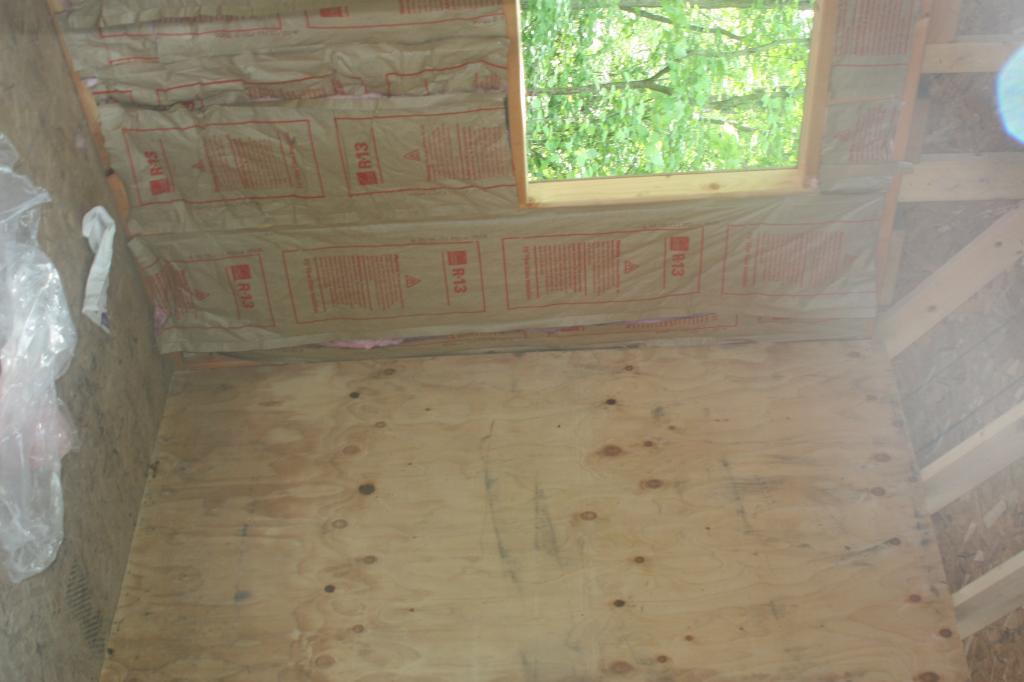
Sorry the first picture is sideways. It is the only picture i had of us insulating the walls and ceilings. We then put up plywood to cover the insulation. We got the plywood from a friend for a great price.
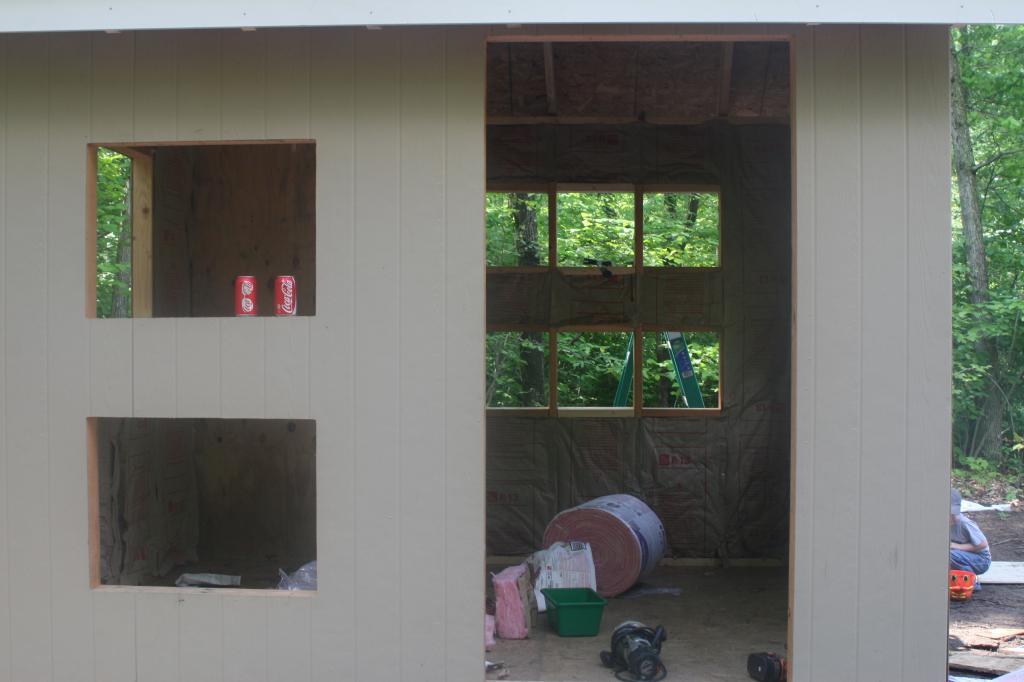
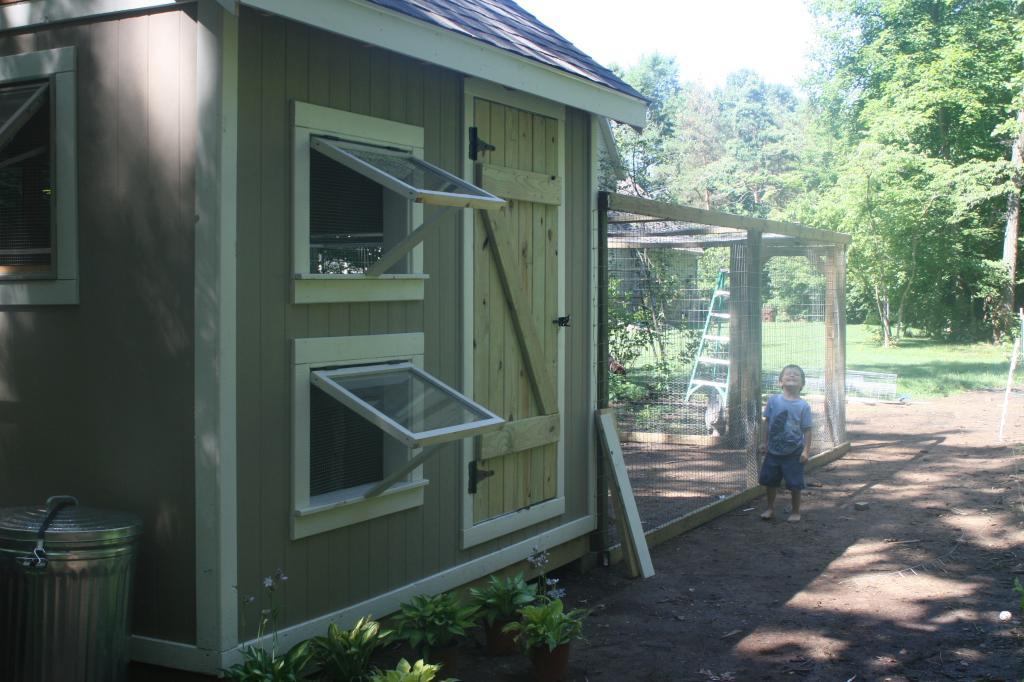
The door measures 6 feet by 34 inches. My husband made the windows our of left over wood and Plexiglass. Both windows are on hinges so we can open and close them. The also have hardware cloth across the openings to keep the chickens in and the predators out. The windows measure 27 inches by 19 inches.
For the back we got a used window from my mom and dad for free. Then we put a metal garbage can up on blocks to hold the feed. Its really nice having it so close.
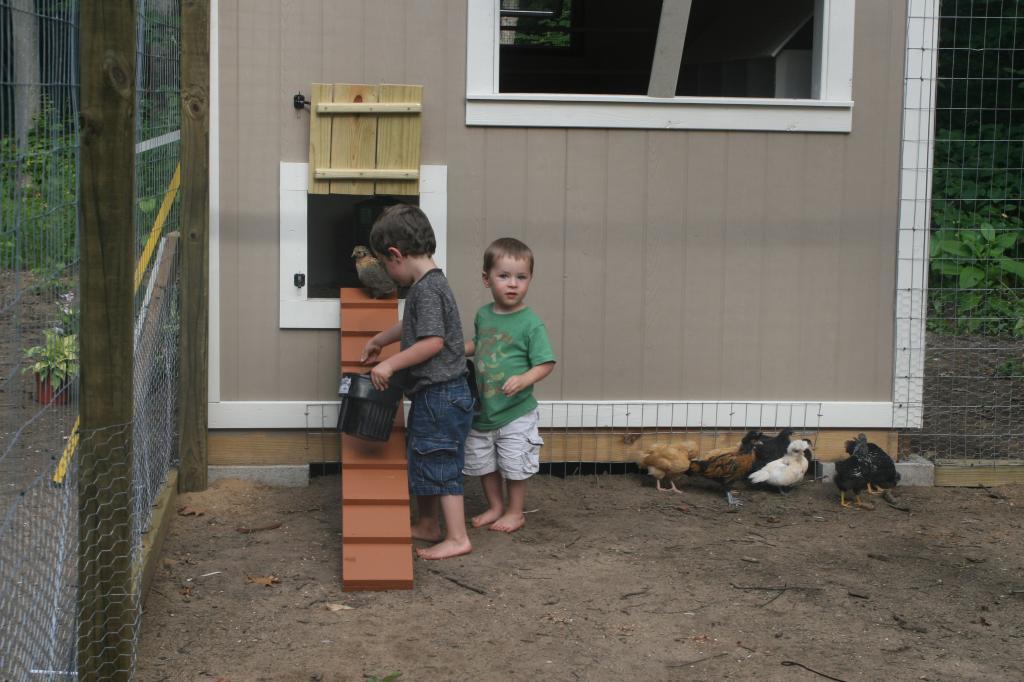
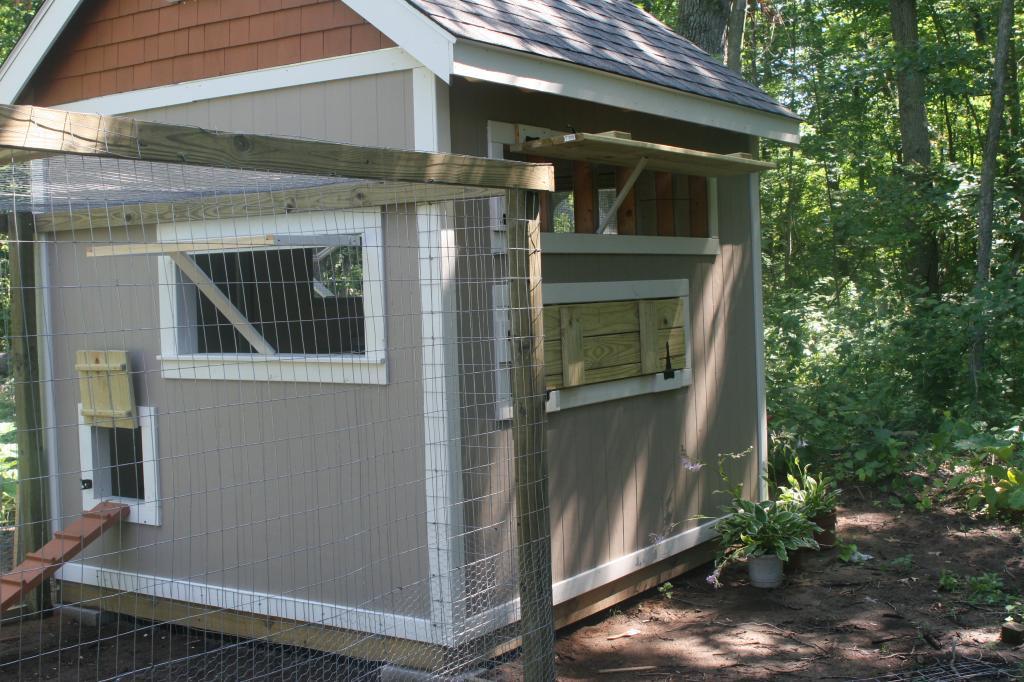
The chicken door measures 14 inches by 14 inches. We used a clip up top to hold the chicken door open and another to hold to closed at night. The Ramp is 60 inches long with pieces every 6 inches to help the chickens get in and out. Right now they seem to be flying and not really using the ramp. We will have to see if they use it when they get older. The window above the chicken door is 43 inches by 19 inches. It was built just like the other windows.
The top opening is a vent with a door so we can regulate the air flow. The vent measures 8 foor by 14 inches. The bottom opening is our 4 nest boxes. They measure 12 by 14 by 14. We put pieces of wood on the bottom the keep the pine shaving from falling out when we go to get eggs. There is a door to open it get the eggs from outside the coop.
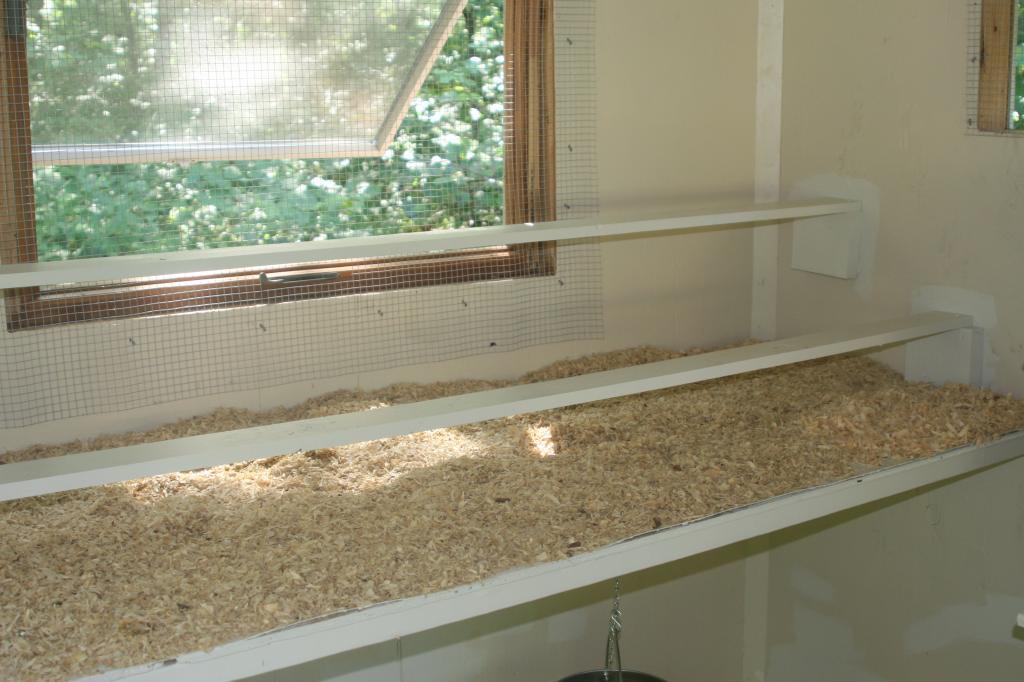
We put in two roost. There was not rhyme or reason we put it as high as we did. We put it there because it fit with the windows. One thing I really wanted to have was the "poop shelve". I read from a lot of members that it is a great and make clean up a breeze. We attached the food and water under the shelve. Putting it on chain helps keep pine shavings out and let us move the containers up as they get bigger.
We are so happy with our coop. I think part of that is because i was apply to research and look at other peoples coop here on BYC.
The only thing i would change is the size. I would love to have it bigger so I could have more chickens! To make that happen I would have to win the lottery.
I spent some time on the BYC website looking at other coops and reading about things that worked and did not work for other people. Once the land was clear and all the wood was stacked my husband and I came up with these plans for what we wanted our coop to look like.


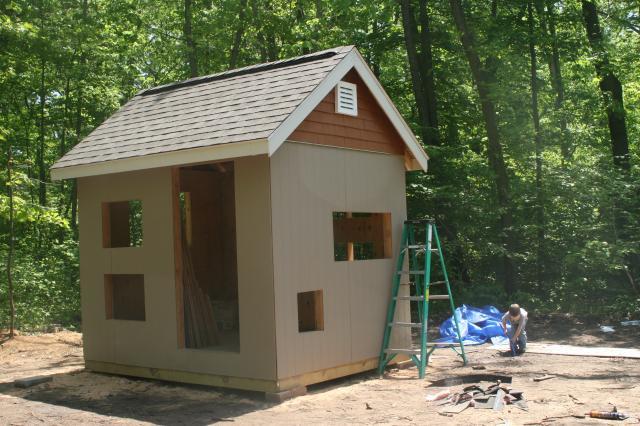
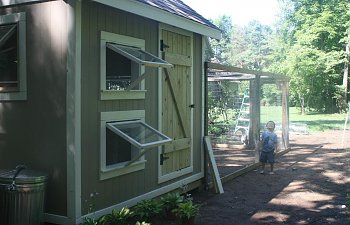
Here are picture of the finished coop..........
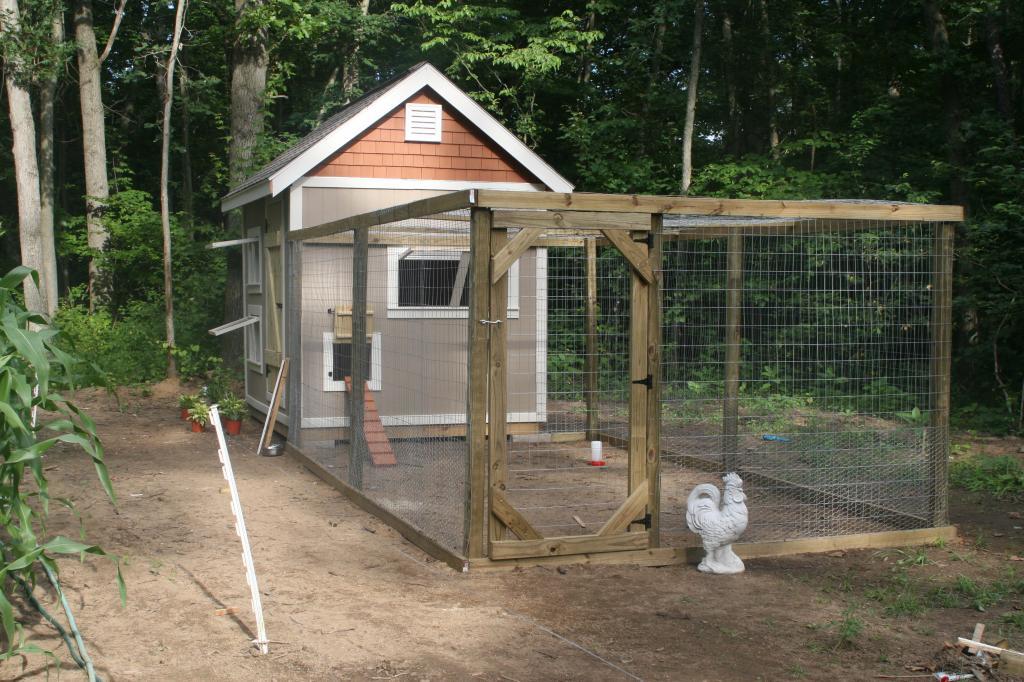
We made the outdoor run 20 by 10. If are coop was full at 20 chickens we wanted to them to have 10 square foot per chicken of outdoor space. We uses 2x4 hardware cloth on the sides and the top. Then we put chicken wire on the bottom and attached it to welded wire. This is to keep my little chickens in and to keep predators hands out. We are planning on putting a 3 foot section of the wire around the run on the floor to keep predators from digging in. Once we have the wire down we plan on putting sand in half the coop and wood chips in the other.

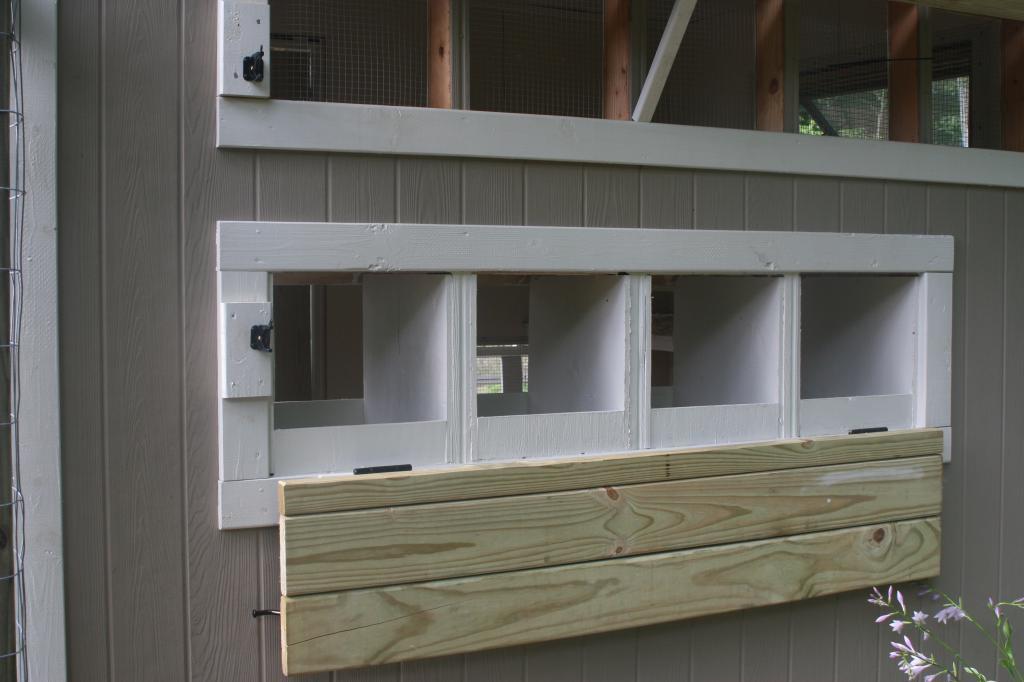
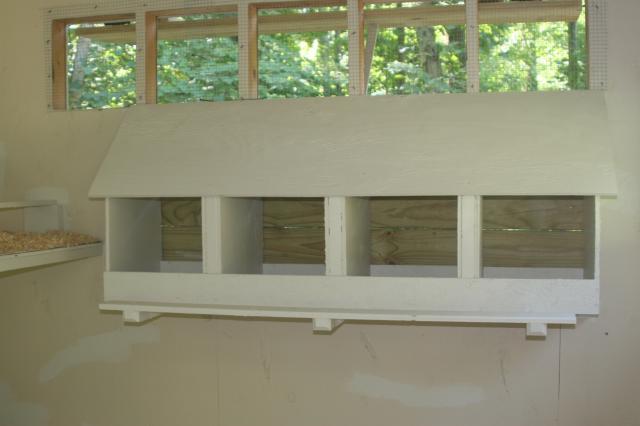
The top opening is a vent with a door so we can regulate the air flow. The vent measures 8 foor by 14 inches. The bottom opening is our 4 nest boxes. They measure 12 by 14 by 14. We put pieces of wood on the bottom the keep the pine shaving from falling out when we go to get eggs. There is a door to open it get the eggs from outside the coop.

We are so happy with our coop. I think part of that is because i was apply to research and look at other peoples coop here on BYC.
The only thing i would change is the size. I would love to have it bigger so I could have more chickens! To make that happen I would have to win the lottery.