Materials: 2 x 4s for framing. 4x4 corner posts/legs. 4x8 plywood sheets. 1x2s for trim and supports. Plastic roof panels. Plexiglas for windows. Glass front cabinet door. Hinges, hasps, screws, nails, 4 wheels.
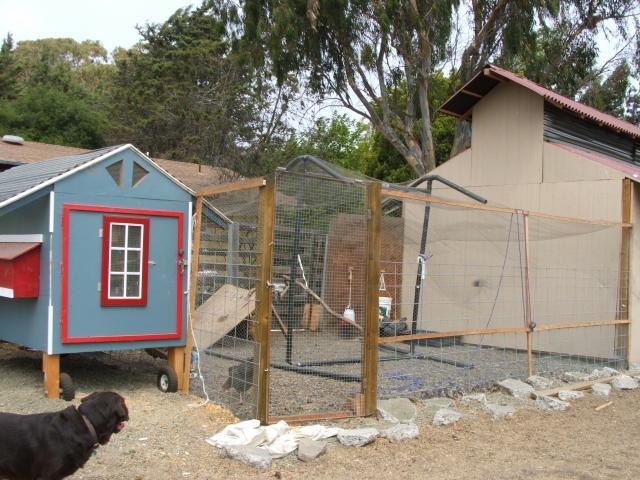
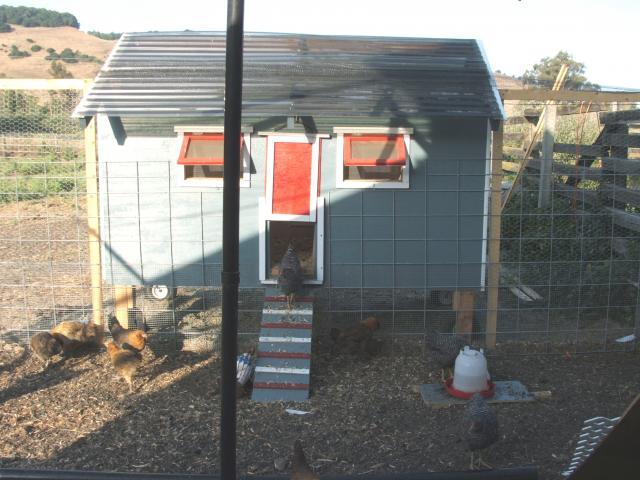
And here it is!
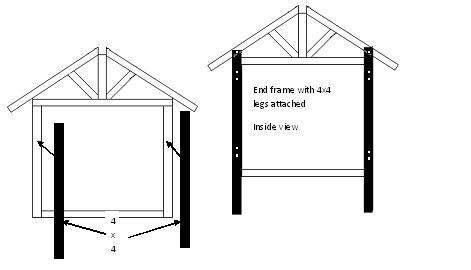
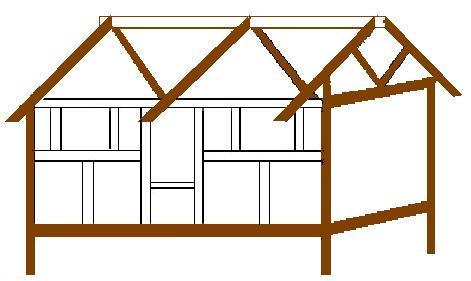
End framing
I started with the end framing, designed to be a 4x4 box with a triangular roof area above. The angled pieces were the most difficult. As shown, the 4 inch edge of the 2x4 is to the front. After the end framing was put together, I attached the 6 foot 4x4 posts to the frame with large bolts for strength. Drilling the holes for the bolts took some time and muscle, but was necessary as they will be supporting the whole coop. I also screwed the rafters to the 4x4s for extra strength, as they were just sitting on the top plate. The 4x4s are to the inside of the coop. Each end section is now quite heavy, but was easier to move at this point than after attaching the sides.
[
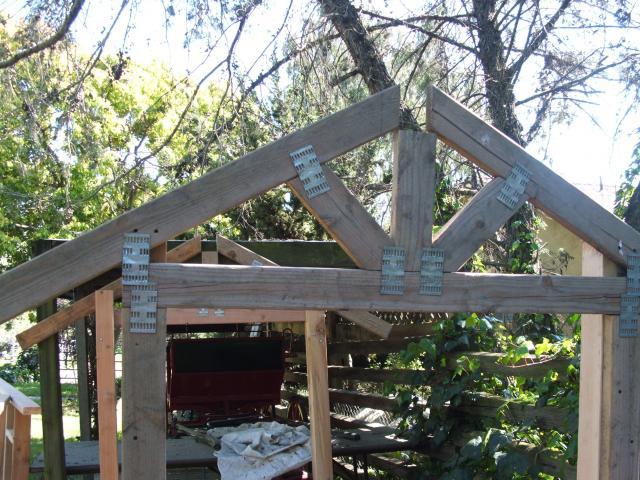

close up of bolts
Side framing
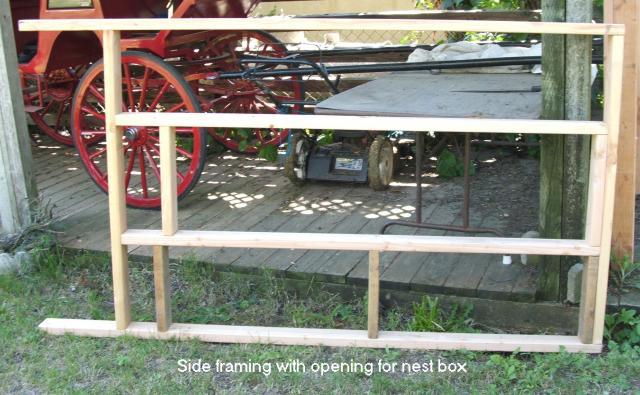
Next was side framing, taking into account chicken door and two windows on one side, and the nest box on the other side. I looked for surplus windows, but small windows are very hard to find. I ended up making my own; using the smallest precut Plexiglas panel I could find at Home Depot, 11x16. I framed the opening slightly larger to account for the window frame.
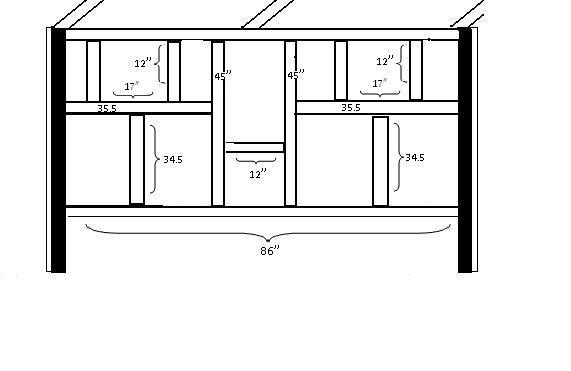
On the nest box side, I framed the opening so that I could build the next box separately and then slide it in. (I re-measured before building the nest box, as it needed to be a very tight fit to work.)
I then attached both side frames to the end frames with screws – starting to take shape! Then added the roof ridge – 2 2x4s side by side. Then, a roof rafter in the middle on each side for support, matching the angle of the side framing.
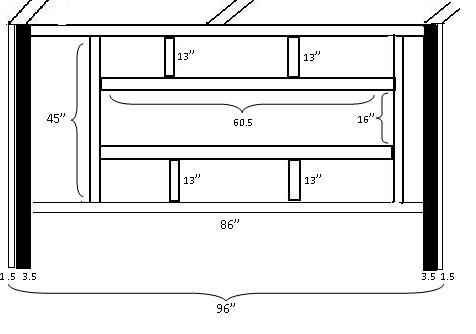
? 8 feet ? The long sides were designed to result in a size of 8 feet long, 4 feet high. When constructing this framing, I subtracted for the width of the end frame and 4x4 legs, which are to the inside. This way, I could use full 4x8 sheets for the sides. The actual measurement of the 4x4 is 3 ½ , and the smaller side of the 2x4 is 1 ½ - so with that in mind, I had to make the top and bottom plates 86 inches long - to make the final measurement 96, or the size of the plywood sheet.
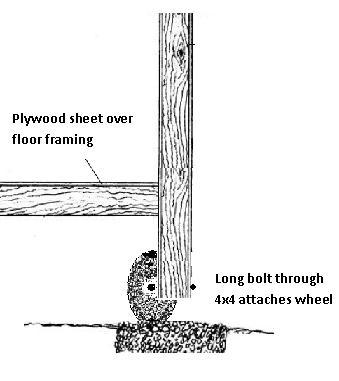
After the framing was together, I installed wheels. Other than moving the coop to its final location, I have not used these, and am not sure I would do it again. I got the wheels at tractor supply – they were a lot less there than at home depot. They were installed by drilling through the bottom of the 4x4s.
Siding, ends
I used outdoor grade plywood due to cost, but also considered using siding or bead board.
I cut one 4x8 sheet of plywood in half for the ends, and then cut two triangular shaped pieces for the space above that. I attached these temporarily, and traced around the framing for cuts for the vents.
? 4 feet ? ? 4 feet ? The 2 4x8 sheets were also attached temporarily and the window and pop door openings traced around on one side, the nest box opening traced around on the other. Then these openings were cut using a jig saw.

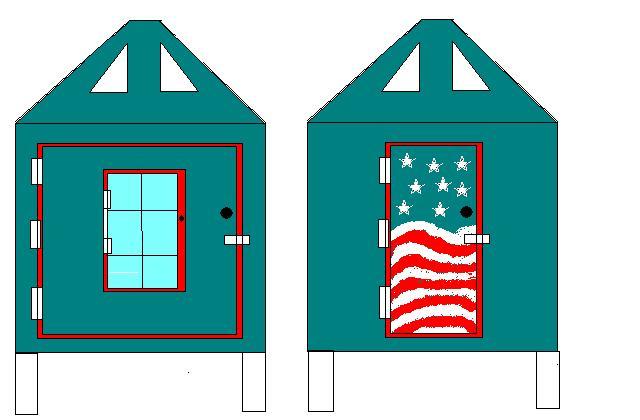
Paint I painted all the plywood before screwing it to the framing. I used “mistake” paint from home depot and free surplus from the local recycling center. I adjusted it to a more pleasing color using smaller cans of mistake paint to lighten or darken as needed. I also prepainted all the red and white trim using spray cans. Prepainting this way saved time - I touched up any damage during installation later. I was even able to get some free oil based enamel paint – it was pink, but since I used it to paint the piece of plywood for the coop floor and the inside of the nest box, the color did not matter as much as the durability. The red white and blue flag door was painted with spray cans and star stencils – not as difficult as it looks, even though I can barely draw a straight line.
Doors and windows
After painting the plywood, I cut out the door panels from each 4ft x 4ft end piece. I used a very large door on one side for easy clean out. The plywood cut out doors were reinforced by 1x2s on the outside, and 2x4s on the inside. The large door was installed with 3 hinges and a latch. A window made of a glass cabinet door was installed on top of this door later, and can be opened for additional ventilation. Window frames for the small front windows were made with 1x2s cut ½ inch bigger all around than the 11x16 Plexiglas. Plexi was then glued to the frames with clear sealant, and thin plastic molding screwed over the plexi to the frame. Frames then were hinged on the top over the openings, and braces that were designed to hold the lids of toy chests up were added so that the windows can be propped open easily.
The opposite end was constructed with a smaller door in the same manner. Feeders and waterers can be changed from this end. Both pieces of siding were first screwed to the framing, and then the doors were installed.
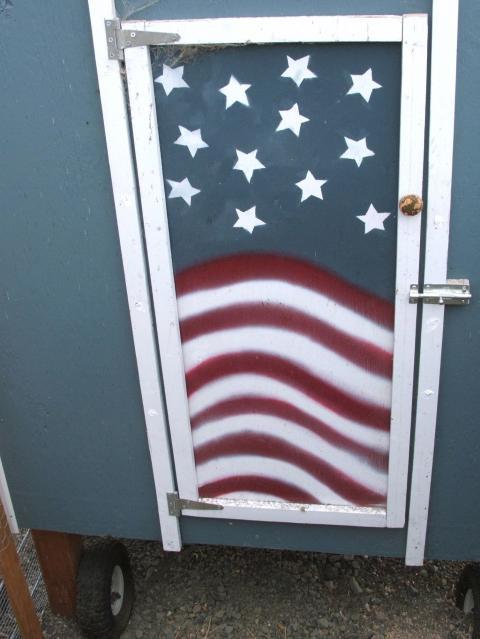
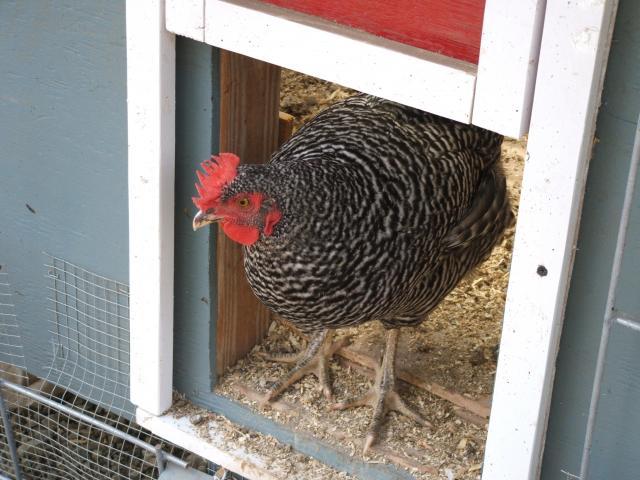
The siding was then was screwed to the front, or pop door side after the openings were cut. The pop door was made from plywood 1 ½ in. wider and 4 inches taller than the opening. A 1x2 was screwed to the top as a stop, and 1x2s and plywood strips were used to make slides for the door to raise and lower.
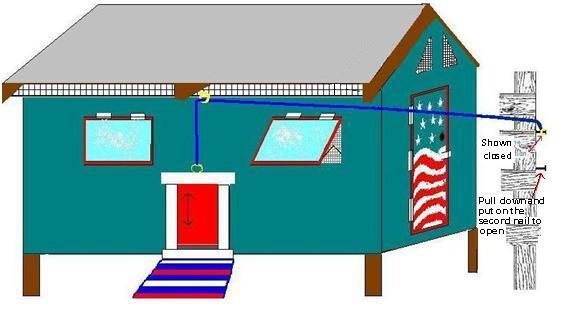
As this coop is just behind my back fence, I wanted to open and close it from there. I ran a plastic covered wire dog tie out from the door over my fence, where it can be slipped over one nail in the open position and another in the closed position.
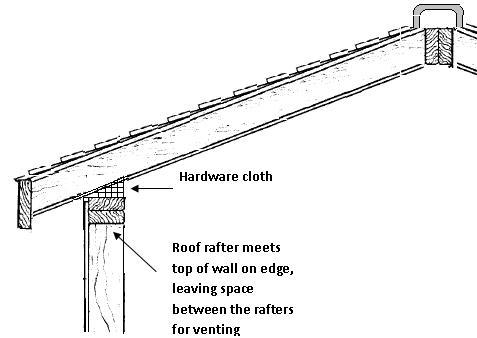
Because the roof rafters hit the top of the side framing, and the framing is 4 feet high, the plywood siding hits just below the rafters, leaving a 3 ¾ in. space between the top of the wall and the roof. This was enclosed with hardware cloth for predator safety and ventilation.
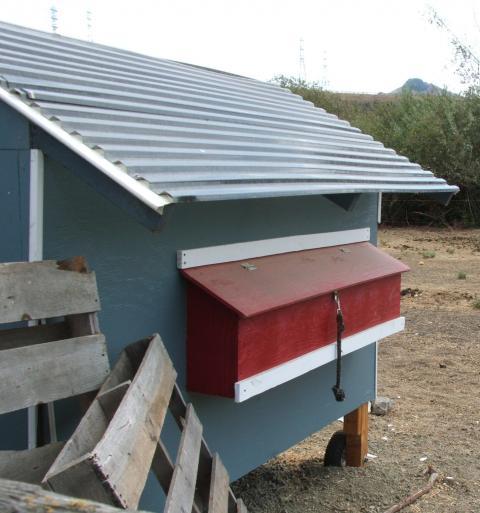
Plywood was then screwed to the back, or nest box side of the coop, the opening for the box having been cut earlier.
Nest box
The nest box was build separately, using one sheet of plywood and some 1x2s: Here is the cutting diagram:
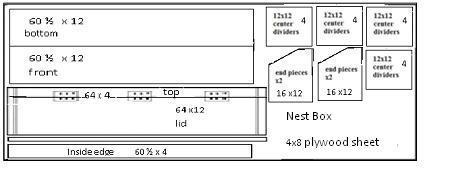
The box was put together, with 1x2s at the bottom edges and corners as support and a surface to screw into. The opening was a very tight fit, so had to be rechecked repeatedly as it was built.
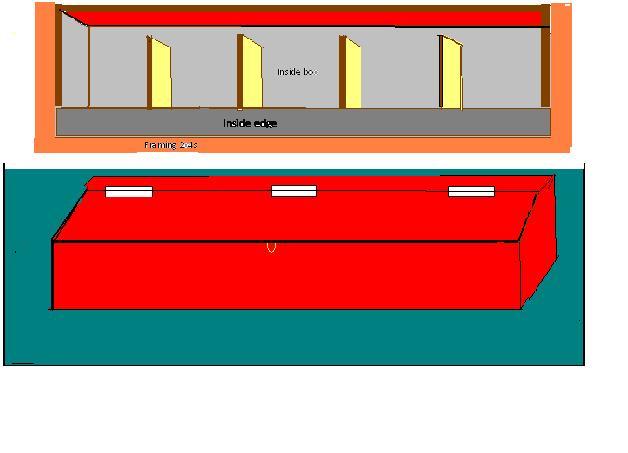
Once the box was put together except for the top and lid, it was slid into place, (with the help of a carefully applied rubber mallet). It was then screwed to the framing, from the inside of the box through the 2x4s in several places, top, bottom, and sides. A 1x2 was applied to the outside of the coop just under the box for extra support. The top was then applied, and the lid hinged to the top.
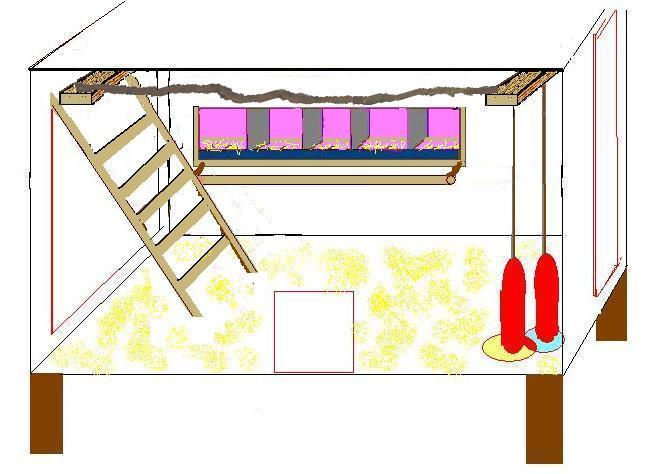
Interior:
At this point, there was no floor installed, making it easier to work from the inside. I stapled hardware cloth securely over the windows, in the triangular openings at the end, and under the eaves.
I also worked on the hinged windows from this position. I then added additional cross pieces as floor joists. I started to install hardware cloth as a floor for summer, but thought better of it and installed the plywood floor painted with enamel paint instead.
A 2x4 roost was installed a few inches back from each short side, and a ladder/roost as well. A 2 inch thick branch was also added as an additional roost.
Roof and trim
After the inside work was done, the plastic roof panels were screwed to the rafters from above with screws that have rubber washers attached to them for this purpose. As the panels are wavy, not flat, they also provide some additional ventilation. I used a gray tinted panel that allows some light in. A piece of plastic gutter was turned upside down and installed over the edges of the panels at the roof ridge to prevent leaks.
Corner trim was applied to cover the edges of the plywood siding, I used a plastic trim that has been breaking a lot – wood might be better.
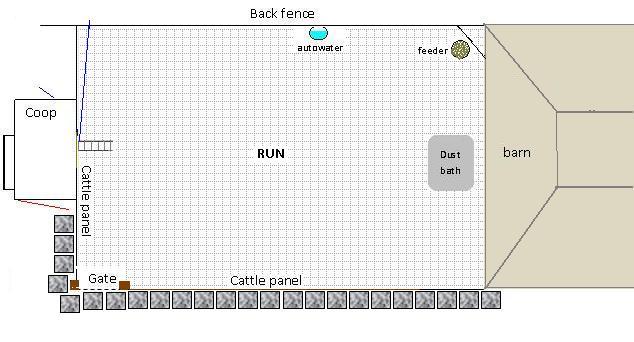
The run
The size of the run was determined by the smaller side of a 12x24 barn that makes up the end, and the size of a 16 foot cattle panel that makes up one of the long sides. The other long side is the fence between my backyard and pasture, and the other short side attaches to the coop itself. All sides, except for the solid barn wall, also have a layer of hardware cloth 3 feet high, then chicken wire another 4 feet stapled to by 1x2 framing. the framing extends to the ground and is attached to the cattle panel.
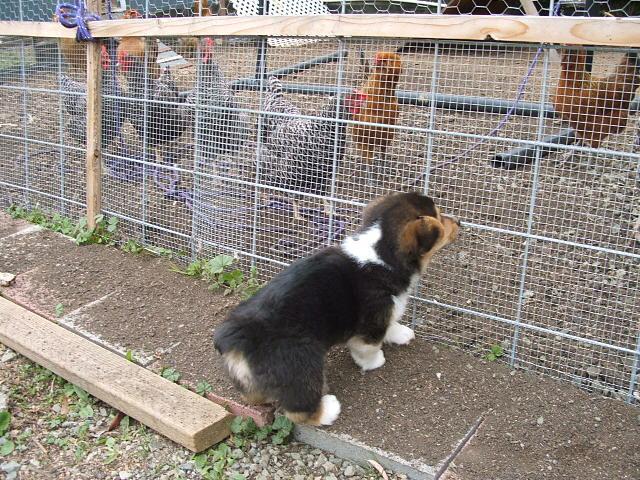
Puppy Proof Run!
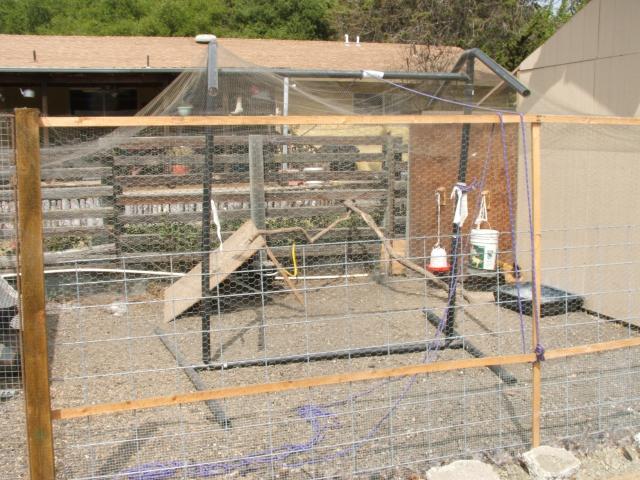
Cattle panel, hardware cloth, and chicken wire are attached to each other with wire twists. Another layer of chicken wire is burried under the edges of the run, extending 2 1/2 feet out and 6 inches inside the run. 1'x1' cement pavers were later placed around the outside edges for more preditor security. Lastly, a freestanding support made of pvc was put in the middle of the run to hold up a layer of bird netting, which was draped over the whole run and stapled to the framing.
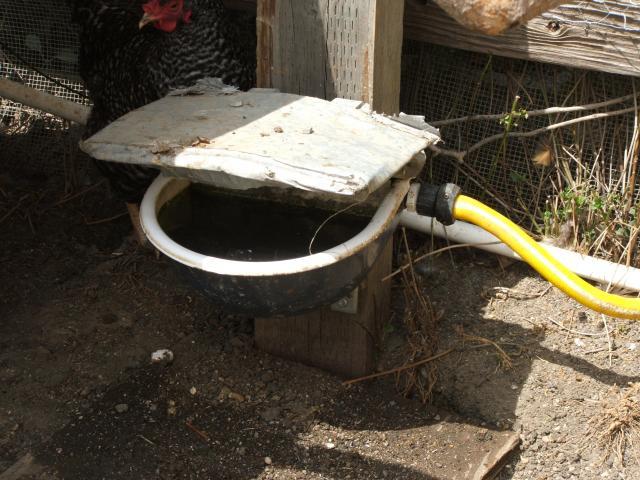
Here is a waterer I copied from someone here on BYC, using an auto horse waterer with a metal cover:
/
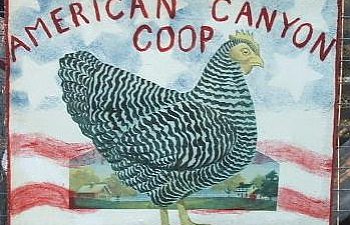
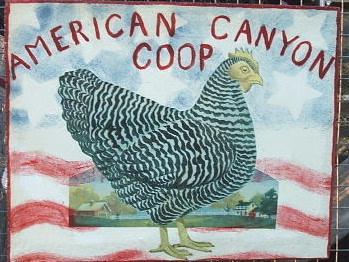
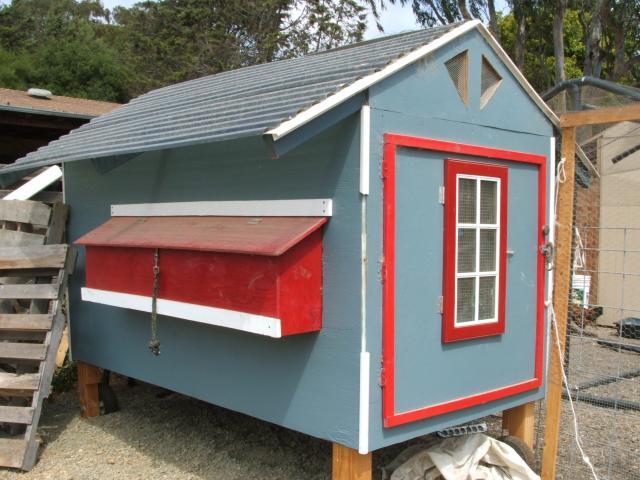
Best parts: The big clean out door - makes it easy to clean. The auto waterer above. The external nest box - easy to get eggs, more room inside, and easier to clean. The size of the run - they only sleep and lay in the coop, so the big run gives them a lot of space. They have stayed healthy and happy there. And, of course, my manual remote control pop door. Low tech, but easy to get to morning and night. I also like my sign -( see above) the chicken was from a feed bag, and was decoupaged on to a piece of plywood. What I would do differently - I would consider using bead board siding rather than exterior plywood. I would use stronger corner moulding, as mine keeps breaking off when the horses use it as a scratching post. I would use heavier wood for the run - the 1x2s that are holding up the chicken wire are sagging a little. I might forget about the wheels - the jury is still out on this one - it did make it easier to put in place, and may help prevent the legs from rotting. However, I have not moved it and likely won't in the future. And finally, I might cover at least half the run - it has been a wet winter and it's pretty soggy and stinky in there.