Birdbrain's Better Bator
Okay, I realize that is a bit presumptuous, but it rhymed, so I went with it. After all, having a homemade bator is "better" than having none at all.
About a year ago we ordered some beef from a grass-fed beef outfit in Amarillo, TX. When the order came, we were happy with the meat, but I was THRILLED about the big thick Styrofoam cooler that it came in. I immediately thought of building an incubator and squirreled it away for the future when I could persuade my DH to let me make and use an incubator. The kids knew that the big white cooler in the box was off limits for their inventions and waited more or less (okay less) patiently for the persuasion campaign to take effect. Late last year my DH finally caved: "Yes, dear, you can go ahead and make an incubator. By the way, I have some ideas on how to put it together." Being translated means "you can make it but it will be done my way". I could live with that. Besides he usually has some really terrific ideas.
We immediately began to collect the items necessary to make this wonderful contraption. DH's main concern was safety and as such he wanted all the wiring in electrical boxes or conduit. AAAARGH. I could just see the outside of this looking like something from Star Trek's Borg. However, it turned out great and even looks pretty good to boot. So, here is how we did it....
Supplies Used:
- One large Styrofoam cooler
- One 115 volt computer fan
- 4-5 inch toggle bolts to attach the fan and set it out from the wall of the bator)
- Scrap heavy plastic from a disposible container (used as sort of washers so the bolts for the fan and the thermostat didn't pull through the Styrofoam)
- One wafer thermostat (used a 4 inch machine screw instead of the threaded key that came with it due to the thickness of the Styrofoam walls)
- One porcelin lighbulb fixture with shallow metal (round) electrical box
- A plastic screw on connector to connect the light junction box to the pvc conduit (don't know what it is called)
- 10-15 feet of white half inch PVC (schedule 40) pipe
- Assorted half inch PVC elbows, 4 way connectors, and T connectors for the turner and conduit.
- A couple of plastic junction boxes
- About 2 or 3 yards of black and red 12 gauge wire (to connect the components to each other)
- About 12 inches or so of 12 gauge extension cord wire (goes from the male plug outside to the junction box inside near the thermostat)
- Male plug for the 12 gauge extension cord wire
- A short piece of wire shelving for the bottom (to make a level bottom--the conduit ran accross the bottom underneath)
- Small 1/2 cup sized cup and a larger TV dinner tray (used underneath the wire bottom for humidity)
- Foil lasagna pan lined with non-skid shelf liner (for a hatching tray)
- Two 18 count Styrofoam egg cartons (for the turner)
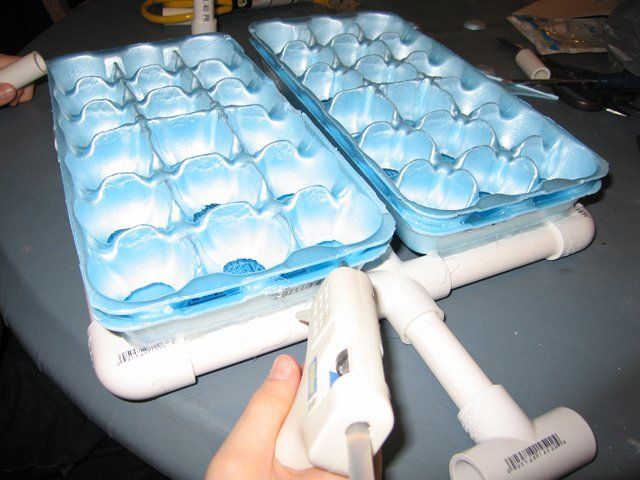
- Hot glue (for attaching the turning trays to the turner)
- Two pieces of plexiglass (donated by the local glass shop)
- Duct tape (to keep the plexiglass in place and use when my kids wouldn't stop telling me how to do this)
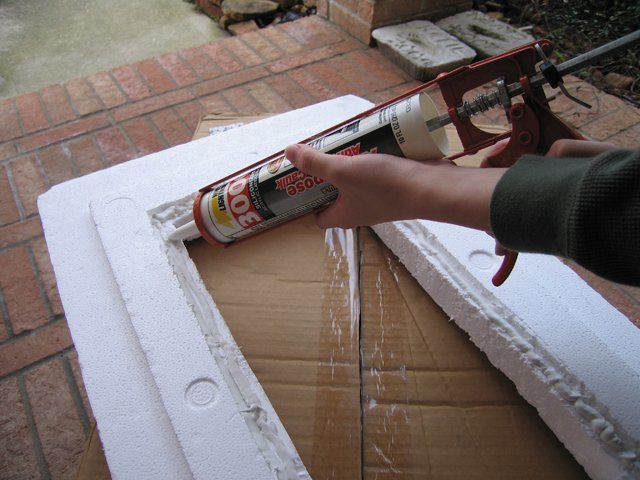
- Caulk (didn't stick the best to Styrofoam and I would probably omit this step next time)
- Small funnel (an old medicine bottle with an appropriate sized hole drilled in the bottom would work as well).
- Clear flexible plastic tubing (buy in hardware stores by the foot--don't get the smallest diameter available)
- Foil
- Peanut butterjar filled with water (for a heat sink)
- Blood, sweat, and tears (not really) and probably something else I will remember the second I get this page set up.
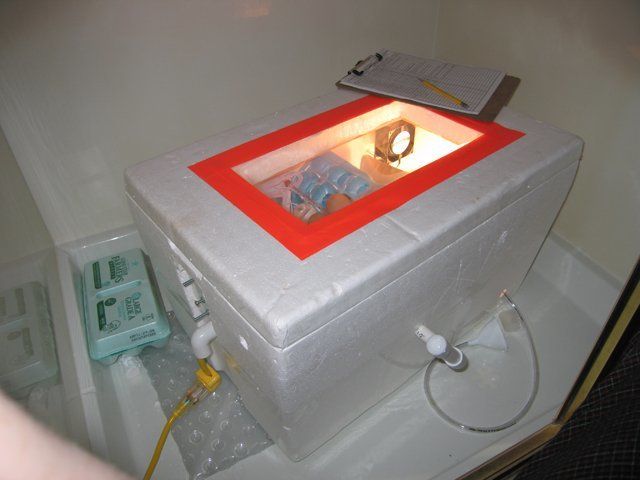
We started with that meat cooler. We cut a whole in the top for a double window made out of plexiglass and a groove on each side of the lid for the plexiglass to sit down into. We then used caulk and duct tape to seal it up. As I said before, I don't think we will use the caulk again as I don't think it really added anything.
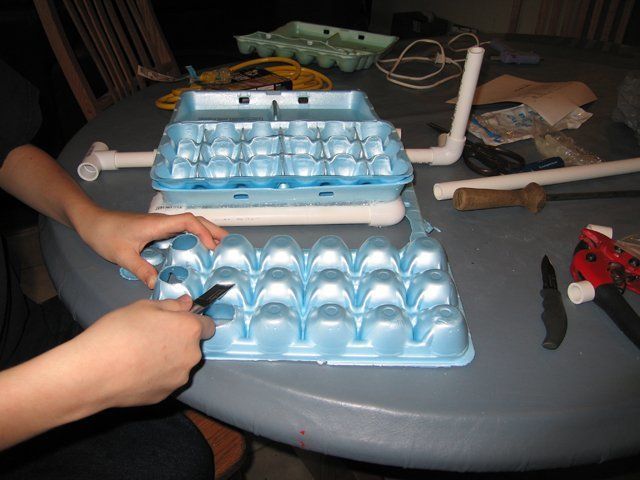
Then we set about constructing a turner. We used PVC pipe and fittings to make a frame that would support a couple of egg cartons.
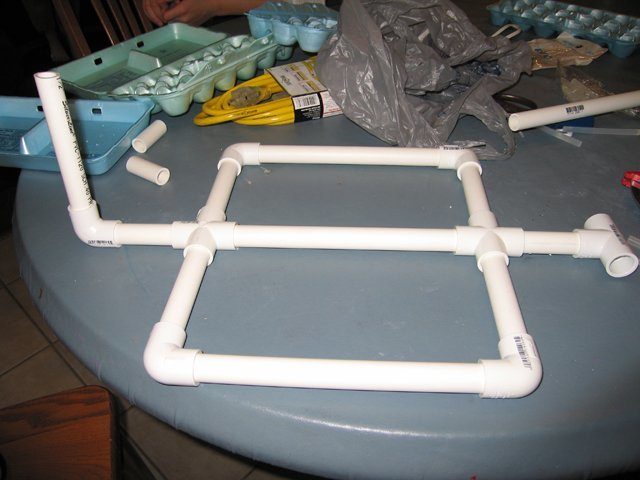
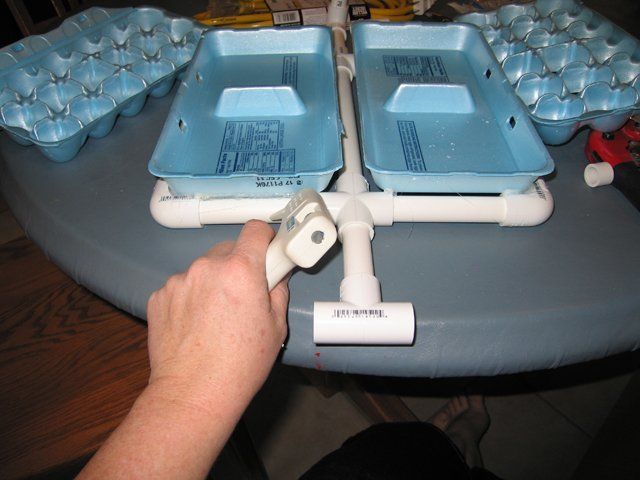
We figured out that it was easier to cut the cartons along the fold between the top and bottom and then (after cutting off the bottom of each cup) glue the bottoms into the tops. From there we glued the two egg cartons on to the PVC turning tray.
We attached the turner to the bator by cutting out a hole on either side of the bator and inserting a short section of PVC through the Styrofoam and into the turning apparatus. We added a PVC "T" on one side and an elbow with a 5-6 inch section of PVC on the other side to act as a turning arm.
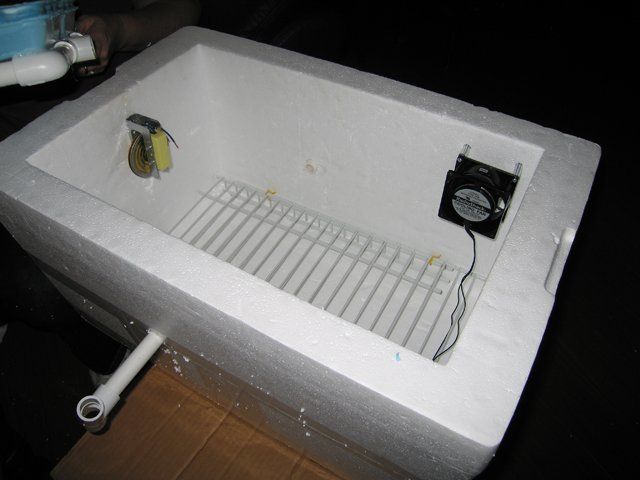
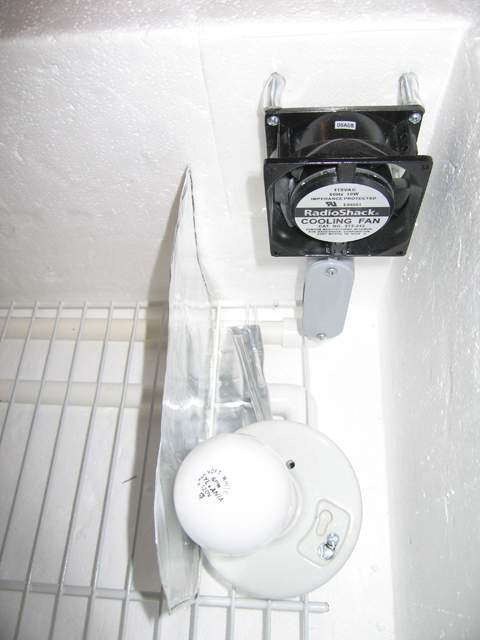
We installed a wafer thermostat and a computer fan and found a rack (old section of wire shelving from a shelving project) that would work.
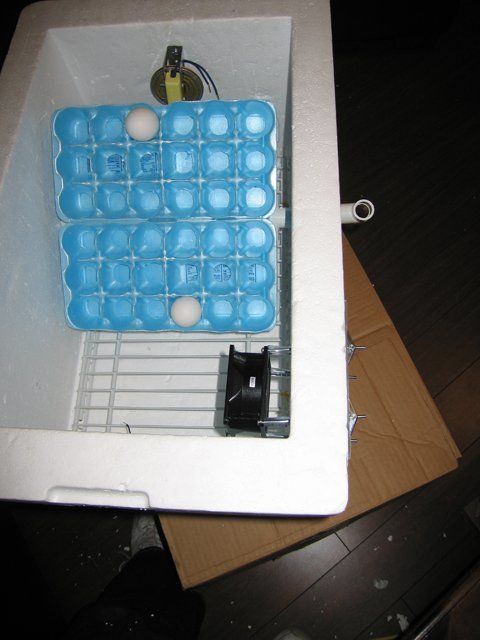
Tested the turner for fit and function:
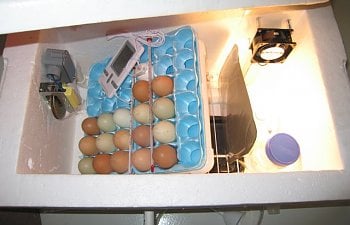
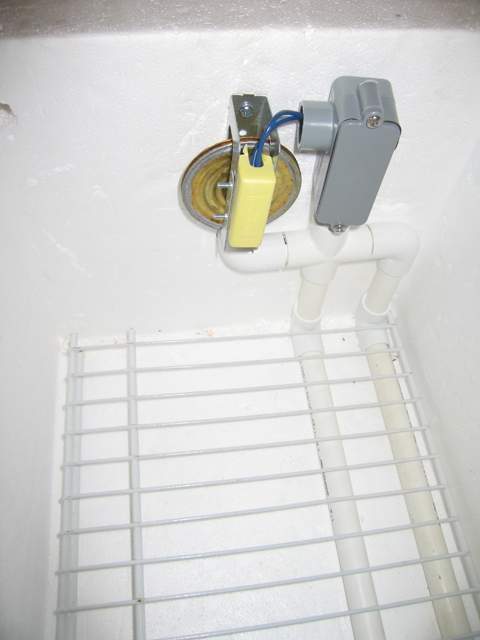
We ran all the wiring inside the bator through plastic conduit so the kids wouldn't get shocked if they decided to go excavating. The wiring for the fan bypassed the thermostat so it stayed on the whole time while the light turned off and on depending on the temperature. When we installed the fan, we cut short sections of tubing to off set the fan from the wall (several nuts added between the fan and wall would work in place of the tubing as well). We ran long toggle bolts through the tubing and bator wall. To prevent the tubing and nuts and bolts from pulling through the Styrofoam as we tightened them we used some heavy scrap plastic as sort of a large washer. The thermostat turning key was replaced with a long toggle bolt with threading that matched (it is the middle screw in the first picture) and adjusted temps with a screw driver. The light is connected to one of those shallow round junction boxes with a screw in type pvc connector that joins it to the conduit.

We also added vent holes and a tube to add water (we stuck a small funnel onto the end to make this easier). We used a 60 watt bulb behind a foil shield (bottom of a lasagna pan--regular foil folded over cardboard or something else stiff would work) and added a peanut butter jar full of water to act as a heat sink. A plastic TV dinner tray was used originally for the water but found it upped the humidity too much and we added a half cup container (apple sauce cup) which we kept full and it held the humidity just perfect. We left the original container in there and used it during the hatch for higher humidity. Four small holes were added for ventilation and left open the whole time...two just above floor level and the other two (on the opposite side of the bator) near the lid.

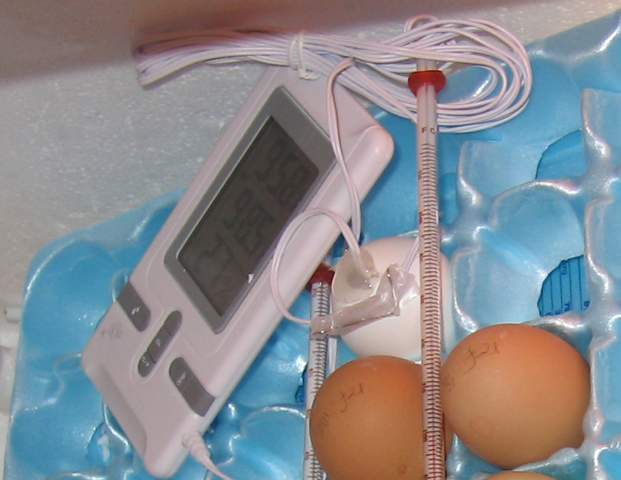
Our Water wiggler is actually an egg filled with hair gel and sealed with hot glue and the temp probe inside. We call it the "fake egg'. It is the very white egg.
When we stopped turning the eggs we took them out of the turner and set them in an extra egg carton. We then removed the whole turning aparatus and plugged the holes (tape works great). We slipped in a foil lasagna pan with nonskid shelf liner and returned the eggs to the bator for hatching. They hatched a day early so I may have had the temps a smidge on the high side. The three weeks passed quickly and we were rewarded for our diligence with 9 very healthy active chicks. Half of our eggs had been refrigerated at 37 degrees for 5 days so we didn't know how those would turn out. Four of them hatched out. The other five were not refrigerated for any period of time.
Here is how we calibrated our hygrometer (thanks to some knowledgeable people on BYC):
We homeschool, so everything we do ends up in a learning adventure. This project was no different. We looked up information on the web. One of the neatest sites we found actually had lesson plans which we used to some extent. Those can be found at:
Worksheets and a game:
http://www.urbanext.uiuc.edu/eggs/pdfs/worksheets.pdf
Lesson plans and activities: (see links on the left of the site below)
http://www.urbanext.uiuc.edu/eggs/activities.html
http://www.urbanext.uiuc.edu/eggs/pdfs/worksheets.pdf
Lesson plans and activities: (see links on the left of the site below)
http://www.urbanext.uiuc.edu/eggs/activities.html
We kept track of our progress using the form below.
Incubation Record | ||||||
Date | Time eggs are turned | Bator Temp | Fake Egg Temp | Humidity | Who turned the eggs | Remarks |
% | ||||||
% | ||||||
% | ||||||
% | ||||||
% | ||||||
% | ||||||
% | ||||||
% | ||||||
% |