ZCoop Du Jour
aka Buffingham Palace

I would like to thank everyone that posted pics and advice on coop construction. BYC.com contributers have been so very helpful.
I stole a little something from each of you.
I researched coop designs for over a year, but did not actually start construction until my 4 buff orpingtons were on order.
I did write down on paper some basic plans, I ended up modifying the plans each step of the way.
I had a lumber and hardware list when I went to the home store, but when I got there I decided to make the coop a little bigger.
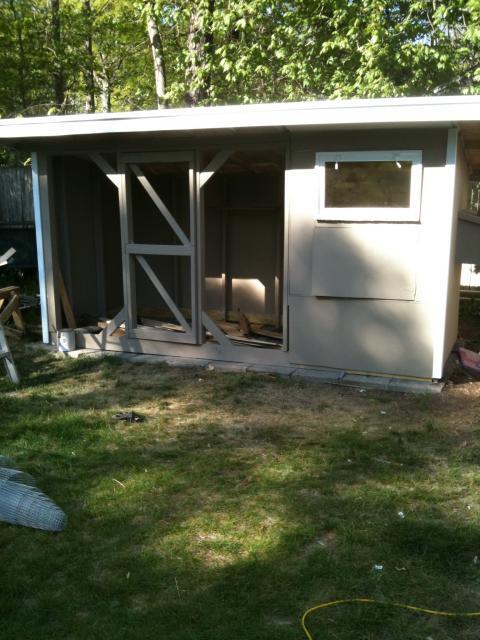
My original design was for a 4' x4' coop with an attached 4' x 8' run, when I saw what a 4 x 8 sheet of plywood looked like, I modified the plans.
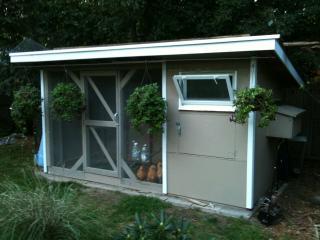
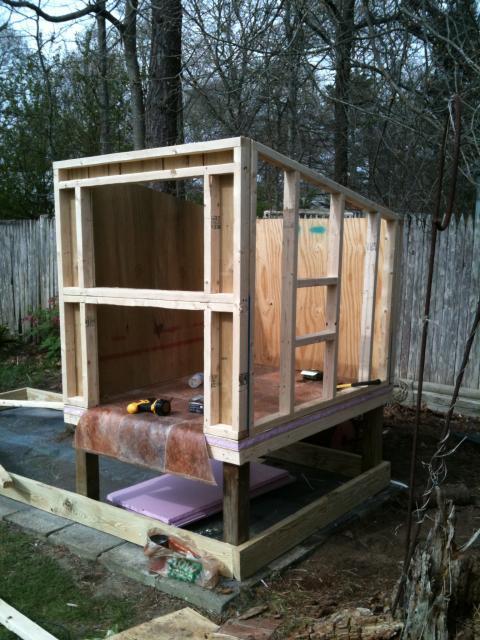
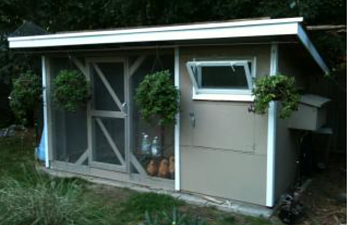
The coop and run ended up being 5 'x 12', the coop part is 4' x 5', 2' off the ground, the run extends under the coop.
I ordered 4 Buff Orpingtons from Waquoit feed and grain in Falmouth Ma, They have been very helpful.
I could probable fit 5 maybe 6 hens but I wanted a cleaner coop and have limited to 4 for now. ( I am glad I did)
I am using the deep litter method with a poop board. I clean it off every couple of days.
The coop and run are covered under one roof, I have side and back walls to screen from the neighbors.
Everything is either plywood or 1/2" hardware cloth and I even have 1/2" cloth under the dirt run.
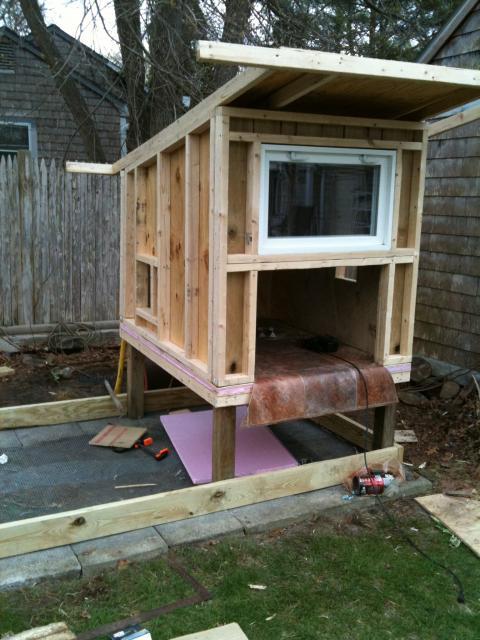
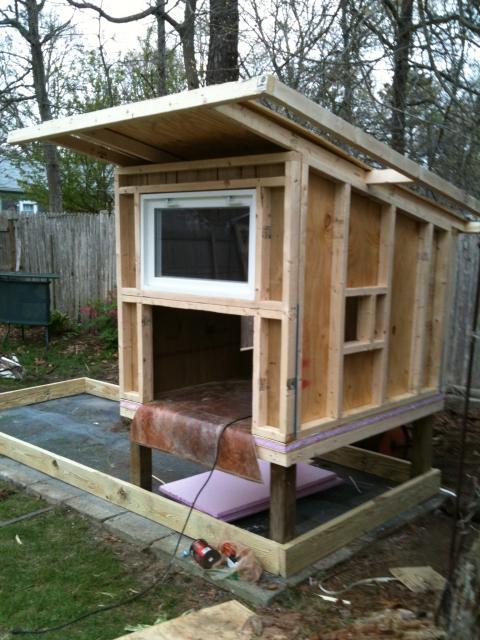
The coop is insulated and electrified. We have had winters as low as zero here. There is a window in the front along with a clean out door. The rear has a 14" x 24" door so I can reach in from there. I installed four 4 inch round air vents in the upper corners, those, along with the window supply plenty of ventilation.
There is an automatic electric pop door to the run and a ramp down to the run. The door works fine but the chickens have knocked out the power supply plug a couple times. The right side has a single nest box. The hen entrance to the nest box is 10" x 12" the box itself is 24" wide 13" deep and 12" tall, the top is a sloped hinged lid. Everything I've read says that the chickens use just one nest box so I gave em a good size box.
It took about four part time week ends to build. My wonderful wife has been great, this coop cost about $1000 I told her it would cost only $300.
When I told her that the first egg cost $1000 and all the rest are free she was good with that.
I have yet to come up with an inspiring coop name, now that I know Coop Du Jour is used already I could not with good conscience use that one. Are there any unused coop names ? lol. Is Buffington Palace taken yet? or Buffingham Palace ?I could use some good ideas.
You know what just came to mind A coop is a hole in the ground you just pour chickens into. (boating joke)
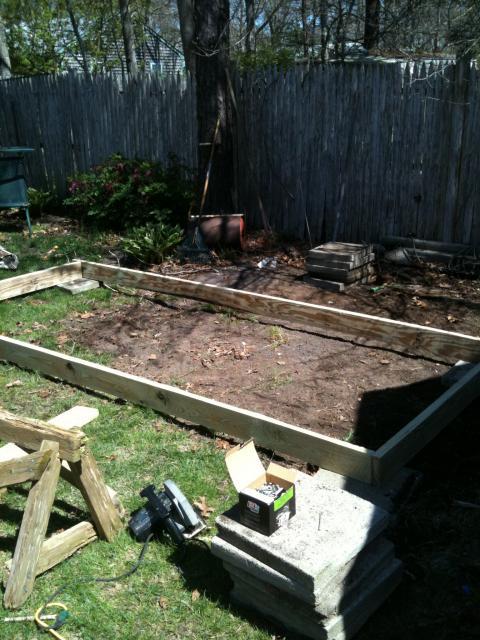
Layout- 2 x 6 pt 12' x 5'
2 foot 4"x4" pt posts for the coop legs.
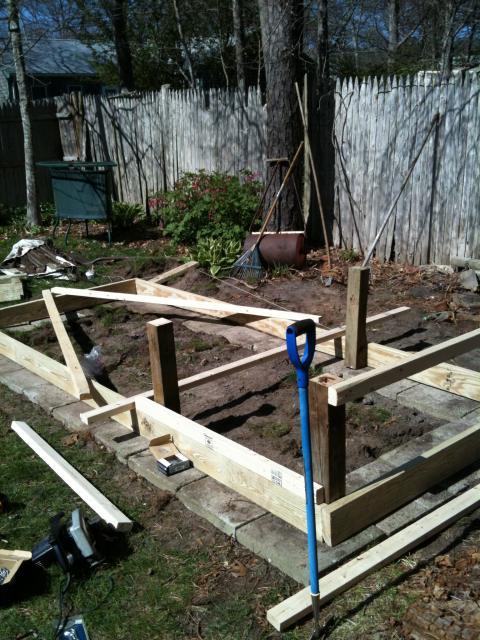
I used 2 x 3s to frame the coop and pt 2x4s to frame the run side.
I recycled some old patio blocks for the foundation
I lined the ground with 1/2 inch hardware cloth
The deck is 2 pieces of plywood 4' wide x 5' deep with a 1" foam sandwich filling
Lined the deck with sheet vinyl.
sizing up the back wall.
I'm not a builder but I stayed in a Holiday in last night
The front wall is 4' 1/2 tall the rear is 3'1/2 with the 2' space under it.
The framing of the coop is 2 x 3 spruce the run side is framed with PT 2 x4
I finished the interior walls first with the intention of insulating from the outside.
that worked out all right. Pop door was too low for deep litter I raised it.
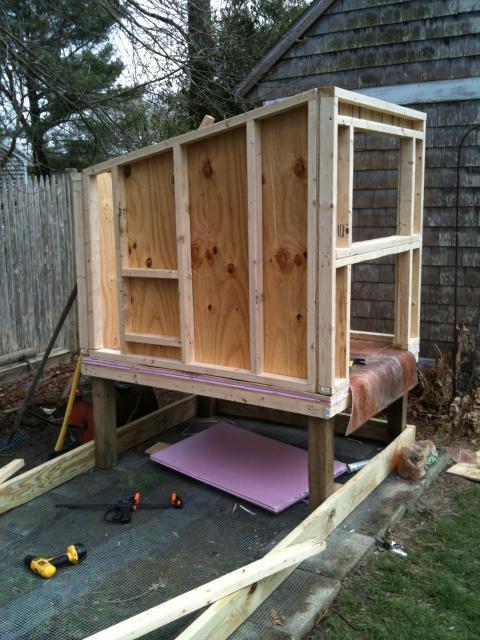
Test run on the roof, it was to far forward. Nest box forward at first I ended up moving it toward the rear across from the pop door.
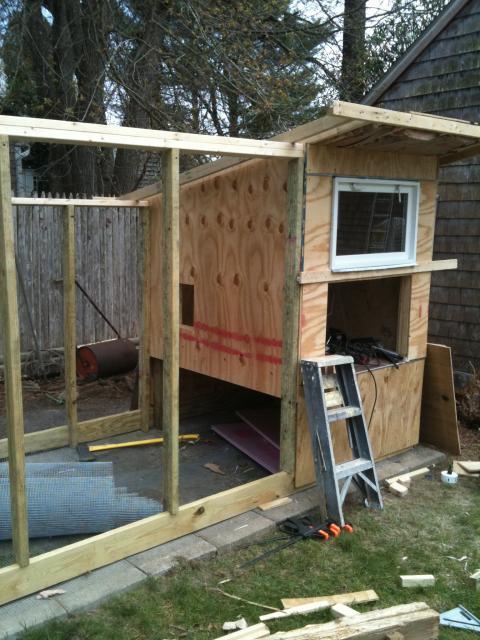
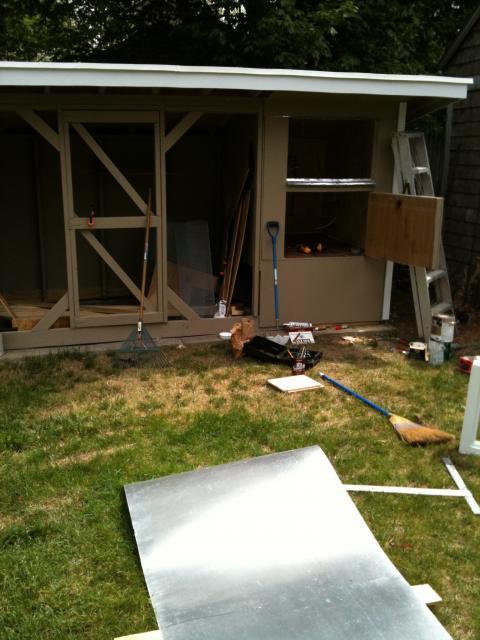
That is a hopper window it was donated by a friend, I have it tilting out instead of in. The front of the roof now has an 18 inch overhang.
I'm glad I framed the walls with sheathing on the inside first, made insulating easy.
Framing the run. back wall and roof on and shingled.
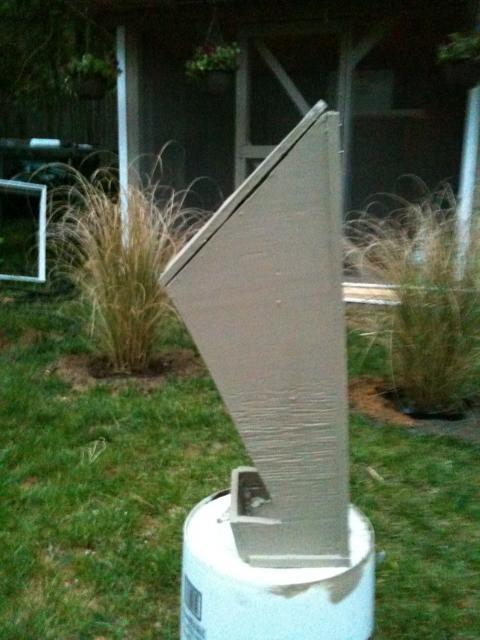
hen house door hinged coat of paint on (bought a gallon of mistake paint at the big box store)
I had some sheet aluminum hanging around so I lined the interior with it should make for easy clean up.
I pitched the coop toward the front, the inside is sealed with caulking so I can hose it out.
Half inch hardware cloth on the front and under the run. Nothing can get to my chickens not even a baby mouse.
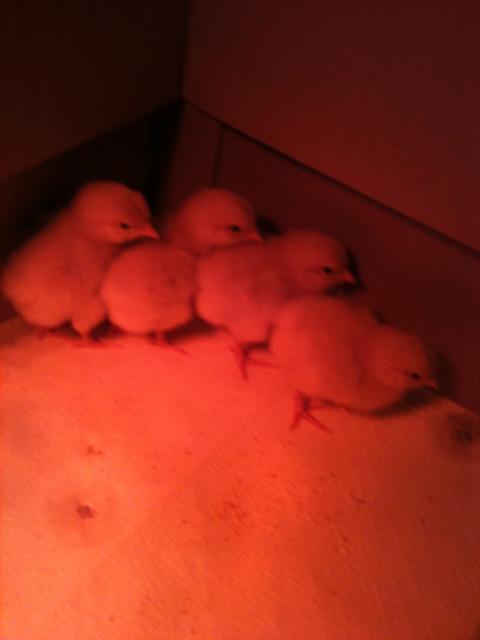
My ten day old buff chicks have been in the coop for three nights with the red heat light on, they love it and my wife loves that they are out of the house.
I am going to fill the run with sand. I will also build a small frame with hardware cloth over it and plant some kind of grass they can pick at.
Update. I have now put a bag of pine shavings in the run seems to work better
5 days old in the card in their new coop 12 days old
board box in the den They do grow fast
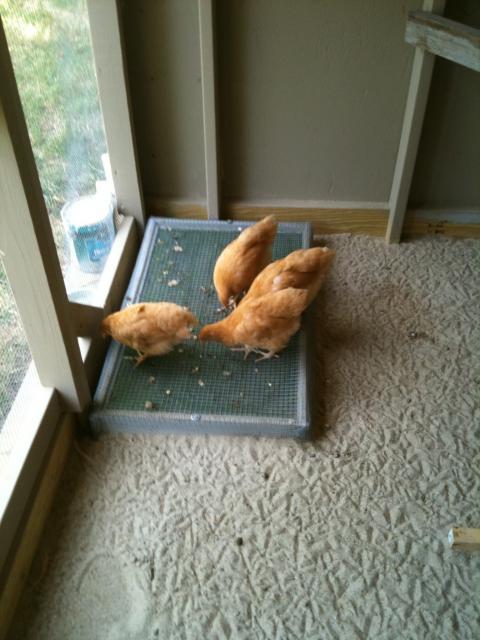
I just whipped together a feeder from some
of the left over scrap, funny how the angles match the roof angles
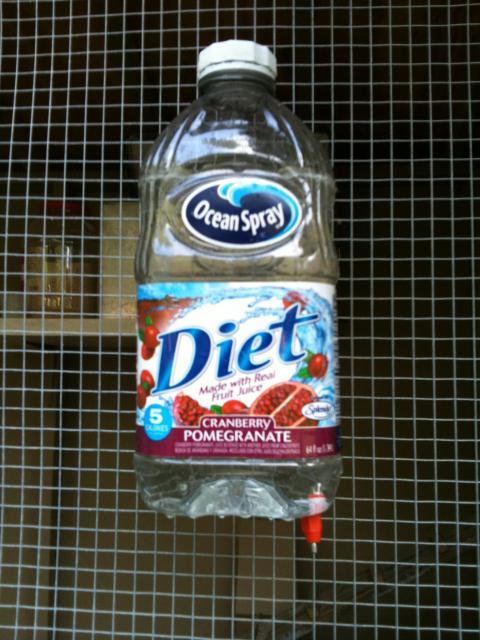
I also made some waterers with some QC Supply poultry nipples,
chicks took to em right away
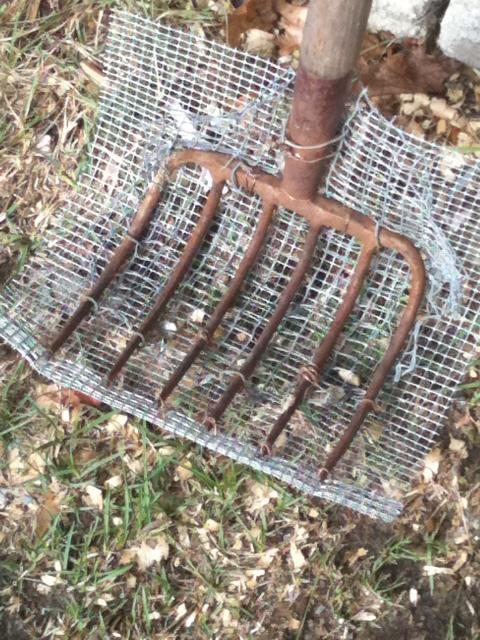
This my home made pooper scooper it is 1/4 inch hardware cloth and a potato rake
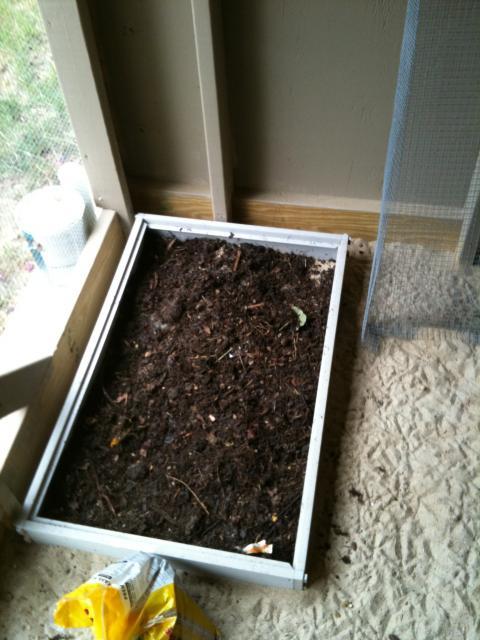
I used the frame that came around the sample window I used for the coop then put the
1/4 inch hardware cloth over it, I planted grass seed in it. This is the chicks first stop when they get out in the morning (note they pooped it up so much I had to remove it)
Yipee, we got or first egg 24 weeks to the day from chick hatching. First egg Oct 29th , got the chicks on May 18th.
That is a large store bought egg next to the small home grown egg.
The decoy golf balls worked, three of or four hens are laying eggs in the egg box the forth hen isn't laying yet.
We are now getting 2 to three eggs a day. super.
Three of the hens started laying within two weeks of each other, we had one hold out, she took an extra 2 months. She almost ended up in the stock pot.
Lucky I wasn't too hasty.
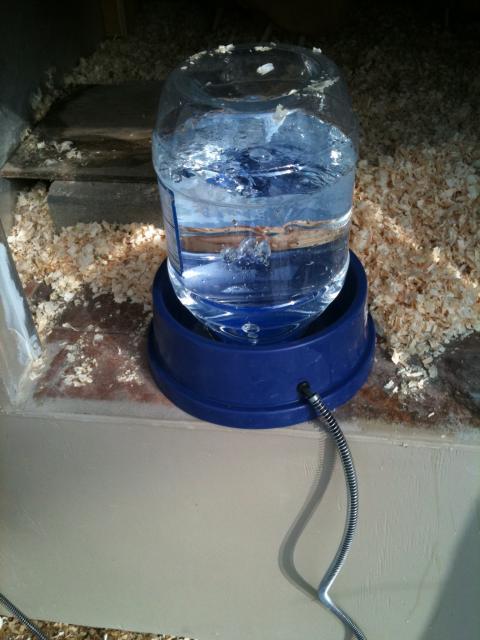
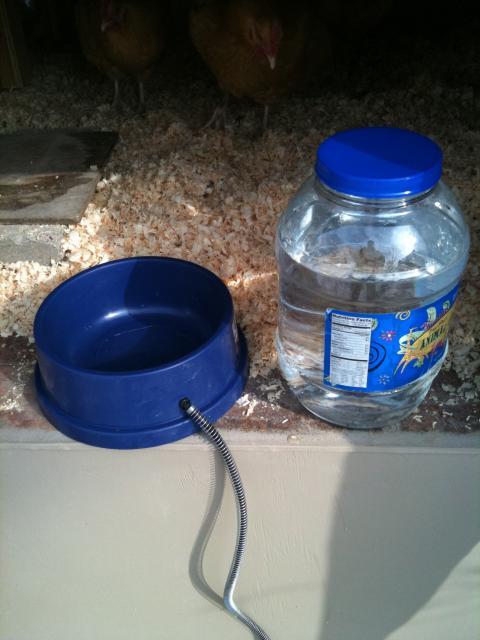
Hey all, I put together this winter waterer, it is a heated dog bowl I got from Amazon and a large plastic cookie container I picked up at BJs
It works like a charm. The bowl has a 25 watt heater in it and has worked down to 4 degrees.
I punched a hole in the jar to the height that I wanted the water to come up to, it is self filling there is a one inch space around the lip for the hens to get a drink.
This is my latest treat for the birds. I grow winter rye in pots and give em a treat every couple days. They sure love it, they gobble it up in no time.
What I would change: I would make the front door bigger by including the window, instead of the just the bottom half as it is now, that would make access much easier. I may figure a way to do it, I will wait until the weather warms up though.
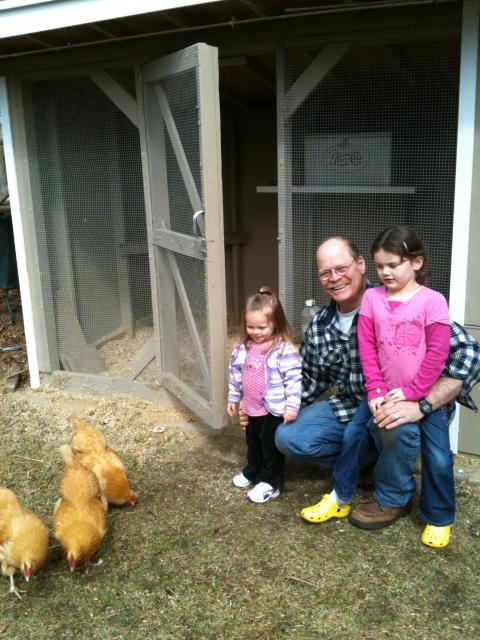
This makes it all worth while, the Grand kids are thrilled. They can't wait to get to see the the chickens.
They help gather the eggs. They seem to always have a scrap of their lunch to share with the chickens.
aka Buffingham Palace
I would like to thank everyone that posted pics and advice on coop construction. BYC.com contributers have been so very helpful.
I stole a little something from each of you.
I researched coop designs for over a year, but did not actually start construction until my 4 buff orpingtons were on order.
I did write down on paper some basic plans, I ended up modifying the plans each step of the way.
I had a lumber and hardware list when I went to the home store, but when I got there I decided to make the coop a little bigger.
My original design was for a 4' x4' coop with an attached 4' x 8' run, when I saw what a 4 x 8 sheet of plywood looked like, I modified the plans.
The coop and run ended up being 5 'x 12', the coop part is 4' x 5', 2' off the ground, the run extends under the coop.
I ordered 4 Buff Orpingtons from Waquoit feed and grain in Falmouth Ma, They have been very helpful.
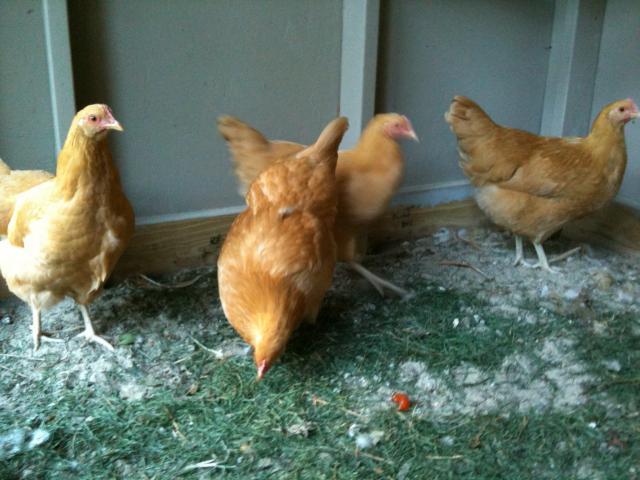
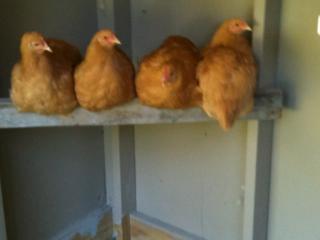
I could probable fit 5 maybe 6 hens but I wanted a cleaner coop and have limited to 4 for now. ( I am glad I did)
I am using the deep litter method with a poop board. I clean it off every couple of days.
The coop and run are covered under one roof, I have side and back walls to screen from the neighbors.
Everything is either plywood or 1/2" hardware cloth and I even have 1/2" cloth under the dirt run.
The coop is insulated and electrified. We have had winters as low as zero here. There is a window in the front along with a clean out door. The rear has a 14" x 24" door so I can reach in from there. I installed four 4 inch round air vents in the upper corners, those, along with the window supply plenty of ventilation.
There is an automatic electric pop door to the run and a ramp down to the run. The door works fine but the chickens have knocked out the power supply plug a couple times. The right side has a single nest box. The hen entrance to the nest box is 10" x 12" the box itself is 24" wide 13" deep and 12" tall, the top is a sloped hinged lid. Everything I've read says that the chickens use just one nest box so I gave em a good size box.
It took about four part time week ends to build. My wonderful wife has been great, this coop cost about $1000 I told her it would cost only $300.
When I told her that the first egg cost $1000 and all the rest are free she was good with that.
I have yet to come up with an inspiring coop name, now that I know Coop Du Jour is used already I could not with good conscience use that one. Are there any unused coop names ? lol. Is Buffington Palace taken yet? or Buffingham Palace ?I could use some good ideas.
You know what just came to mind A coop is a hole in the ground you just pour chickens into. (boating joke)
Layout- 2 x 6 pt 12' x 5'
2 foot 4"x4" pt posts for the coop legs.
I used 2 x 3s to frame the coop and pt 2x4s to frame the run side.
I recycled some old patio blocks for the foundation
I lined the ground with 1/2 inch hardware cloth
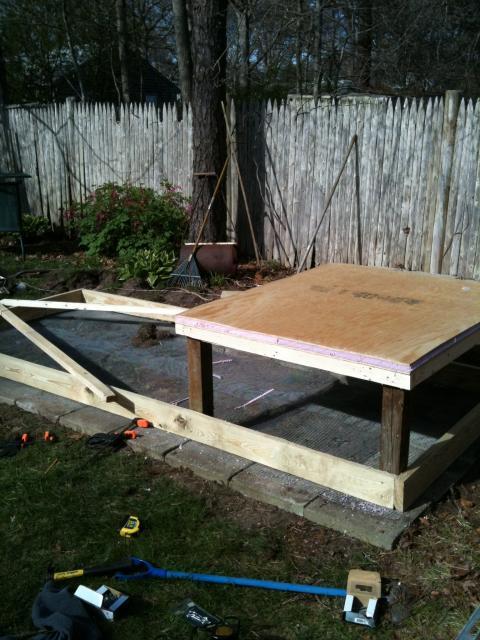
The deck is 2 pieces of plywood 4' wide x 5' deep with a 1" foam sandwich filling

Lined the deck with sheet vinyl.
sizing up the back wall.
I'm not a builder but I stayed in a Holiday in last night
The front wall is 4' 1/2 tall the rear is 3'1/2 with the 2' space under it.
The framing of the coop is 2 x 3 spruce the run side is framed with PT 2 x4
I finished the interior walls first with the intention of insulating from the outside.
that worked out all right. Pop door was too low for deep litter I raised it.
Test run on the roof, it was to far forward. Nest box forward at first I ended up moving it toward the rear across from the pop door.
That is a hopper window it was donated by a friend, I have it tilting out instead of in. The front of the roof now has an 18 inch overhang.
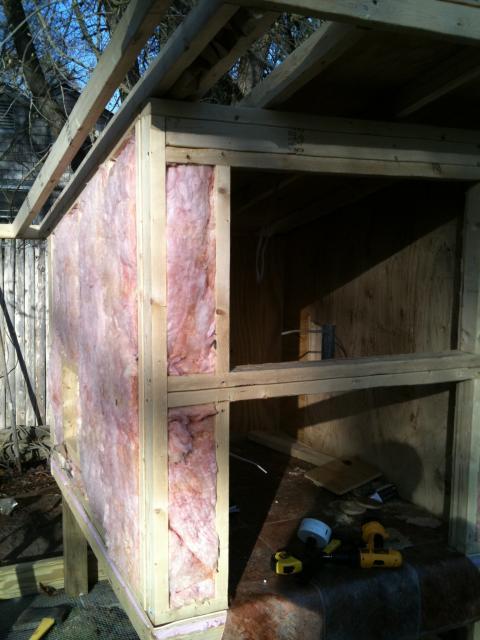
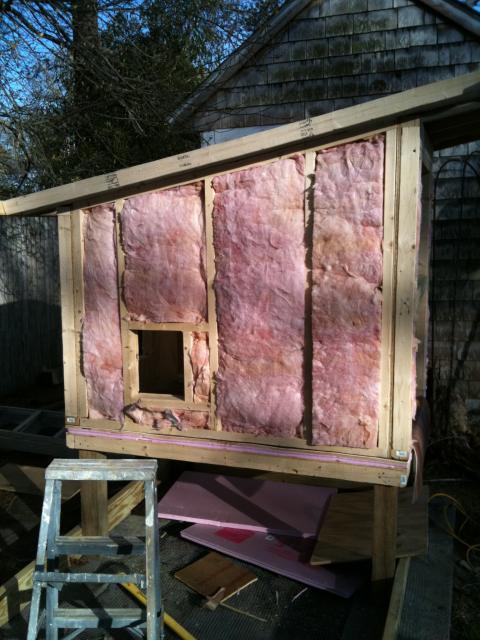
I'm glad I framed the walls with sheathing on the inside first, made insulating easy.
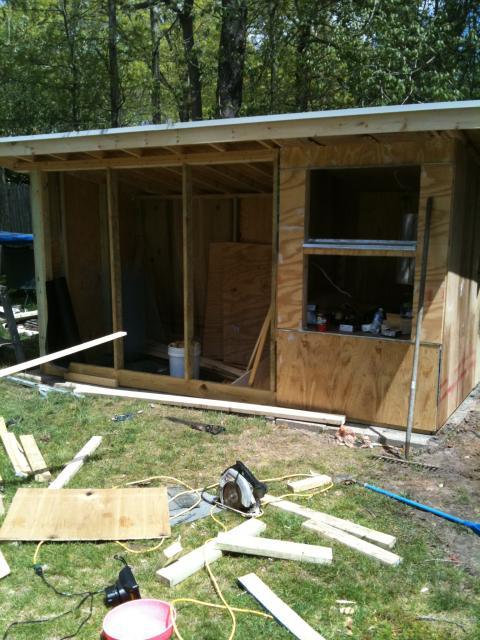
Framing the run. back wall and roof on and shingled.
hen house door hinged coat of paint on (bought a gallon of mistake paint at the big box store)
I had some sheet aluminum hanging around so I lined the interior with it should make for easy clean up.
I pitched the coop toward the front, the inside is sealed with caulking so I can hose it out.

 Half inch hardware cloth on the front and under the run. Nothing can get to my chickens not even a baby mouse.
My ten day old buff chicks have been in the coop for three nights with the red heat light on, they love it and my wife loves that they are out of the house.
I am going to fill the run with sand. I will also build a small frame with hardware cloth over it and plant some kind of grass they can pick at.
Update. I have now put a bag of pine shavings in the run seems to work better


5 days old in the card in their new coop 12 days old
board box in the den They do grow fast


I just whipped together a feeder from some
of the left over scrap, funny how the angles match the roof angles
I also made some waterers with some QC Supply poultry nipples,
chicks took to em right away
This my home made pooper scooper it is 1/4 inch hardware cloth and a potato rake
I used the frame that came around the sample window I used for the coop then put the
1/4 inch hardware cloth over it, I planted grass seed in it. This is the chicks first stop when they get out in the morning (note they pooped it up so much I had to remove it)
Yipee, we got or first egg 24 weeks to the day from chick hatching. First egg Oct 29th , got the chicks on May 18th.
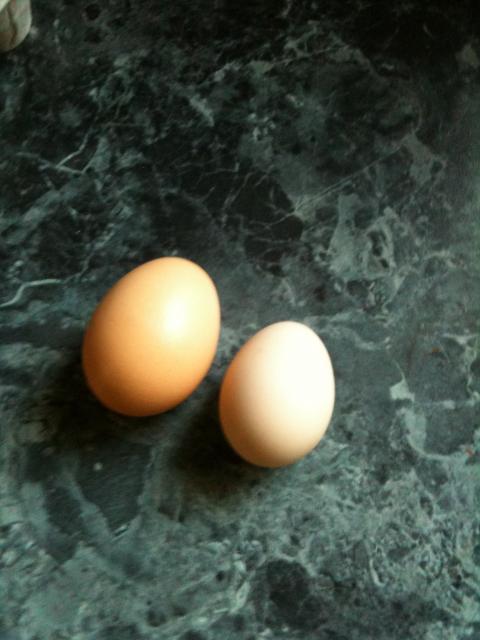
That is a large store bought egg next to the small home grown egg.
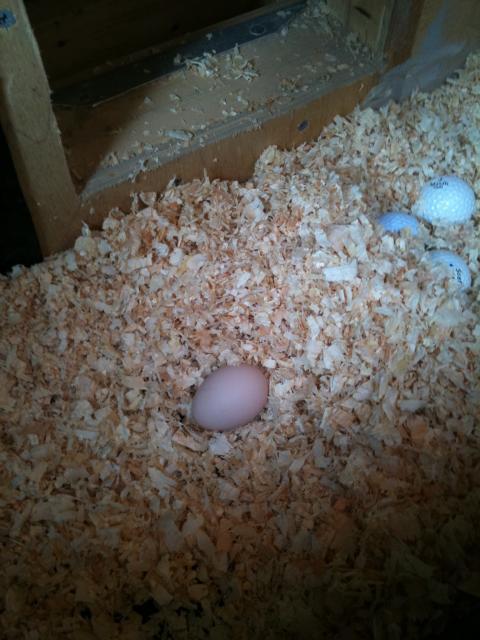
The decoy golf balls worked, three of or four hens are laying eggs in the egg box the forth hen isn't laying yet.
We are now getting 2 to three eggs a day. super.
Three of the hens started laying within two weeks of each other, we had one hold out, she took an extra 2 months. She almost ended up in the stock pot.
Lucky I wasn't too hasty.
Hey all, I put together this winter waterer, it is a heated dog bowl I got from Amazon and a large plastic cookie container I picked up at BJs
It works like a charm. The bowl has a 25 watt heater in it and has worked down to 4 degrees.
I punched a hole in the jar to the height that I wanted the water to come up to, it is self filling there is a one inch space around the lip for the hens to get a drink.

What I would change: I would make the front door bigger by including the window, instead of the just the bottom half as it is now, that would make access much easier. I may figure a way to do it, I will wait until the weather warms up though.
They help gather the eggs. They seem to always have a scrap of their lunch to share with the chickens.