'Casa de Huevos'

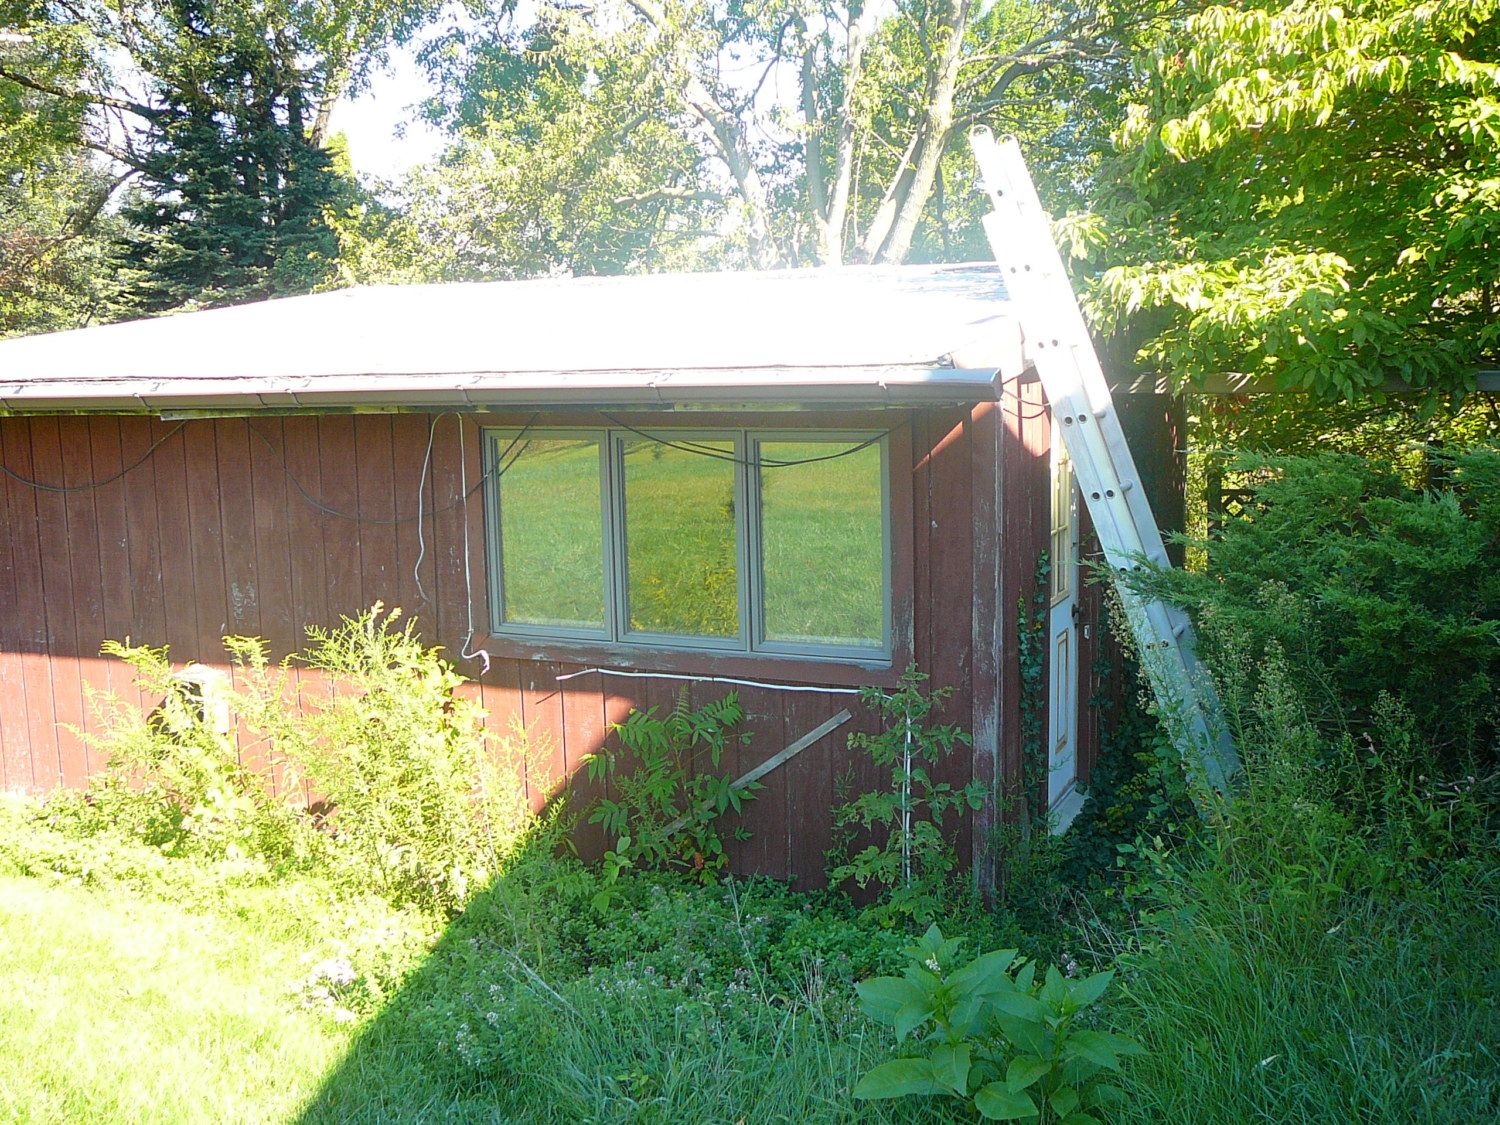
The story of how our coop came to be really starts last Summer when we were asked to tear down an old structure on my folks farm as a source of lumber to build a hen house with. Well that sounded like our best bet to get the materials we needed with minimal expense. So we took 5 weekends in September and October before the weather got too bad and got to work.
Unfortunately we did not get documentation of the destruction, it was quite a project. We took it apart board by board the best we could knowing we needed as much good lumber as we could salvage. We took home two pickup truck loads of lumber from it all, and filled a large dumpster with the refuse, of which there was a lot. None of the roof was salvageable, water damage. And then some of it was just so hard to get apart in one piece that it was torn out and thrown away. I really regret not getting photos of the wall full of snakes. As we tore down one of the walls of the building the insulation was full of snakes of all sizes. About 30 of them slowly slithered away as we tore out the old insulation. (My wife says it was more, WAY more.)
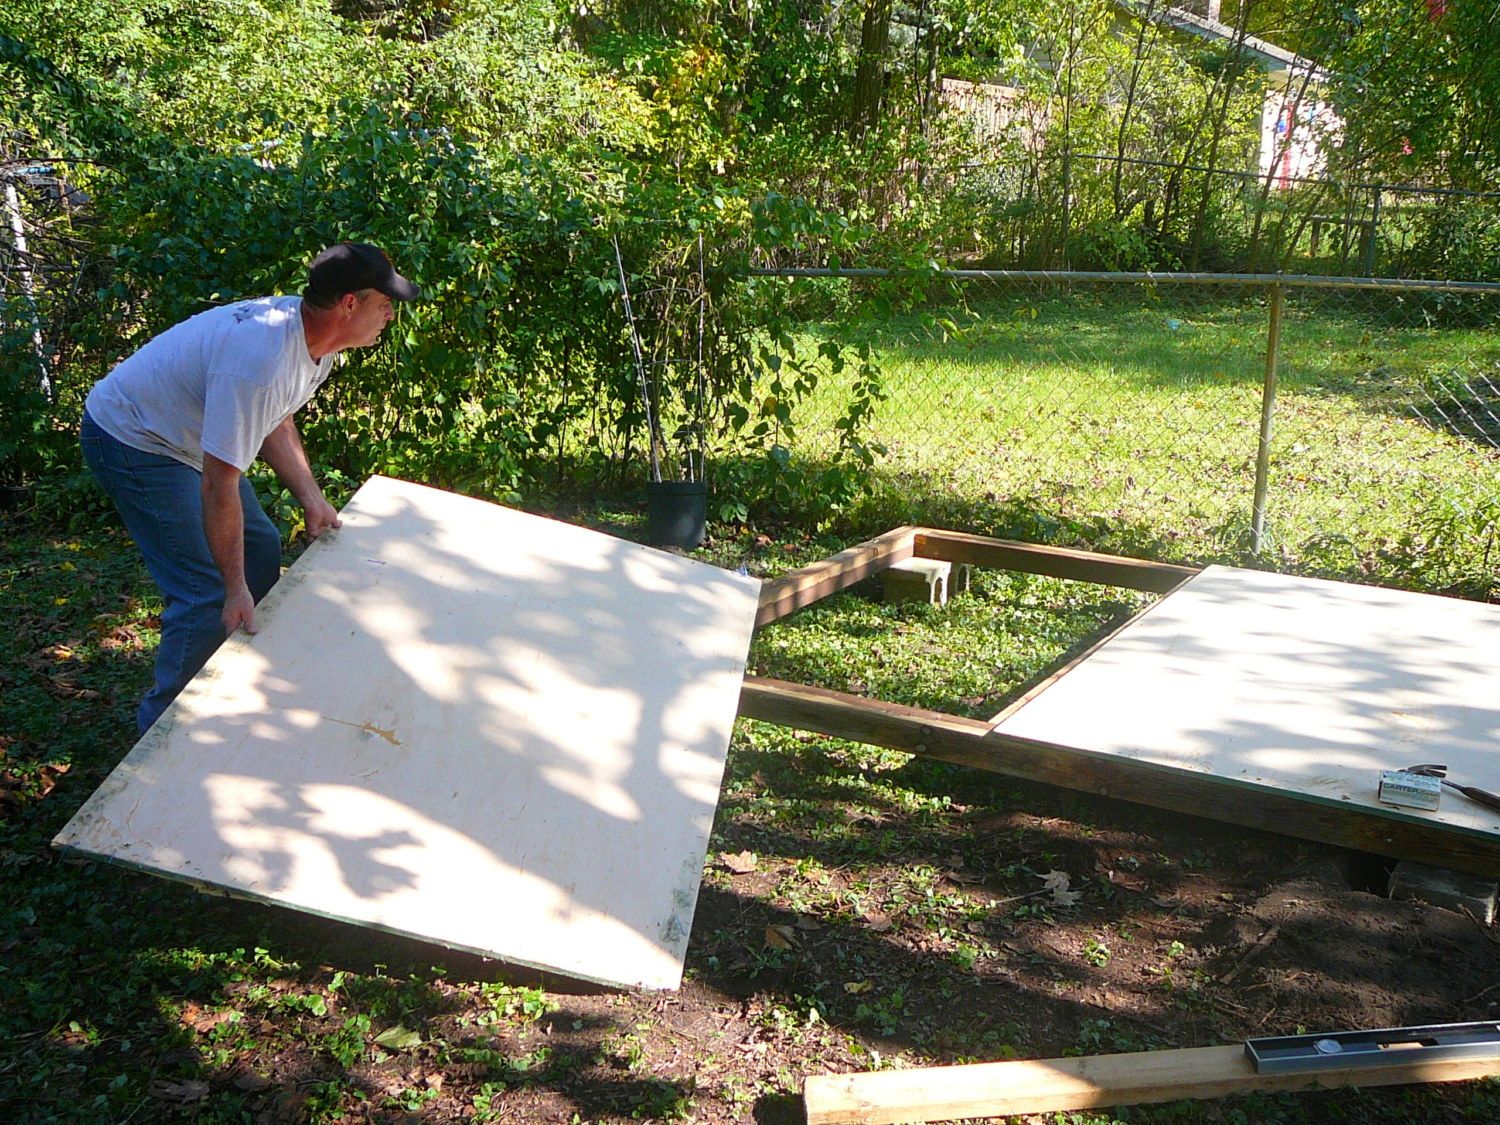
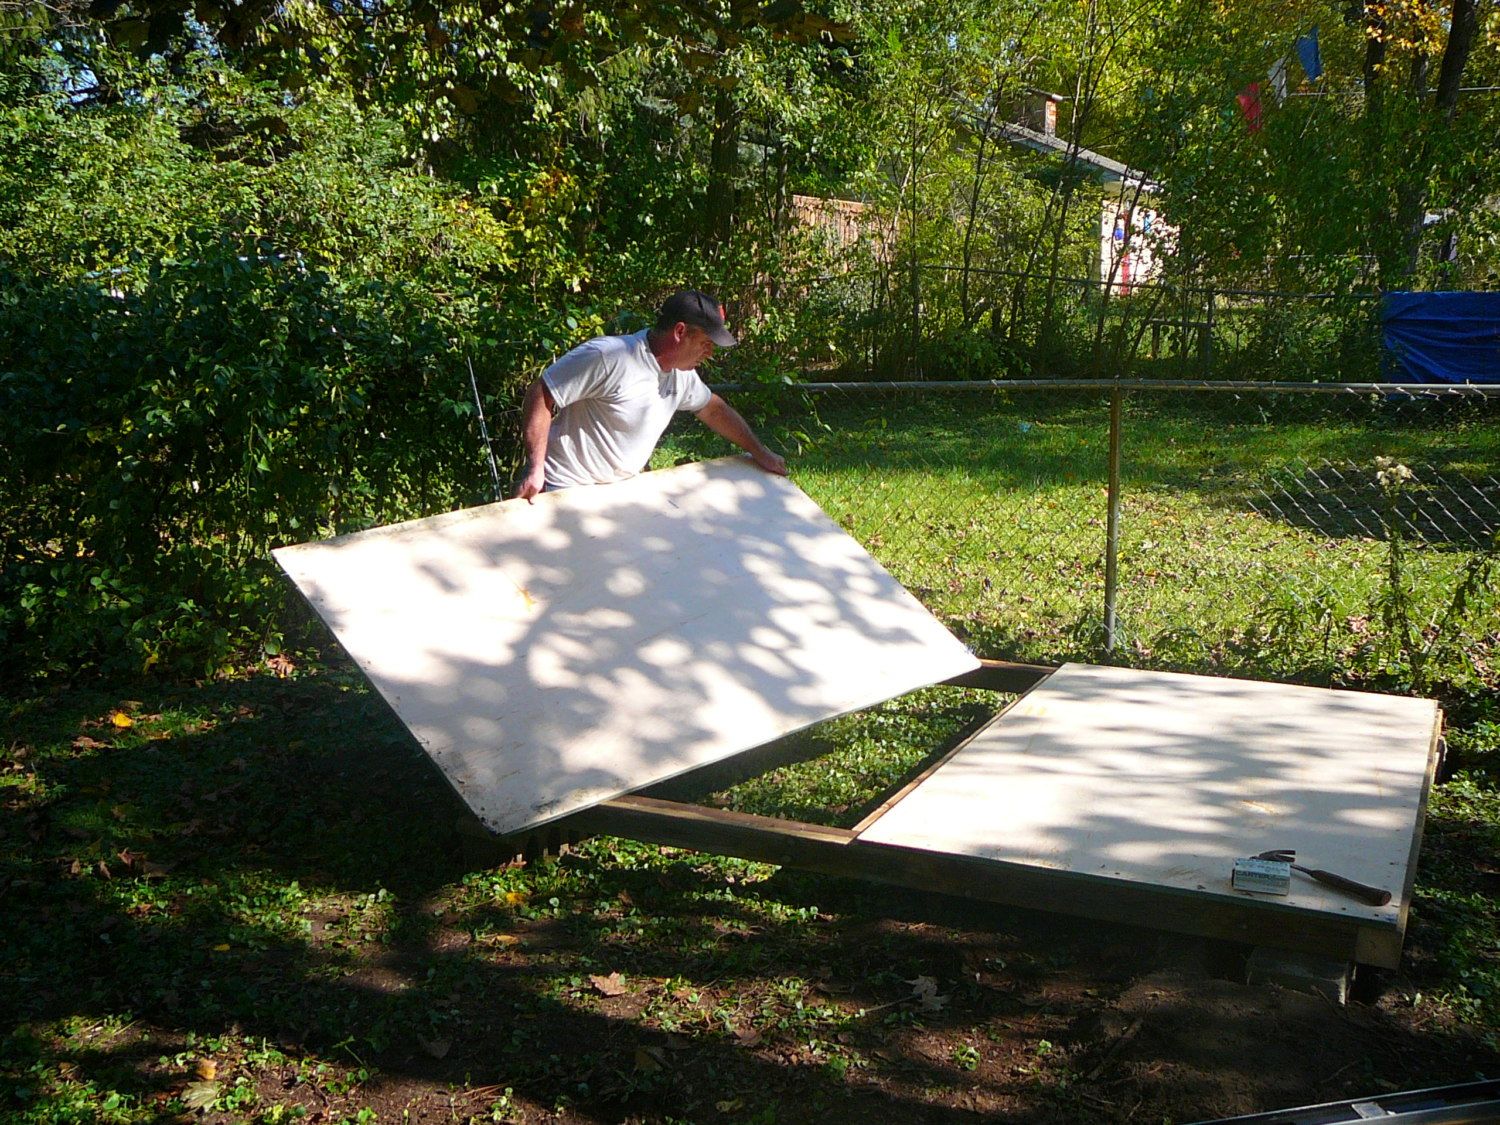
So the construction of the coop really started when we were finished at the farm last Fall. Didn't have a whole lot of time before the conditions get really bad here. I had two crates I had gotten from work that had some nice wood I wanted to use for the flooring of our coop. Each sheet measured 4'X6', so that determined the dimensions of our floor, I had two sheets that were used to frame out a floor 6'X8'.
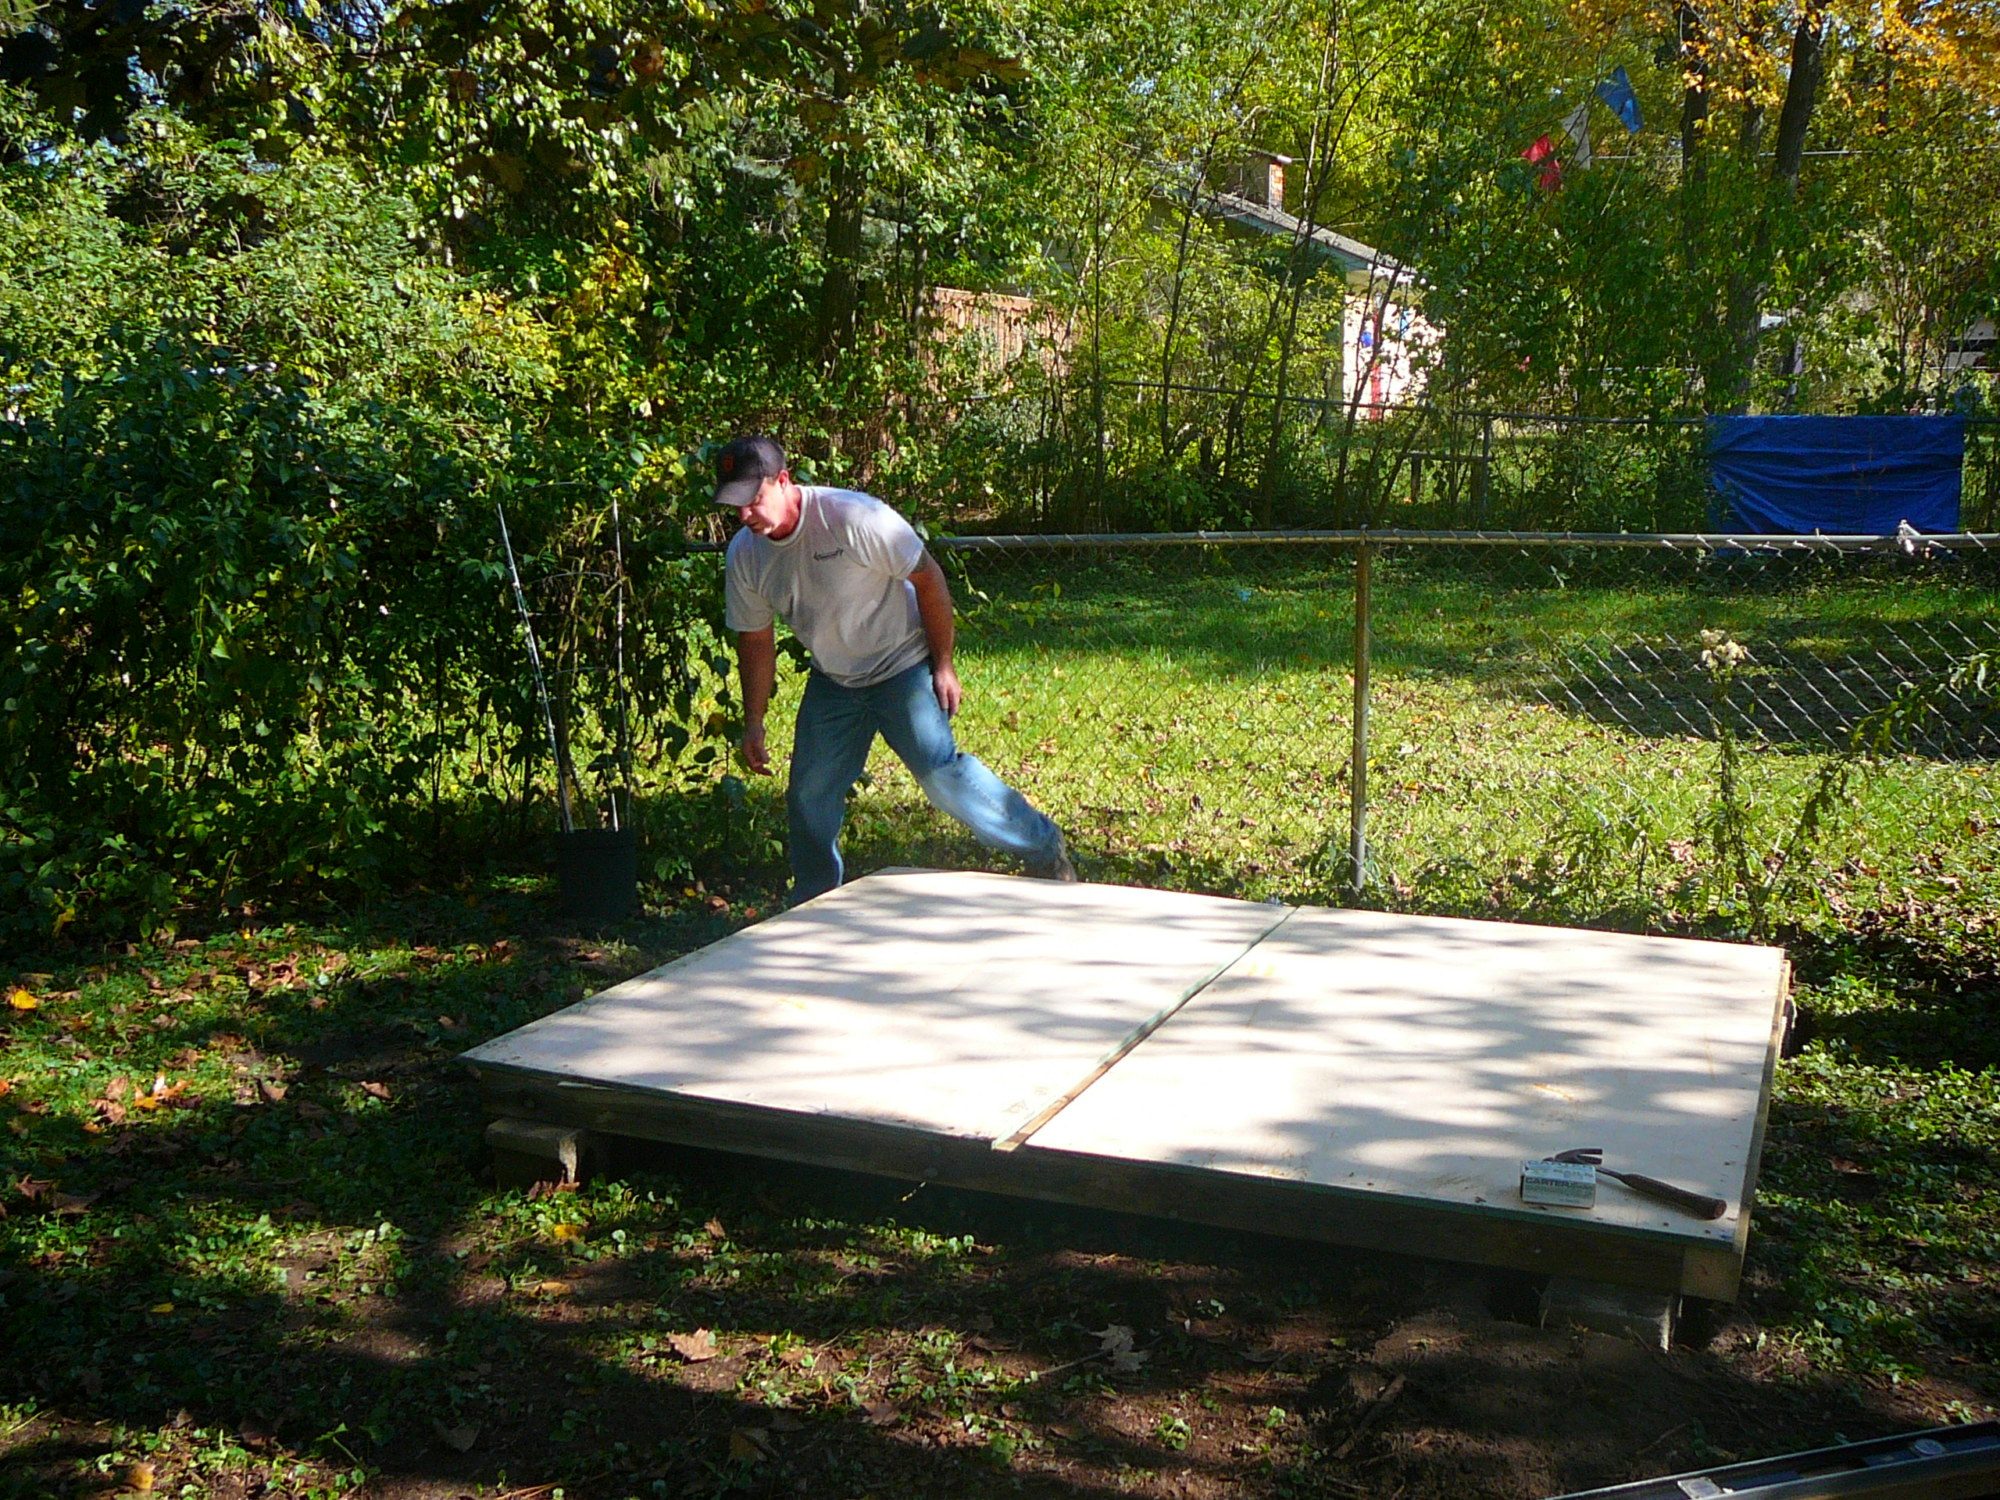
There was no shortage of 4'X4' posts to use, so the floor was framed out with those. We dug holes in the yard and leveled out some cinder blocks to set the frame on.
We have no idea what we are doing but it was actually quite easy once we thought through what we wanted to do with the materials we brought home. We did not want to spend too much money on our chicken palace, but we want it to be nice. Nearly everything we learned about putting this thing together was taken from the pages of the members here and their coop designs. We spent many an hour looking at the coops of others and how they were put together. There were some that were more helpful than others, we bookmarked a couple of those and referred back to them often. I'm not a carpenter, but I found this site that helped me learn how to put things together.
http://www.buildeazy.com/chicken_coop_1.html
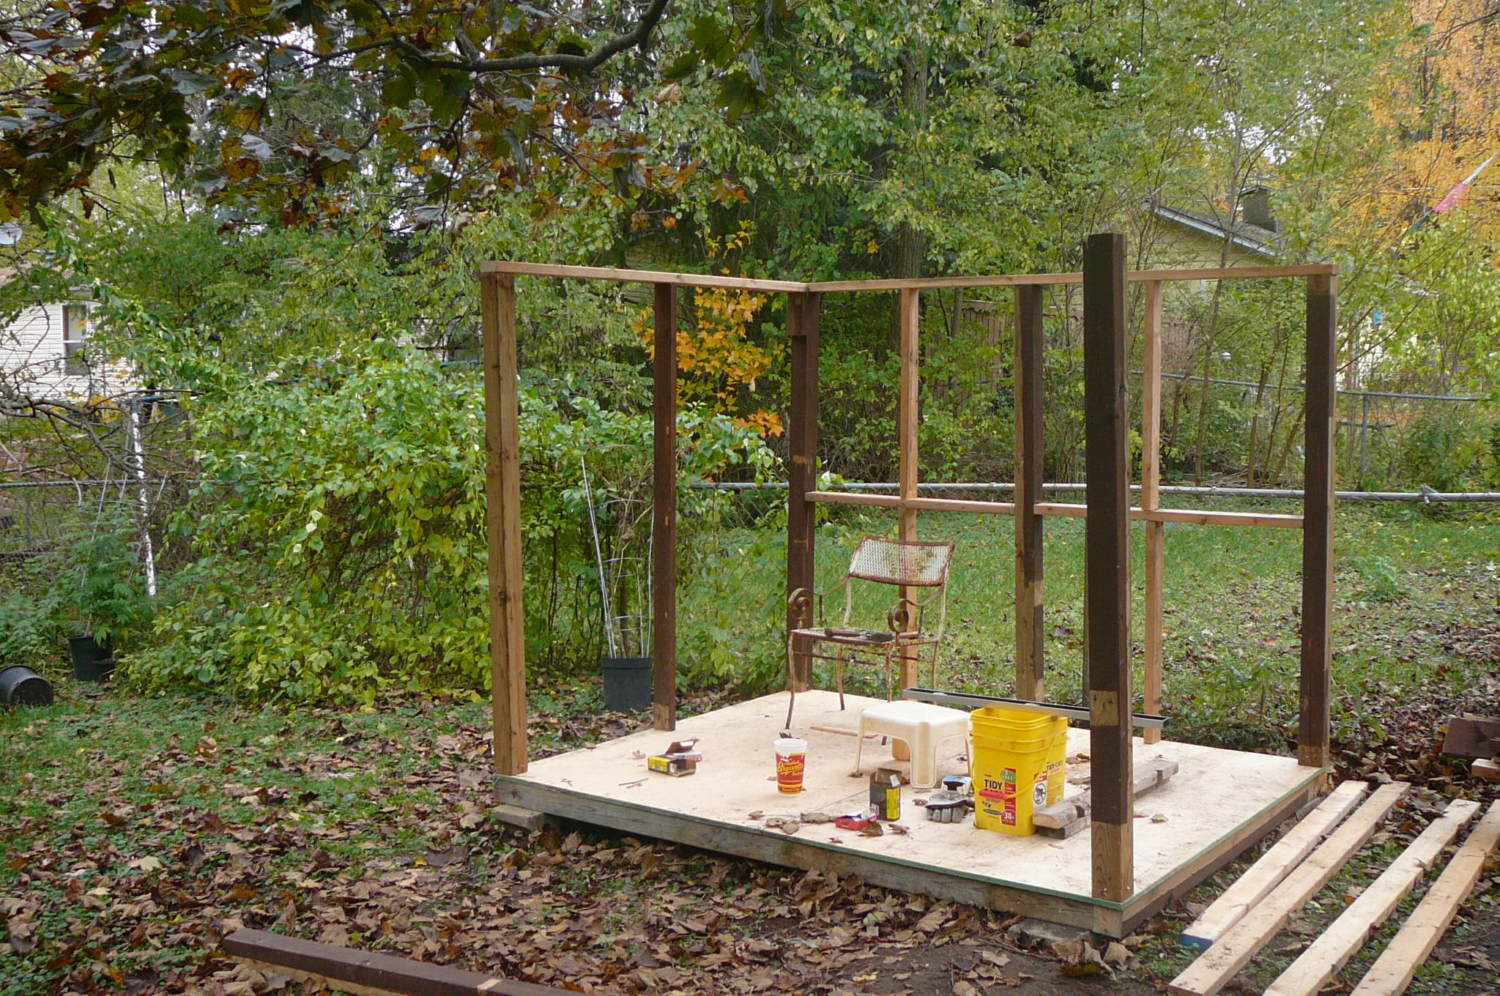
We attached the 4x4 posts at the corners and mid points on the long walls. 4x4s were used to complete the framing.
Now I had read that by fixing the walls directly to the flooring would make clean up easier. So far I believe this was a good idea. We've been using a plastic snow shovel to scoop out the floor and it's been quick and easy. We do not have plans for what we've done here. We did find online some basic floor plans for building a small structure like this that was helpful, but mostly coop designs here
.
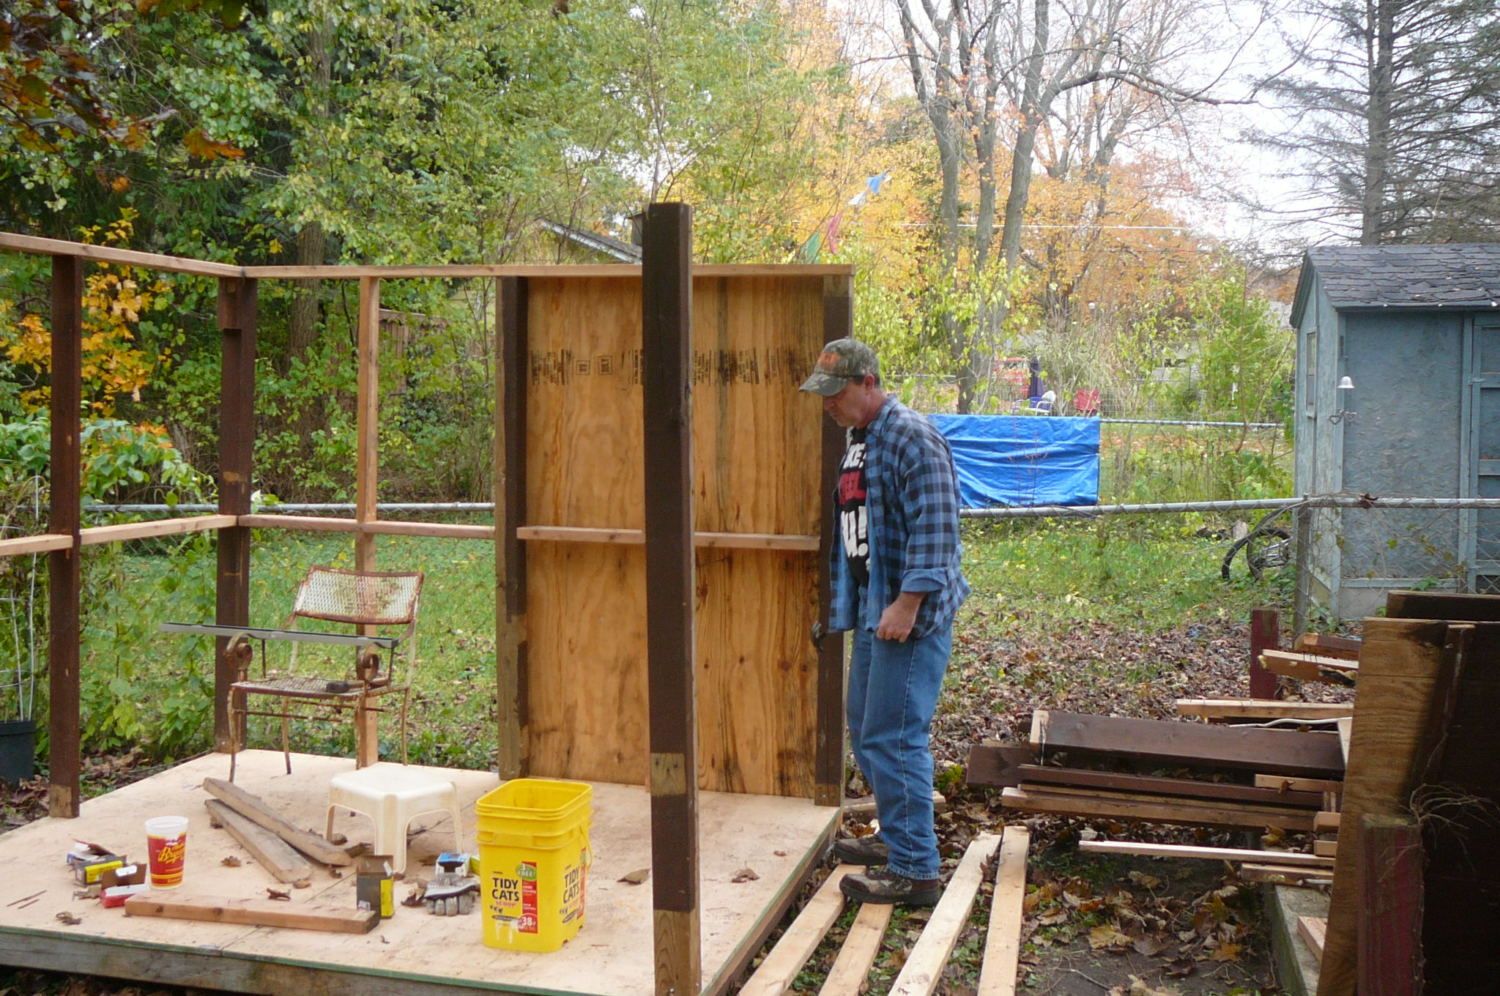
So being salvaged wood, every single board we had to work with first had to be denailed as we called it. One board we denailed, we removed 18 nails from. I say we, but when it came to denailing it was daddy's job.
Again, we ended up with a structure that best utilized the wood we had. The walls were a minimum height of 6', that sounded fine, because that fit well with the panels we saved. Many of those were in rough condition, and many we had to use were in rough shape. Hanging the panels was pretty straight forward, we used scrap wood under the bottom of the board to help lift and hold it in place while it was being nailed on. Your back will thank you.
So that's about all that gets done in the Fall. We pick it up again in the Spring after all of the snow melts, timing it around a vacation and when the chicks will be available.
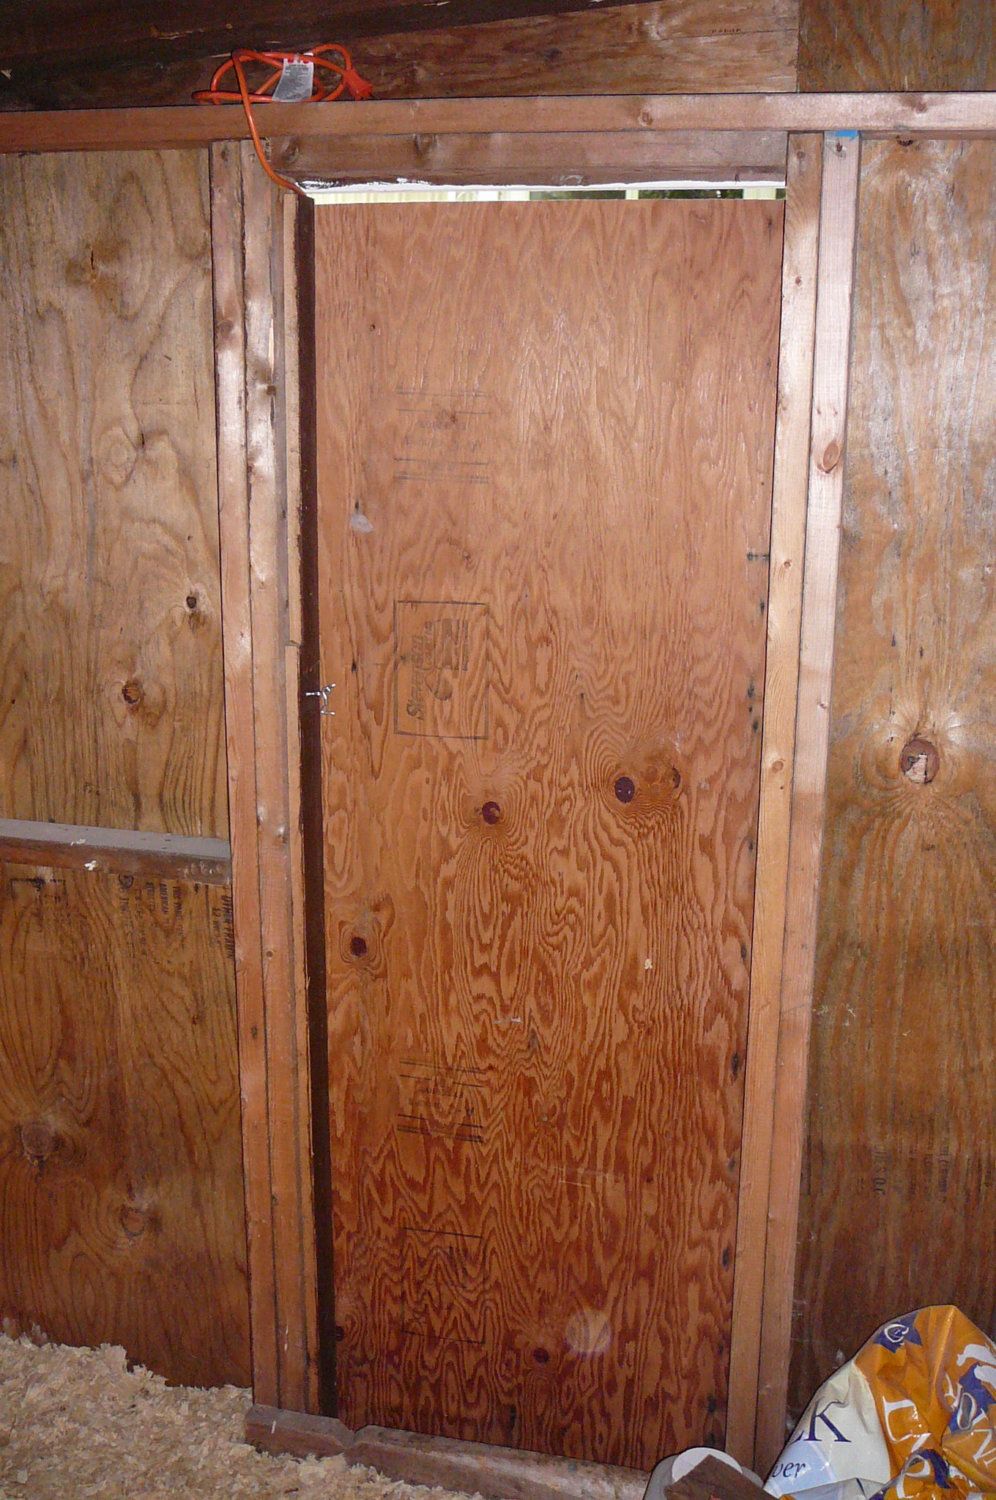
(This picture was taken after the coop was finished) The door opening was framed with 2x4s nailed together. The door itself was cut from a sheet of 4'X8'X1" plywood, all we did was add hinges and a handle. We put a low sill in to try and keep the wood chips inside. There is a simple latch on the inside of the door for when you are working in the coop. Before winter we'll add some trim to cover the gap at the top of the door.
We painted the coop's trim separately and after finishing the opening attached the door hinges to the trim.
Paint and trim covered a multitude of sins.
Missed taking pictures of the rest of the framing and getting the roof on. Ran out of the nicer outside wall panels and had to finish the outer walls with interior wall panels. We had to just kind of cut and piece them together the best we could, hoping paint would cover a lot of problems.
The roof pitch was achieved by stacking up and nailing a bunch of warped 2X4's together until I had a decent pitch. Then laying flat 2X6's, 12 inches apart, than nailed down the panels I had to use for the roof. All that was left was some very thin wall panels, and by doing it this way, it added a lot of strength to the roof. We average 85 inches of snow each Winter so I need it to be strong.
I had several different kinds of shingles laying around from different sources, so I only had to buy one bundle of shingles and one roll of
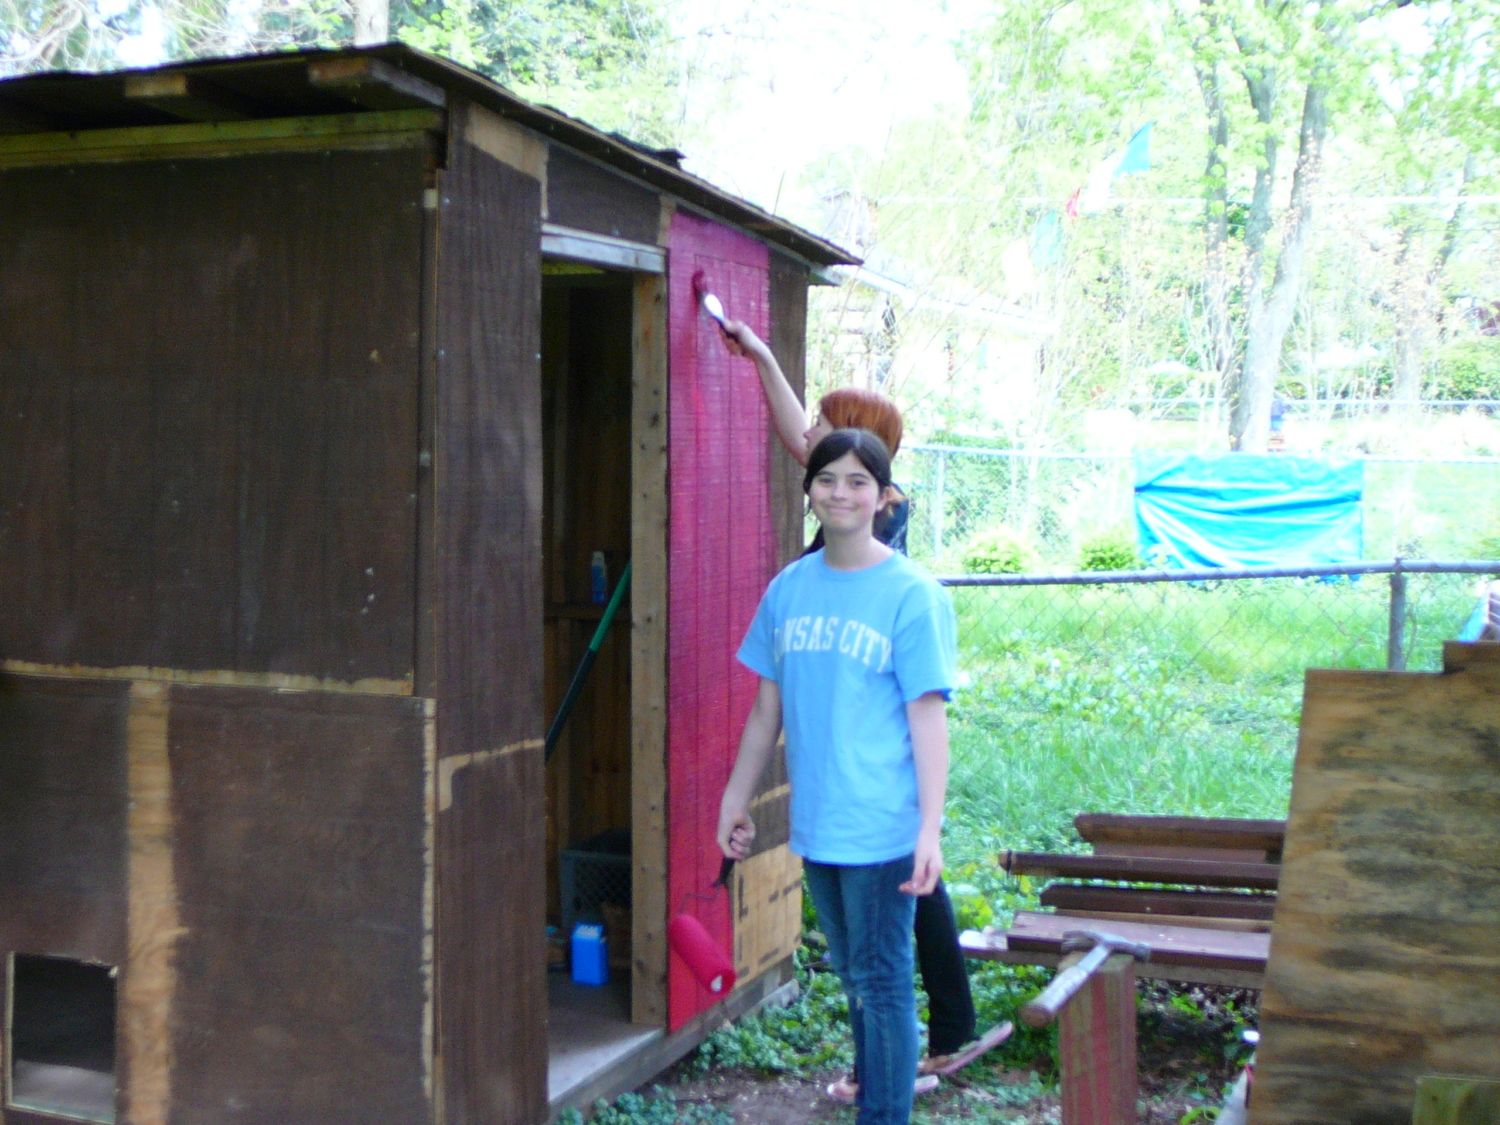
roofing paper, $45. Bought some decent paint, $65 for the paint, red and white. Had plenty of help with the painting tasks. That was very very
helpful!
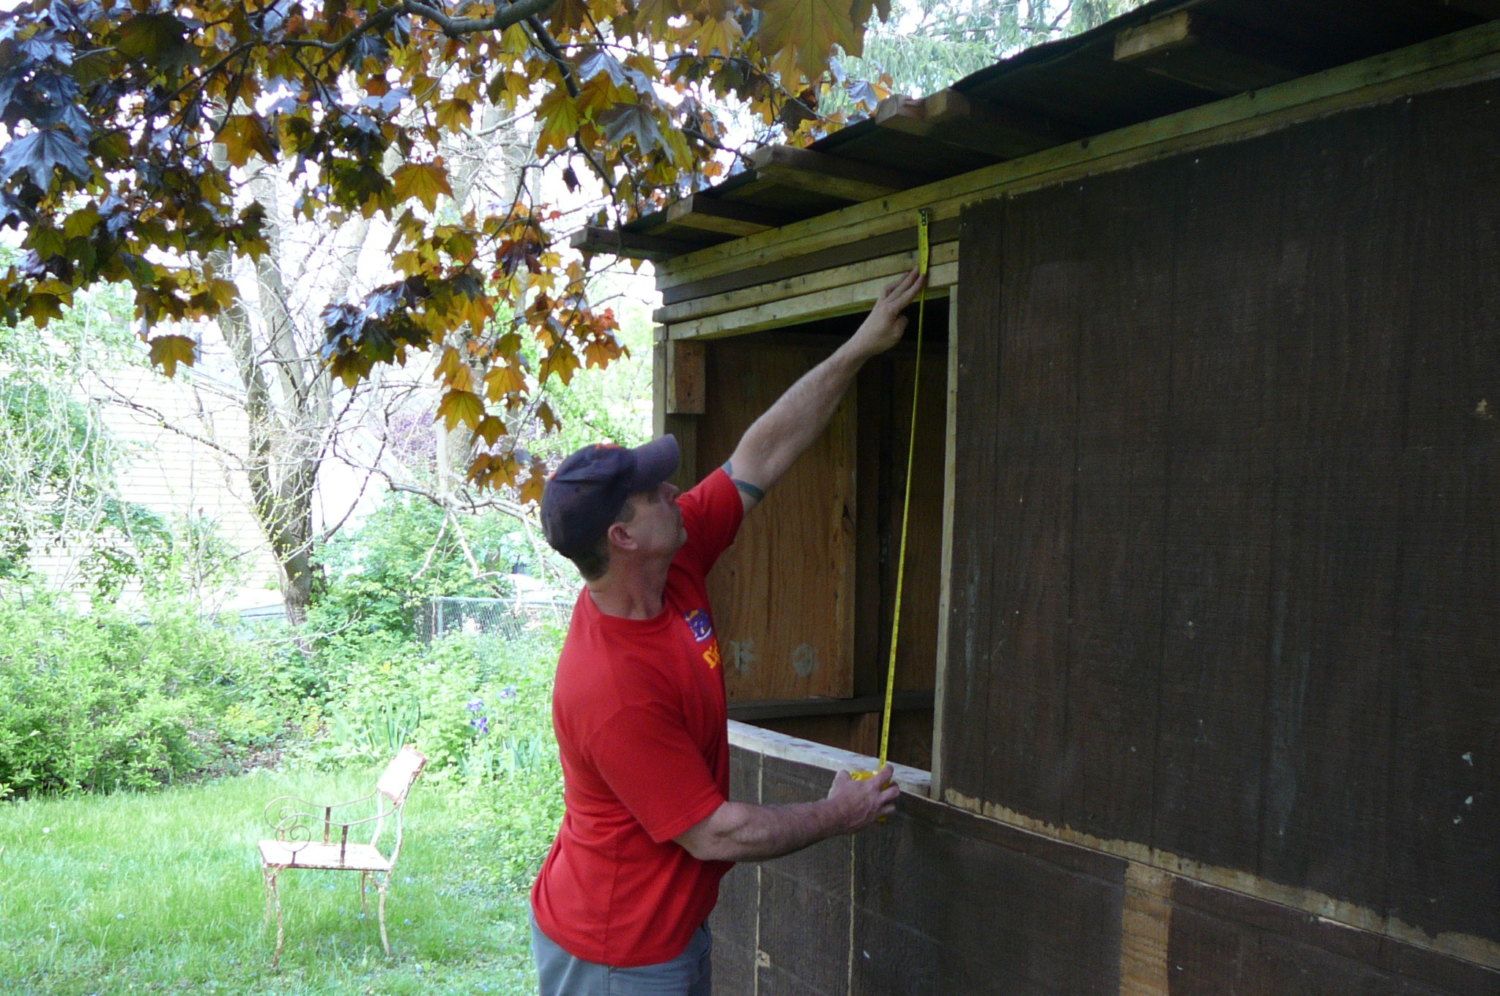
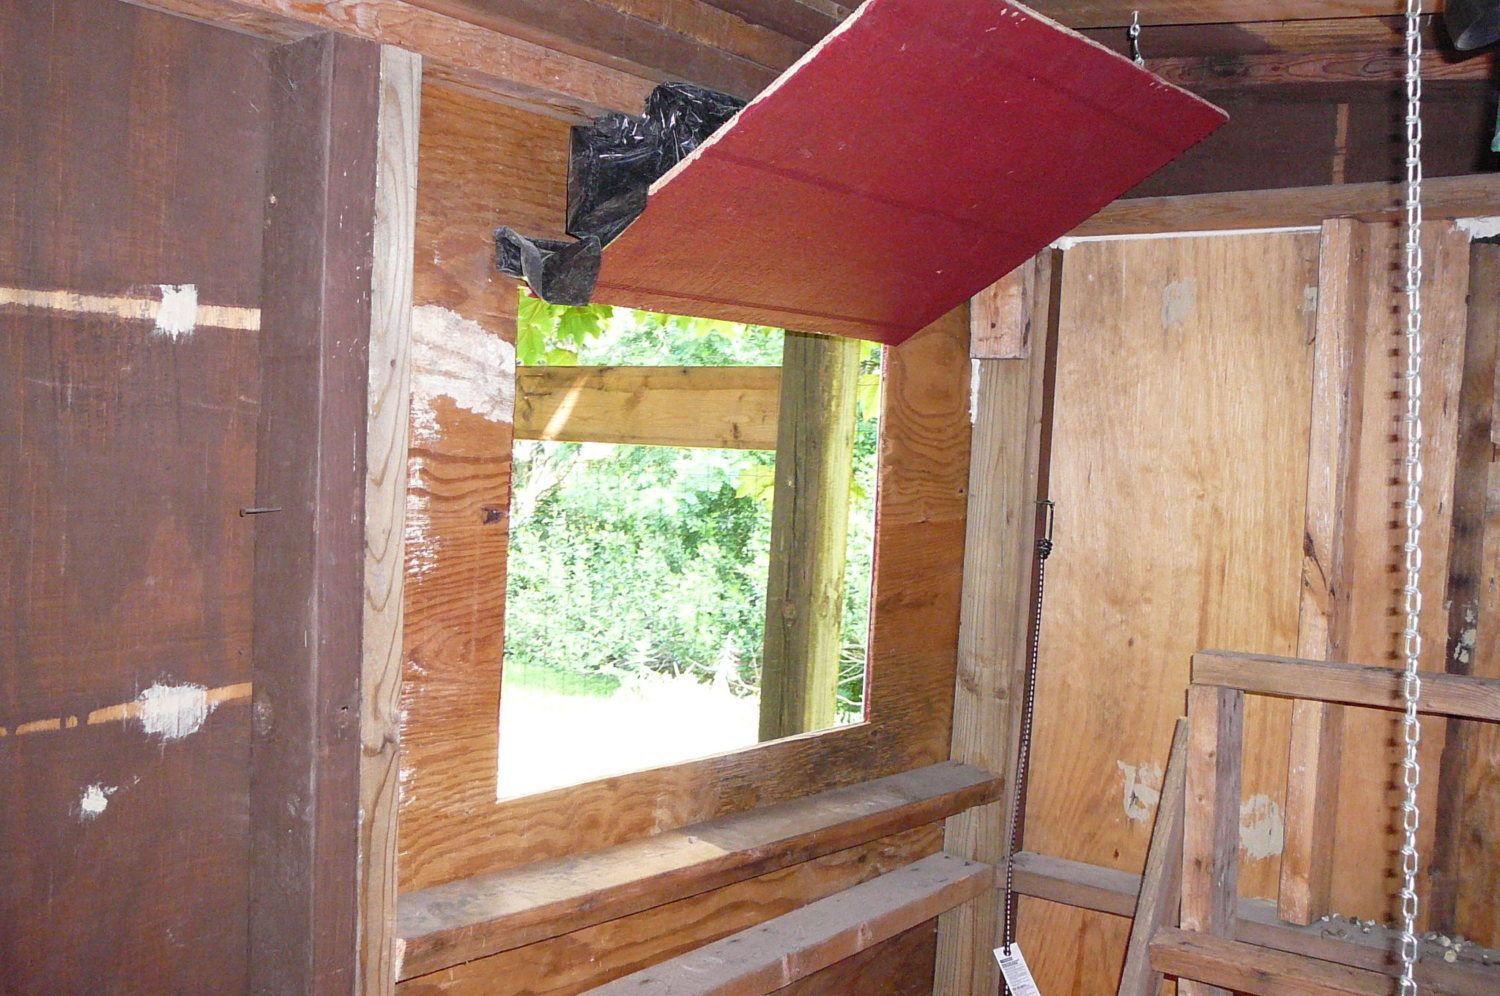
We do not have proper windows at this time, So we're leaving a wall panel open to frame in a window when we find something suitable. So in the meantime we cut out a panel and hinge in a window to get some air into the coop a hook and eye latch holds it open.
Found a linoleum remnant for 20 bucks, 5 dollars for the glue, and we have a floor that's super easy to clean.
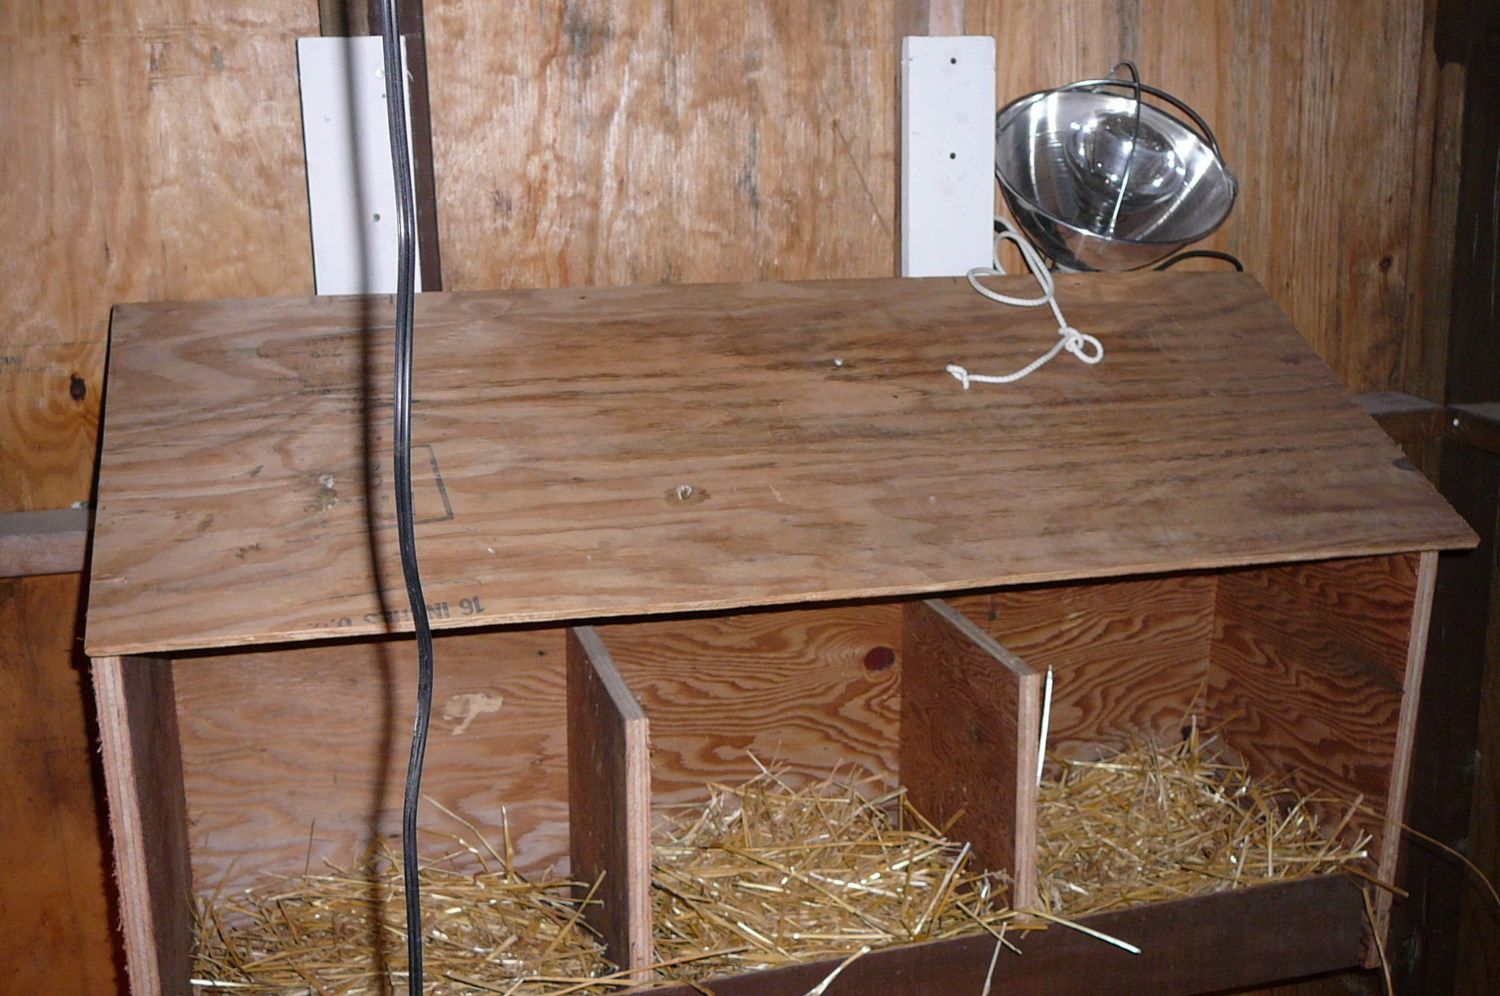
Roost under construction. We have 11 birds, more than enough room.
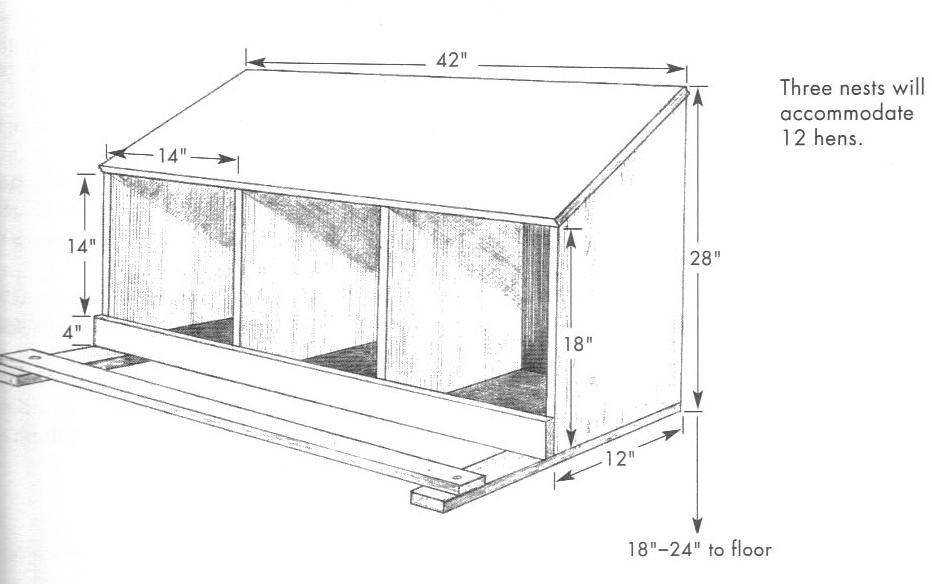
I had one decent sheet of 4'X8'X1" plywood that was used to make the door of the coop and the nesting box. Here are the plans for the nesting box.
.
We cut and nailed 2 x 4s to the back of the nesting box and used those to nail it to the frame of the coop.
So our new chicks are growing much faster than anticipated, especially the ISA's. We've gotta get this coop ready to be inhabited quickly.
And we'll need to get the girls out there before the outdoor run is finished.
First day in new (unfinished) coop!
She's loving the roost.
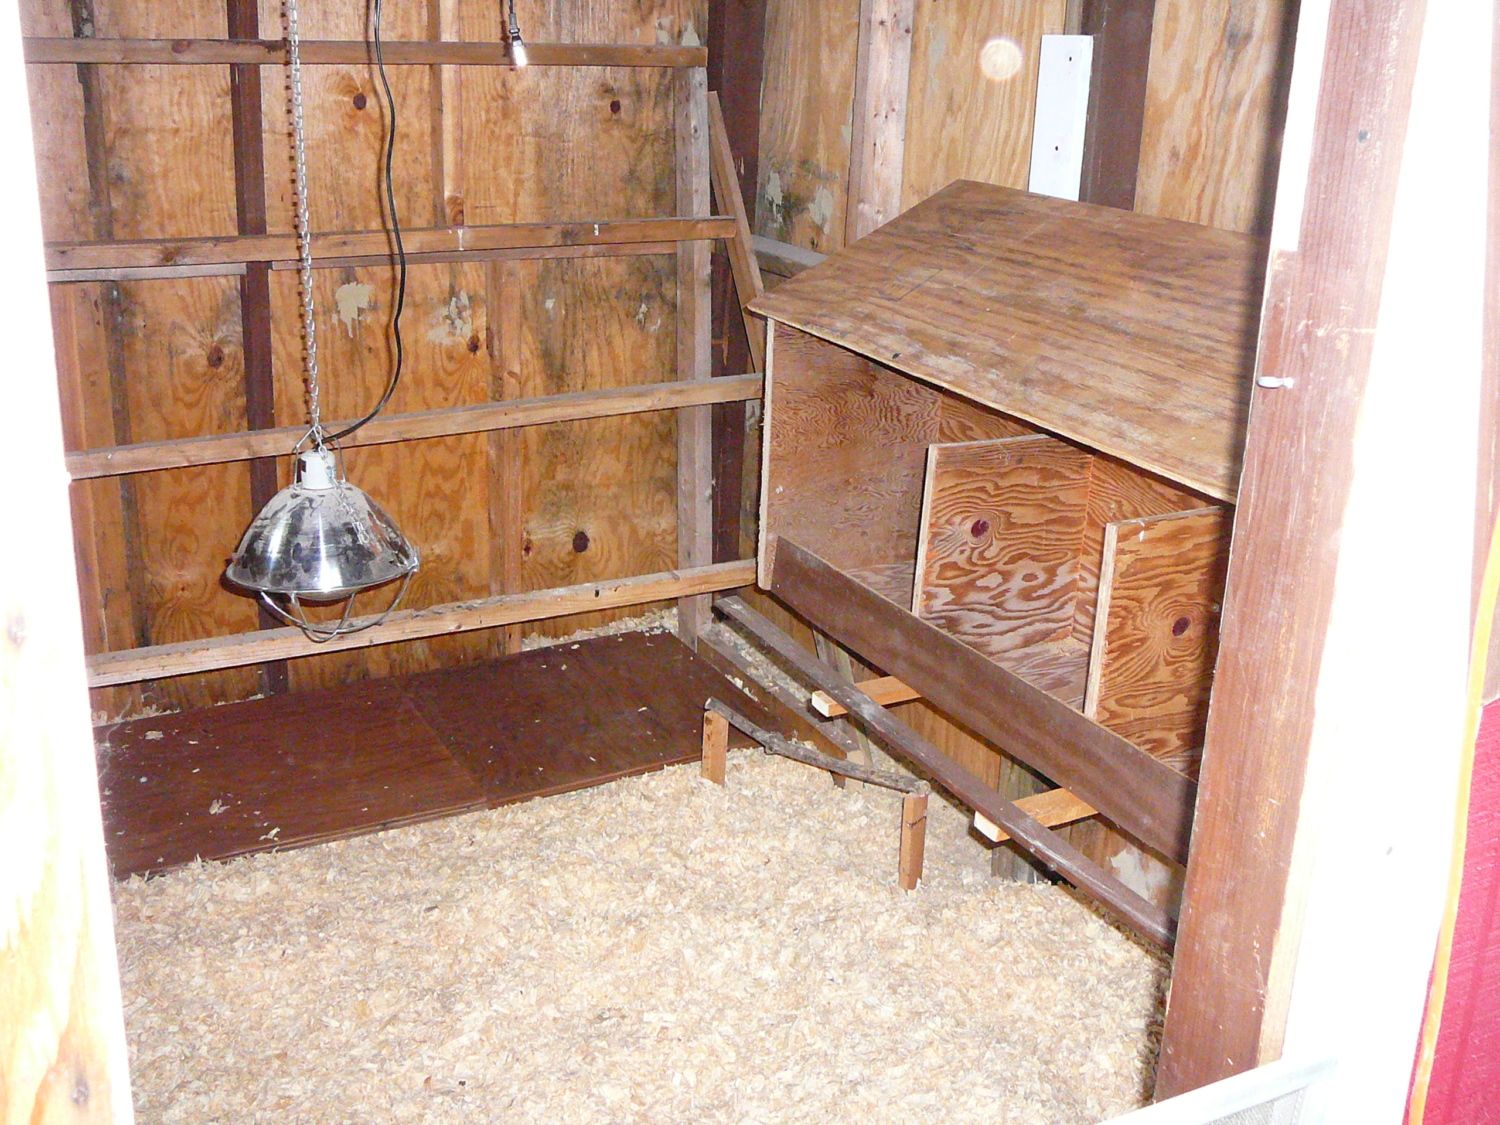
Here's a shot of the interior with the nesting box nailed to the frame. We decided to put a poop board under the roost and it does help. Both the box and the roost are moveable. We have very long snowy winters so the chickens will probably be indoors for long stretches and we wanted the option of being able to rearrange the interior. The electricity was brought over by an extension cord from the garden shed. The lights are hung from the ceiling by simple (but strong) hooks and chains so they can be moved.
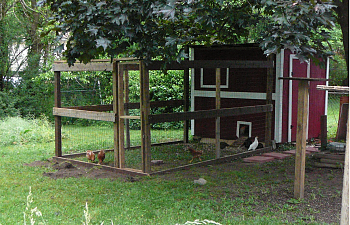
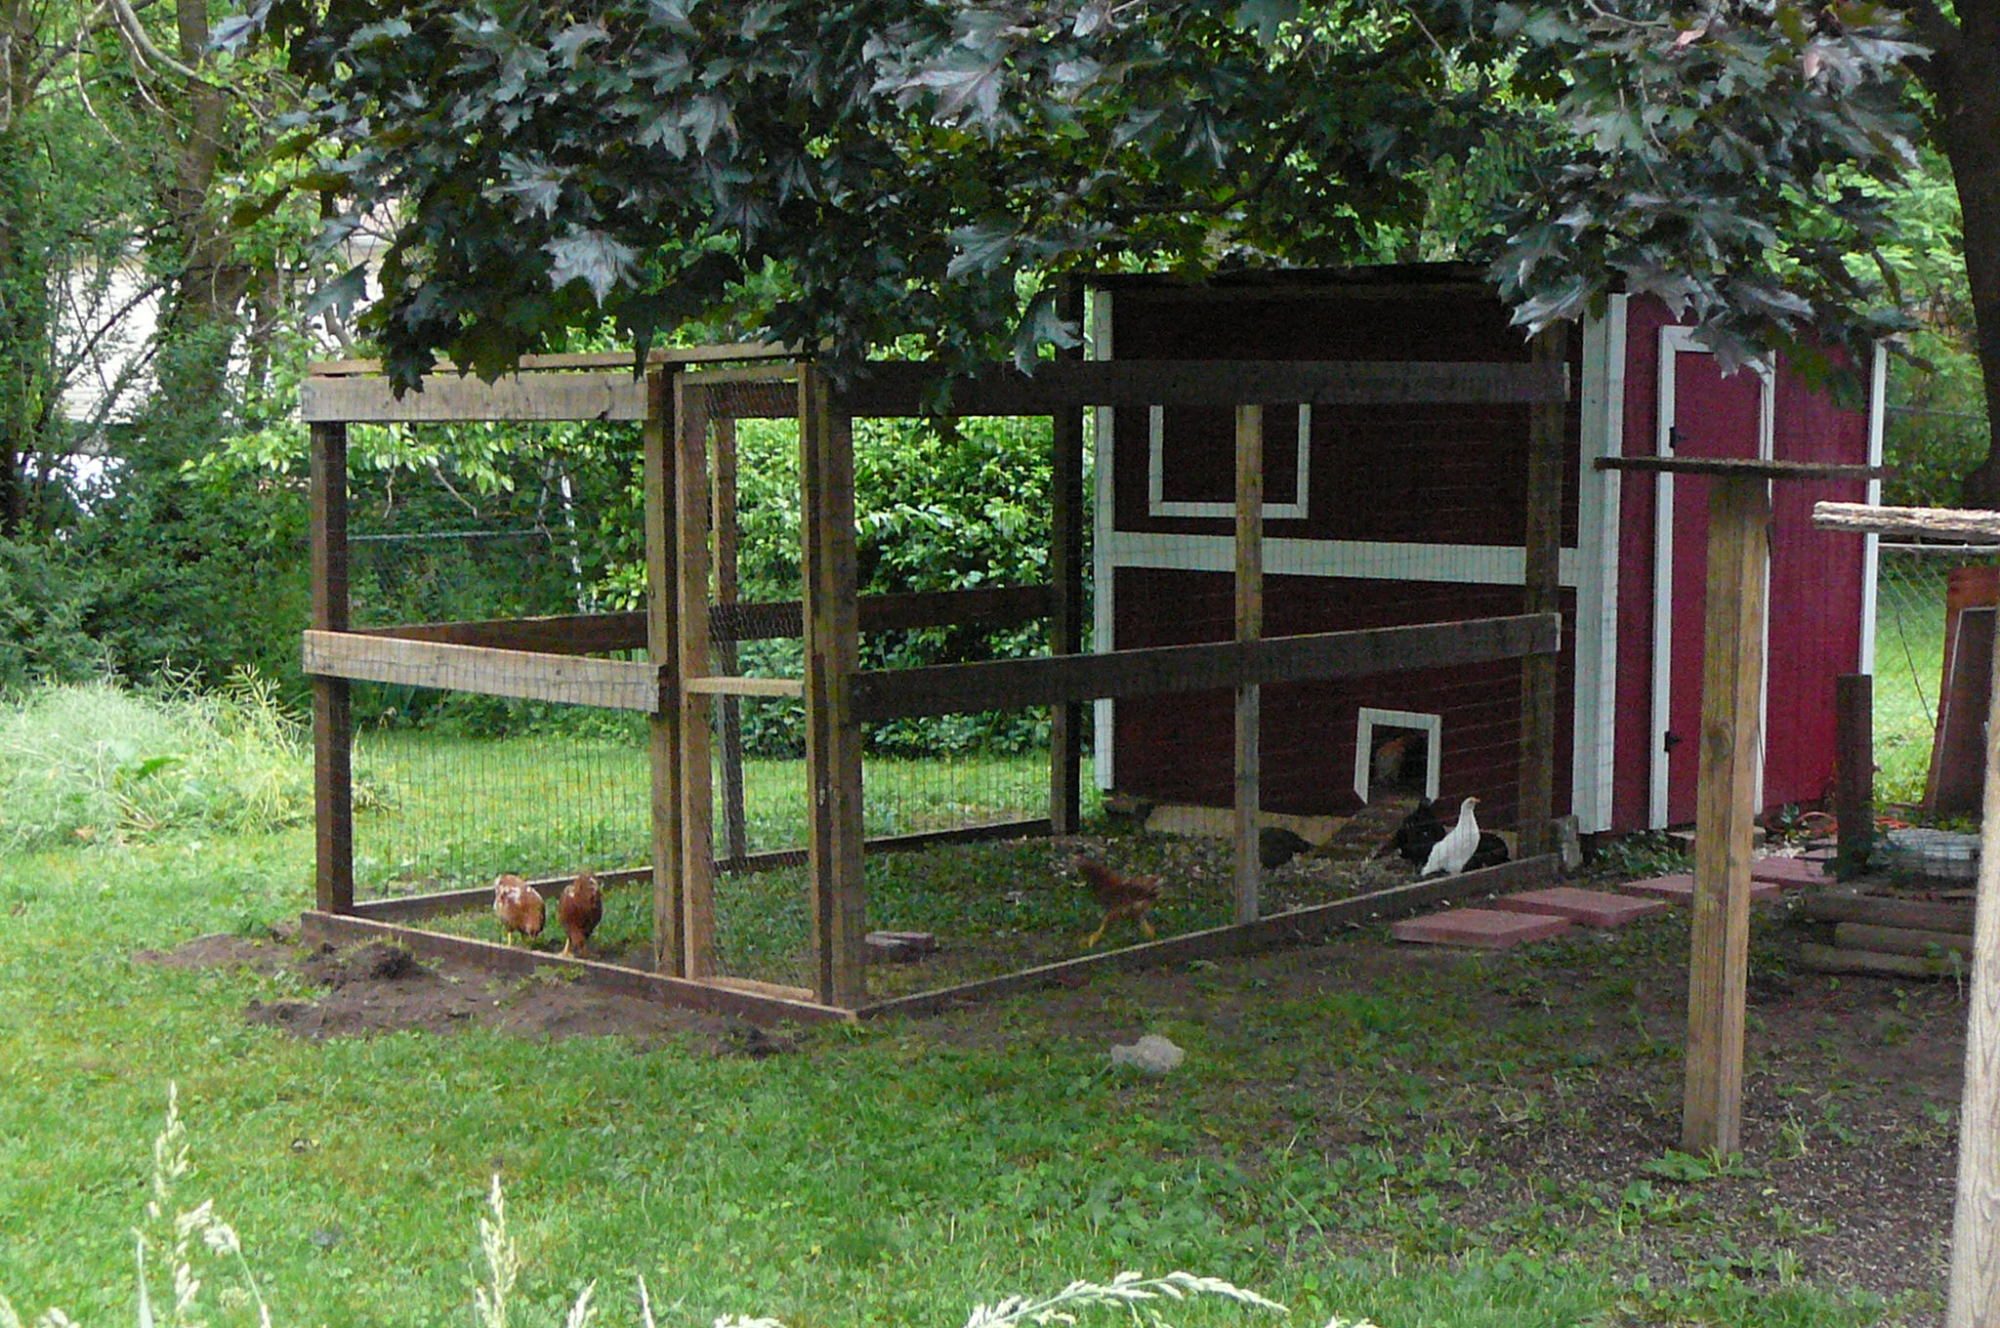
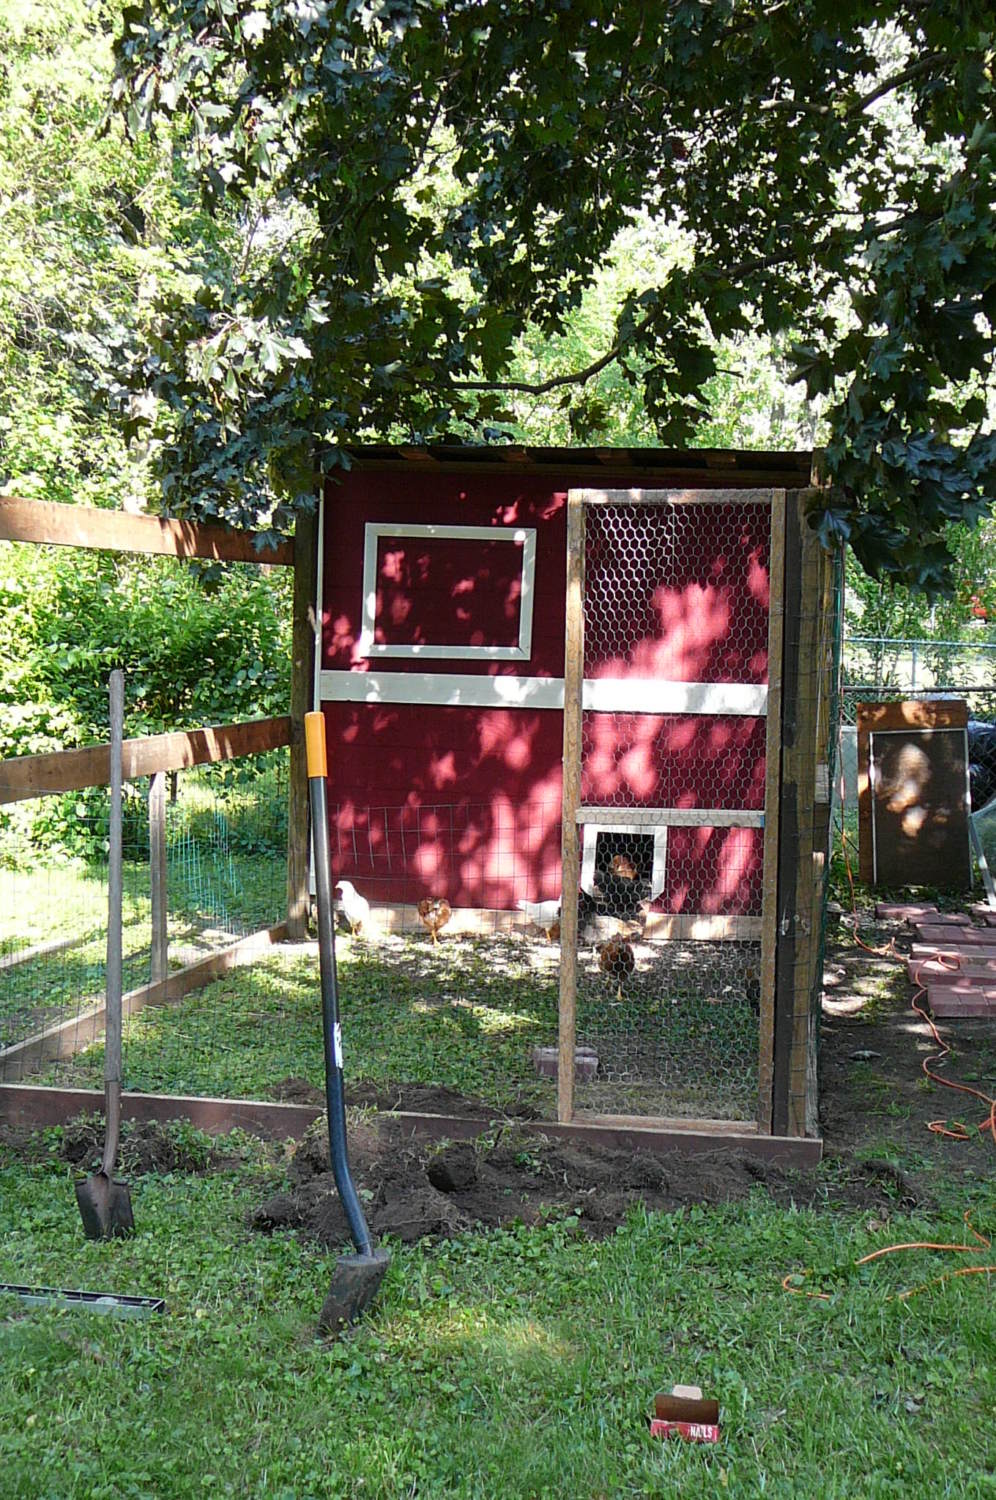
So we have the coop ready to be inhabited, and there is plenty of lumber left to make the girls a really nice outdoor run. We cannot let the girls run loose without supervision, too many neighbors and predators. We found some cheap chicken wire at one of the large home improvement stores, just perfect for the enclosure and framing a door. Not yet finished completely covering the run. Want to cover it with wire but weather proof it some.
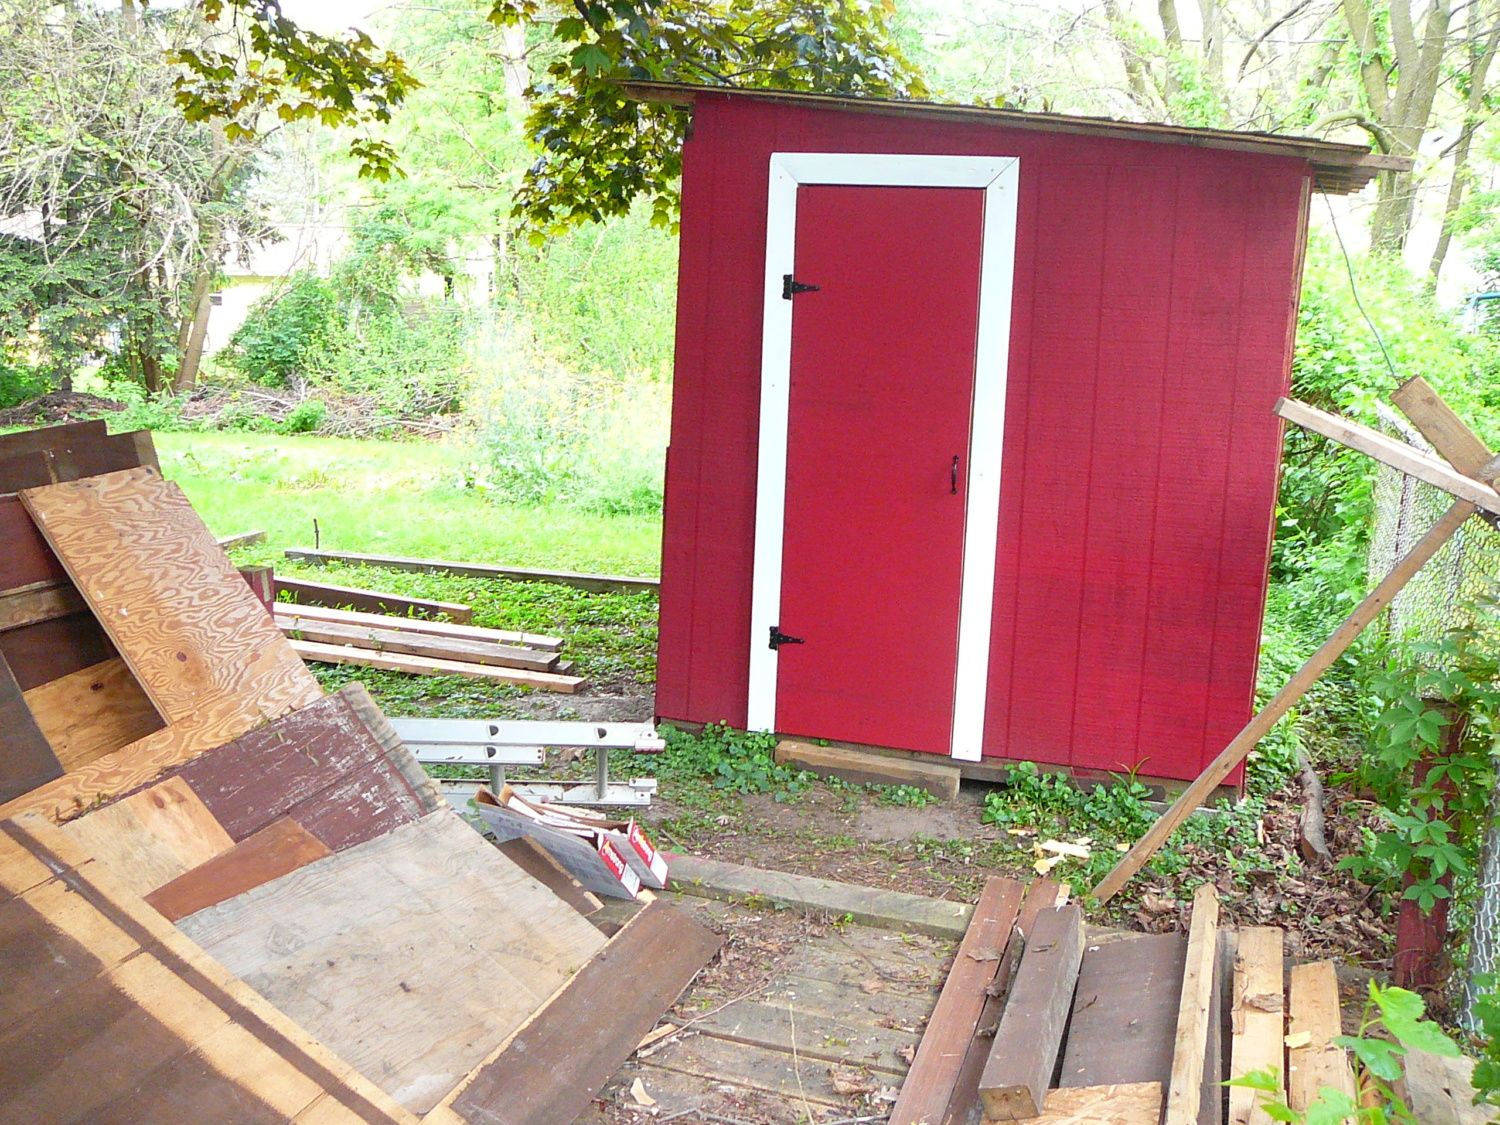
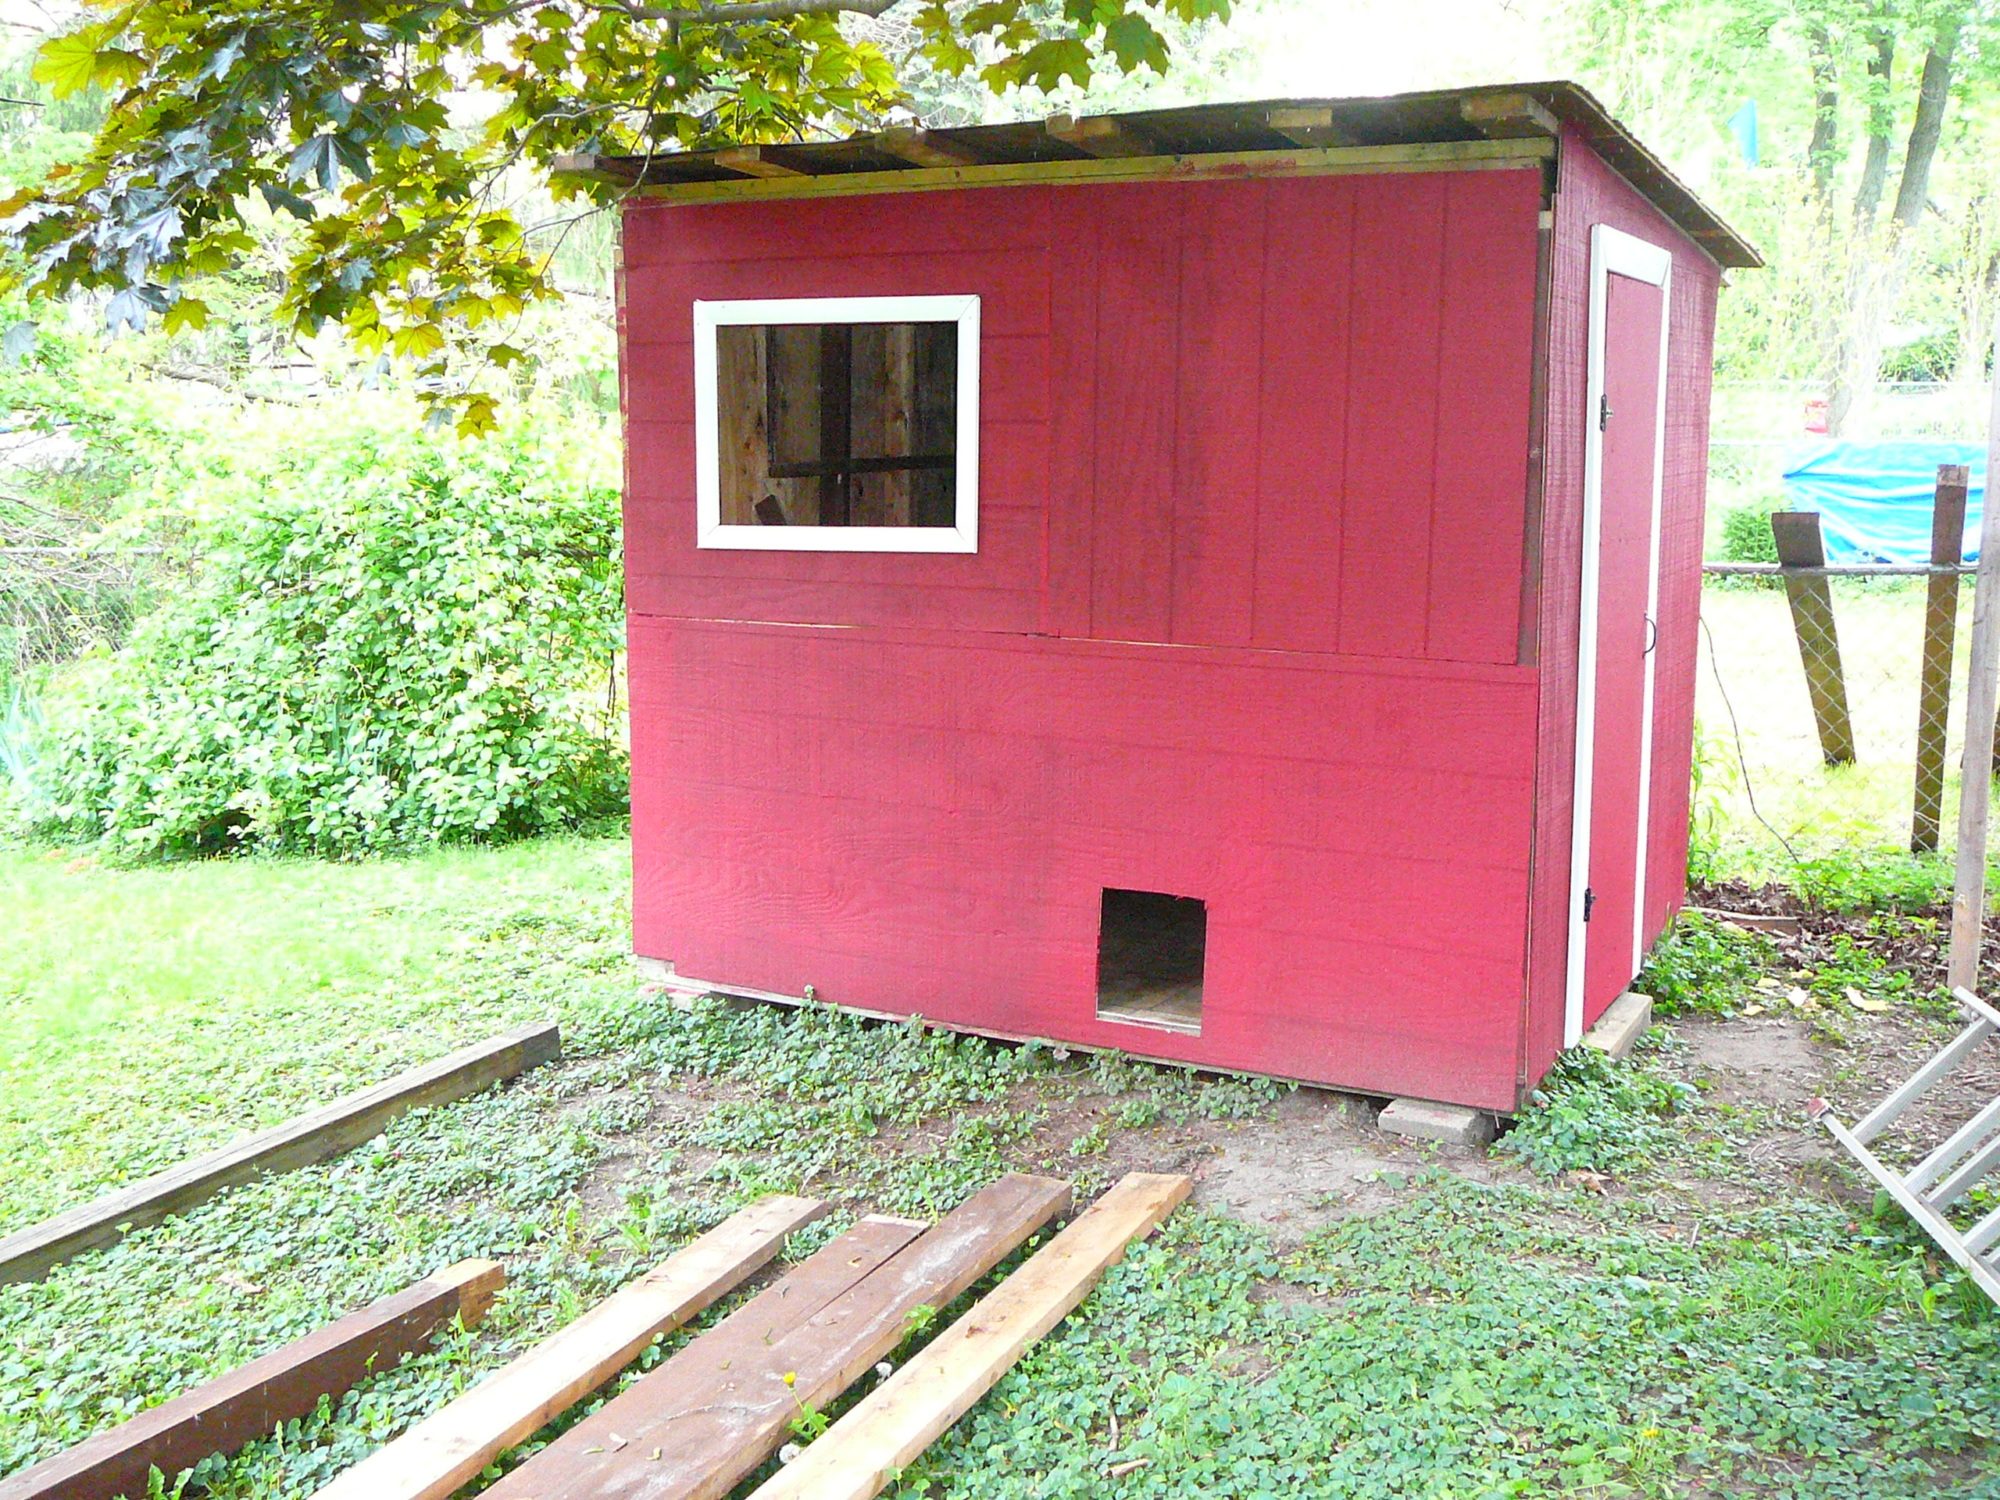
After lots of paint and some pretty white trim, it's looking pretty good. We will be landscaping it next, and some other finishing touches. The chicken door is something we haven't decided what we want to do. And as the Summer goes on we'll be working on closing the drafts in the structure. I think I'll be cutting another spot for a window next to the door to create a cross breeze in the coop. Otherwise we are very pleased with how it turned out. Our biggest challenge by far was working with very old and warped wood. Not a single board was straight, so there are a lot of corners and edges that don't fit together well
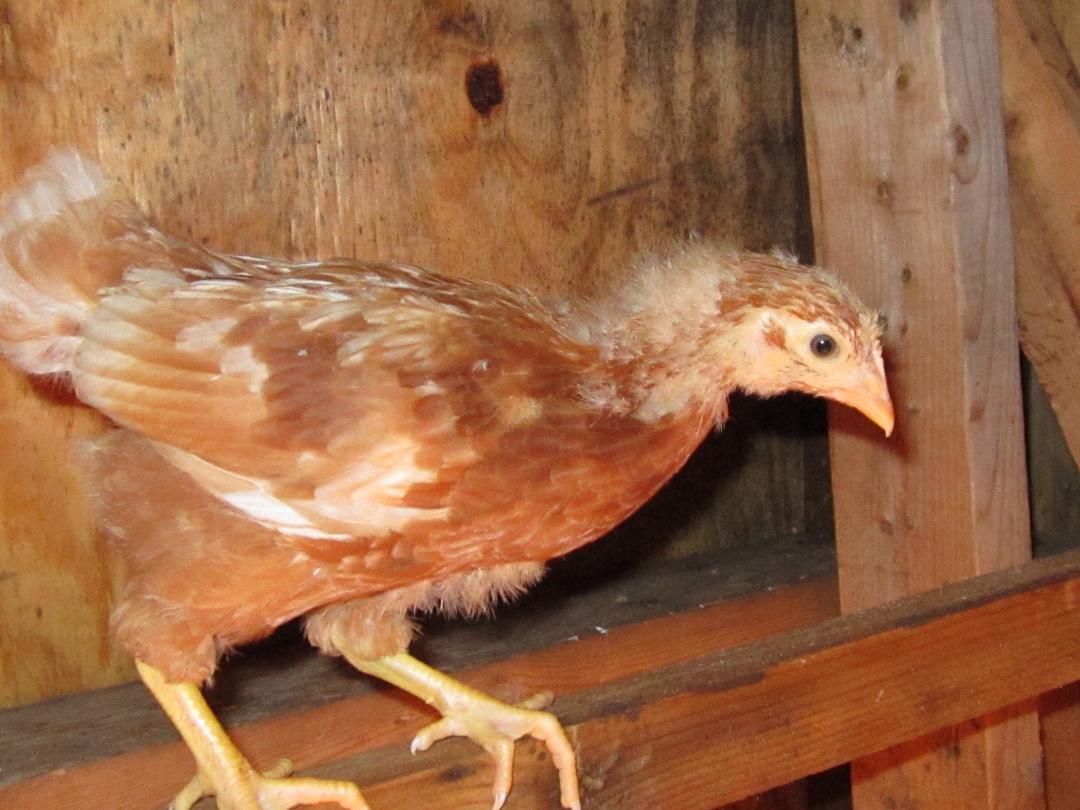
Our girls love their new home, lots of room to stretch out. We have 11 birds, the 3 ISA reds at 7 weeks old, are one week older than the rest. 2 Leghorns, 2 Black Jersey Giants, 2 Golden Lace Wyandotte, and 2 EE. Including feeders, water-er, lights, some paving stones, to date we've spent less than $200. Tons of work, but now that we're pretty much finished we all feel it was well worth it. And when we begin to get eggs it will be even better.
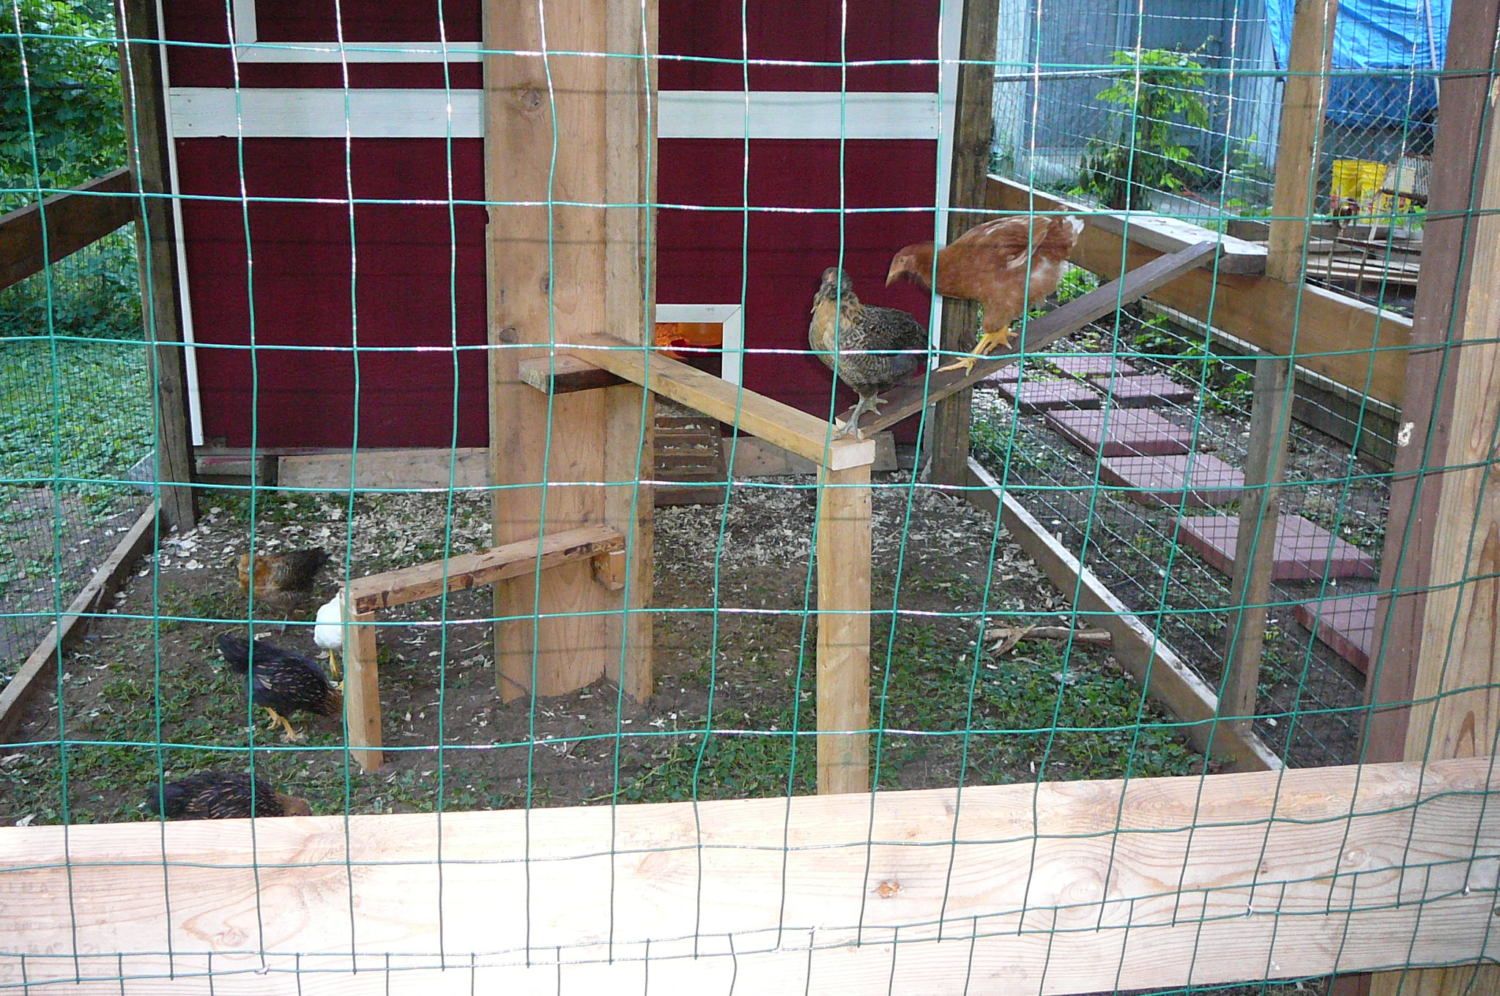
Here's the beginning of the jungle gym. The center post was a very large step that was removed in one piece. It is buried several feet in the ground. Several chicken ladders and some places to sit up high will make them happy.
The original design of the roost wasn't working out. All of the chickens wanted to be on the top rung and after a few weeks there wasn't enough room for everybody. So, we swapped out the 1 X 1 for a longer 2 X 4 as there was enough room to make it wider. Another problem was they were using the nesting boxes to hop on the roost. We added another step to the wall for easier access hoping they would use it instead, it seems to be working.
We enlarged the jungle gym and added platforms and ladders, the chickens love them.
We just threw a couple of tarps over the run to keep the chickens from escaping (again). This is just until something more permanent goes up in this Fall.
This project will go well into the Fall as we add insulation, trim, decided on hardware that won't freeze and find suitable windows. All in all we spent less than $300, birds and feeders included. No special tools at all with the exception of an old electric saw I borrowed. Pretty primitive I admit, and not exactly what I had envisioned as I began, but very solid, and we had the whole family involved.
11 chickens, all with names now, and as of the first week in August, still about a month away from getting eggs.
The story of how our coop came to be really starts last Summer when we were asked to tear down an old structure on my folks farm as a source of lumber to build a hen house with. Well that sounded like our best bet to get the materials we needed with minimal expense. So we took 5 weekends in September and October before the weather got too bad and got to work.
Unfortunately we did not get documentation of the destruction, it was quite a project. We took it apart board by board the best we could knowing we needed as much good lumber as we could salvage. We took home two pickup truck loads of lumber from it all, and filled a large dumpster with the refuse, of which there was a lot. None of the roof was salvageable, water damage. And then some of it was just so hard to get apart in one piece that it was torn out and thrown away. I really regret not getting photos of the wall full of snakes. As we tore down one of the walls of the building the insulation was full of snakes of all sizes. About 30 of them slowly slithered away as we tore out the old insulation. (My wife says it was more, WAY more.)
So the construction of the coop really started when we were finished at the farm last Fall. Didn't have a whole lot of time before the conditions get really bad here. I had two crates I had gotten from work that had some nice wood I wanted to use for the flooring of our coop. Each sheet measured 4'X6', so that determined the dimensions of our floor, I had two sheets that were used to frame out a floor 6'X8'.
There was no shortage of 4'X4' posts to use, so the floor was framed out with those. We dug holes in the yard and leveled out some cinder blocks to set the frame on.
We have no idea what we are doing but it was actually quite easy once we thought through what we wanted to do with the materials we brought home. We did not want to spend too much money on our chicken palace, but we want it to be nice. Nearly everything we learned about putting this thing together was taken from the pages of the members here and their coop designs. We spent many an hour looking at the coops of others and how they were put together. There were some that were more helpful than others, we bookmarked a couple of those and referred back to them often. I'm not a carpenter, but I found this site that helped me learn how to put things together.
http://www.buildeazy.com/chicken_coop_1.html
We attached the 4x4 posts at the corners and mid points on the long walls. 4x4s were used to complete the framing.
Now I had read that by fixing the walls directly to the flooring would make clean up easier. So far I believe this was a good idea. We've been using a plastic snow shovel to scoop out the floor and it's been quick and easy. We do not have plans for what we've done here. We did find online some basic floor plans for building a small structure like this that was helpful, but mostly coop designs here
.
So being salvaged wood, every single board we had to work with first had to be denailed as we called it. One board we denailed, we removed 18 nails from. I say we, but when it came to denailing it was daddy's job.
Again, we ended up with a structure that best utilized the wood we had. The walls were a minimum height of 6', that sounded fine, because that fit well with the panels we saved. Many of those were in rough condition, and many we had to use were in rough shape. Hanging the panels was pretty straight forward, we used scrap wood under the bottom of the board to help lift and hold it in place while it was being nailed on. Your back will thank you.
So that's about all that gets done in the Fall. We pick it up again in the Spring after all of the snow melts, timing it around a vacation and when the chicks will be available.
(This picture was taken after the coop was finished) The door opening was framed with 2x4s nailed together. The door itself was cut from a sheet of 4'X8'X1" plywood, all we did was add hinges and a handle. We put a low sill in to try and keep the wood chips inside. There is a simple latch on the inside of the door for when you are working in the coop. Before winter we'll add some trim to cover the gap at the top of the door.
We painted the coop's trim separately and after finishing the opening attached the door hinges to the trim.
Paint and trim covered a multitude of sins.
Missed taking pictures of the rest of the framing and getting the roof on. Ran out of the nicer outside wall panels and had to finish the outer walls with interior wall panels. We had to just kind of cut and piece them together the best we could, hoping paint would cover a lot of problems.
The roof pitch was achieved by stacking up and nailing a bunch of warped 2X4's together until I had a decent pitch. Then laying flat 2X6's, 12 inches apart, than nailed down the panels I had to use for the roof. All that was left was some very thin wall panels, and by doing it this way, it added a lot of strength to the roof. We average 85 inches of snow each Winter so I need it to be strong.
I had several different kinds of shingles laying around from different sources, so I only had to buy one bundle of shingles and one roll of
roofing paper, $45. Bought some decent paint, $65 for the paint, red and white. Had plenty of help with the painting tasks. That was very very
helpful!
We do not have proper windows at this time, So we're leaving a wall panel open to frame in a window when we find something suitable. So in the meantime we cut out a panel and hinge in a window to get some air into the coop a hook and eye latch holds it open.

Found a linoleum remnant for 20 bucks, 5 dollars for the glue, and we have a floor that's super easy to clean.
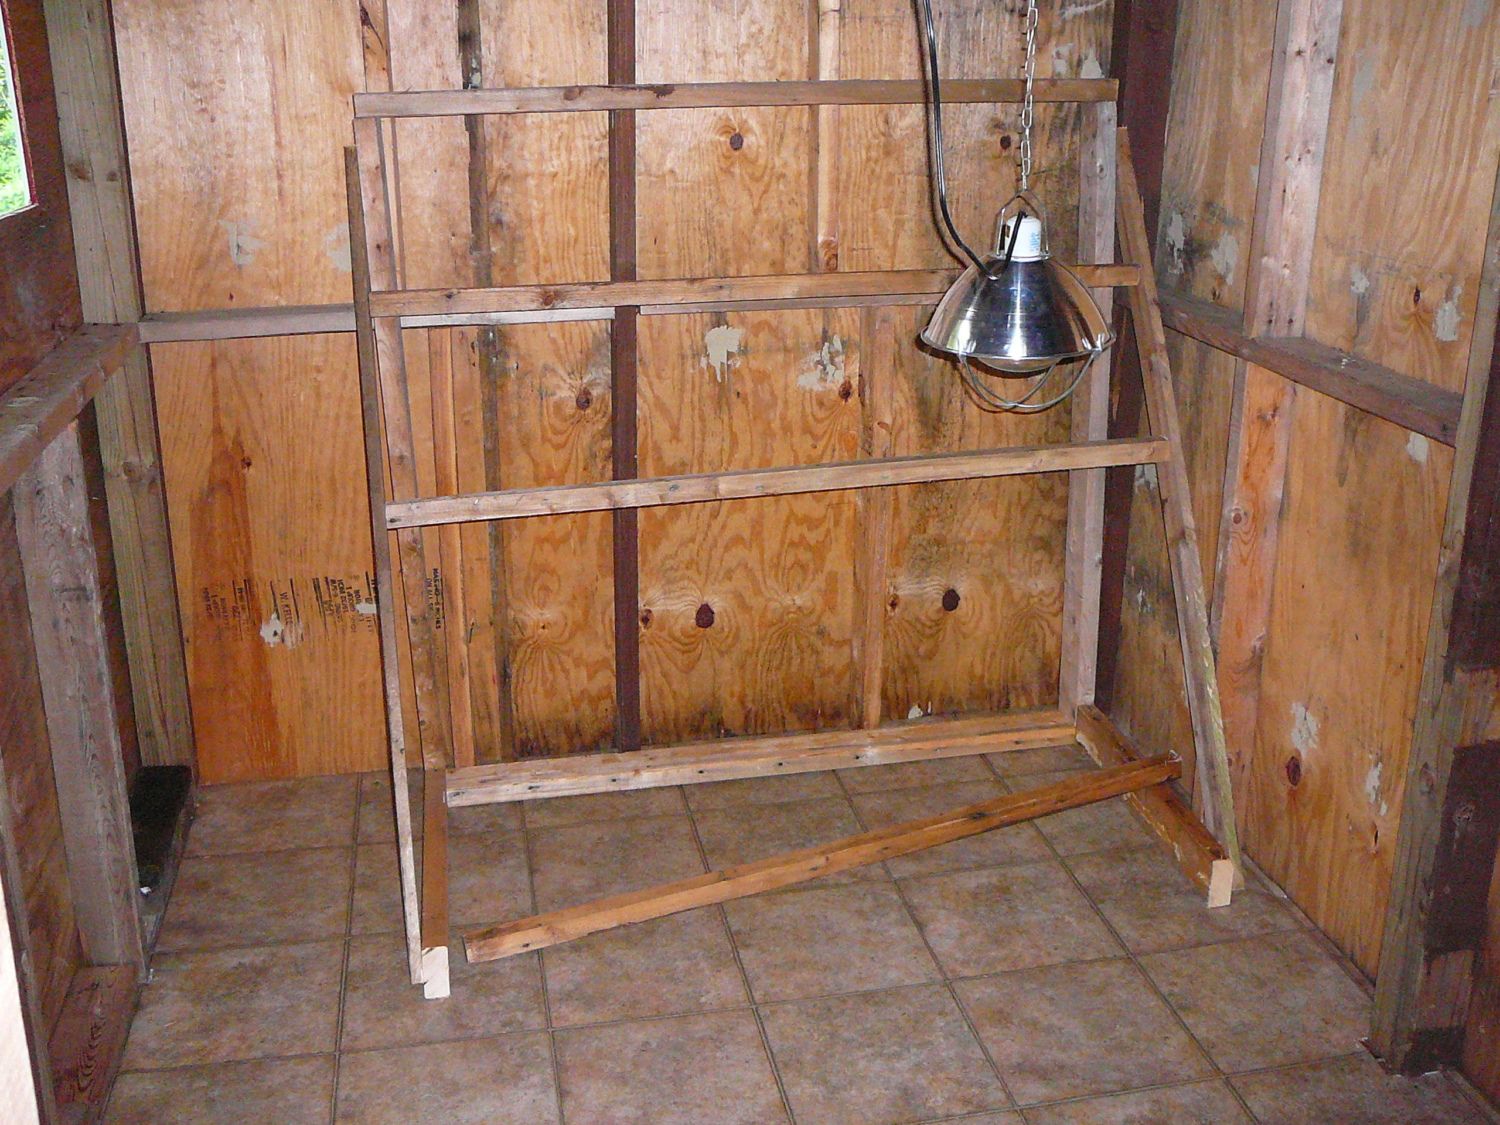
Roost under construction. We have 11 birds, more than enough room.
I had one decent sheet of 4'X8'X1" plywood that was used to make the door of the coop and the nesting box. Here are the plans for the nesting box.
.
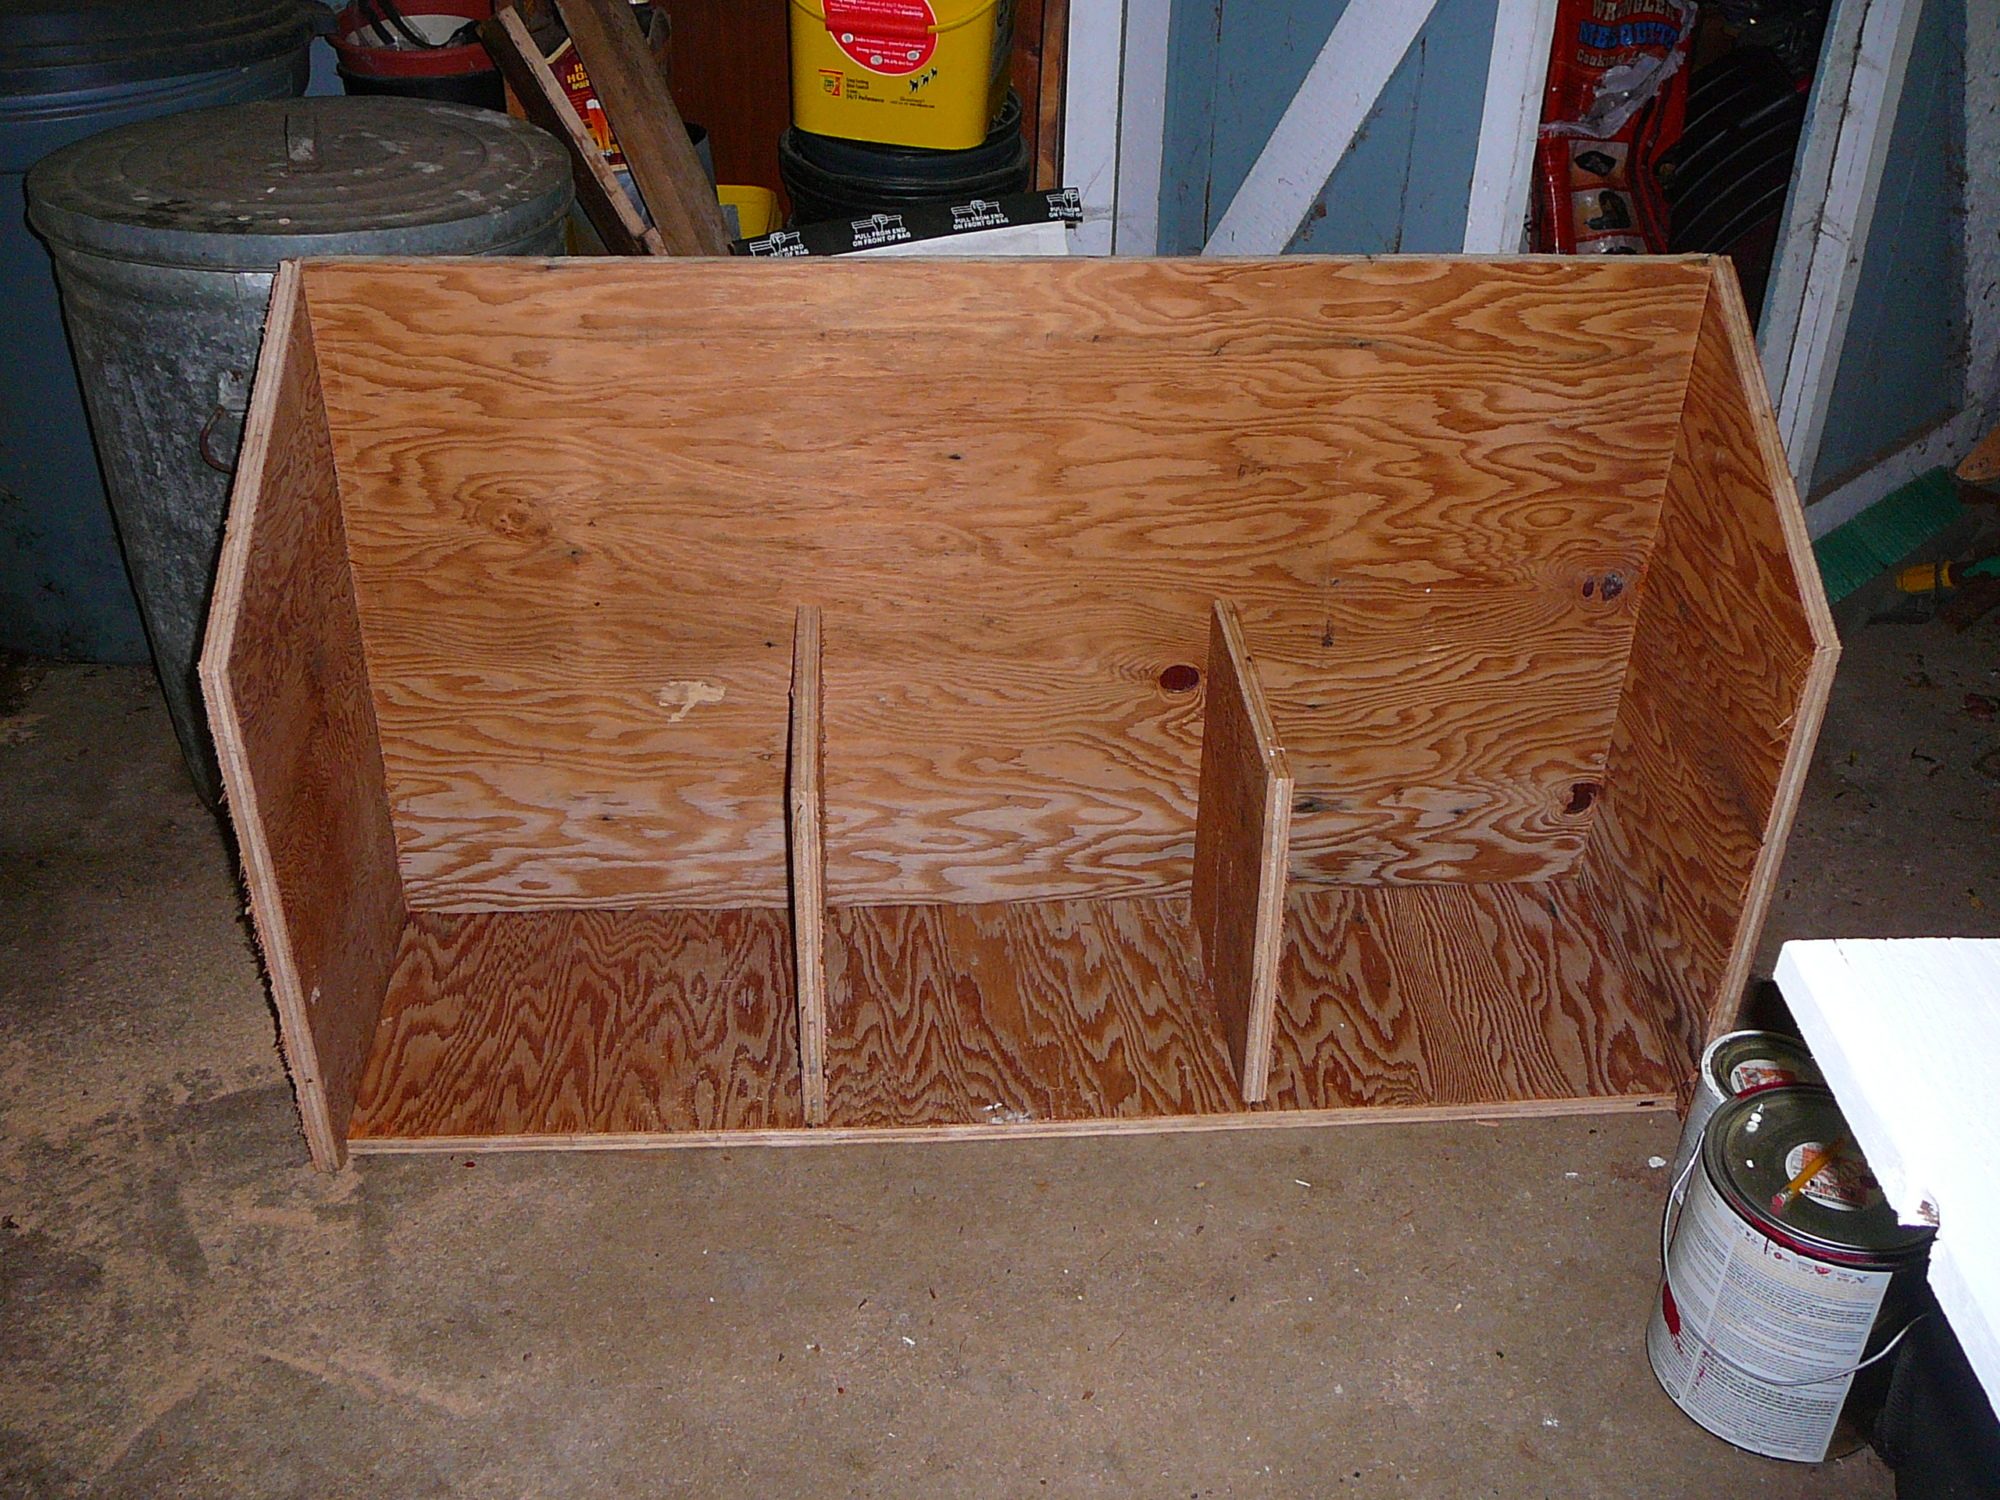

We cut and nailed 2 x 4s to the back of the nesting box and used those to nail it to the frame of the coop.
So our new chicks are growing much faster than anticipated, especially the ISA's. We've gotta get this coop ready to be inhabited quickly.
And we'll need to get the girls out there before the outdoor run is finished.
First day in new (unfinished) coop!

She's loving the roost.
Here's a shot of the interior with the nesting box nailed to the frame. We decided to put a poop board under the roost and it does help. Both the box and the roost are moveable. We have very long snowy winters so the chickens will probably be indoors for long stretches and we wanted the option of being able to rearrange the interior. The electricity was brought over by an extension cord from the garden shed. The lights are hung from the ceiling by simple (but strong) hooks and chains so they can be moved.
So we have the coop ready to be inhabited, and there is plenty of lumber left to make the girls a really nice outdoor run. We cannot let the girls run loose without supervision, too many neighbors and predators. We found some cheap chicken wire at one of the large home improvement stores, just perfect for the enclosure and framing a door. Not yet finished completely covering the run. Want to cover it with wire but weather proof it some.

After lots of paint and some pretty white trim, it's looking pretty good. We will be landscaping it next, and some other finishing touches. The chicken door is something we haven't decided what we want to do. And as the Summer goes on we'll be working on closing the drafts in the structure. I think I'll be cutting another spot for a window next to the door to create a cross breeze in the coop. Otherwise we are very pleased with how it turned out. Our biggest challenge by far was working with very old and warped wood. Not a single board was straight, so there are a lot of corners and edges that don't fit together well
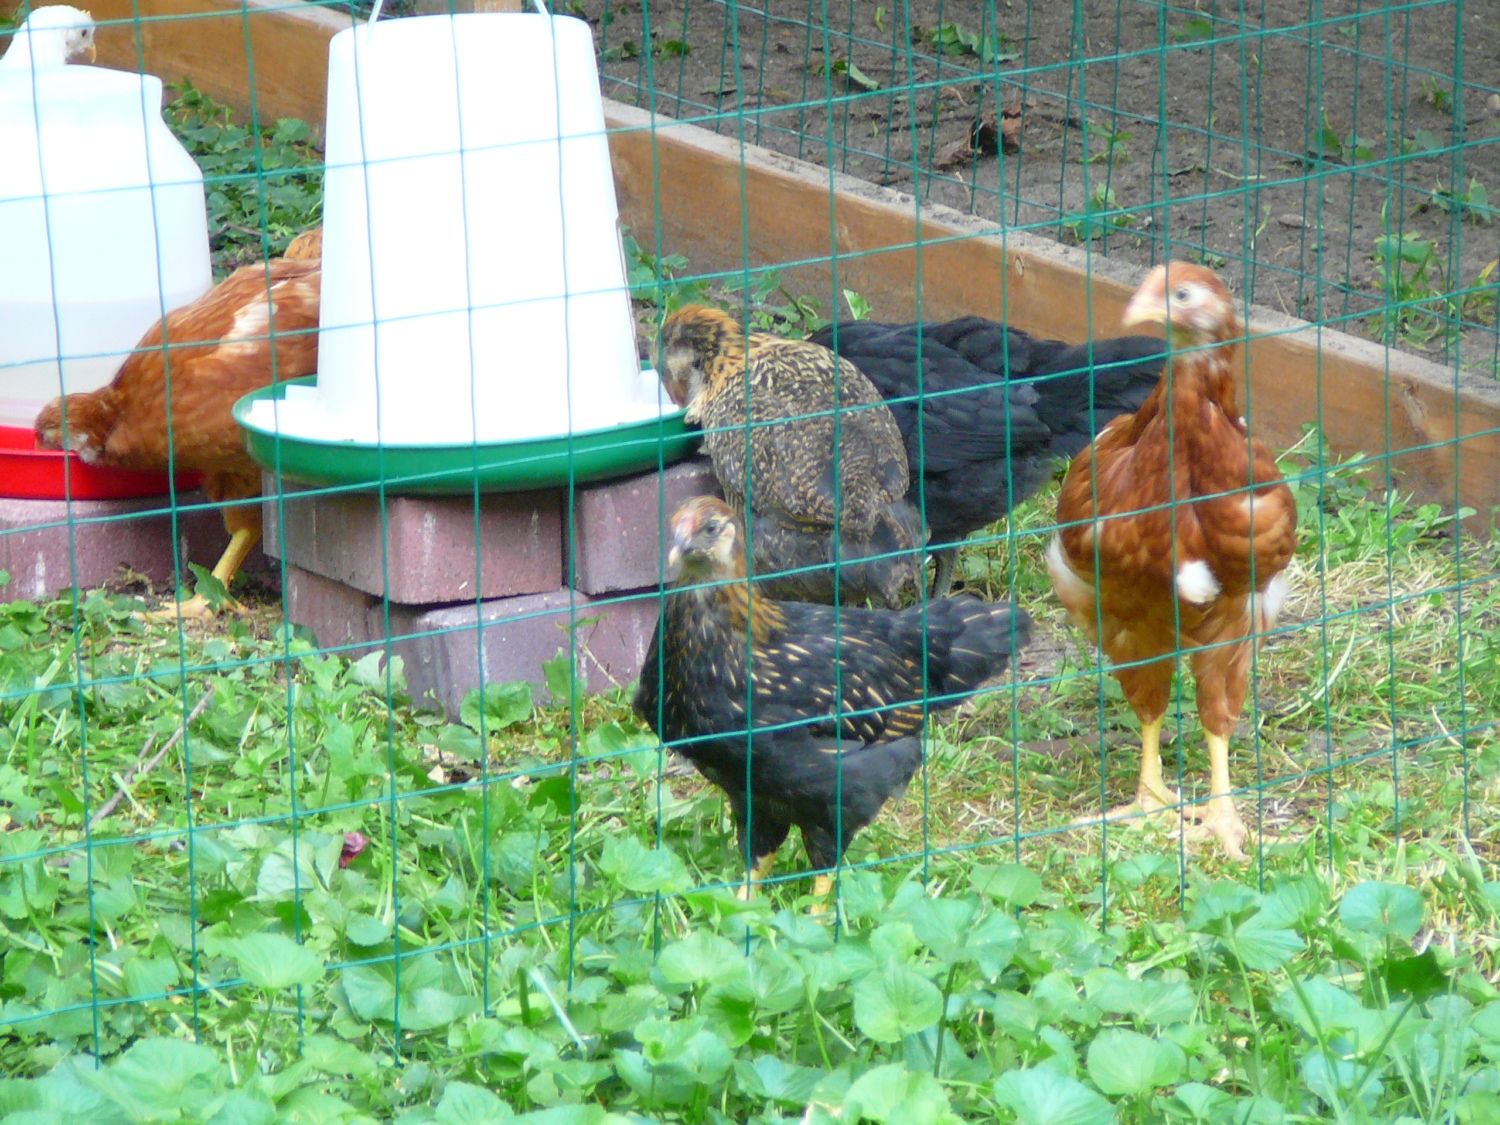
Our girls love their new home, lots of room to stretch out. We have 11 birds, the 3 ISA reds at 7 weeks old, are one week older than the rest. 2 Leghorns, 2 Black Jersey Giants, 2 Golden Lace Wyandotte, and 2 EE. Including feeders, water-er, lights, some paving stones, to date we've spent less than $200. Tons of work, but now that we're pretty much finished we all feel it was well worth it. And when we begin to get eggs it will be even better.
Here's the beginning of the jungle gym. The center post was a very large step that was removed in one piece. It is buried several feet in the ground. Several chicken ladders and some places to sit up high will make them happy.
The original design of the roost wasn't working out. All of the chickens wanted to be on the top rung and after a few weeks there wasn't enough room for everybody. So, we swapped out the 1 X 1 for a longer 2 X 4 as there was enough room to make it wider. Another problem was they were using the nesting boxes to hop on the roost. We added another step to the wall for easier access hoping they would use it instead, it seems to be working.
We enlarged the jungle gym and added platforms and ladders, the chickens love them.
We just threw a couple of tarps over the run to keep the chickens from escaping (again). This is just until something more permanent goes up in this Fall.
This project will go well into the Fall as we add insulation, trim, decided on hardware that won't freeze and find suitable windows. All in all we spent less than $300, birds and feeders included. No special tools at all with the exception of an old electric saw I borrowed. Pretty primitive I admit, and not exactly what I had envisioned as I began, but very solid, and we had the whole family involved.
11 chickens, all with names now, and as of the first week in August, still about a month away from getting eggs.