If you read nothing else, READ THIS; don't use a water heater thermostat! It cost $10 more for a base board heater Tstat that works far better.
That being said, our incubator was not actually that cheap to make. But if we knew then what we know now it could have been. I am not going to list every item we purchased since this is not meant to be as much of a how-to as it is a few good ideas for the thrifty and/or those that must re-invent the wheel. The big ticket items we used:
12v computer fan and 120v-12v converter, both from Radioshack $20 total. This could be cheaper just keep your eyes open for a while.
Base board heater Tstat, Home Depot for $20. Uses line power (120v) so it wires in line with the second light.
Small submersible water pump, Amazon for $9. Needed to get the humidity up.
Single outlet electric box with 2 lamp fixtures and a wall switch, Home Depot $8 I think.

So the switch is wired with an old plug and the switch powers the "always on" 14w bulb (it's one of those eco friendly, spiral, 60w equivalent bulbs), the power converter for the fan, and the thermostat. The thermostat is only set up to go to 80 degrees so it has to be modified. The one I got simply needed to have the knob removed and a washer installed under it to increase the temp range. Obviously you need to be a little bit of a trouble shooter to figure out how to hack a thermostat, but it is not difficult. The thermostat powers the temp control bulb which is a 25w fridge bulb.
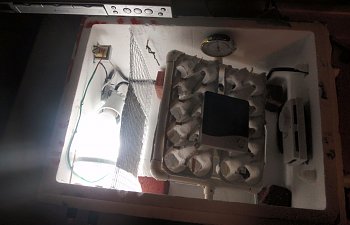
Not the best picture above, but you can see the bulbs on the left with the fan towards the bottom and the converter towards the top. There is a wall made of 1/2" chicken wire with a piece of aluminum to block direct light on the eggs. Far right is the Tstat, top is a cigar hygrometer, and you can see 4 pieces of brick in the corners acting as heat syncs ready to hold the shelf for lock down.
Above you can see the small submersible water pump that I bought off of Amazon for about $8-9. It pumps water to the top of a slide that has several sticks glued in place to agitate and slow the water as it goes back down to the supply tray. Before this we tried everything to increase humidity including sponges, stacked lasagna pans and even a cake tin painted black placed directly under the bulb. We could never get humidity above 45%. TN in winter it is 40% at 65 degrees. The water flow has allowed us to control humidity with vents predictably between 40% and 65%. You can also see the filling straw for the supply tray.
This is a picture of the thermostat we used. As mentioned before it uses 120v so there is no need for additional power supplies or relays. It is set up to operate at 80 degrees max so be prepared to figure out how it works and how to modify it. This one just needed a washer under the control knob and now it works to 106. You can also see the digital thermometer/hygrometer that has high and low memory so you can see what is happening over time. This tstat holds temp from 88.5-100.9 (1 hour cycle) compared to the 94-106 range (2-3 hour cycle) which was the best we got out of the water temp tstat.
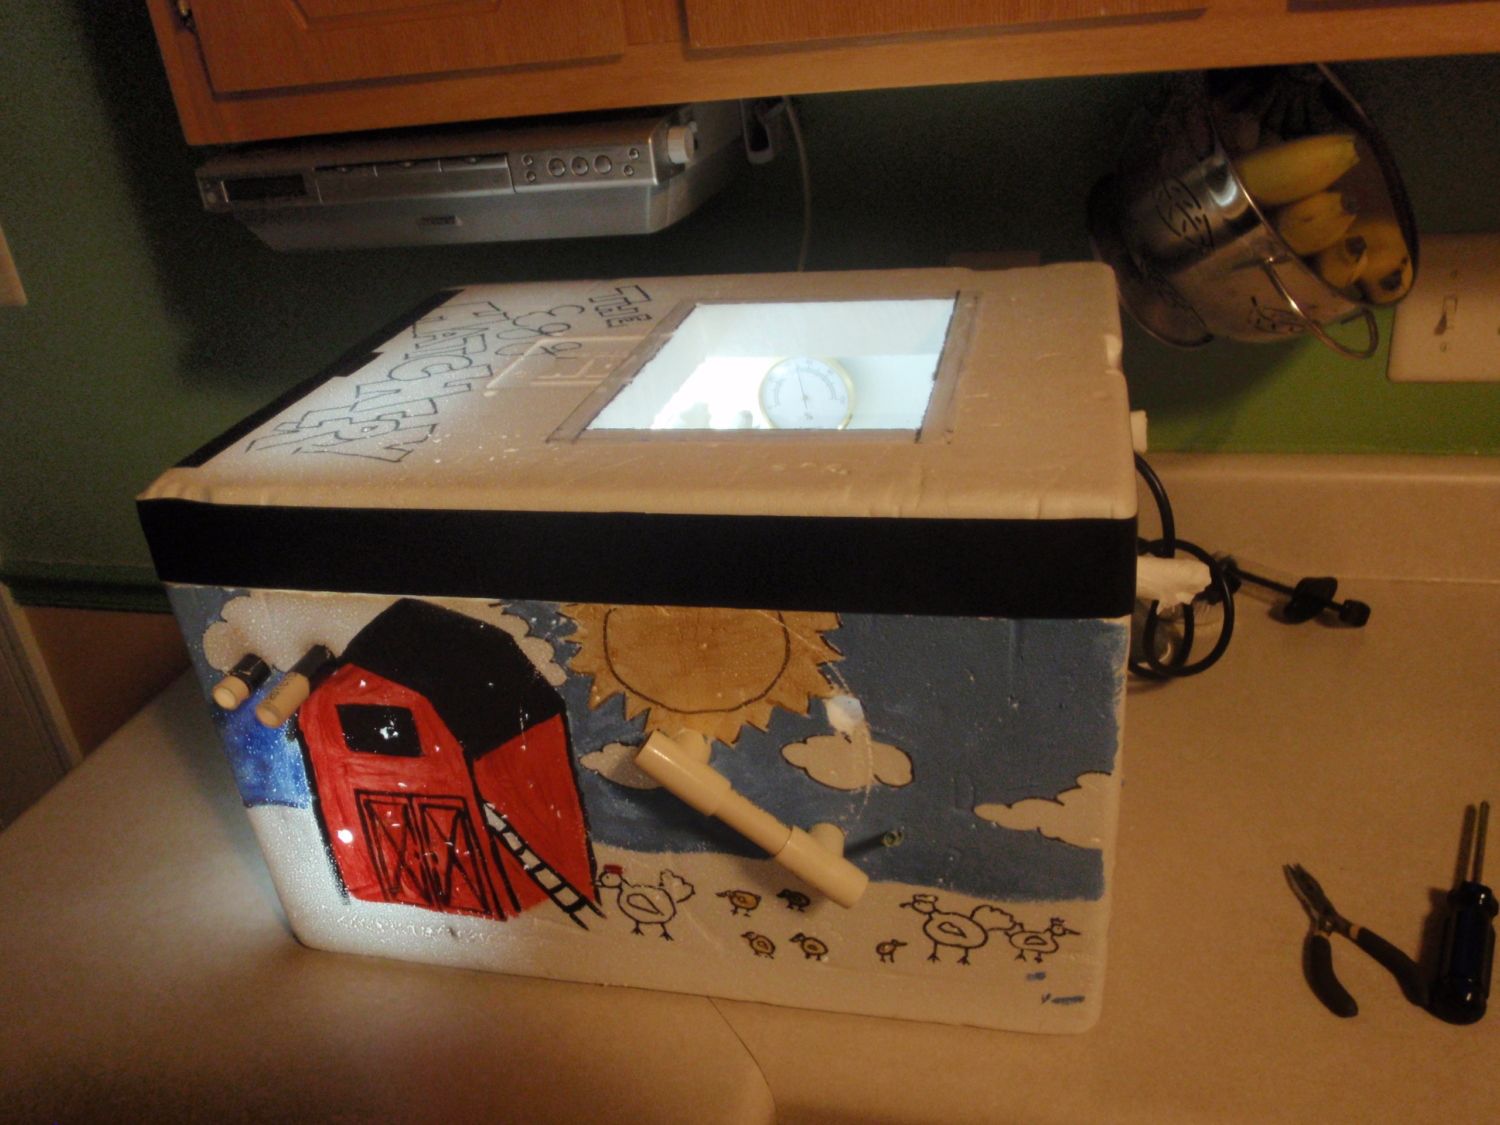
I just thought this was a good idea to share. The egg turner attaches to this handle so it is pulled out, turned and inserted into a different hole in the outside of the cooler for turning.
This is the side with the switch and the lower vents. All vents are about 3/4" made with a dremel.
Hopefully some of these pictures and ideas help you with your home made bator. We will be putting eggs in in two days and we will update with results.
That being said, our incubator was not actually that cheap to make. But if we knew then what we know now it could have been. I am not going to list every item we purchased since this is not meant to be as much of a how-to as it is a few good ideas for the thrifty and/or those that must re-invent the wheel. The big ticket items we used:
12v computer fan and 120v-12v converter, both from Radioshack $20 total. This could be cheaper just keep your eyes open for a while.
Base board heater Tstat, Home Depot for $20. Uses line power (120v) so it wires in line with the second light.
Small submersible water pump, Amazon for $9. Needed to get the humidity up.
Single outlet electric box with 2 lamp fixtures and a wall switch, Home Depot $8 I think.
So the switch is wired with an old plug and the switch powers the "always on" 14w bulb (it's one of those eco friendly, spiral, 60w equivalent bulbs), the power converter for the fan, and the thermostat. The thermostat is only set up to go to 80 degrees so it has to be modified. The one I got simply needed to have the knob removed and a washer installed under it to increase the temp range. Obviously you need to be a little bit of a trouble shooter to figure out how to hack a thermostat, but it is not difficult. The thermostat powers the temp control bulb which is a 25w fridge bulb.
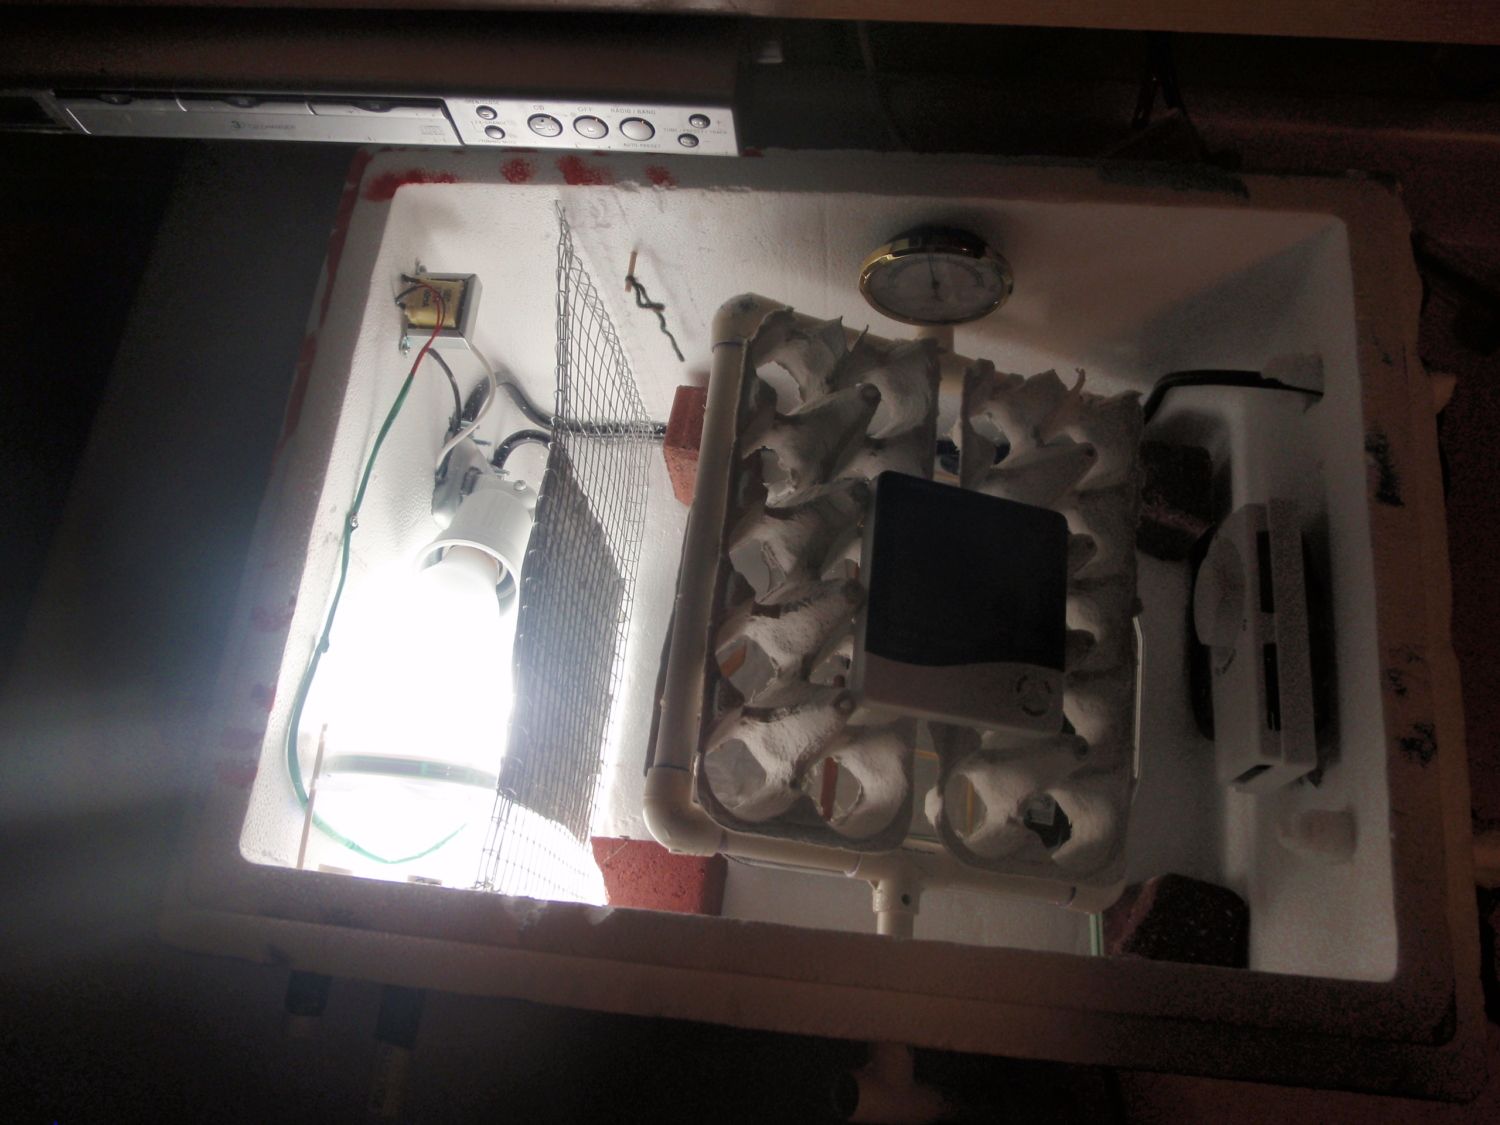
Not the best picture above, but you can see the bulbs on the left with the fan towards the bottom and the converter towards the top. There is a wall made of 1/2" chicken wire with a piece of aluminum to block direct light on the eggs. Far right is the Tstat, top is a cigar hygrometer, and you can see 4 pieces of brick in the corners acting as heat syncs ready to hold the shelf for lock down.
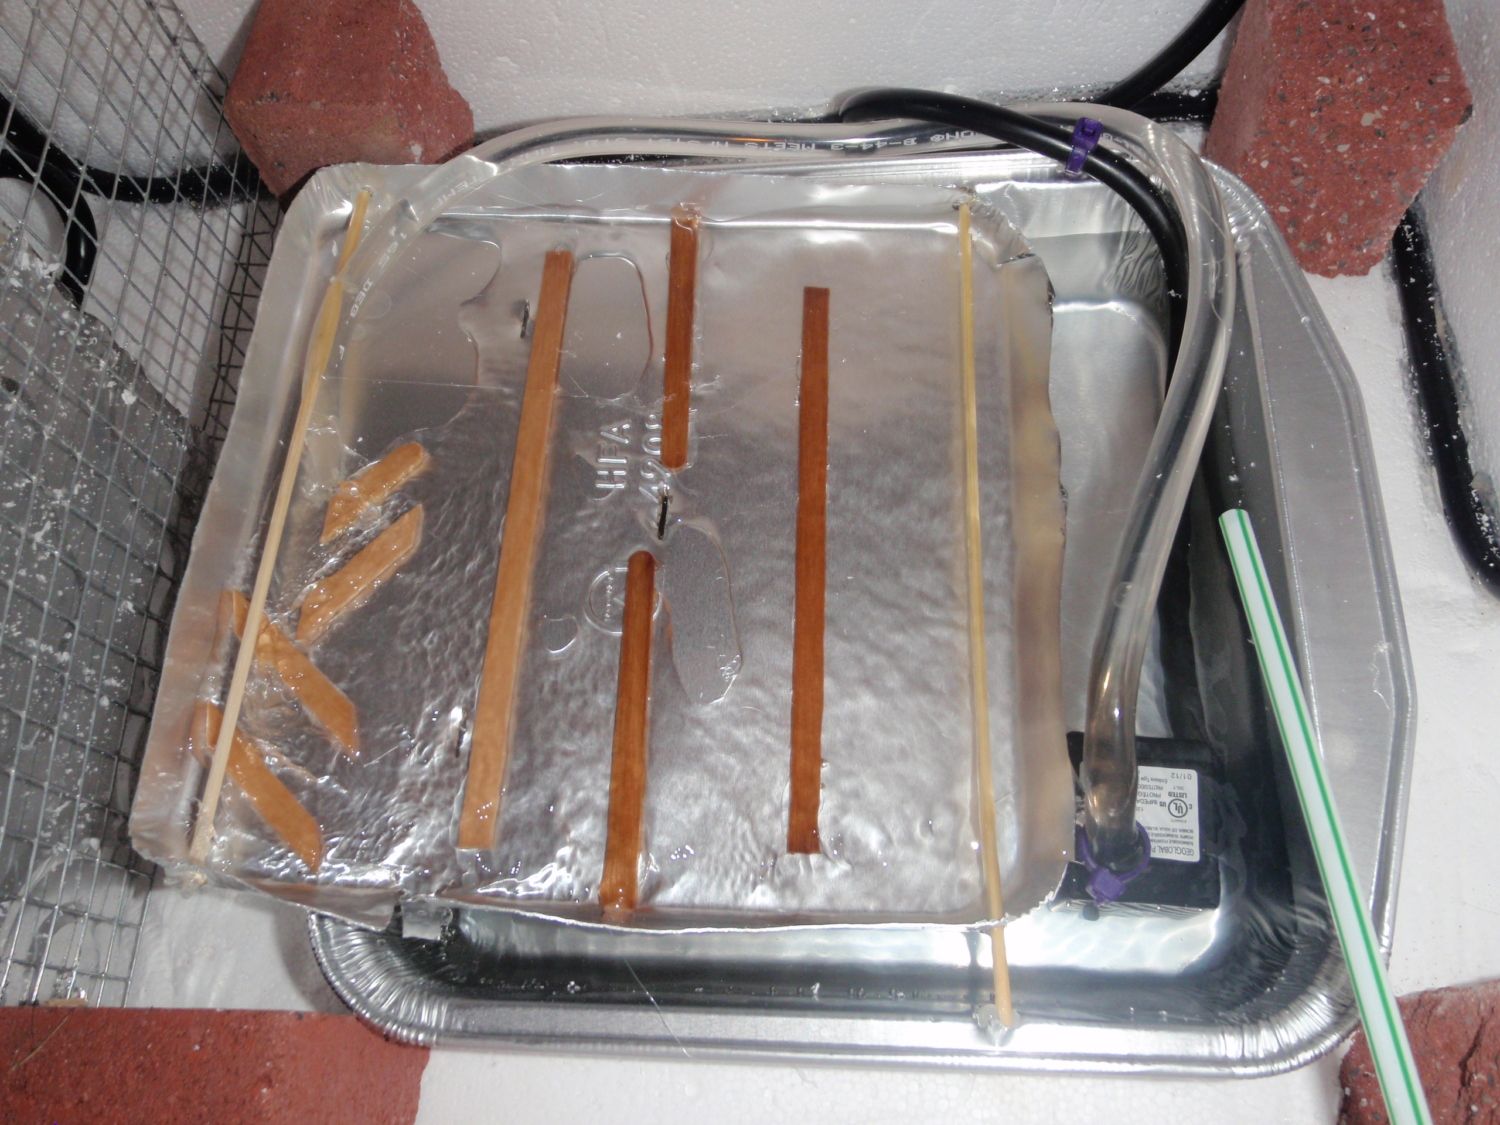
Above you can see the small submersible water pump that I bought off of Amazon for about $8-9. It pumps water to the top of a slide that has several sticks glued in place to agitate and slow the water as it goes back down to the supply tray. Before this we tried everything to increase humidity including sponges, stacked lasagna pans and even a cake tin painted black placed directly under the bulb. We could never get humidity above 45%. TN in winter it is 40% at 65 degrees. The water flow has allowed us to control humidity with vents predictably between 40% and 65%. You can also see the filling straw for the supply tray.
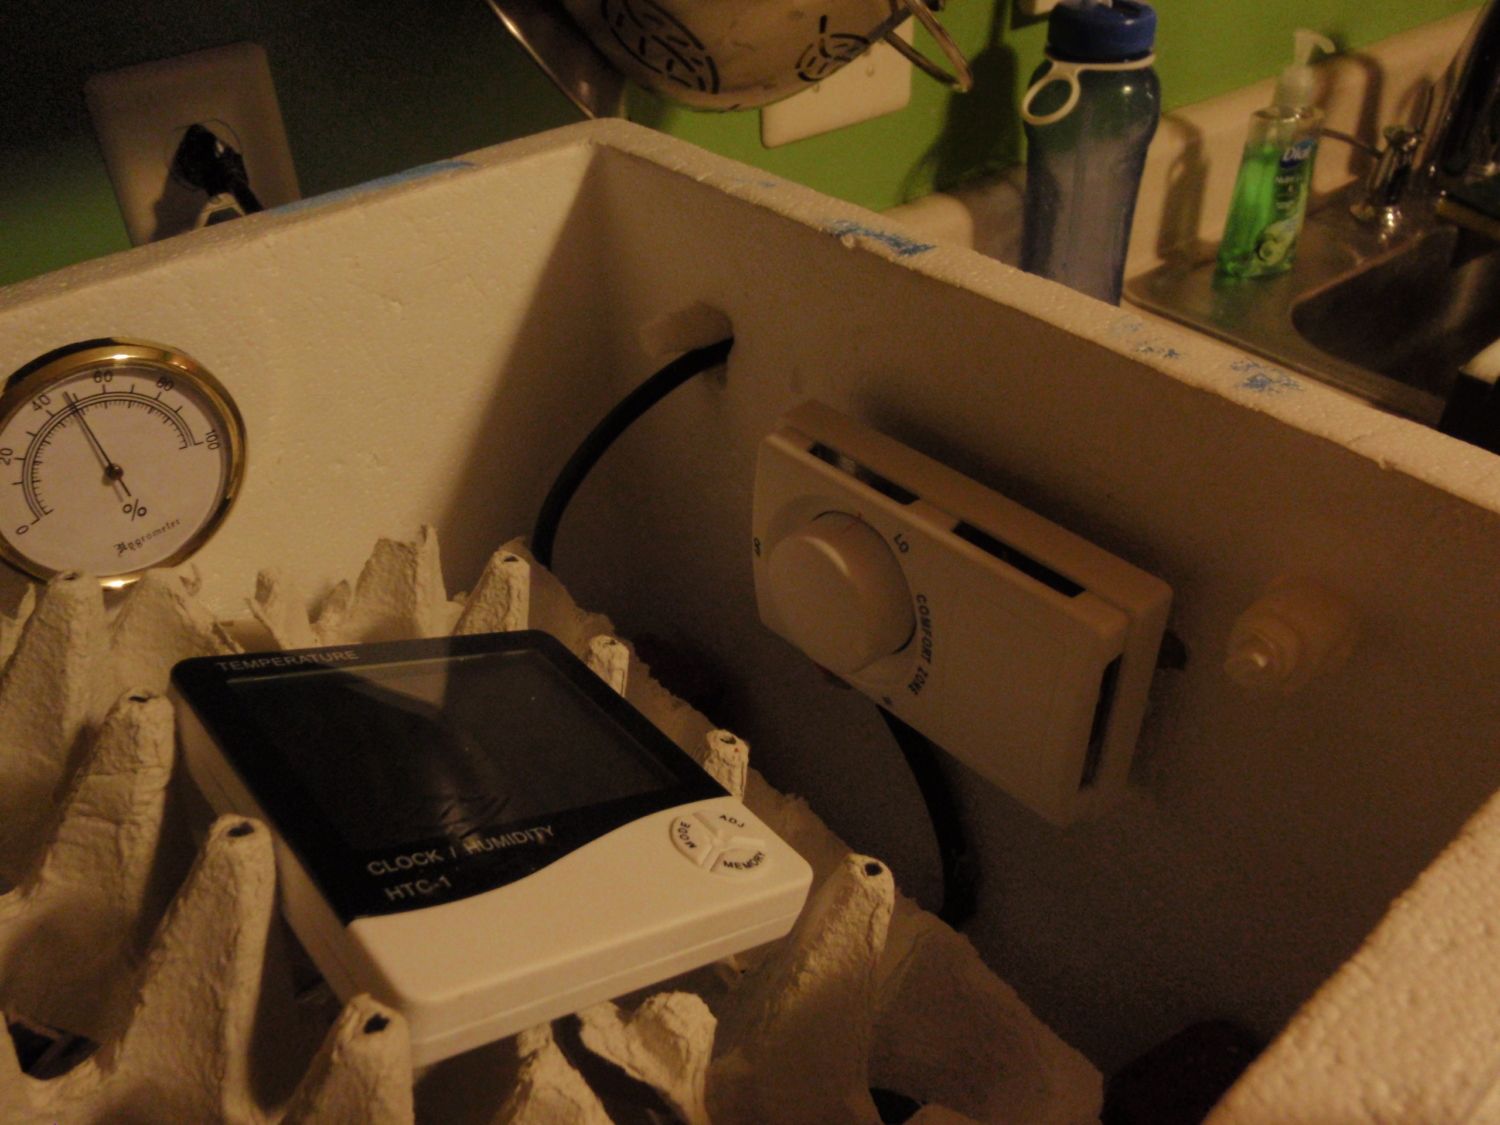
This is a picture of the thermostat we used. As mentioned before it uses 120v so there is no need for additional power supplies or relays. It is set up to operate at 80 degrees max so be prepared to figure out how it works and how to modify it. This one just needed a washer under the control knob and now it works to 106. You can also see the digital thermometer/hygrometer that has high and low memory so you can see what is happening over time. This tstat holds temp from 88.5-100.9 (1 hour cycle) compared to the 94-106 range (2-3 hour cycle) which was the best we got out of the water temp tstat.
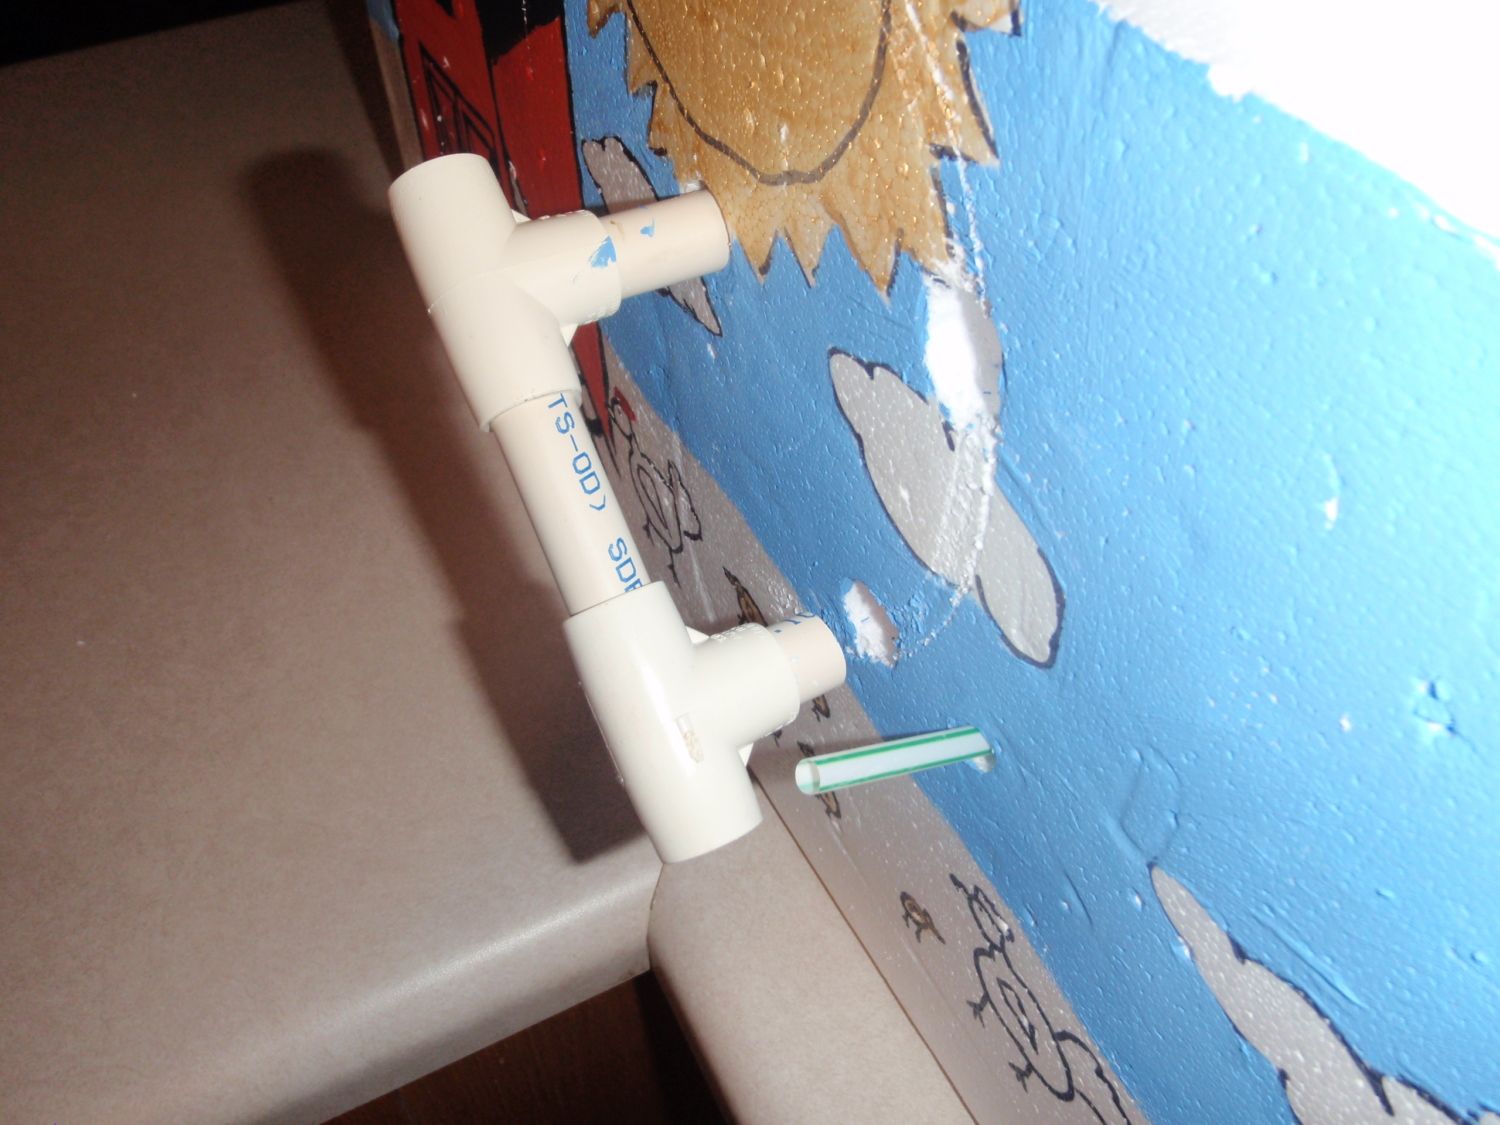
I just thought this was a good idea to share. The egg turner attaches to this handle so it is pulled out, turned and inserted into a different hole in the outside of the cooler for turning.
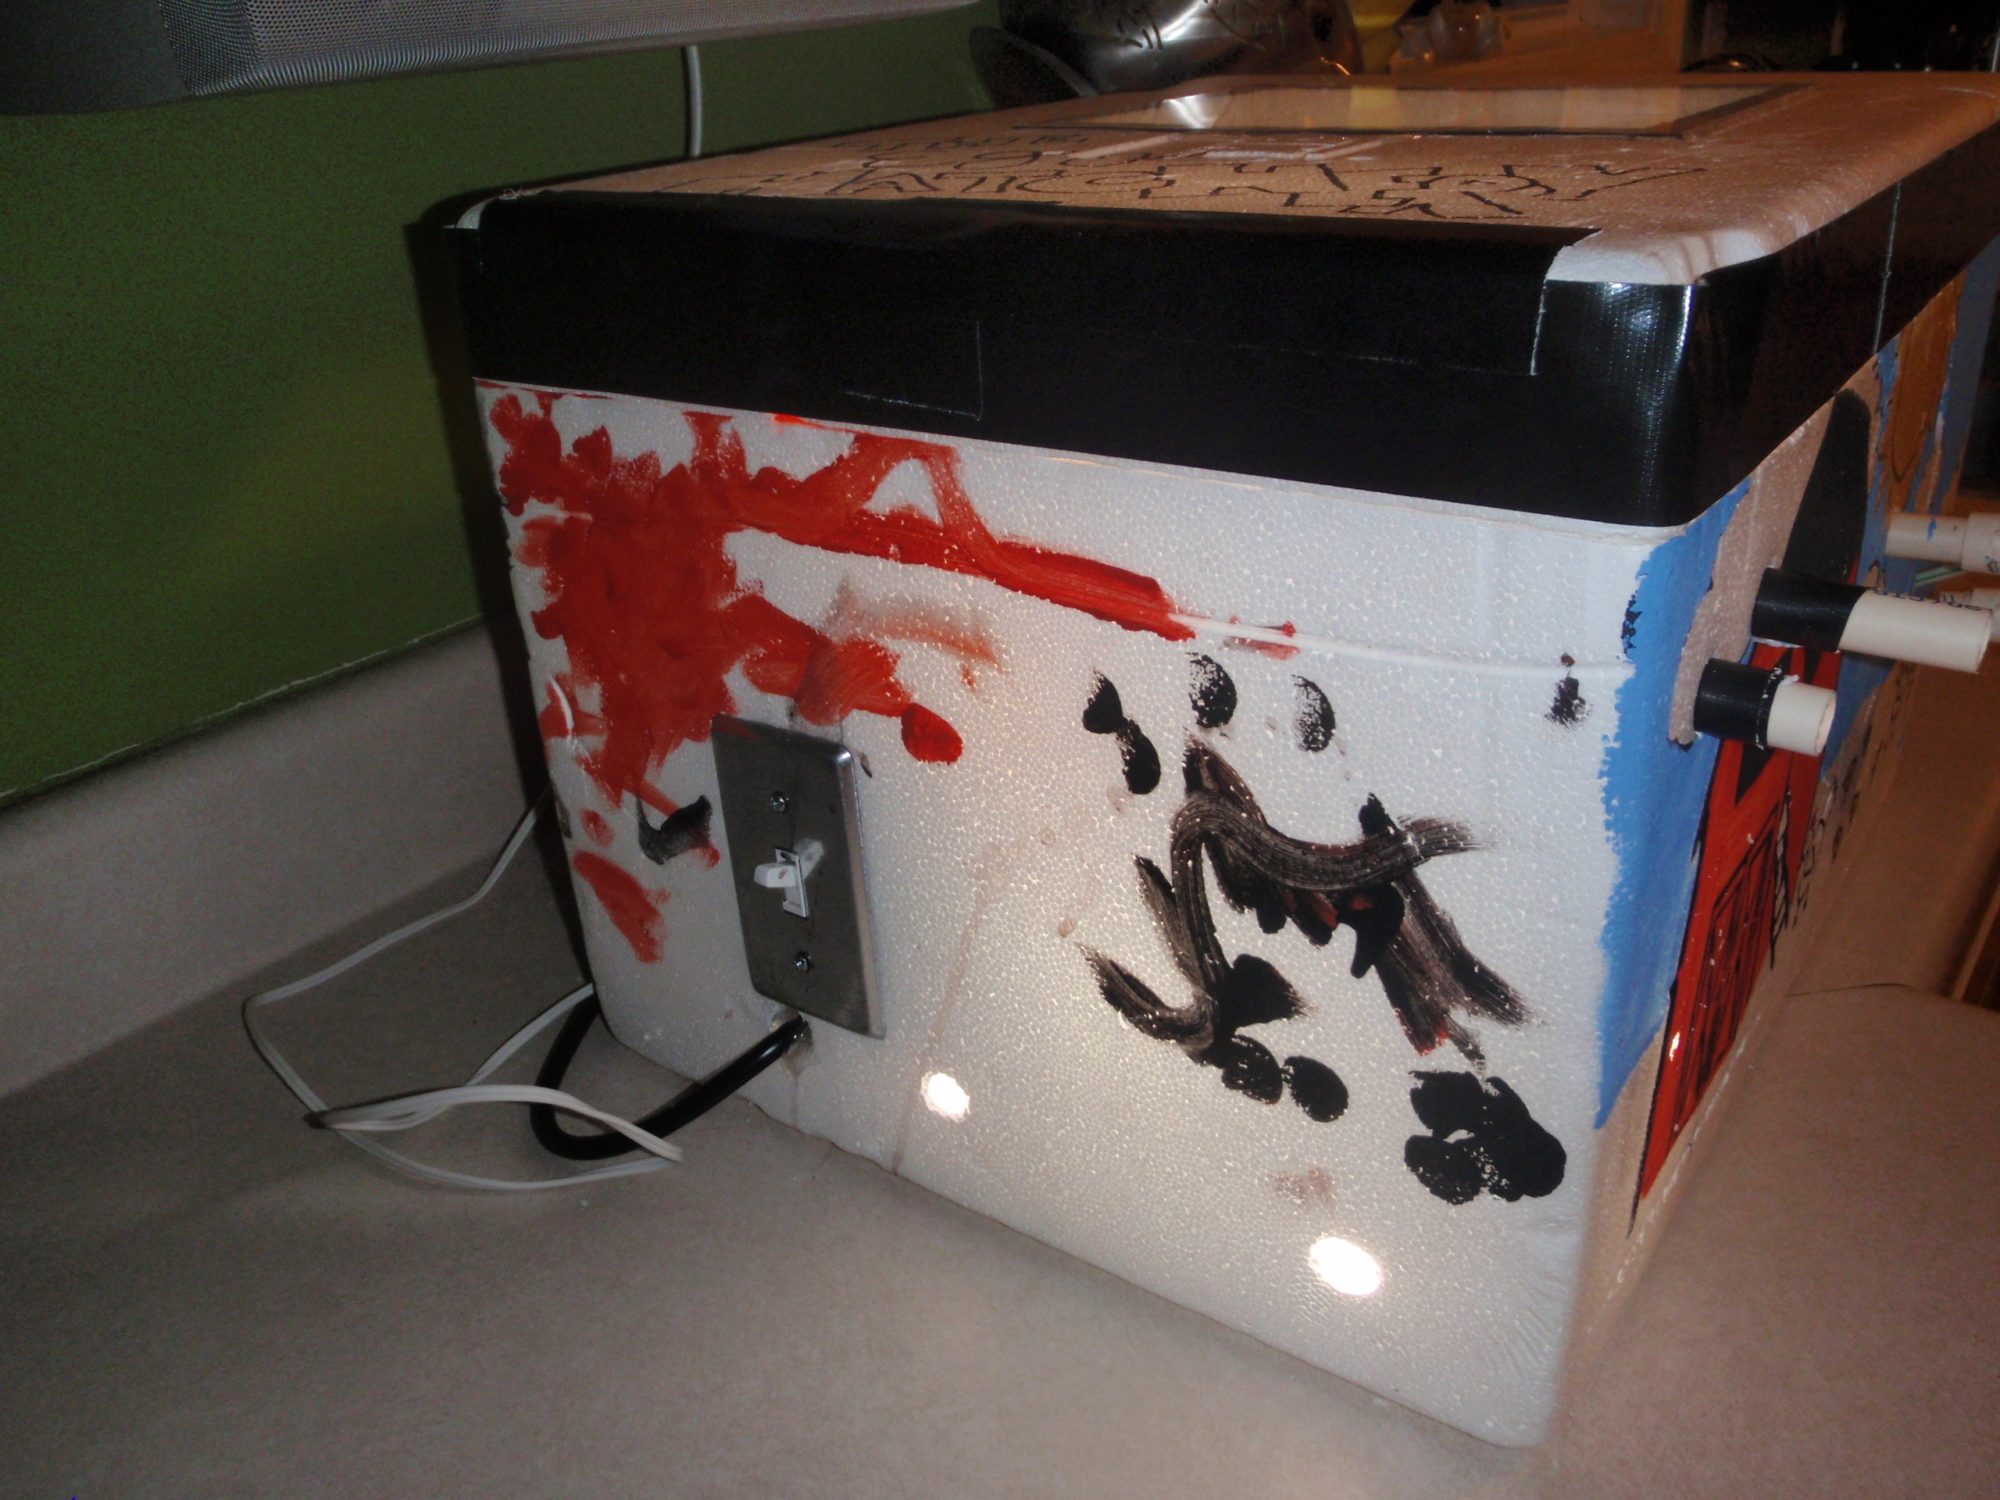
This is the side with the switch and the lower vents. All vents are about 3/4" made with a dremel.
Hopefully some of these pictures and ideas help you with your home made bator. We will be putting eggs in in two days and we will update with results.