Here is my homemade, bargain basement, bits and pieces, CluckyChucky Pallet Palace!
We started with the purchase of the only "store bought" items in the chicken tractor, the wall studs that I used to frame out the tractor itself. I believe they were around a dollar and change a piece.

Then, I put in some shelves for the laying boxes. This plywood is a roadside find.
")
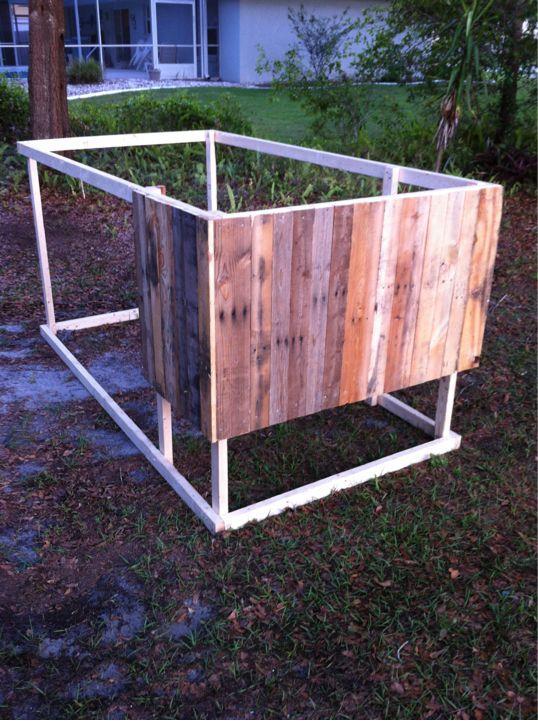
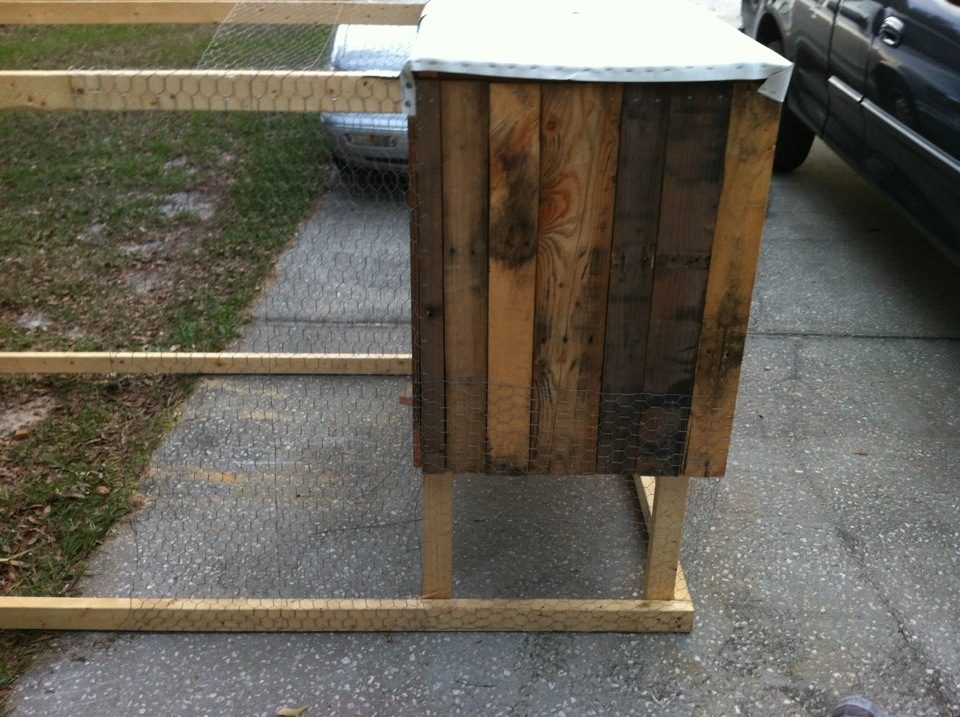
Tore apart some pallets for the boards to make the sideboards.

This is the first thing I have ever built in my life, so squared up and bubble level it is not!
Starting to look pretty cool. The nails came from the local Re-Store. Boxes and boxes for $3.00 total.
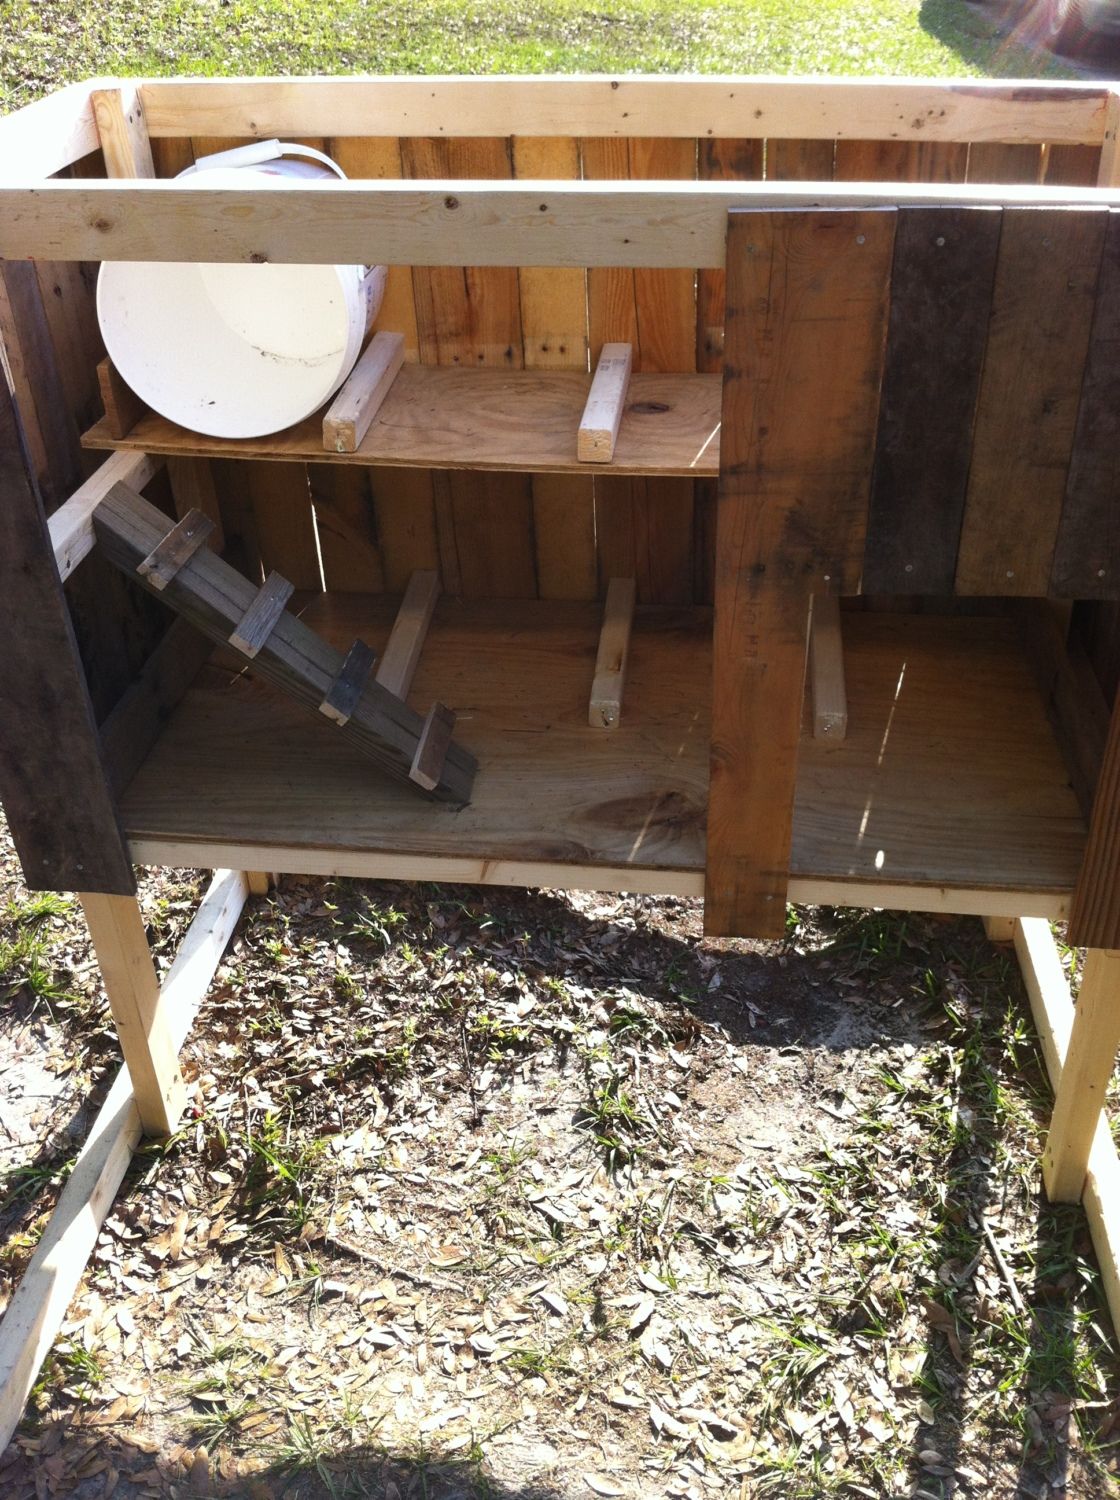
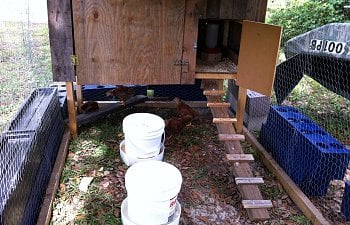
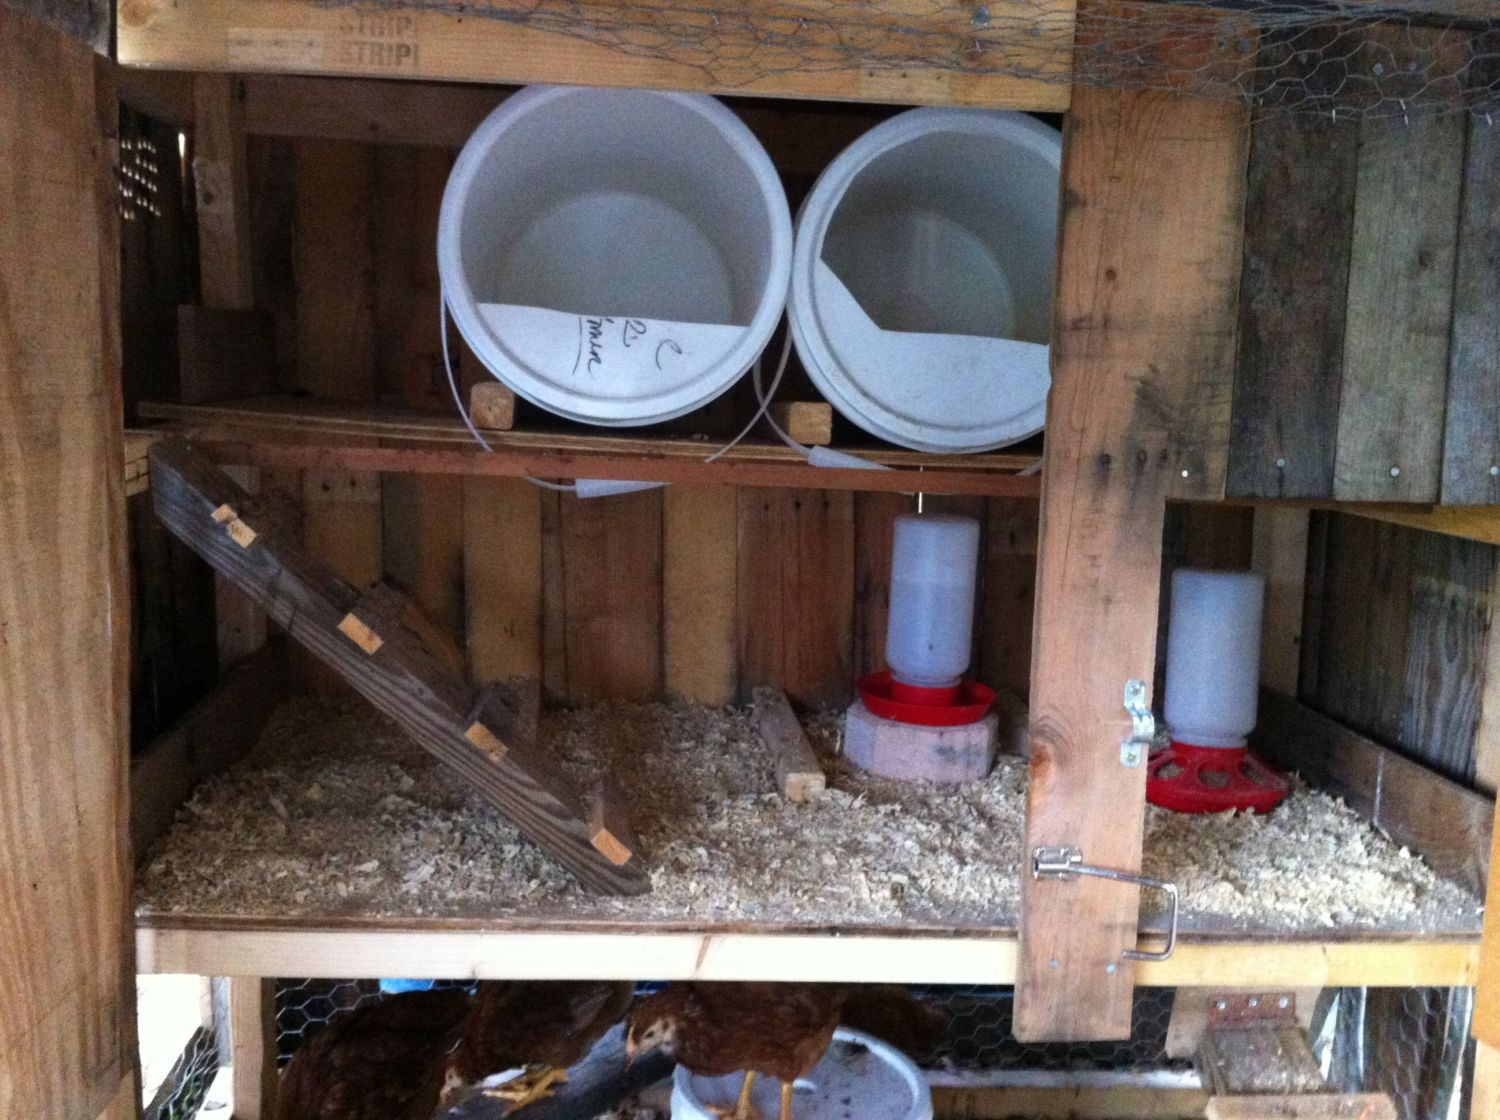
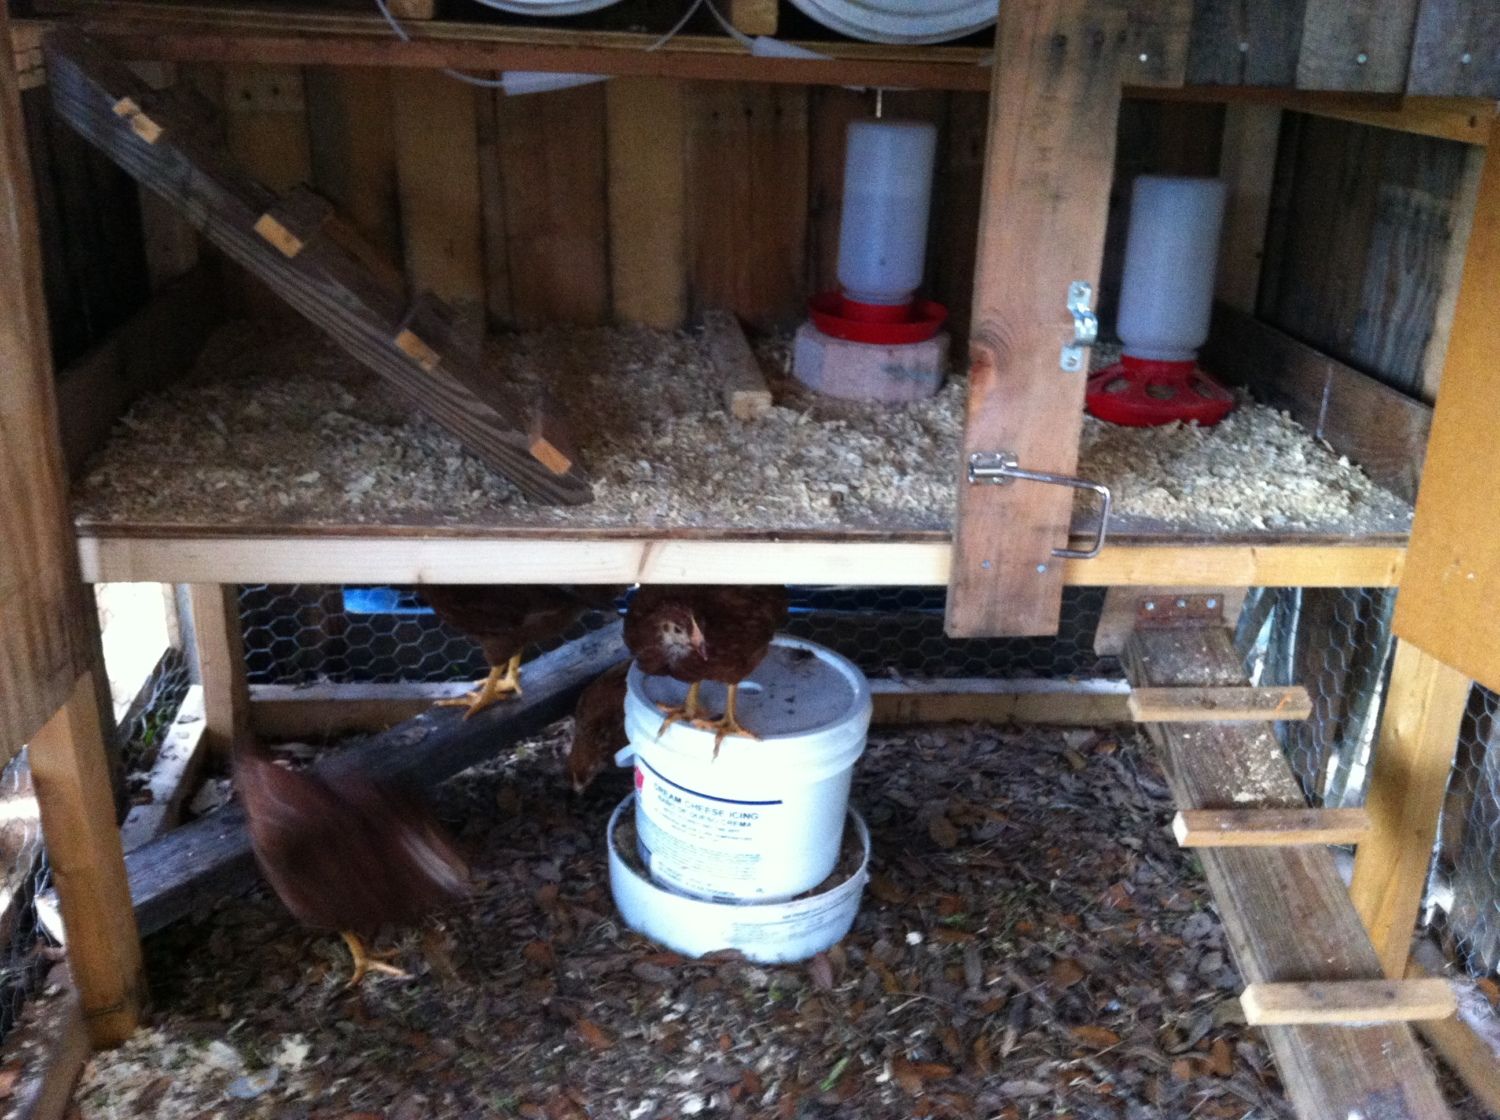
I get the buckets from a local store that saves them for me. It took a lot of people to make this coop on the cheap come together! The little ramp is from pallet board that I chopped into sections on the miter saw. I was off a little on the spacing of the 2 x 2 dividers. I discovered that the bucket I used as a template was only a four gallon. Sad face. It still worked out, though.

This is how I cut the lid for the laying buckets. I just throw the pine shavings in there, (or straw, etc...) and can easily clean them out.
My wife, who is awesome (BTW), made me this cake for my birthday. It was the best birthday cake I ever had. She amazes me. So stinking creative! The project was quite an undertaking. Not because of the scale of it, but simply because it was our first step toward self-sufficiency.
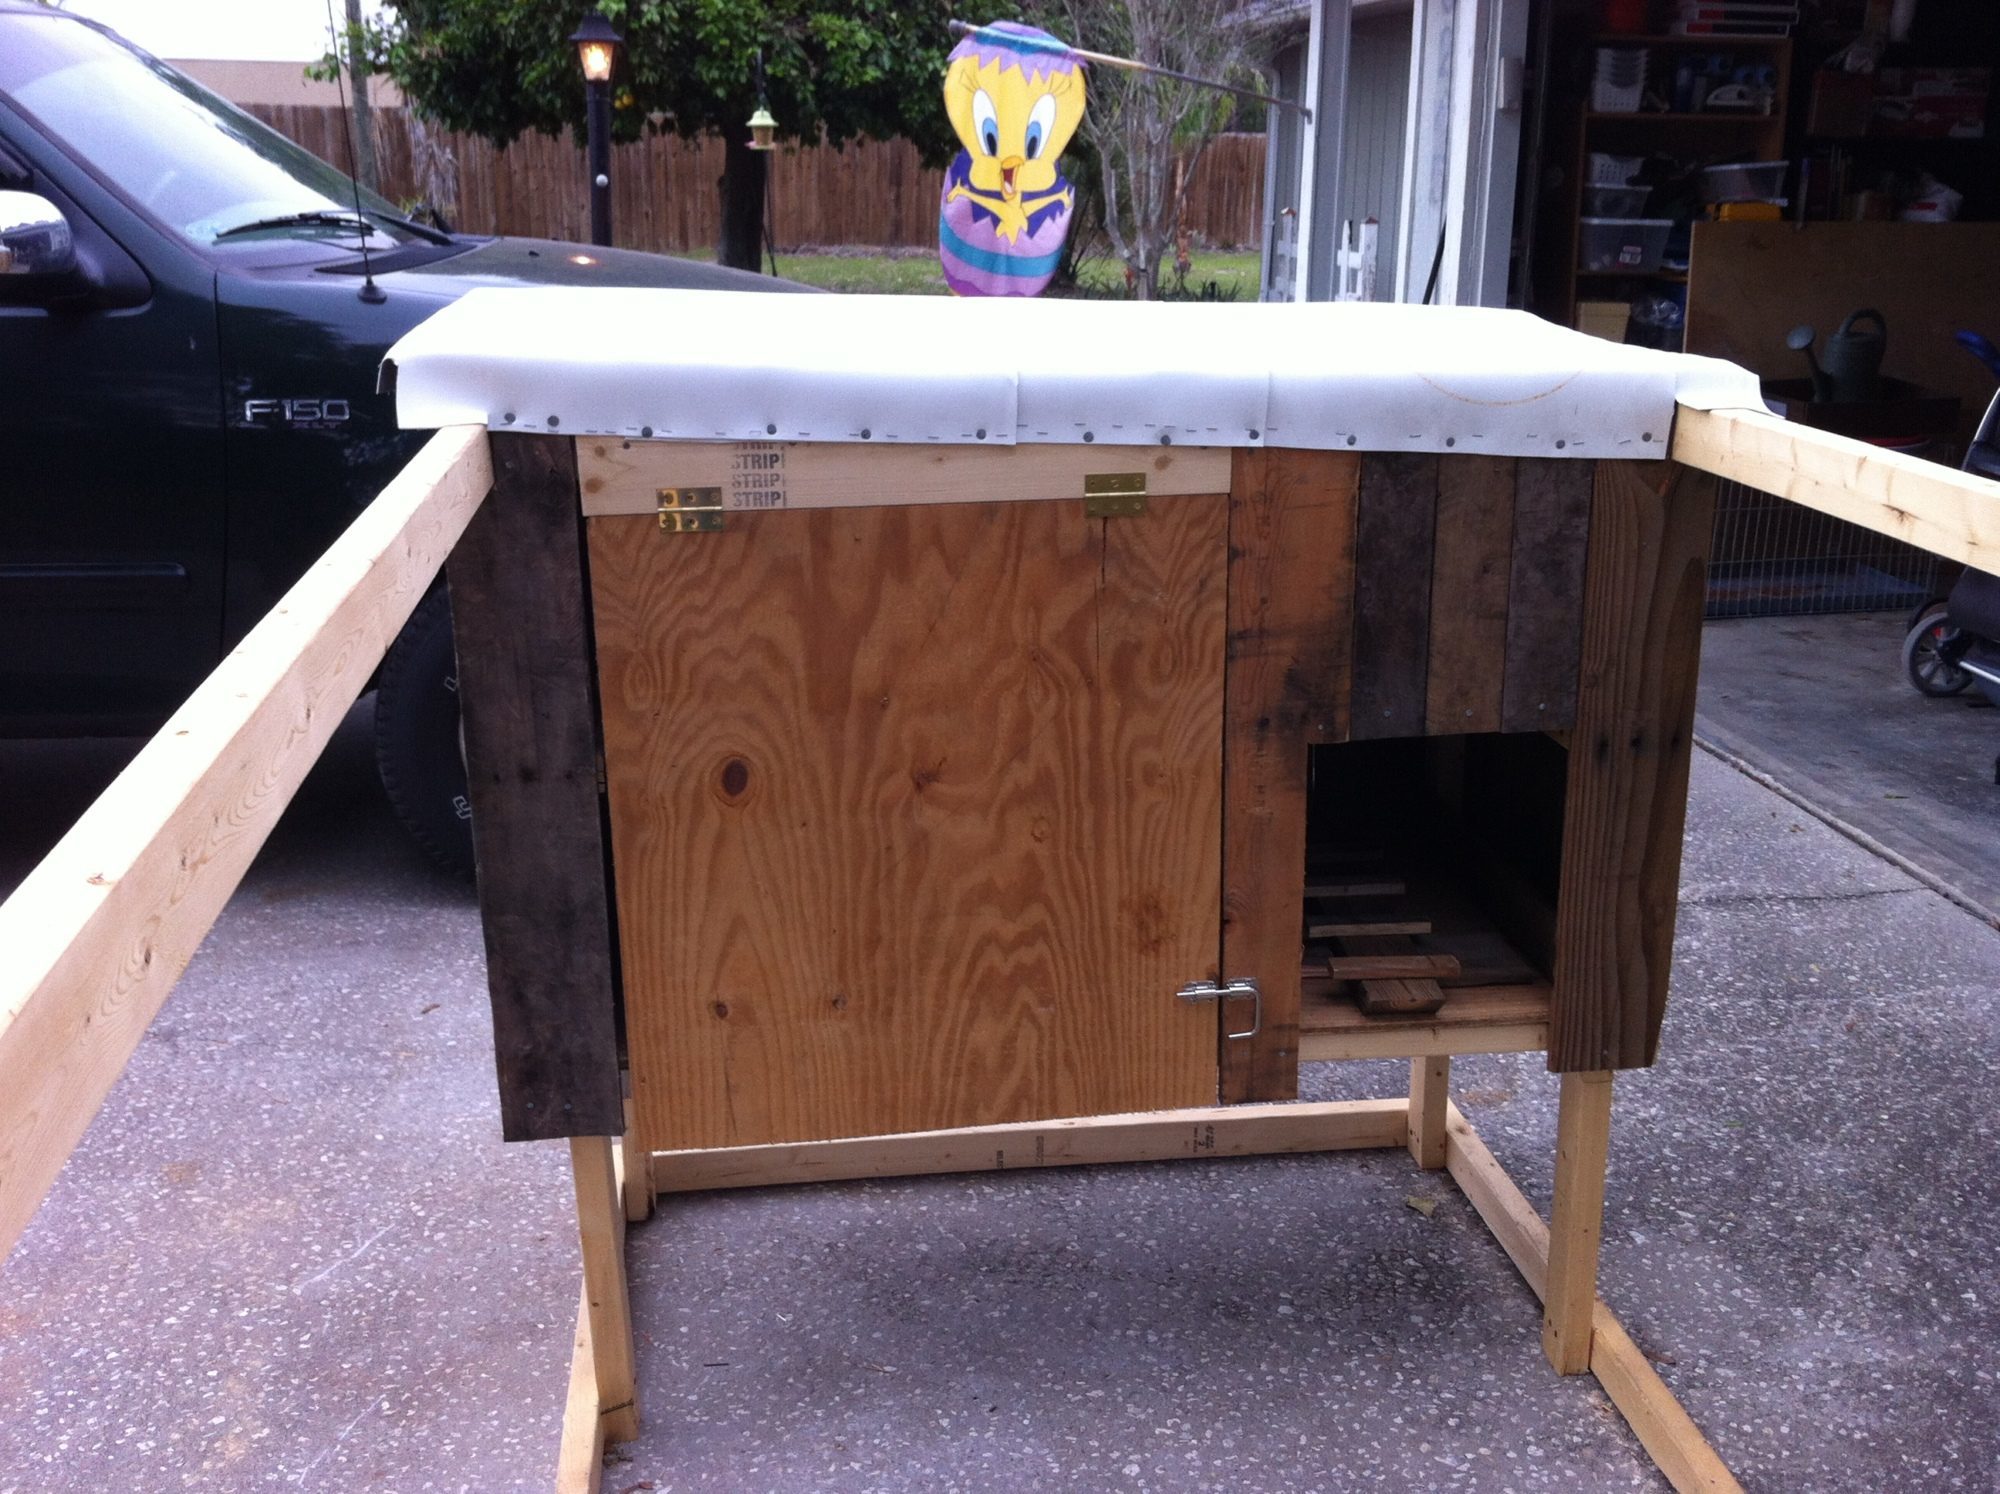
Well... The door went on, and the roofing was applied. My neighbor gave me some 80 Mil super roofing to top the sheet of plywood siding that I acquired on trash day. Yep...I said that. Now, It is time to apply the chicken wire and the finishing touches.
Starting to attach the chicken wire. My first, free roll ran out, so I had to actually go BUY a roll to finish it off! The humanity!
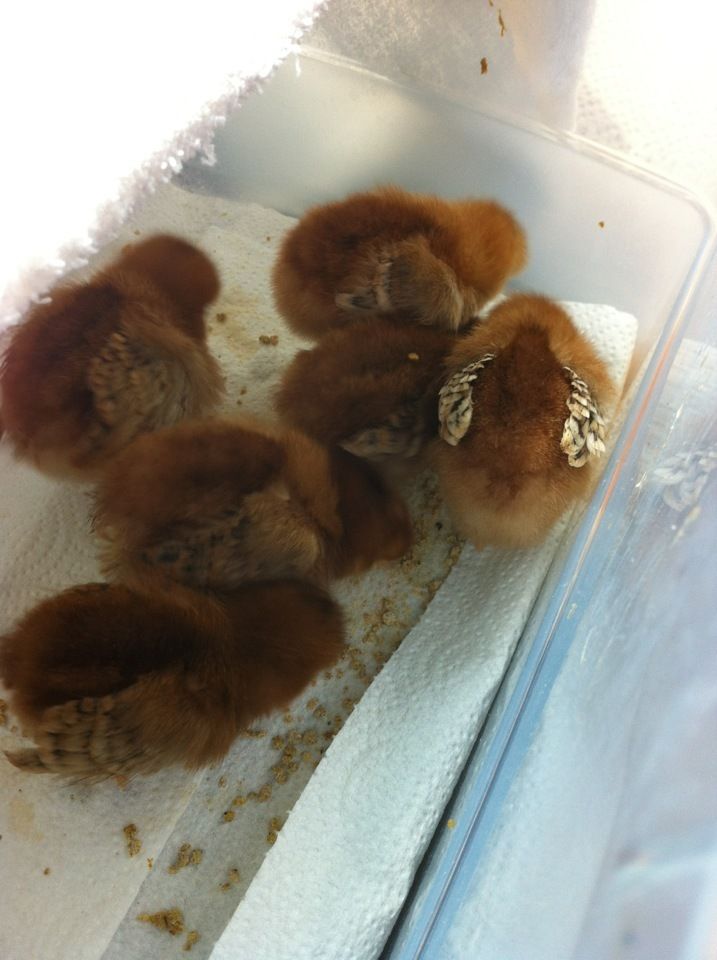
At this point, I got cocky and went ahead and got these gals. RIR chicks. Half a dozen chicken lovin'.
It made THIS boy happy!

...and that is what makes THIS man happy!

Coop in it's element. Still no wheels,door, ramp, and no real roost inside. We remedied that, though.
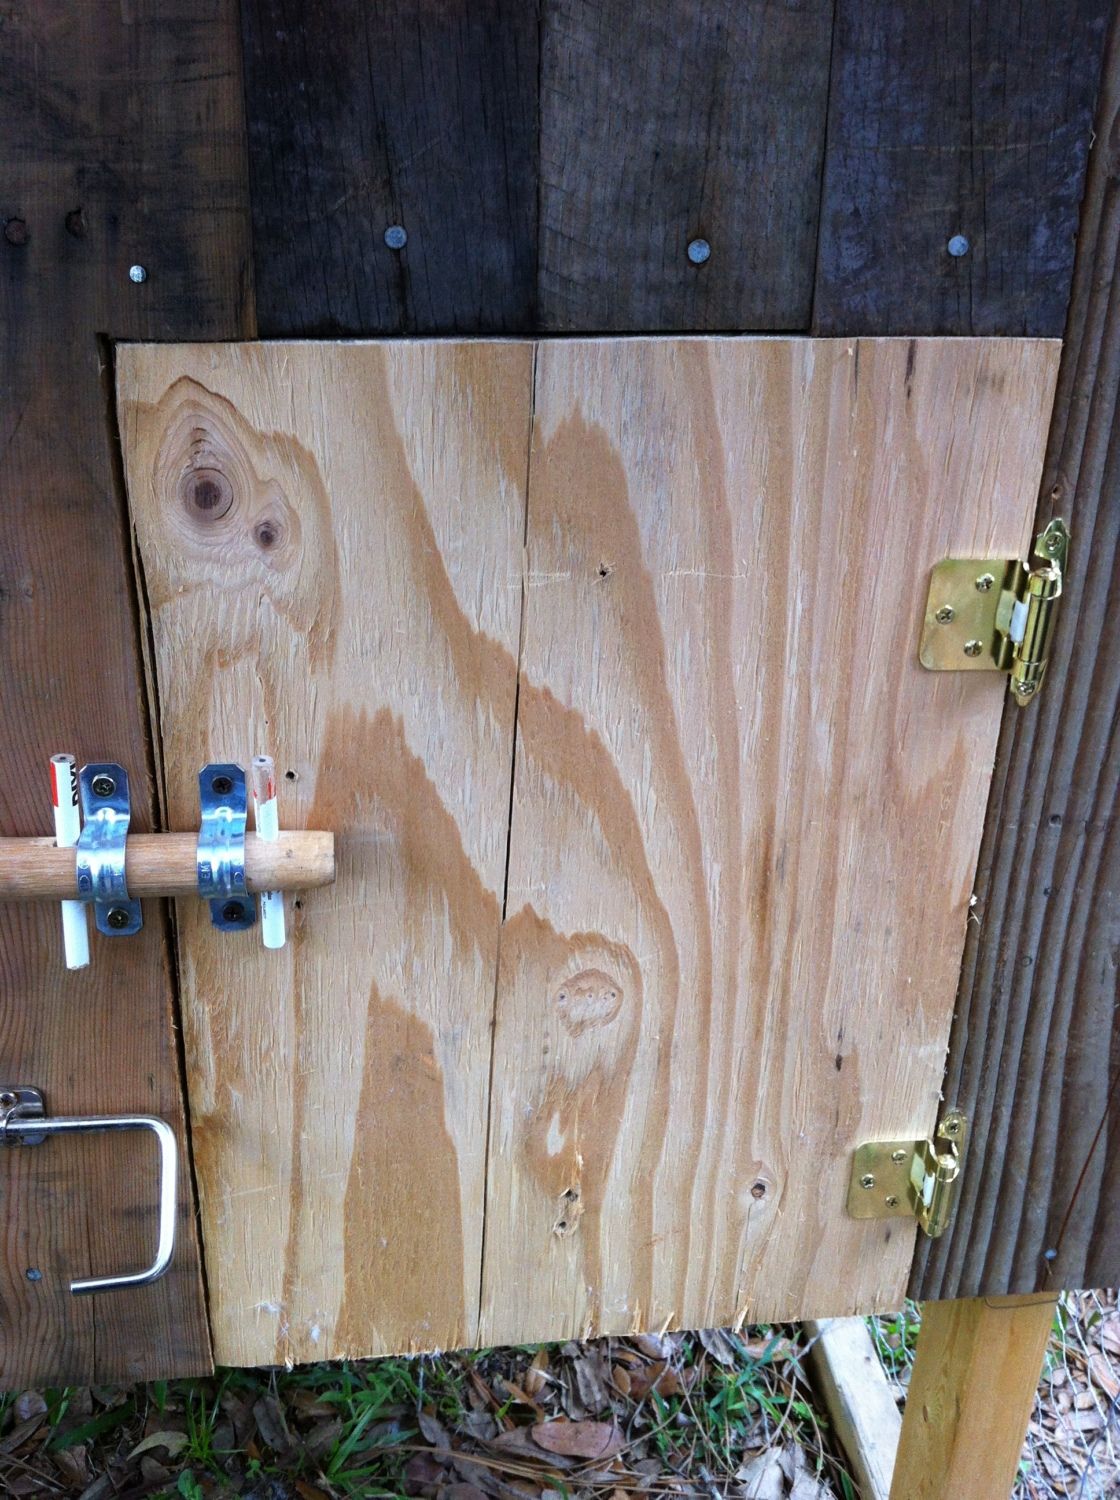
The piece of plywood I had fit perfectly width wise, and I only had to trim it down to 17" tall. The locking mechanism was a creative solution, however, the very first morning, I realized that the dowel and pencil wood swelled with condensation, and I switched to the same setup in a pvc and nut/bolt combination. In the future, I would definitely design a better door that can be opened from the outside. It is annoying to duck down into the coop every night to lock the hen house.

The final setup. The feeder and waterer were made from five gallon bucket bottoms and three gallon buckets with lids. The ramp was an old 2 x 4 that I found and the same steps made from strips of pallet wood. It isn't pretty, but it is functional and the girls (*ahem* mostly girls, it turns out) love it. Excuse the planters. That was our temporary solution to the hawks getting the chicks.
That's the setup as it sits now. I will make improvements as I acquire parts to do so. I will be designing a new coop for my upcoming meat birds. I have sweet pallets for the base of that. I will post as I build. There are things I would do differently, now that I know better, but for a rookie, I'm pretty proud of it.
Plus,....the chicks dig it the most. Ha.
Keep on cluckin'
C
Now That I have some months under my belt, here are the changes I have made.

You can see that I did remove the top shelf and added a roost up top. (Good advice, guys!) I decided to make more room in the coop by adding on an EXTERNAL Laying box. (also, your advice)
Cut the hole for the box entry. Also, note that the laying box is also made from pallet wood, and the frame from 2 x 4's and other scrap wood from roadside finds.
The box.
Attached box with "L" Brackets, One each side and One on bottom.
I am still not sure how I did this, but the angles and everything were dead on.
When I went to open it, and it worked, I'm not going to lie, I may have let out a yelp like a little girl.LOL
Filled her up with shavings...
Added some "inspiration!'
Whammo! Our first egg! Our little Red Stars started laying at just four and a half months! Stoked!
The brains behind this operation.
Also, We decided to opt for a better watering system. This is what I came up with, after I saw something similar online.
The girls seem to love it, and I like only having to fill the water every three or four days much better.