CACKLEBERRY CABIN
(A Shipping Crate Coop)
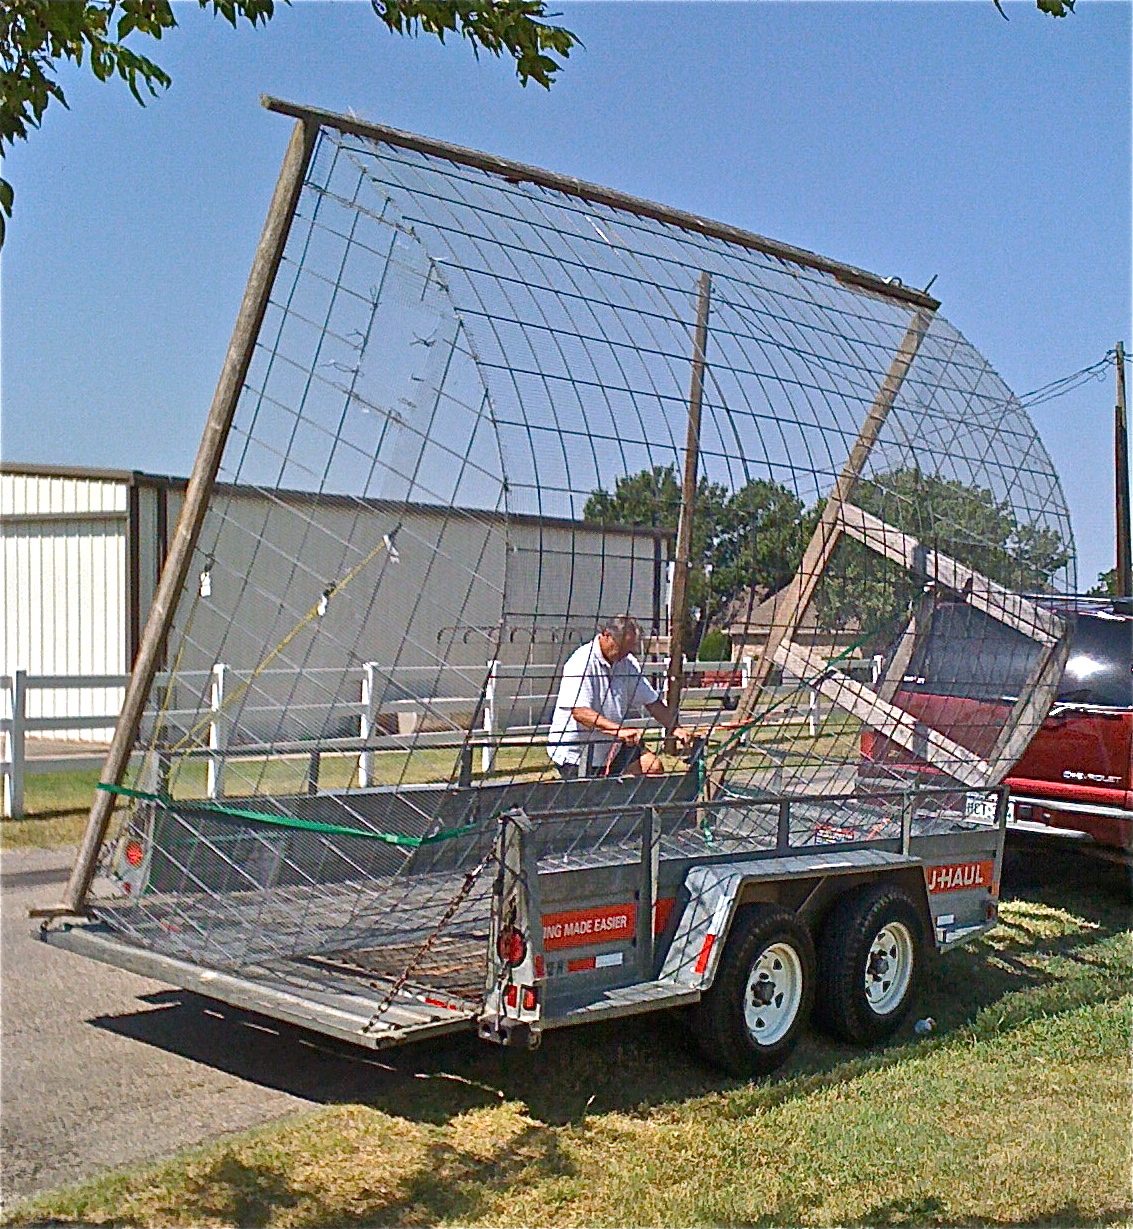
I had wanted chickens for a long time - and when my husband finally relented, I was thrilled and immediately began checking out Craigslist. I found a used, 3rd-generation hoop coop for $175 (A Bargain!!) and we immediately rented a trailer and hauled it home:
So I put my two Black Copper Marans in it and waited for eggs...
...they seemed lonely...I probably should get a few more chickens...
So back to Craigslist and we got 4 Americaunas, and 4 Barred Rocks. I had a flock!! But one afternoon, one of my free-ranging BRs went missing and I immediately drove out to the seller to pick up 3 more (because you don't want to introduce just one chicken to a flock - right?) And of course, that night, the missing chicken wandered home... so now I had 13 chickens (yeah, chicken math). Still waiting for eggs, of course...
The record-setting hot summer finally came to an end and I began to think about winter and the need for a real coop for our rare, but often severe, ice, snow, and/or rainstorms.
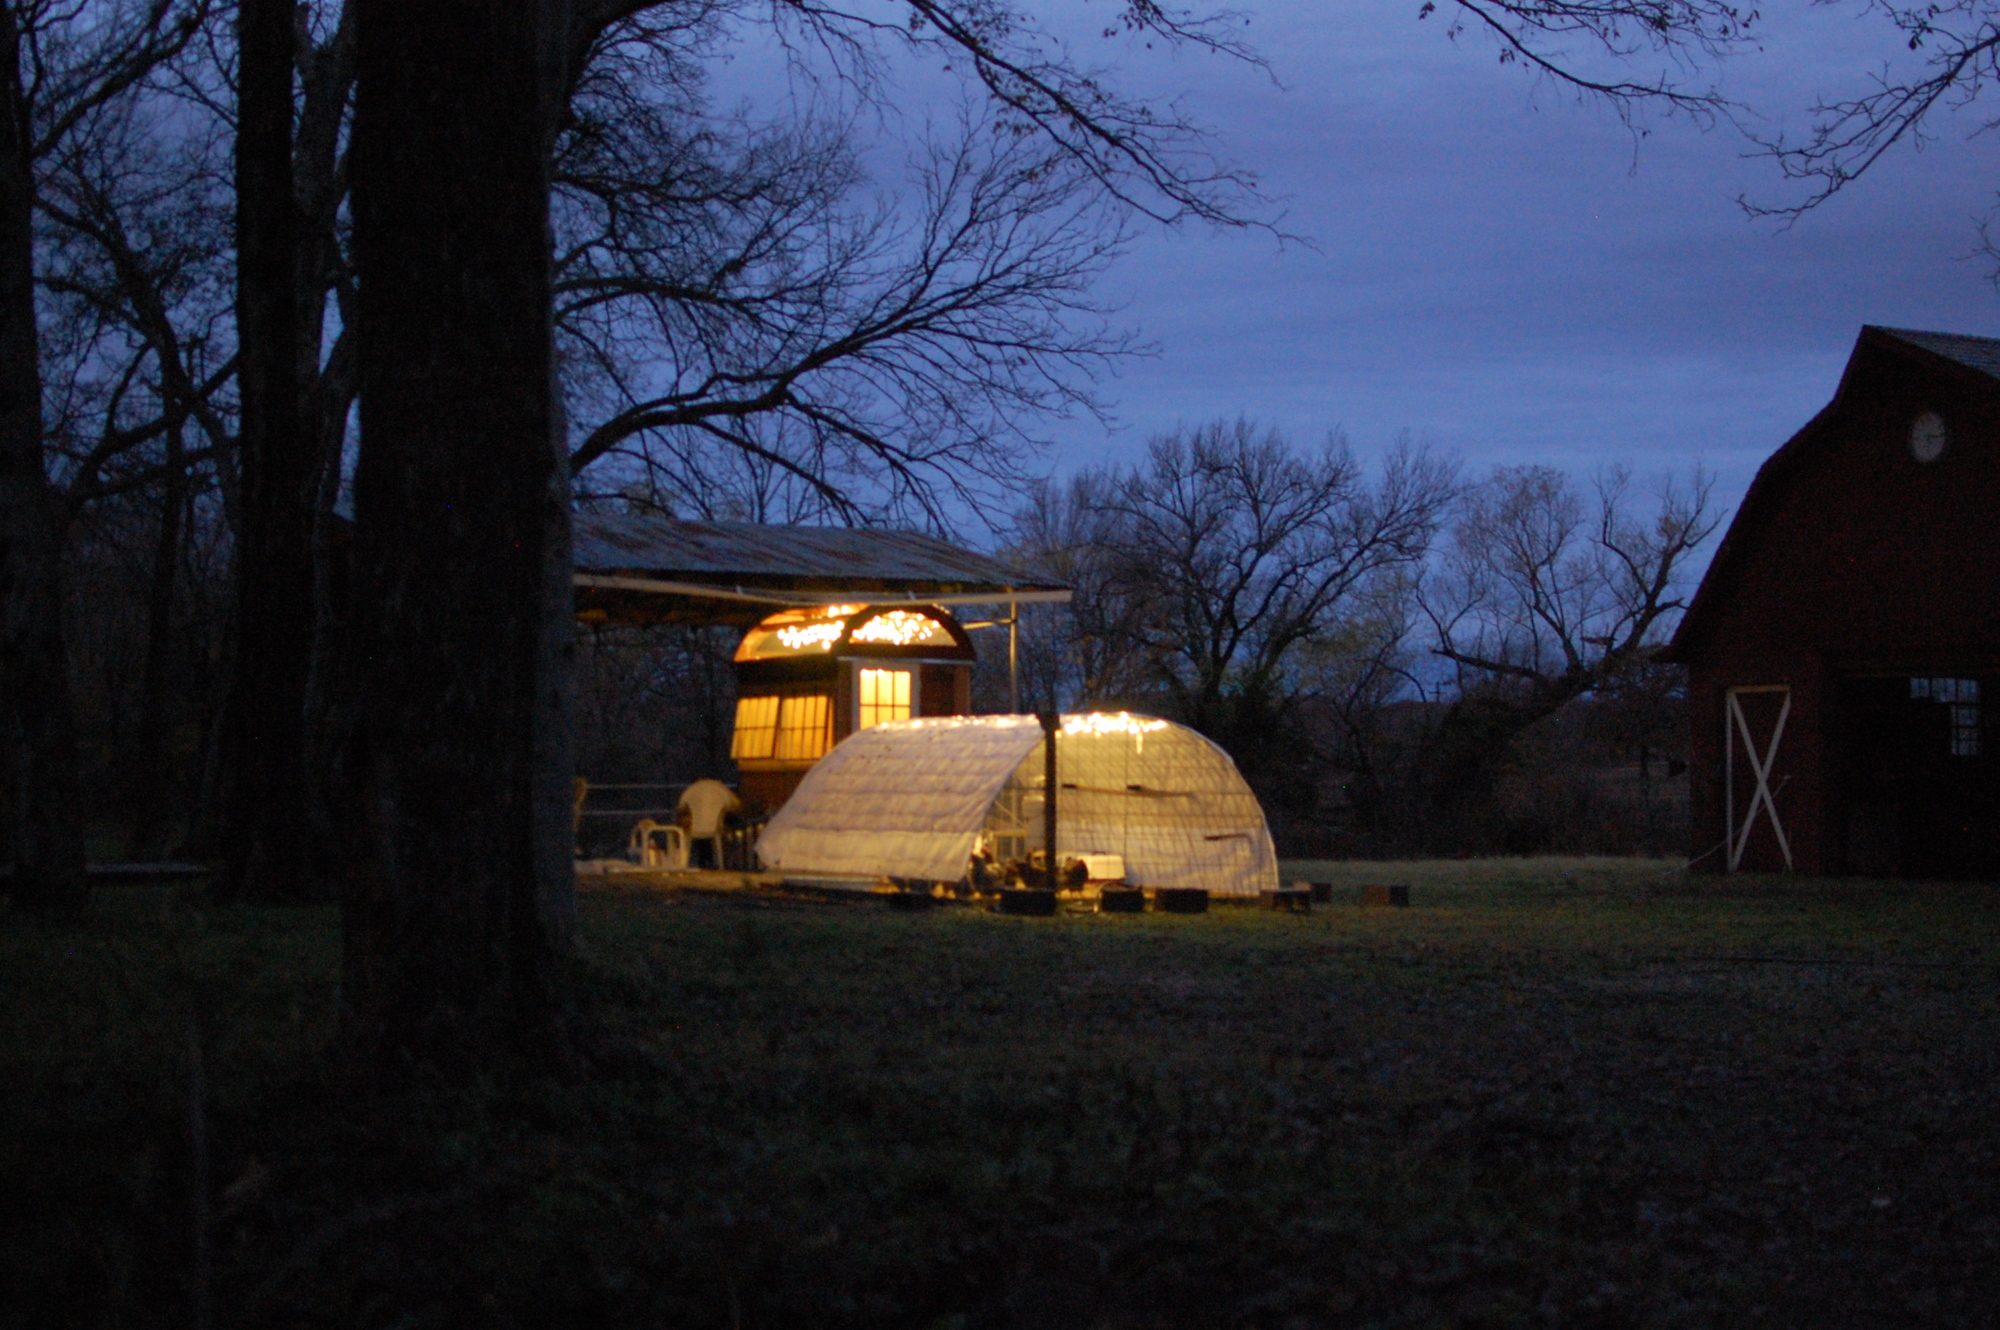
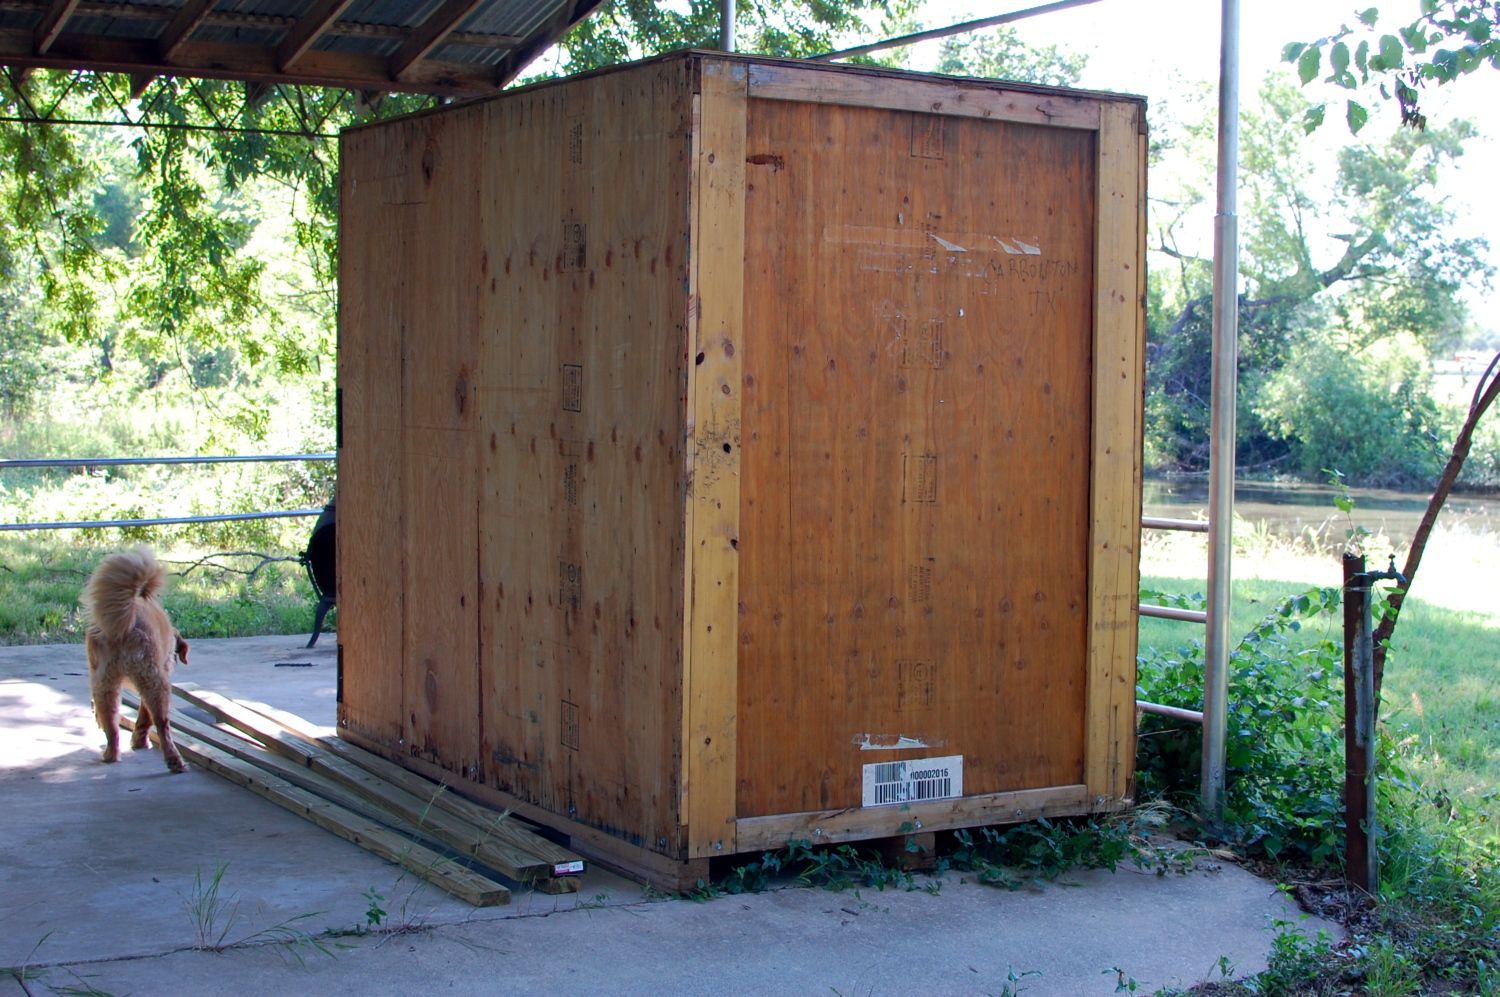
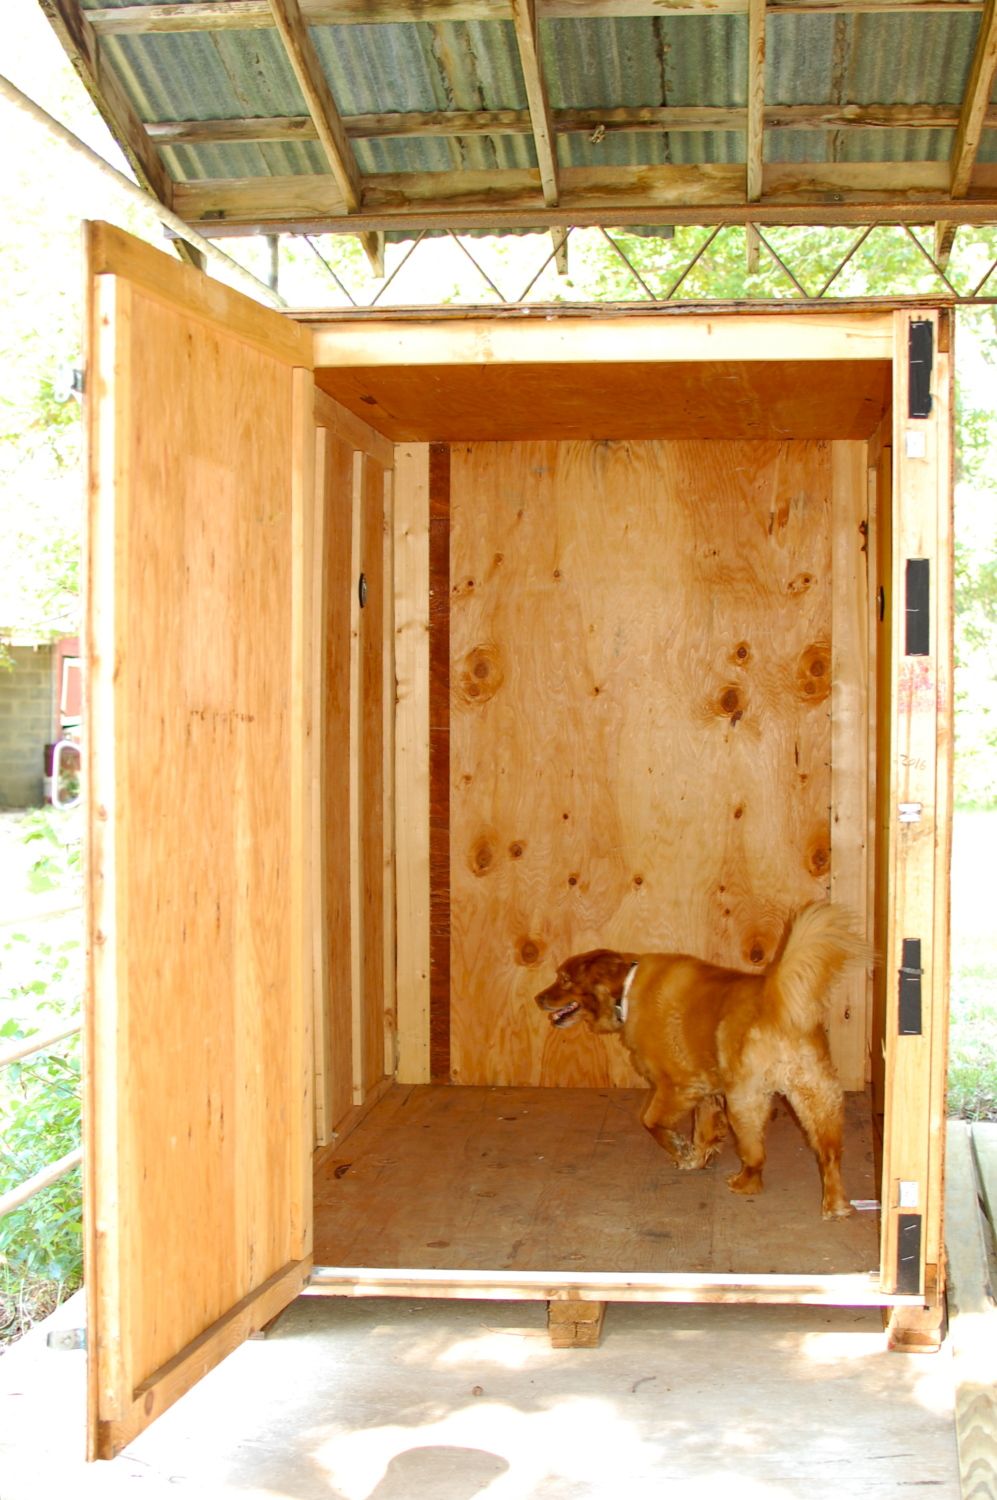
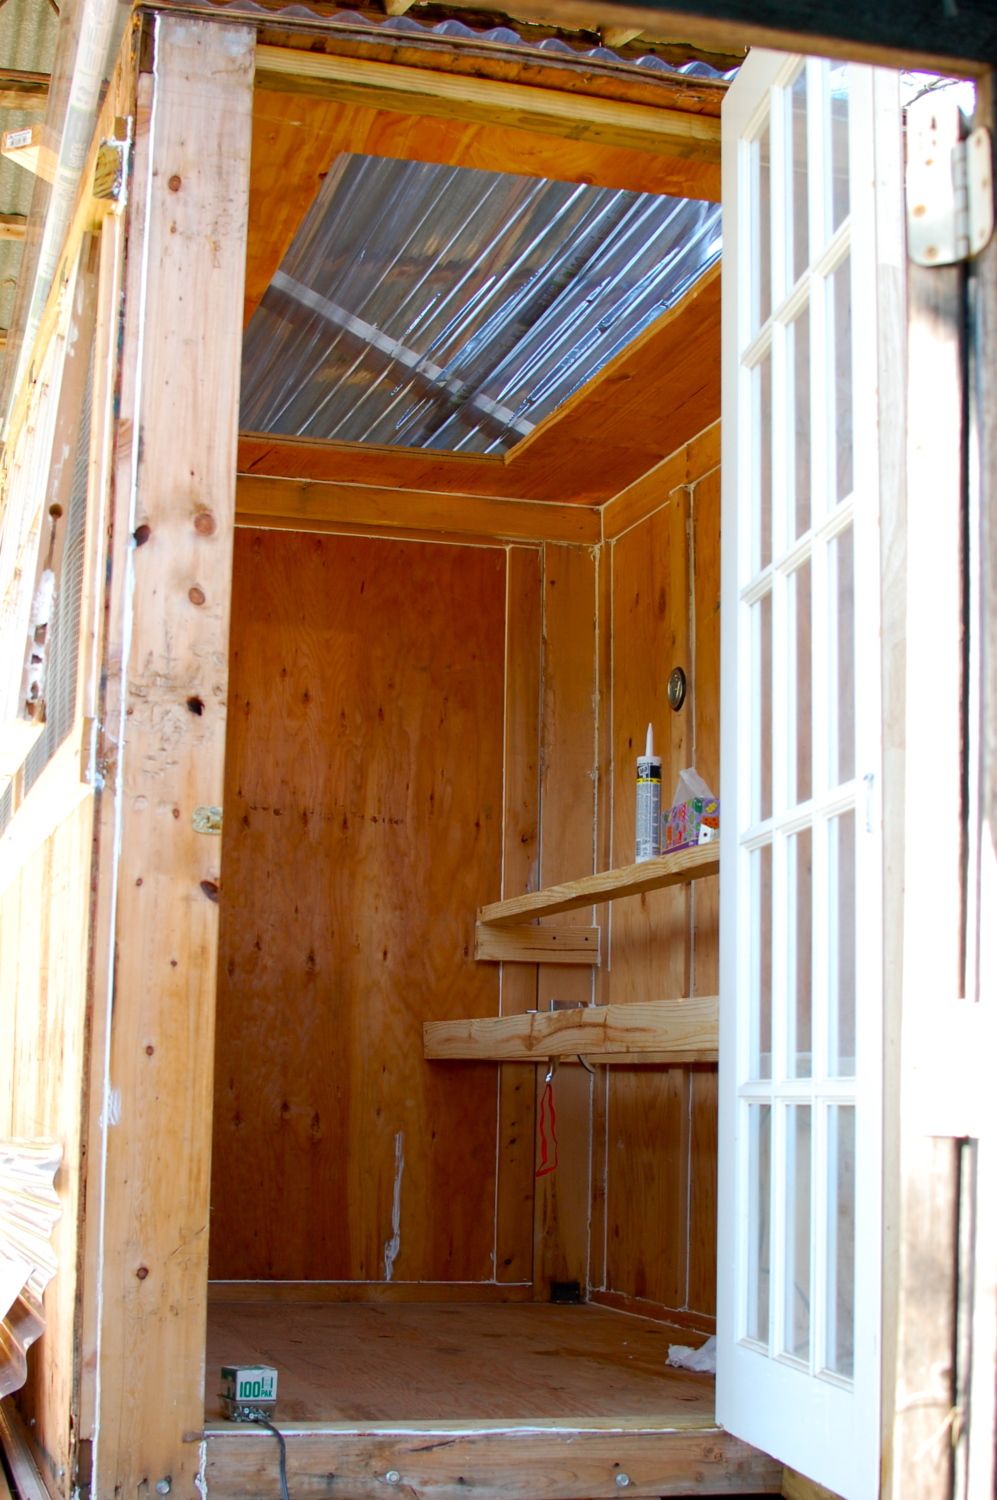
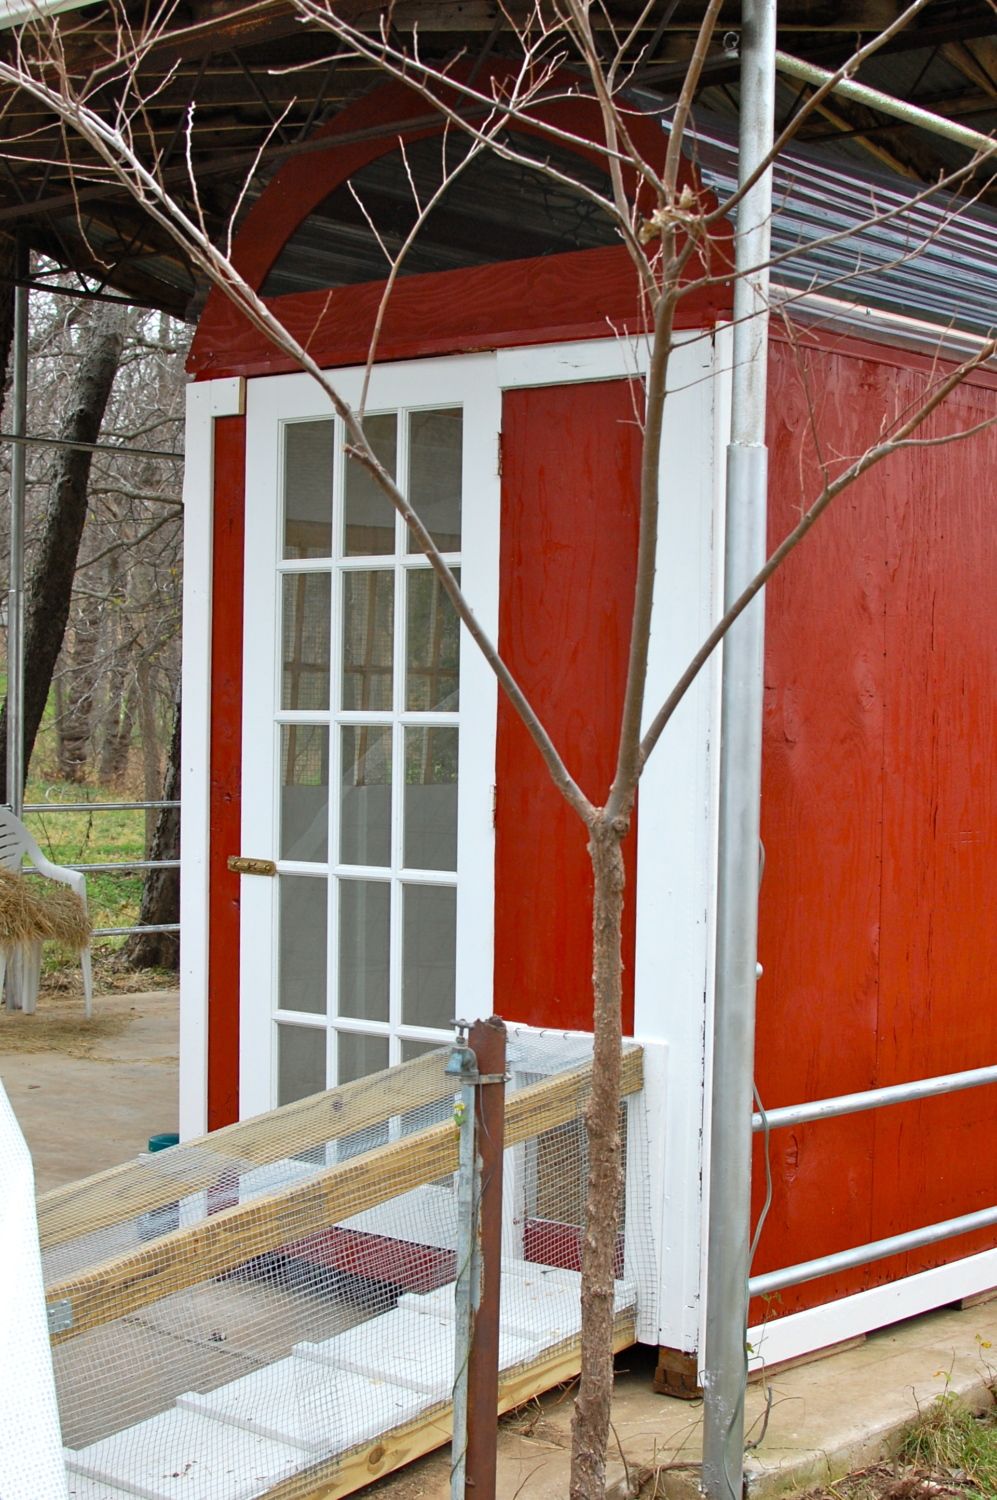
We started with a 5x8x7 shipping crate that I got off Craigslist - it took us 2 tries, with 2 different U-Haul trailers, but we finally got it home. I really wanted a clear, barrel roof for light and ventilation - but, here in Texas, it's almost impossible to find a place that's in full shade all day. Otherwise, we'd have a solar oven. But our hoop coop was already set up next to an old, unused, concrete-floored pavilion - so we just unloaded the crate there and decided to connect the two with a chicken tunnel... a.k.a. chunnel.

Now, those of you who said to plan on it taking 3X longer than you expect to build a coop - were right! I thought it would be a weekend project, since we were already starting with 4 walls, a ceiling and floor! How hard could this be? We aren't carpenters and have no experience constructing anything, so I guess that explains why it took us MONTHS to finish this.
So many details....

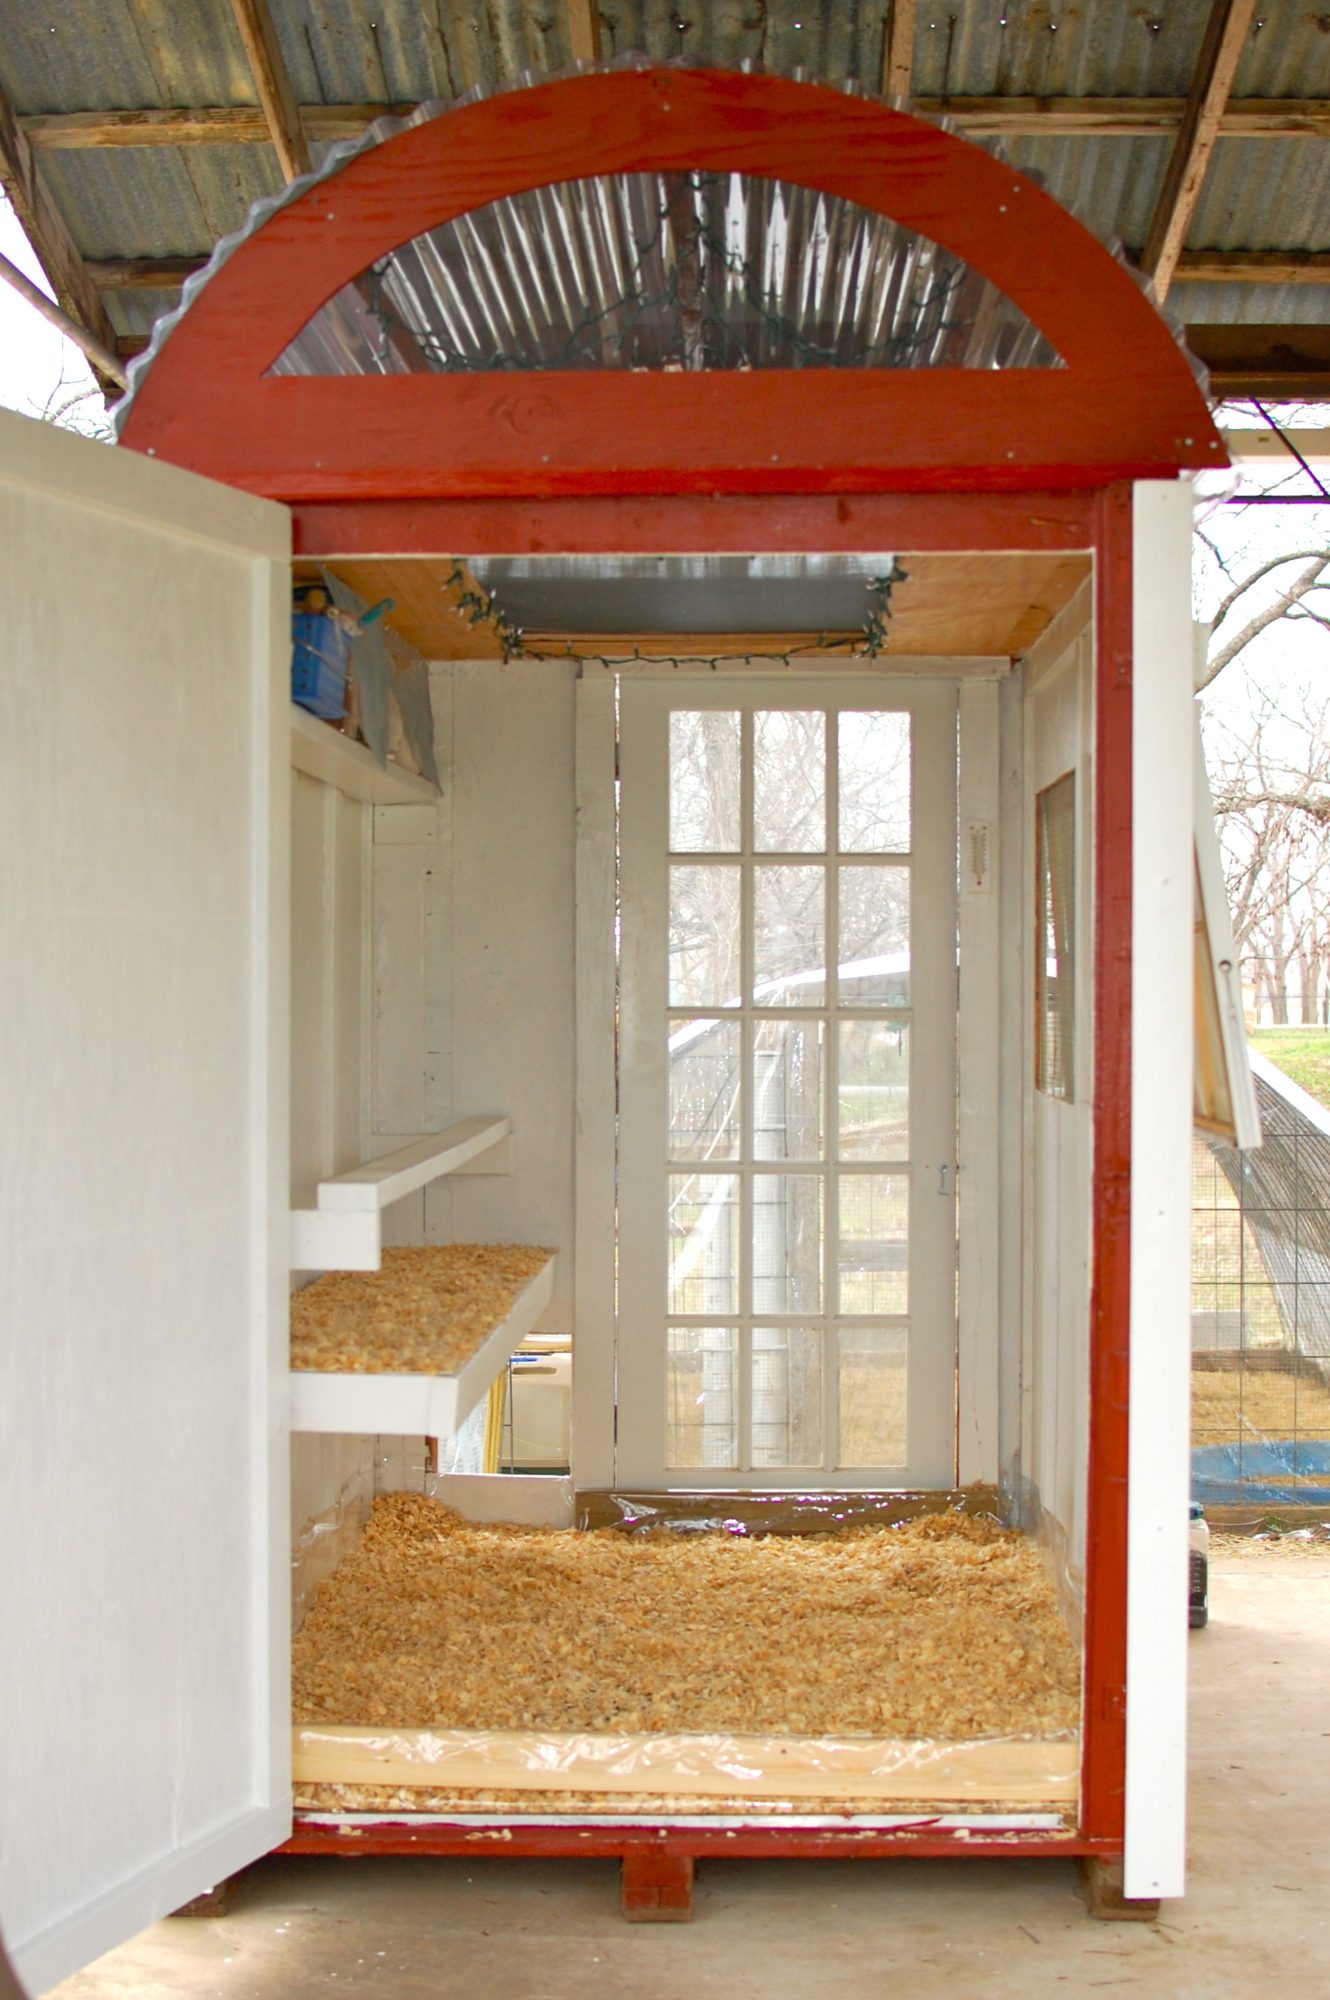
The crate had one end that opened up on a full-length piano hinge -- very nice!
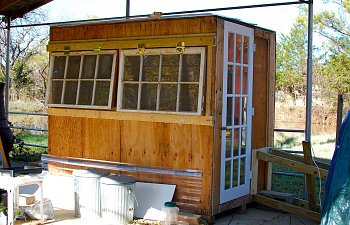
We cutout and added windows that we found in our shed attic. It was at this point that we discovered that using screws, rather than nails, was so much more efficient than hammering nails. Plus, it saved on personal injuries.

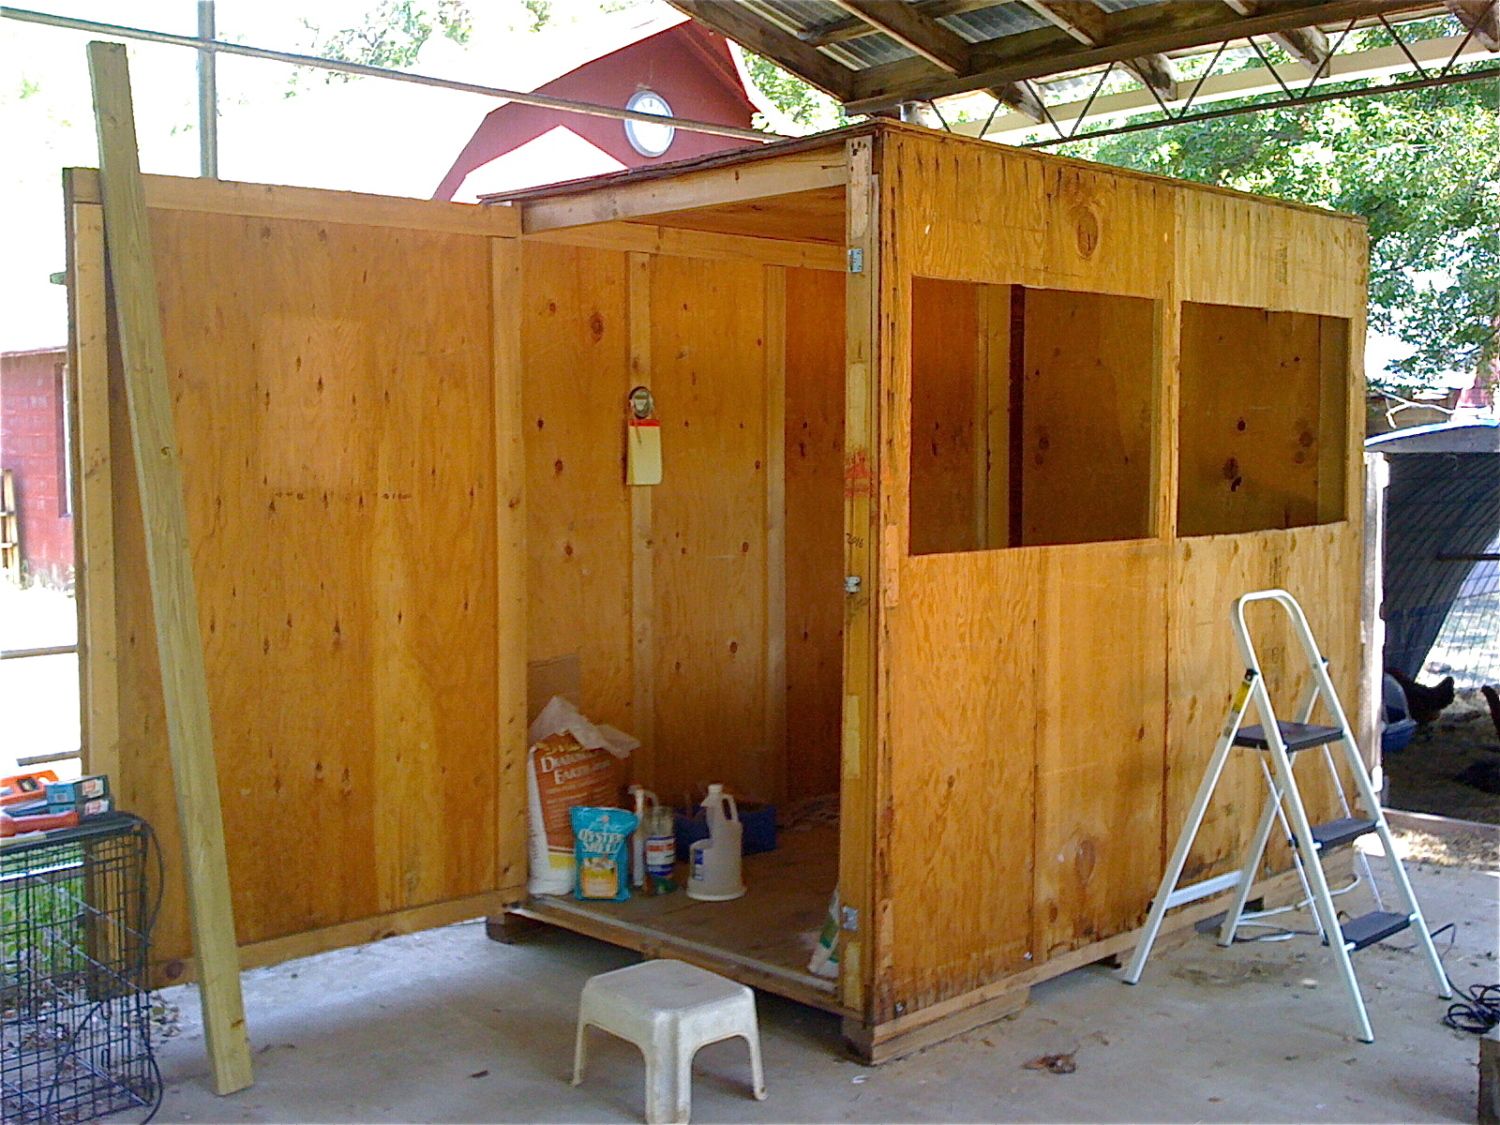
I'd purchased a $15 French door from Craigslist and, after cutting out the opening, ran into problems installing it. My DH and I were so frustrated trying to hang it that we eventually ended up hiring a handyman to put it in. It took him all of 15 minutes.

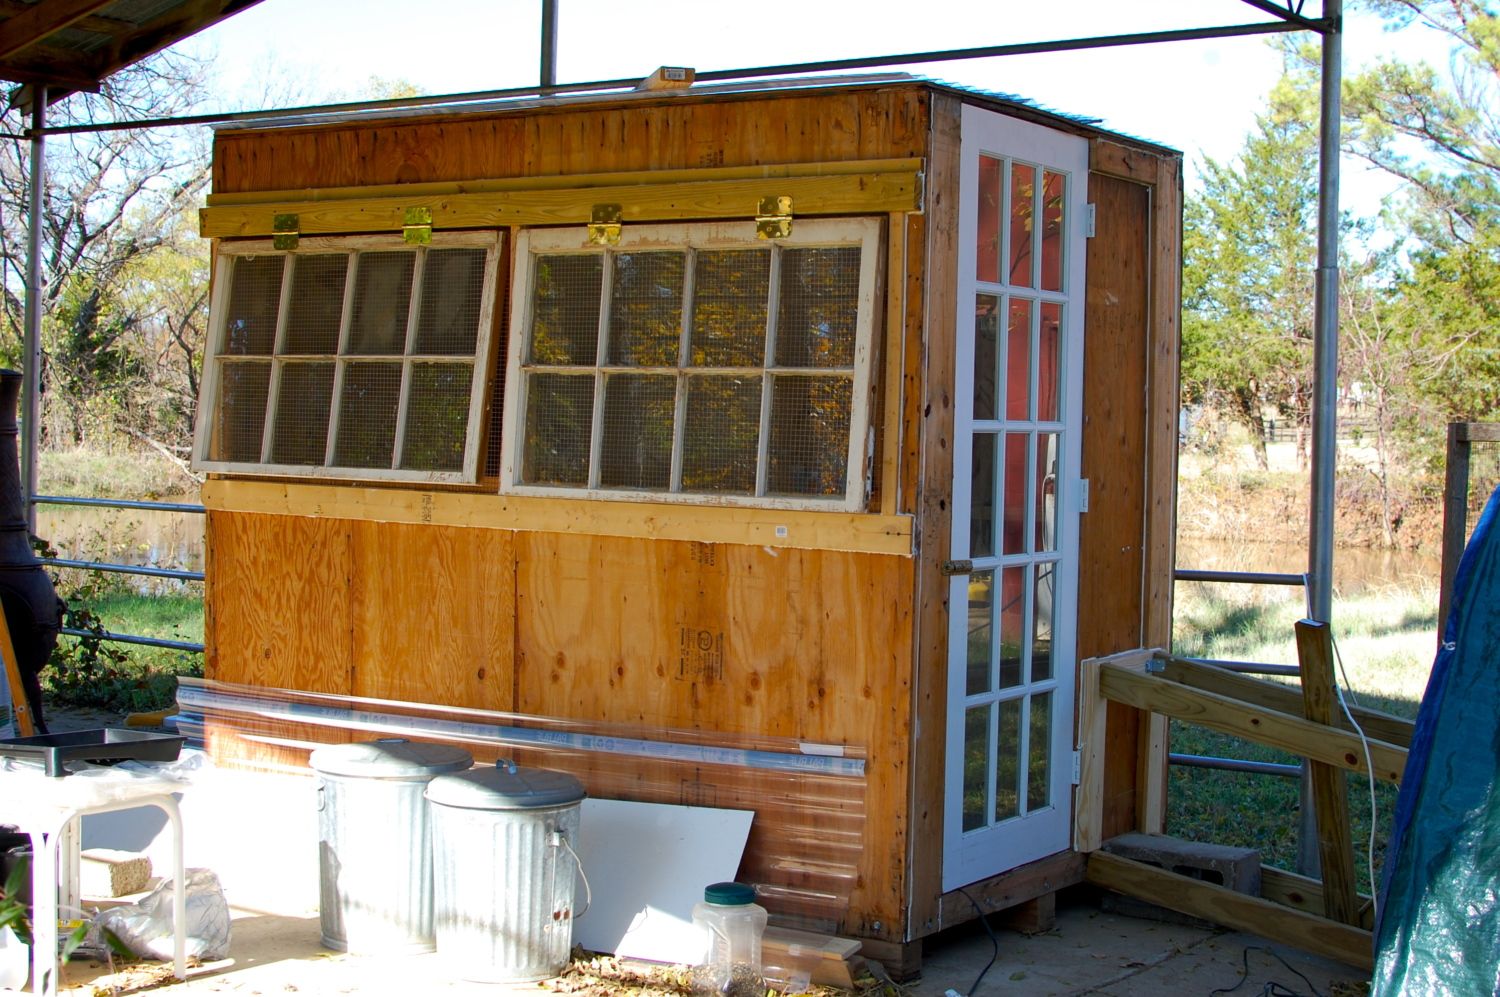
Marriage saved, frustration lowered, we resumed work and put in a large, screened opening in the ceiling for ventilation (the roof panels were just laid up there at this point to keep out any wind-blown rain)
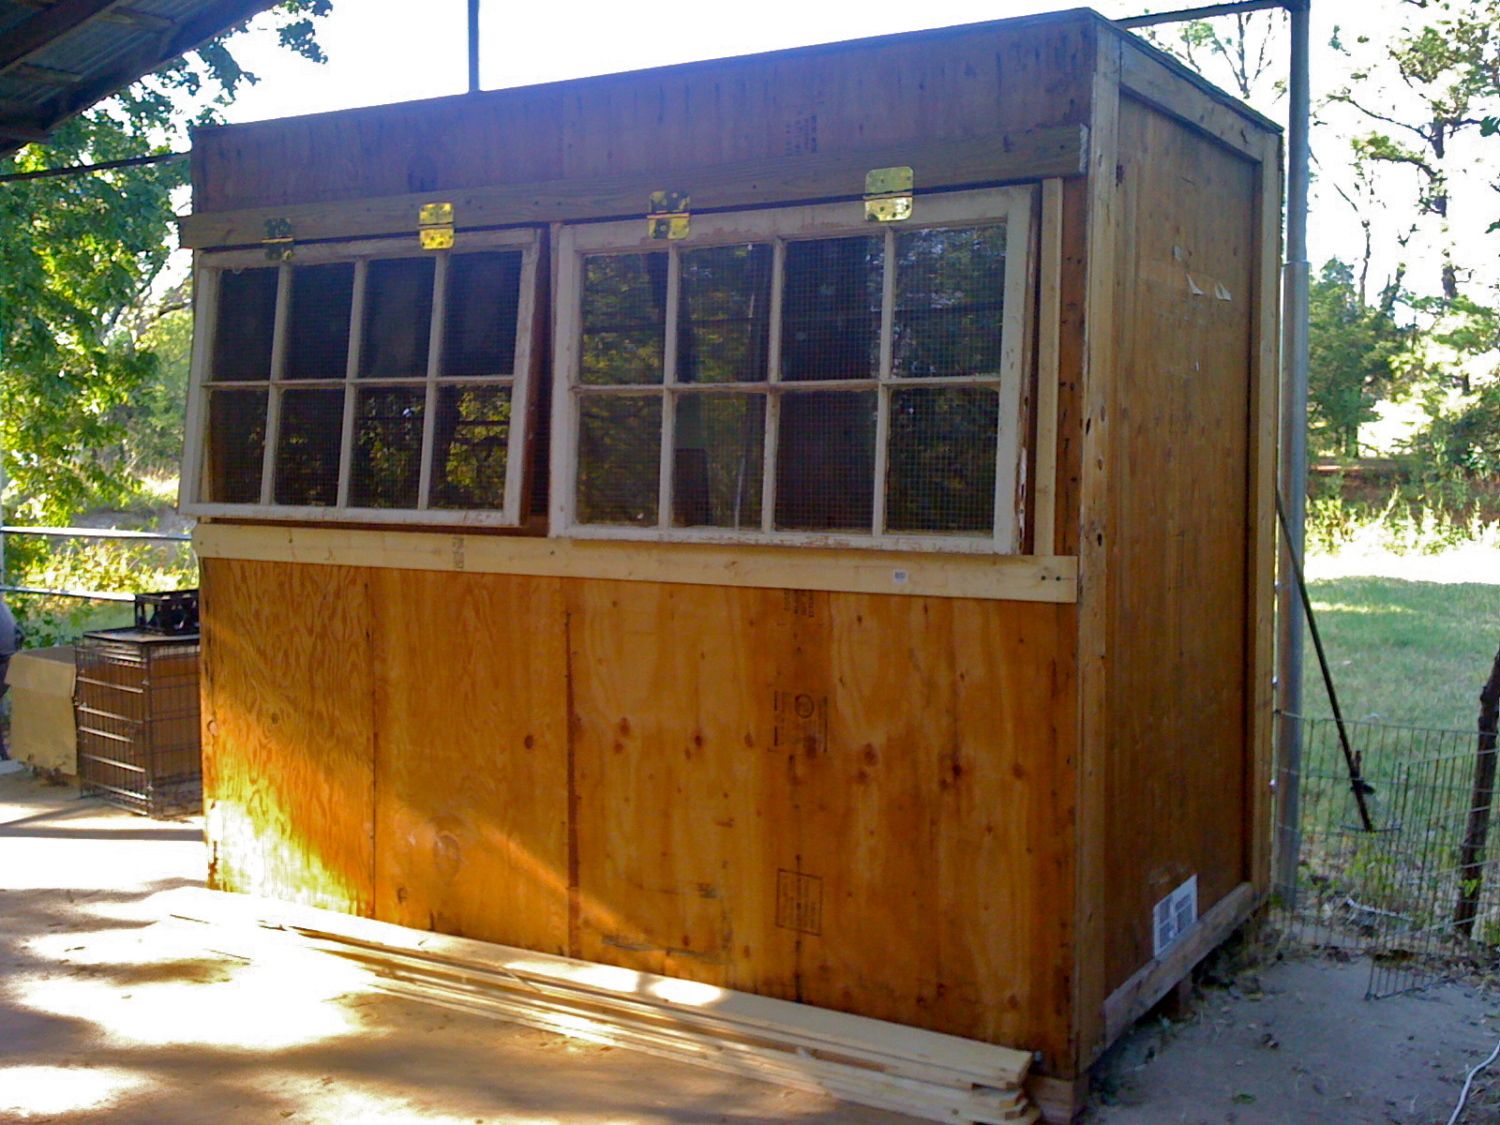
While cutting through the ceiling for the vent, I discovered there was a double layer of plywood, so I just used the cutouts to make the roof's arched endcaps. We painted these (using self-priming barn paint), and attached window screening to the inside of the endcaps to keeps wasps out of the "attic" and added some of that squishy foam corrugated roofing filler along the plywood, under the screws, for the same reason.
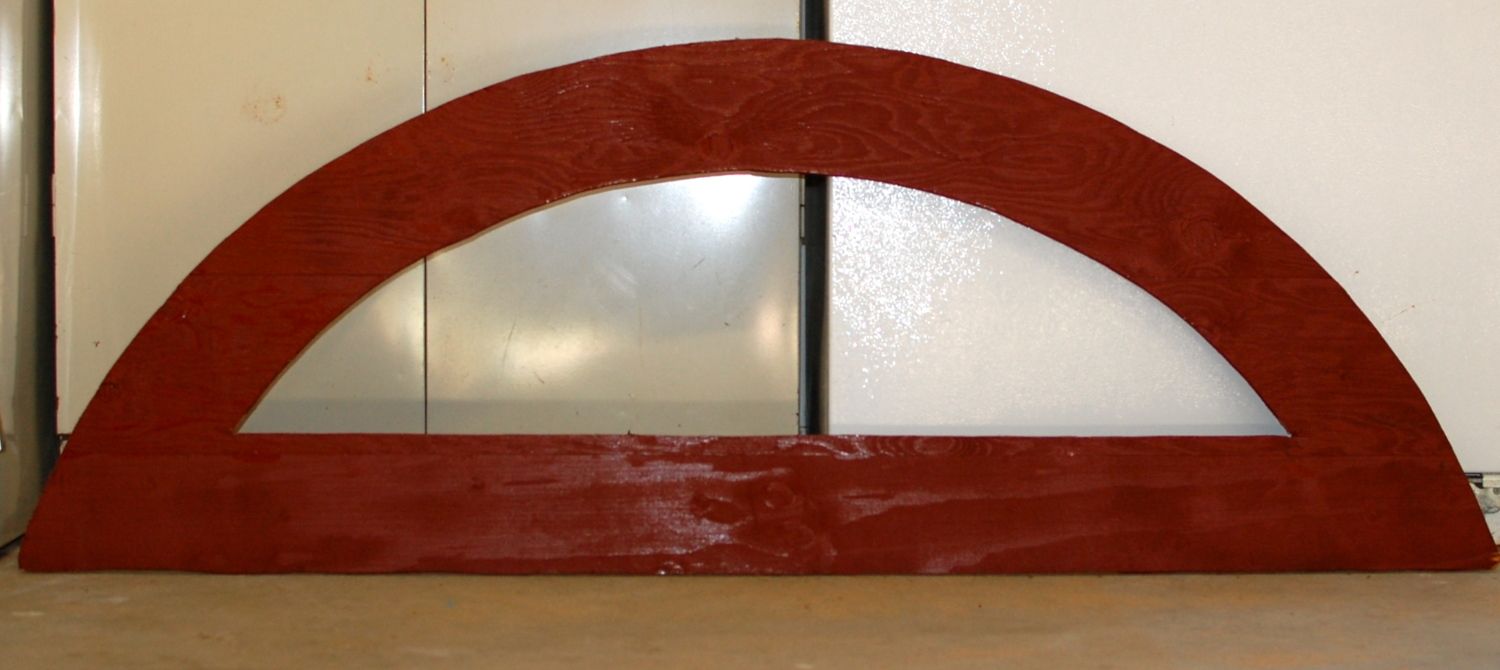
Fortunately, the opening I'd cut was 6" longer than the width of the crate, so the endcaps had a 3" overhang on each side. (If i ever make another crate coop, I'd be sure to cut the ceiling opening 12" longer than the width for a 6" overhang)
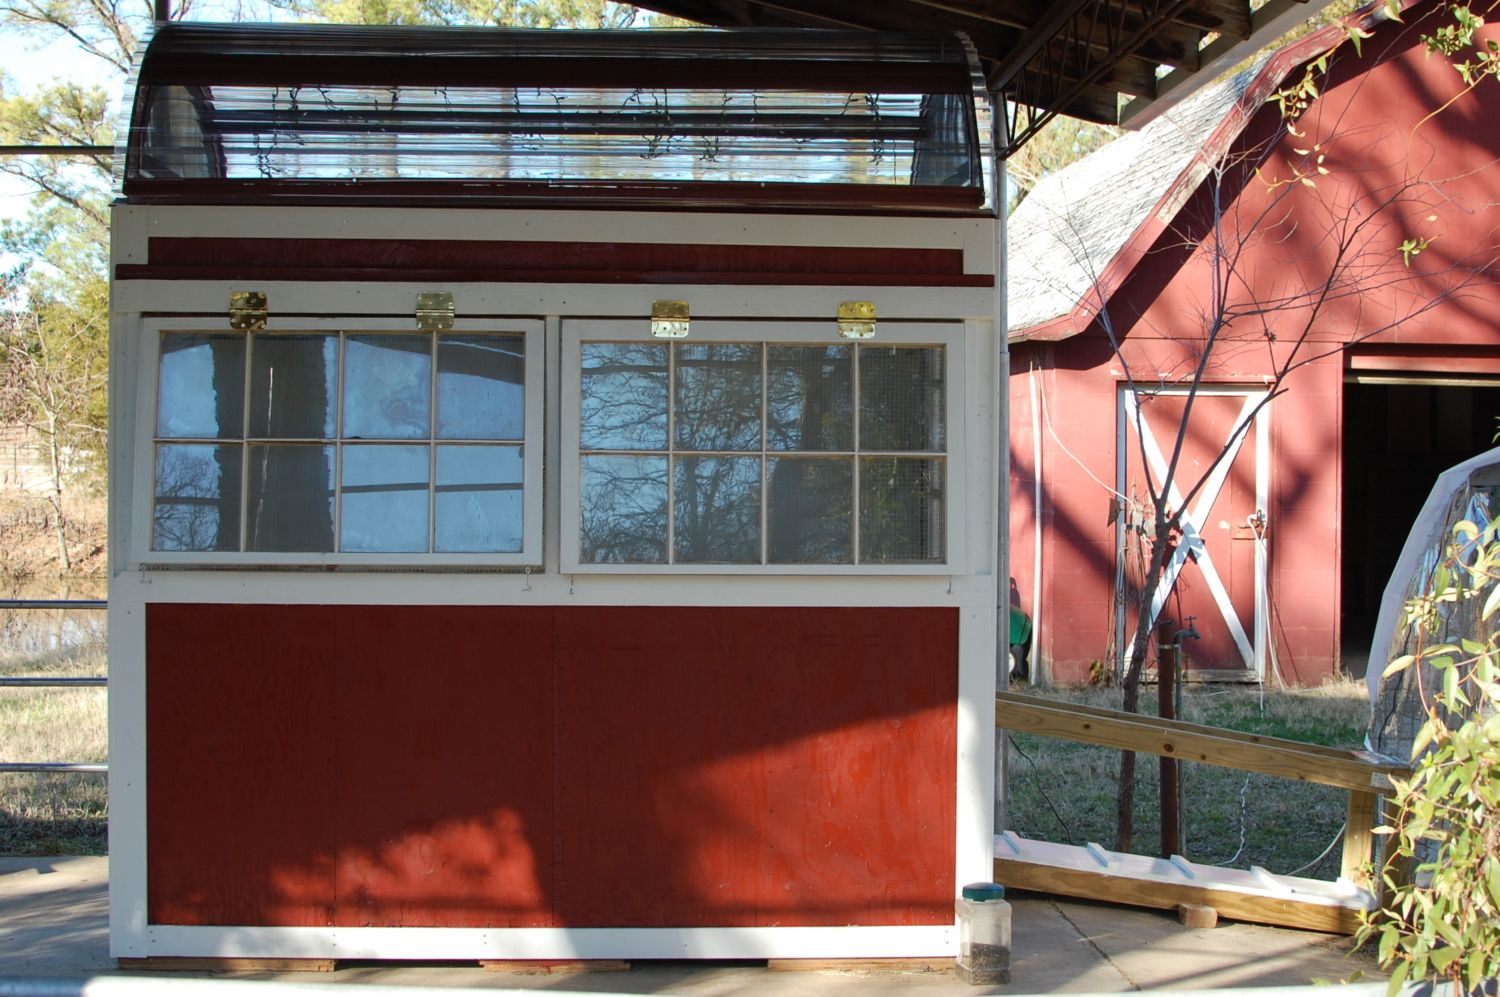
We added a baseplate of 2x4s to the top edges of the crate to attach the bottom of the arches to, and used 3 additional painted 2x4s (from one endcap to the other) mounted flush along the top of the arch to attach the clear corrugated roofing. We strung LED Christmas lights in the attic for seasonal lighting, added corner trim boards and then painted it, inside and out.
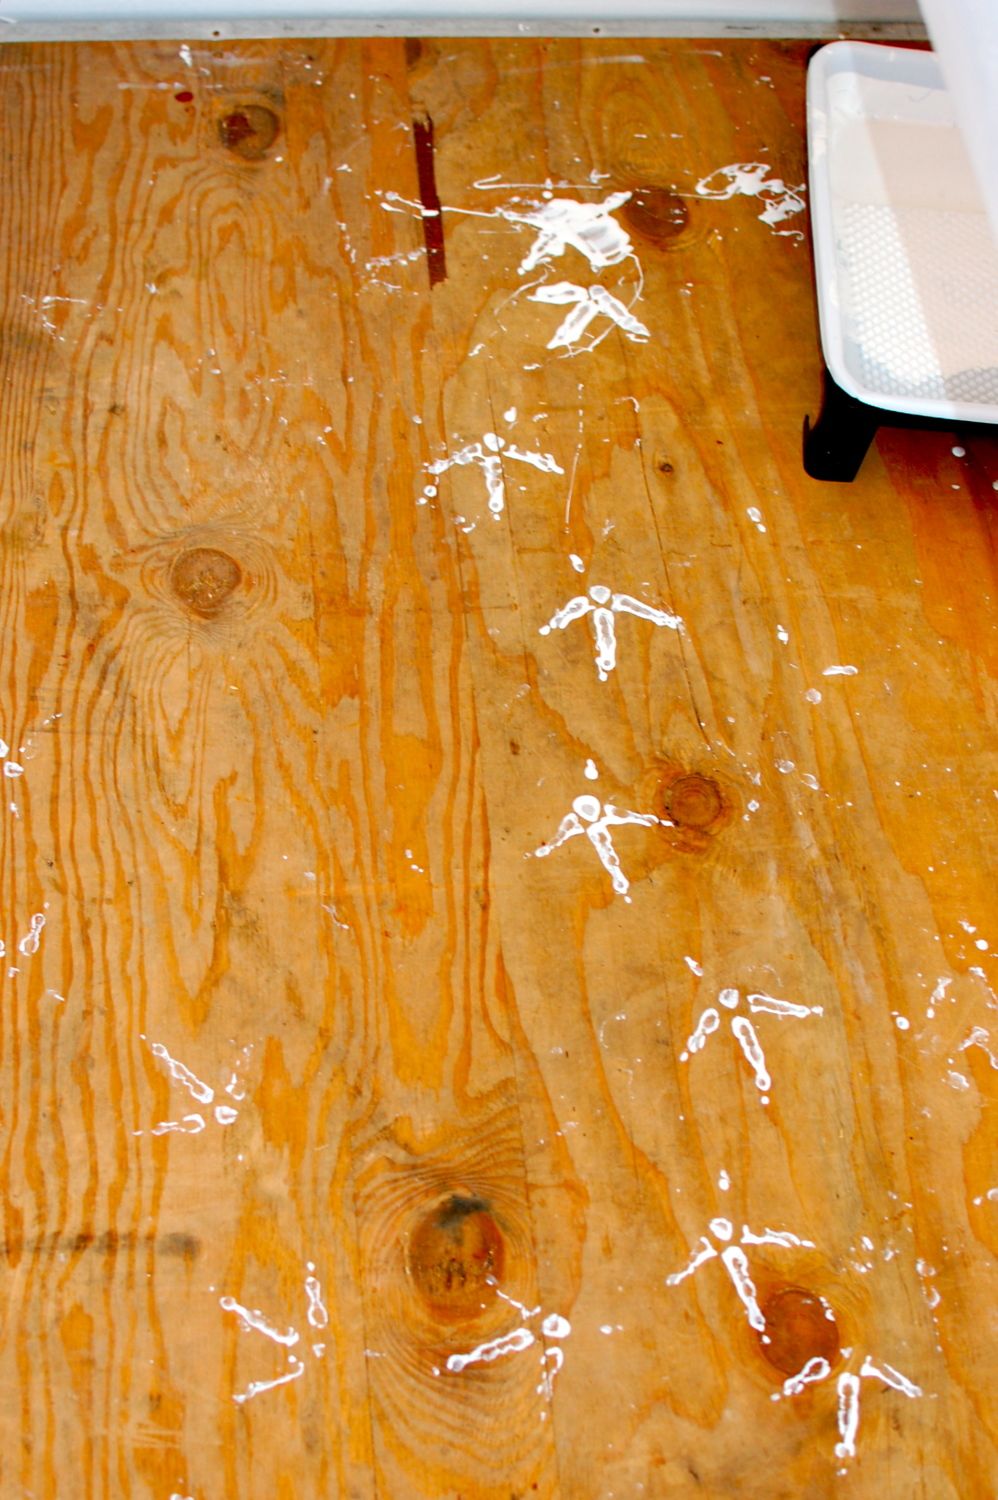
The chickens helped with the interior painting (thanks, Chuckles!) She snuck in through the popdoor we'd been working on and probably thought it was yogurt...and though she seemed none the worse for wear, she lost her "organic" status that day...

Here's the inside high shelf for chicken paraphernalia, covered with hardware cloth "doors", and roost & plastic poop deck (from the ReStore):

Inside with vinyl-covered floor. The large back door will be great for clean-outs. Just sweep everything out onto a tarp and drag it to the veggie garden (yup, it will never be this clean again...) This also shows the 3" overhang on each side of the endcaps and the three 2x4s along the top edge of the barrel arch:
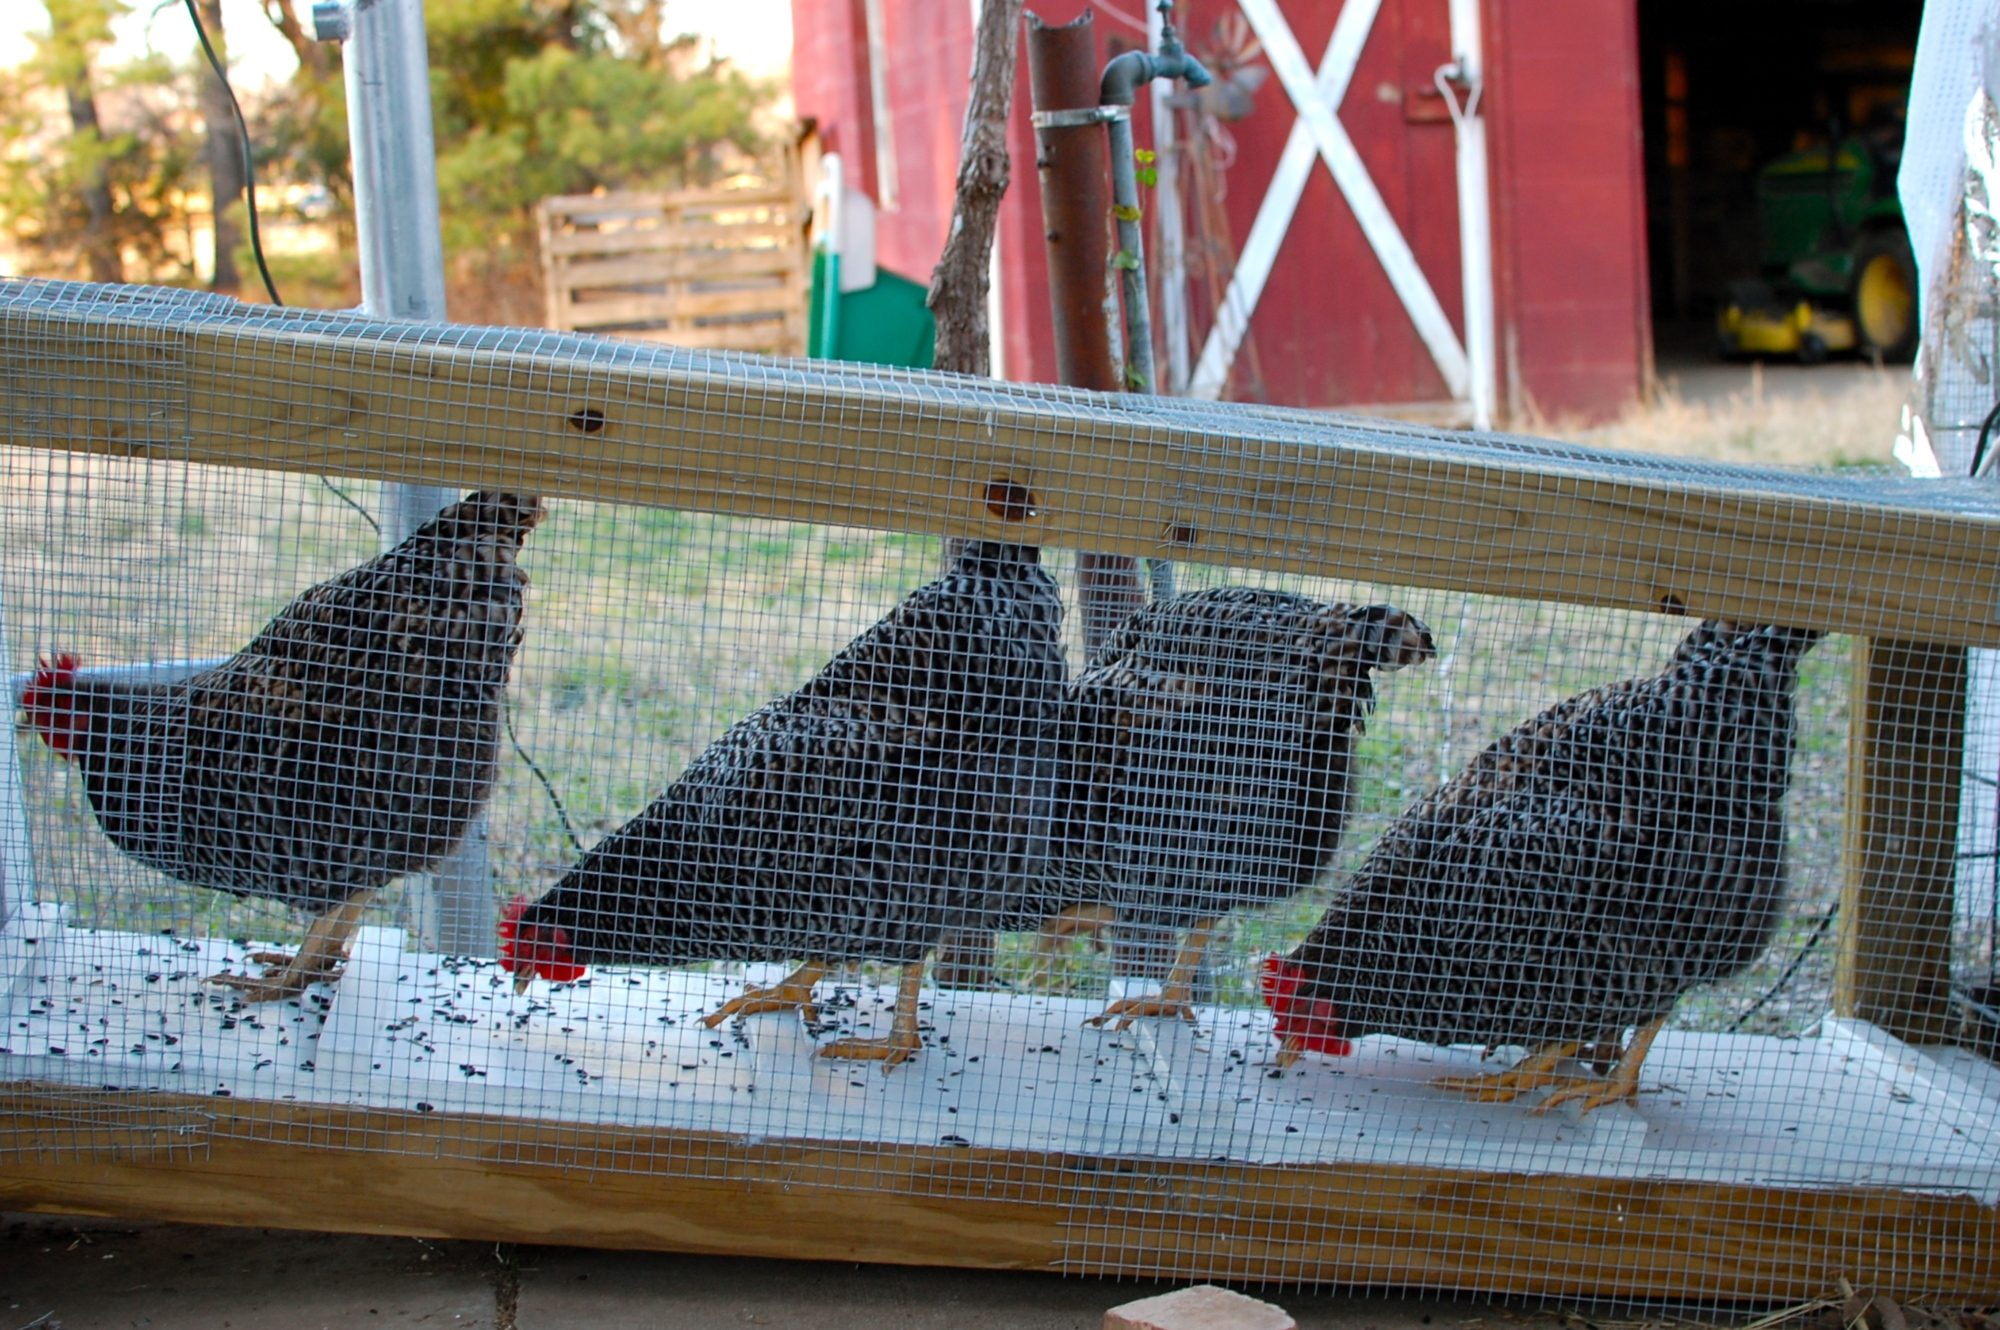
Chunnel:
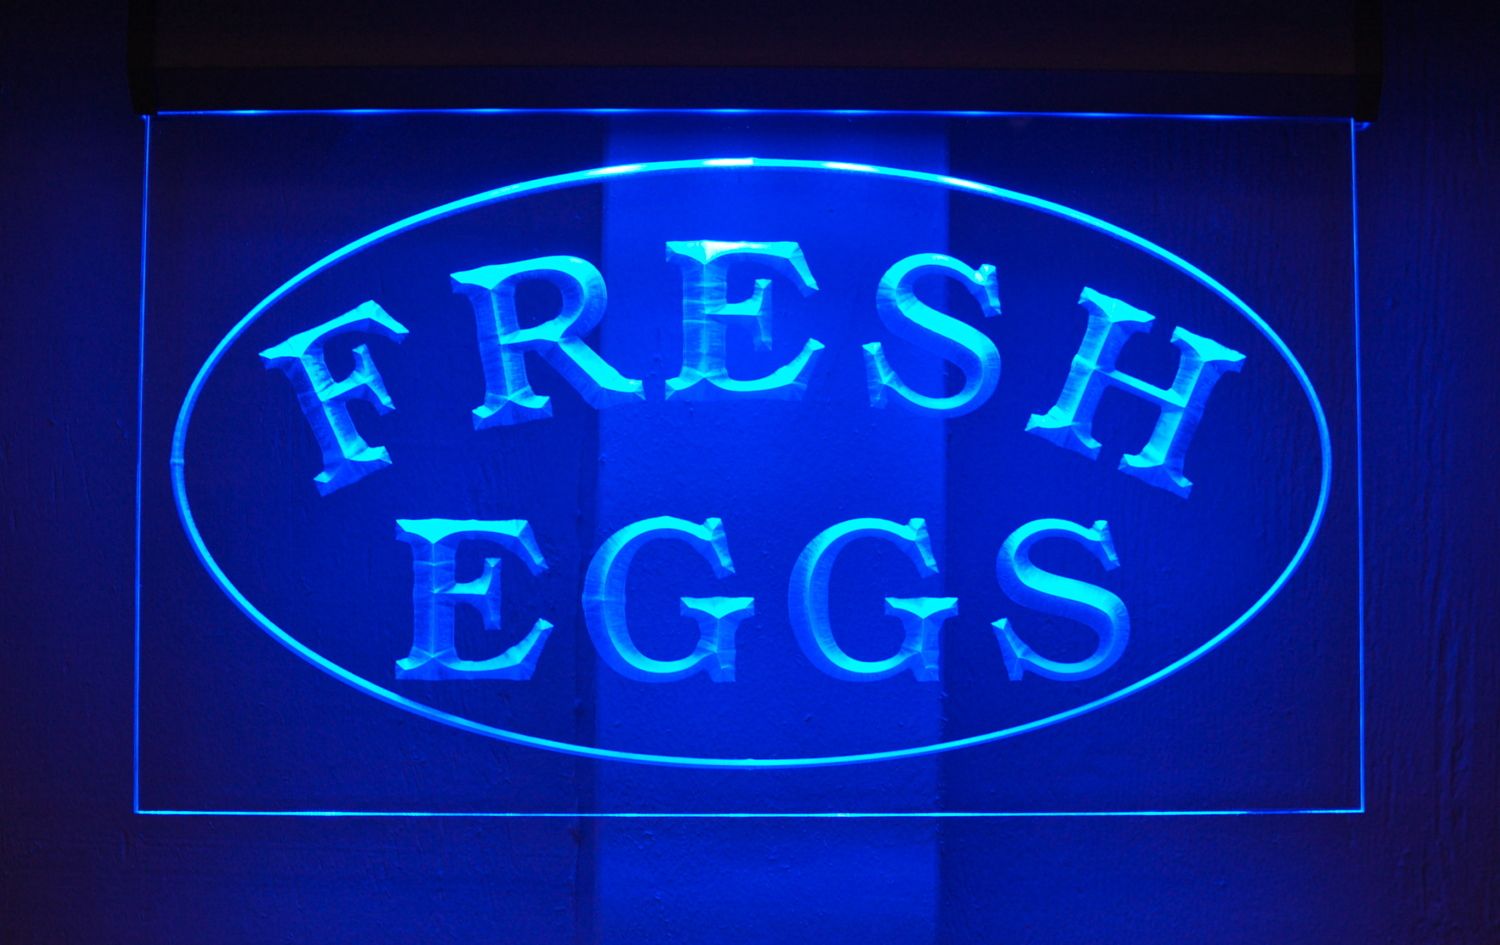
Lastly, I hung a motivational, LED sign inside for the girls:
All in all, I'm happy with the way the coop turned out. It's well protected since it's under the pavilion, otherwise, the screened end cap vents would probably let rain blow in. If I were building it in the open, we'd need to add louvers to the vents. We've had a couple of really gusty rainstorms, but everything stayed dry, so it works in our situation.
The chickens, after checking out the chunnel, have only occasionally slept inside when it was really cold. Since this is basically a fowl-weather coop for the occasional snow, ice or heavy rain storms, I'm not too worried about it.
 They know where to go, if needed.
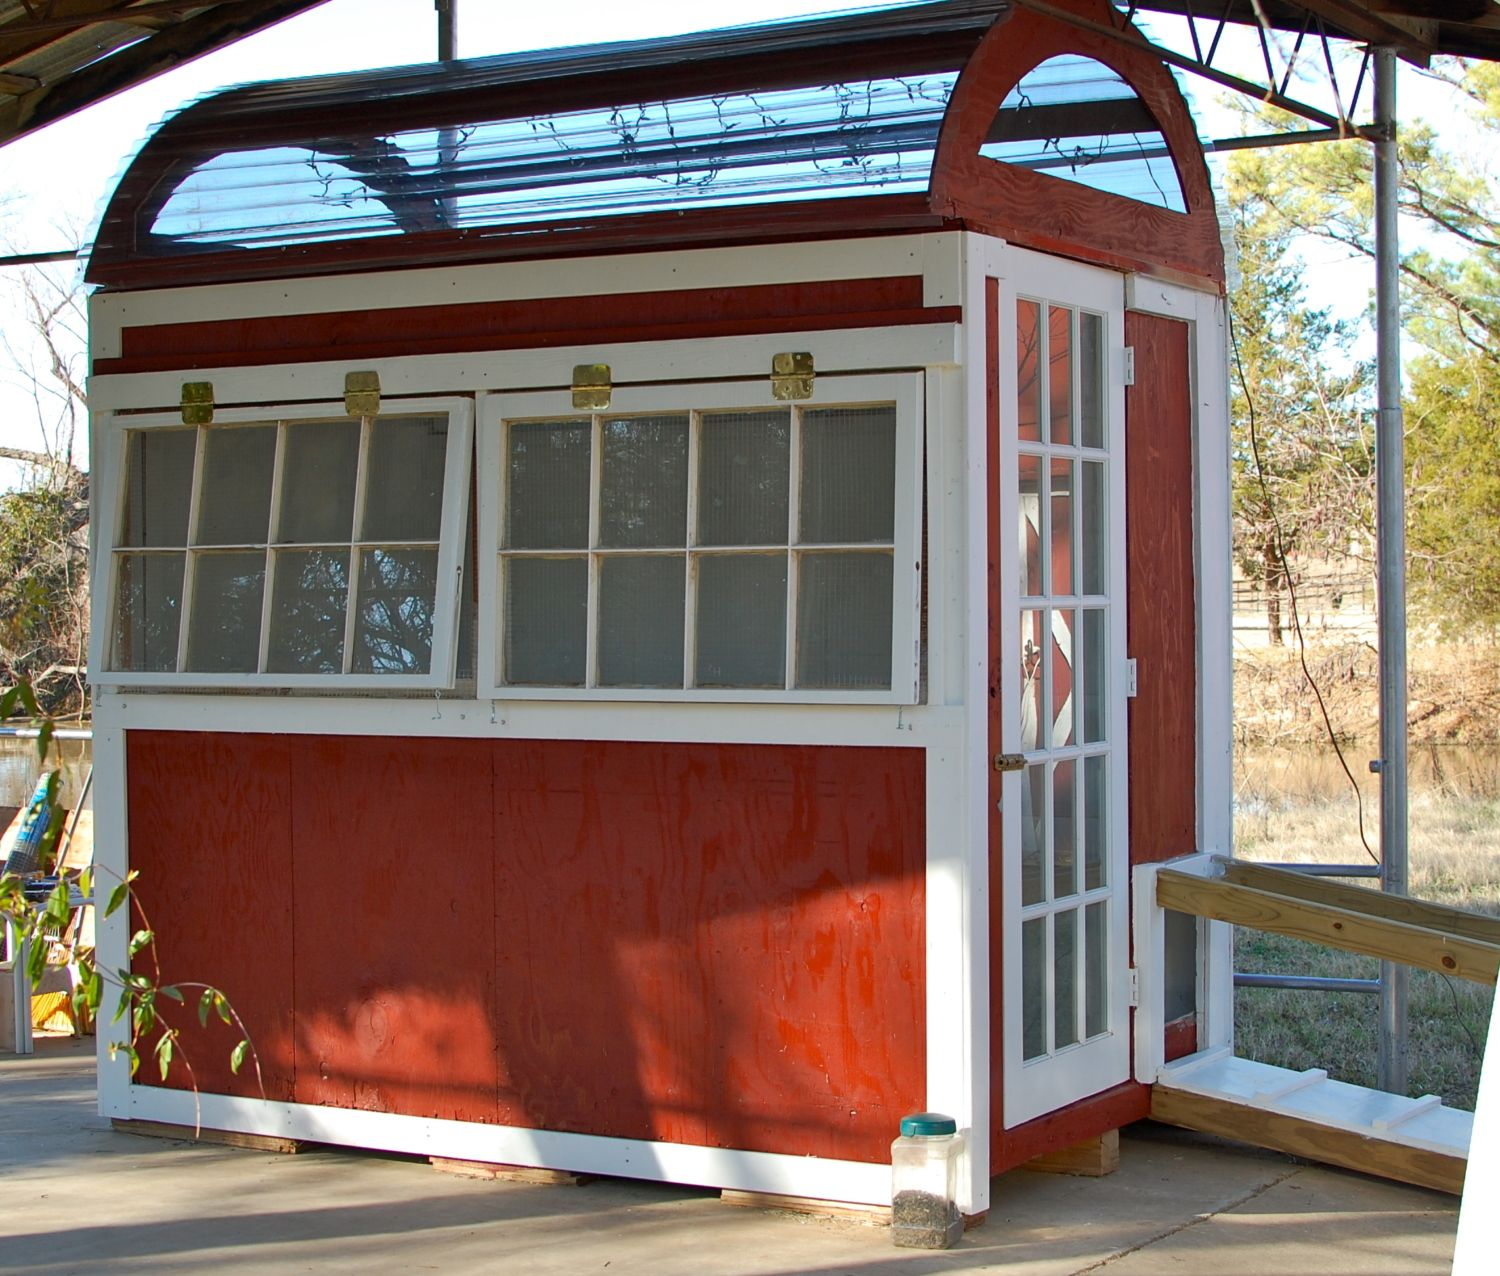
Many, many thanks to all you BYC'ers who have given advice and posted your pics - we would never have attempted something like this without all your great ideas and help!!