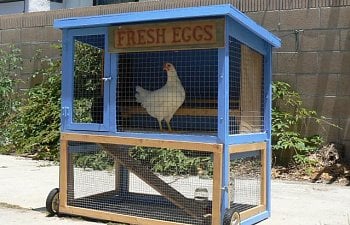
Recycled Rabbit Hutch Chicken Tractor

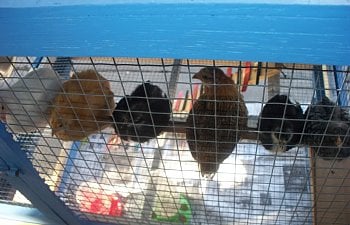
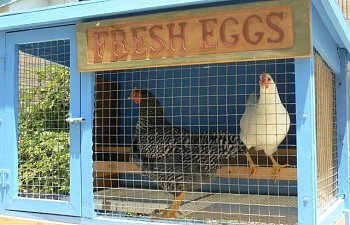
When it was used as a brooder it had six chicks in it. If it was for a fulltime coop, it would hold only two bantams comfortably. Pictured here are my Leghorn hybrid and my Barred Rock for chicken scale.
However, my chickens a regular coop, seen here...
https://www.backyardchickens.com/ar...ng-with-backyard-chickens-chicken-coop.47811/
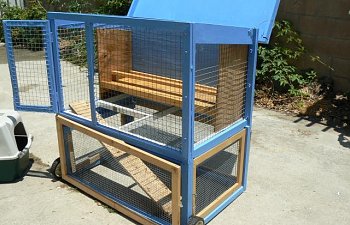
The chicken tractor began as a beat up old rabbit hutch I got on craigslist for free.
It is 42" x 26" interior measurements with the two levels dividing another 42" tall. The outside measurements are slightly larger, 45" x 29". After thoroughly disinfecting it and cleaning it up, I cut the rotted bottoms off the legs and framed out the bottom.
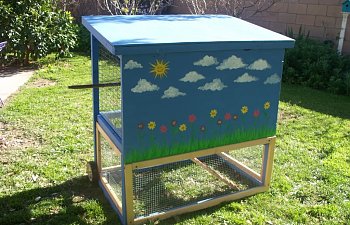
I added the lower wired frames, and added 2X2s around the bottom for stability. Next, I drilled holes on the corners and put on tires from an old discarded BBQ that are removable. I replaced the hardware cloth on the floor of the second level to accommodate the opening for the ladder. My 8 year old made a ladder/ ramp out of scrap from the coop project and large craft/ popsicle sticks. Then we primed and painted it a pretty shade of blue exterior paint from Habitat for Humanity Restore in Garden Grove @$3.00 a gallon.
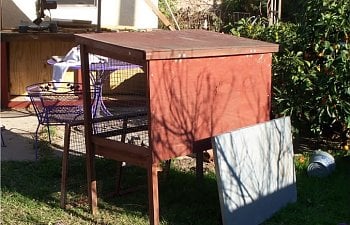
This is a picture of it when I first fixed it up. I have since made a couple changes.
I used an old broom handle for the original roost.
I have used the tractor as a brooder with a heat lamp attached and the whole thing would go back into the garage each night for the chicks to stay warm. It can also be an isolation area when needed.
Not counting the painting, the conversion took only about 2 1/2 hours, and I work pretty slow. A more experienced person could probably do it in half the time. The painting took two other half days, just when I found time. The hardest part with the painting was painting around the existing hardware cloth on the hutch. It was messy and difficult to get into the small spaces and still have it look nice. It may have been faster to have removed all the hardware cloth, paint the hutch, and then put it back on. It has a door on the bottom off on one side. I would recommend putting it on the front instead since it is wider and a shorter reach. When the chicks don't want to come out they stay out of arms' reach on the opposite end right now. I had been in half way in a couple of times to get them.
The total costs were about $10.00 turn it from bunny rabbit hutch to chicken tractor/ temporary coop. The only supplies that were purchased were paint, 2 furring strips, and hardware and hardware cloth (but it is being used and calculated in the coop project.) The closest looking thing I have seen around here like it is about $300 new, and it is the standard redwood stain color. I like bright stuff, so I would have painted a new one, too.
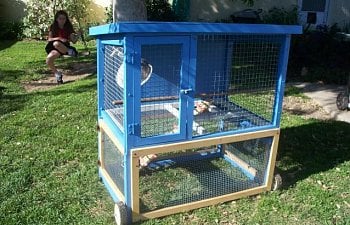
I added an old broom handle for a roost when I first made it, but since then I have added an easily removable platform with a roost.
Here are a few things I changed after using it awhile.
1. I made a better roost with side walls.
2. I made a simpler, easier to climb ladder out of an old fence board, popscicle sticks, and wood glue that goes from one corner to the top edge of the second floor opening.
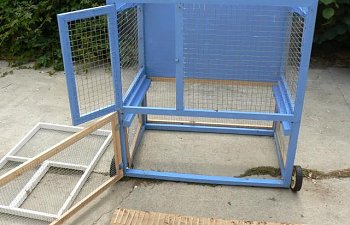
3. I added hinges and a latch on the long front panel. This way I don't have to crawl in to get them, like when the opening was only on the one end.
4. I enlarged the opening between levels to about 20" x 12" to fit the adult chicken size better.
*These changes added another hour or two of labor, but I already had the supplies left over from other projects.
I can take it apart for hosing it down to clean.
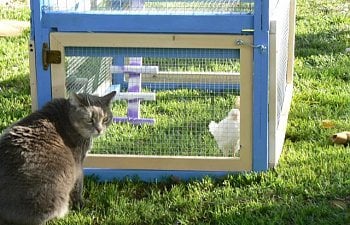
My cat uses it as a TV set to watch my Leghorn Hybrid, Joey the Hyline-from a Trader Joes' egg.

When it was used as a brooder it had six chicks in it. If it was for a fulltime coop, it would hold only two bantams comfortably. Pictured here are my Leghorn hybrid and my Barred Rock for chicken scale.
However, my chickens a regular coop, seen here...
https://www.backyardchickens.com/ar...ng-with-backyard-chickens-chicken-coop.47811/
The chicken tractor began as a beat up old rabbit hutch I got on craigslist for free.

It is 42" x 26" interior measurements with the two levels dividing another 42" tall. The outside measurements are slightly larger, 45" x 29". After thoroughly disinfecting it and cleaning it up, I cut the rotted bottoms off the legs and framed out the bottom.
I added the lower wired frames, and added 2X2s around the bottom for stability. Next, I drilled holes on the corners and put on tires from an old discarded BBQ that are removable. I replaced the hardware cloth on the floor of the second level to accommodate the opening for the ladder. My 8 year old made a ladder/ ramp out of scrap from the coop project and large craft/ popsicle sticks. Then we primed and painted it a pretty shade of blue exterior paint from Habitat for Humanity Restore in Garden Grove @$3.00 a gallon.

This is a picture of it when I first fixed it up. I have since made a couple changes.

I used an old broom handle for the original roost.
I have used the tractor as a brooder with a heat lamp attached and the whole thing would go back into the garage each night for the chicks to stay warm. It can also be an isolation area when needed.

Not counting the painting, the conversion took only about 2 1/2 hours, and I work pretty slow. A more experienced person could probably do it in half the time. The painting took two other half days, just when I found time. The hardest part with the painting was painting around the existing hardware cloth on the hutch. It was messy and difficult to get into the small spaces and still have it look nice. It may have been faster to have removed all the hardware cloth, paint the hutch, and then put it back on. It has a door on the bottom off on one side. I would recommend putting it on the front instead since it is wider and a shorter reach. When the chicks don't want to come out they stay out of arms' reach on the opposite end right now. I had been in half way in a couple of times to get them.
The total costs were about $10.00 turn it from bunny rabbit hutch to chicken tractor/ temporary coop. The only supplies that were purchased were paint, 2 furring strips, and hardware and hardware cloth (but it is being used and calculated in the coop project.) The closest looking thing I have seen around here like it is about $300 new, and it is the standard redwood stain color. I like bright stuff, so I would have painted a new one, too.

I added an old broom handle for a roost when I first made it, but since then I have added an easily removable platform with a roost.
Here are a few things I changed after using it awhile.
1. I made a better roost with side walls.
2. I made a simpler, easier to climb ladder out of an old fence board, popscicle sticks, and wood glue that goes from one corner to the top edge of the second floor opening.
3. I added hinges and a latch on the long front panel. This way I don't have to crawl in to get them, like when the opening was only on the one end.
4. I enlarged the opening between levels to about 20" x 12" to fit the adult chicken size better.
*These changes added another hour or two of labor, but I already had the supplies left over from other projects.


I can take it apart for hosing it down to clean.

My cat uses it as a TV set to watch my Leghorn Hybrid, Joey the Hyline-from a Trader Joes' egg.