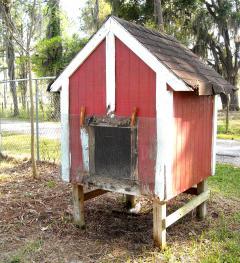
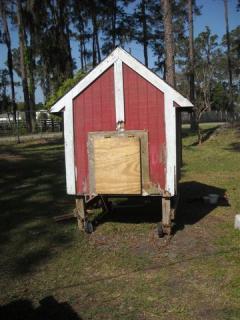
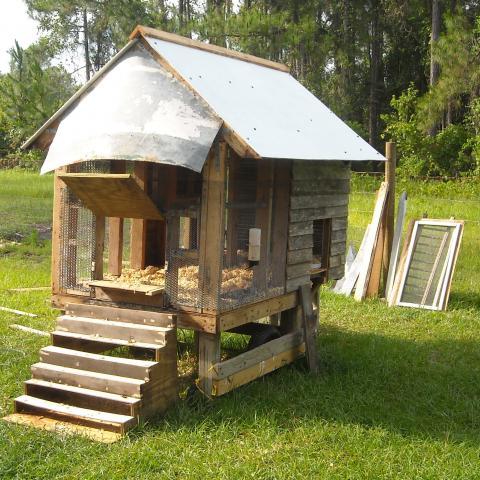
This is our tractor in progress. We have no plans, we're just winging it. The goal is to purchase as little material as possible. We're starting with an existing dog house which was later repurposed to a goat house. In it's third life, it'll house our chickens! We have to add doors and vents, an egg box and wheels, and cut it off of it's posts of course! Sounds easy enough, right?

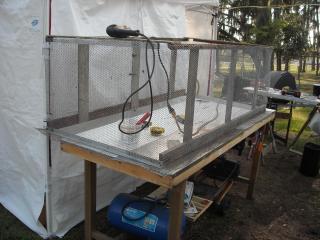
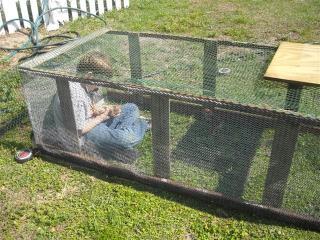
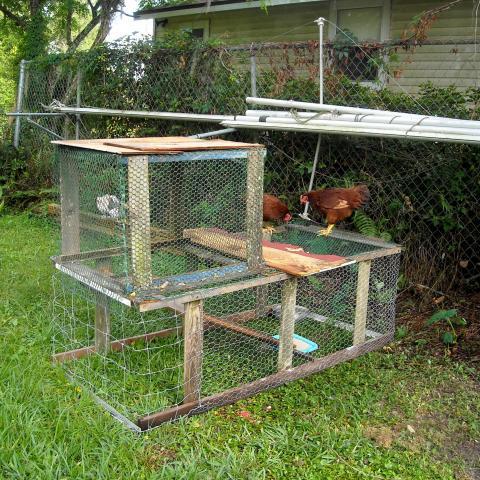
This is the run in progress. I'm an artist who works in found materials and my fiance can't throw out anything that might be useful. So, between us, there should be plenty of material to use. The metal mesh was originally intended as walls to hang art from my booth at art shows. It didn't work out so well and was later repurposed to house rabbits in the front garden. Rabbits gone, third life as chicken run! It's expanded steel mesh used normally used as a lathe for stucco.The wood was all scrap of ours including beautiful mahogany from a salvaged boat. Drip rails form the end pieces.
Here's the run. Finished for now so the chicks can get out of the house and into some fresh air to exercise. Already planning on how to make it bigger! That's plastic chicken wire on top. We had it left over from an art project. I don't recommend it. It's a temporary roof that's easy enough to open but we need something sturdier to keep the critters out. Notice the removable wheels so it can be picked up and moved about.
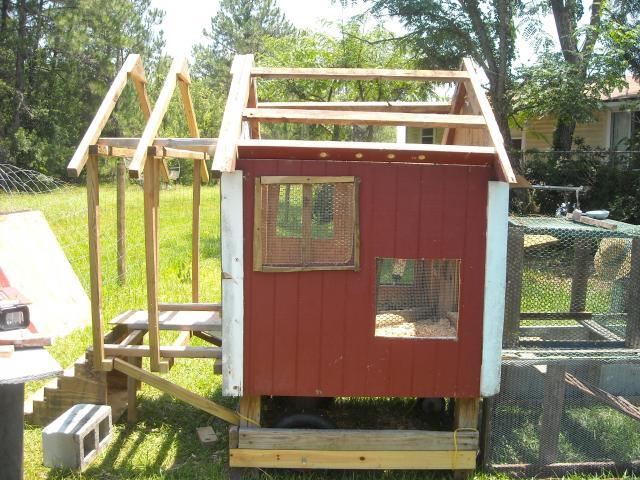
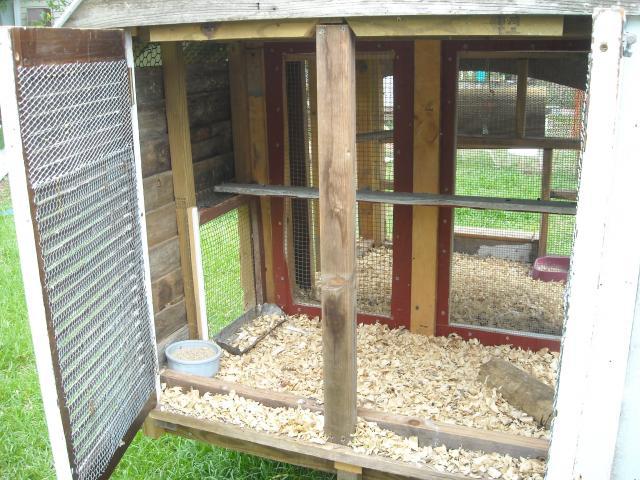
We've got the coop free of it's pilings now and the front door installed. Neither one of us can part with a hinge so of course we had a set just right to combine with some scrap lumber. It's a sturdy heavy door that will have a pull accessed from outside the run for easy opening. We plan to add a bar across the door for security, it will also be accessed from outside the run. This idea was lifted from another BYC member's design but I can't give credit as I've looked as so many, I have no idea who it was. As you can see, the wheels from a lawnmower have been added but they are buckling under the weight. The original builder of this little house never pictured it moving. Lag bolts for the wheels were our first purchase.
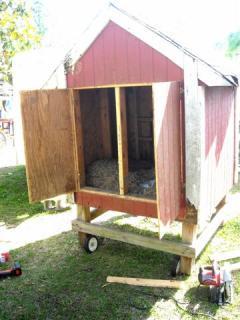
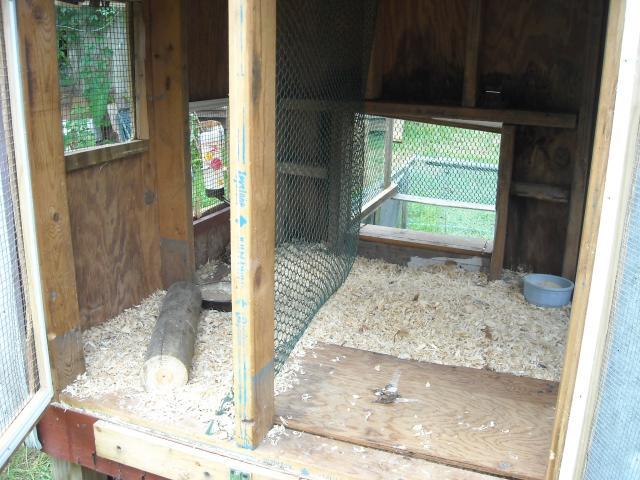
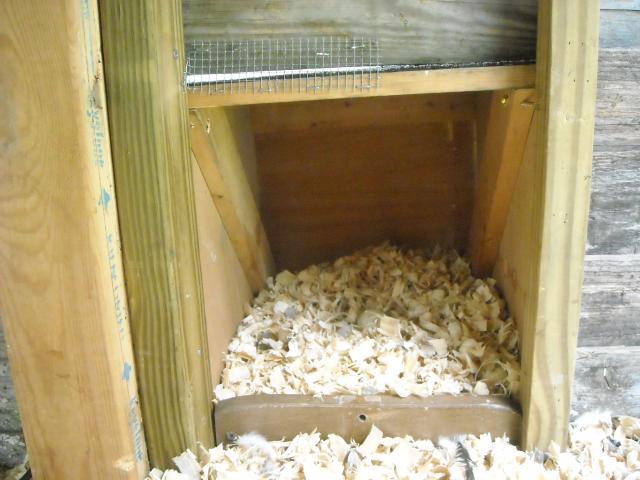
Here's the back view! If we were building this from scratch the floor would be over the two by fours. There won't be easy sweeping out going on here. I'm pretty sure after the bedding is removed I'll be going over it with a shop vac. It is much easier to access now so we can install roosts. We haven't made a decision yet on the wheels but are considering a rickshaw design. As is, it moves easily when pulled by the lawnmower but those wheels won't last and there's no turning! That thing is heavy! The shingles on the very top of the roof are shot so that's the next big fix, that and adding vents around the sides. The trim boards are termite eaten but structurally this baby is sound. We'll replace the trim eventually.
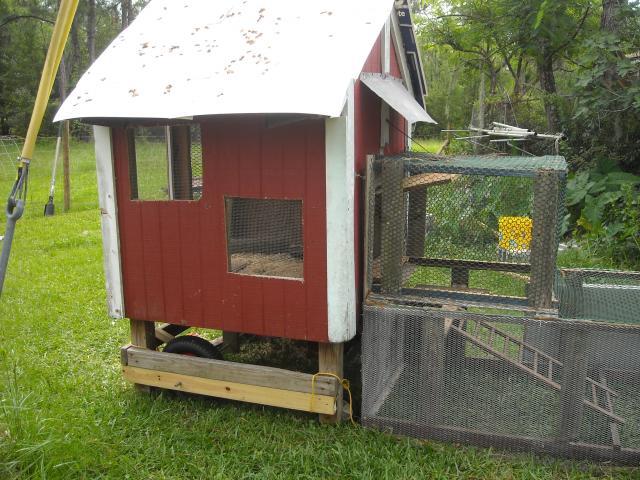
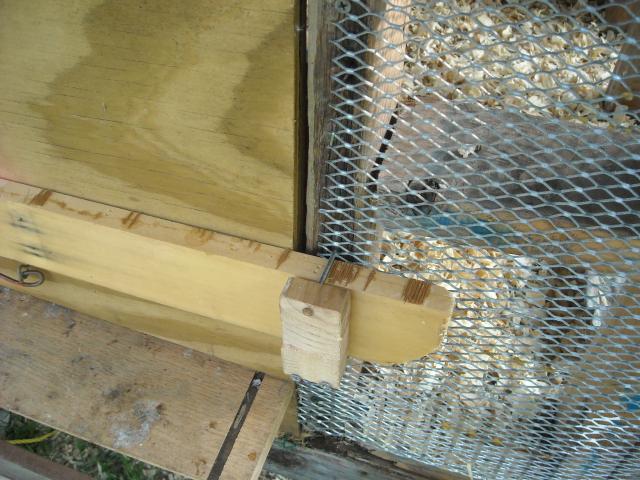
We replaced the wheels with two big tires. It pulls and turns so much easier now! Holding off on the roost, the next step was to cut holes in the coop instead of vents. We're going to need a lot of ventilation to keep it cool in there. Vents wouldn't have provided nearly enough. The back doors have been turned into windows also. Everything is screened with hardware cloth. The screen was stapled on, then trim boards screwed around all edges. The back windows have a metal eave like the front. The run attaches to the coop w/hook and eye fasteners. We removed the old heat absorbing asphalt shingles and temporarily replaced them with old political signs, the plastic covered paper ones. Free, cheap and heat deflecting!
During construction we (I) bought more chickens. When the four little ones were old enough to leave the brooder, we needed to divide the coop. Now it's a duplex! The big girls can go outside into the run whenever they want. The little ones have to wait for me to let their roommates out into the backyard and then they can leave the coop and forage in the run. They go through the door and down all by themselves even though they're tiny still. I have to carry them in at bedtime.
Three more chickens now to add to the flock (Polish cuties!). Also adding to the coop. We decided there wasn't nearly enough ventilation through the windows. Next step, tear off the wall boards and replace with wire mesh on three sides! So the chickens can get in out of the weather, we're adding a small back room where they can shelter and/or roost. This thing is never ending. Knowing the roof was going to need replacing anyway, this is the time to do it. We're adding two feet on the back and closing in an additional foot on the existing coop for a 3x4 sheltered area using free recycled lumber from Disney. The coop is still mobile, but it turned out to be more practical for us to leave it stationary and fence in an area for the girls. We also had to fence in the entire yard to keep the neighbor's dogs out. All the money saved by using recycled components was spent on field fencing. The screened "porch" will be 3x4 also. In our climate they'll spend most of their days in their enclosed paddock or loose in the backyard so we didn't need a lot of coop space. The make do run will be dismantled for the wire mesh in lieu of hardware cloth on the porch area.
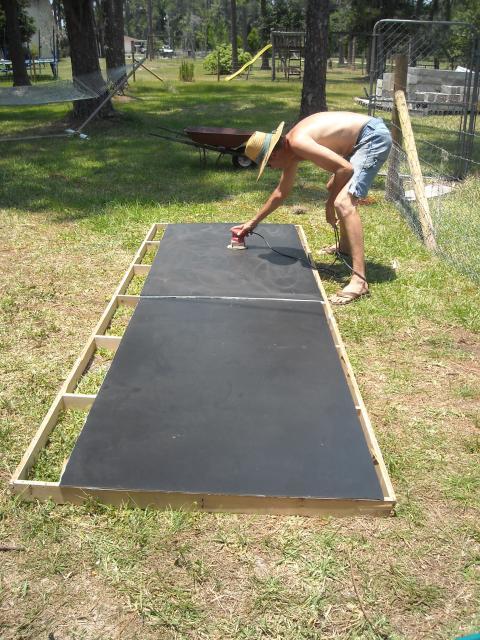
The roofing material was free. It was a flat used somewhere on Disney property. That's my eternally patient fiancee sanding it down before painting it white to deflect the heat. I'll paint the coop with paint left at the recycling center. I have a stash of lovely colors!
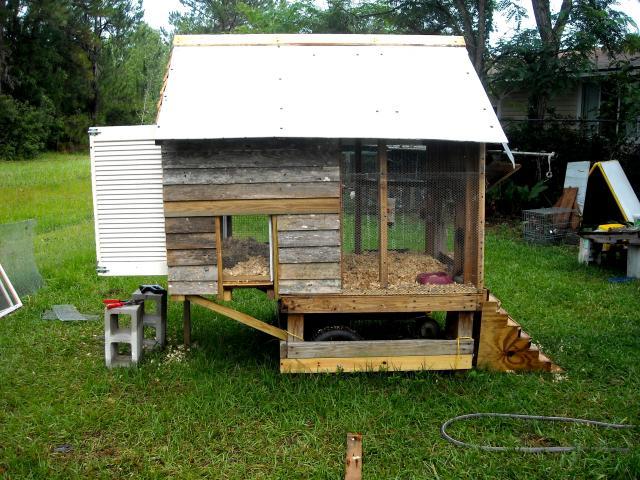
The coop has been sided with old fence slats. I think it looks very cute. It's a shotgun shack! I'm thinking it may not need painting except for the doors and another coat on the roof. The cut outs on each side are where egg boxes will go. My amazingly patient fiance has been distracted by a car project with my oldest boy so for now they'll have to wait. The spaces are screened in with hardware cloth. The louvred doors were old display boards from my show booth. I've switched to a different look for art shows so I've got scads of doors lying around. These are the big, heavy old fashioned ones. Not that flimsy stuff. In case of snakes, I've put some mesh screen over them on the inside.
Here's the front view. I'm told the awning will be cut to a more attractive shape. The chickens actually use that staircase which was repurposed from one of my boy's projects. In the background you can see the coop's original back doors. We'll be installing them inside the coop temporarily so my little polish girls can move in but stay safe from the big girls. The untreated wood will be painted as soon as we get some exterior paint. I'm thinking a little picket fence will be cute around the bottom where those two support bars run.
Here's what became of the temporary run. We've covered it with chicken wire and added leftover livestock fencing to the front. The little girls can get in and the big girls cannot! There's a food pan and water bowl in there since the big girls enjoy keeping the banties away from their food and water. Now they can eat in peace and not worry about hawks either!
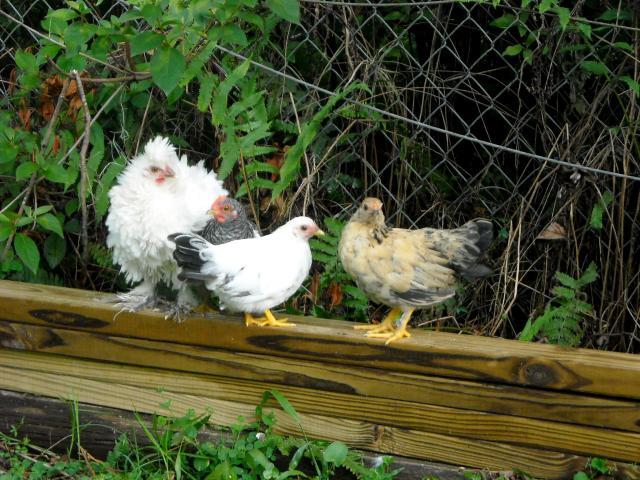
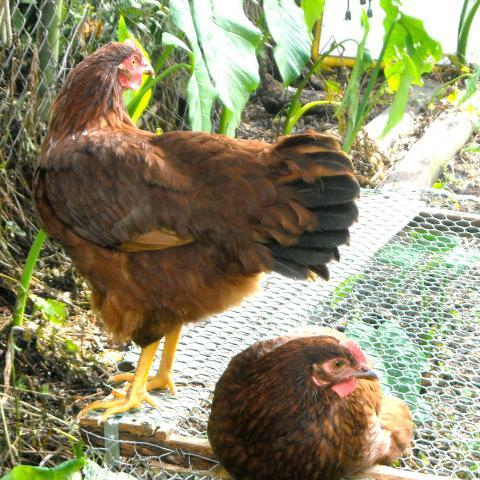
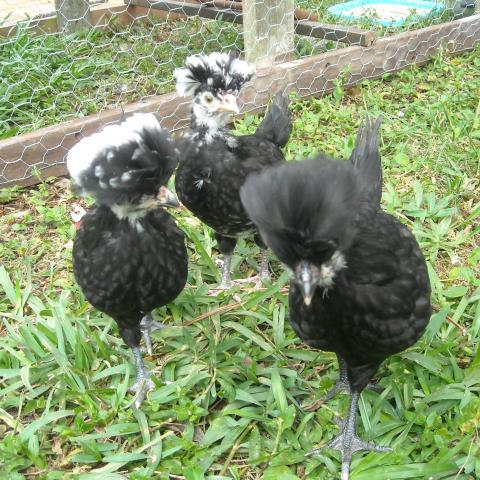
And now for something different. Here's my beautiful banties! and the RIR's!
The little polish girls moved in (aren't they cute?!) and required their own temporary apartment. So we took the screened doors from the original version of the coop and screwed them in where the addition met the main coop. The chickens have adapted so well to each other that we'll take that partition down here shortly and have our nice big, airy coop.
The little polish girls are now part of the flock and we've removed the screen door partition. The chicken door security has been beefed up also. We've installed a door bar that is secured with pin at night. For day, there is a homemade hook that attaches to a screw above the door to hold it in the open position. It's not very visible in the picture but it's just a thick stiff wire with a loop at each end one permanently attached to the door through an eye, the other is free to meet up to hang from a screw on the coop itself. There's a string attached to that free end running to the screw so that it's not just flopping around.
And here's the door in it's open position. The bar swings up and secures behind a nail.
A close up of the pins. They're just nails pushed through predrilled holes, one at each end. A raccoon would have to remove each one then push the bar up and out of the way and pull the door open. Hopefully they can't do that! We just need egg boxes and paint to finish.
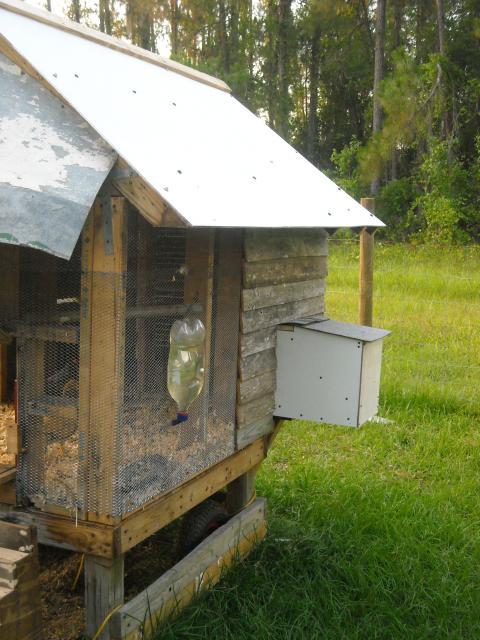
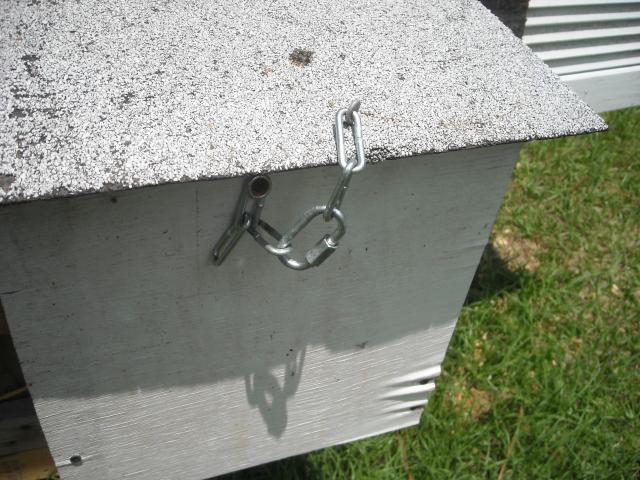
So the Rhode Island Red's, our big girls, are now 14 weeks old and I'm anxious for nest boxes. Now there are two ready and waiting with golf balls in them for inspiration! They were made from scrap wood and some formica bonded to wood. In case of glue failure, there are screws to hold the formica to the wood. Eventually they may need replacing, but we'll probably be wanting a bigger better coop by then anyway! They are perfect for now. The top is hinged with heavy duty rubber sheeting which is topped with rolled asphalt roofing. You can see in the picture how the top locks to the base so no critters can get in and steal my eggs. Again, everything used was recycled material.
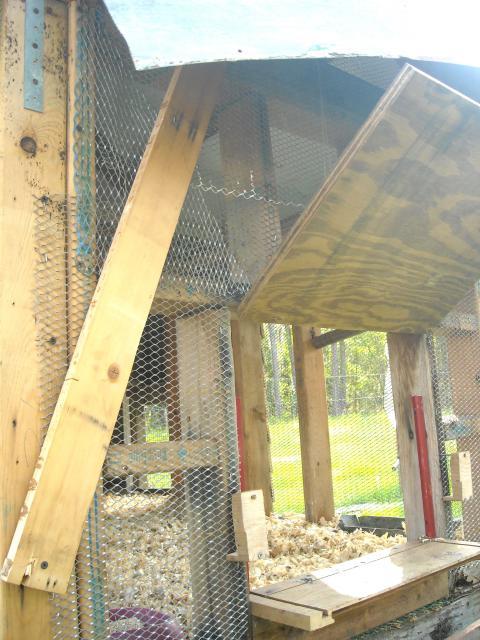
Here's a shot from inside the coop. I think we need to make that bar in the front higher. That bit of screen is to deter snakes. We've tried to cover every hole possible. We've rethought the paint thing and decided to put trim boards up on the exposed lumber. Fortunatly we have a ready supply of worn out fence slats to use! We just need to paint the doors and roof and add my picket fence to the bottom and we'll FINALLY be done!
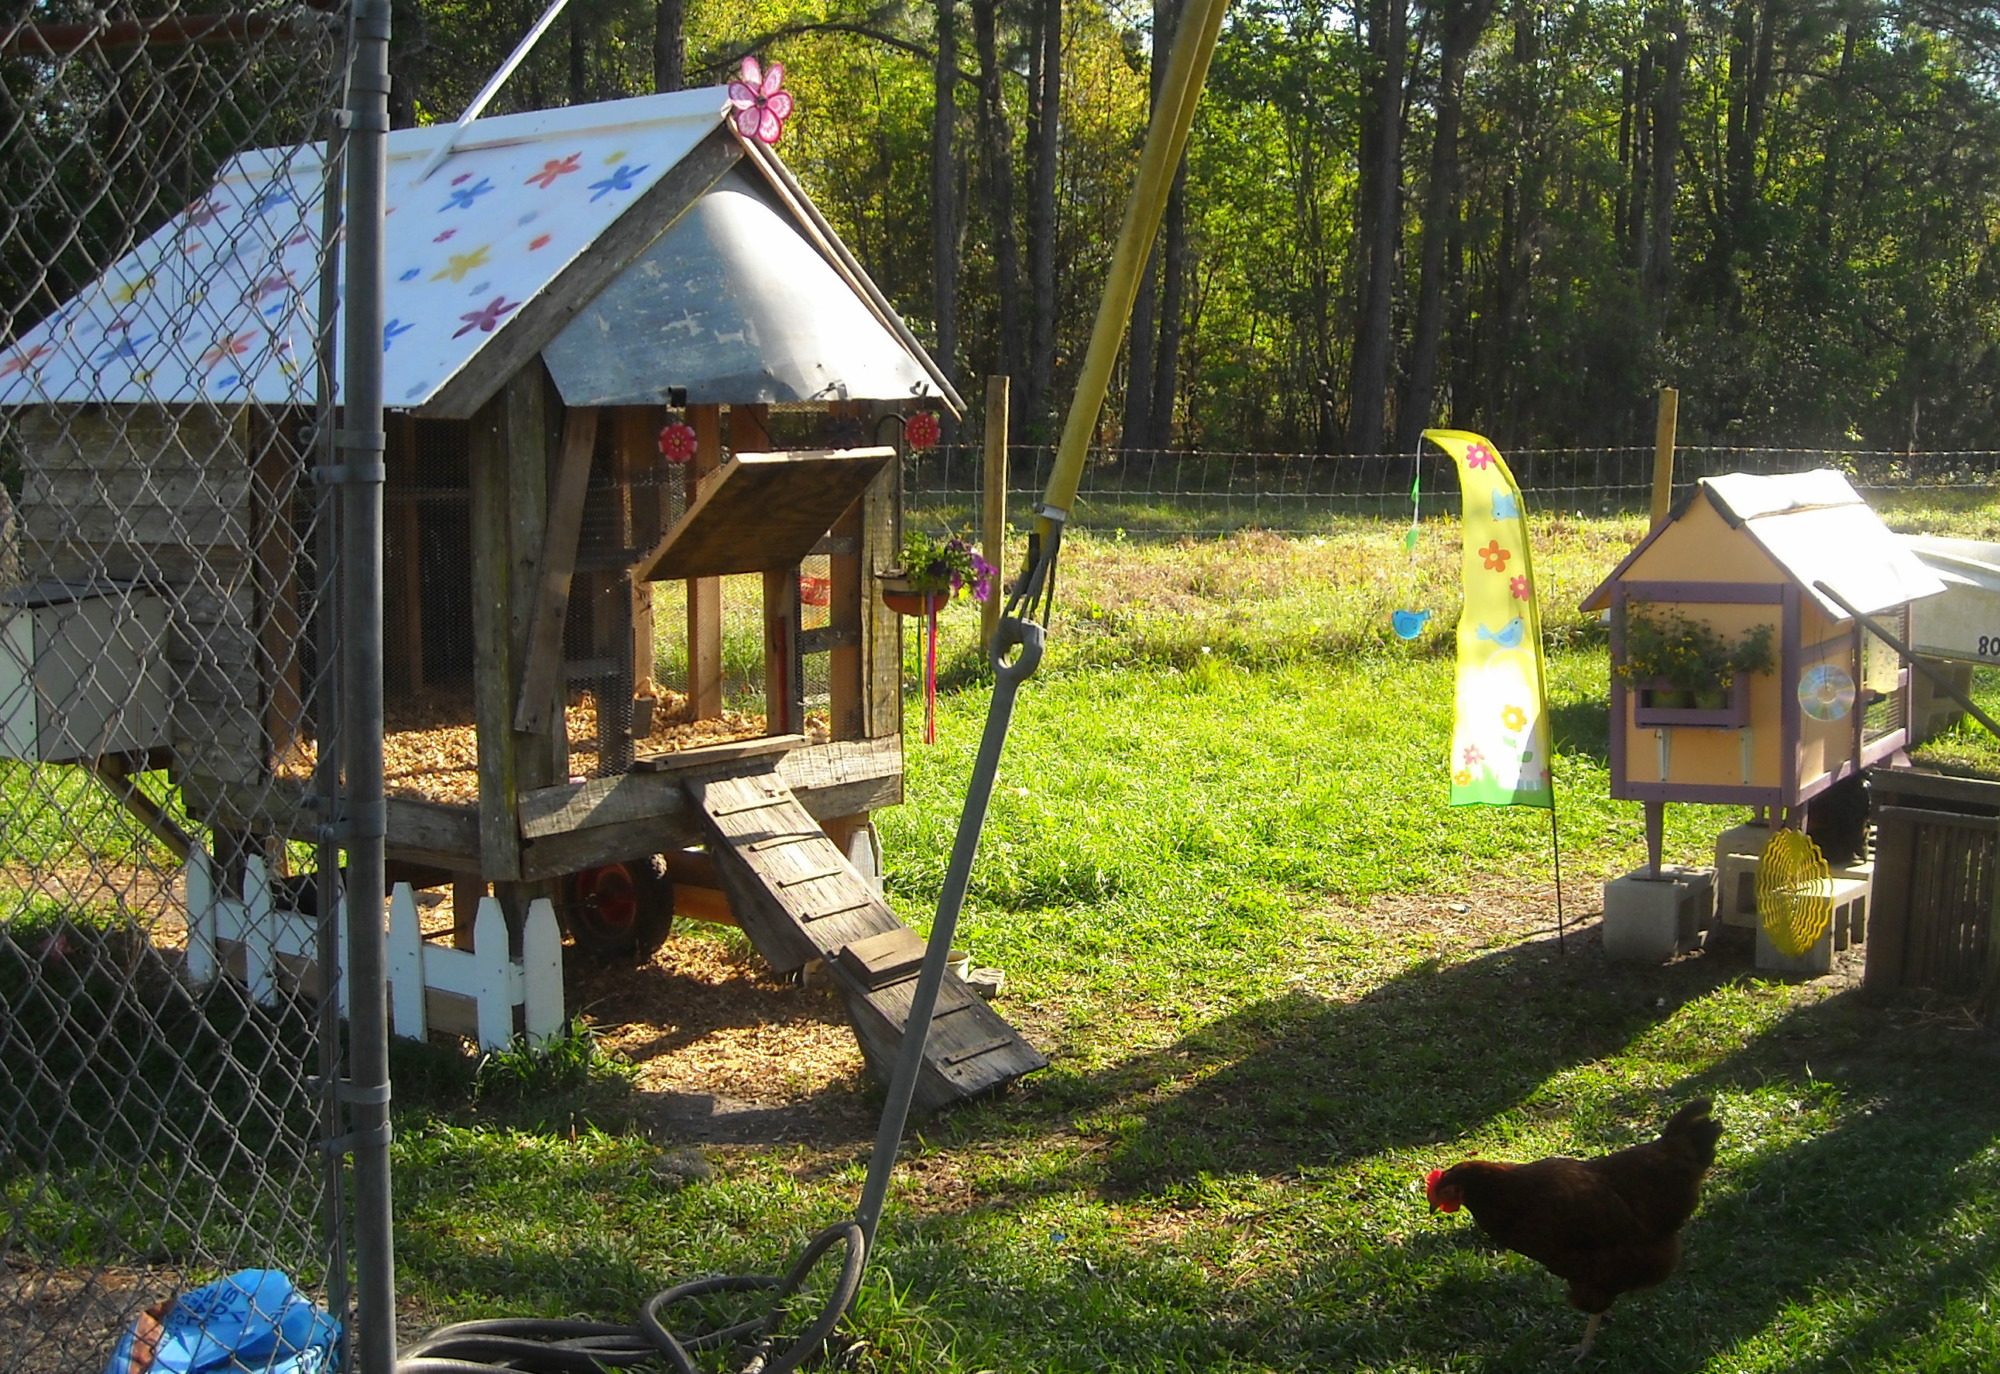
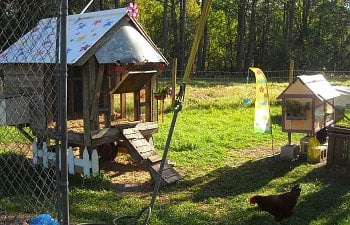
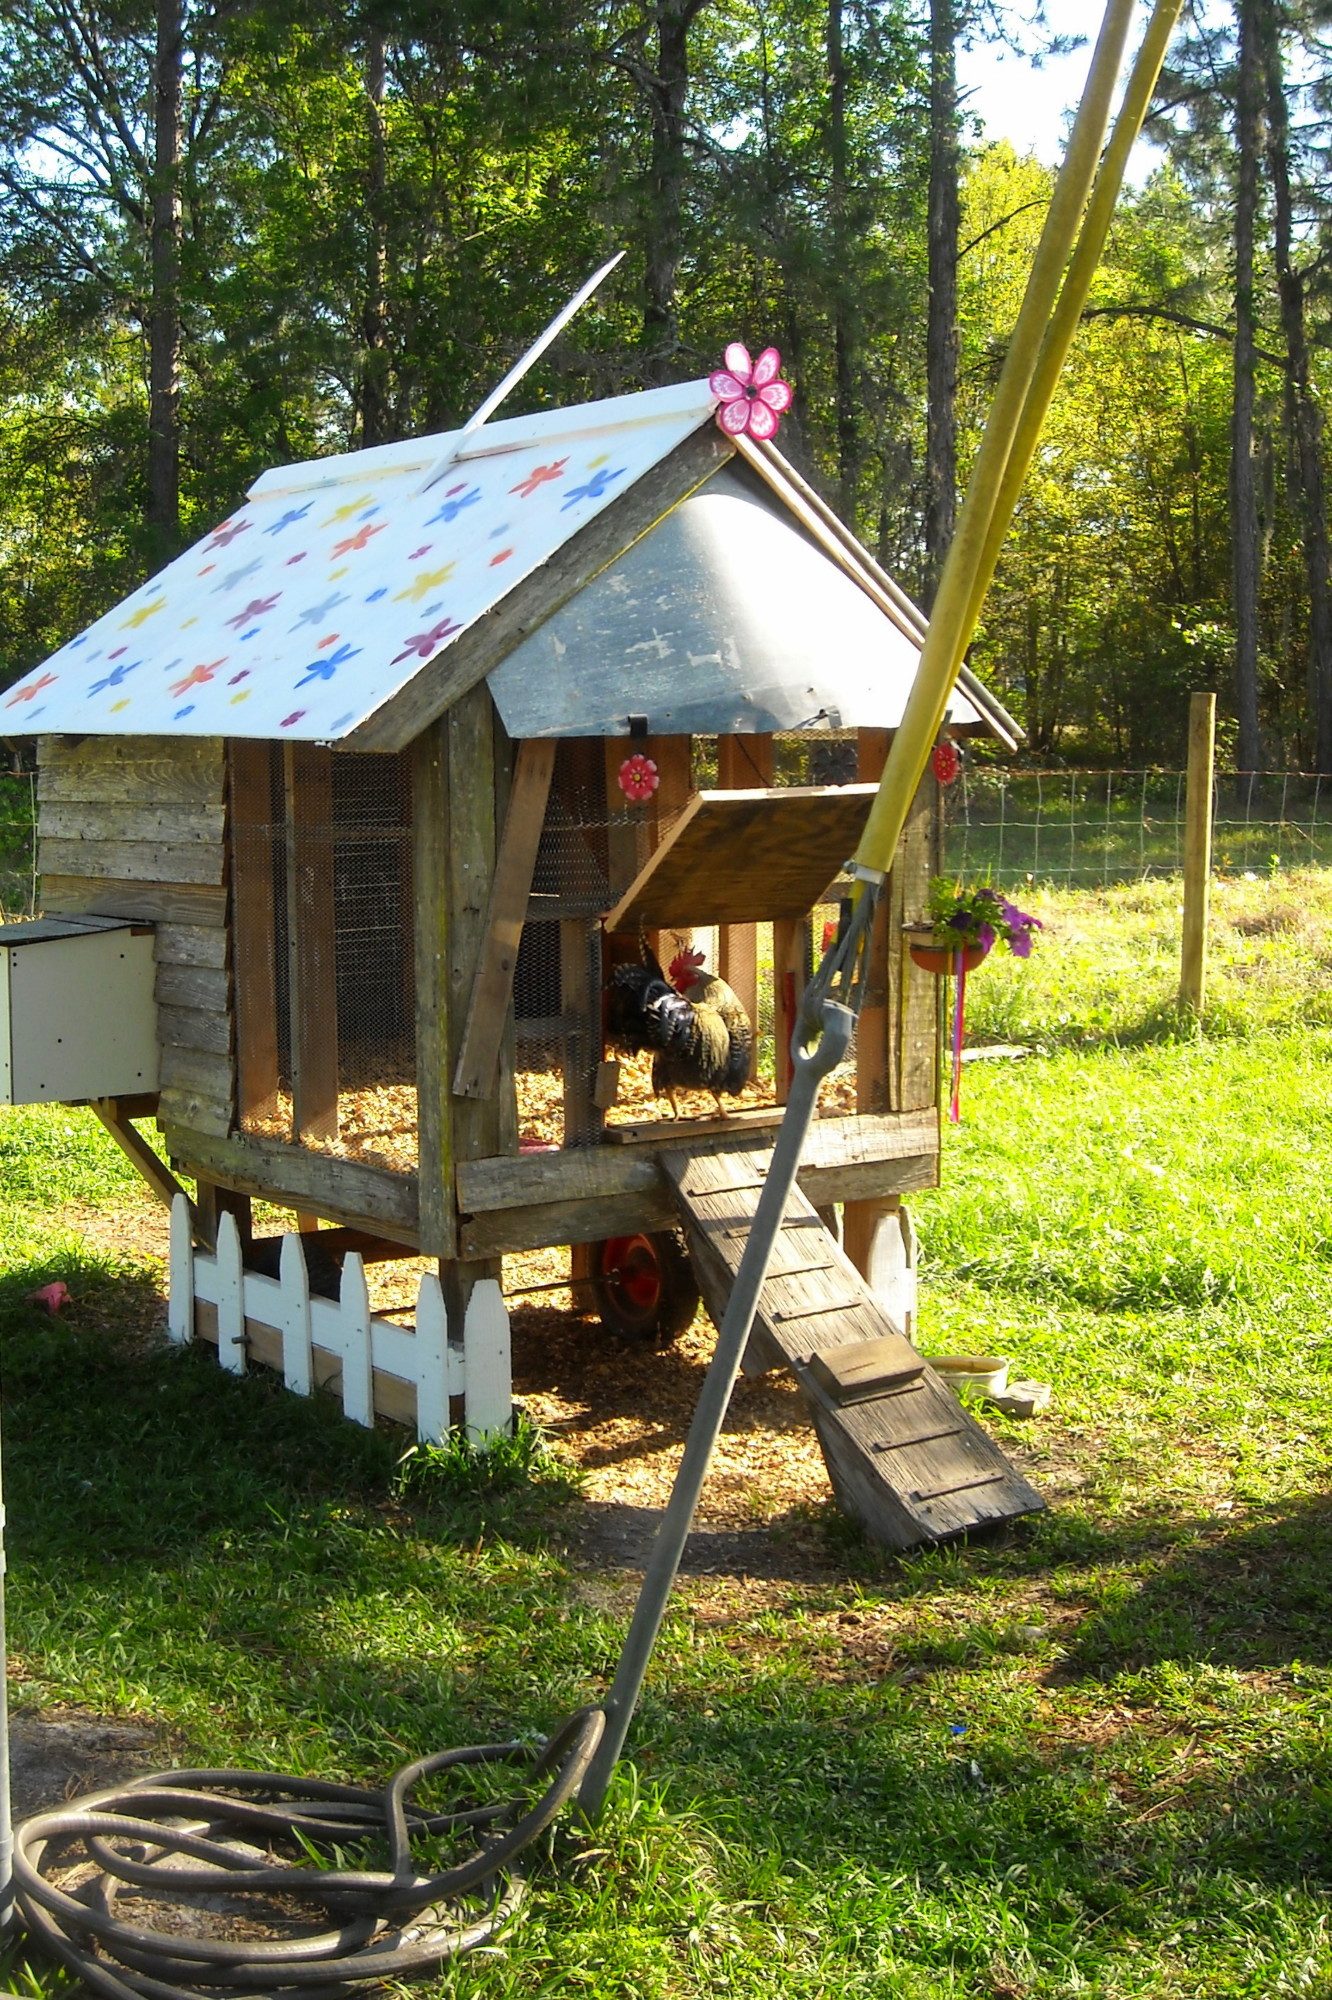
03162012 Now almost a year has gone by as well as several chickens, including those adorable polish who just didn't work out. We finally get around to trimming out the coop. We finished installing the trim boards, added several coats of paint to the roof as well as stenciled flowers, and we cutesified it with a little picket fence, hanging flower pot , a flower pinwheel at the roof peak, and darling little dangly flowers for the awning. We're still working at getting the old paint off the awning and it may have a paint job in it's future. As you can see, we had to replace the grandstair case with a sturdy ramp. The pole at the top held a spinner but it broke. We'll be adding something else there in the future. We currently have 11 in this coop. 2 LF, the red's who turn out to be production red, the frizzle and the three original banties, as well as four 10wk chicks that were hatched by Gracie, the banty buff brahma.
Three of my girls go broody and we found it to be inconvenient having a hen occupying the egg box so we created a broody house from an old dresser. I'll be adding a page for it's progress but you can see the end result here. Next up, the silkie chicks need their own house! Stay tuned!
This is the run in progress. I'm an artist who works in found materials and my fiance can't throw out anything that might be useful. So, between us, there should be plenty of material to use. The metal mesh was originally intended as walls to hang art from my booth at art shows. It didn't work out so well and was later repurposed to house rabbits in the front garden. Rabbits gone, third life as chicken run! It's expanded steel mesh used normally used as a lathe for stucco.The wood was all scrap of ours including beautiful mahogany from a salvaged boat. Drip rails form the end pieces.
Here's the run. Finished for now so the chicks can get out of the house and into some fresh air to exercise. Already planning on how to make it bigger! That's plastic chicken wire on top. We had it left over from an art project. I don't recommend it. It's a temporary roof that's easy enough to open but we need something sturdier to keep the critters out. Notice the removable wheels so it can be picked up and moved about.
We've got the coop free of it's pilings now and the front door installed. Neither one of us can part with a hinge so of course we had a set just right to combine with some scrap lumber. It's a sturdy heavy door that will have a pull accessed from outside the run for easy opening. We plan to add a bar across the door for security, it will also be accessed from outside the run. This idea was lifted from another BYC member's design but I can't give credit as I've looked as so many, I have no idea who it was. As you can see, the wheels from a lawnmower have been added but they are buckling under the weight. The original builder of this little house never pictured it moving. Lag bolts for the wheels were our first purchase.
Here's the back view! If we were building this from scratch the floor would be over the two by fours. There won't be easy sweeping out going on here. I'm pretty sure after the bedding is removed I'll be going over it with a shop vac. It is much easier to access now so we can install roosts. We haven't made a decision yet on the wheels but are considering a rickshaw design. As is, it moves easily when pulled by the lawnmower but those wheels won't last and there's no turning! That thing is heavy! The shingles on the very top of the roof are shot so that's the next big fix, that and adding vents around the sides. The trim boards are termite eaten but structurally this baby is sound. We'll replace the trim eventually.
We replaced the wheels with two big tires. It pulls and turns so much easier now! Holding off on the roost, the next step was to cut holes in the coop instead of vents. We're going to need a lot of ventilation to keep it cool in there. Vents wouldn't have provided nearly enough. The back doors have been turned into windows also. Everything is screened with hardware cloth. The screen was stapled on, then trim boards screwed around all edges. The back windows have a metal eave like the front. The run attaches to the coop w/hook and eye fasteners. We removed the old heat absorbing asphalt shingles and temporarily replaced them with old political signs, the plastic covered paper ones. Free, cheap and heat deflecting!
During construction we (I) bought more chickens. When the four little ones were old enough to leave the brooder, we needed to divide the coop. Now it's a duplex! The big girls can go outside into the run whenever they want. The little ones have to wait for me to let their roommates out into the backyard and then they can leave the coop and forage in the run. They go through the door and down all by themselves even though they're tiny still. I have to carry them in at bedtime.
Three more chickens now to add to the flock (Polish cuties!). Also adding to the coop. We decided there wasn't nearly enough ventilation through the windows. Next step, tear off the wall boards and replace with wire mesh on three sides! So the chickens can get in out of the weather, we're adding a small back room where they can shelter and/or roost. This thing is never ending. Knowing the roof was going to need replacing anyway, this is the time to do it. We're adding two feet on the back and closing in an additional foot on the existing coop for a 3x4 sheltered area using free recycled lumber from Disney. The coop is still mobile, but it turned out to be more practical for us to leave it stationary and fence in an area for the girls. We also had to fence in the entire yard to keep the neighbor's dogs out. All the money saved by using recycled components was spent on field fencing. The screened "porch" will be 3x4 also. In our climate they'll spend most of their days in their enclosed paddock or loose in the backyard so we didn't need a lot of coop space. The make do run will be dismantled for the wire mesh in lieu of hardware cloth on the porch area.
The roofing material was free. It was a flat used somewhere on Disney property. That's my eternally patient fiancee sanding it down before painting it white to deflect the heat. I'll paint the coop with paint left at the recycling center. I have a stash of lovely colors!
The coop has been sided with old fence slats. I think it looks very cute. It's a shotgun shack! I'm thinking it may not need painting except for the doors and another coat on the roof. The cut outs on each side are where egg boxes will go. My amazingly patient fiance has been distracted by a car project with my oldest boy so for now they'll have to wait. The spaces are screened in with hardware cloth. The louvred doors were old display boards from my show booth. I've switched to a different look for art shows so I've got scads of doors lying around. These are the big, heavy old fashioned ones. Not that flimsy stuff. In case of snakes, I've put some mesh screen over them on the inside.
Here's the front view. I'm told the awning will be cut to a more attractive shape. The chickens actually use that staircase which was repurposed from one of my boy's projects. In the background you can see the coop's original back doors. We'll be installing them inside the coop temporarily so my little polish girls can move in but stay safe from the big girls. The untreated wood will be painted as soon as we get some exterior paint. I'm thinking a little picket fence will be cute around the bottom where those two support bars run.
Here's what became of the temporary run. We've covered it with chicken wire and added leftover livestock fencing to the front. The little girls can get in and the big girls cannot! There's a food pan and water bowl in there since the big girls enjoy keeping the banties away from their food and water. Now they can eat in peace and not worry about hawks either!
And now for something different. Here's my beautiful banties! and the RIR's!
The little polish girls moved in (aren't they cute?!) and required their own temporary apartment. So we took the screened doors from the original version of the coop and screwed them in where the addition met the main coop. The chickens have adapted so well to each other that we'll take that partition down here shortly and have our nice big, airy coop.
The little polish girls are now part of the flock and we've removed the screen door partition. The chicken door security has been beefed up also. We've installed a door bar that is secured with pin at night. For day, there is a homemade hook that attaches to a screw above the door to hold it in the open position. It's not very visible in the picture but it's just a thick stiff wire with a loop at each end one permanently attached to the door through an eye, the other is free to meet up to hang from a screw on the coop itself. There's a string attached to that free end running to the screw so that it's not just flopping around.
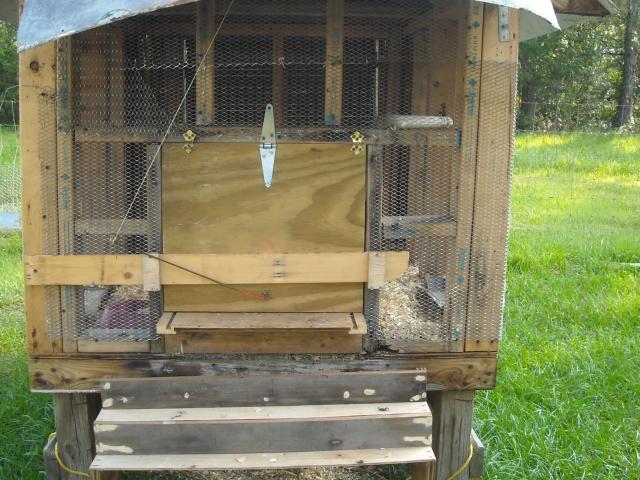
And here's the door in it's open position. The bar swings up and secures behind a nail.
A close up of the pins. They're just nails pushed through predrilled holes, one at each end. A raccoon would have to remove each one then push the bar up and out of the way and pull the door open. Hopefully they can't do that! We just need egg boxes and paint to finish.
So the Rhode Island Red's, our big girls, are now 14 weeks old and I'm anxious for nest boxes. Now there are two ready and waiting with golf balls in them for inspiration! They were made from scrap wood and some formica bonded to wood. In case of glue failure, there are screws to hold the formica to the wood. Eventually they may need replacing, but we'll probably be wanting a bigger better coop by then anyway! They are perfect for now. The top is hinged with heavy duty rubber sheeting which is topped with rolled asphalt roofing. You can see in the picture how the top locks to the base so no critters can get in and steal my eggs. Again, everything used was recycled material.
Here's a shot from inside the coop. I think we need to make that bar in the front higher. That bit of screen is to deter snakes. We've tried to cover every hole possible. We've rethought the paint thing and decided to put trim boards up on the exposed lumber. Fortunatly we have a ready supply of worn out fence slats to use! We just need to paint the doors and roof and add my picket fence to the bottom and we'll FINALLY be done!
03162012 Now almost a year has gone by as well as several chickens, including those adorable polish who just didn't work out. We finally get around to trimming out the coop. We finished installing the trim boards, added several coats of paint to the roof as well as stenciled flowers, and we cutesified it with a little picket fence, hanging flower pot , a flower pinwheel at the roof peak, and darling little dangly flowers for the awning. We're still working at getting the old paint off the awning and it may have a paint job in it's future. As you can see, we had to replace the grandstair case with a sturdy ramp. The pole at the top held a spinner but it broke. We'll be adding something else there in the future. We currently have 11 in this coop. 2 LF, the red's who turn out to be production red, the frizzle and the three original banties, as well as four 10wk chicks that were hatched by Gracie, the banty buff brahma.
Three of my girls go broody and we found it to be inconvenient having a hen occupying the egg box so we created a broody house from an old dresser. I'll be adding a page for it's progress but you can see the end result here. Next up, the silkie chicks need their own house! Stay tuned!