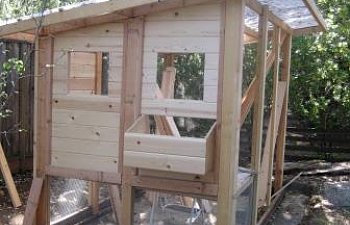
Now that there are actually chickens living in the coop, I thought it was time to add some new photos.
This was mostly completed early July 2012. The photo below was taken Jan 2013.
Footprint is 6' x 10', and the enclosed section is 3' x 6'. 7ft tall at the front, 6ft at the back. I had some leftover redwood & deck hardware on hand, and was able to keep the cost down to $850.

Work started on 3/26. I'm attempting to make a something close to the Taj Mahal, with some details taken from the well known & loved Wichita coop.
I helped build a deck & arbor many years ago. This is by far the most ambitious project I've every attempted.
First of all, a huge thank you to bigghoss and baldessariclan for posting their designs.
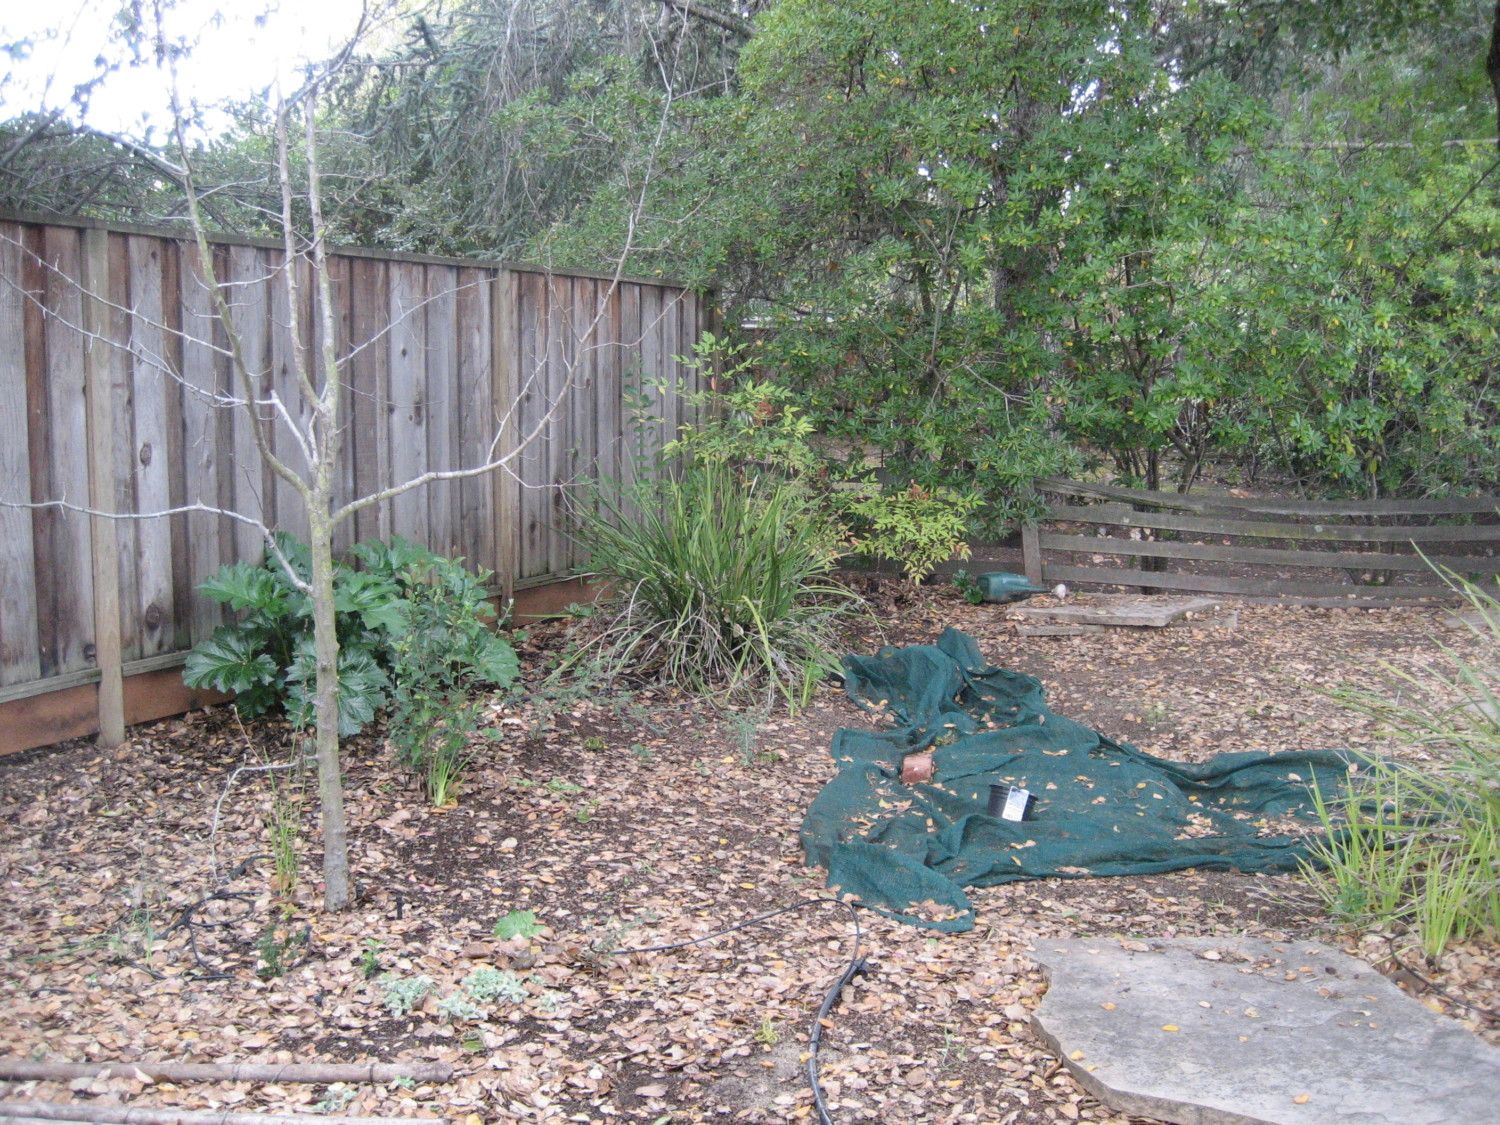
Here's the location before I started on 3/26/12. The green tarp is covering an old sand pit my kids used to play in when younger.
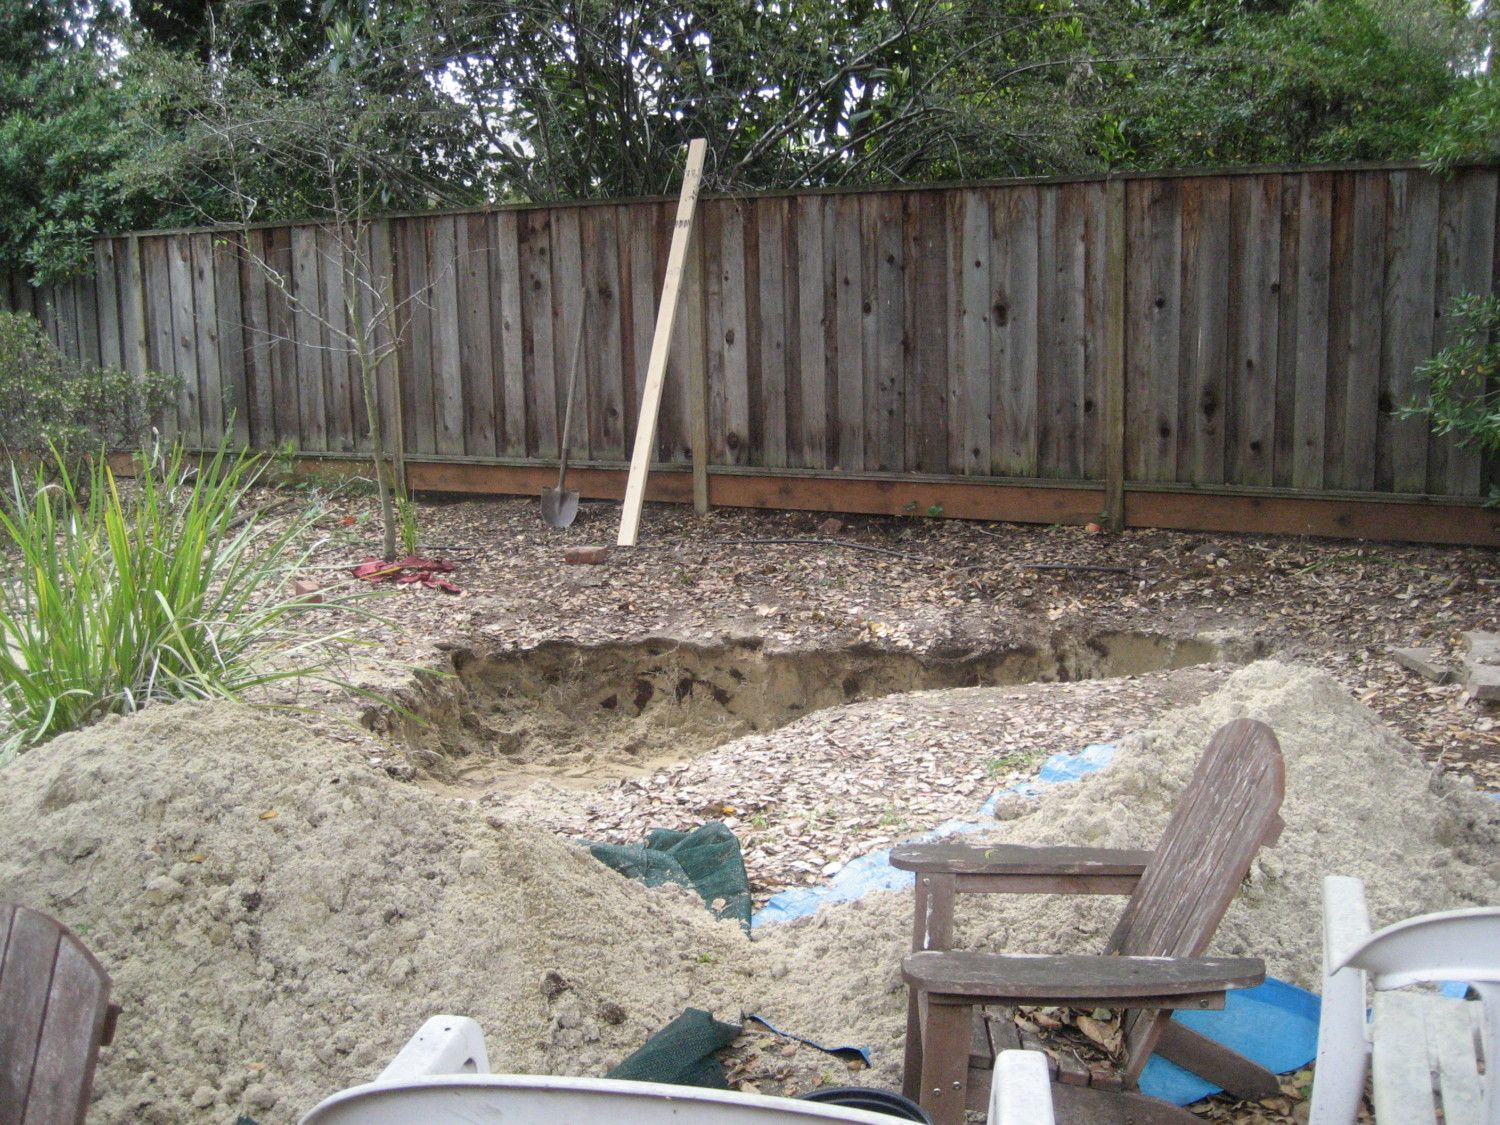
Dig out all the old sand and save it for the run area.
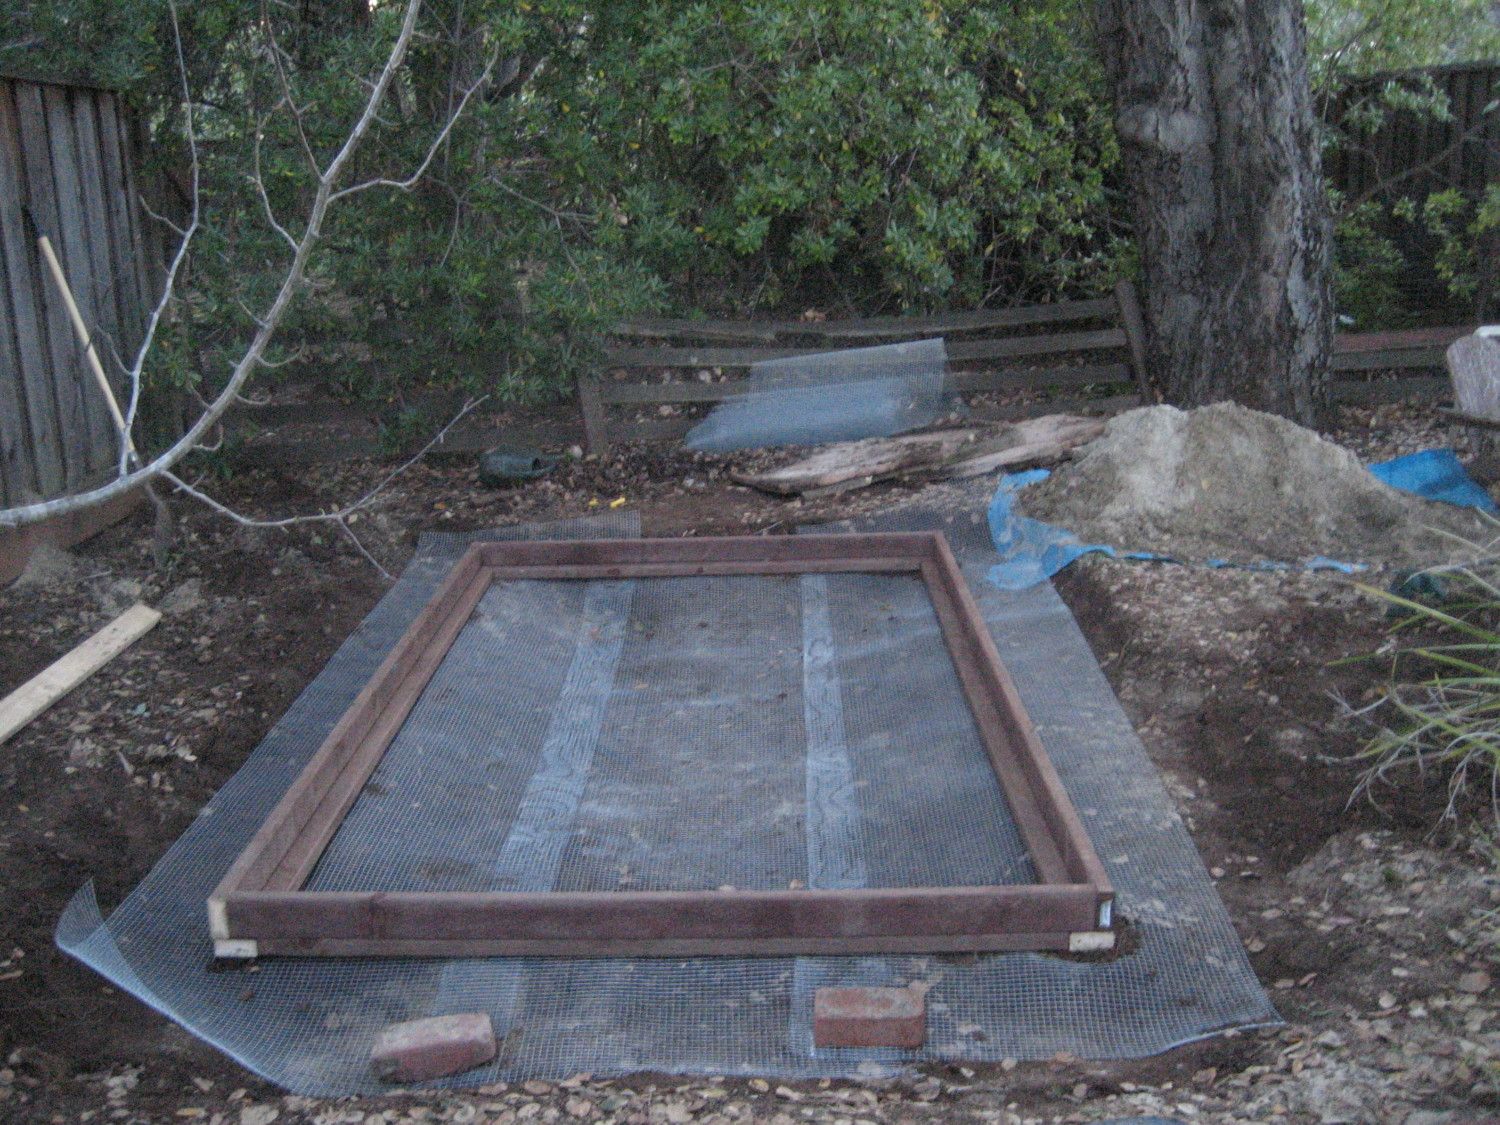
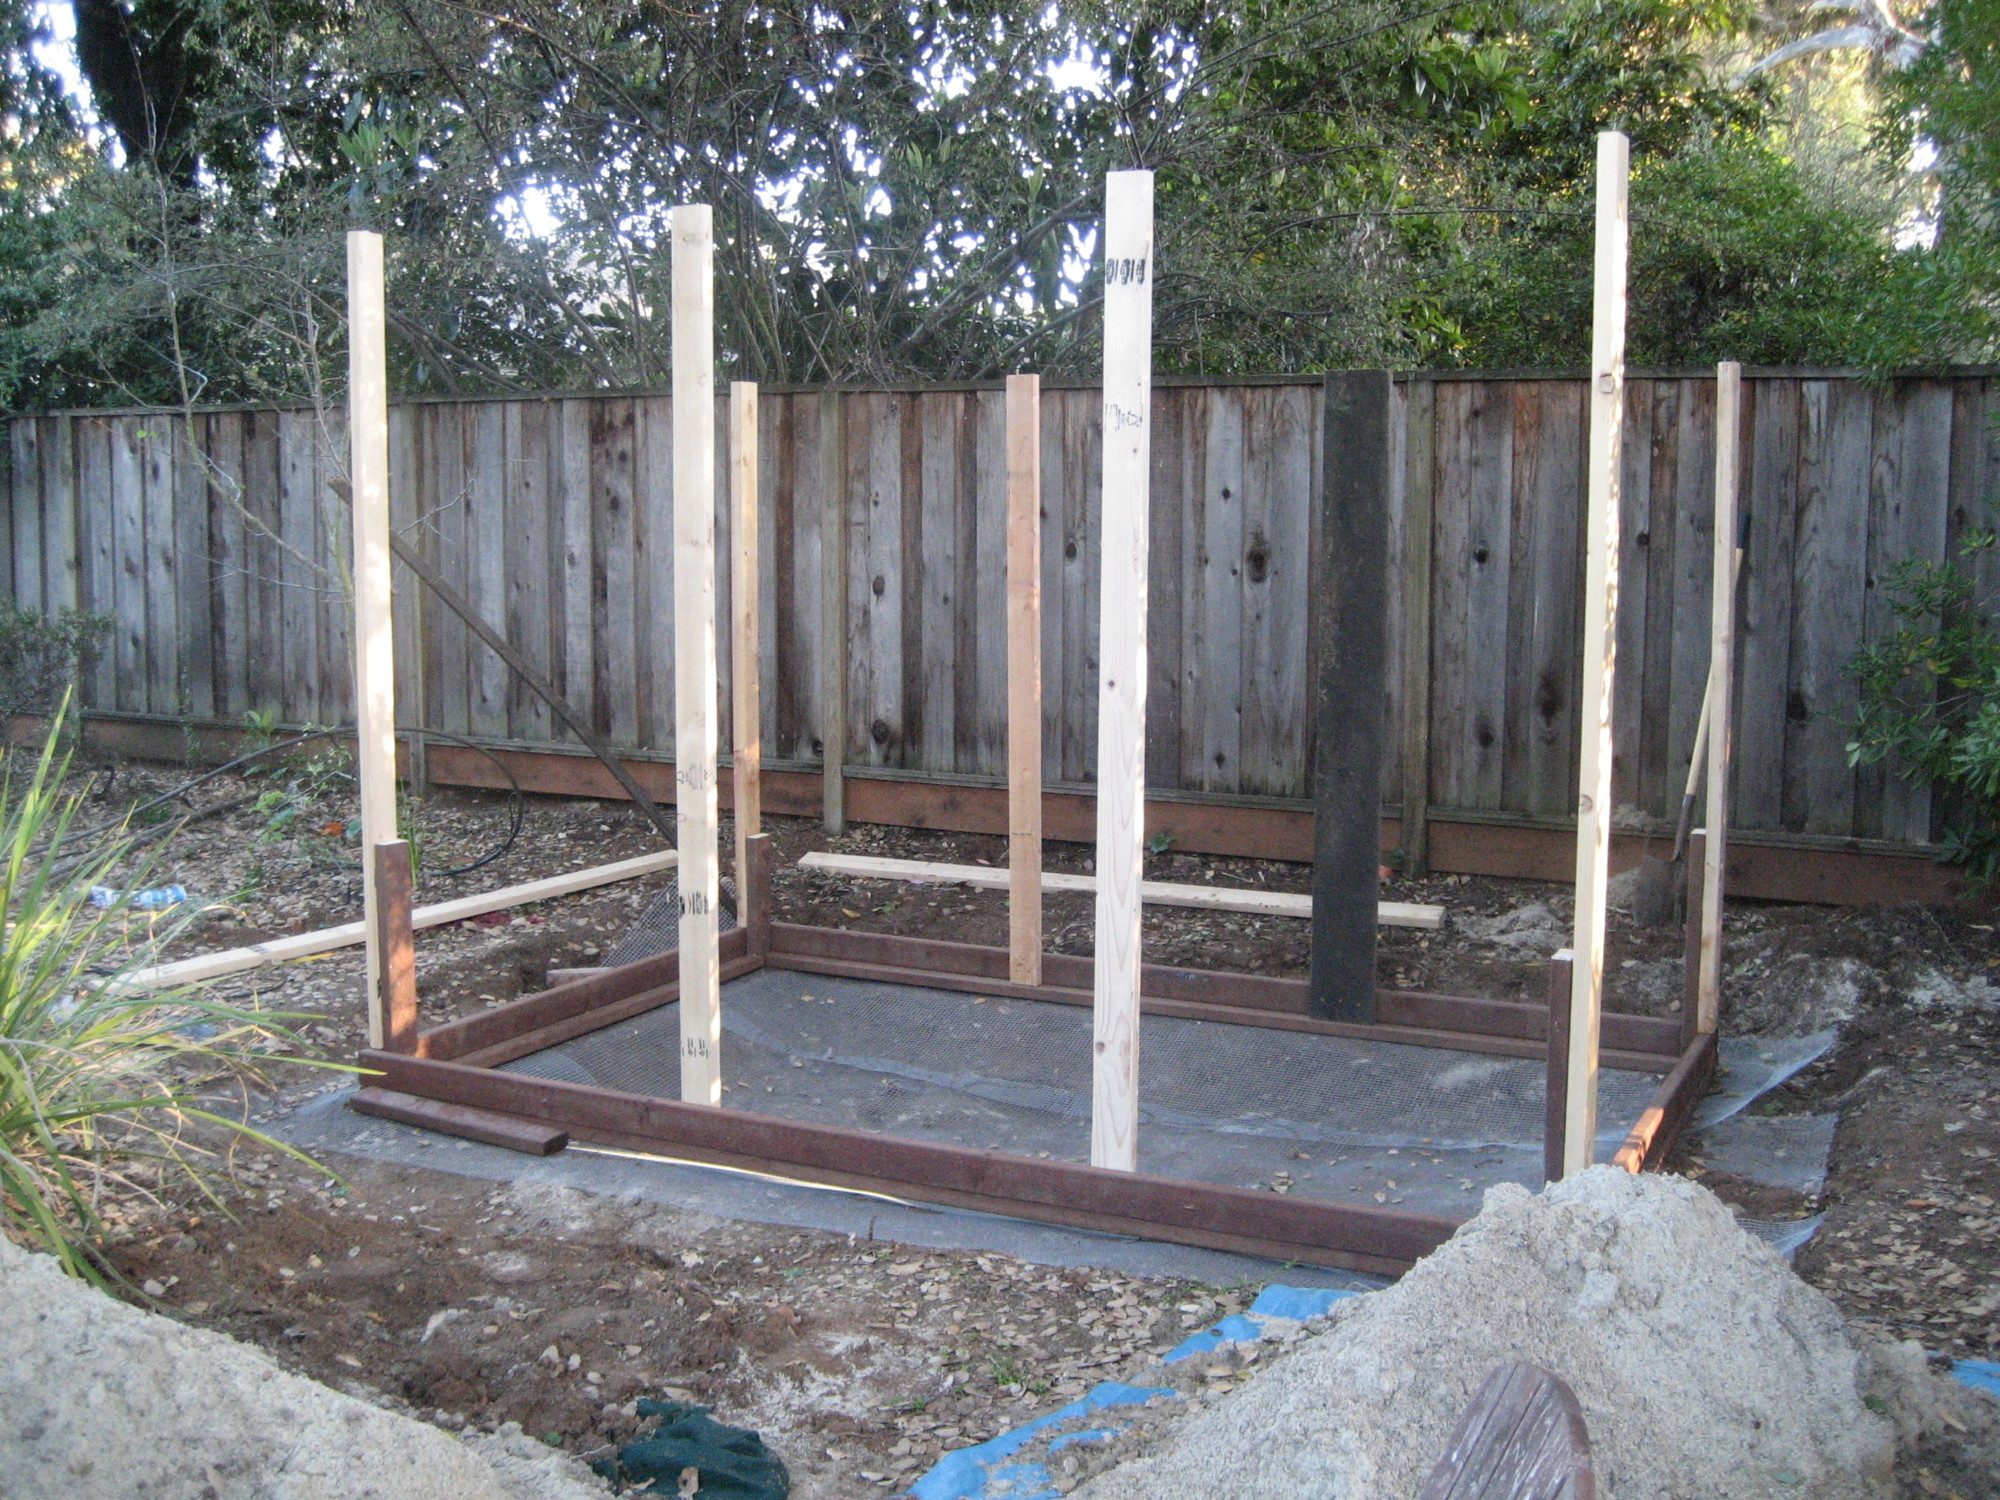
Dig out and then re-level the area. Hard to tell from this photo, but there's about an 8 - 12 depression inside the foundation, so the hardware cloth will be covered with good layer of sand. 6' x 10' pressure treated foundation. First level flat, then second level on edge.
Initial set of framing. 7' tall in front, 6' in back. With the 1 foot deep center, kind of a pain to work on something this tall. I happen to have some leftover 2x8 redwood from an old deck project, so I'm using that in the back instead of 2 2x4 side by side which would be needed to maintain a 34" opening for 36" hardware cloth. The short braces in the corner are temporary.
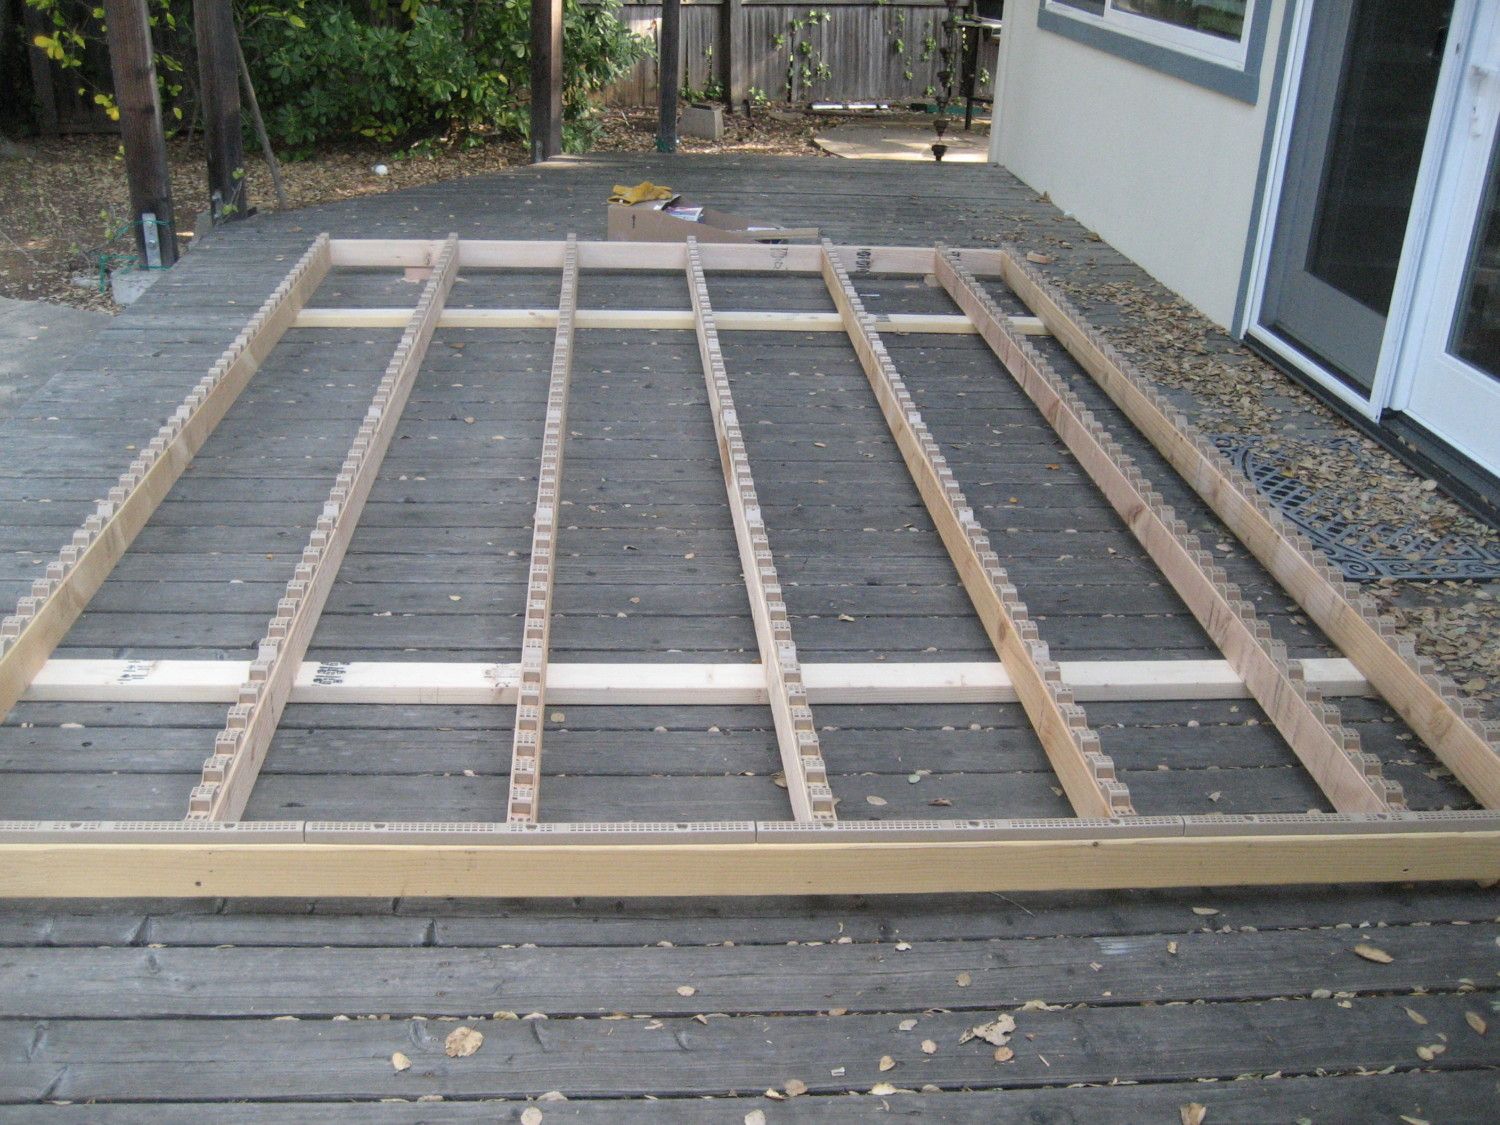
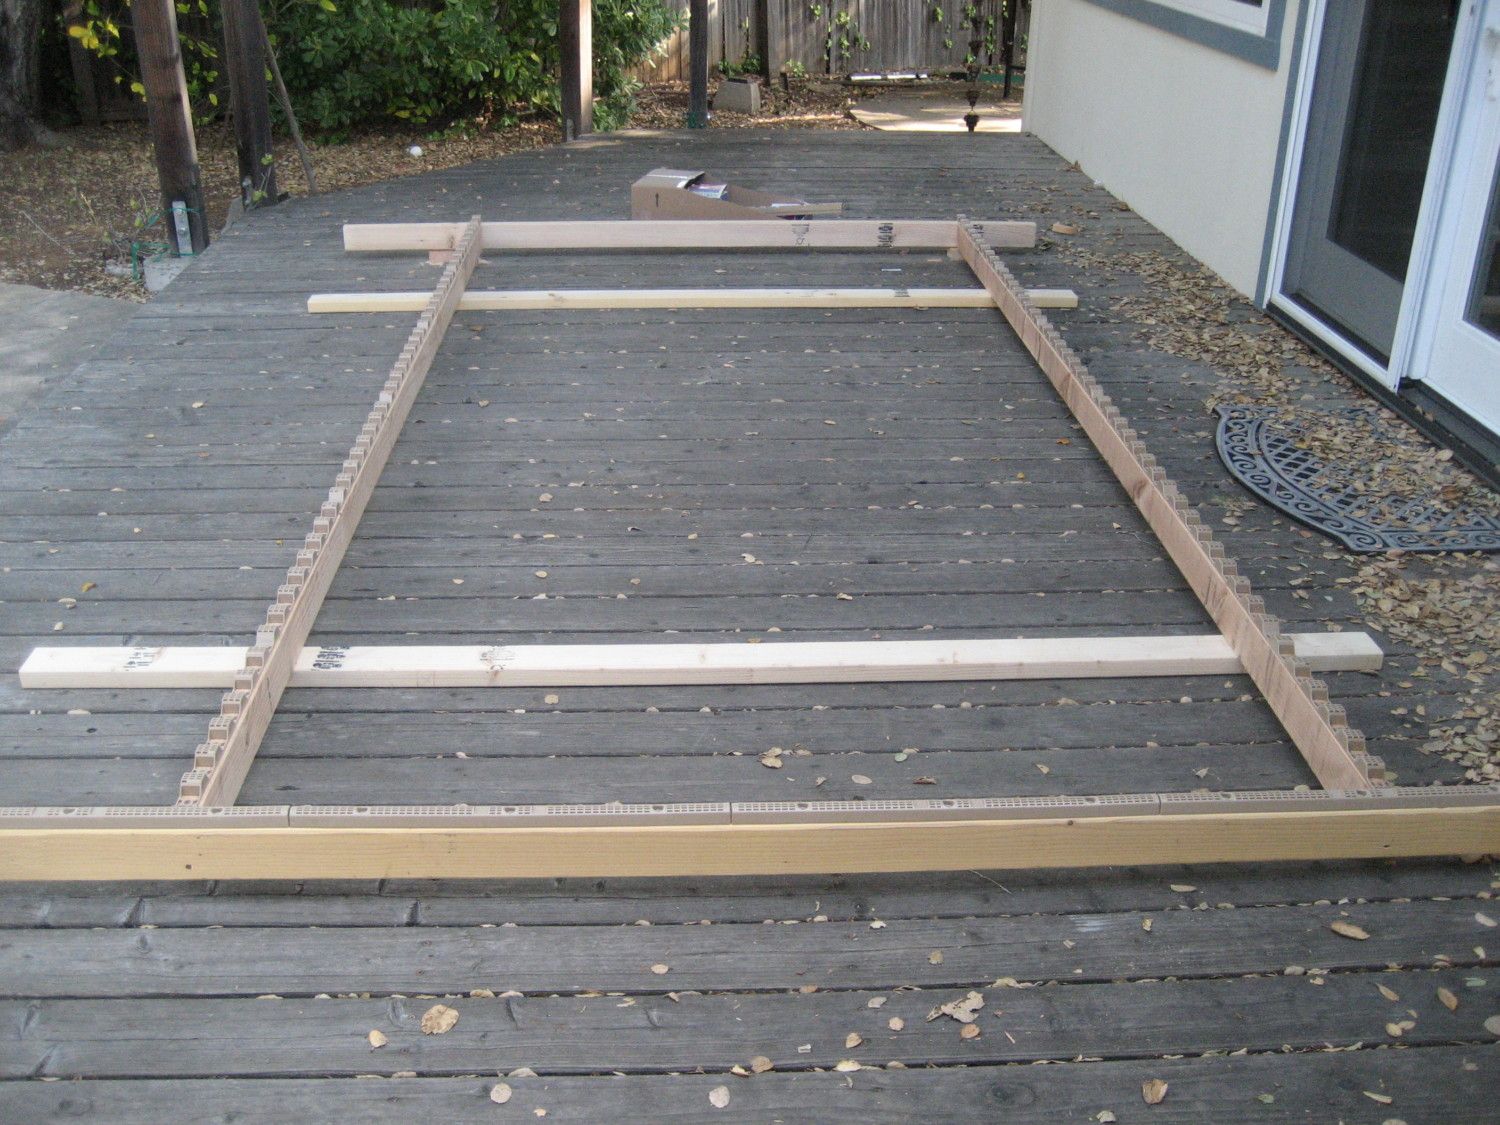
Roof will be 8 x 12. While it would be nice to build the whole thing flat on the ground, there's no way me and my trusty helper (my very tall husband) will be able to lift it in place. I did a full layout on the patio, then screwed together the minimum pieces needed. There are 2 extra cross pieces to act as temporary rafter hangers so that it will be easier to screw in the remaining 5 rafters.
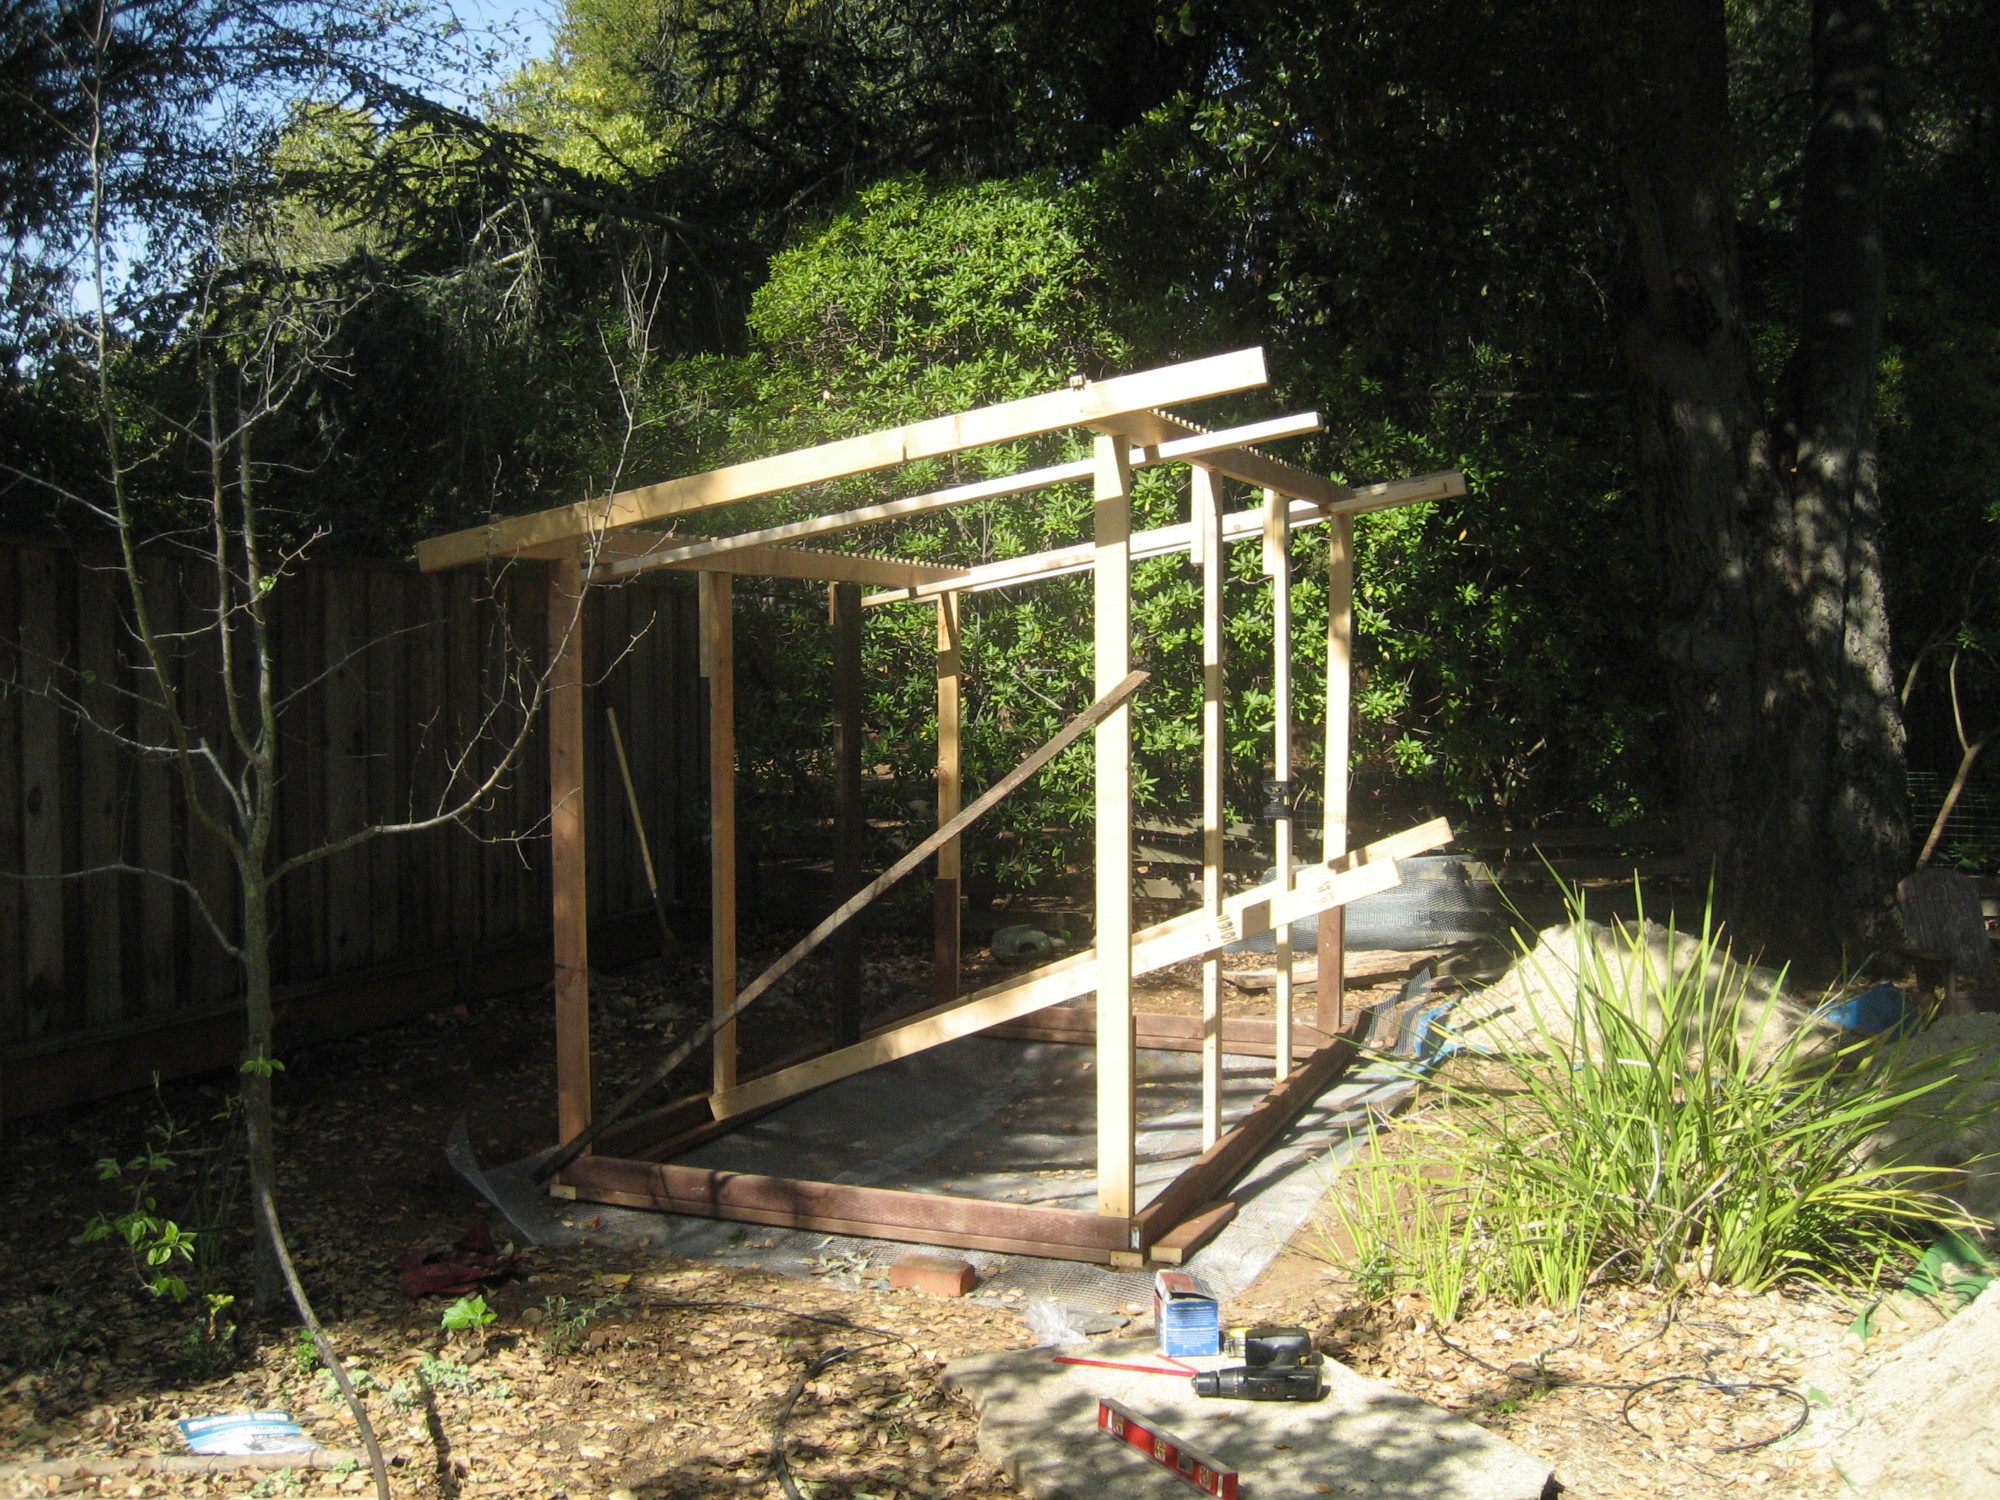
Minimal roof frame attached to uprights. Used some small wood blocks to provide a resting spot so the roof won't slide off while we're trying to attach it.
All rafters in place. If you look closely you'll see the horizontal attachement strips for the Suntuf roofing overhangs the frame by a bit. When I put the first one down, the frame was too large, so I cut the pieces down by an inch. I had messed up, and the frame was fine, and the plastic parts weren't flat. Oh well, the very last rib of the panel won't be attached.
Roof panels in place. Not all the fasteners in place yet. Still need to do some around the edges.
Started adding some short cross-beams between the rafters, and the first section of hardware cloth. As I attach the hardware cloth, I removed the temporary corner braces and add a second 2x4 to sandwich the cloth in place. I want to get the hardware cloth on the one side, and the back wall closest to the fence, since the second 2x4 makes the structure a lot more sturdy. Then I'll start framing the coop, which will be on the left side.
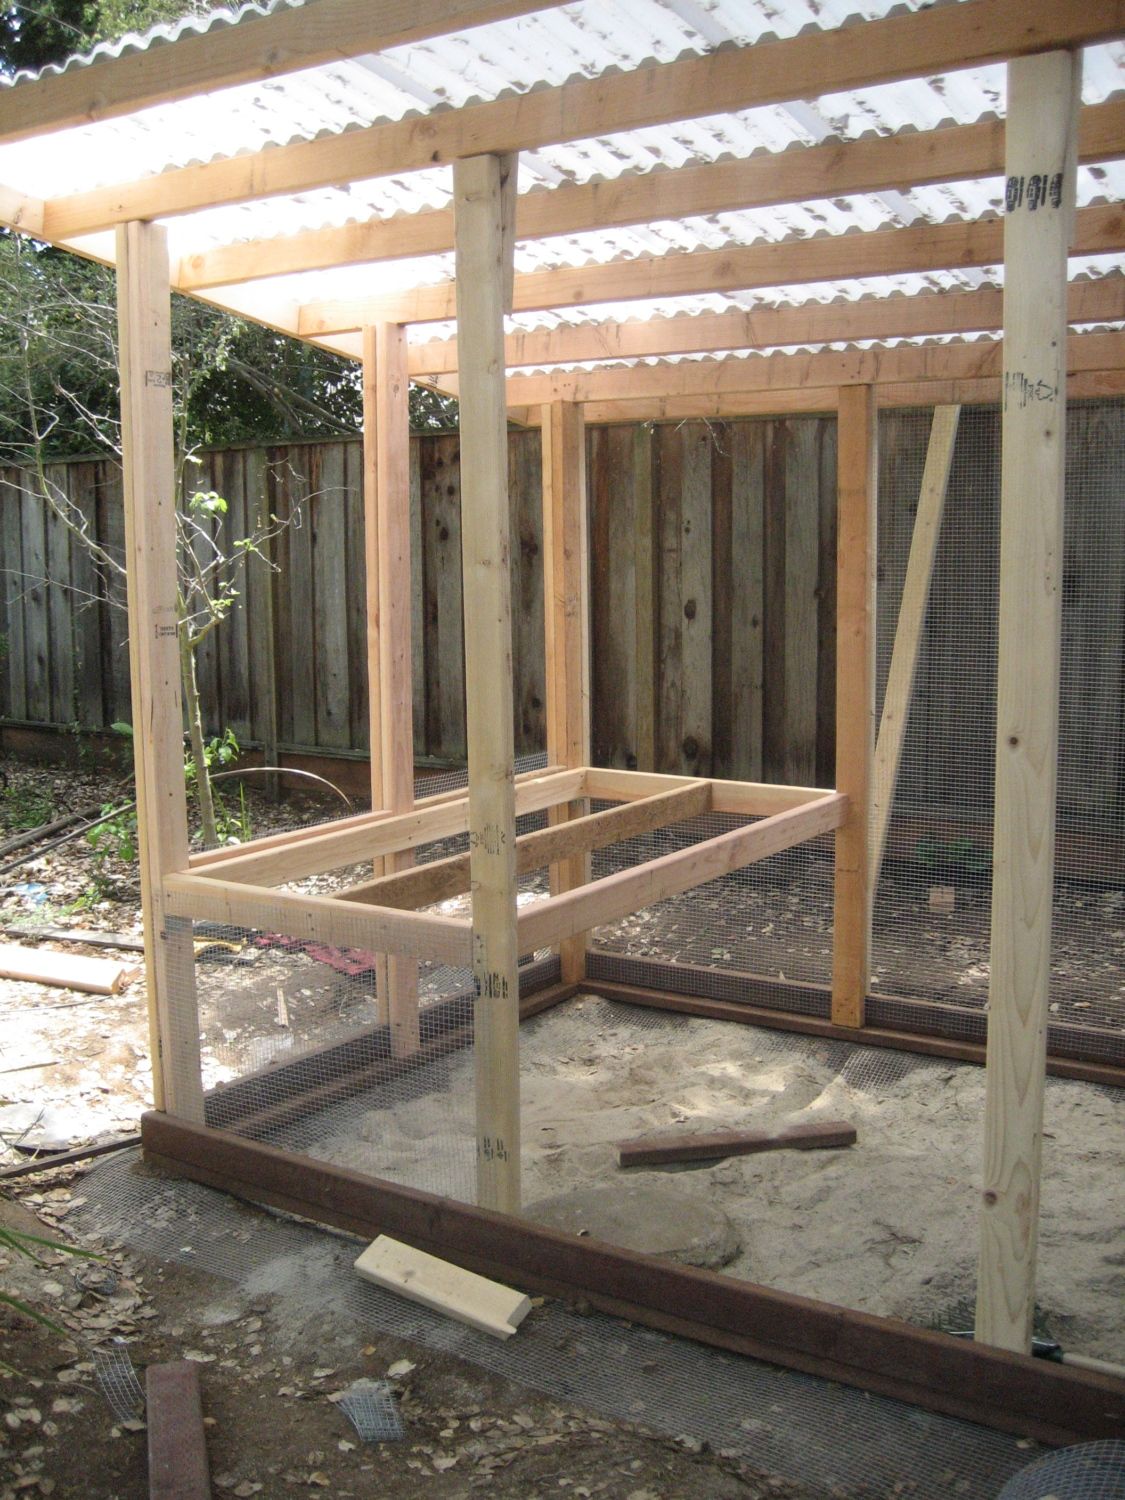
Finally got back to work a couple of days ago. I added more hardware cloth and additional 2x4's. Put in the first pieces of framing for the coop floor. I put the back one 1" taller than the front for a very gentle slope to help with water drainage during cleaning. Now it's time to come up with my plan for the full framing of the coop.
Finished framing the floor of the coop.
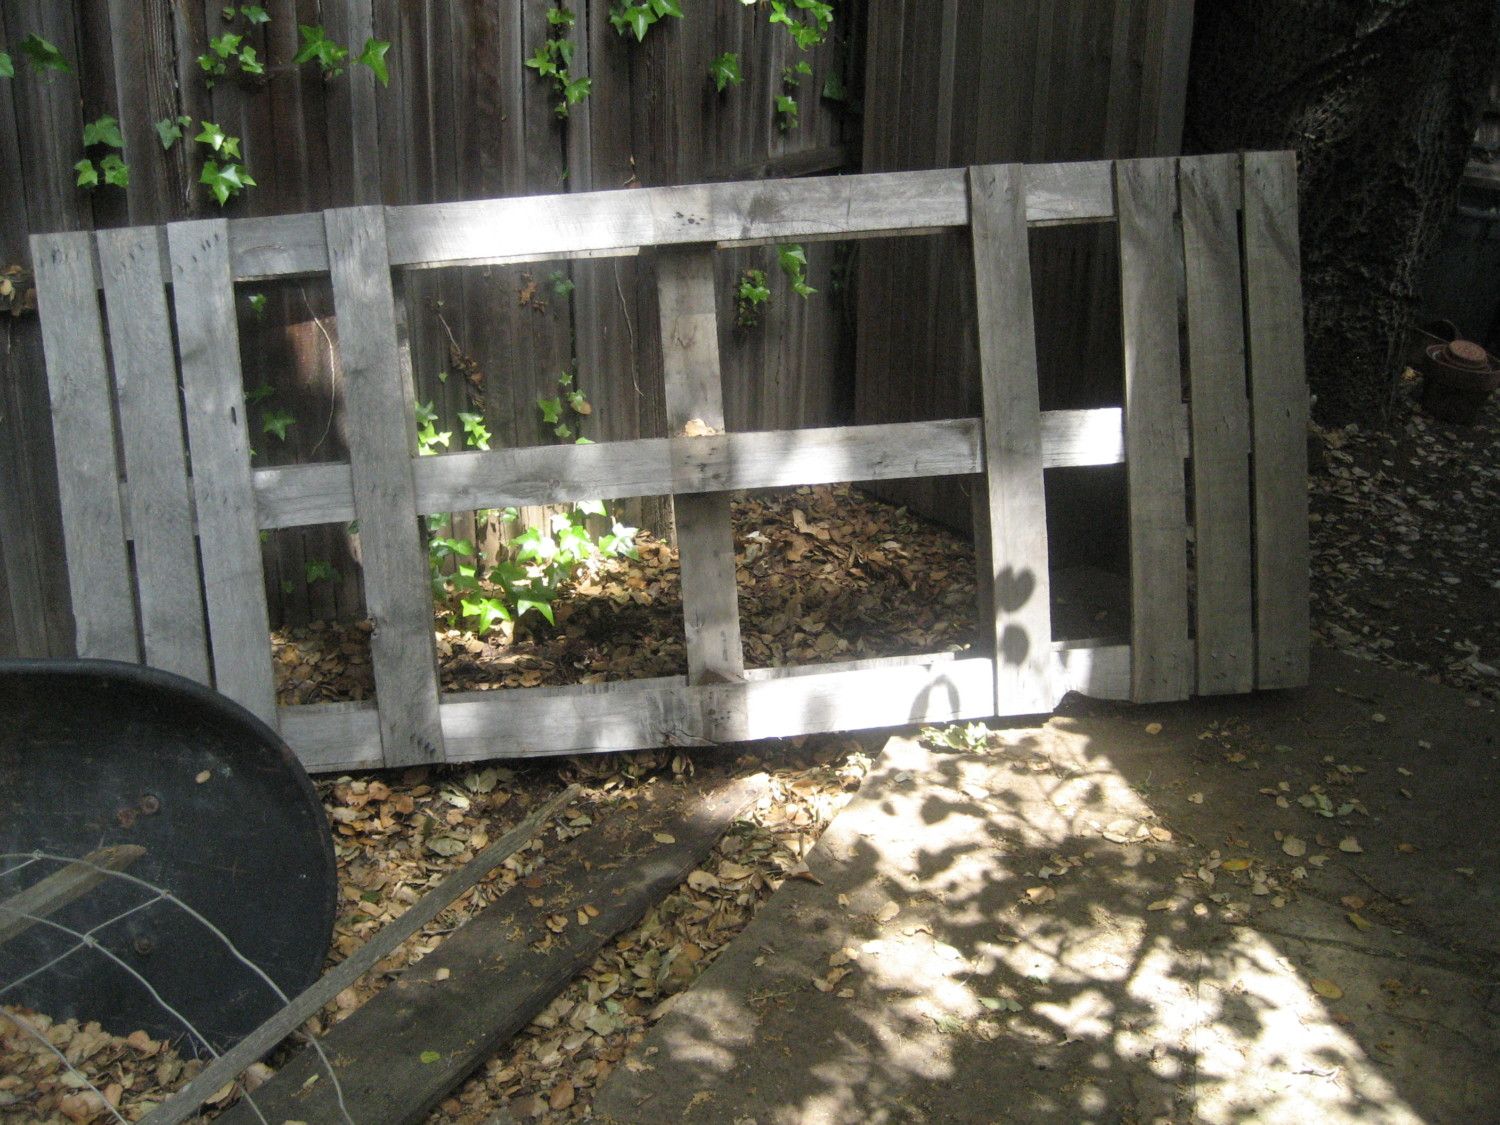
I will use wood from this pallet for the floorboards. They will get covered with a vinyl flooring remnant I got at Home Depot. Hopefully there is enough wood in good enough shape. Trying to save a few bucks, plus I've had this taking up space for the last year.
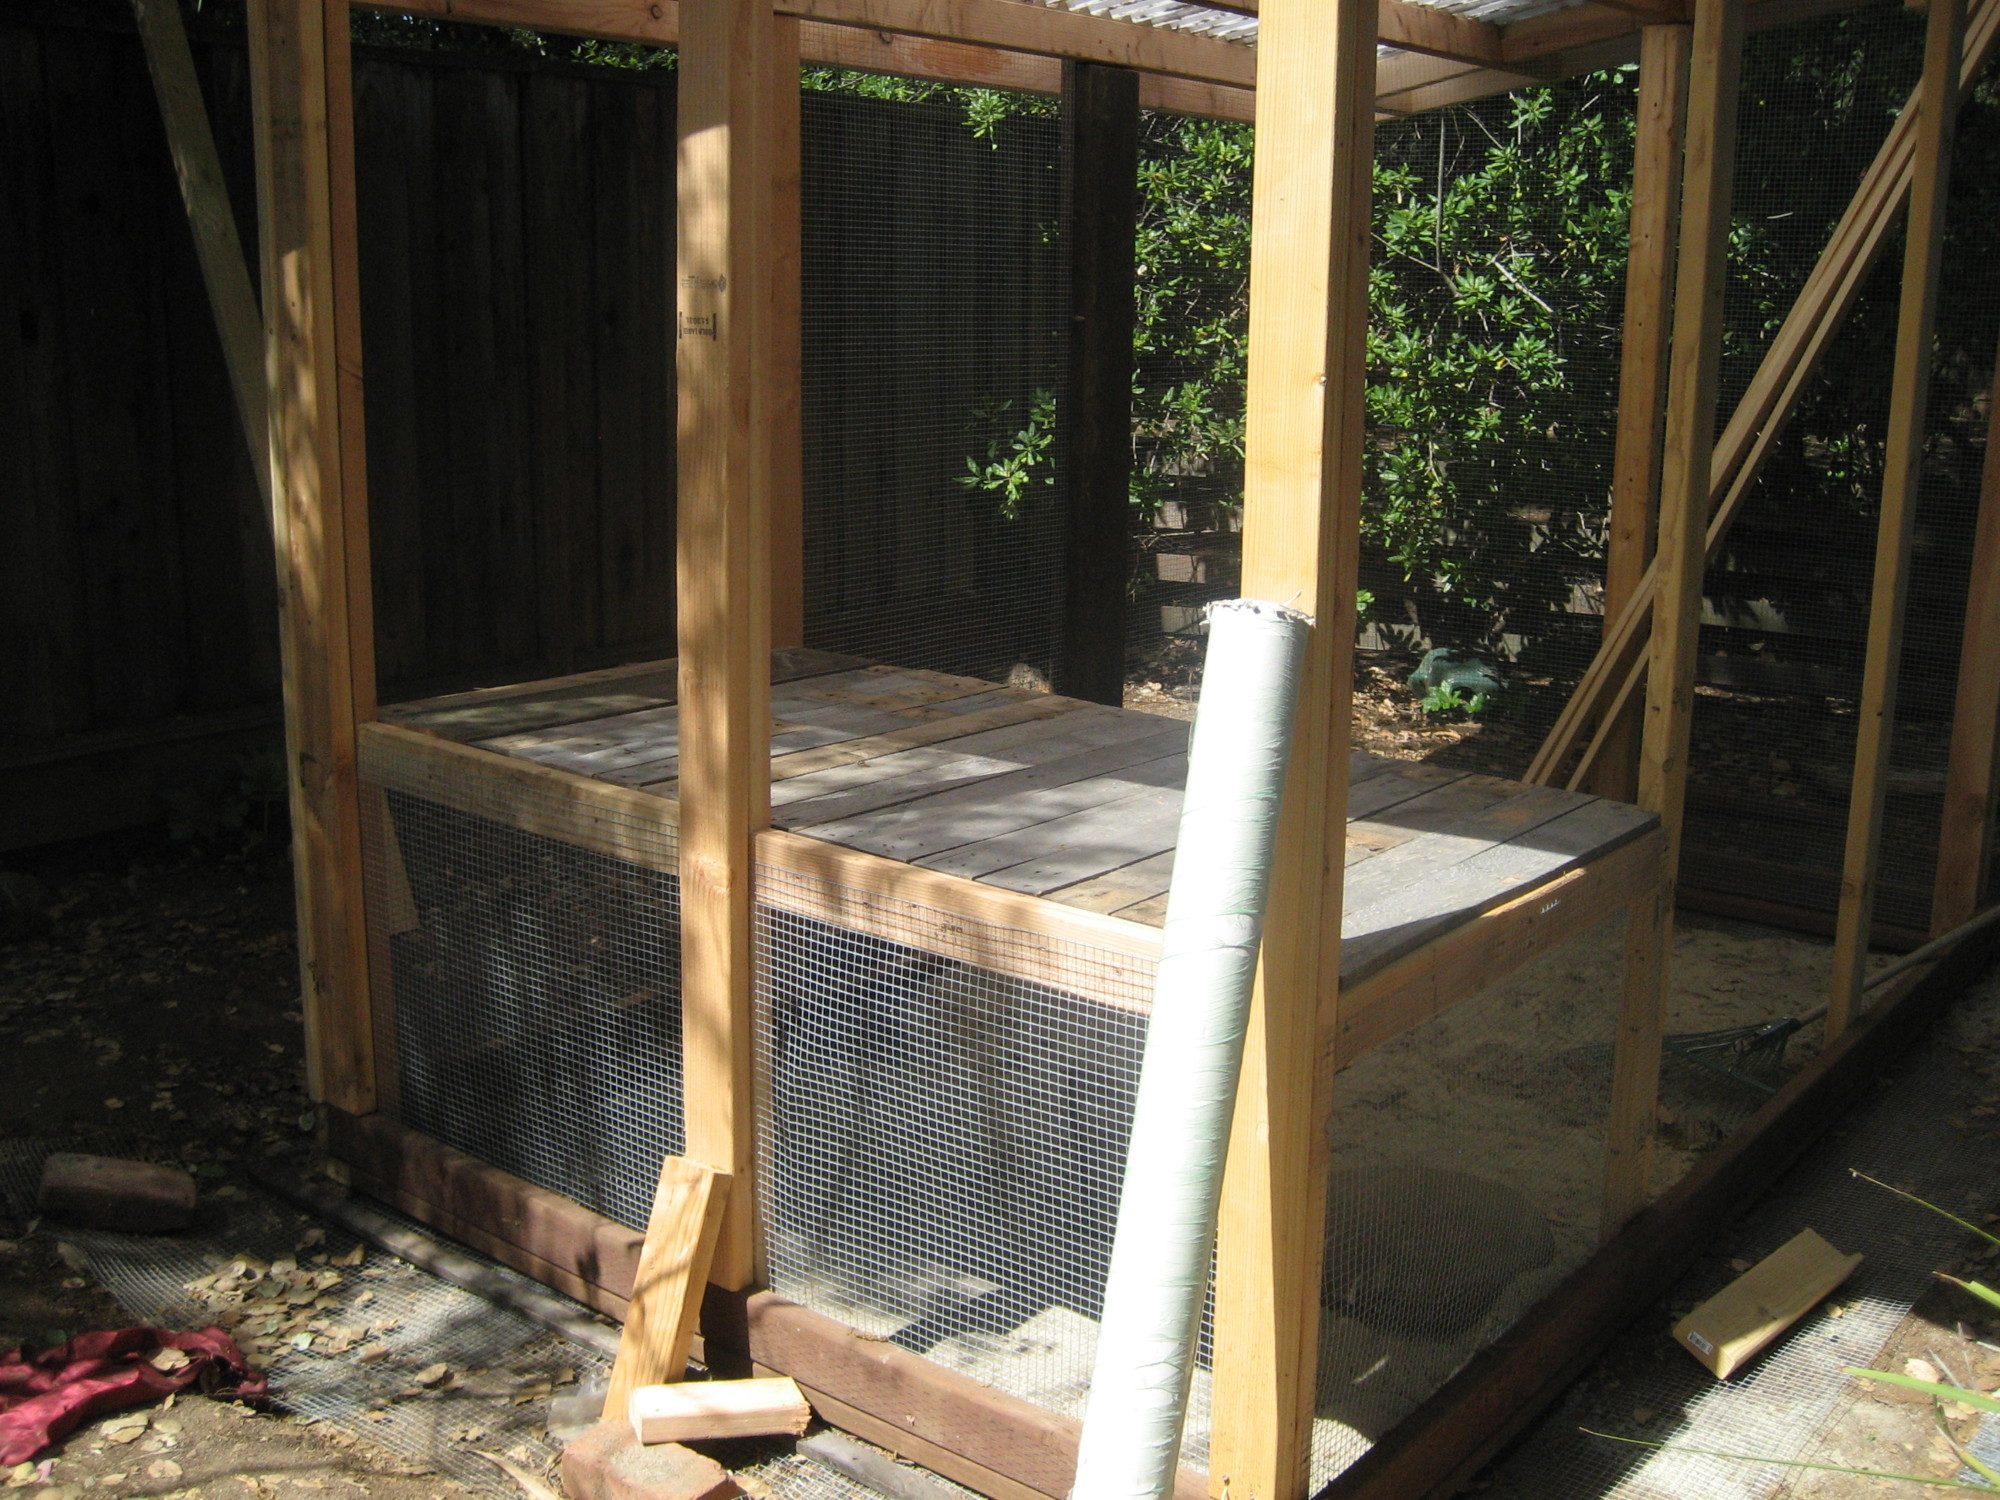
Pallet is gone. Coop floor in place.
Added vinyl flooring, and 2x2 and 2x4 to frame/attach the shiplap on the rear wall.
Rear wall complete. There is a gap at top with hardware cloth for ventilation.
Outside wall with nestbox framed. Still need to add divider and lid.
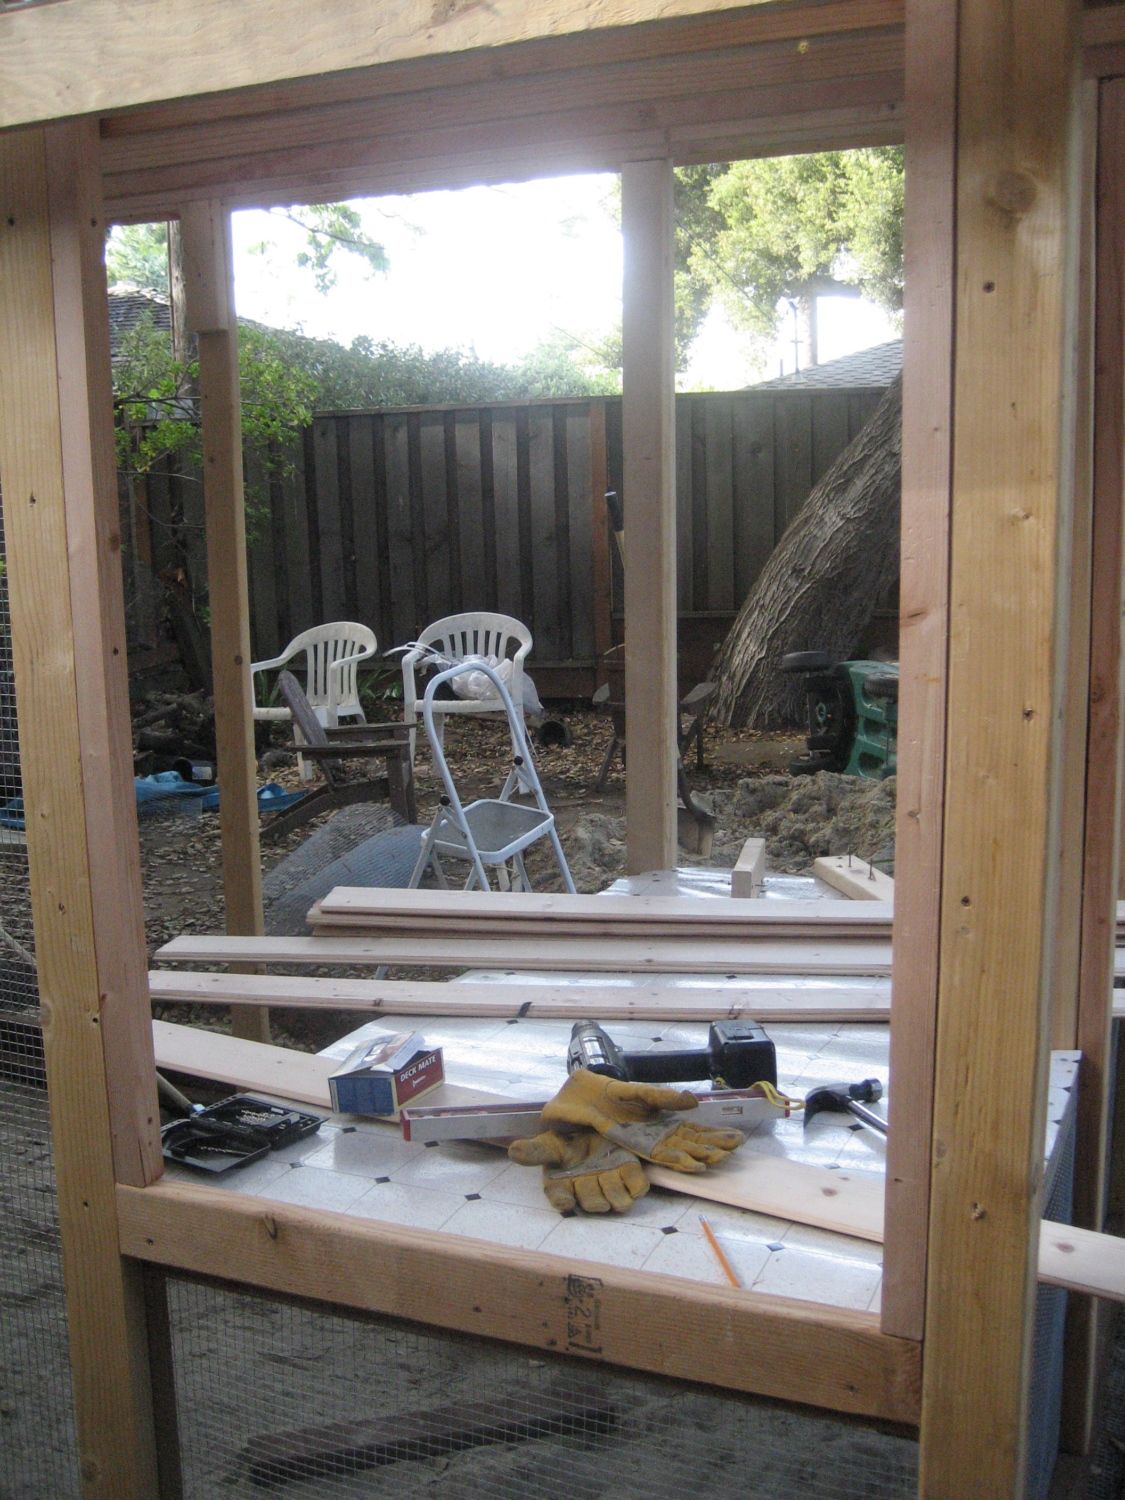
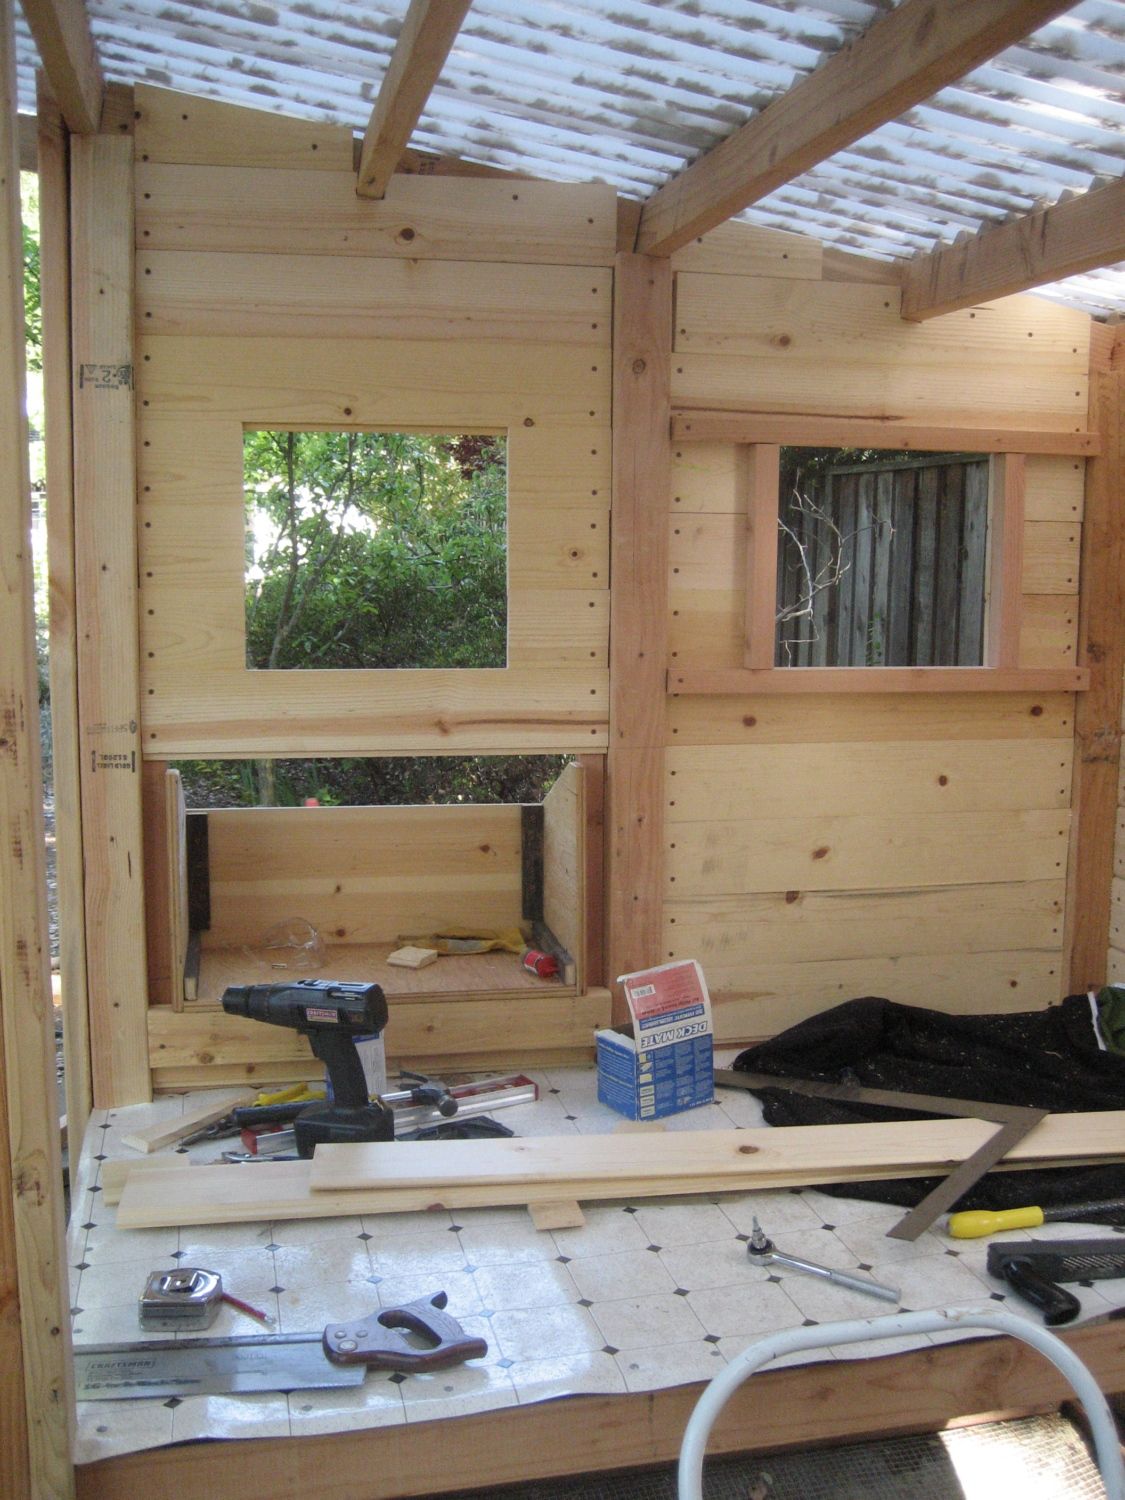
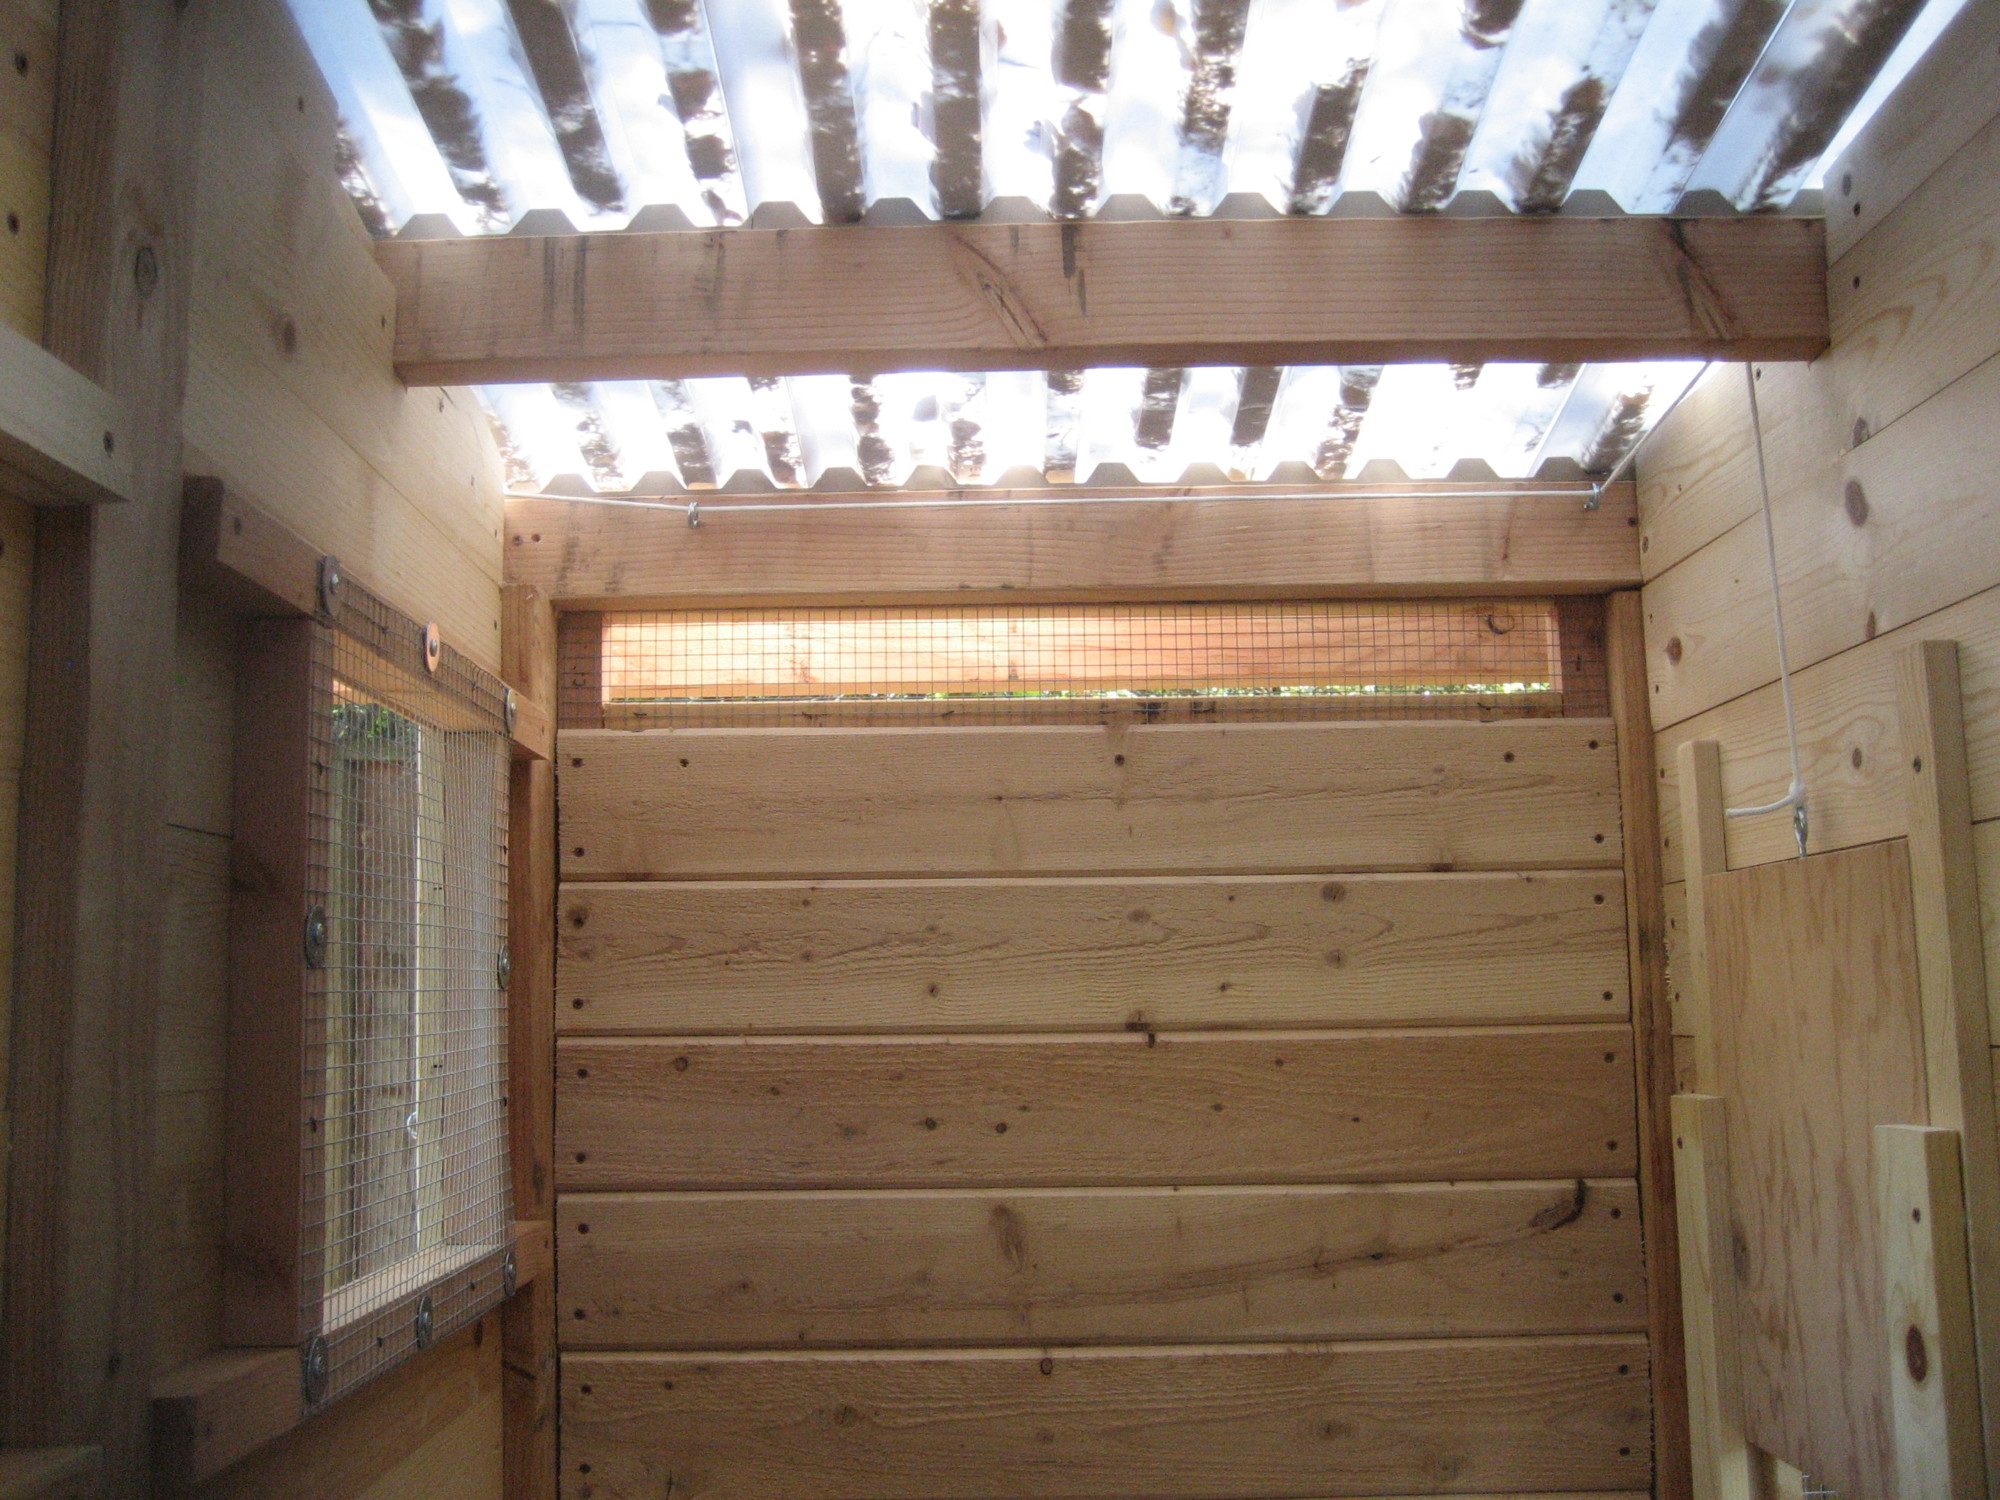
Inside view of that same wall. After putting up the shiplap I added 2x2 framing around the windows. I will attached hardware cloth to these pieces. Still need to do the other window. Have to go to the store to get more.
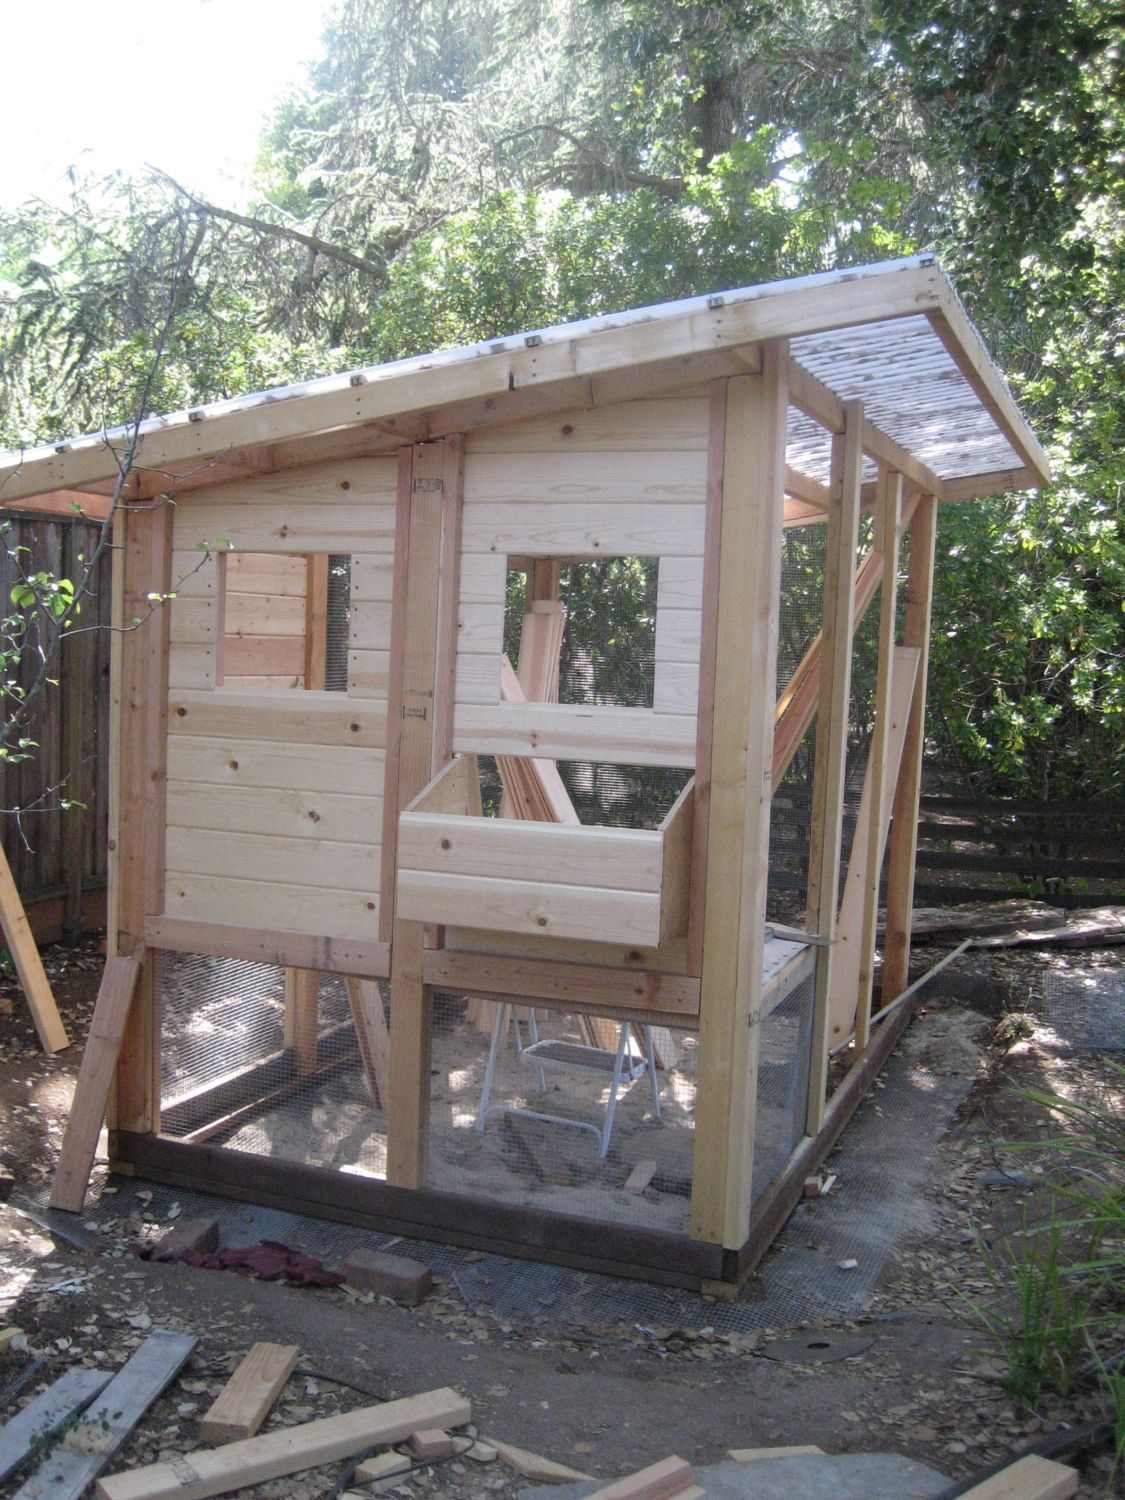
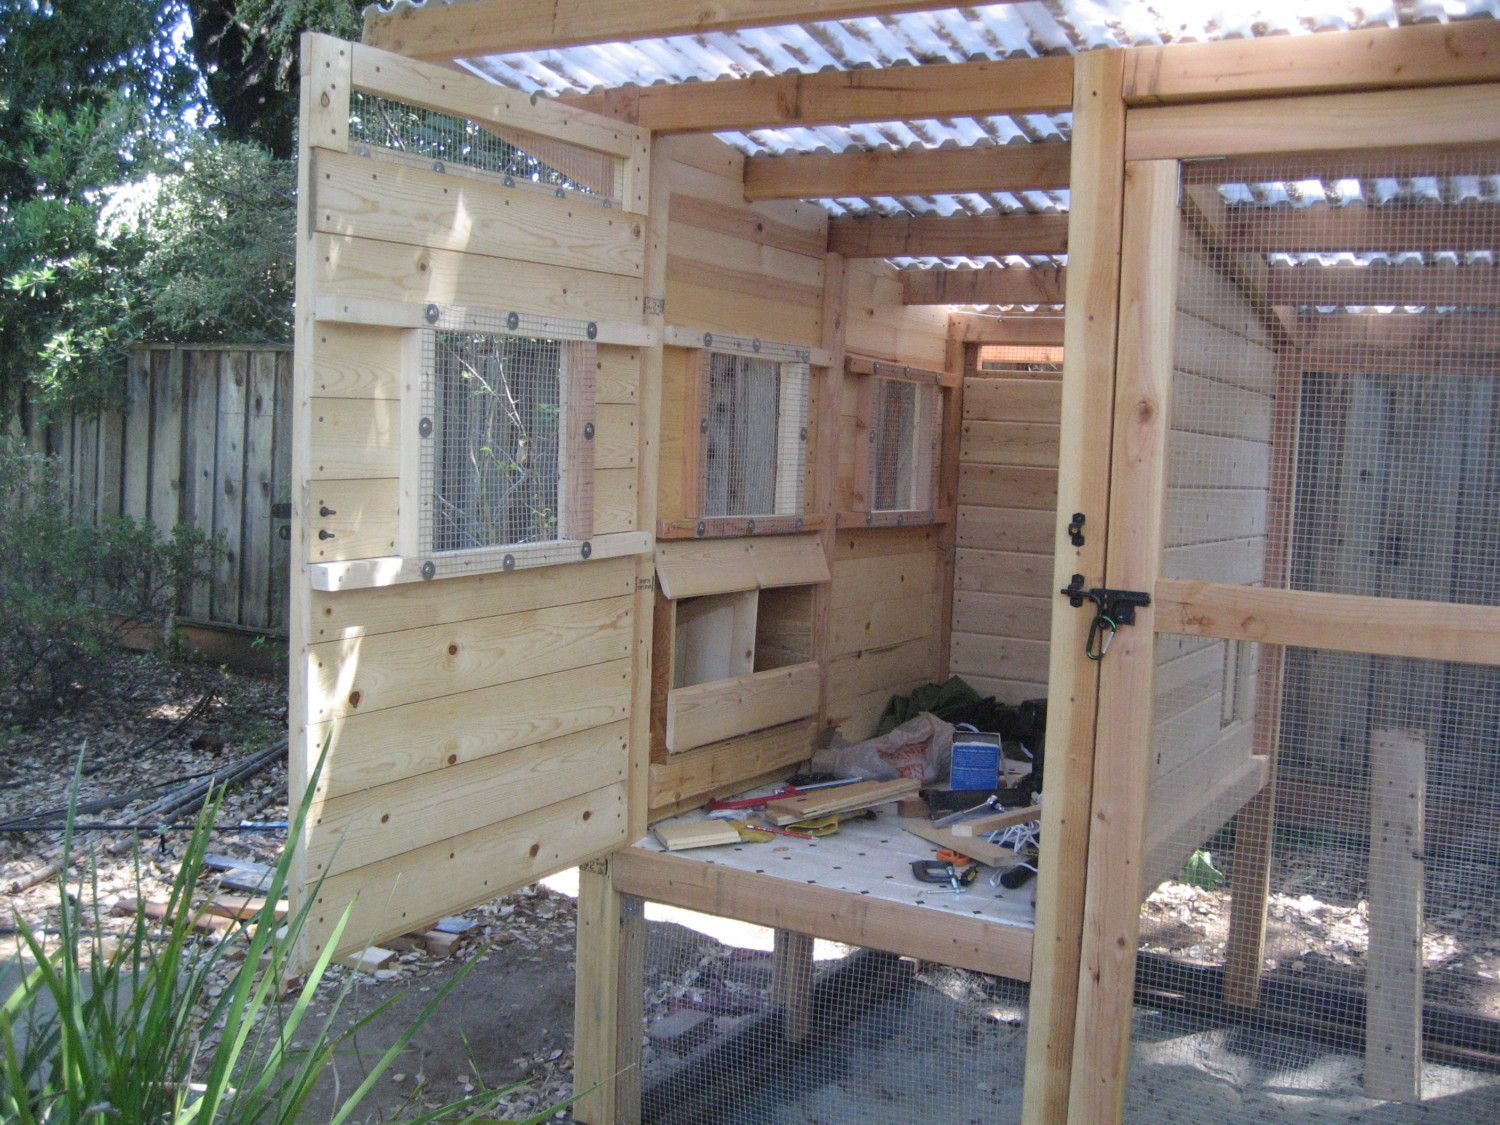
Other side all completed. Still need to figure out how to build and install the sliding door.
Week of June 25 finished all the details. Added front door, hardware cloth to windows, nest boxes, and sliding door.
I ran the cord to the nestbox side since it was easier to route the rope, plus it is on the side facing the house.
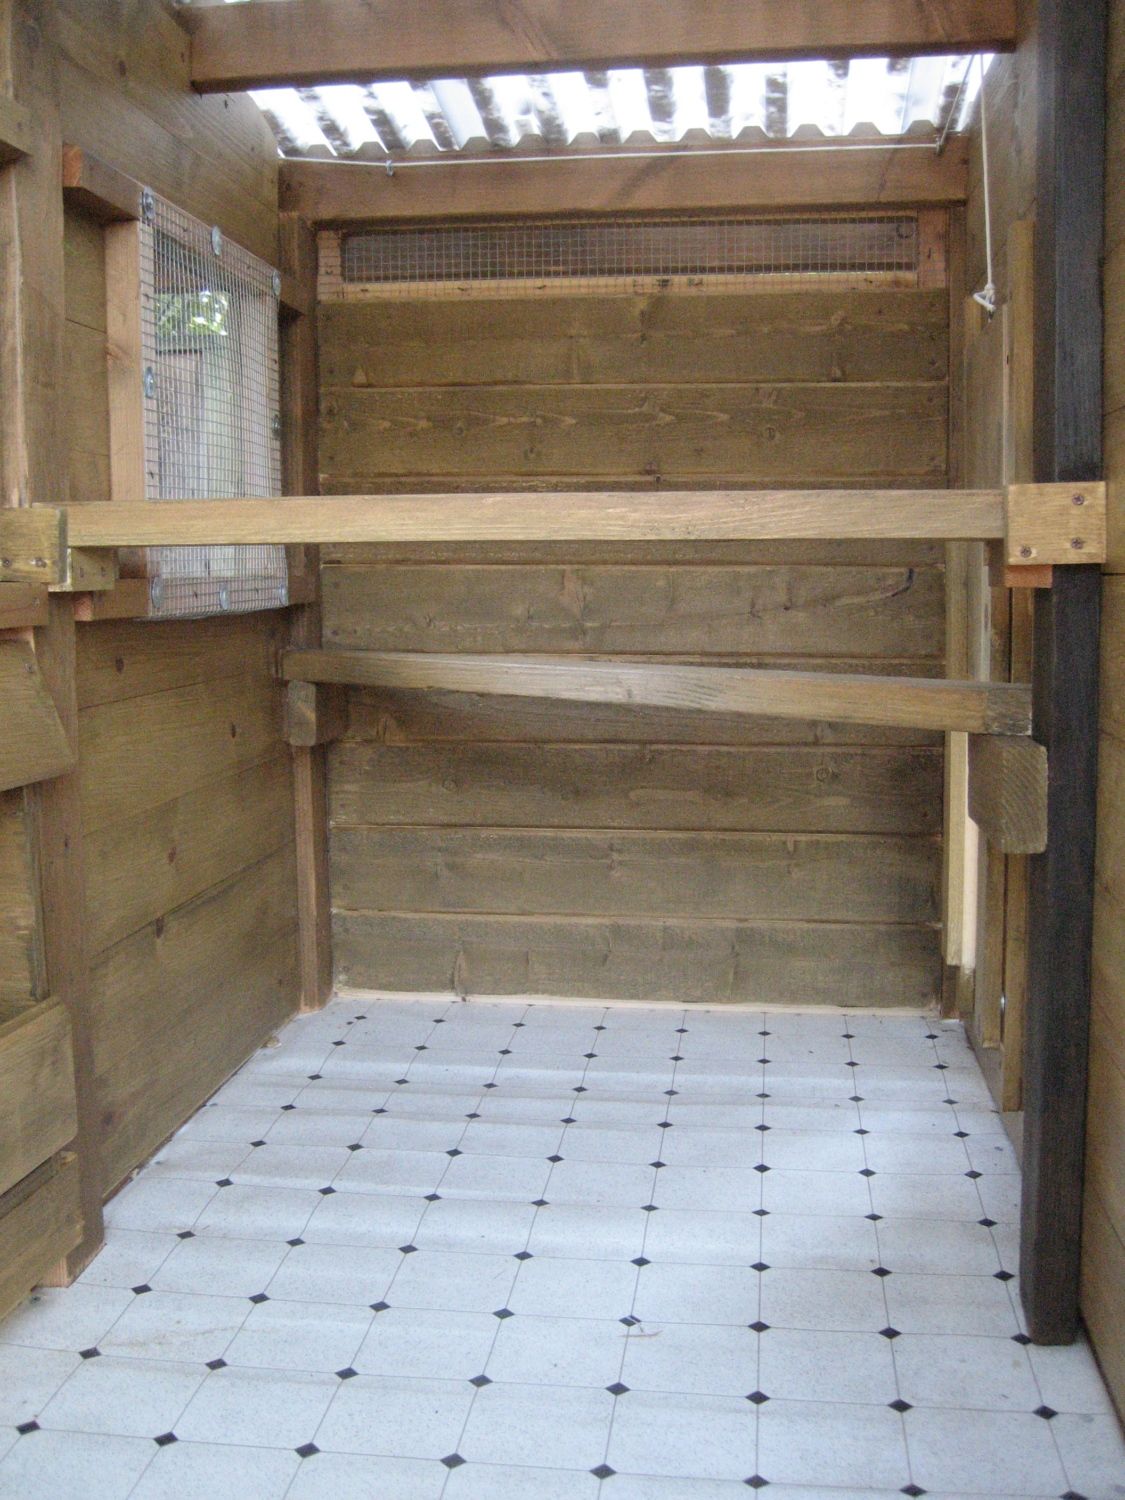
Two roosting bars.
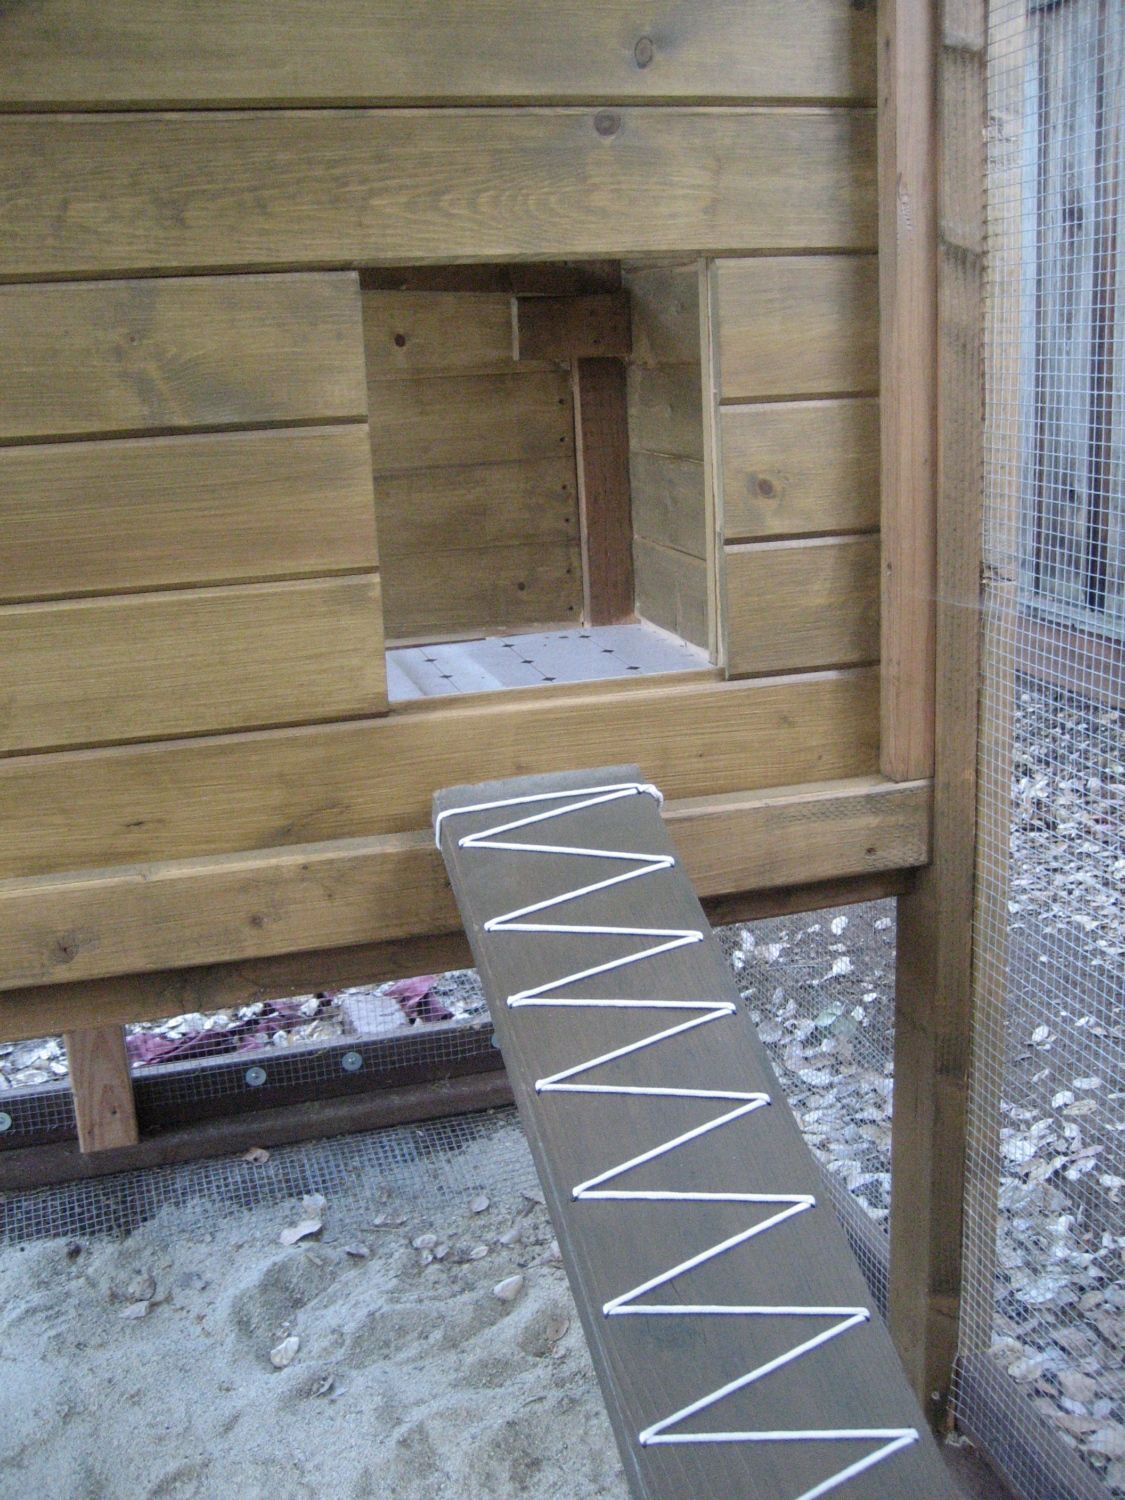
Instead of wood cross bars, I decided to try using rope for traction up the ramp.
Challenges:
I never really knew what the final plans would be. I was able to create some sketches of the basic framing, and once past that I made it up as I went along. The challenge that created was that I had framed the roof with rafters going side to side. I figured it would be easier to line up with the vertical studs that were in place. The downside was that it was really difficult to put in the top row of shiplap around these beams. I had to carve notches with larger clearances to allow me to swing the siding into place. For the inside wall (the one with the ramp, I ended up piecing shorter lengths because it was impossible to install a long one. I think it would have been easier to install the siding if I had run the rafters front to back.
Another change I'd make is use plywood for the coop flooring instead of recycling an old pallet. The thickness of the pallet wood wasn't very even, so it made for a very bumpy floor under the vinyl layer. It was very uncomfortable to kneel on while working on the coop, and allows for water to puddle even on a slanted floor when I hose it out.
We got 3 barred rock chicks on 9/3. They were 12 days old.
They grew really fast, and we kept them in our garage. Starting at 5 weeks, we moved them outside during the day. I put in a watering system:
Since they had been using nipples from the day we brought them home, no problems getting the birds to drink from them.
I installed the pipes while the chicks were in the run. While crouched down doing the final adjustments, one of the bird came from right underneath me and pecked me in the eye. OUCH. Luckily, I have completely healed. Now we enforce a safety glasses rule for anyone going into the coop.
The chicks are now 7 weeks old, and have been in the coop/run full time for 9 days. We put in a heat lamp for night time. So far, they have not figured out that they are supposed to go into the coop at dusk, so we've been having to put them in every night. Starting tonight, they will be confined to the coop for 2-3 days in order to teach them that this is their home. Otherwise they huddle together in the dark underneath the coop.
Once they are bigger they will be allowed to forage in the backyard. Right now there are too many little cracks under the fence that they could sneak away.
Update 2/8/13: Yippee. The first egg. I'm pretty sure it was Buddy, who has the largest comb & wattles. So exciting to finally get one: (The green/grey one is the fake one to show them where to lay the egg)
January 2016 and it's time for an update.
The first change I made pretty quickly was swapping out the galvanized feeder with a Blenheim 13lb feeder. The narrow grill pattern prevents the chickens from from scattering their feed all over the place. It's a really nice feeder and highly recommended.
Summer of 2015, Scar goes to meet her maker in the chicken ranch in the sky. No warning that she was ill.
Dec 26, 2015, Pepper is also gone, though not such a surprise. She had been lethargic for days. Not wanting to have one lonely chicken, the next day I pick up three red sex links that are 4-5 months old. I'd would have preferred more barred rocks, but am unable to find pullets this time of year. I don't want to deal with younger birds, and I think it better to get new ones quickly.
My old girl Buddy is quickly renamed Bully, and she shows what a jerk she can be. The first day I allow all 4 to roam the yard, hoping that space will do them all good. I supervise for the first few hours. A few hours later I investigate, and find that two had escaped from a gap under the fence and are in my front yard. Much chasing ensues, and by nightfall everyone is stowed away. Buddy sleeps in her roost, the 3 newbies are too terrified to enter the coop and stay in the run. The next morning I go to investigate and find Buddy in the run, and the three cowering in the corner of the coop.
It's been a week now, and it's still showdown at the OK corral. The young ones hide in the coop, with Buddy coming every once in a while to shoo all 3 into one next box. Most days I kick Buddy into the yard, and leave the three in the run. No free ranging until they fatten up, and learn to lay in the nest boxes.
Some quick modifications to deal with the standoff.
I add a new roost in the run that the younger ones can reach but is out of range of Buddy.
The newbies need access to food & water inside the coop since they are afraid to be in the run with Bully. I reuse the small water bottle with nipple and build a feeder from ABS piping.
Miss Bully supervises the construction.
Update April 2018
A coop is never really finished, right?")
In Jan 2017 I lost one of the brown chickens to a hawk. My luck ran out. Even though there's so many hiding places, a small hawk attacked near sunset. I happened to walk outside just in time to see the hawk fly up into a tree. No more free ranging for the flock. Ever since then I see and/or hear the hawks quite often and decided it's never going to be safe to let them out.
I lost another brown one to illness about 4 - 6 months ago, and am down to 2. I'll be getting 3 young birds next month to build up my flock again.
In the meantime, I've built a quarantine coop for the new ones to live in until they are big enough to integrate. Not very pretty, but I used up a lot of scrap material in the junk pile. It assembles with only 8 screws, so it will be easy to store when not needed (4 panels 4' x 3' each, plus 4' x 4' lid).

I've added a 6' x 8' addition to the run. Spent a bunch of time designing a door between the two sections. The new run isn't quite up to Fort Knox standards, so I wanted to be able to shut the door in the evening. After various attempts with springs to shut the door, I did a design reset and used the track and hardware for a sliding closet door. I ran a cord all the way around so that the door can be opened and closed with a motion similar to opening blinds.
This was mostly completed early July 2012. The photo below was taken Jan 2013.
Footprint is 6' x 10', and the enclosed section is 3' x 6'. 7ft tall at the front, 6ft at the back. I had some leftover redwood & deck hardware on hand, and was able to keep the cost down to $850.
Work started on 3/26. I'm attempting to make a something close to the Taj Mahal, with some details taken from the well known & loved Wichita coop.
I helped build a deck & arbor many years ago. This is by far the most ambitious project I've every attempted.
First of all, a huge thank you to bigghoss and baldessariclan for posting their designs.
Here's the location before I started on 3/26/12. The green tarp is covering an old sand pit my kids used to play in when younger.
Dig out all the old sand and save it for the run area.
Dig out and then re-level the area. Hard to tell from this photo, but there's about an 8 - 12 depression inside the foundation, so the hardware cloth will be covered with good layer of sand. 6' x 10' pressure treated foundation. First level flat, then second level on edge.
Initial set of framing. 7' tall in front, 6' in back. With the 1 foot deep center, kind of a pain to work on something this tall. I happen to have some leftover 2x8 redwood from an old deck project, so I'm using that in the back instead of 2 2x4 side by side which would be needed to maintain a 34" opening for 36" hardware cloth. The short braces in the corner are temporary.
Roof will be 8 x 12. While it would be nice to build the whole thing flat on the ground, there's no way me and my trusty helper (my very tall husband) will be able to lift it in place. I did a full layout on the patio, then screwed together the minimum pieces needed. There are 2 extra cross pieces to act as temporary rafter hangers so that it will be easier to screw in the remaining 5 rafters.
Minimal roof frame attached to uprights. Used some small wood blocks to provide a resting spot so the roof won't slide off while we're trying to attach it.
All rafters in place. If you look closely you'll see the horizontal attachement strips for the Suntuf roofing overhangs the frame by a bit. When I put the first one down, the frame was too large, so I cut the pieces down by an inch. I had messed up, and the frame was fine, and the plastic parts weren't flat. Oh well, the very last rib of the panel won't be attached.
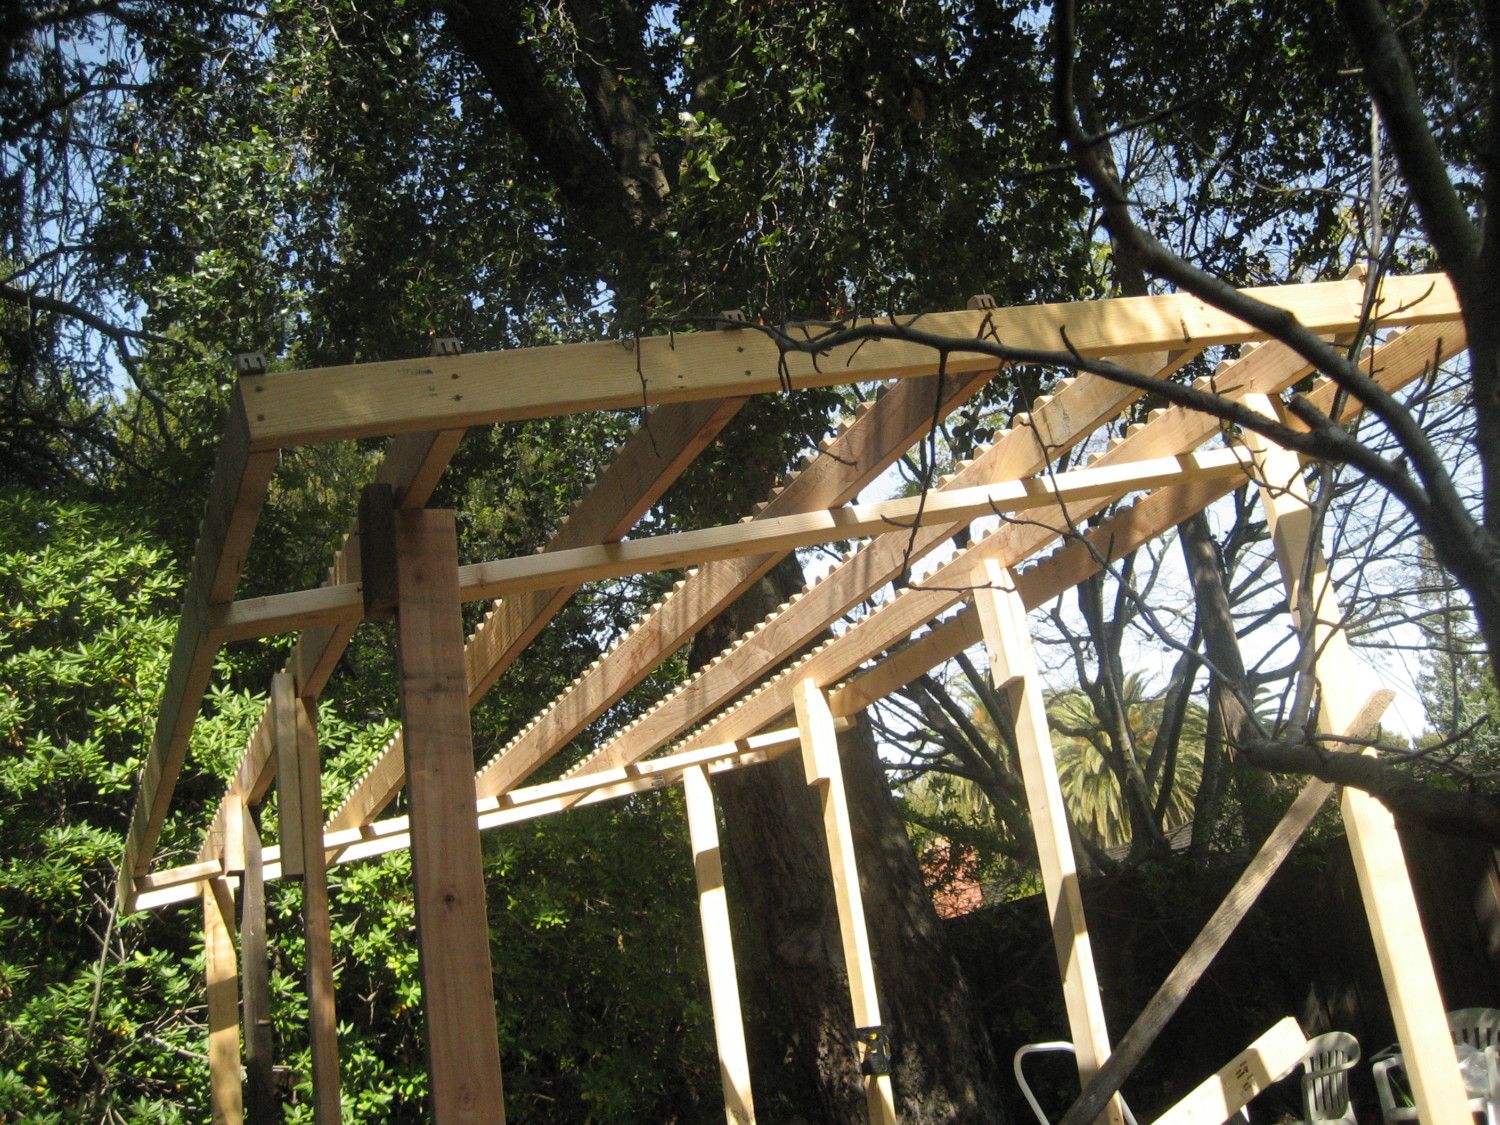
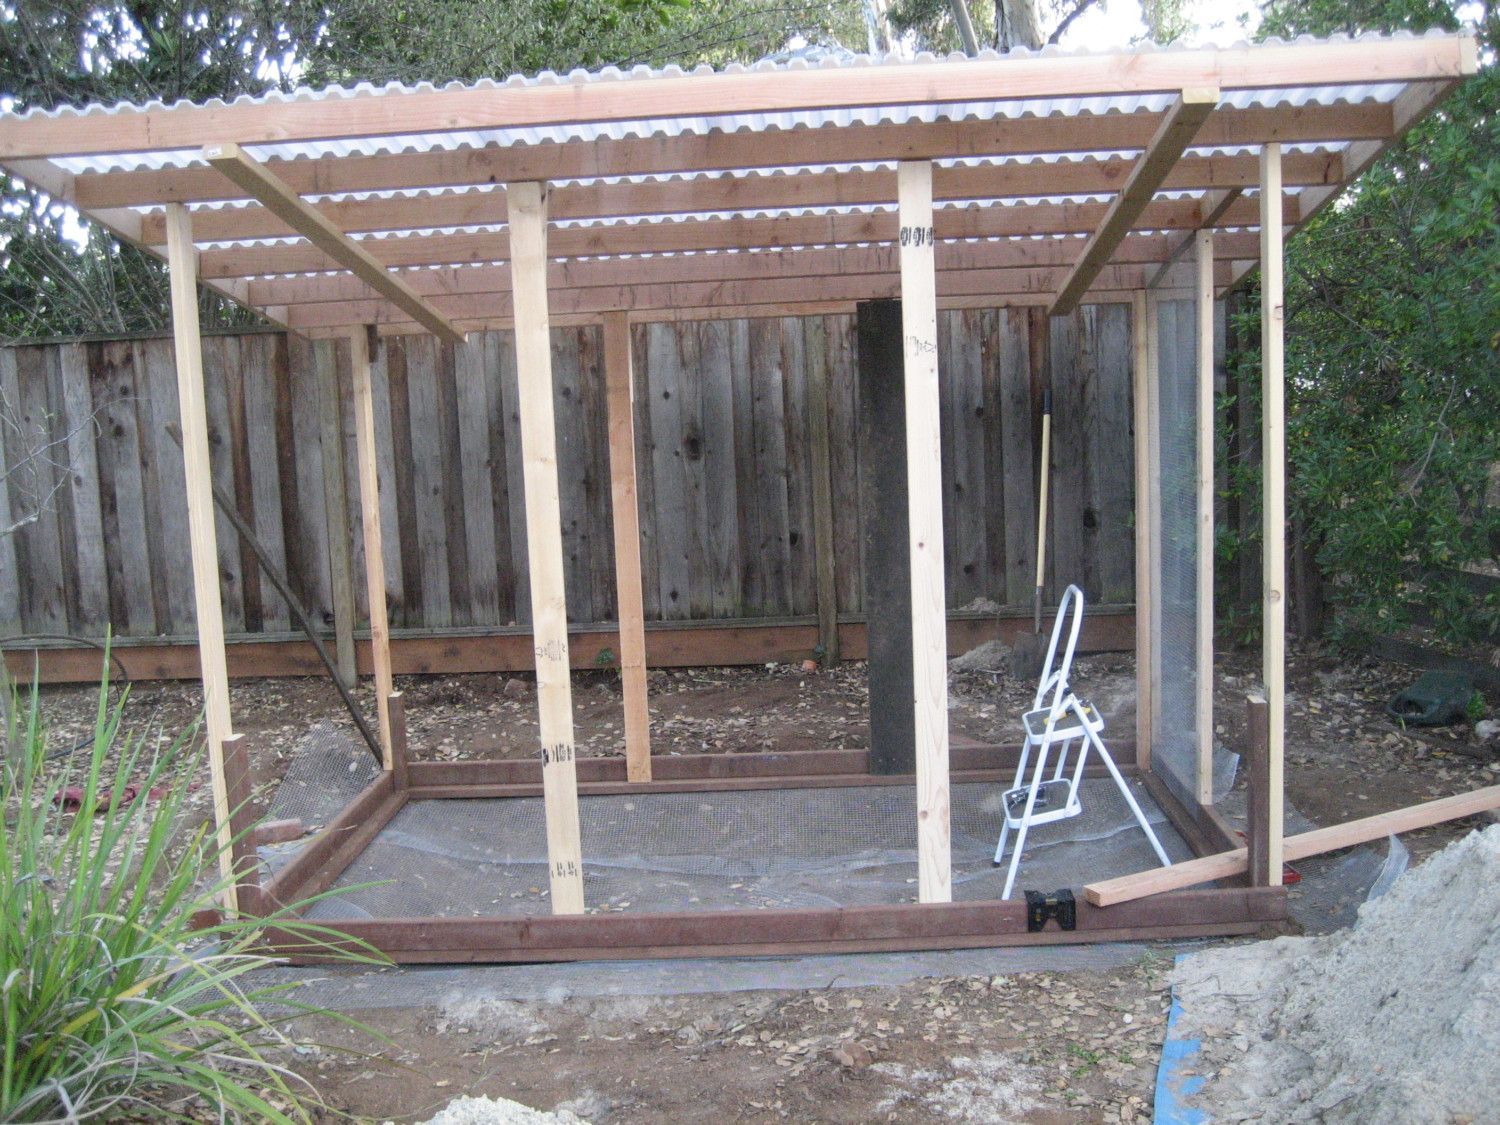
Roof panels in place. Not all the fasteners in place yet. Still need to do some around the edges.
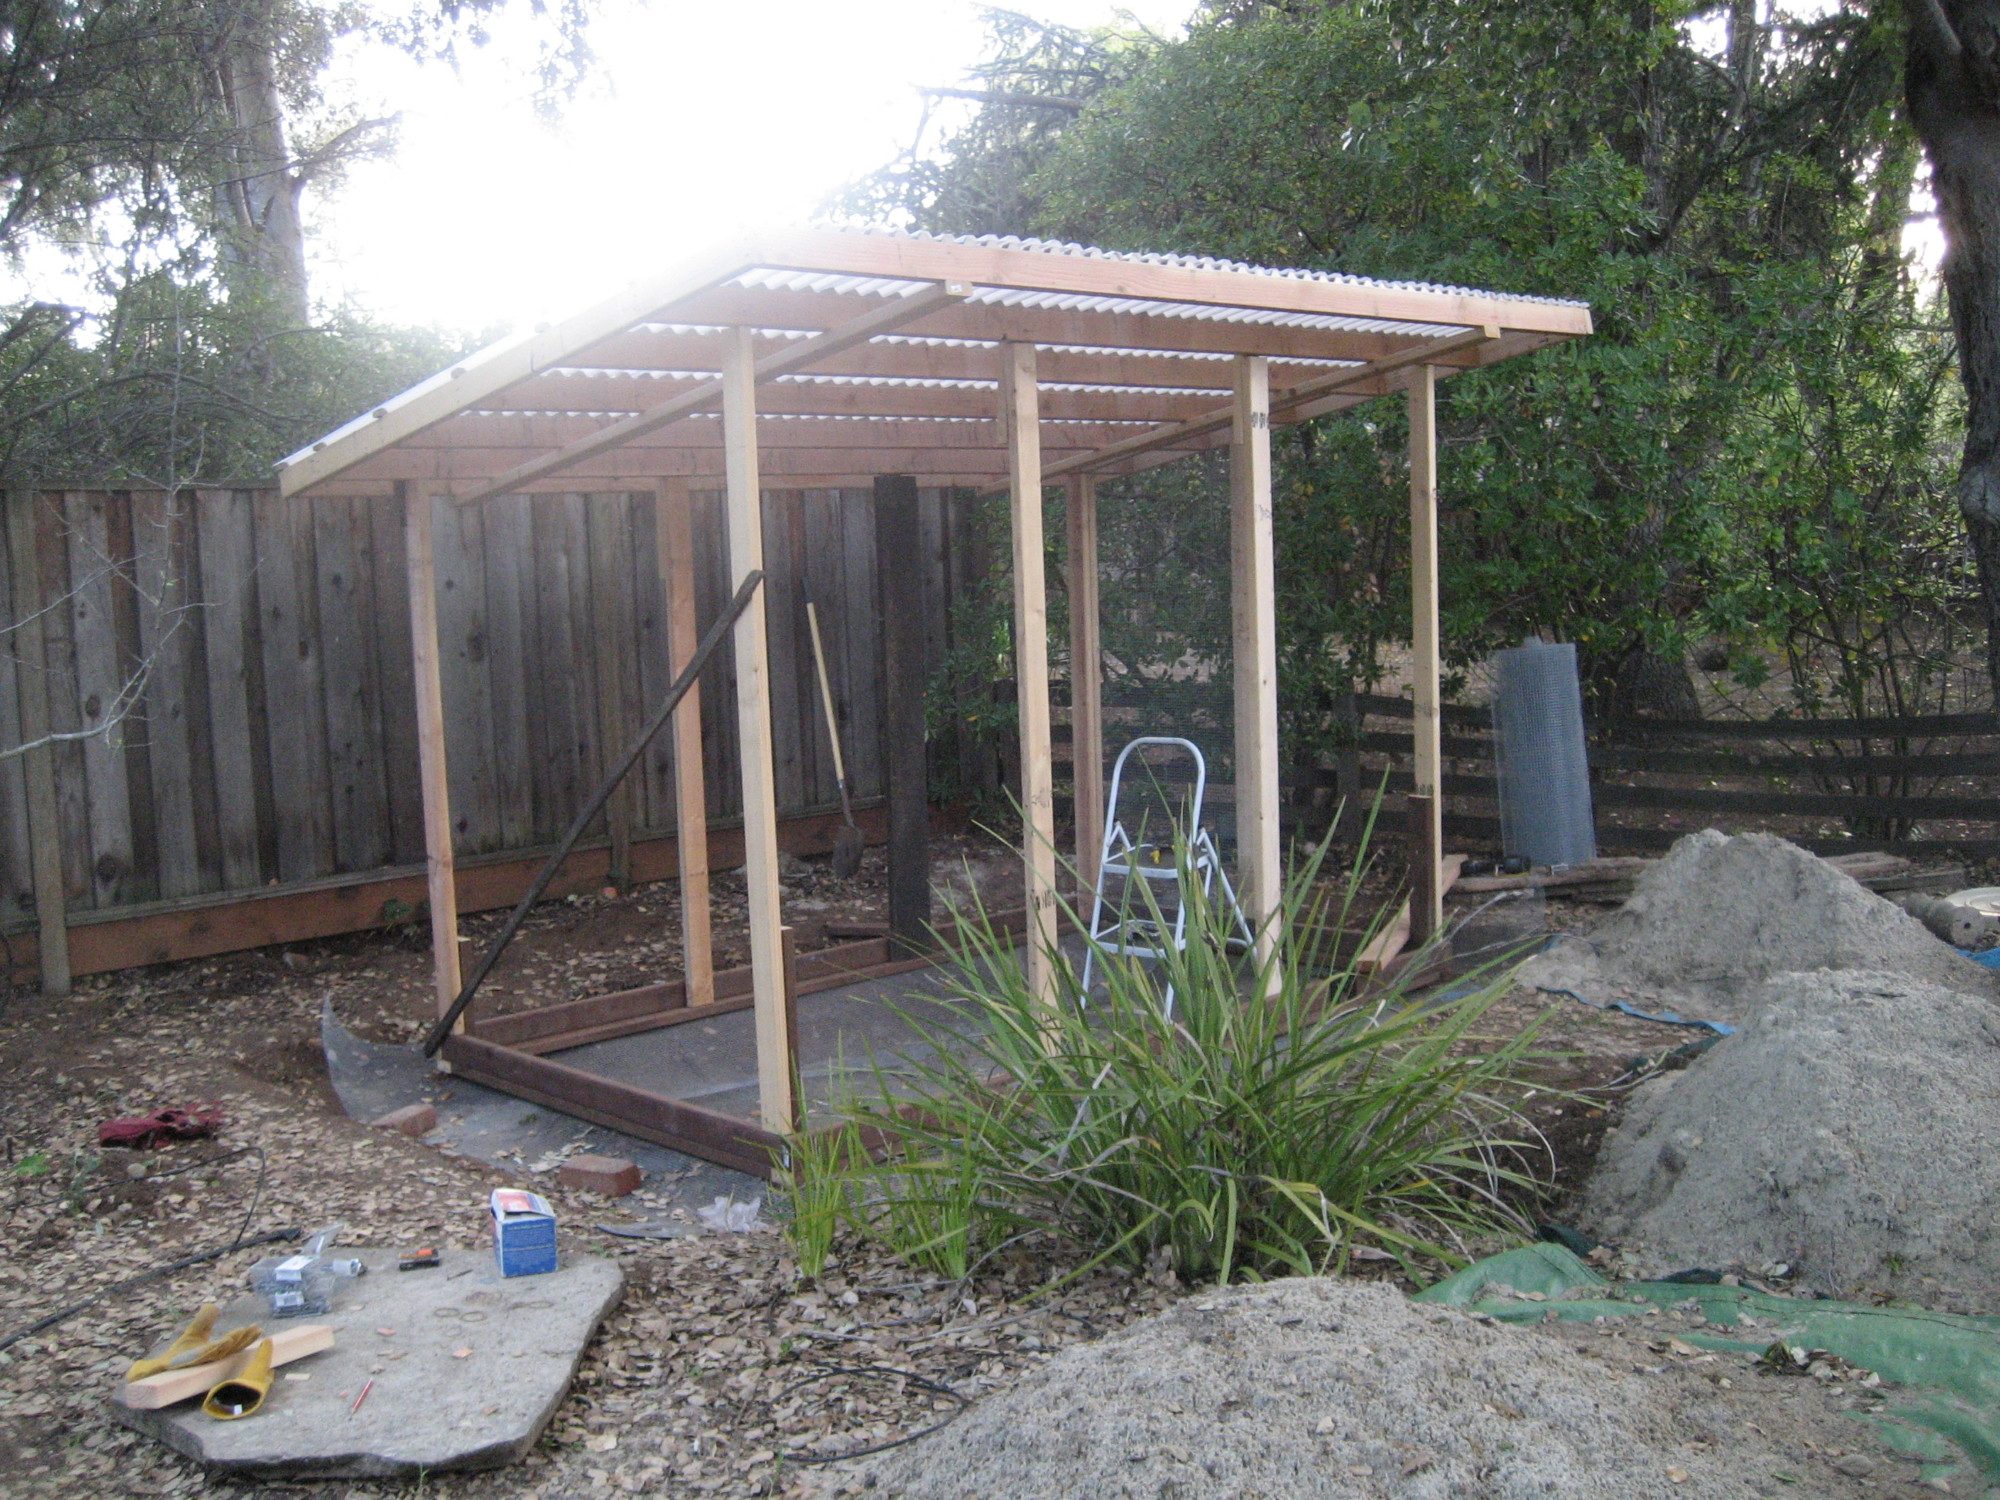
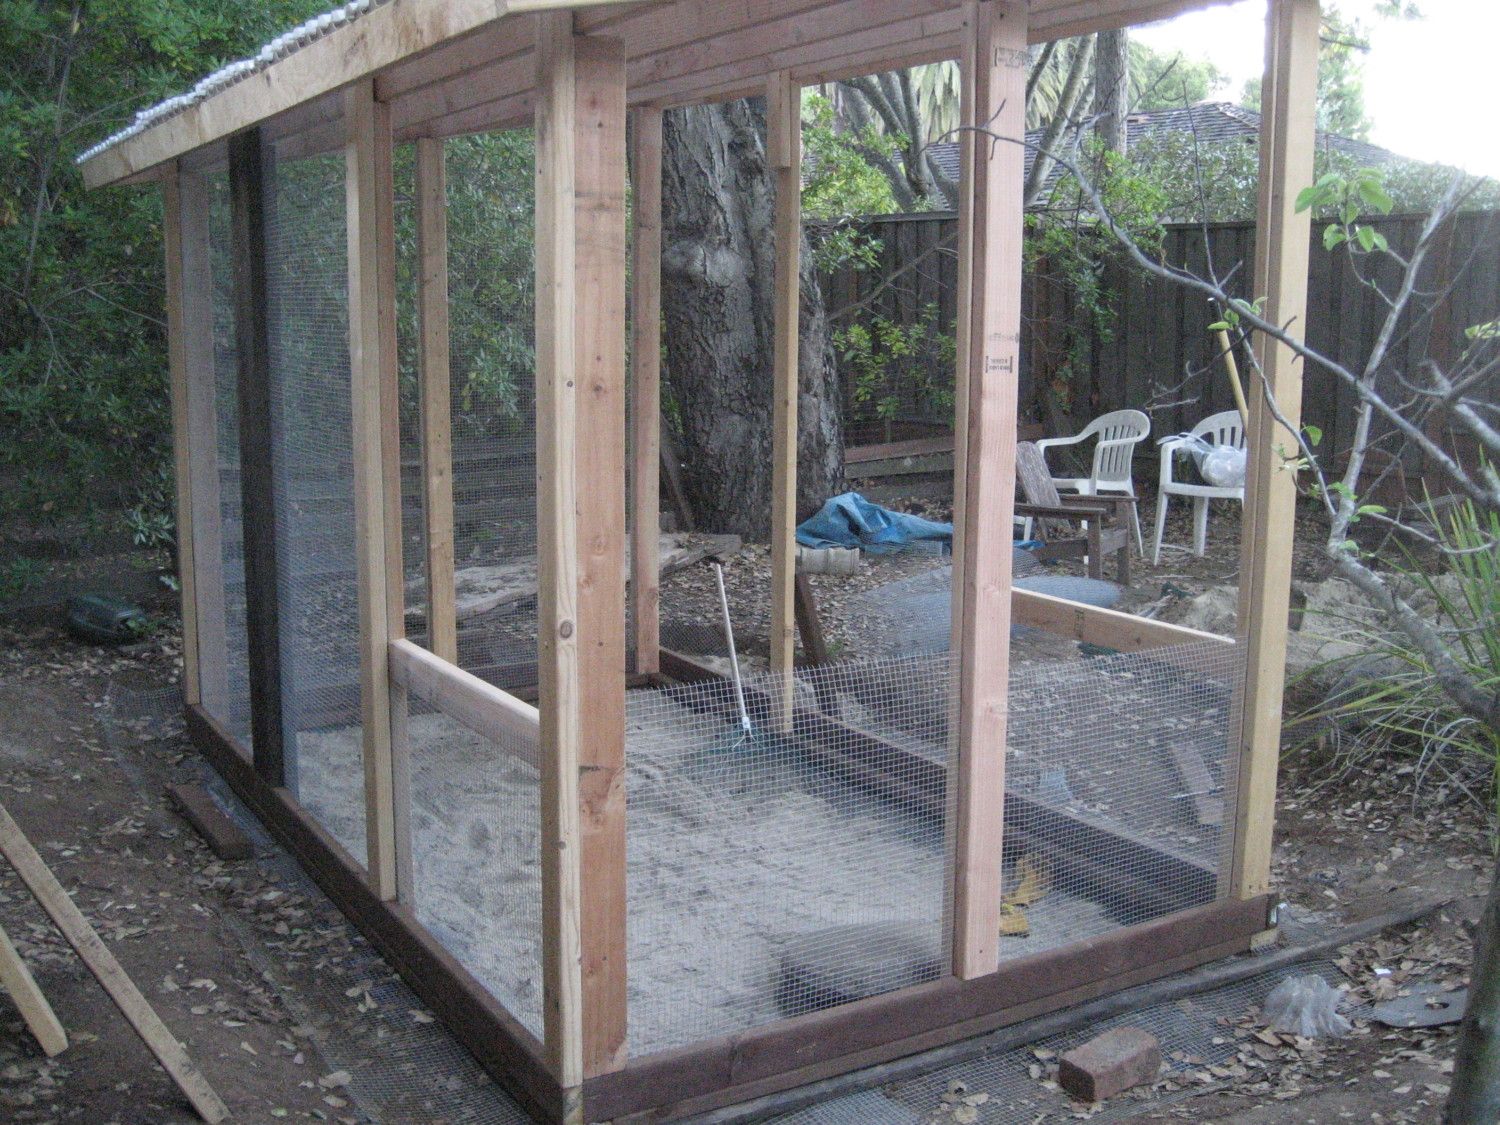
Started adding some short cross-beams between the rafters, and the first section of hardware cloth. As I attach the hardware cloth, I removed the temporary corner braces and add a second 2x4 to sandwich the cloth in place. I want to get the hardware cloth on the one side, and the back wall closest to the fence, since the second 2x4 makes the structure a lot more sturdy. Then I'll start framing the coop, which will be on the left side.
Finally got back to work a couple of days ago. I added more hardware cloth and additional 2x4's. Put in the first pieces of framing for the coop floor. I put the back one 1" taller than the front for a very gentle slope to help with water drainage during cleaning. Now it's time to come up with my plan for the full framing of the coop.
Finished framing the floor of the coop.
I will use wood from this pallet for the floorboards. They will get covered with a vinyl flooring remnant I got at Home Depot. Hopefully there is enough wood in good enough shape. Trying to save a few bucks, plus I've had this taking up space for the last year.
Pallet is gone. Coop floor in place.
Added vinyl flooring, and 2x2 and 2x4 to frame/attach the shiplap on the rear wall.
Rear wall complete. There is a gap at top with hardware cloth for ventilation.
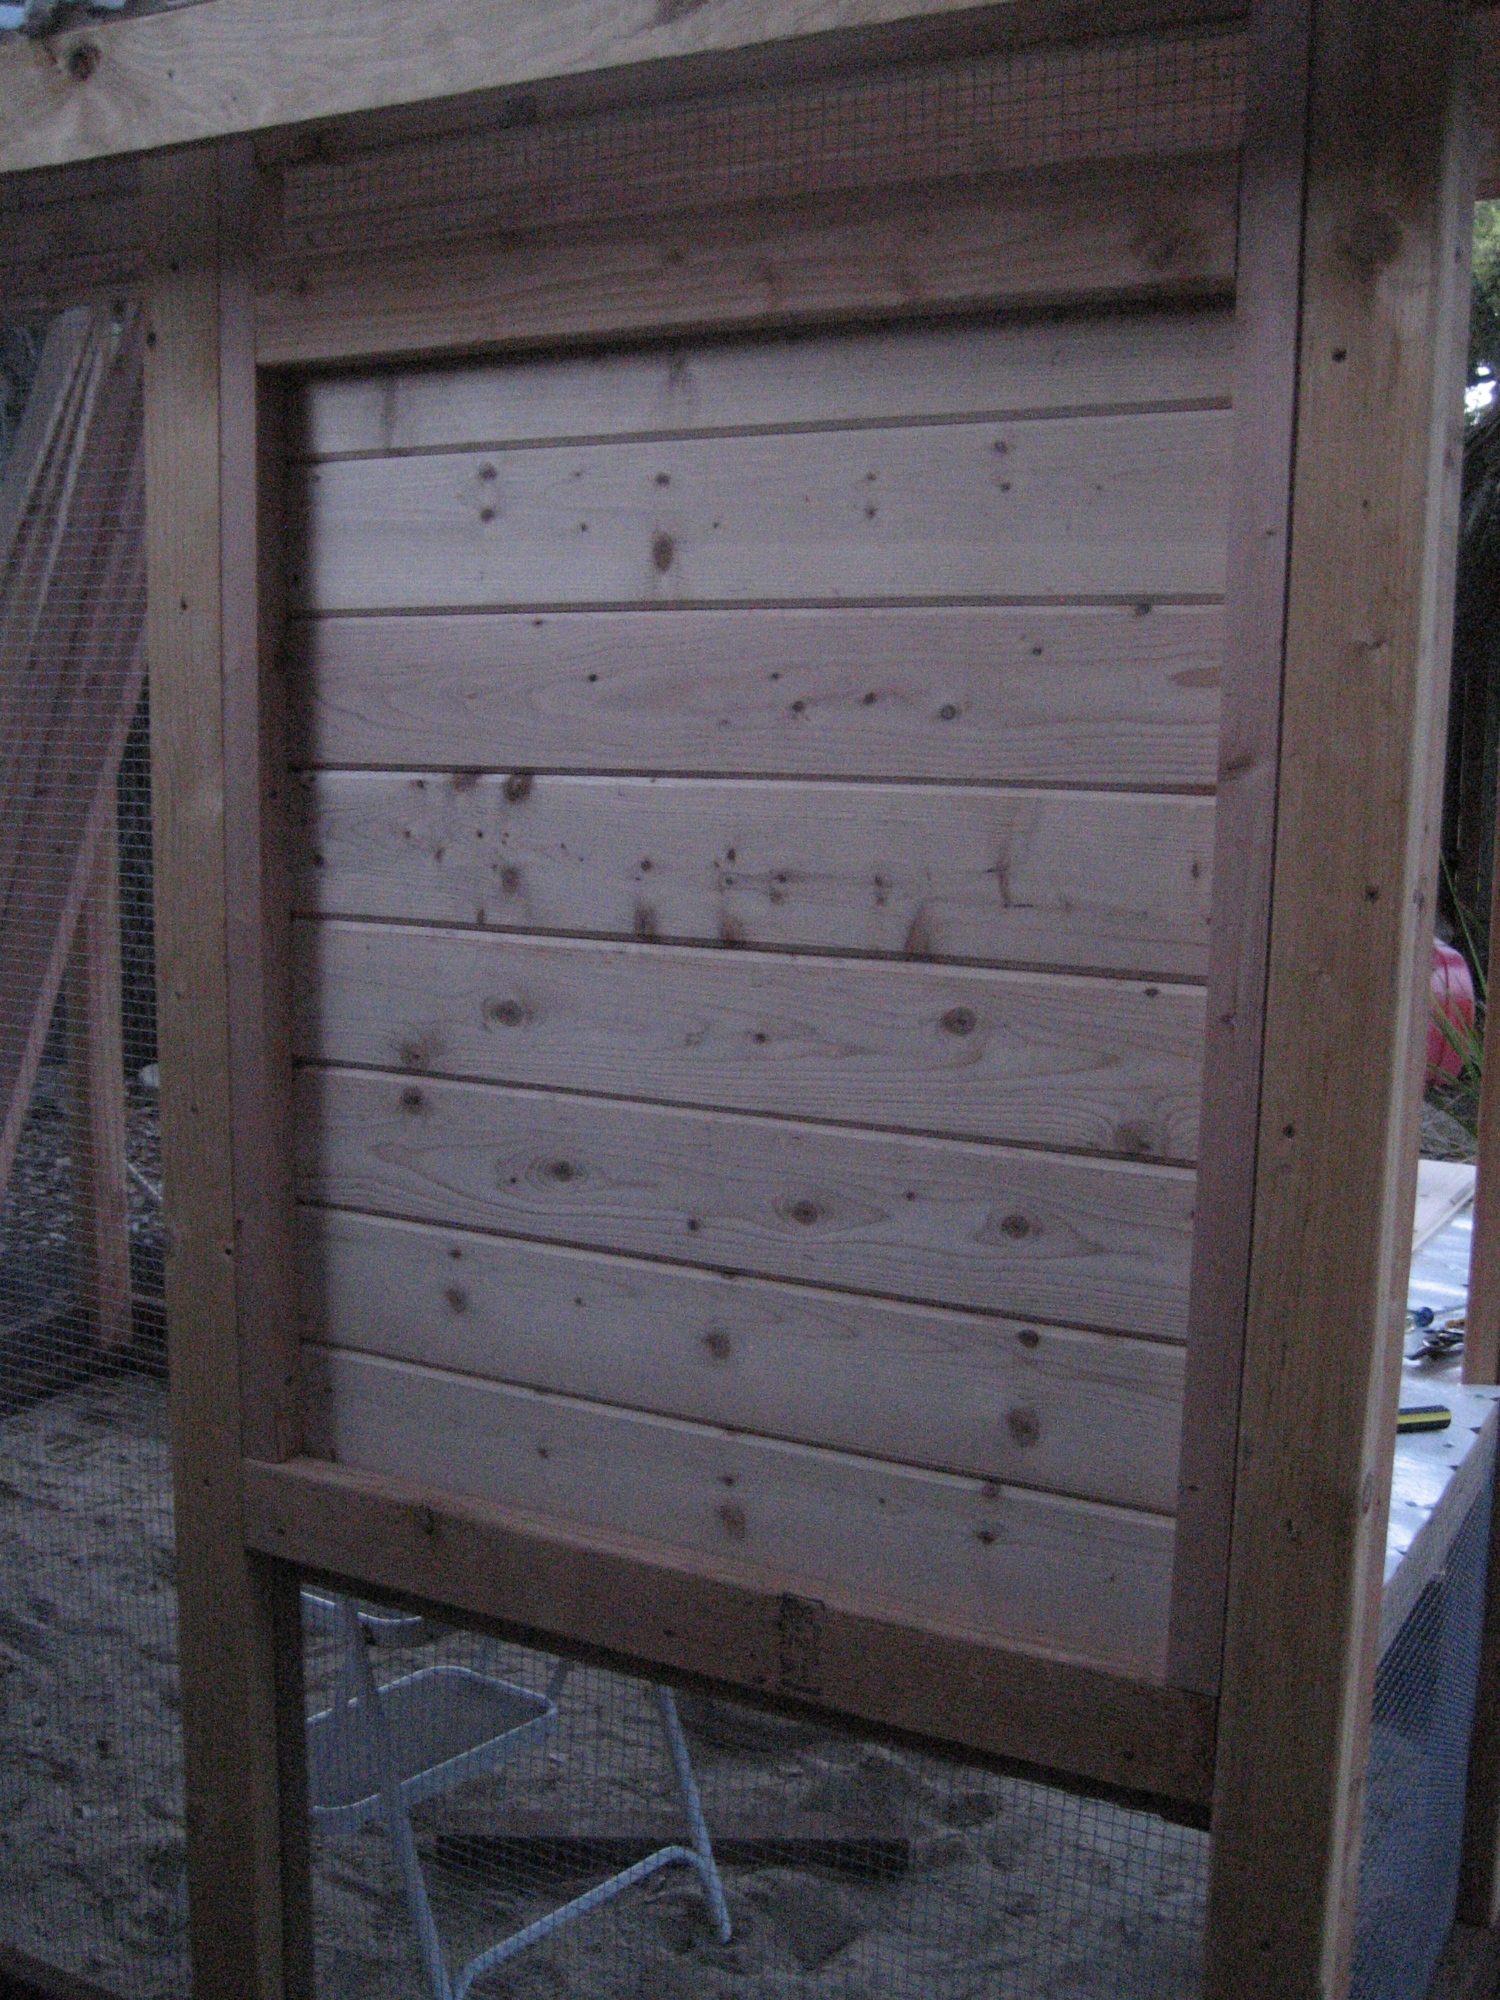
Outside wall with nestbox framed. Still need to add divider and lid.
Inside view of that same wall. After putting up the shiplap I added 2x2 framing around the windows. I will attached hardware cloth to these pieces. Still need to do the other window. Have to go to the store to get more.
Other side all completed. Still need to figure out how to build and install the sliding door.

Week of June 25 finished all the details. Added front door, hardware cloth to windows, nest boxes, and sliding door.
I ran the cord to the nestbox side since it was easier to route the rope, plus it is on the side facing the house.
Two roosting bars.
Instead of wood cross bars, I decided to try using rope for traction up the ramp.
Challenges:
I never really knew what the final plans would be. I was able to create some sketches of the basic framing, and once past that I made it up as I went along. The challenge that created was that I had framed the roof with rafters going side to side. I figured it would be easier to line up with the vertical studs that were in place. The downside was that it was really difficult to put in the top row of shiplap around these beams. I had to carve notches with larger clearances to allow me to swing the siding into place. For the inside wall (the one with the ramp, I ended up piecing shorter lengths because it was impossible to install a long one. I think it would have been easier to install the siding if I had run the rafters front to back.
Another change I'd make is use plywood for the coop flooring instead of recycling an old pallet. The thickness of the pallet wood wasn't very even, so it made for a very bumpy floor under the vinyl layer. It was very uncomfortable to kneel on while working on the coop, and allows for water to puddle even on a slanted floor when I hose it out.
We got 3 barred rock chicks on 9/3. They were 12 days old.
They grew really fast, and we kept them in our garage. Starting at 5 weeks, we moved them outside during the day. I put in a watering system:
Since they had been using nipples from the day we brought them home, no problems getting the birds to drink from them.
I installed the pipes while the chicks were in the run. While crouched down doing the final adjustments, one of the bird came from right underneath me and pecked me in the eye. OUCH. Luckily, I have completely healed. Now we enforce a safety glasses rule for anyone going into the coop.
The chicks are now 7 weeks old, and have been in the coop/run full time for 9 days. We put in a heat lamp for night time. So far, they have not figured out that they are supposed to go into the coop at dusk, so we've been having to put them in every night. Starting tonight, they will be confined to the coop for 2-3 days in order to teach them that this is their home. Otherwise they huddle together in the dark underneath the coop.
Once they are bigger they will be allowed to forage in the backyard. Right now there are too many little cracks under the fence that they could sneak away.
Update 2/8/13: Yippee. The first egg. I'm pretty sure it was Buddy, who has the largest comb & wattles. So exciting to finally get one: (The green/grey one is the fake one to show them where to lay the egg)
January 2016 and it's time for an update.
The first change I made pretty quickly was swapping out the galvanized feeder with a Blenheim 13lb feeder. The narrow grill pattern prevents the chickens from from scattering their feed all over the place. It's a really nice feeder and highly recommended.
Summer of 2015, Scar goes to meet her maker in the chicken ranch in the sky. No warning that she was ill.
Dec 26, 2015, Pepper is also gone, though not such a surprise. She had been lethargic for days. Not wanting to have one lonely chicken, the next day I pick up three red sex links that are 4-5 months old. I'd would have preferred more barred rocks, but am unable to find pullets this time of year. I don't want to deal with younger birds, and I think it better to get new ones quickly.
My old girl Buddy is quickly renamed Bully, and she shows what a jerk she can be. The first day I allow all 4 to roam the yard, hoping that space will do them all good. I supervise for the first few hours. A few hours later I investigate, and find that two had escaped from a gap under the fence and are in my front yard. Much chasing ensues, and by nightfall everyone is stowed away. Buddy sleeps in her roost, the 3 newbies are too terrified to enter the coop and stay in the run. The next morning I go to investigate and find Buddy in the run, and the three cowering in the corner of the coop.
It's been a week now, and it's still showdown at the OK corral. The young ones hide in the coop, with Buddy coming every once in a while to shoo all 3 into one next box. Most days I kick Buddy into the yard, and leave the three in the run. No free ranging until they fatten up, and learn to lay in the nest boxes.
Some quick modifications to deal with the standoff.
I add a new roost in the run that the younger ones can reach but is out of range of Buddy.
The newbies need access to food & water inside the coop since they are afraid to be in the run with Bully. I reuse the small water bottle with nipple and build a feeder from ABS piping.
Miss Bully supervises the construction.
Update April 2018
A coop is never really finished, right?
In Jan 2017 I lost one of the brown chickens to a hawk. My luck ran out. Even though there's so many hiding places, a small hawk attacked near sunset. I happened to walk outside just in time to see the hawk fly up into a tree. No more free ranging for the flock. Ever since then I see and/or hear the hawks quite often and decided it's never going to be safe to let them out.
I lost another brown one to illness about 4 - 6 months ago, and am down to 2. I'll be getting 3 young birds next month to build up my flock again.
In the meantime, I've built a quarantine coop for the new ones to live in until they are big enough to integrate. Not very pretty, but I used up a lot of scrap material in the junk pile. It assembles with only 8 screws, so it will be easy to store when not needed (4 panels 4' x 3' each, plus 4' x 4' lid).
I've added a 6' x 8' addition to the run. Spent a bunch of time designing a door between the two sections. The new run isn't quite up to Fort Knox standards, so I wanted to be able to shut the door in the evening. After various attempts with springs to shut the door, I did a design reset and used the track and hardware for a sliding closet door. I ran a cord all the way around so that the door can be opened and closed with a motion similar to opening blinds.