"A tractor from scraps I had
lying around"
lying around"

This was built to quarantine a grown pair of turkeys, but I expect to use it next year as a grow-out pen or maybe for some meat birds. It's not meant for northern winters, but would be ok year-round in a very mild climate. Dimensions are 8'x8', and 4' high in the middle - pretty easy to walk around and work inside as long as you don't mind bending over. It is too heavy for one person to lift completely off the ground but I can drag it fairly easily and with a second person it'd be very easy to move.
My goal here was not to spend any money, seeing as how my husband was already not entirely happy I spent $52 on a pair of turkeys
 I came pretty close.
The final tab:
6 pieces 12' 2x4 lumber, pressure-treated: free (I reused the good boards from a rotten deck
I'd removed from the back of our house - in
fact, I have to PAY to haul the rest to the
dump, so in a sense, using good ones for the
tractor has actually SAVED me money!)
1 piece, 50", of non p/t 2x4 for roost free (leftover bit from previous project)
4' wide chainlink gate free (was here when we bought the property)
42' of 48" 2x4 wire fencing: $10 (bought at auction several years ago; retail
cost would obviously have been higher)
3" deck screws and 3/4" fence staples: ~$10 (I didn't buy them for this, but they were
were brand new and would have been
used for other things, so I suppose they
counts toward the cost of the tractor)
raunchy old, but non-holey, tarp free (came out of the hay barn)
a lot of heavy duty poly baler twine free (from last winter's hay)
_______________
So the total "cash cost" of the tractor is roughly: $20
Construction process:
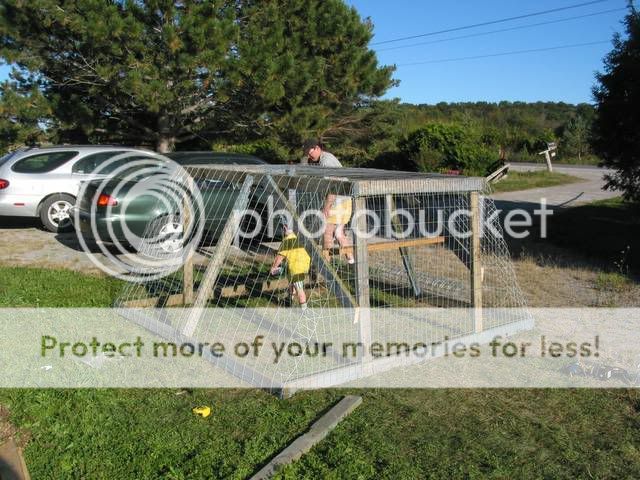
After removing the old nails from the 12' 2x4s, I cut an 8' piece off each of them. Four of the 8' pieces I laid in a square on the ground with butt-jointed corners, checked that the diagonal measurements were equal to make sure it really *was* square, then fastened with deck screws. This was the 8x8 base frame of the tractor.
Did the same thing to make a 4x8 frame for the top part, except I reconsidered and took it apart and sawed 4" off the eight-footers so it would fit the way I wanted and reassembled it. So the top frame is actually made with 4' pieces and 7'8" pieces. I laid it on the base frame, got it straight and centered, and then marked where the vertical supports needed to go (to hit *inside* the corner joints of the top frame)
Took four of the 4' cutoffs, screwed them into place at the marked locations on the base frame. Balanced the top frame on those four supports and screwed it onto them (would have been far far easier with a second person - I had to put in temporary screws for it to rest upon). Note that the vertical support goes *inside* the corner, so I screwed horizontally thru the top frame into the support. I think this is the stronger way of doing it.
Unrolled some of my 4' wide fence wire and covered half the tractor -- you can see in the photos which direction it's put on. Then I took two more 4' 2x4s and made the diagonal braces on the side walls. They serve three functions -- something to staple into where the two pieces of fence wire meet, strengthening for the side which would otherwise be very floppy, *and* diagonal bracing of the whole tractor structure so it does not twist and rack so much. The pieces are notched at the top and bottom to give me a little bit of good flat joint where they meet the top and bottom frame; I just shot a couple deck screws through them and they are firmly in there. The staples for the fence wire help hold them in place too.
Before putting on any more fence wire, I cut two pieces of wood about 4' long to use as the diagonal supports for the roost. Again, though they support the roost they *also* diagonally brace the whole tractor structure against twisting so it is stronger and more rigid. Screwed the roost in between them.
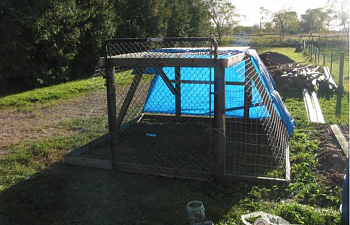
Then I put on the second half of the wire over the tractor. To cover the roost end, I cut a piece a little over 8' long, stapled it on along the bottom and center top, then folded the sticky-out-y "ears" over the sides. To secure that, I pulled it tight and wrapped the cut ends of the wire (you know, the ones that cut and scratch you all over) around the side mesh wire using pliers. The resulting corner has no lumber supporting it but is actually quite surprisingly strong.
I did the same for the two triangular side portions of the other end. This is what it looked like:

Then I wired my chainlink gate onto the central portion as a door. I was too lazy for hinges; it's just held on by some honkin' big heavy gauge wire from an old cedar fence, I would guess maybe 6 gauge, well twisted back on itself. Nothing short of a bear is taking that gate off, but it still opens just fine.
Tied the tarp on (I need to switch it for a larger tarp I think), put some smaller mesh scraps around the places where a raccoon could reach in and grab a bird, and there ya go... a six hour $20 tractor
")
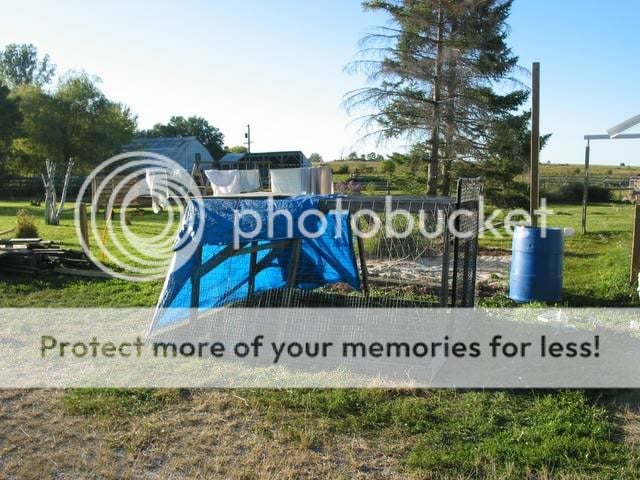
The turkeys seem to like it, and next year it should make a good grow-out pen for 6-10 young birds, or be good for meat chickens, and I'm thinking it might even be good to cover with plastic as a mini greenhouse on the garden in the early spring.
Pat