| OUR CHICKEN COOP PROJECT | |
| The Story | |
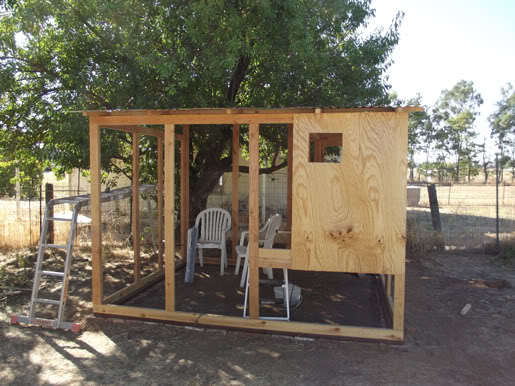
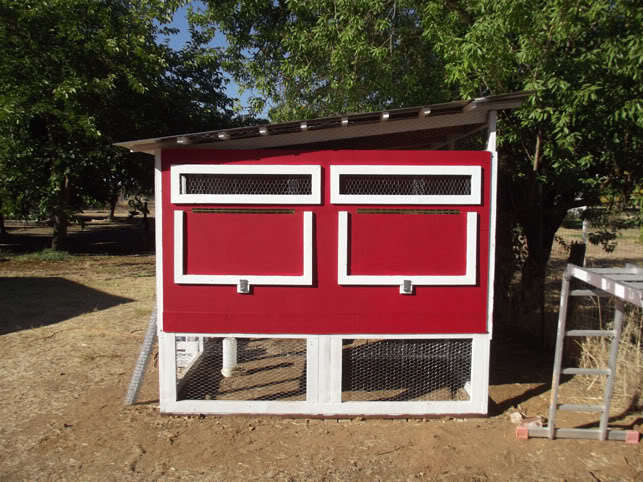
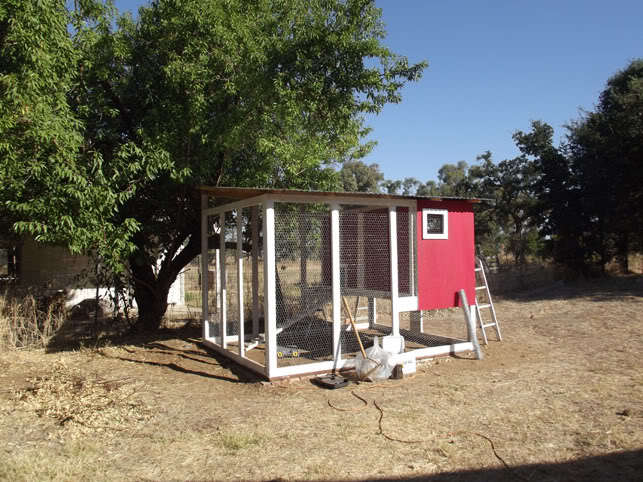
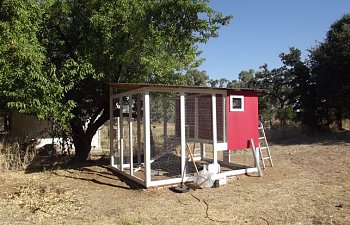
| My DH and I decided to get some chickens because I like animals, and he likes to be self-sufficient. Isn't that just the story of our lives? Anyhow, we wanted to build a chicken coop ourselves because we thought it would be cheaper. In the end, this thing was a whole lot of work, but was most likely cheaper than one of this size (8' X 10') we would have bought online. I haven't checked because, frankly, I don't think I want to know at this point! I'm just glad it's here, and the chickies seem to like it. | |
| Things to Note | |
| |
| Materials | |
| Oh, materials. I had all these plans that were supposed to make it so we only had to go to the Home Depot a few times. Hah! More like 15. Here is a hopefully full list of items from my Home Depot receipts. |
|
| Plans | |
I had to change the plans a bit as I went, so here is what they should have been like. These pictures show my plans, and I did the best I could to edit them for mistakes that I made along the way, but be prepared to double check my measurements and possibly edit things / cut them down as you go. I'm no construction expert, and it's hard to remember EVERYTHING that I had to flub with! Also, there are parts that you build as you go - these are the parts you preassemble before you do anything! Finally, it will definately help to look at the finished coop first so you know what these pictures refer to. | |
Steps to Completion | |
| (1) Make the pieces listed above. All of them are made from 2'X4's. We screwed long ends into long ends like shown in the picture. Also, be sure to use wood glue to make them even stronger. Make sure they fit together as you go and that the measurements make sense. Also, make the walls before you make the floor piece so that you can test to be sure the walls fit along the outer edge of the floor piece. Make the floor in pressure treated wood to keep it from rotting. |

|
| (2) Go to where you want the coop to be, and level out the ground using bricks as foundation peices. It helps to lay down your premade floor peice (from above directions) so you know just how big / where the bricks should go. Then start the long and horrible job of digging all of the bricks level. How fun! |

|
| (3) Lay the floor piece down onto your newly leveled ground, and then bring out your wall pieces. Use extra 2'X4's to hold them up while you screw them down into the floor piece. We had to drill holes before we screwed them in because we bought way too-short screws. Pain-in-the-butt. | 


|
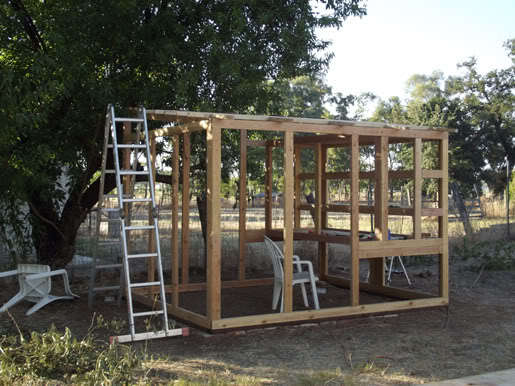
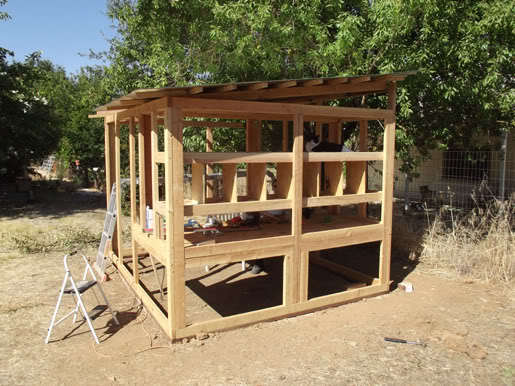
(4) Look at all your walls - are they set up right? Don't be alarmed if it's not very steady right now - it won't be until you put in the roof, etc. As you can see, the back wall (Wall 1) should be taller than the front wall (Wall 2) to allow for a sloped roof. The coup back wall (Wall 3) has pieces going across to hold up the future hen house off the ground. These pieces going across should be equal height with the pieces going across on walls 1 and 2. The top of the hen house should be a flat level piece, which is why there is an extra 2X4 in Wall 1 (the taller back wall) (included in the plans above) to make the hen house top is equal with the rest of the walls' height. | 

|
| (5) Next, we doubled up the 2'X4's going across the hen-house walls. I think we did this to give us extra room for a lip in the hen-house (to keep in bedding) as well as to add support pieces across the floor. You can see this here. Actually, if you are reading this beforehand you could probably do this before you put the walls up at all. | 
|
(6) Put up your rafters. These are 2X4s cut at an angle to go from a 7 foot wall down to a 6 foot wall. There are calculators on the net to figure out the angle for this, but we just layed the piece of wood up there and used a straightedge to draw 2 straight lines from the innerwall up onto the 2X4. If you don't know what I mean, then use a calculator for it ") Anywho, once you cut the angled piece, screw in rafter brackets to hold them up. We used 5 of these, spread evenly along the roof. | 


|
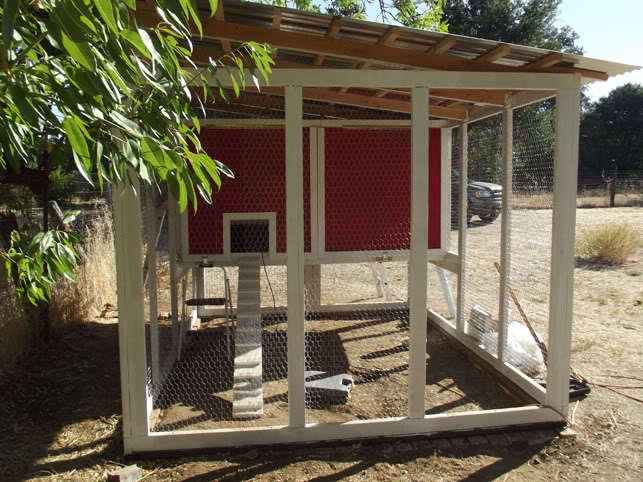
(7) Start building the hen house! First put a 2'X4' across the inside of the coup, from one wall to the other. If you followed my new and improved plans above, the 2x4 should run from one upward 2X4 to the other, rather than being set inward like mine here. I realized after my original plans that a regular piece of plywood would have been two small to make the floor of the henhouse originally, so I had to make the henhouse smaller. Next, put another 2X4 in the same way, but along the top of the hen-house where it's roof would be, parallel to the one you just put in. Then, put a 2X4 perpendicular to these new 2X4s going up the center of the henhouse front. Finally, use 2X2 pieces to frame in a floor on which you can lay a piece of plywood as the henhouse floor. Then add in 2X2s going across the gap as support to make the floor very strong. This is shown as the last picture in this section on the right. Screw the plywood floor down into these supporting 2X2s. After this we were able to stand on the henhouse floor without it so much as budging. | 


|
(8) This is pretty much a repeat of step 7, but much easier and without all the support. Take a piece of plywood that will fit your henhouse ceiling and then cut out gaps for your rafters to fit through (because when you push the ceiling up, the rafters will be in the way). You'll need two people to put up the ceiling. One person needs to hold up the ceiling, and the other needs to screw in 2X2s underneath the ceiling to hold it into place. You don't need all the extra supports - nothing will be standing on the ceiling. | 

|
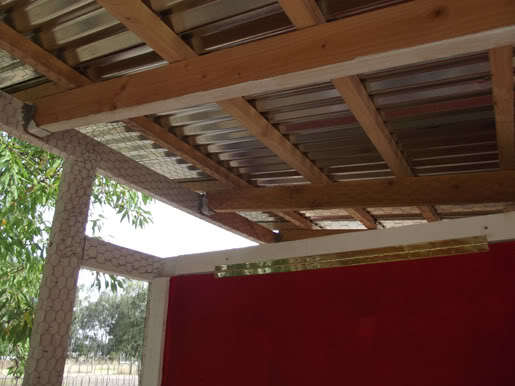
(9) Add 2X2s perpendicularly along the rafters whatever length apart you like. I prefer a strong roof, so we put up a lot of them. Go out however much on all four sides as you want to - remember to keep the length of your corrugated roofing in mind, as well as how much of an eve you want. | 

|
(10) Put on your corrugated metal roofing panels using metal-to-wood nails! This may very well require you to get on top of the henhouse, and it is very loud so be prepared to bug your neighbors with every swing of the hammer. Overlap the panels by about two wavy rows. This will keep it from leaking. | 


|
| (11) Frame in your nesting boxes with 2X4s. Add one 2X4 going up the walls however deep you'd like your boxes, and then add another two 2x4s going across them at the front just as you did when framing the hen house itself. Do the same with two more 2x4s spanning across the back of the nesting boxes. Add sides to the boxes as well, by framing in short 2x4s to complete the box. | 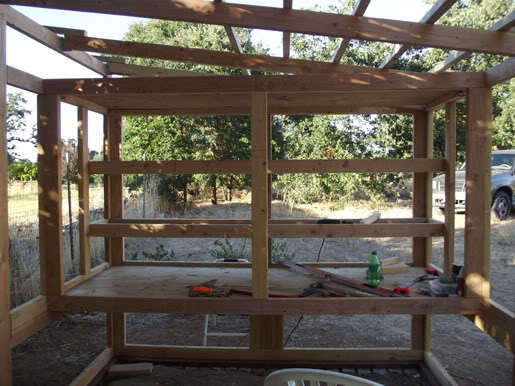
|
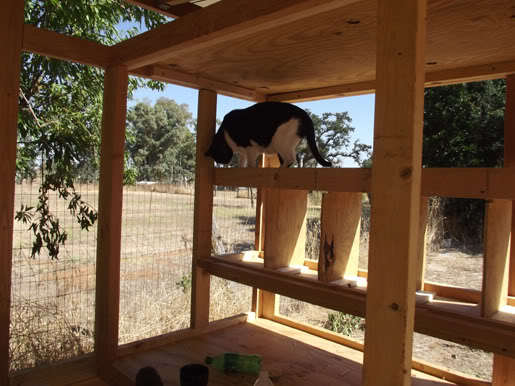
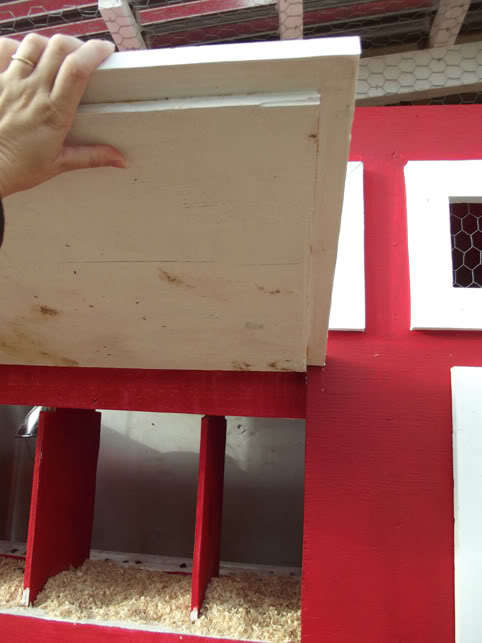
(12) Add floors and ceilings into your nesting boxes the same way you did for the hen house itself, using 2x2 supports and plywood. Next cut small peices of plywood as "dividers" for your individual nesting boxes and screw them into place using furring strap wood as blocks. Refer to these pictures if you're confused. (Yeah, the numbers on the boxes aren't in order. I was using them to cut.) I made 8 nesting boxes, even though I didnt need that many. Also, notice that we added a bar in front of the boxes so they have something to walk out onto before jumping up and down from the boxes. | 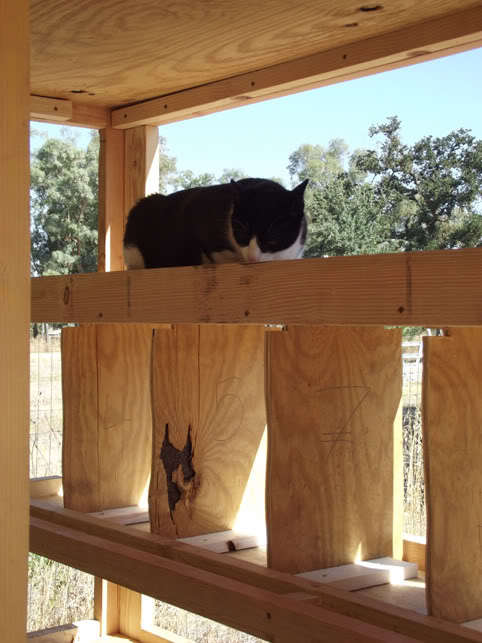
|
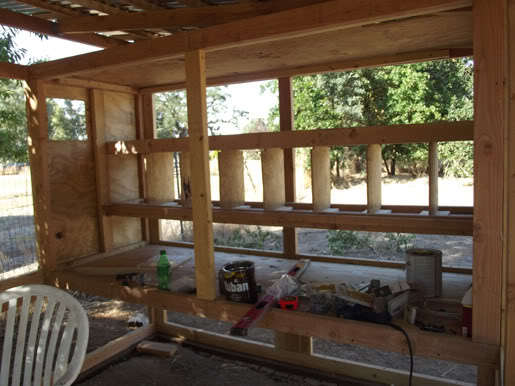
(13) Cut plywood for the siding, including any windows you might want for ventilation. Nail them into your frame using short nails. | 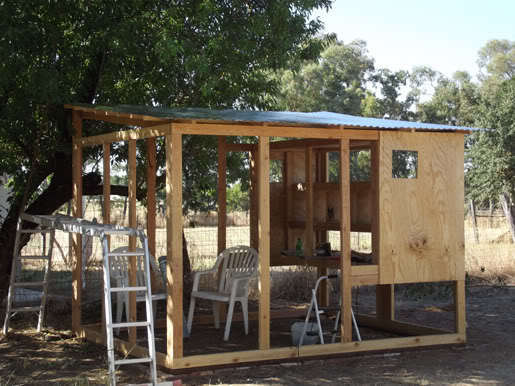
|
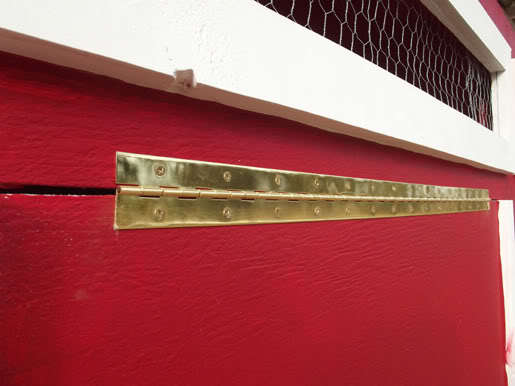
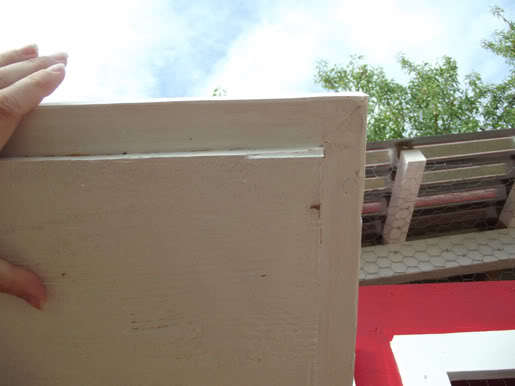
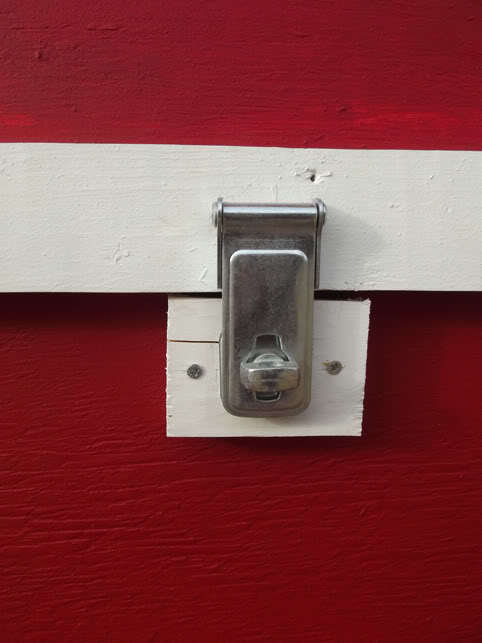
(14) Continue cutting and adding plywood for the back of the coop. However, for the back of the coop you must cut out both windows and egg doors. When cutting the egg doors, leave the cut-out pieces in nice shape (dont cut them in half or anything) because you will be using the peices you cut out as the doors themselves. Also, mark which one goes on which side, as they are very unlikely to come out perfectly even. Then, frame the egg doors (not the holes where the doors will go) with furring strips and while doing so, leave some of the furring strip hanging out over the edge of the egg doors. This will stop the egg doors from just falling into the hole when it is closed. Do not frame the top of the egg door, because that is where your piano hinges will go. Add latches beneath the doors to keep predators out. | 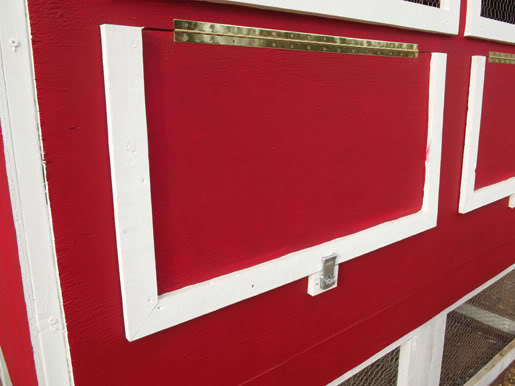
|
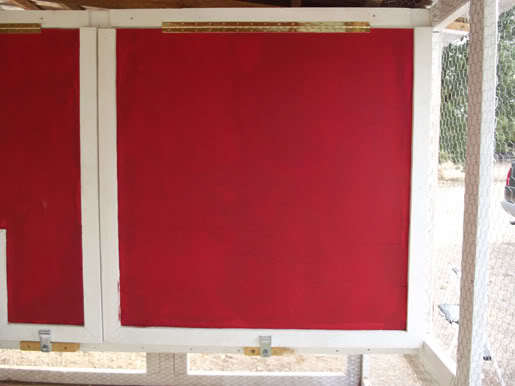
(15) For the front of the Hen House (on the inside of the coop), you will need to cut two peices of plywood which are big enough to lay across your framing for the hen house (so they dont just fall into the henhouse when you close them), but just a bit small so that they don't catch on the sides of the coop as they warp over time as they open and close. You can frame these if you want, like I did. Remember to cut out a door for your hens to go in and out of their home. Add latches beneath the doors to keep them closed. | 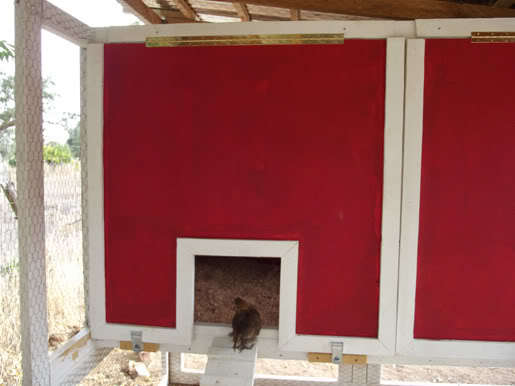
|
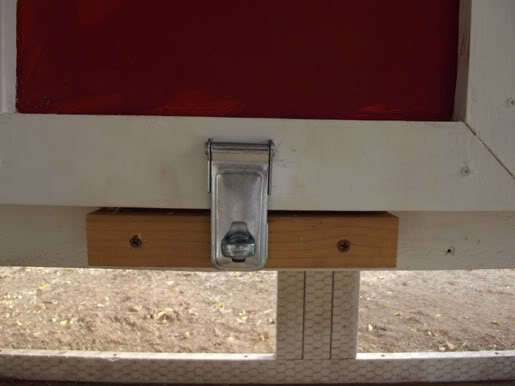
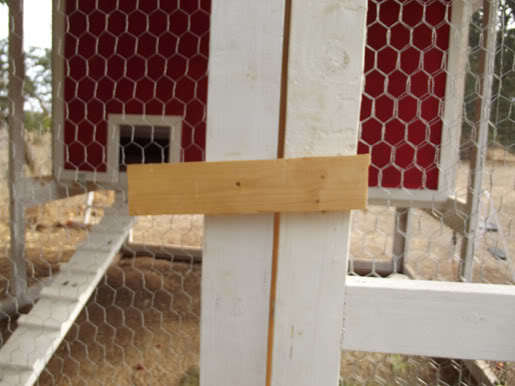
(16) Make your front door out of 2X4s in the same way that you framed the rest of the coop. Be sure to add a gap so you have room for hinges and for the door to warp with time. Add a middle 2x4 to add strength, as well as diagonal 2x2s for more strength. Look at the pictures if you are unsure. Also, add a furring strip on this inside of the front door so that the door cannot be pushed inward by accident or predators. The latch for the door can be made from a piece of furring strip attached with a single screw. This is turned up to open the door and down to "lock it". A simple, cheap solution. | 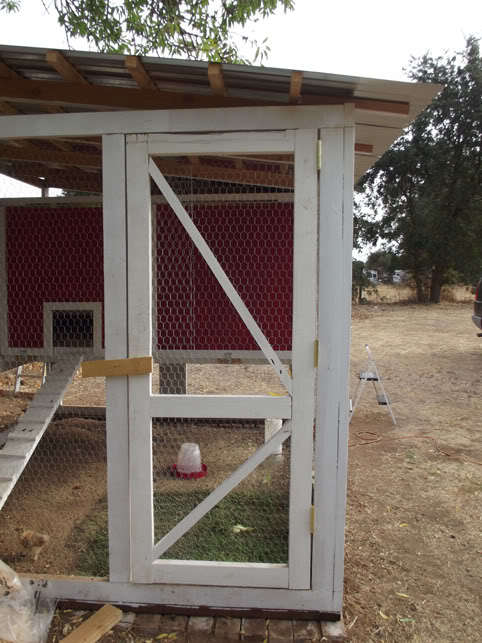
|
(15) Finally, add your ramp in front of the door by screwing it in. Add chicken wire around the whole thing and you are done! Voila! Now you have a hen house! | 
|
Enjoy! | 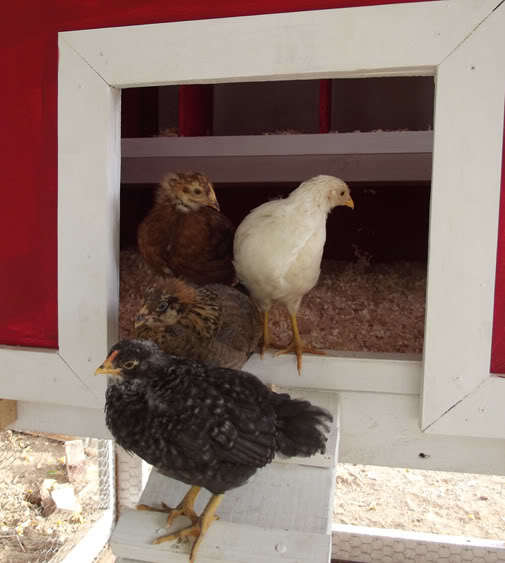
|
Things we plan to change | |
Here are a list of things we're going to do "someday" to make this coop better.
| |
| Back To Homepage | |
| ** These images are copyright protected. Please do not reproduce them, especially without first requesting permission. Thank you.** |
ourcoop
- Author TheIvoryKitty
- Publish date
- Updated
- Article read time 9 min read
-
- Tags
- medium-coops


Article information
- Author
- TheIvoryKitty
- Article read time
- 9 min read
- Views
- 45,974
- Comments
- 17
- Reviews
- 3
- Last update
- Rating
More from TheIvoryKitty
-
 Coop Pictures 2COOP PICTURES Welcome to the pictures of our chicken coop! It is 8' X...
 -
AboutusABOUT US Hello world! My name is Chantal and my DH’s name is Joey. We...
-
Theivorykittys Member PageTheIvoryKitty's Page Welcome to my page! I had a flock or two when I...
-
Dominique DomDOMINIQUE, OUR DOMINIQUEThis is my page about Dominique, our Dominique...
-
Leghorn FosterFOSTER, OUR LEGHORNThis is my page about Foster, our Leghorn chick. For...