Brooding Our Little Flock
My family and I are backyard chicken keepers that can only have a few hens at time because we live in a big city with lots of restrictions on keeping poultry. We do not plan to be hatching chicks regularly, so we needed something cheap and easy. I looked around for anything that could be either recycled, re-purposed, or collapsible. There really aren't any construction photos of my brooder set ups, since it was mainly a matter of getting the things out of the garage. Set up instructions come with most dog crates.
Stage 1 Stage 2
The terrarium and fish tank brooders. The dog crate brooder

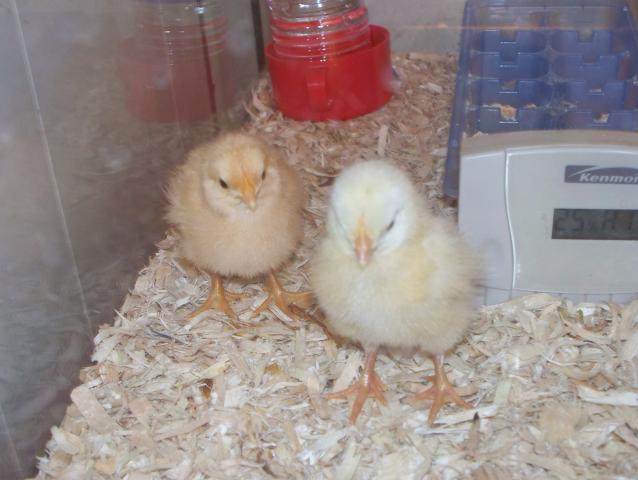
Brooder temperature
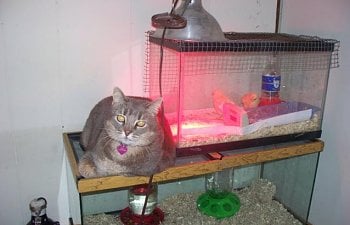
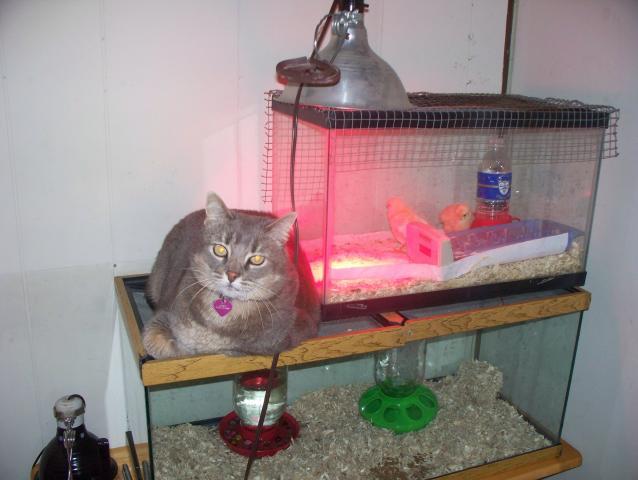
Our chicks started in a glass terrarium so there would not be as much fluctuation in the temp as the dog crate. We used a red light bulb with a reflector for heat in the terrarium to keep the temp around 95 degrees at first. We kept an old thermometer/ hygrometer on the floor to make sure the temp was correct at the chicks' level. Later, rather than always raising the bulb and reflector, we switched to the ceramic heat bulbs our tortoise had used. The two were rated for different temperatures. We reduced the temperature about 5 degrees each week or two, until they were ready to go outside.
Water
We did try a number of homemade waterers, but eventually I purchased two chick water bases. I used my own glass mason jars on top. We placed marbles in the basin for the first few weeks to prevent drowning. They had to be cleaned a few times a day. As the chicks got bigger, we propped the waterers up on a block.
Feeders
We tried substituting an old ice cube tray as feeder in one brooder. It worked okay, but needed frequent cleaning because the chicks would stand on it. Again, the store bought version was better in preventing this problem. I only purchased the bases of the round feeders and used my own mason jars. A mayonnaise jar could work too.
Bedding
We covered the bottom of the brooder with shavings and changed them as needed. Until the chicks figured out what was food, we covered it with paper towels. The paper towels were changed a couple of times of day due to the droppings. Also, since we were raising the chicks on non-medicated feed, cleanliness of the bedding was even more important. The bedding and chicks made a lot of dust, so a vacuum was also necessary pretty regularly in the room the chicks were in.
Pictures of the coop our chickens are now in: https://www.backyardchickens.com/articles/me-and-my-little-garden-by-gardenerd.48401/
Supplies we had on hand:
Supplies purchased:
Alterations to the crate
Some things I would want to change when we do it again:
Some things I really liked about our brooder
My family and I are backyard chicken keepers that can only have a few hens at time because we live in a big city with lots of restrictions on keeping poultry. We do not plan to be hatching chicks regularly, so we needed something cheap and easy. I looked around for anything that could be either recycled, re-purposed, or collapsible. There really aren't any construction photos of my brooder set ups, since it was mainly a matter of getting the things out of the garage. Set up instructions come with most dog crates.
Stage 1 Stage 2
The terrarium and fish tank brooders. The dog crate brooder
Brooder temperature
Our chicks started in a glass terrarium so there would not be as much fluctuation in the temp as the dog crate. We used a red light bulb with a reflector for heat in the terrarium to keep the temp around 95 degrees at first. We kept an old thermometer/ hygrometer on the floor to make sure the temp was correct at the chicks' level. Later, rather than always raising the bulb and reflector, we switched to the ceramic heat bulbs our tortoise had used. The two were rated for different temperatures. We reduced the temperature about 5 degrees each week or two, until they were ready to go outside.
Water
We did try a number of homemade waterers, but eventually I purchased two chick water bases. I used my own glass mason jars on top. We placed marbles in the basin for the first few weeks to prevent drowning. They had to be cleaned a few times a day. As the chicks got bigger, we propped the waterers up on a block.
Feeders
We tried substituting an old ice cube tray as feeder in one brooder. It worked okay, but needed frequent cleaning because the chicks would stand on it. Again, the store bought version was better in preventing this problem. I only purchased the bases of the round feeders and used my own mason jars. A mayonnaise jar could work too.
Bedding
We covered the bottom of the brooder with shavings and changed them as needed. Until the chicks figured out what was food, we covered it with paper towels. The paper towels were changed a couple of times of day due to the droppings. Also, since we were raising the chicks on non-medicated feed, cleanliness of the bedding was even more important. The bedding and chicks made a lot of dust, so a vacuum was also necessary pretty regularly in the room the chicks were in.
Pictures of the coop our chickens are now in: https://www.backyardchickens.com/articles/me-and-my-little-garden-by-gardenerd.48401/
Supplies we had on hand:
- Fish Tank
- Terrarium
- 2 Reflectors (one from the tortoise, one from the work bench light)
- 2 different wattage ceramic bulbs
- Dog crate- fold up metal
- wooden bar for roost
- 2 extension cords
Supplies purchased:
- red brooder bulb
- white brooder bulb
- bedding- pine wood shavings
- 2 chick waterers
- 1 chick feeder - new
- 1 chick feeder - vintage
- paper towels
- hardware cloth (used scraps from the coop project)
- zip ties to hold on hardware cloth on dog crate lower sides
- feed - organic starter grower crumbles (We ran it through a burr mixer while the chicks needed mash sized food.)
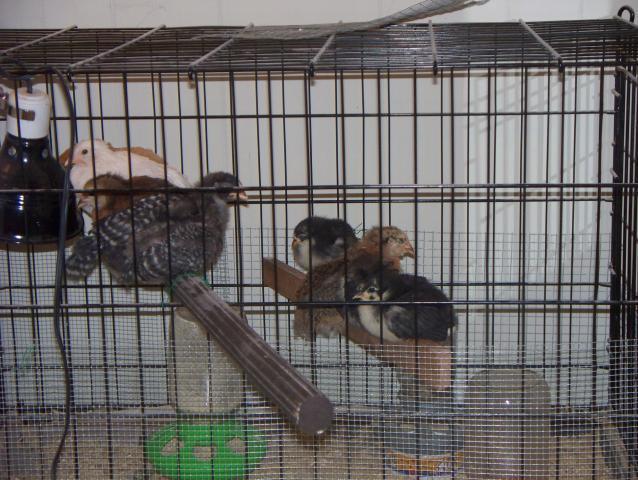
Alterations to the crate
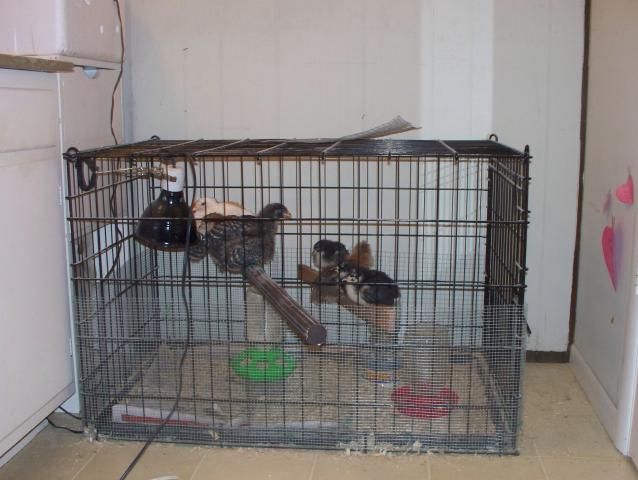
- I added hardware cloth around the bottom of the dog crate to keep the cat from reaching in and to keep the chicks from squeezing out when they were still small enough. It was held on using zip ties. When we were done with the dog crate, I just snipped the ties to pack it away.
- For the roost, I slid the old wooden curtain rod and a scrap of wood through the gaps and then secured it with wire so it would not move when the chicks hopped on top.
Some things I would want to change when we do it again:
- I don't recommend trying to use a terrarium for brooding for the whole 8 weeks. Even with just 6 chicks, they quickly out grow it. Our chicks were only in the terrarium for about two weeks, until the dog crate was utilized for the second phase. The dog crate would be sufficient.
- Make it easier to clean the dog crate. The door is on one end by a wall so I would have to pull it out and sort of climb in.
- Put a different material around the bottom to keep the shavings in, (but I liked seeing in.) The dog crate allowed shavings to spill out the sides when the chicks were big enough to scratch them out. The spillage can be seen in the photo below.
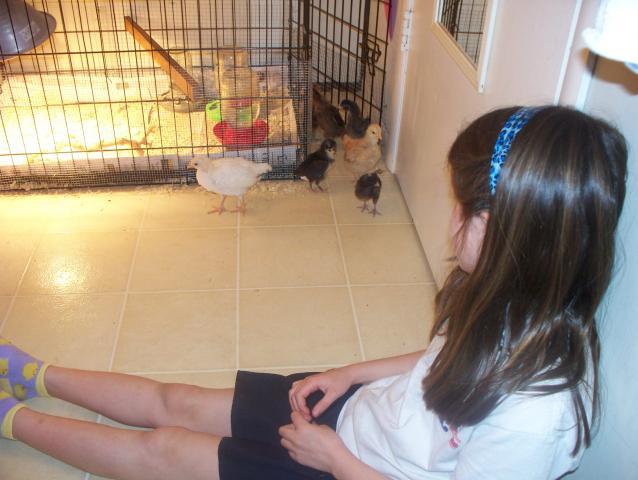
Some things I really liked about our brooder
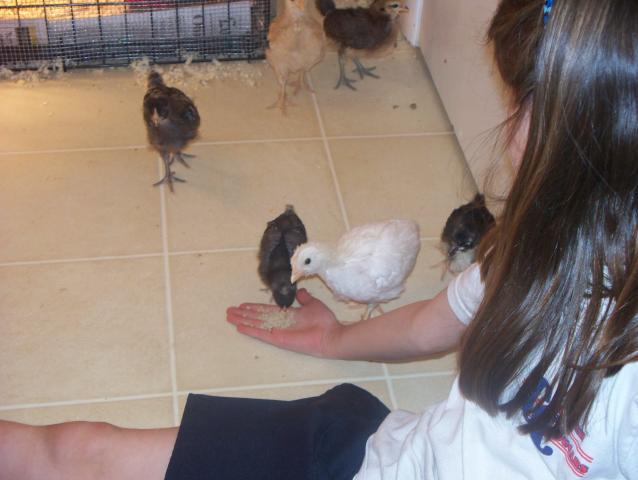
- I liked that it was in the house on the floor of the bathroom. The kids could close the door to the room and open the brooder door. The chicks would come out on their own to play. Some chicks were shy and this worked better for them. It also kept the dust confined to one room, rather than everywhere.
- I also liked that when we finished, the dog crate folded flat and went back the garage for next time. Nothing was wasted or disposed of in a landfill. It is not really taking up much space in our tiny house or our little city lot.