I came up with my chicken tractor/coop design based on some things i had left over from previous projects like the drawer slides for the nesting boxes and the slides for the floor. I designed this coop around the bassis of whatever would make it easiest for us to keep up with the chickens maintenence since we are already rather buisy right now and with a baby on the way.
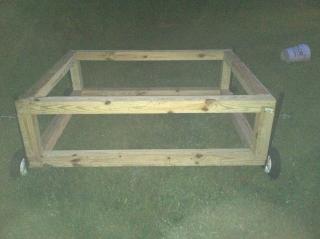
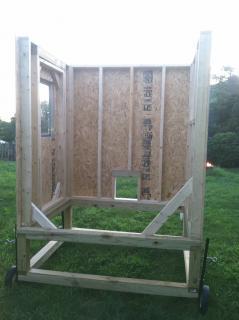
My first step was to build the base or foundation for the coop/tractor. I used pressure treated 4''x4''s for this so it would be nice and sturdy. I half lapped them to make good strong joints. Half lapping is when you cut away half the thickness of the two pieces of material so when you put them together they are the thickness of one piece of material. This is a very strong and simple way to atach large material together. Then I secured the half laps with 3 1/2'' decking screws. I made the base so it was 4ft deep and 5ft wide inside to inside so the over all dimensions was was 4'7''x5'7''. Then i came up with a design for the wheels to be on levers so that i could lower the coop to the ground when i had it where i want it so nothing could get in or out. Below is a picture of the base. (it was taken at night when i finished it) after the base was built it was time to build the walls.
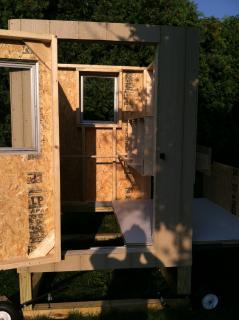
I built the front wall first with the door for the chicken run and everything was built on 16'' centers just like normal framing on a home is done.
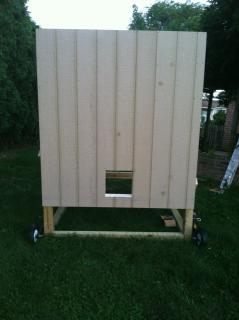
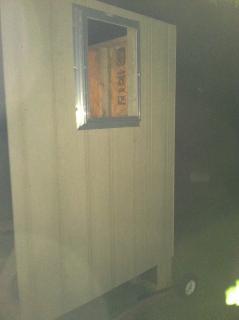
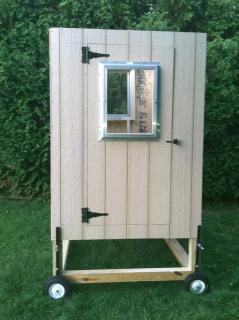
Then i built the side wall with the window in it and then the side wall with the door and window in it.
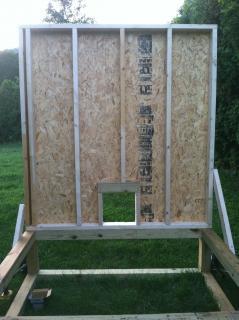
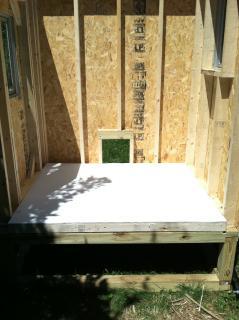
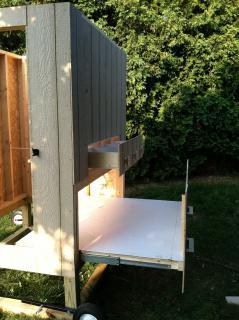
It was important that i built those three walls first so i could install the slidding floor and then build around that for the back wall with the nesting boxes. I built a frame for the floor out of 2x4s cut down to 2x3 so it wouldn't raise the floor much above the door openings. once the frame was built I installed the slides on the two side walls then atached the floor frame to the slides. Then I atached pressure treated floor sheathing to the floor framing. The reason i used pressure treated for that application is because it will be exposed to the elements. Then I applied FRP to the floor which is a fiberglass sheathing used in kitchens for its easy ability to be cleaned off.

Then my floor was complete so i built the nesting boxes next out of cabinet grade plywood since my chickens will be exposed directly to that i didn't want them getting splinters lol. My nesting boxes are 12''x12'' on the inside then i also used FRP in those too so they will be easy to clean too. Once i had the nesting boxes built i then had the dimensions i needed to build my back and final wall so i did.
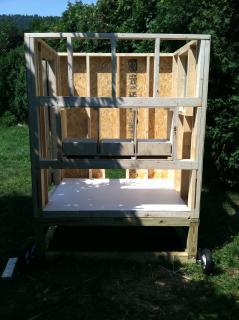
Then i sheated the wall and the nesting boxes too.
Once all four walls were in place I installed the perches inside the coop.
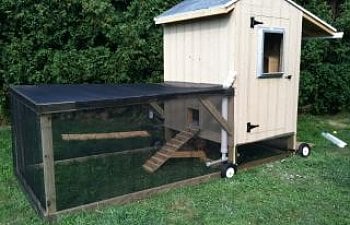
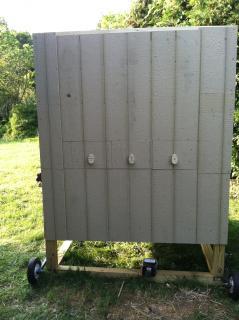
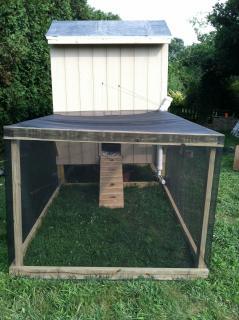
After the walls were done i built the roof with a three foot over hang over the back side of the coop with a gutter on it so when i have to get the eggs out of the boxes while its raining the inside of the boxes won't get wet and neither will I. I used rubber sheathing for my roofing material because it is simple to put on and no maintenence.
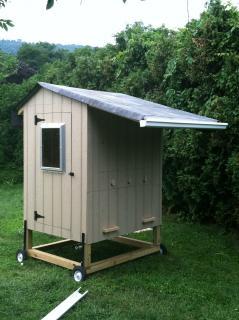
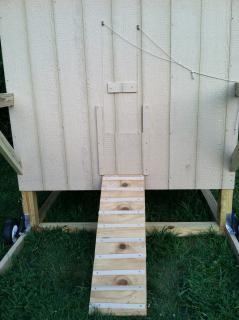
After the main portion of the coop was built I then built the run on the front of the coop out of basic 2x4 pressure treated material. I did use 2 metal L brackets on both sides where the run atached to the 4x4's on the bottom to give it extra strength when it is lifted and thats what the angled 2x4 is for also. Once the framing was built I put screening on the sides and the top for three reason 1st to keep the chickens in. 2nd to keep other animals out. 3rd because the screening actually provides shade also. Before i put the screening on I did build a feeder out of pvc so I don't have to tend to the food on a daily basis and its gravity fed. I am currently waiting on my watering cups to get here but when they do there will be 5 inside the coop and 5 outside in the run area on a low pressure system.
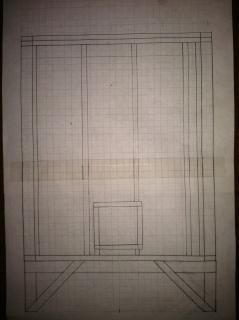
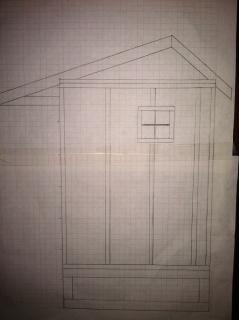
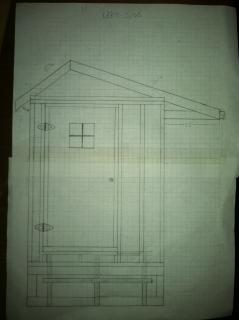
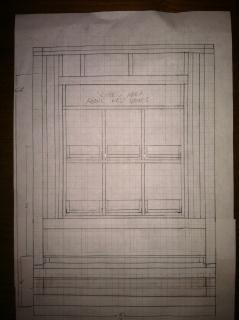
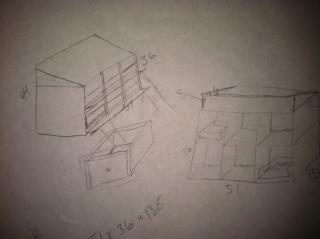
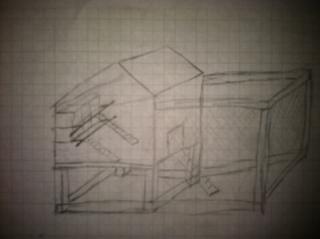
I have also included my plans/chicken scratch that i drew up by hand before i built the coop/tractor too. Each square on the graph paper roughly represents two inches. Hope you enjoy and if you have any questions please feel free to contact me on BYC
Thanks; chrisnum9