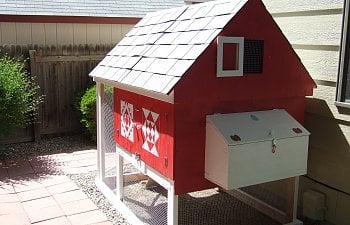
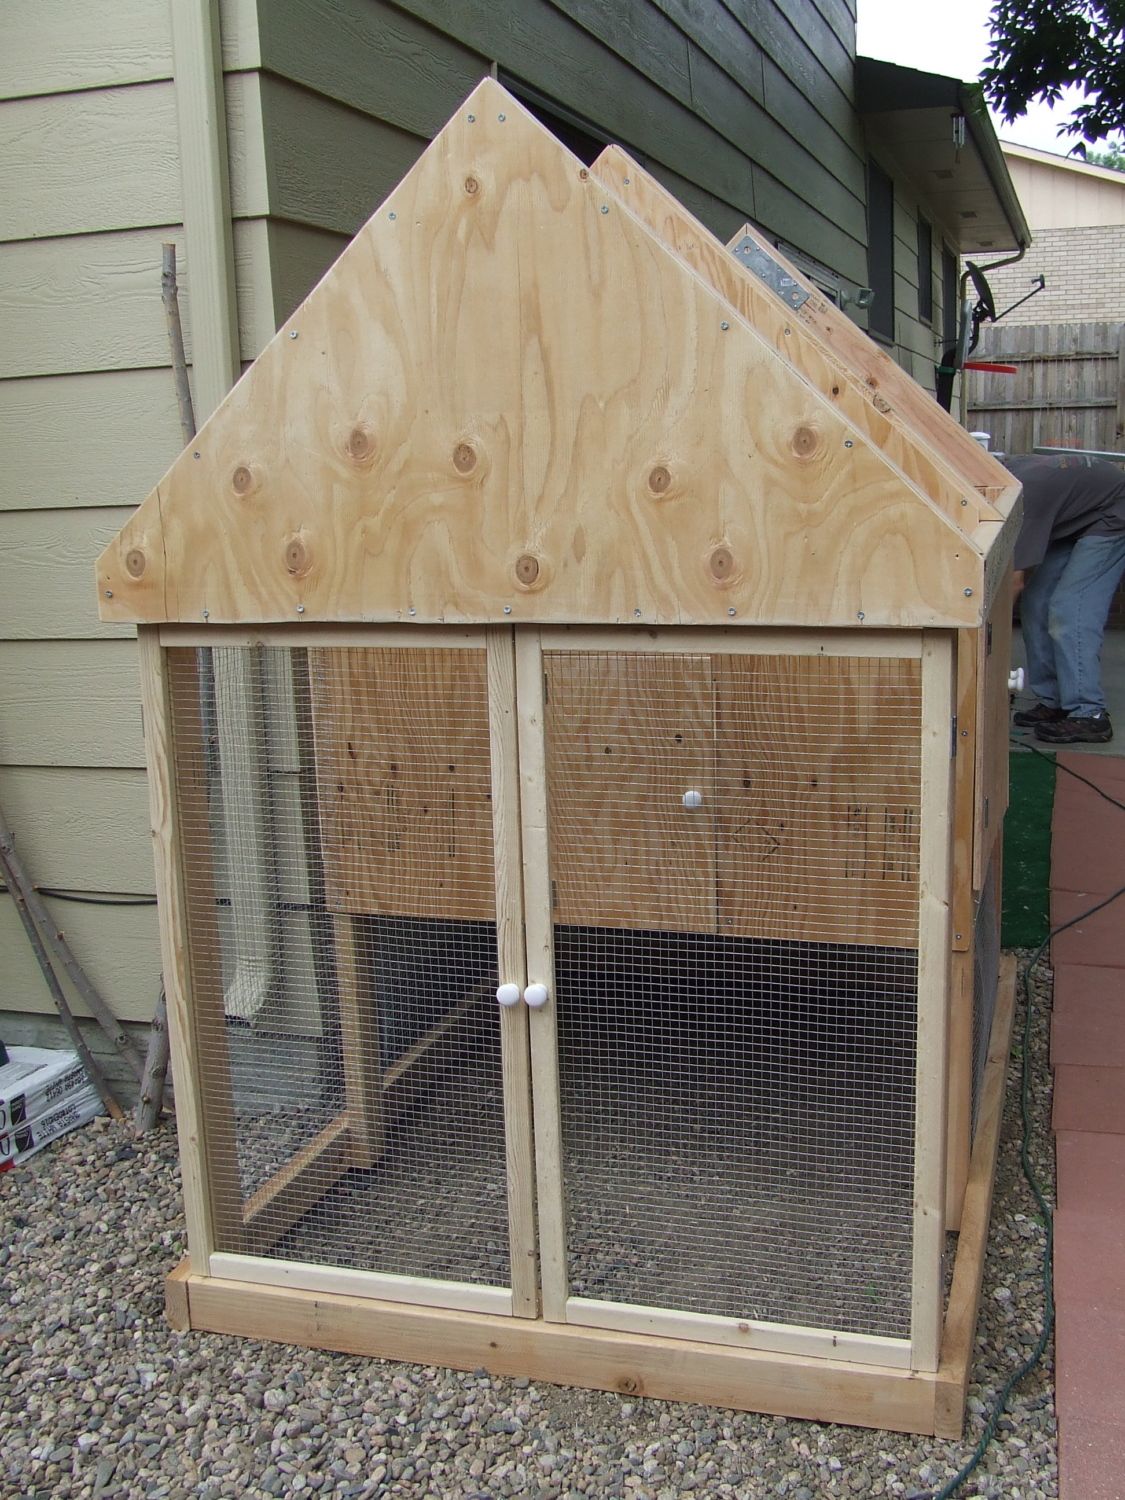
My husband and I had to have a lovely coop for our girls. We took an existing design and made it to suit our needs. Our coop is 6x4 with the coop part being almost 4x4. I will start with the plans. Hopefully you can see the measurements in the pictures.

My husband was very particular with the plans. Now that we are all done. I am glad for his preciseness. There were a couple of things we had to change as we were going along and I will tell you about those in the upcoming pictures.
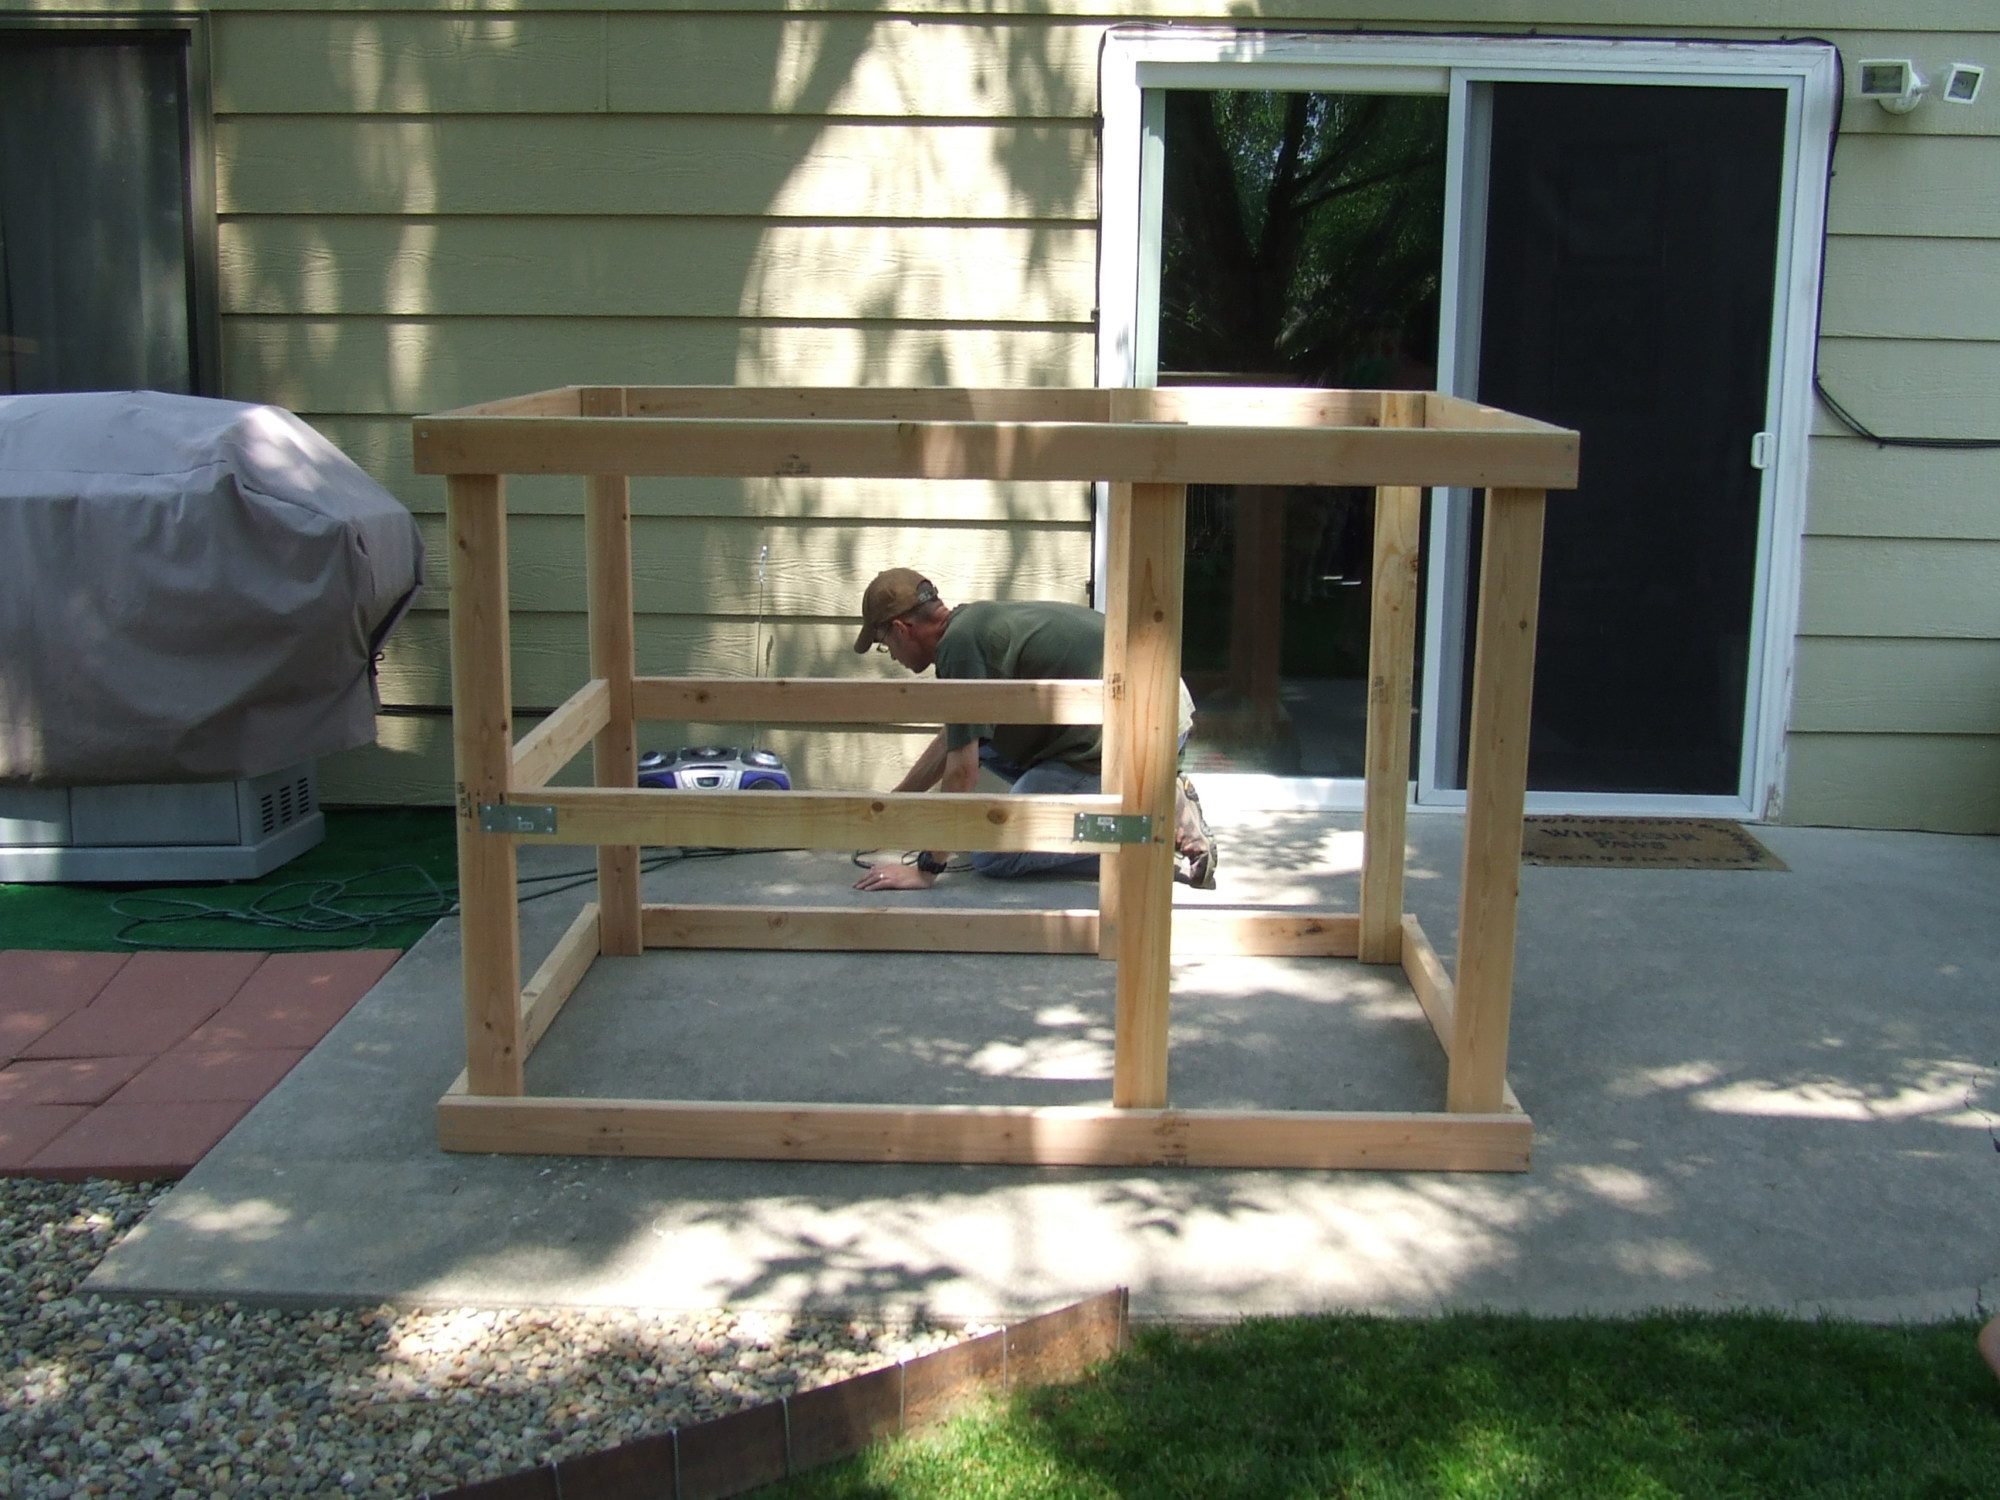
First we had to build the frame. Just a warning this is an at least two person job. Don't try to do this by yourself it won't work. Make sure your drill is charged, it makes things a lot easier. We used screws for everything. Most of them are size ten and we used a few size six and size eight. I didn't write down all of the hardware, but ask the guys at Lowe's and they will help you figure it out. (I highly recommend Lowe's for your supplies).
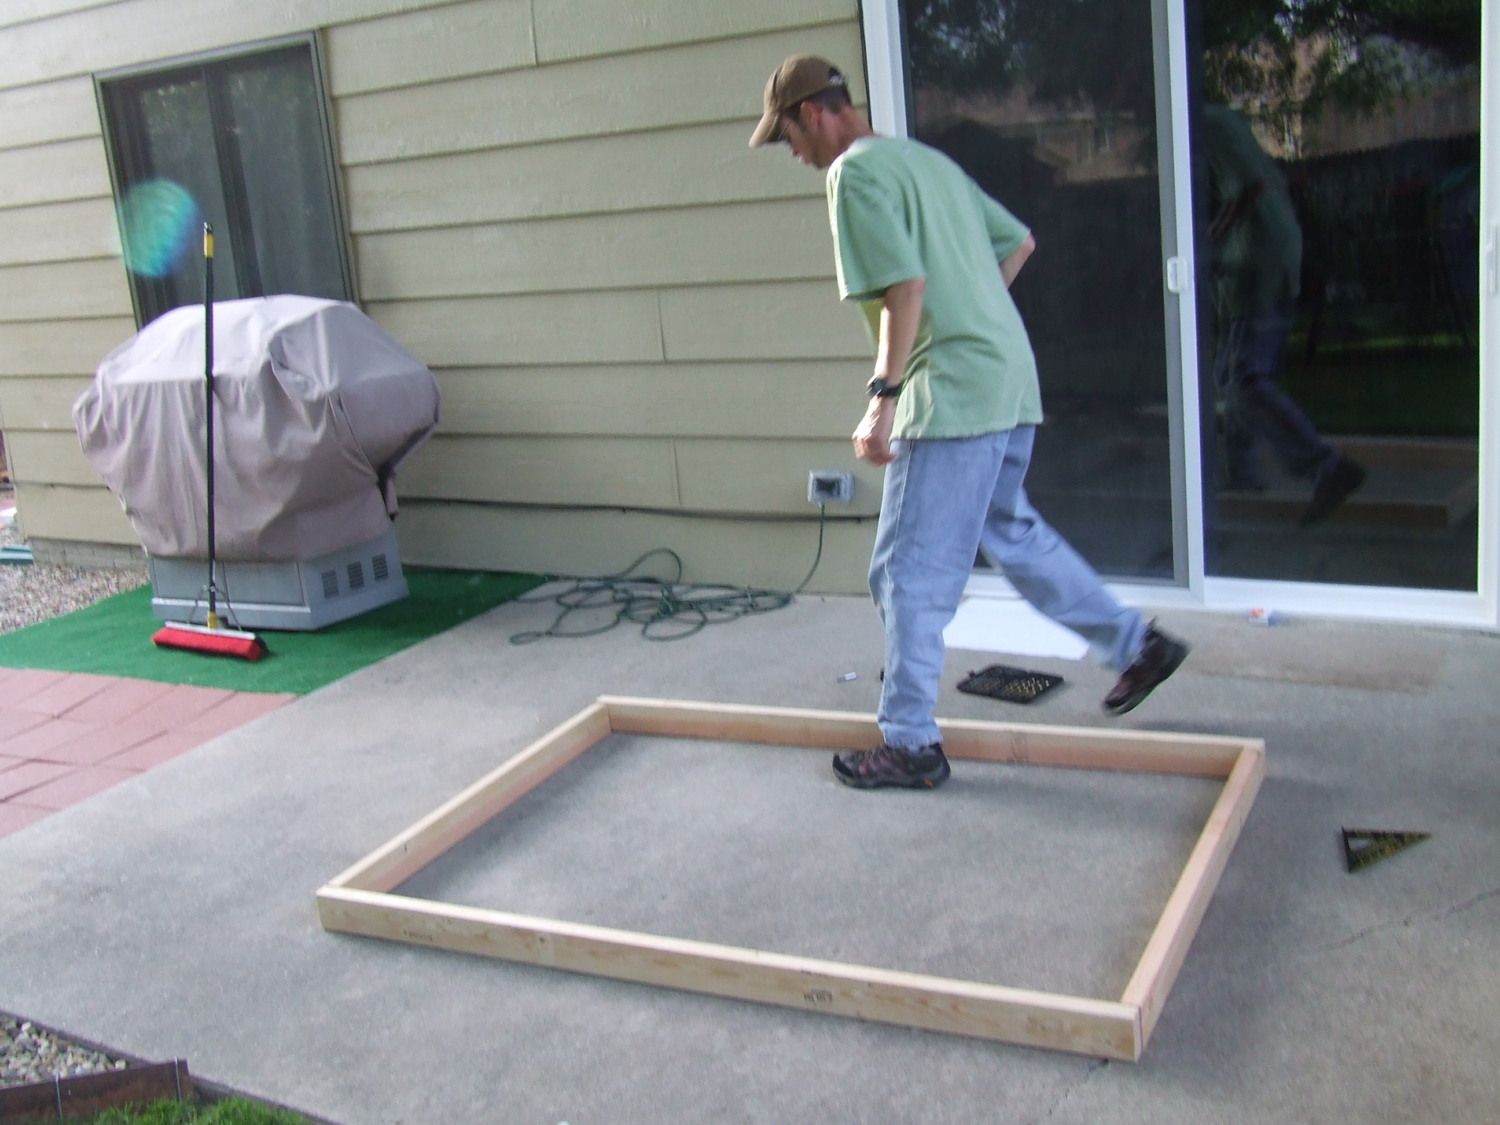
Here is the bottom frame, the top frame is just like this. The 2x4s measure 72 and 45 When putting any screws in make sure to predrill, this keeps the wood from splitting.
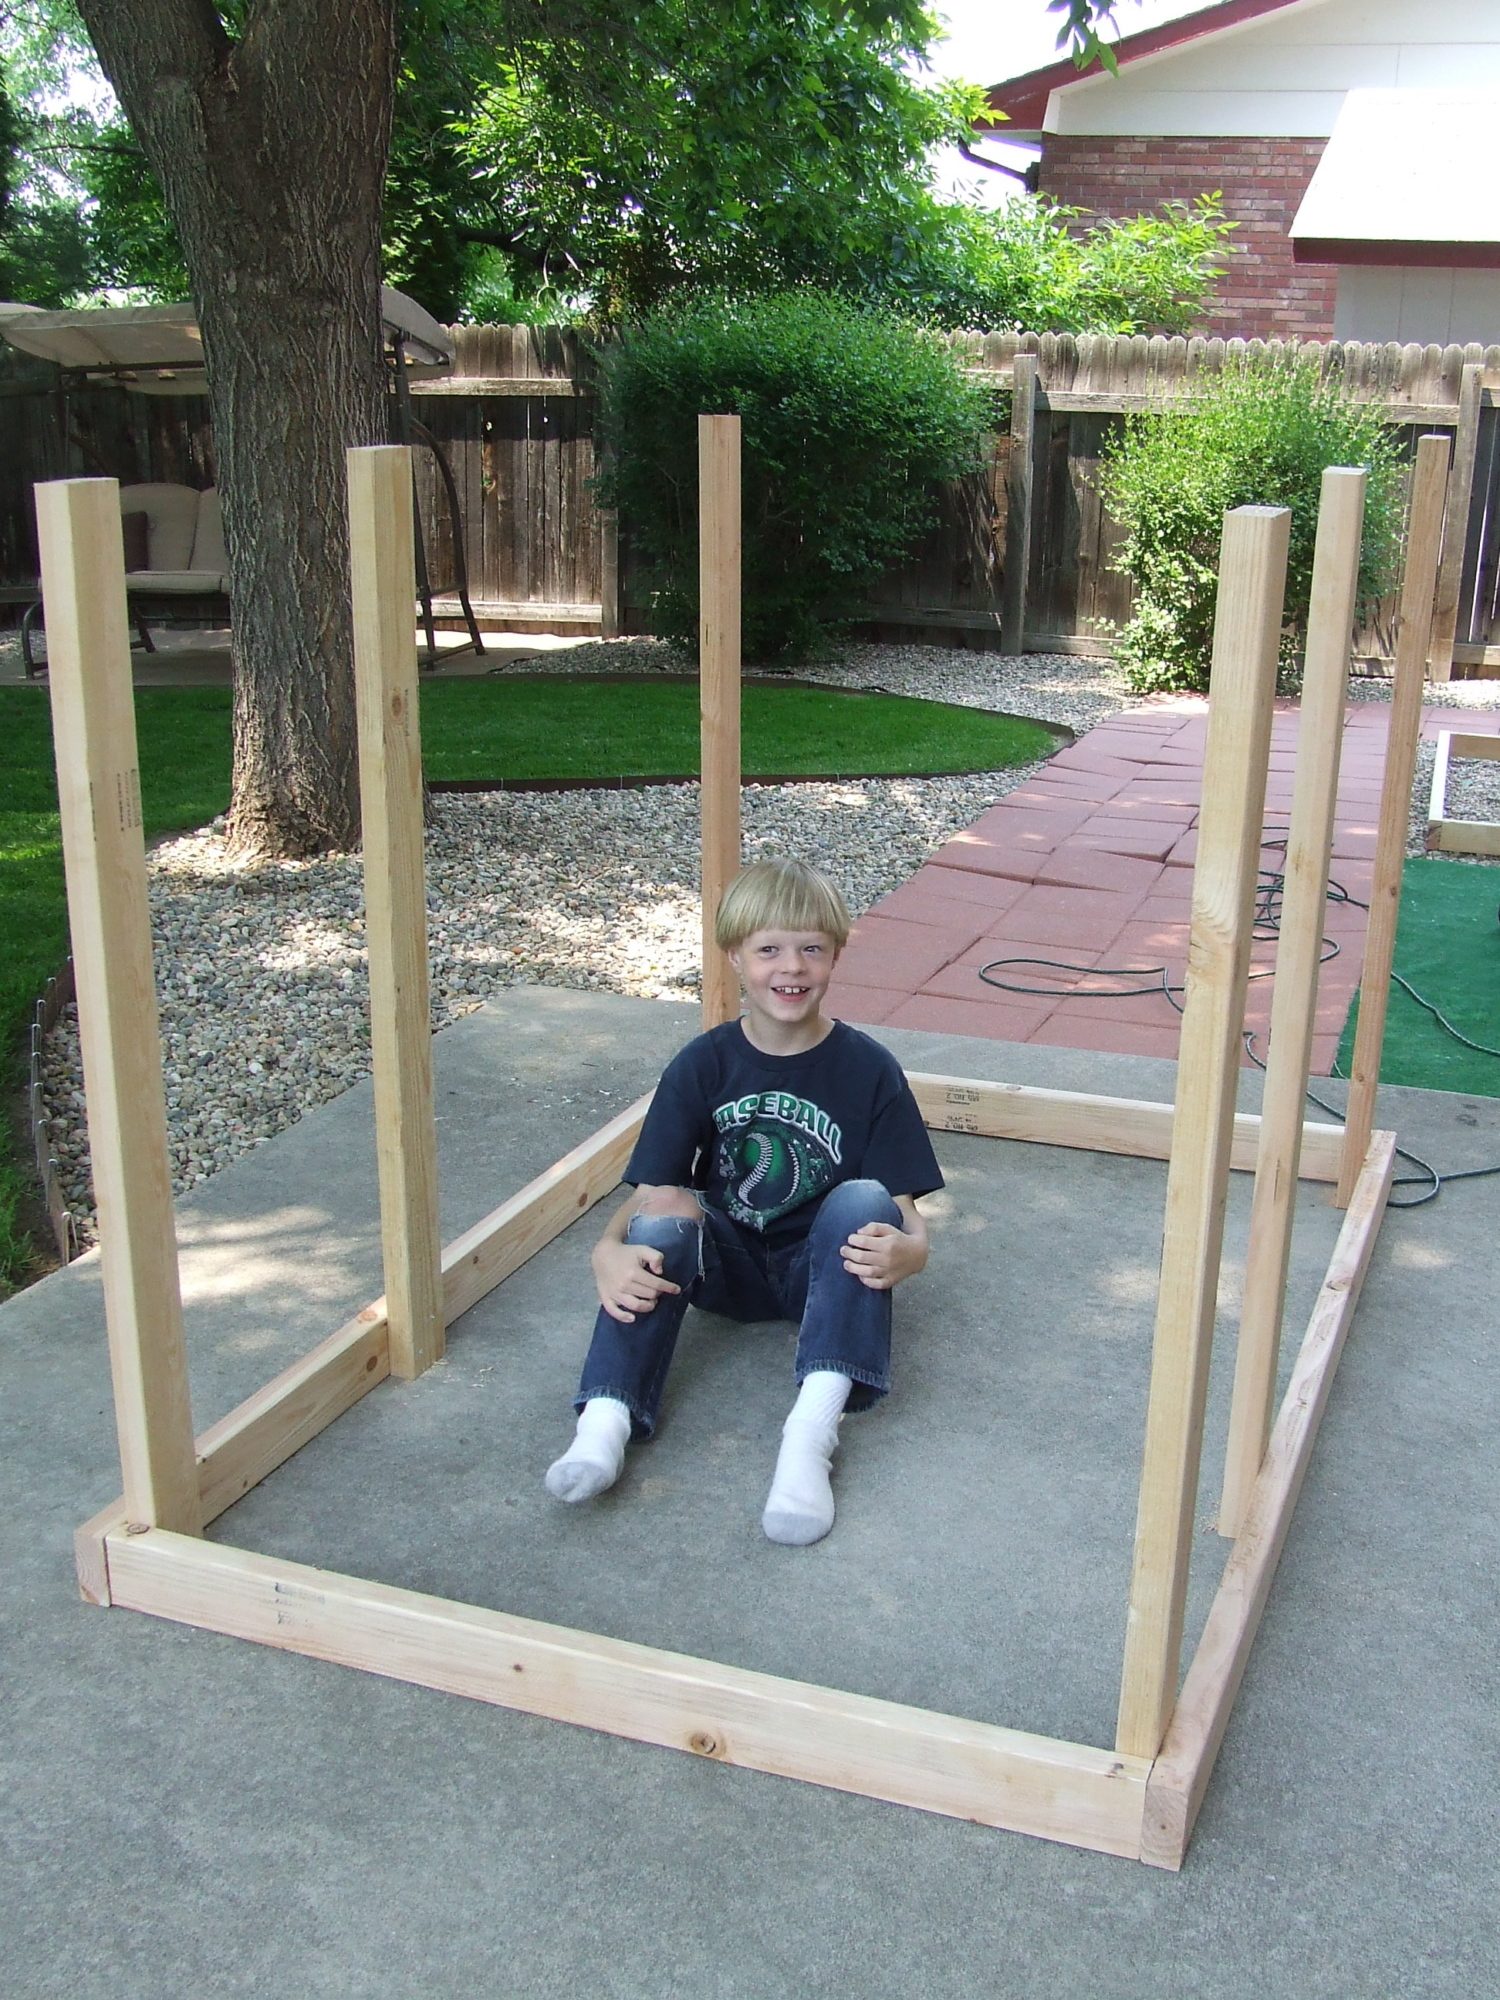
Next came the legs placed in each corner and then the middle ones are placed 46 1/2 inches from the inside of the bottom frame.
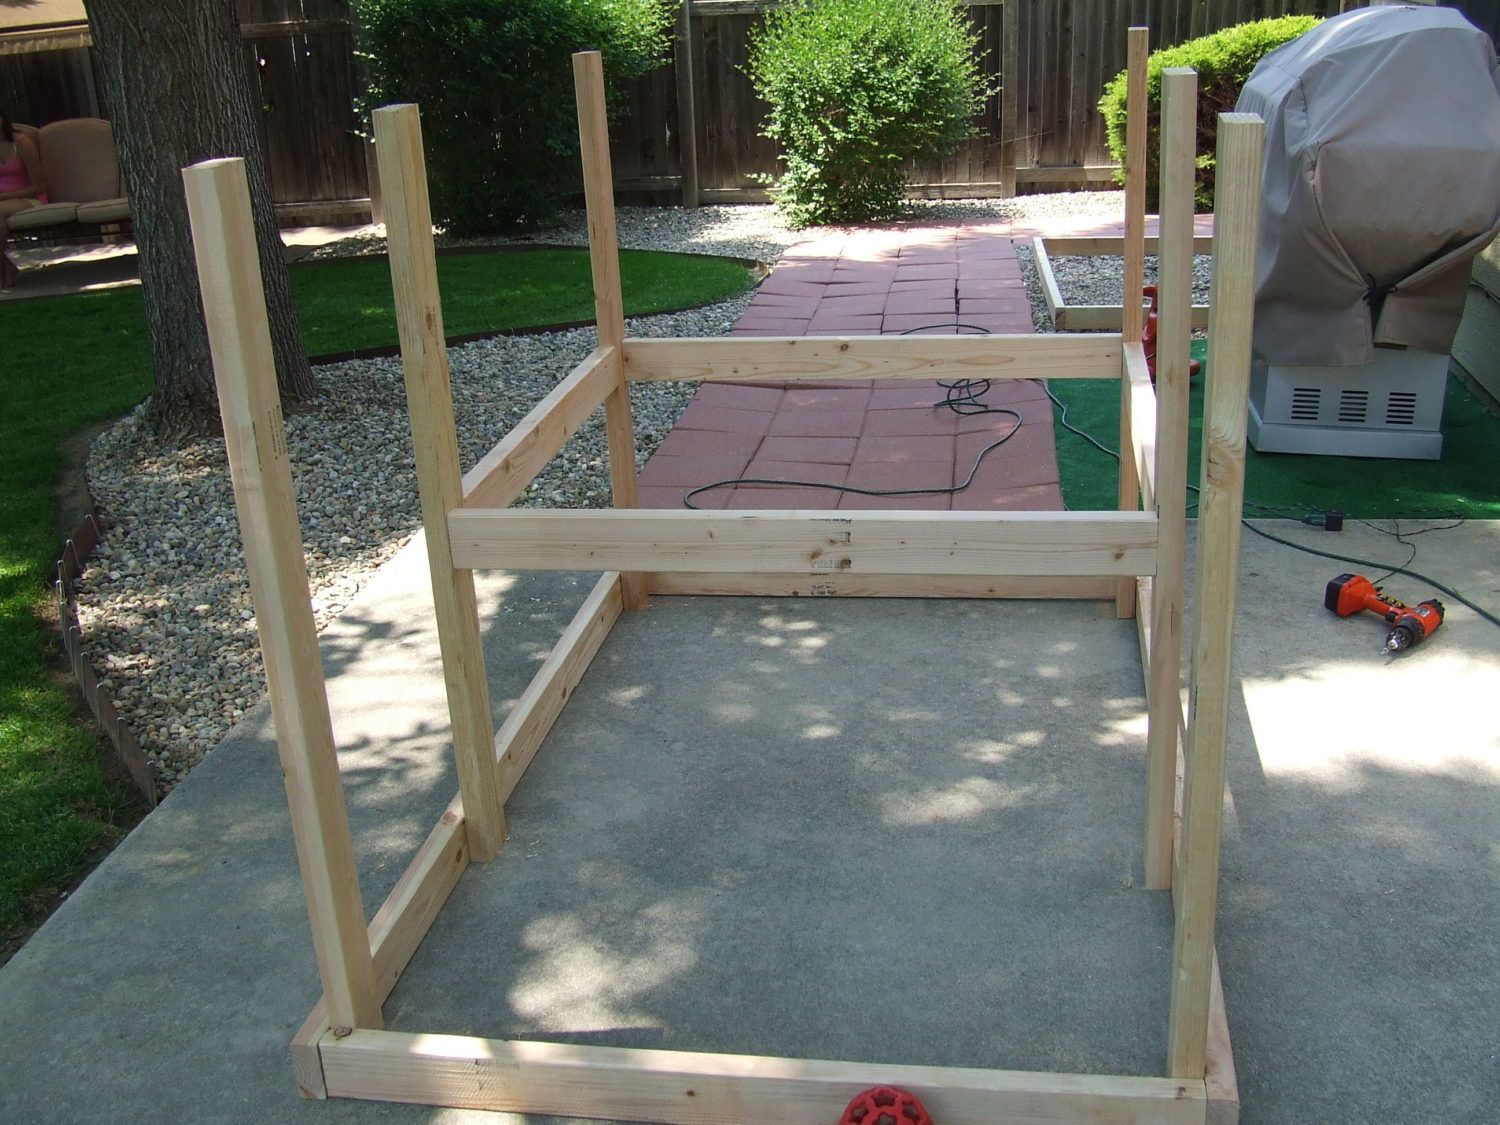
We then added the coop support boards. These were 24 ins from the ground to the top of the 2x4. Two of the 2x4s are 39 1/2 and the other 2 are 42 inches long. These will support the floor of your coop. We had to use flat brackets on the front 2x4s because we could not find screws long enough to go through the think side of a 2x4. The next picture will show that. After that we enlisted the help of a neighbor girl and we got the top frame on. (this was the only time we needed three people).
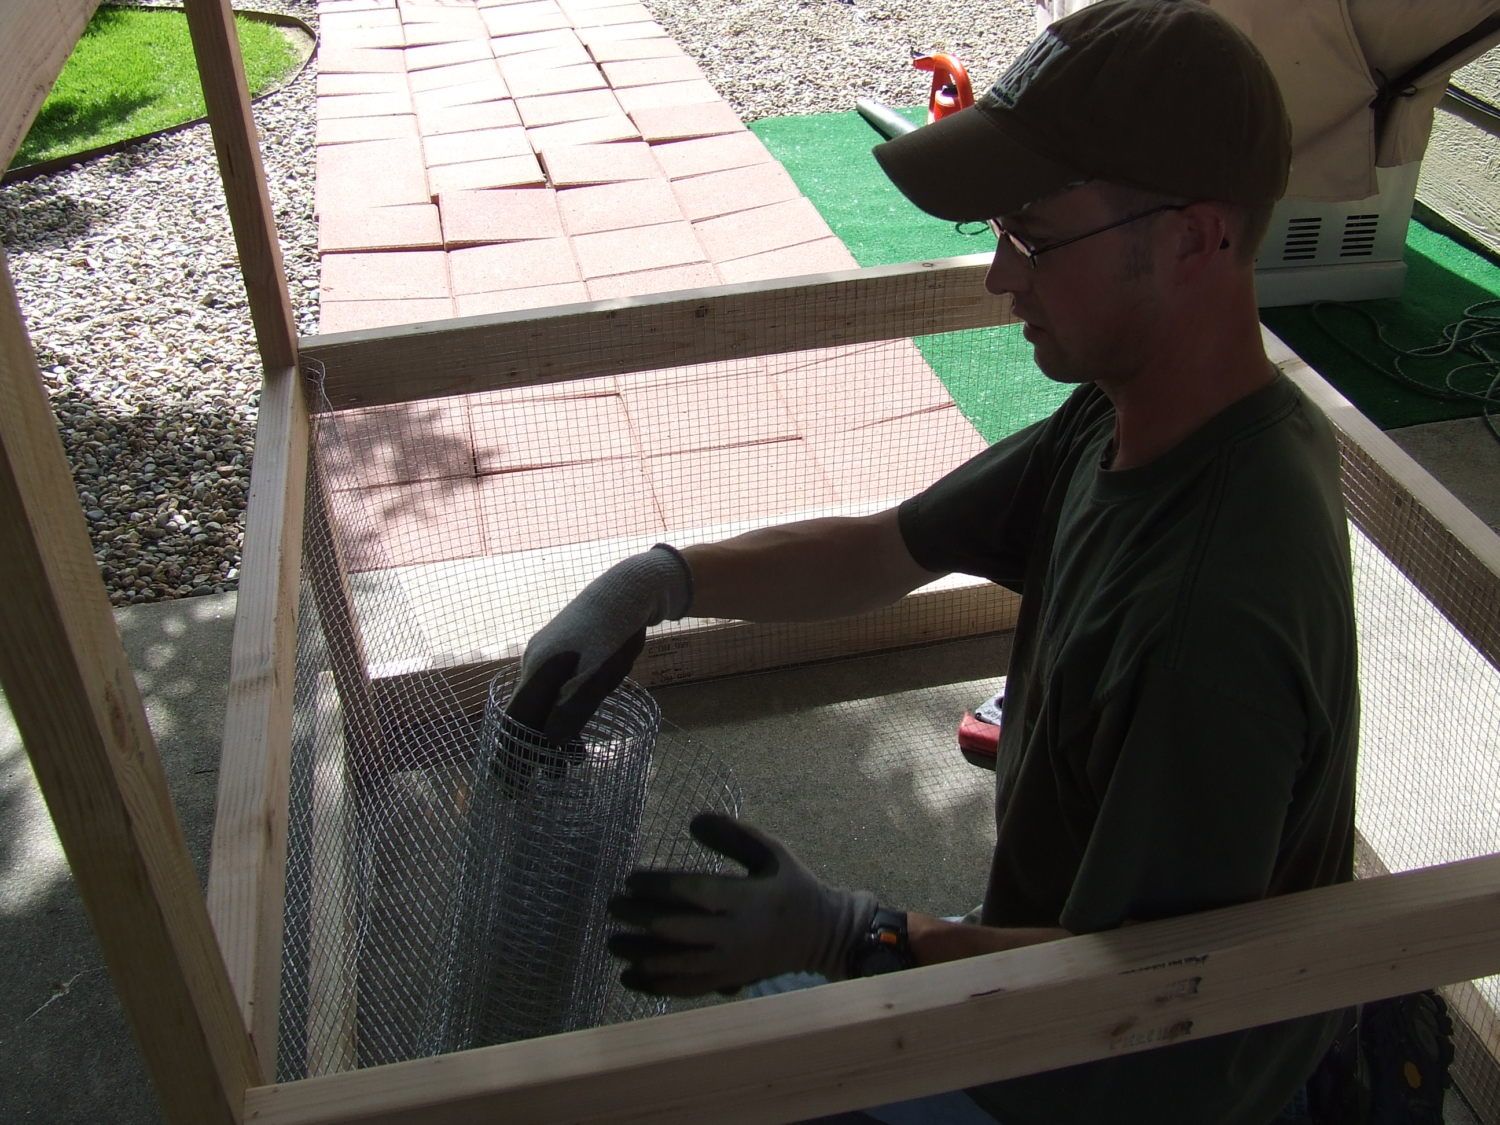
We decided to put the hardware cloth for underneath the coop up next. We figured that would be much easier than trying to put in on once the floor was in. Smart huh? We bought a 25 foot roil of the 24 inch and had just enough for the whole run.
We made the floor next. This is one of the area where we made a mistake in measurements. We had the guys at Lowe's cut all of out pieces down so that we only had to do the angle cuts. When we had them cut the floor we had him do 4 ft x 4 ft, the actual measurement is 42x39 1/2 and then you cut notches out for the legs. At least we were big on out measurement for that.
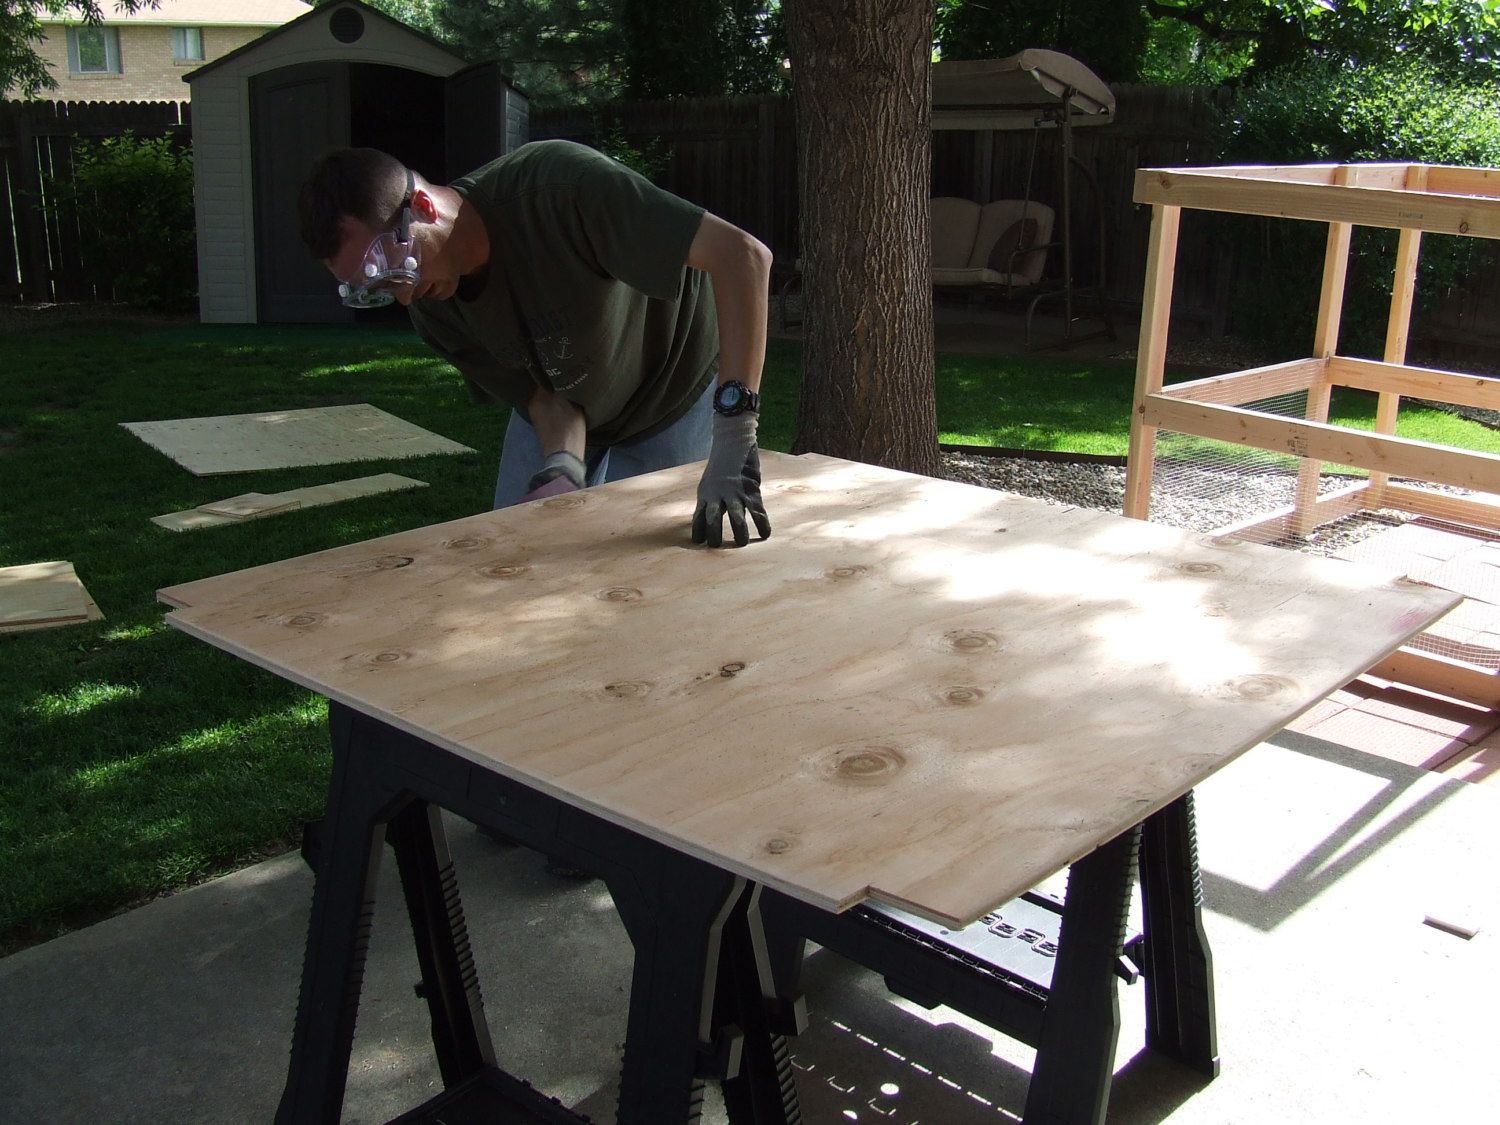
Once it was cut right, We were able to easily drop it in and screw it down. We also added the back wall. This is just a plain piece of plywood (all of the plywood is
15/32 4 PLY FIR RATED SHEATHING) the piece in the back measured 46 1/2 x 20.
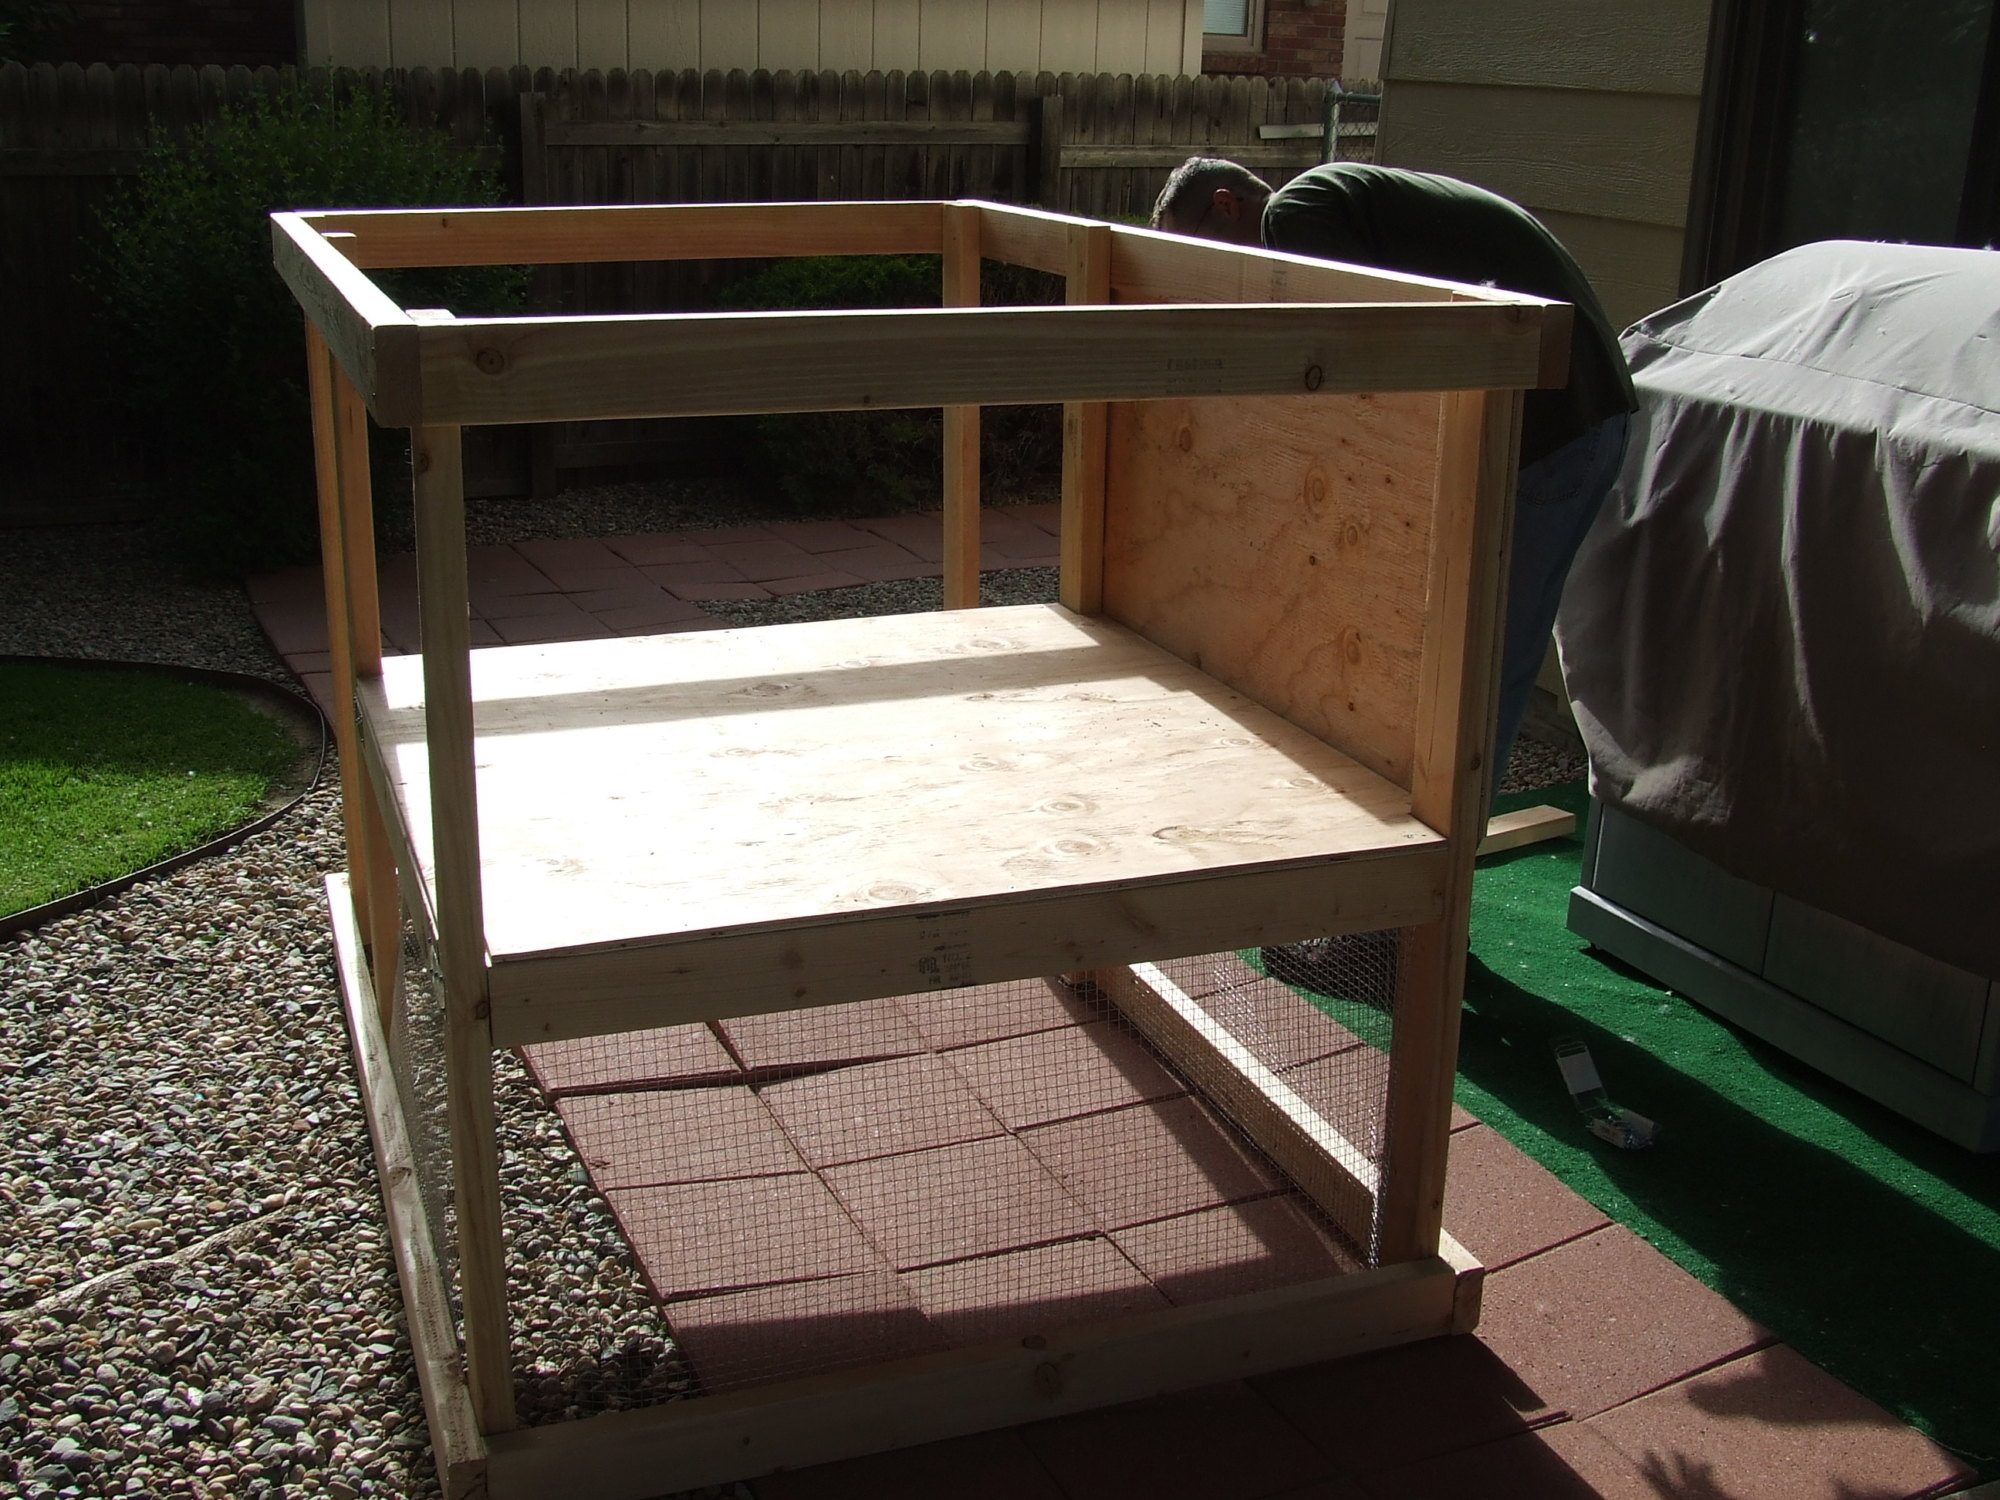
Next we added the roosts, much easier before we put everything else up. This part we kind of just winged it. The roosts were made with left over 2x4s and some 1x2s We screwed the 2x4s from underneath the floor so they won't move and from the top.
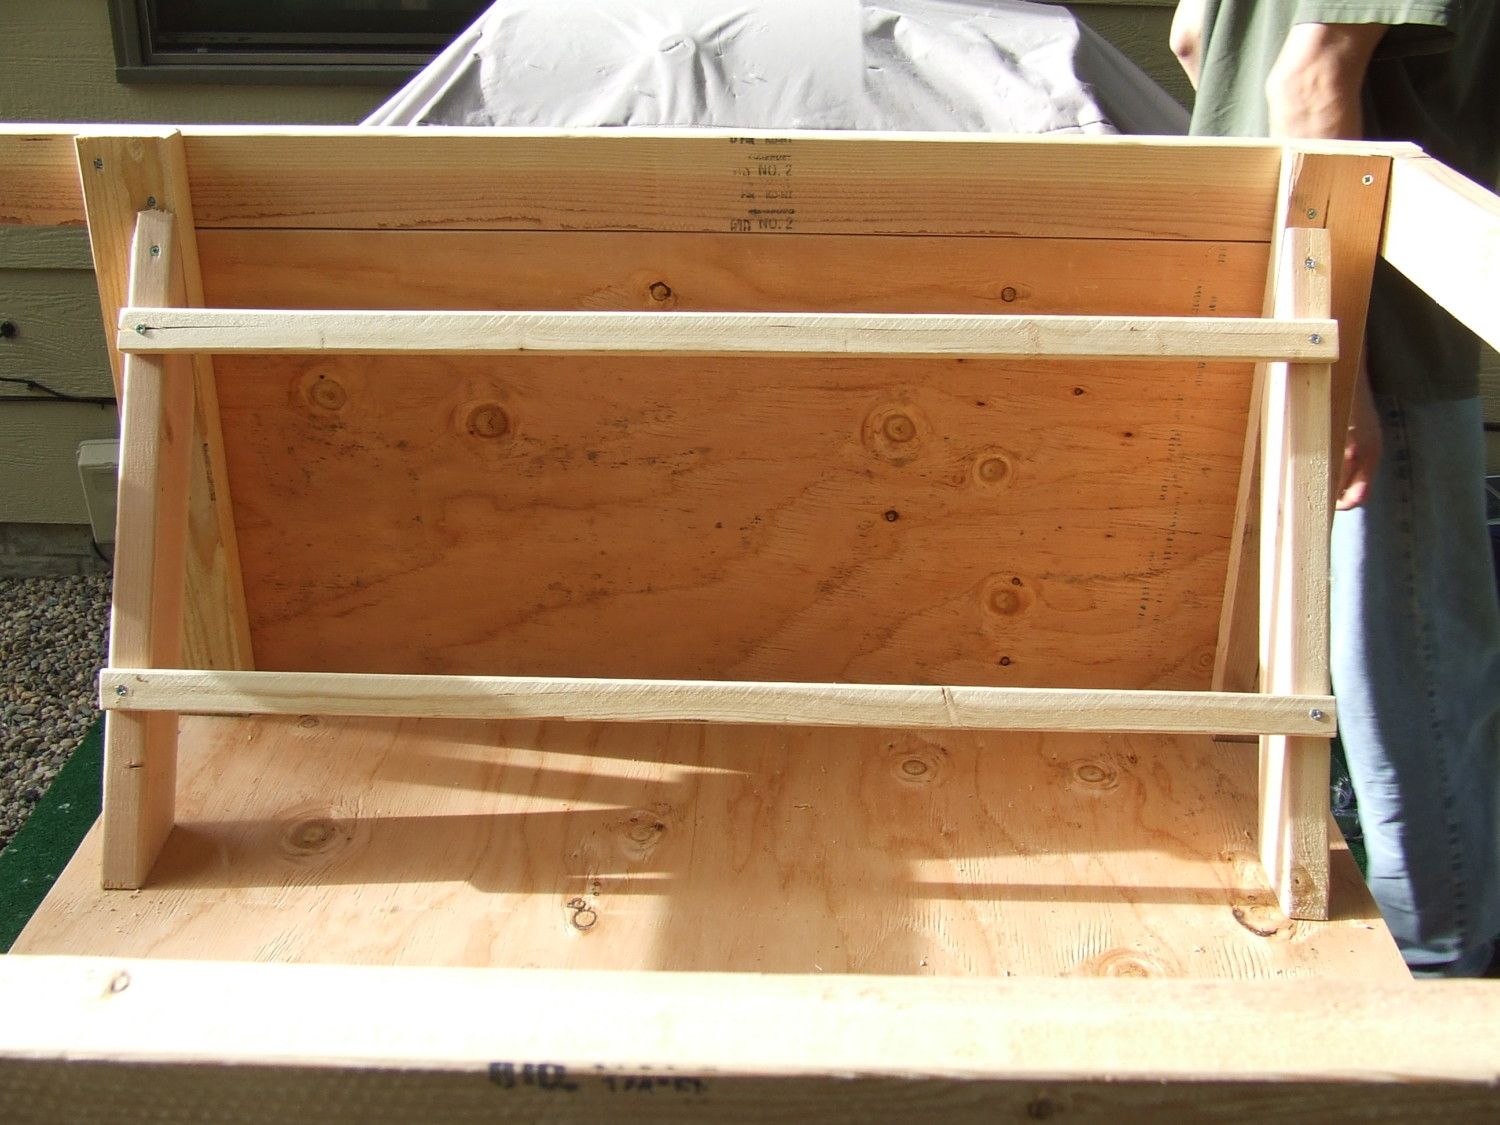
Now the nest box wall was added. We used a piece of plywood measuring 45x24 with an opening of 26x15.
We added doorstops out of 1x3s to the run door side, I'll show a pic of that later with the run doors. Then we added a door stop to the top of the coop and a small lip to the bottom to keep the bedding in (we may need to make it bigger, because stuff keeps falling out now).
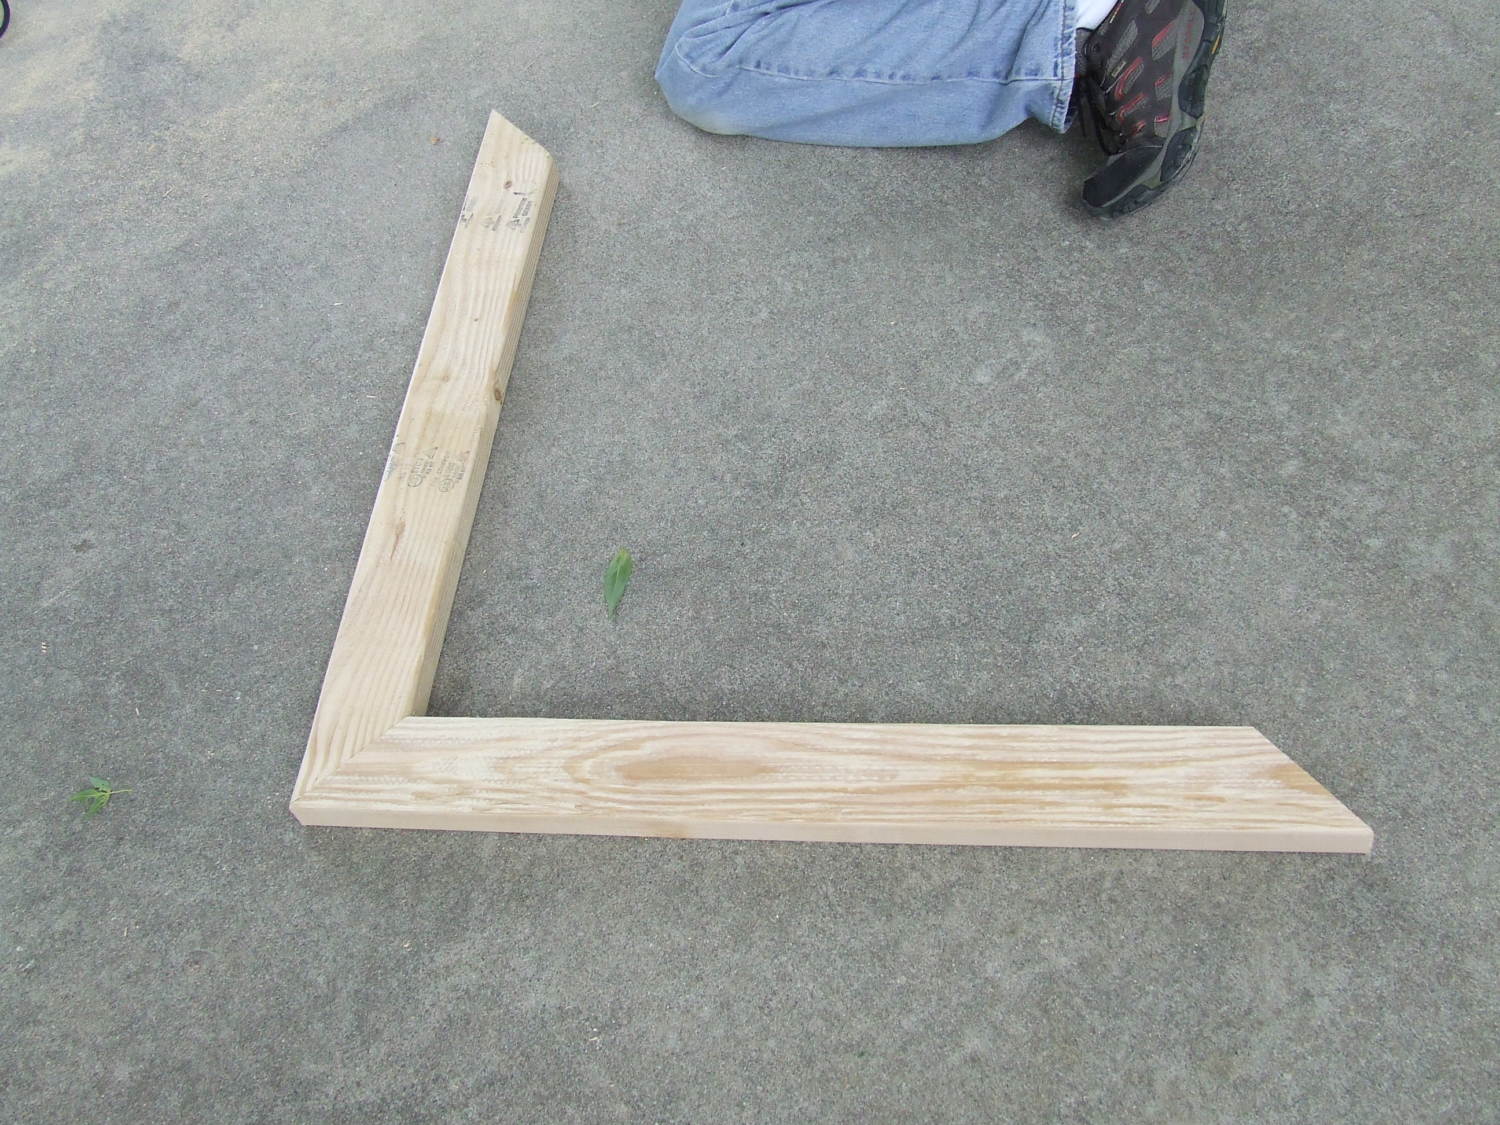
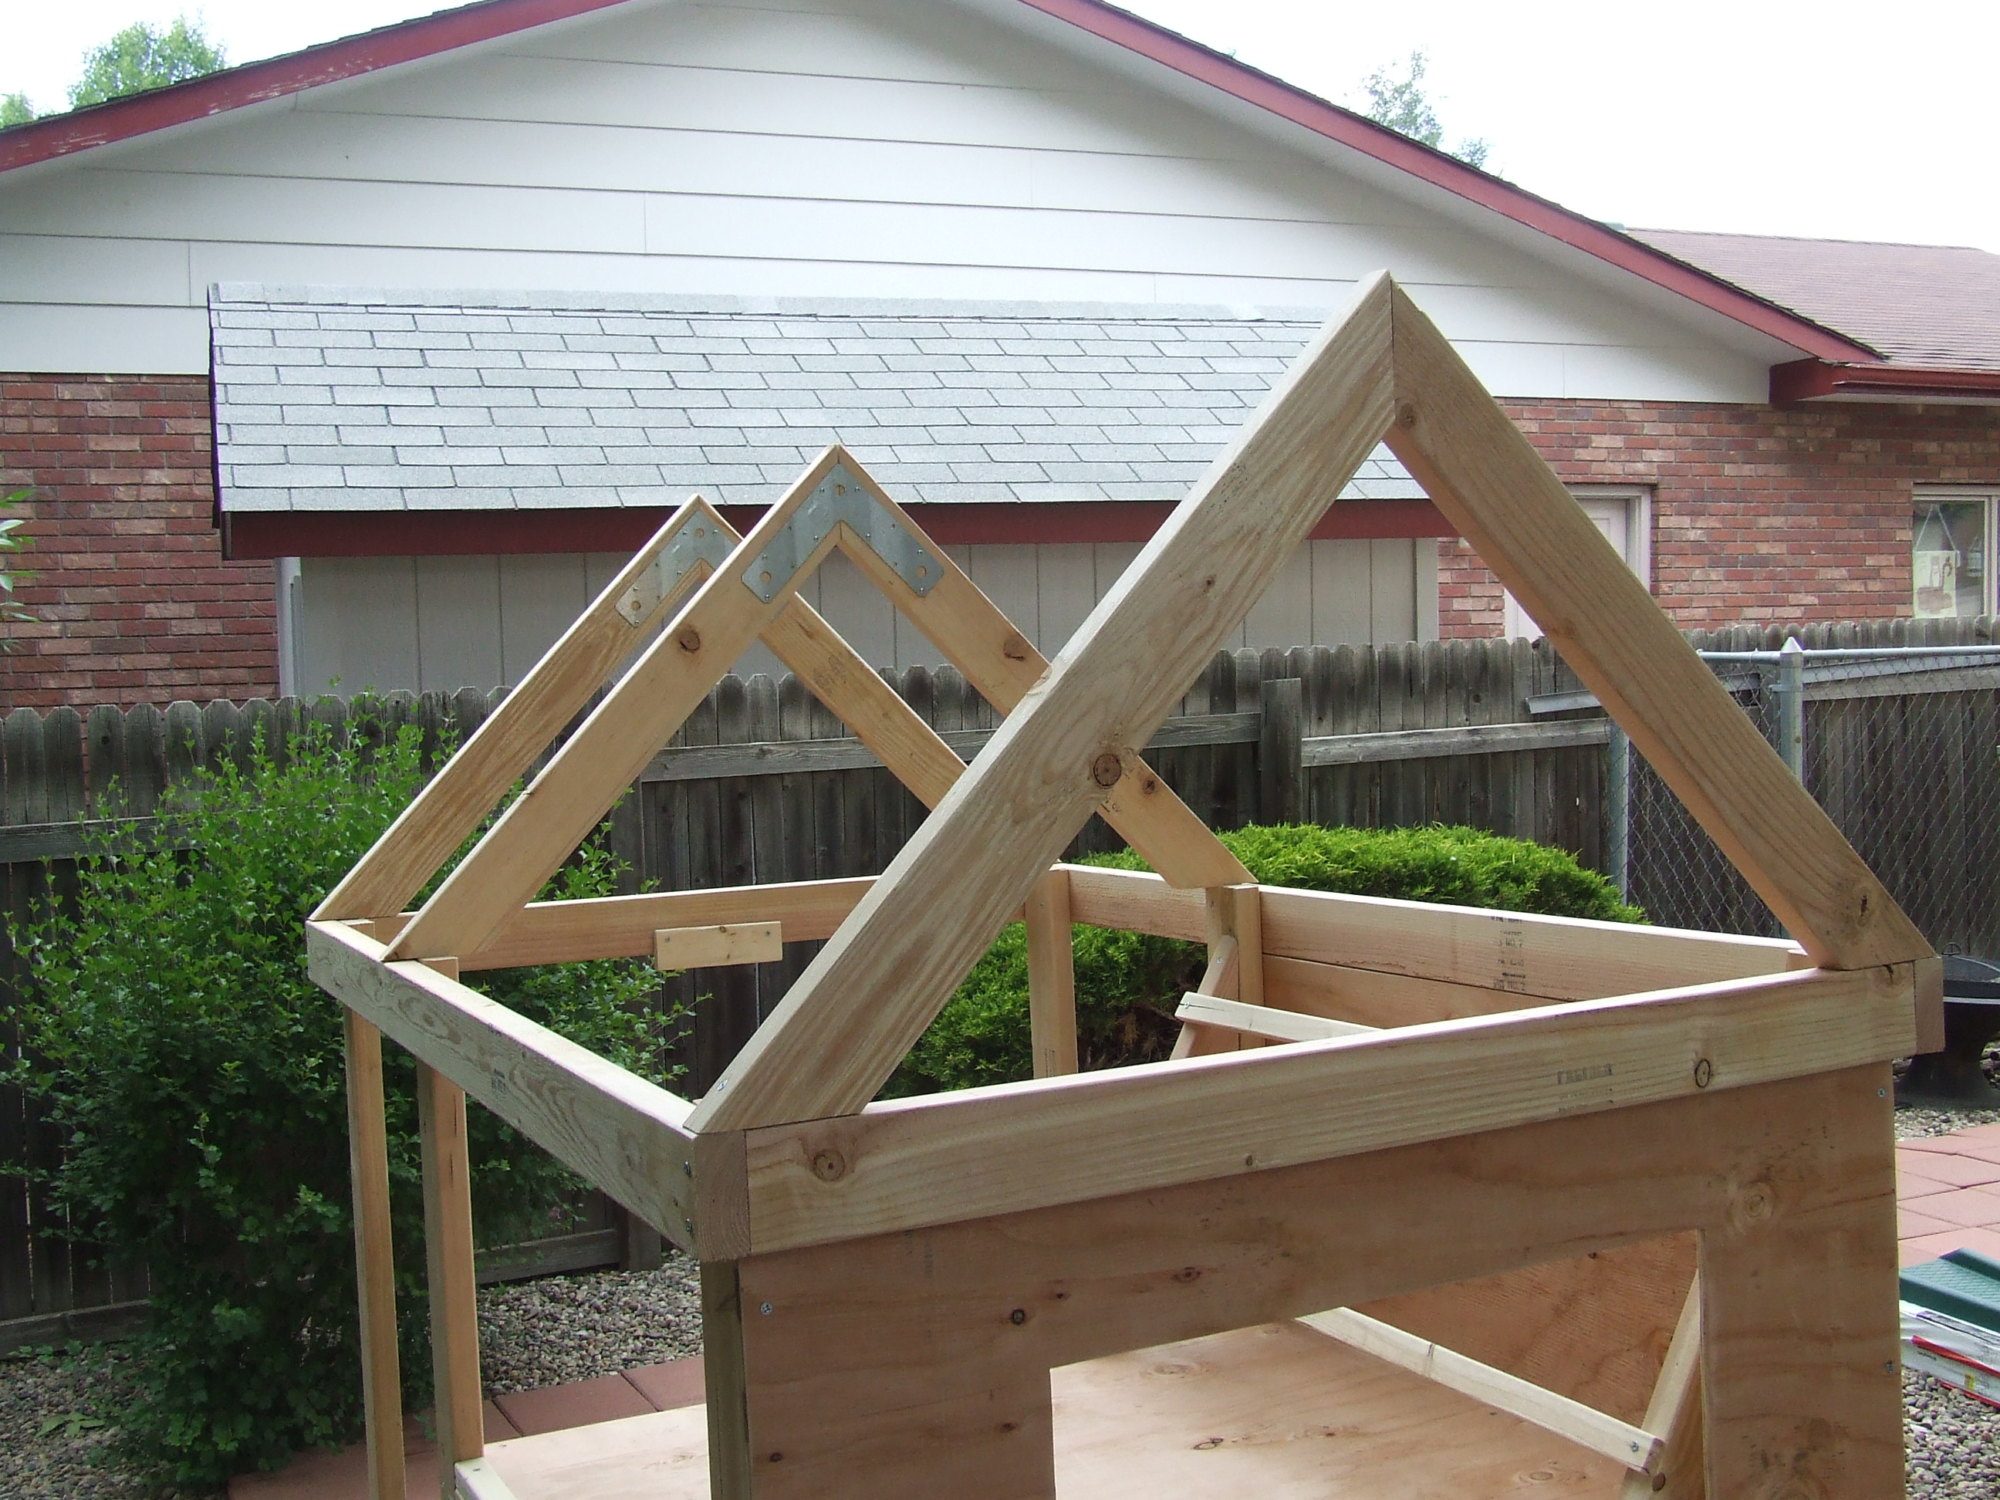
Next came the roof. We had a time trying to figure out how to put the roof on. It kept my husband awake ll night until it came to him. This is where the measurements are off in the plans. We ended up making the 2x4s at a right angle and then cutting off the bottoms so they would be flush with the top frame. I think at the longest part they came out to be 37 in long, but I'm not sure.
We held them together with angle brackets and screwed them into the top frame. You can see the door stops for the run in this picture too.
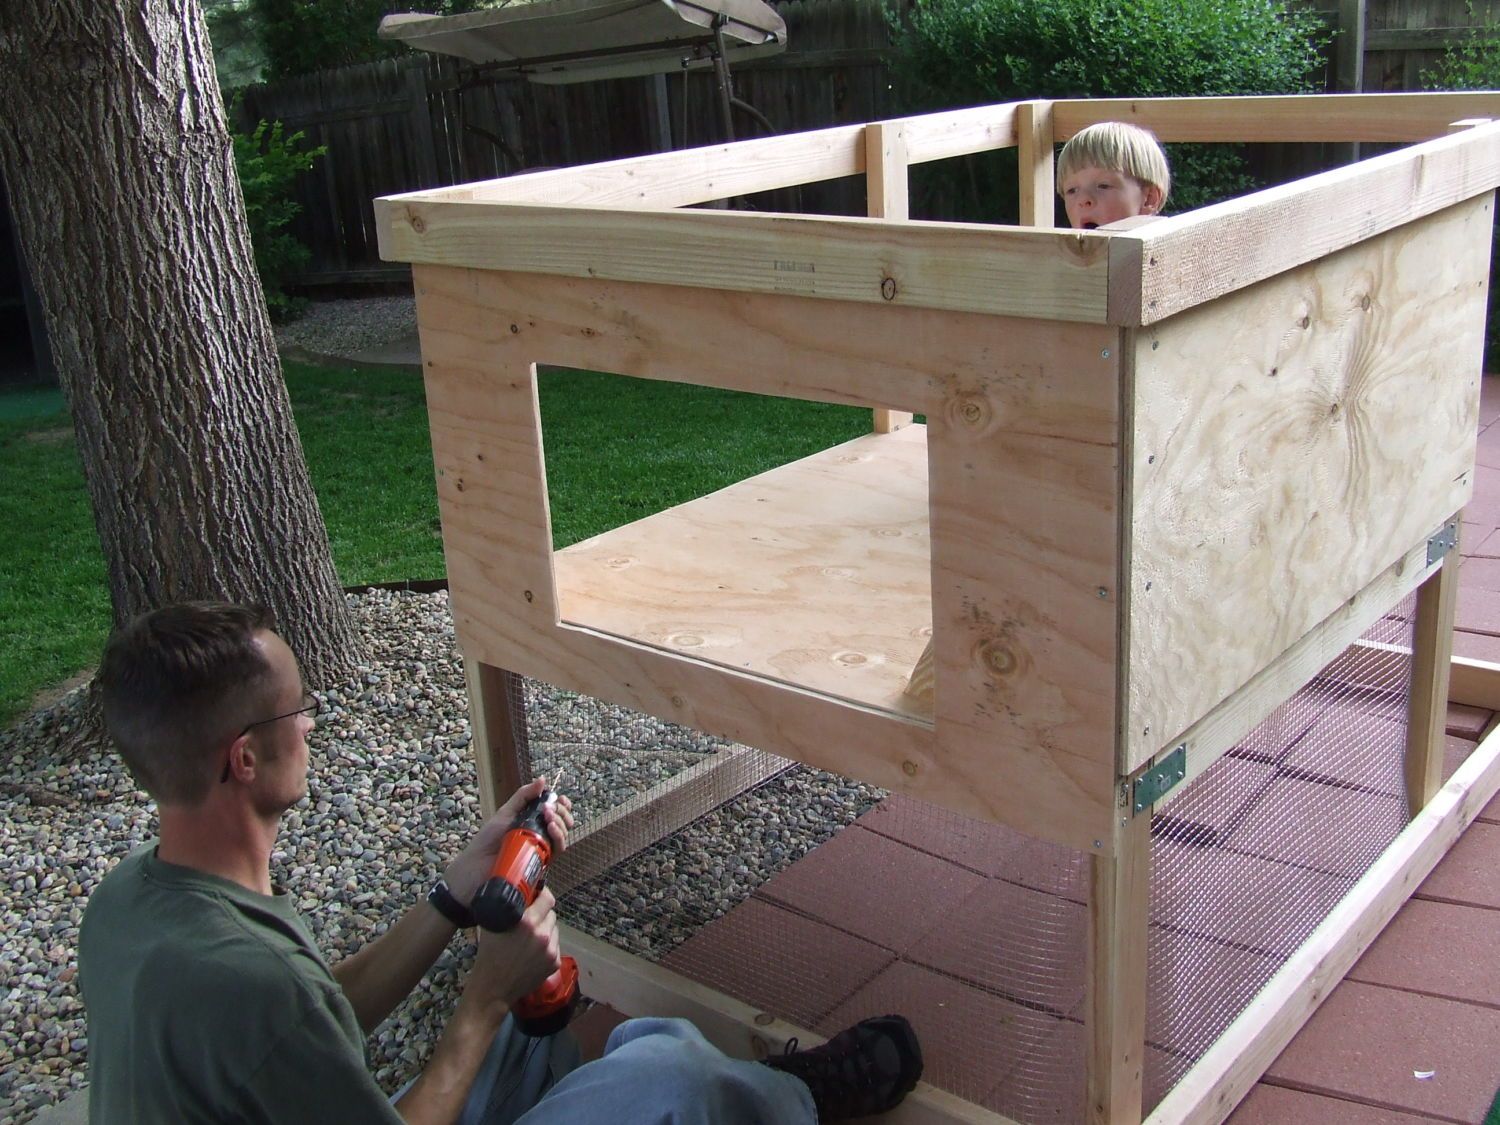
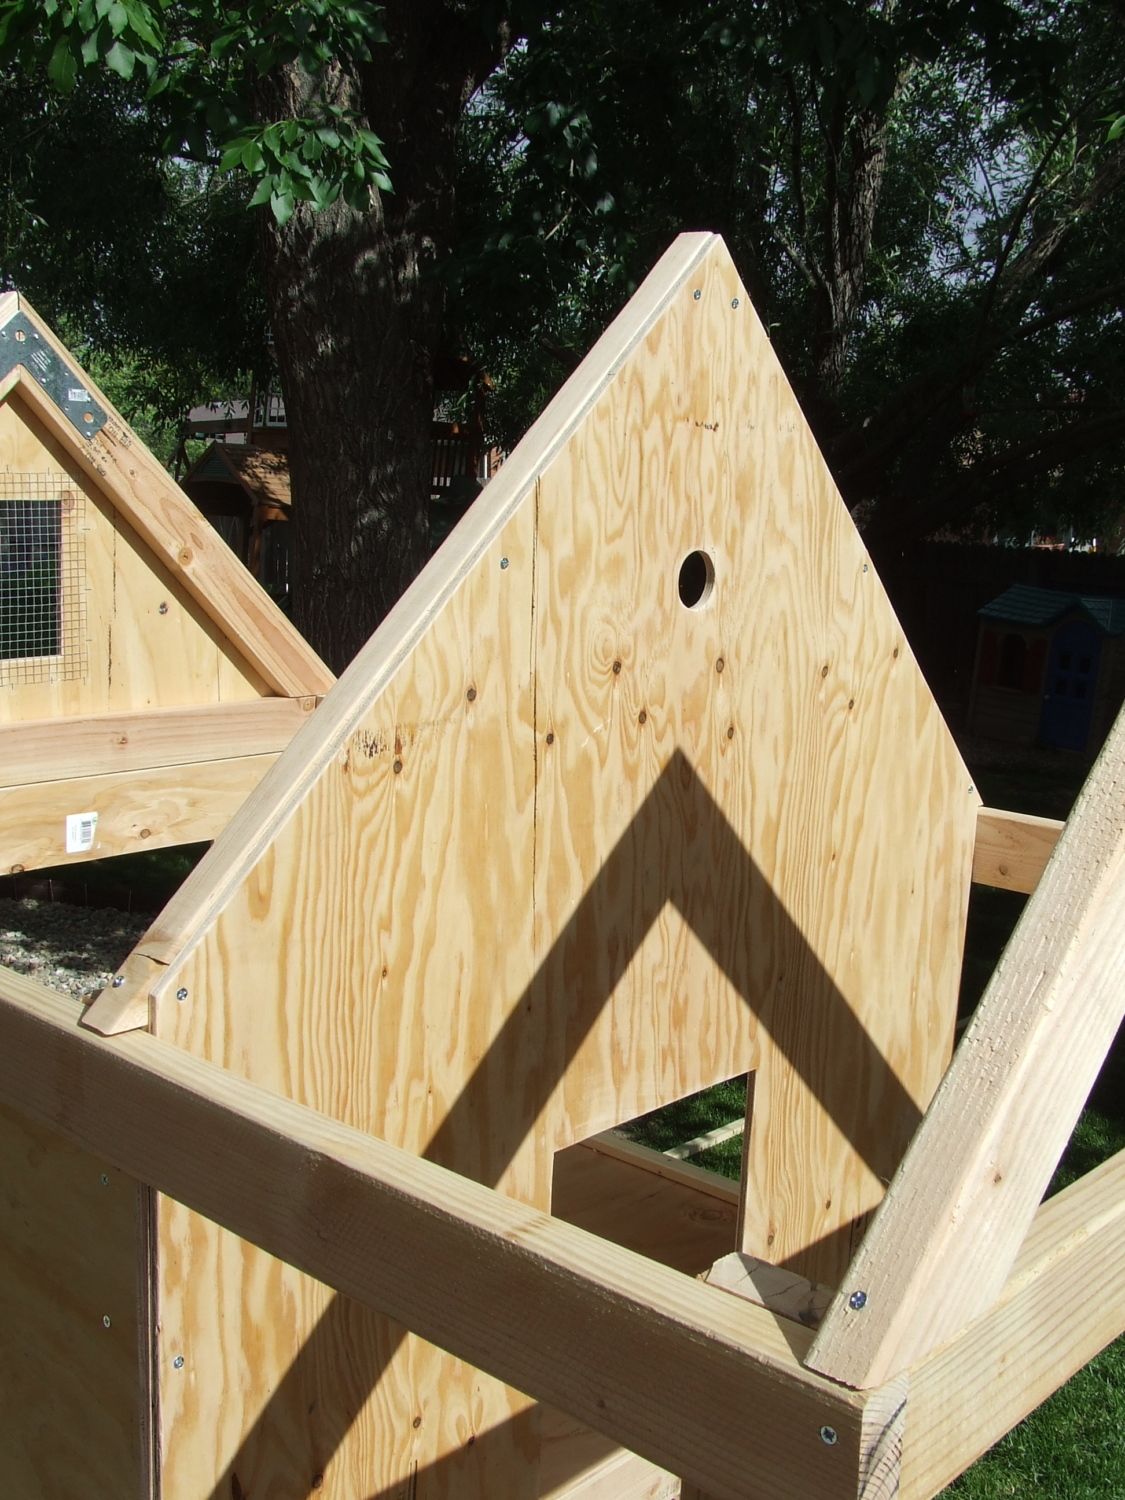
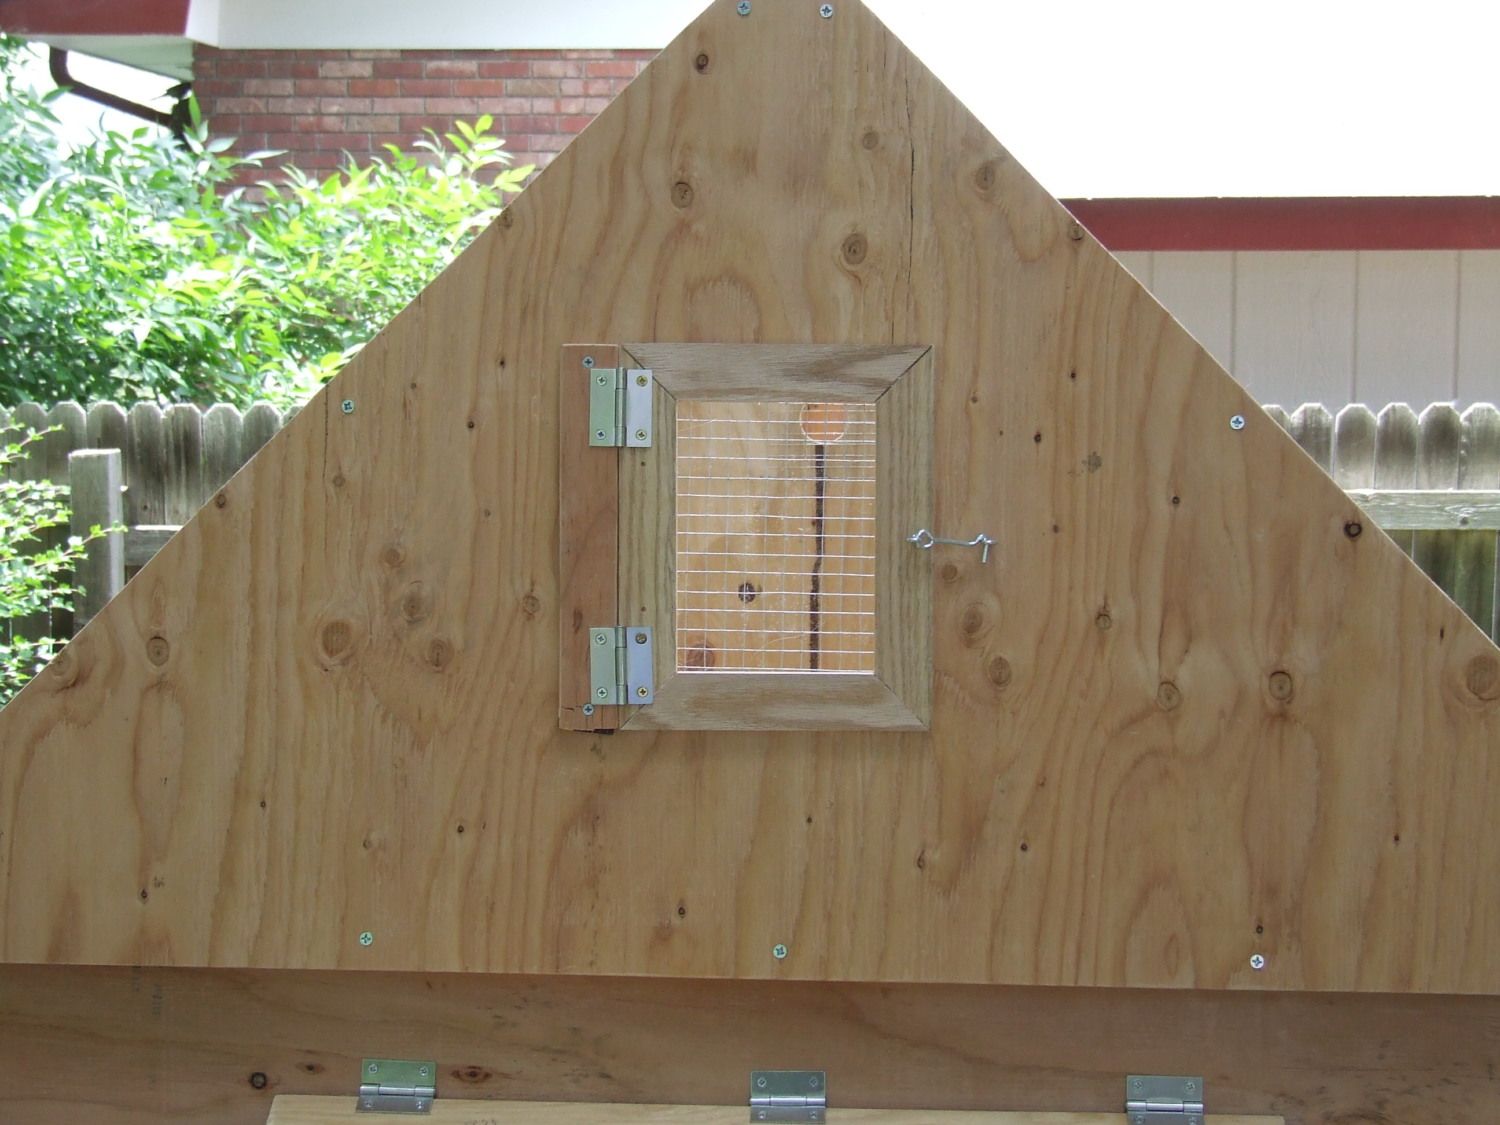
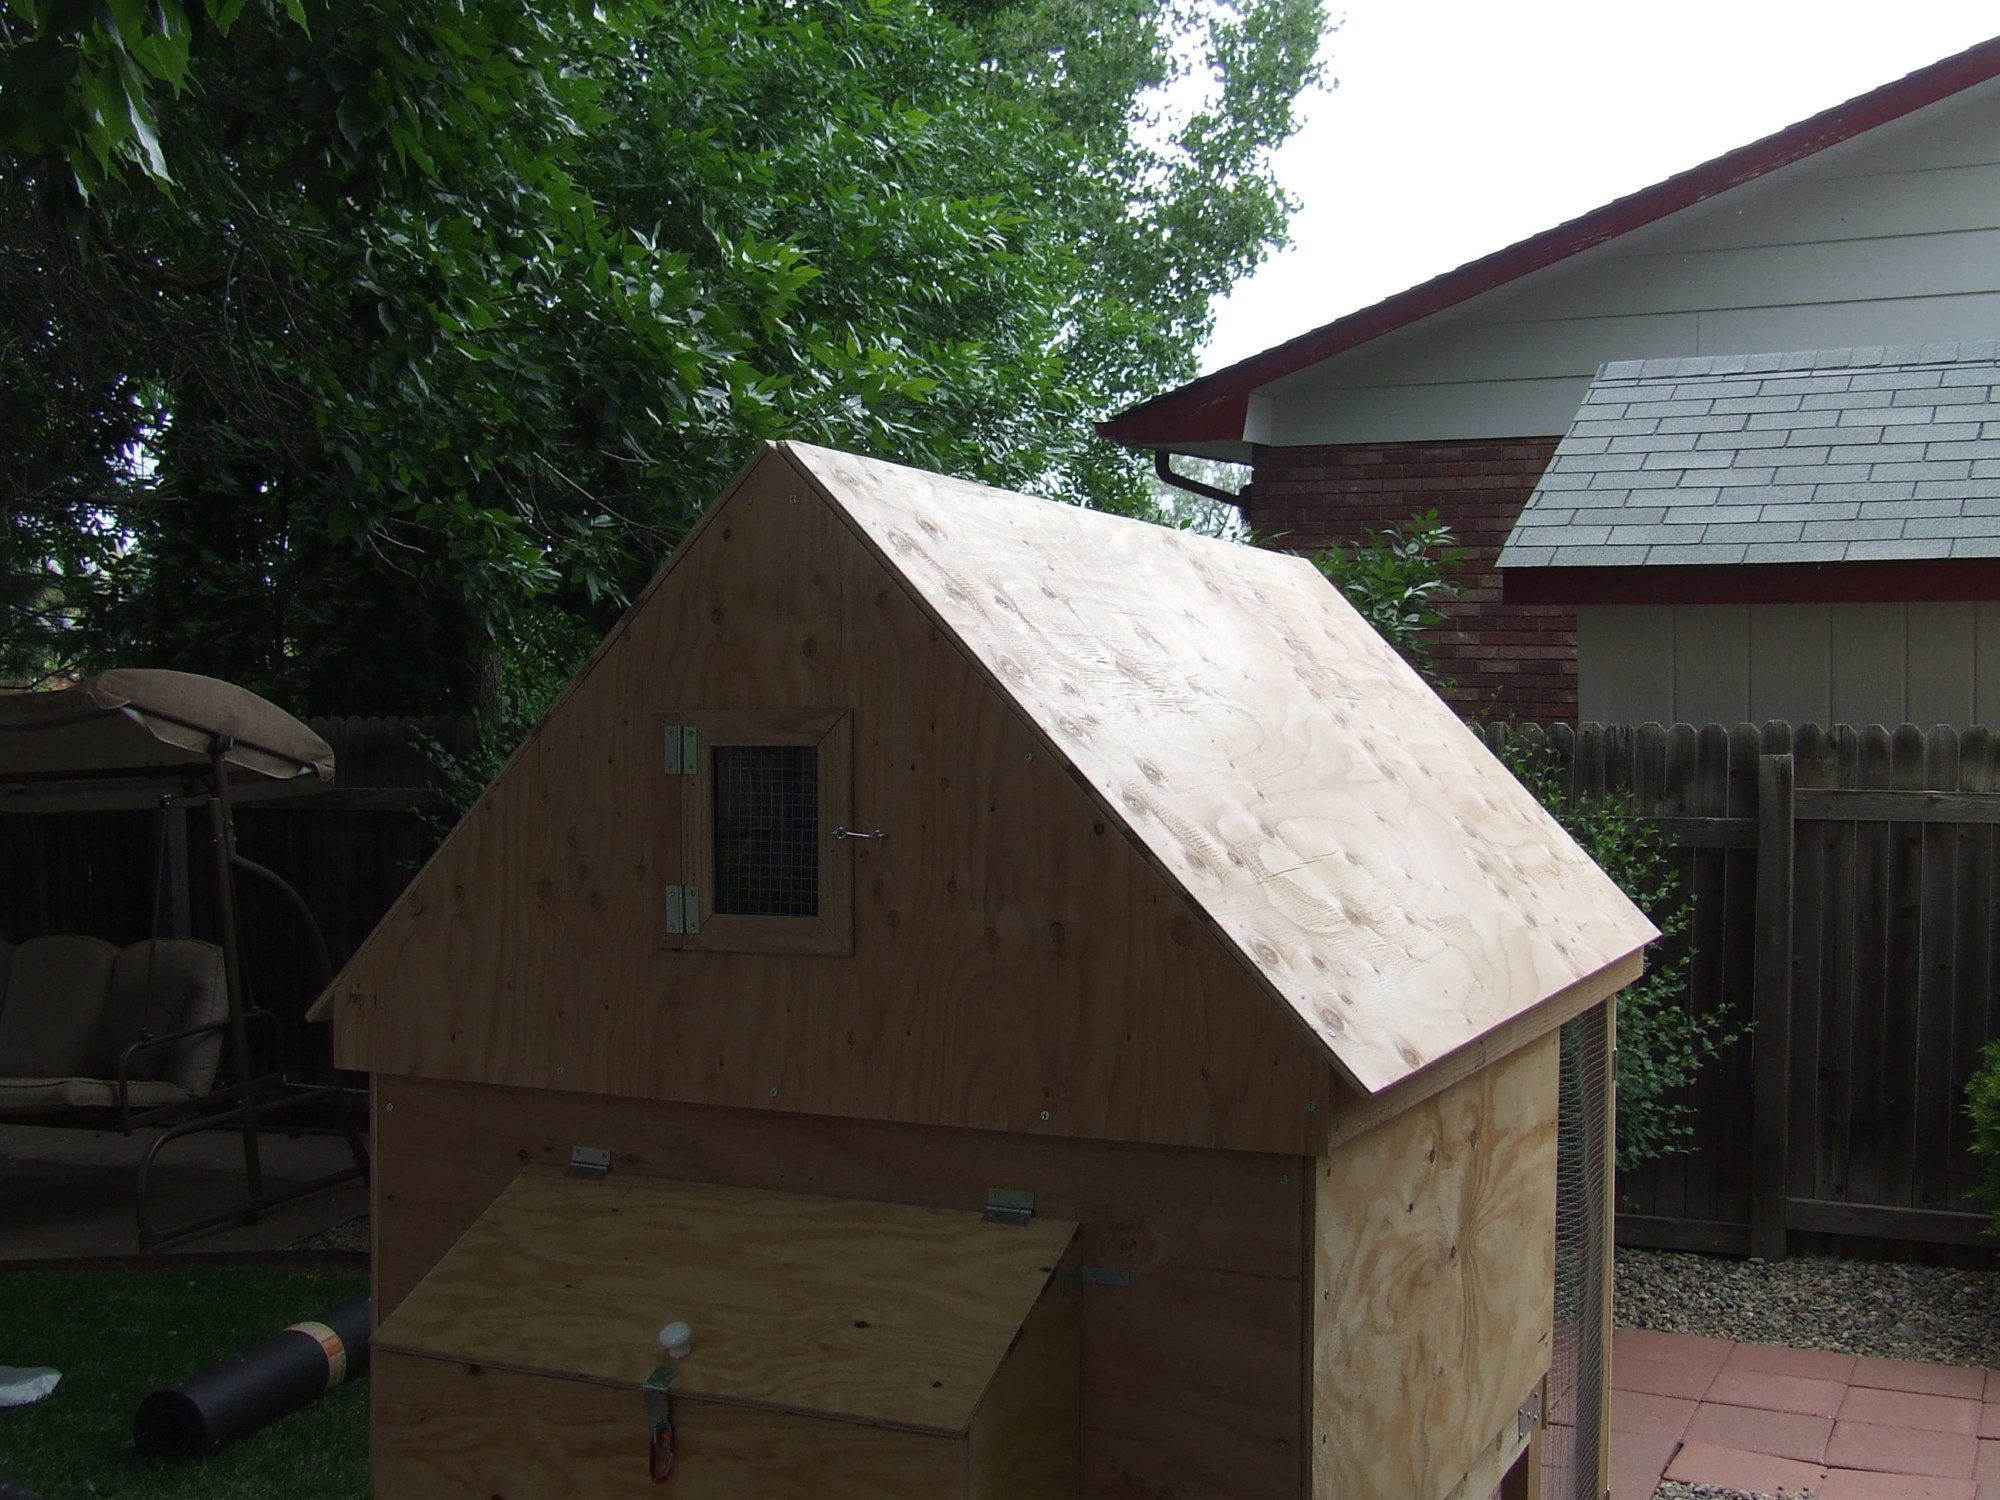
We added the plywood to all three peaks. The one over the run was solid measuring 48x32 (then cut the angles to match the roof on all of these) The outside coop is 48x32 with a 7x9 hole cut for a window and the inner coop wall measured 53x45 with a 19x12 hole cut for the door and a three inch hole cut for ventilation. We put hardware cloth over the hole for the window and the hole for ventilation. I am a bit paranoid about anything getting in the coop.
.
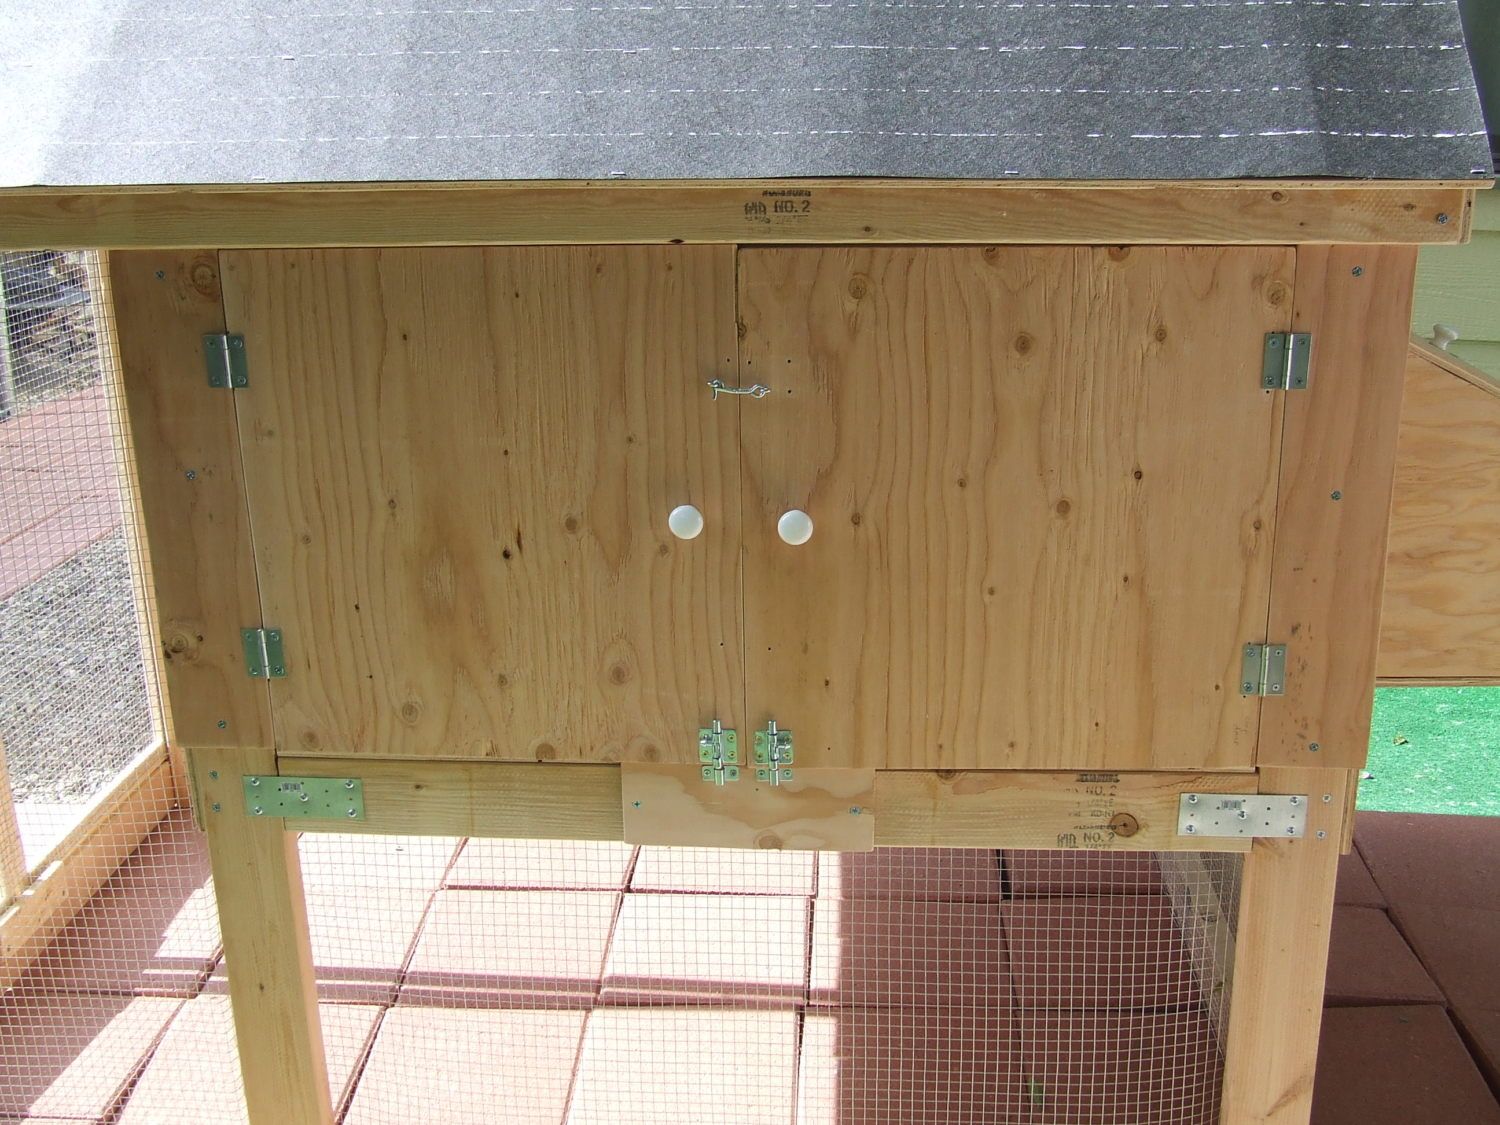
We added doors to the front of the coop to make it easy to clean out, but we had some issues with the hinges. We solved the problem a couple days later, so I will just show you a picture of the fix in a bit. My husband had to go back to work so we covered the coop with a tarp to keep the wood from getting wet and then the next weekend we began again. The next part of the project was the nest box. The bottom measured 27x10 and is attached by three brackets on the bottom. The sides are 16 in the back x 10 on the bottom x 11 in the front. The sides were attached with brackets on the outside and on the inside. We had to hammer the tips of the nails because they poked through the plywood.
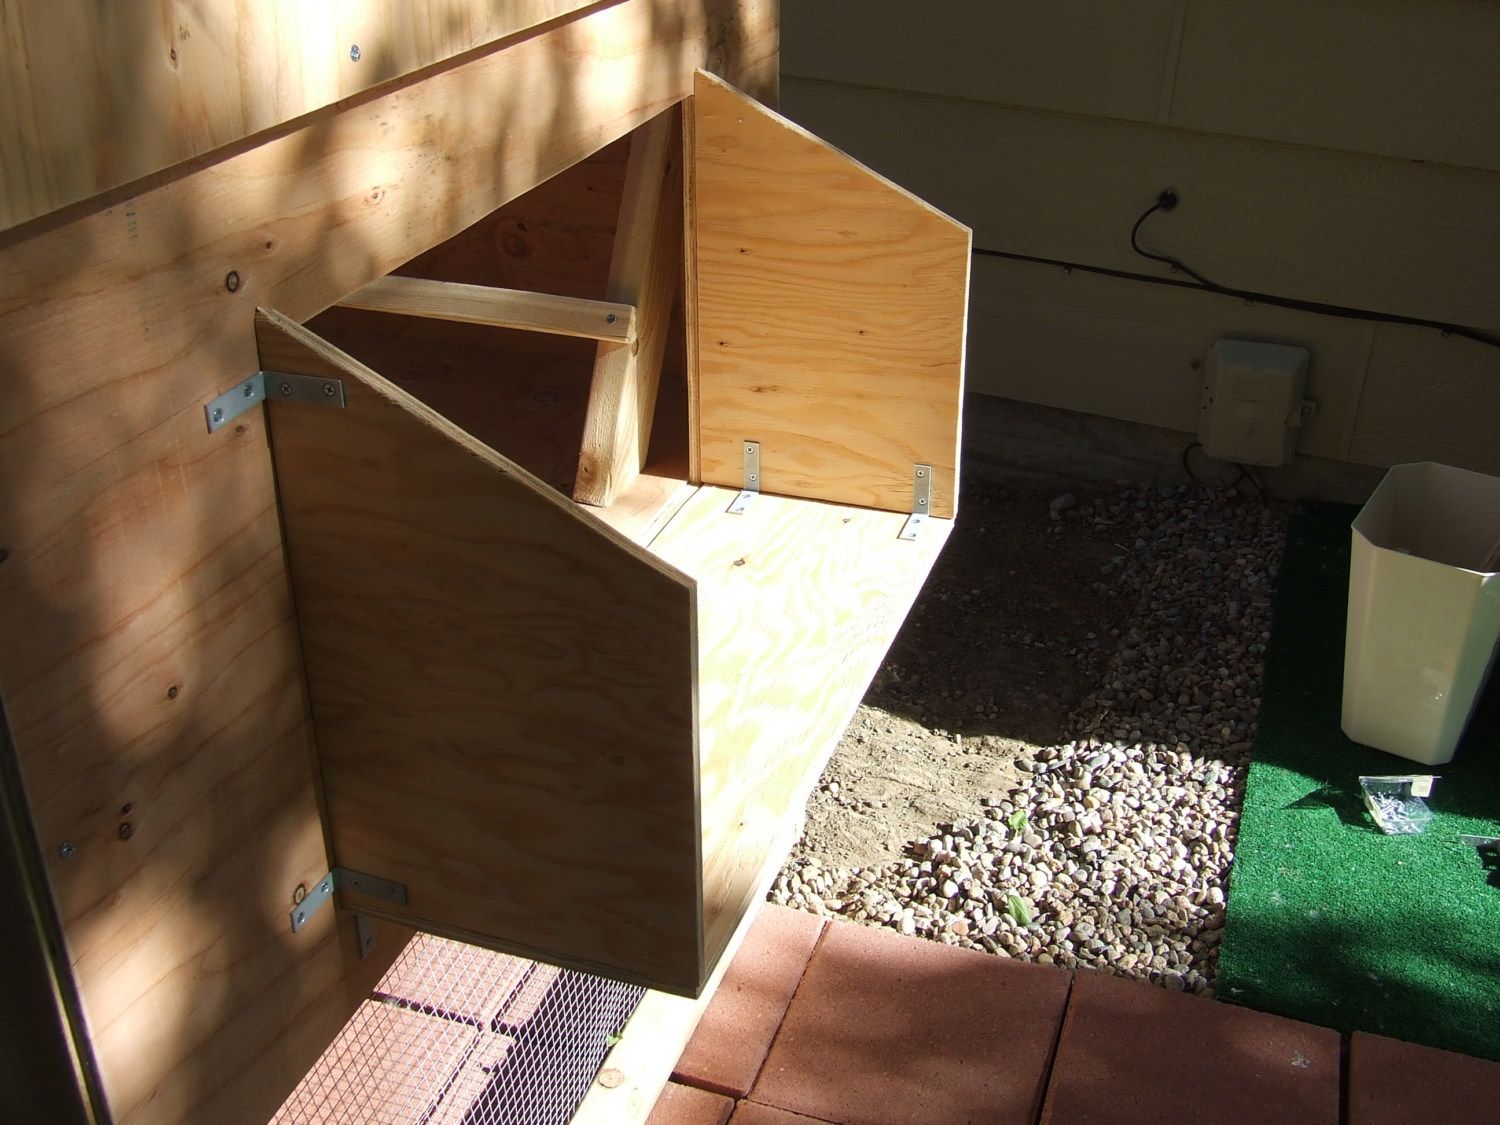
The front is next 27x11 (the side panels will stick up a smidge from the front panel, but that's okay.
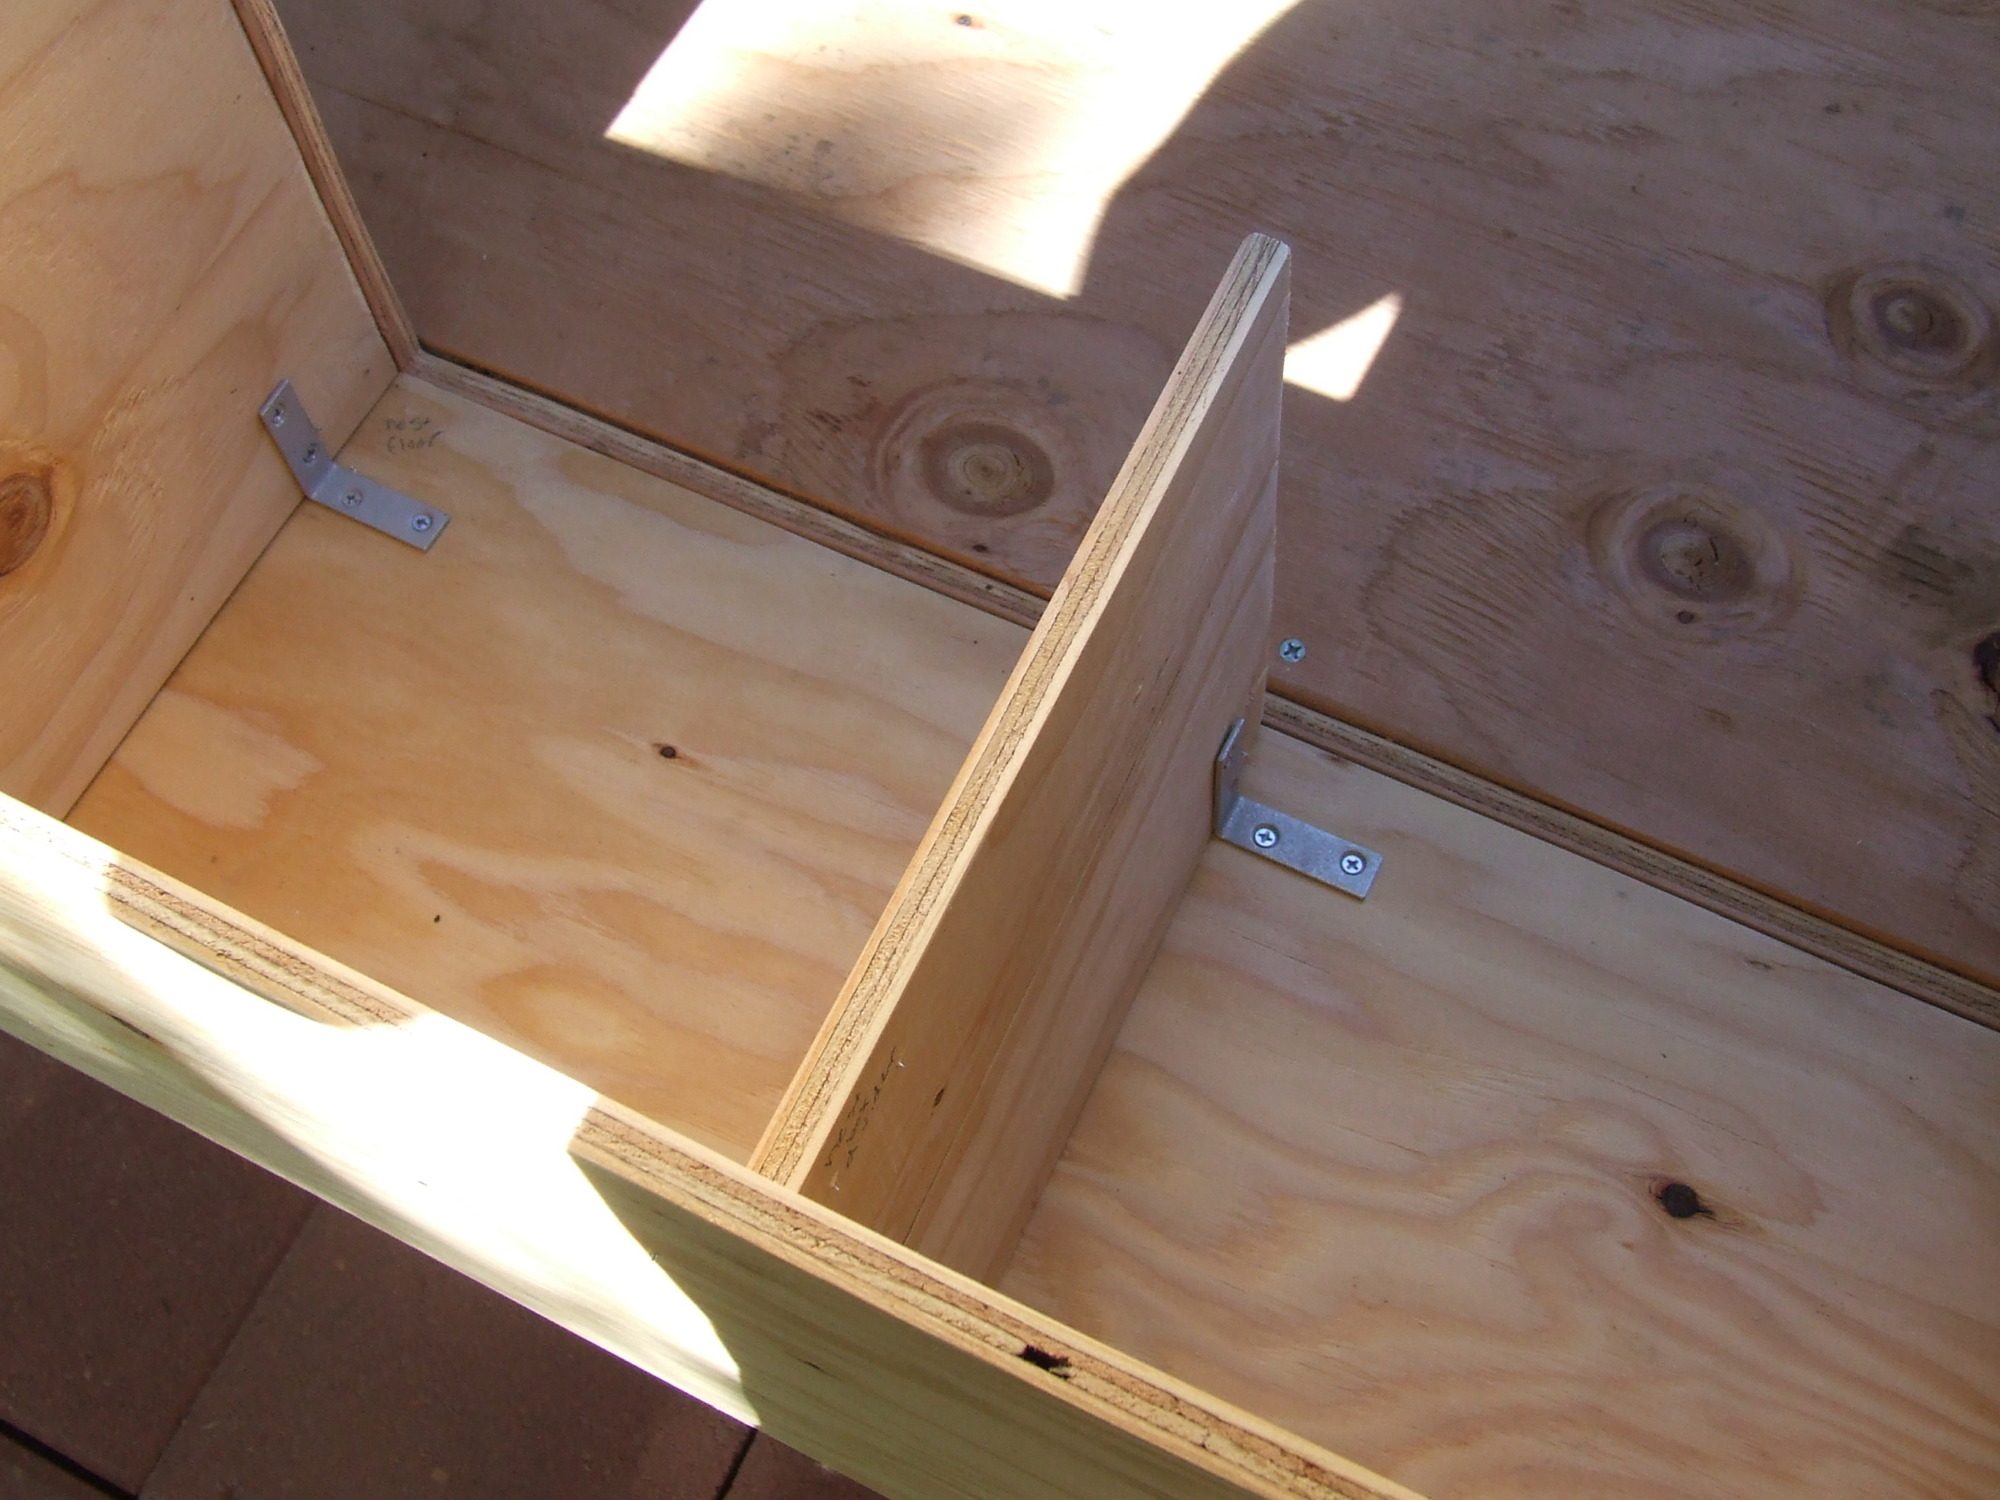
Then we added the divider on the inside. This thing has lots of brackets. The divider is 10x9
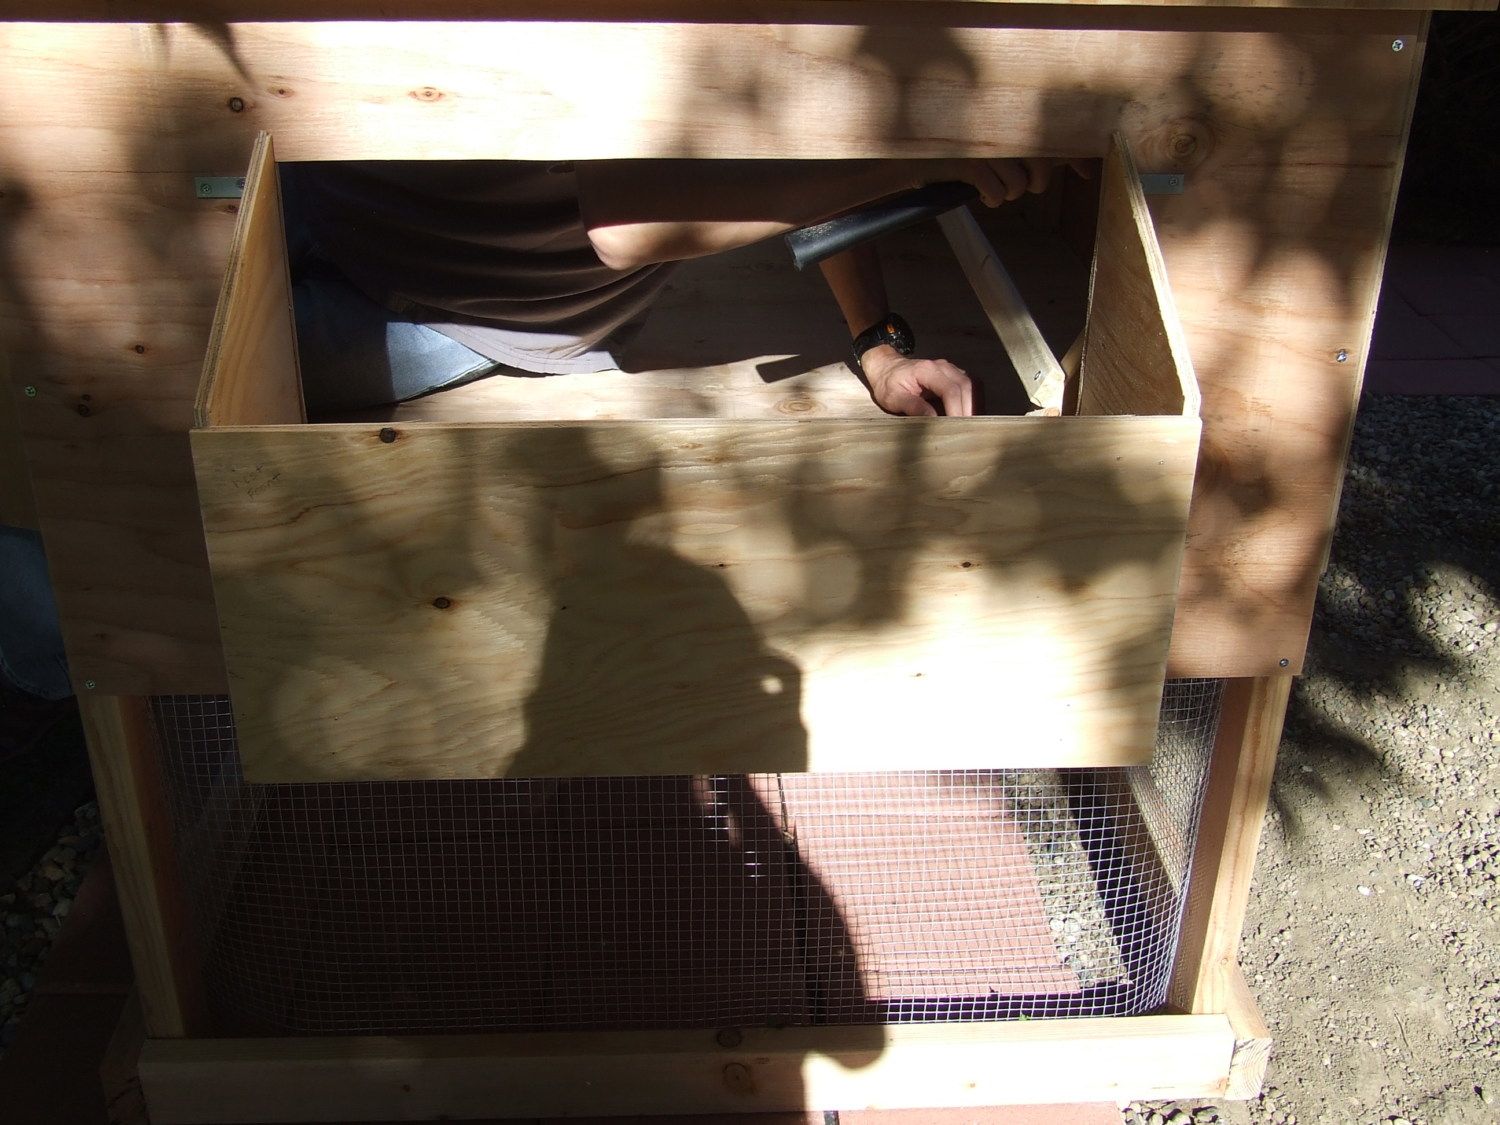
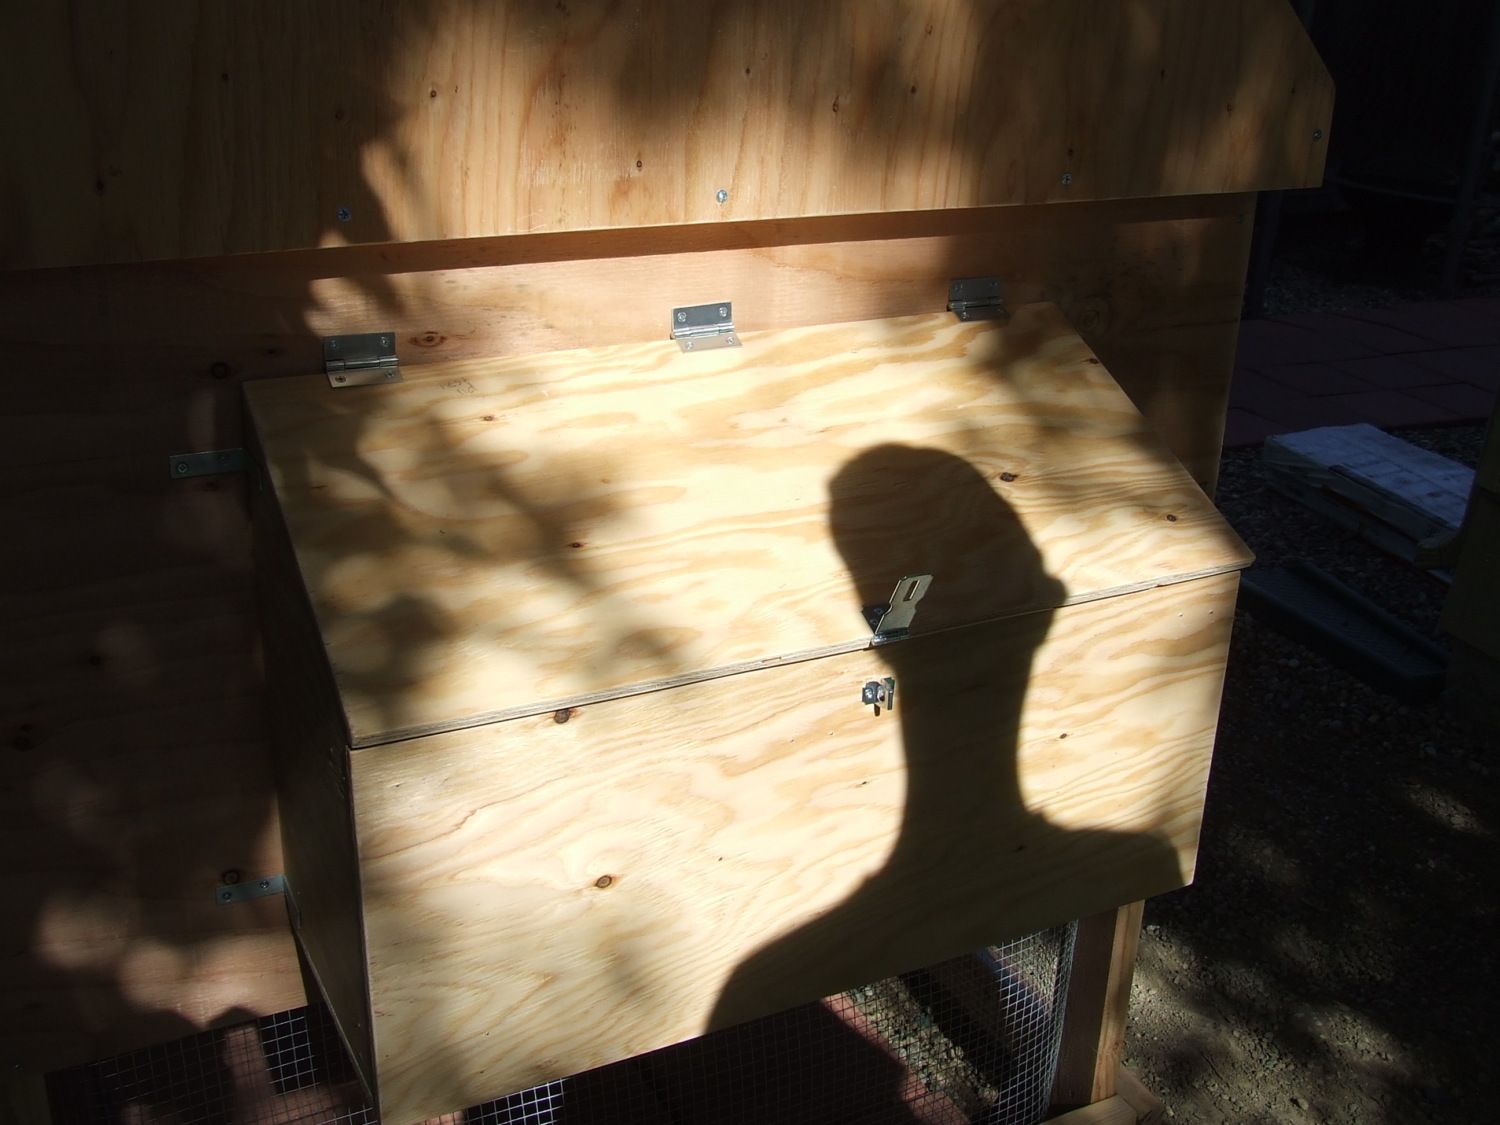
The net box lid is attached with flat hinges that are rotated for the lid to open easily. We put on a locking latch and threaded a carabiner through it.
We added the coop door 19x12. The plywood sits inside the hole we cut and we used flat brackets here. We added a slide lock and a locking hook and eye. Yes, I told you I'm paranoid.
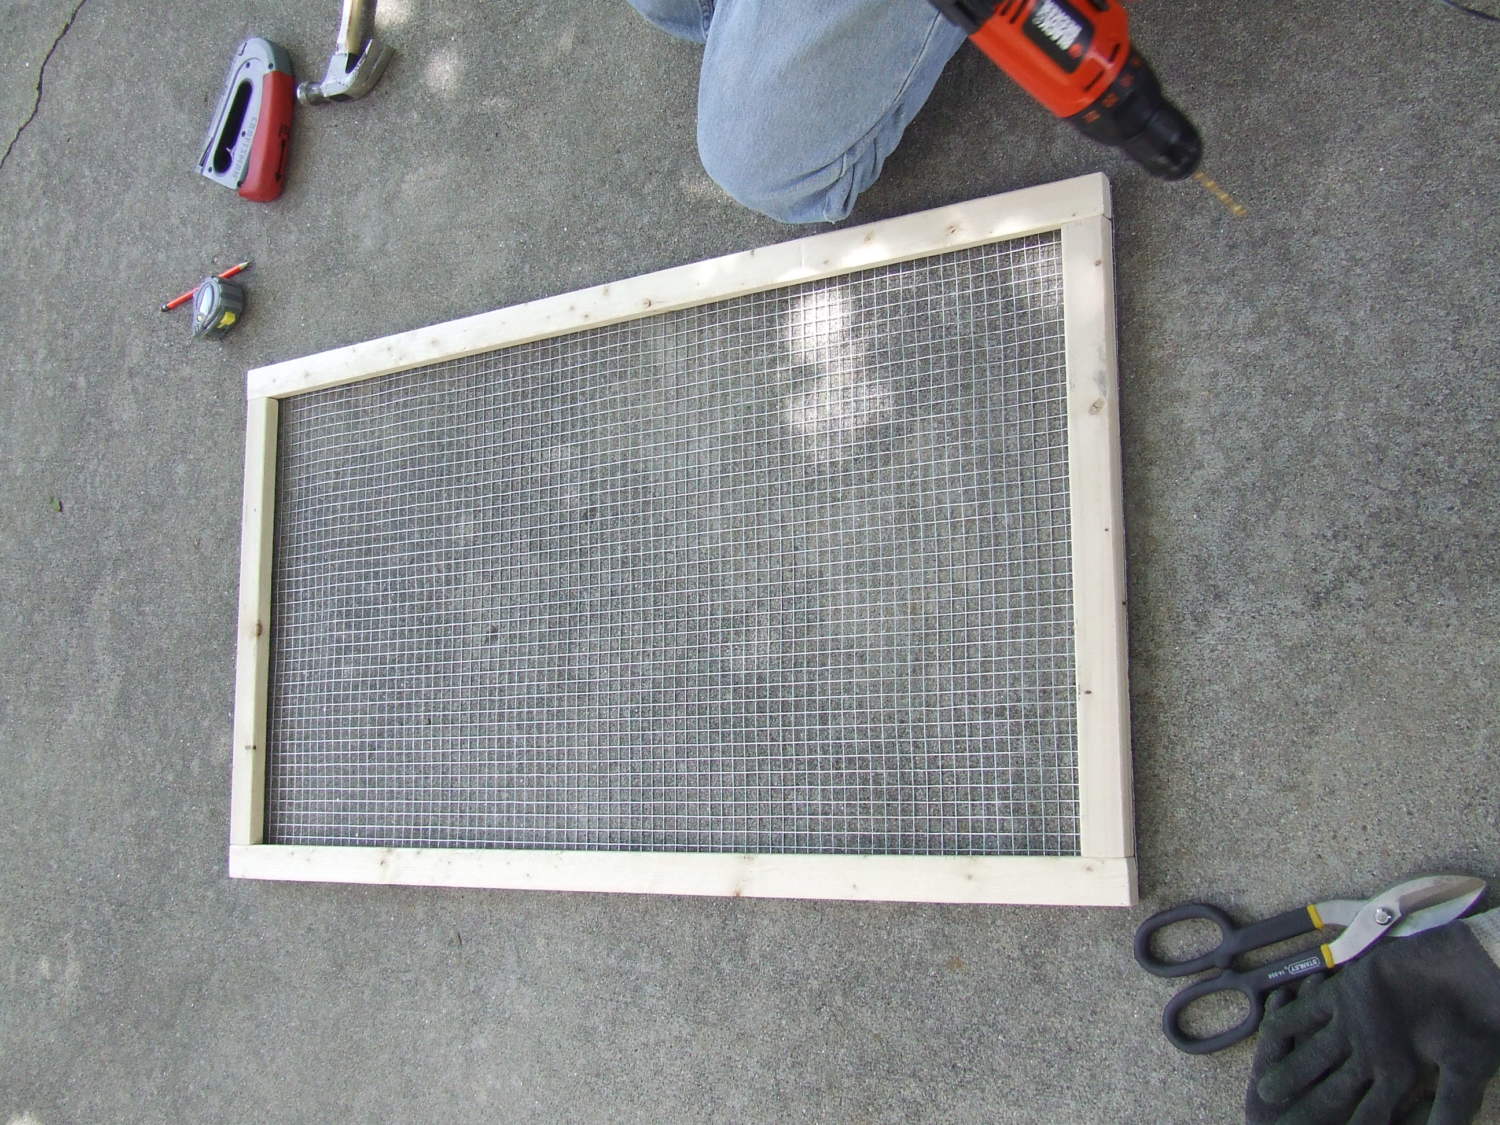
Next we made the doors for the run. We used 1x2s. The lengths for each door is two at 40 3/4 and two at 19 1/2. Once they were put together we staples the hardware cloth to the frame. They were attached with flat brackets also and lock with locking hook and eyes.
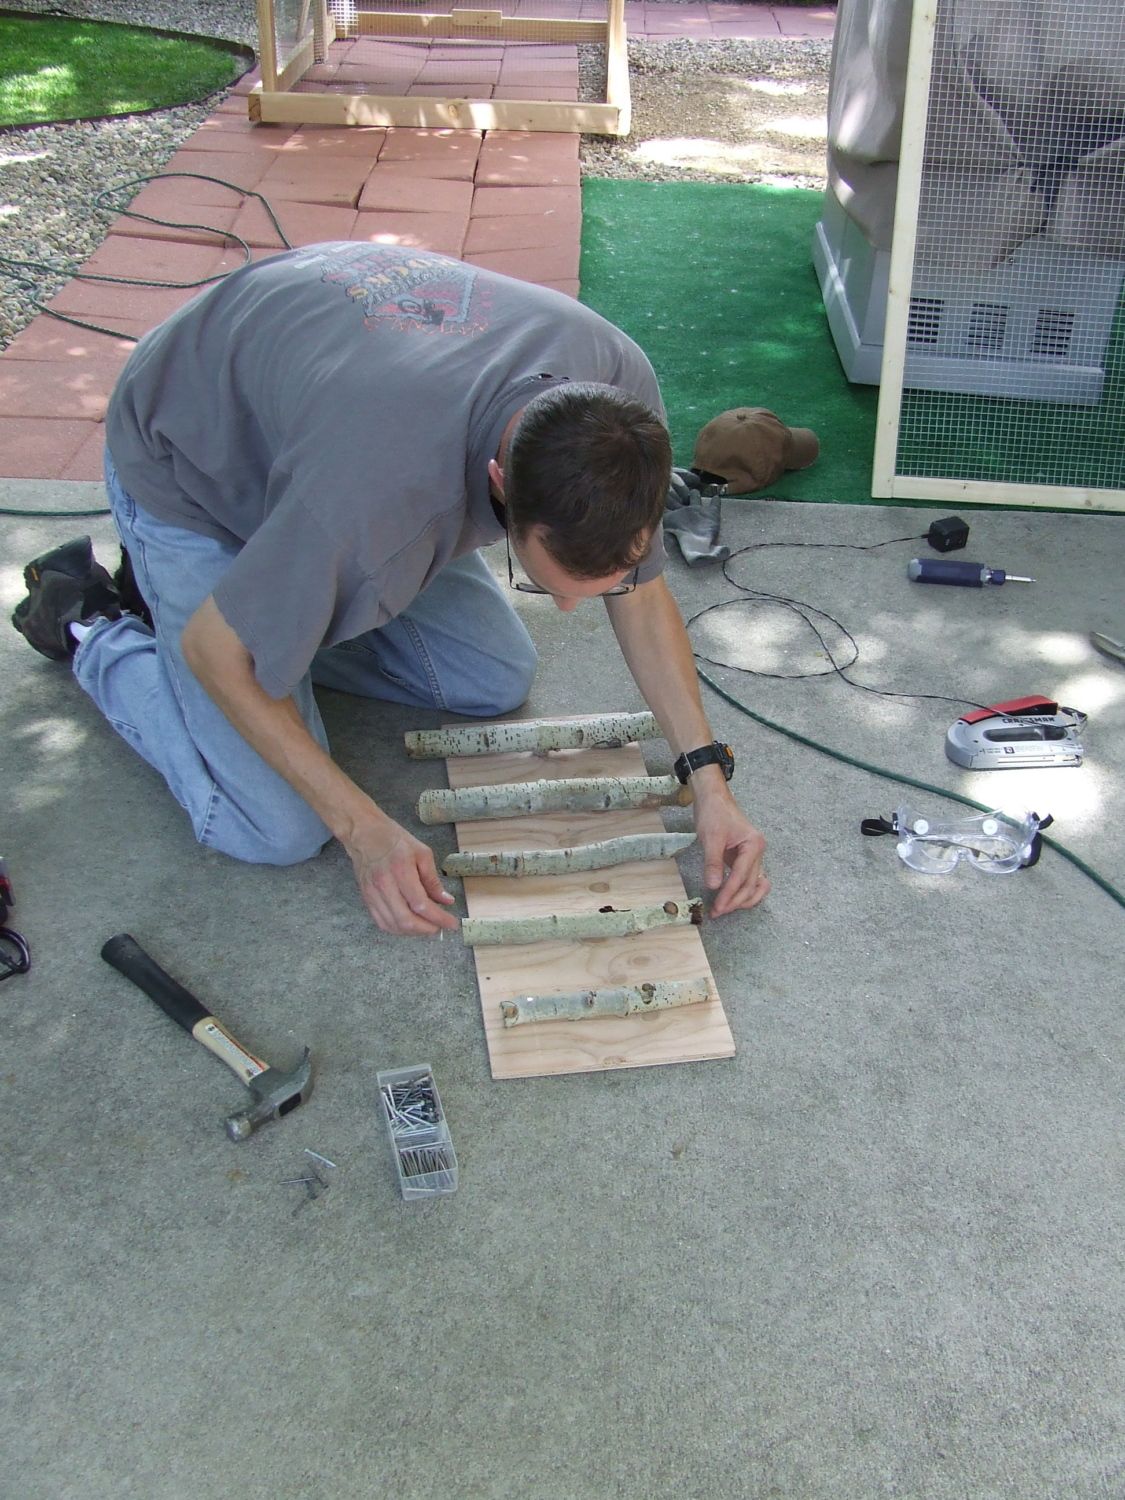
My husband made a ramp out of some of the left over plywood and some old branches from a tree we cut down last year. This is the only place we used nails.
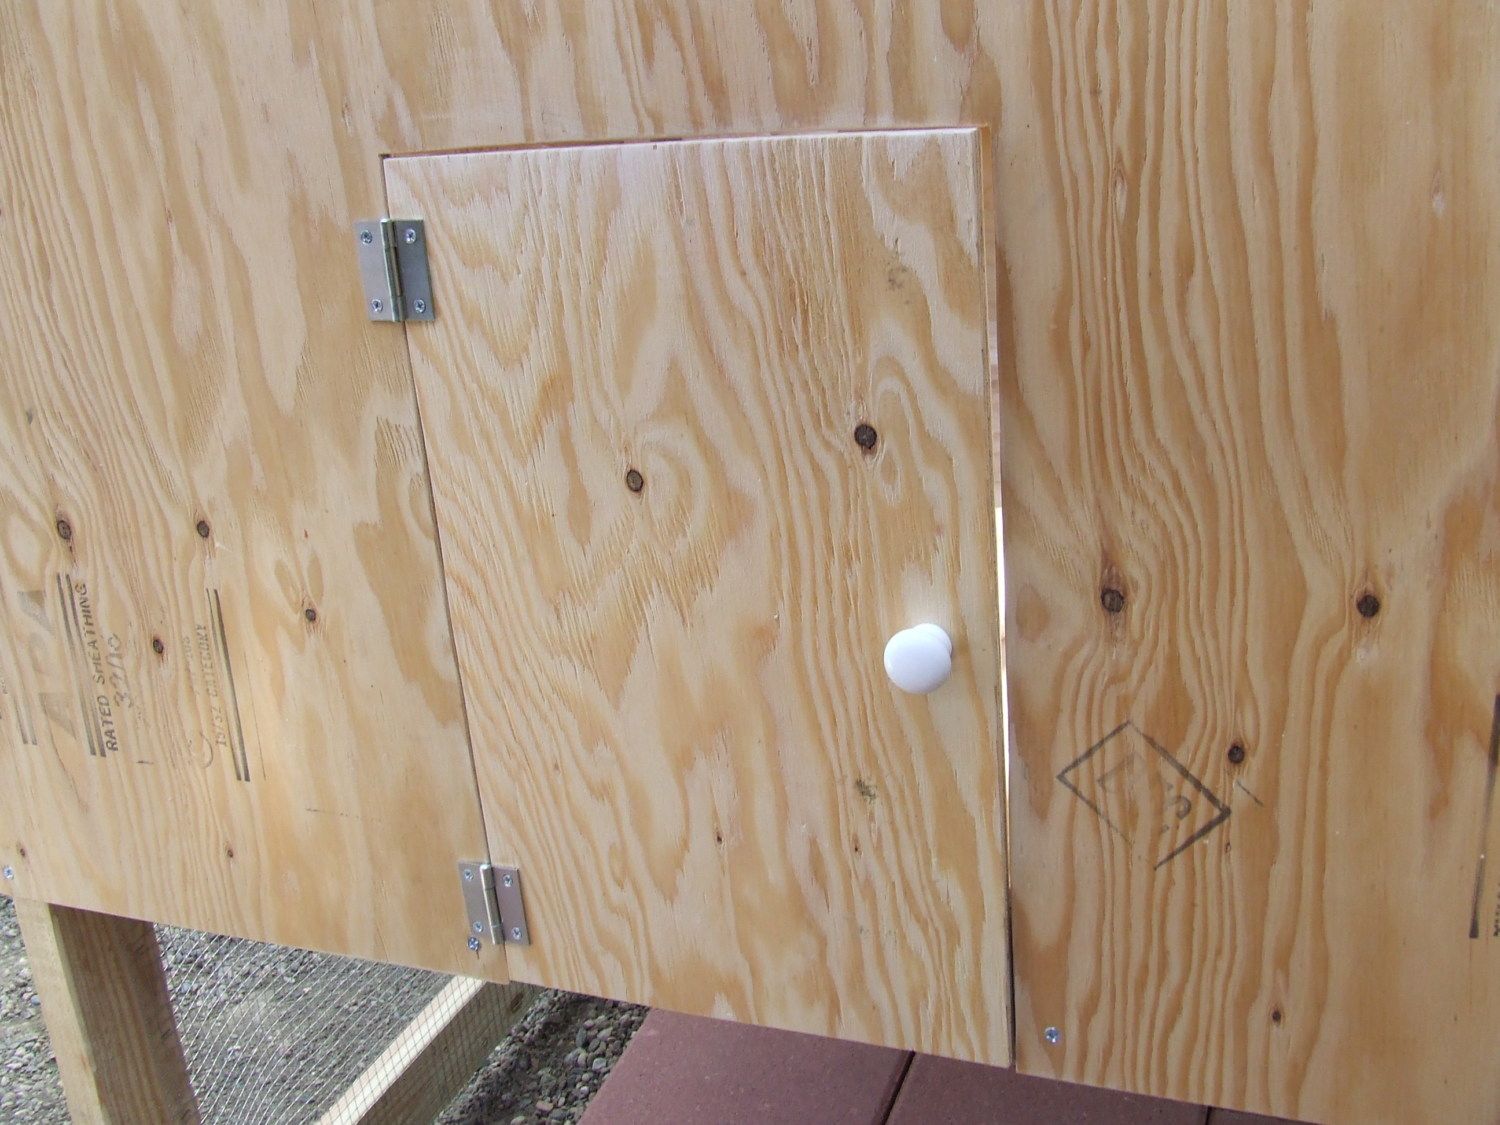
Then we made a window For the window hole. Lowe's sells a sheet of 8x10 lexan plastic. We glued pieces of oak wood to the plastic with Arlene's Tacky glue. Then predrilled holes for the flat hinges (we actually cracked the window because we predrilled for hinges that didn't work and then forgot to predrill when we attached the flat hinges). We added a small piece of plywood next to it so that we could use the flat hinges. This was also used for the front coop door so we could use the flat hinges there also.
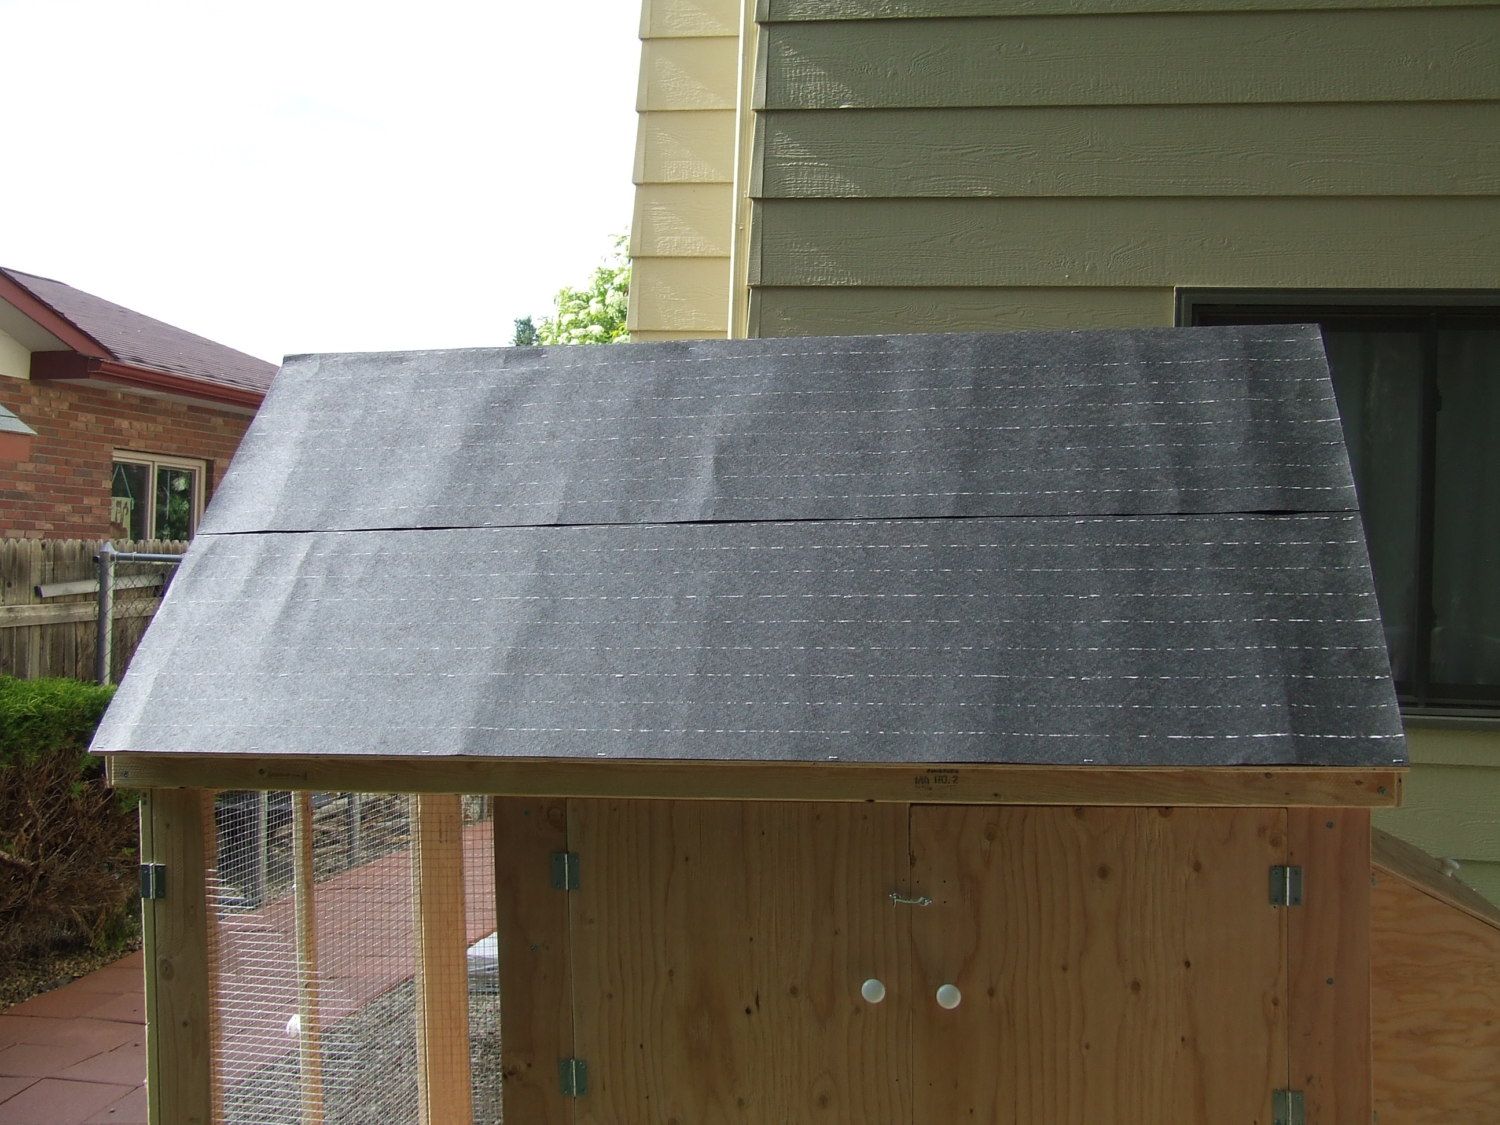
We finally got the roof panels up. They measure 73x38 (I think) 73 is the length of the roof with the plywood figured in, but the 38 may be too long, you'll need to measure and see.
Here is a shot of the doors all fixed. they measure 19 1/2 x 20. each one. Oh yeah and we had added the hardware cloth to the rest of the openings.
Then came asphalt paper for the roof.
When it came to the tiles, we were very lucky. There were some people roofing apartments near us, when my husband and I were out for a walk. We asked them if we could have some of their old tiles and the guy told us that he had two packs of new tiles that were the wrong color. He gave them to us saying he was just going to throw them out anyway. We did do the roof a bit wrong, but its going to stay that way. We should have staggered the tiles instead of having huge overlap. Hey I never said we were roofers.
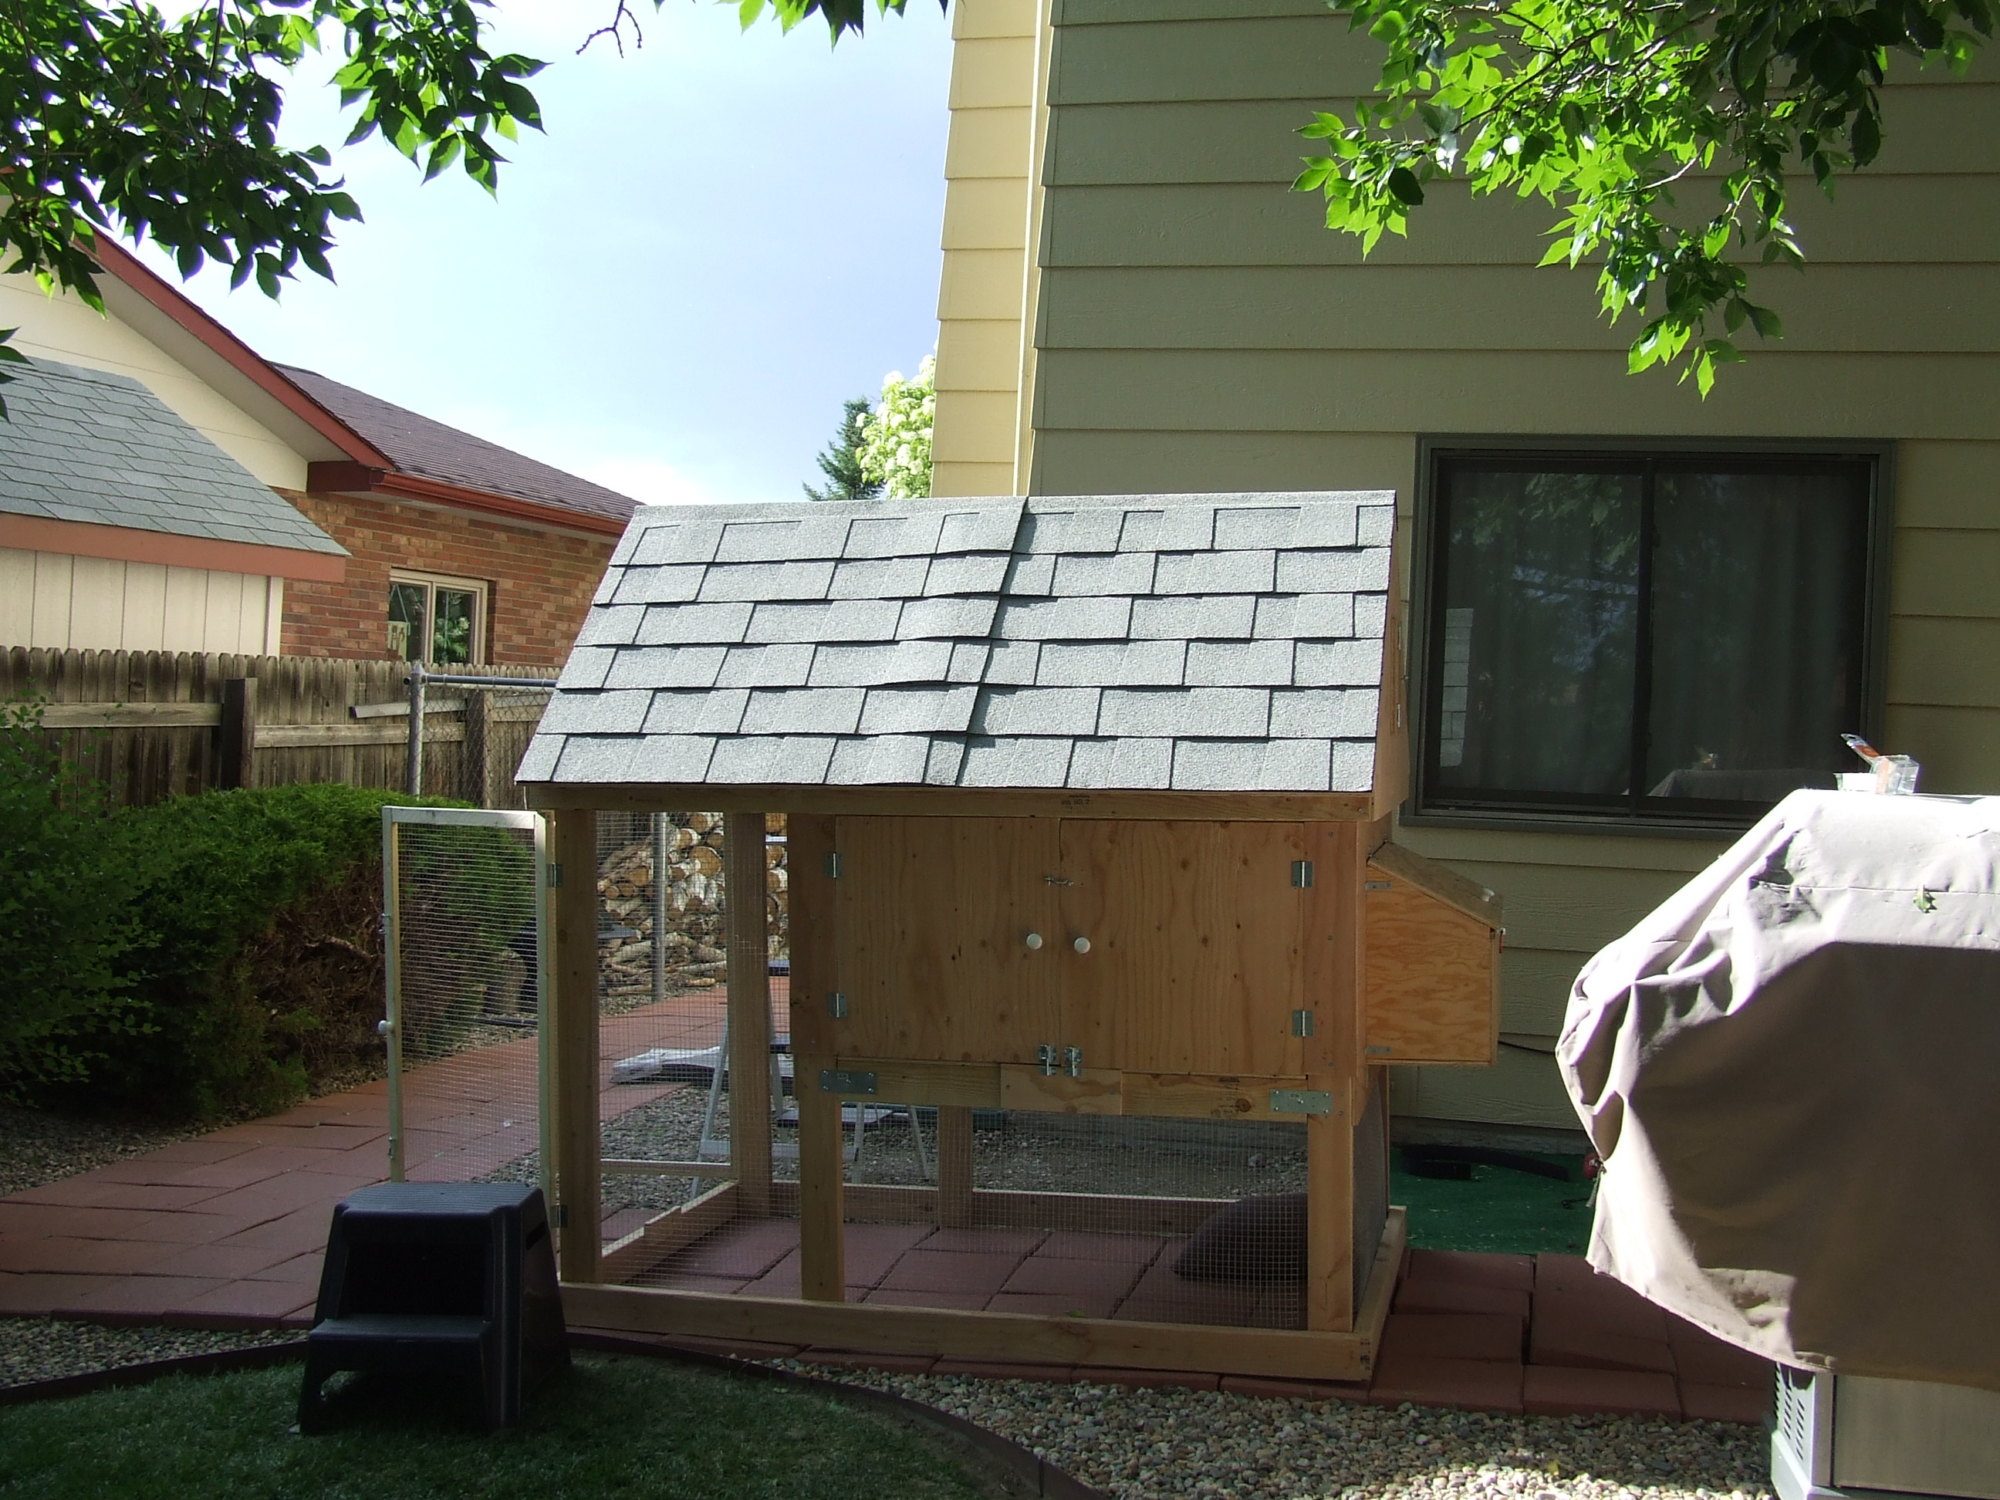
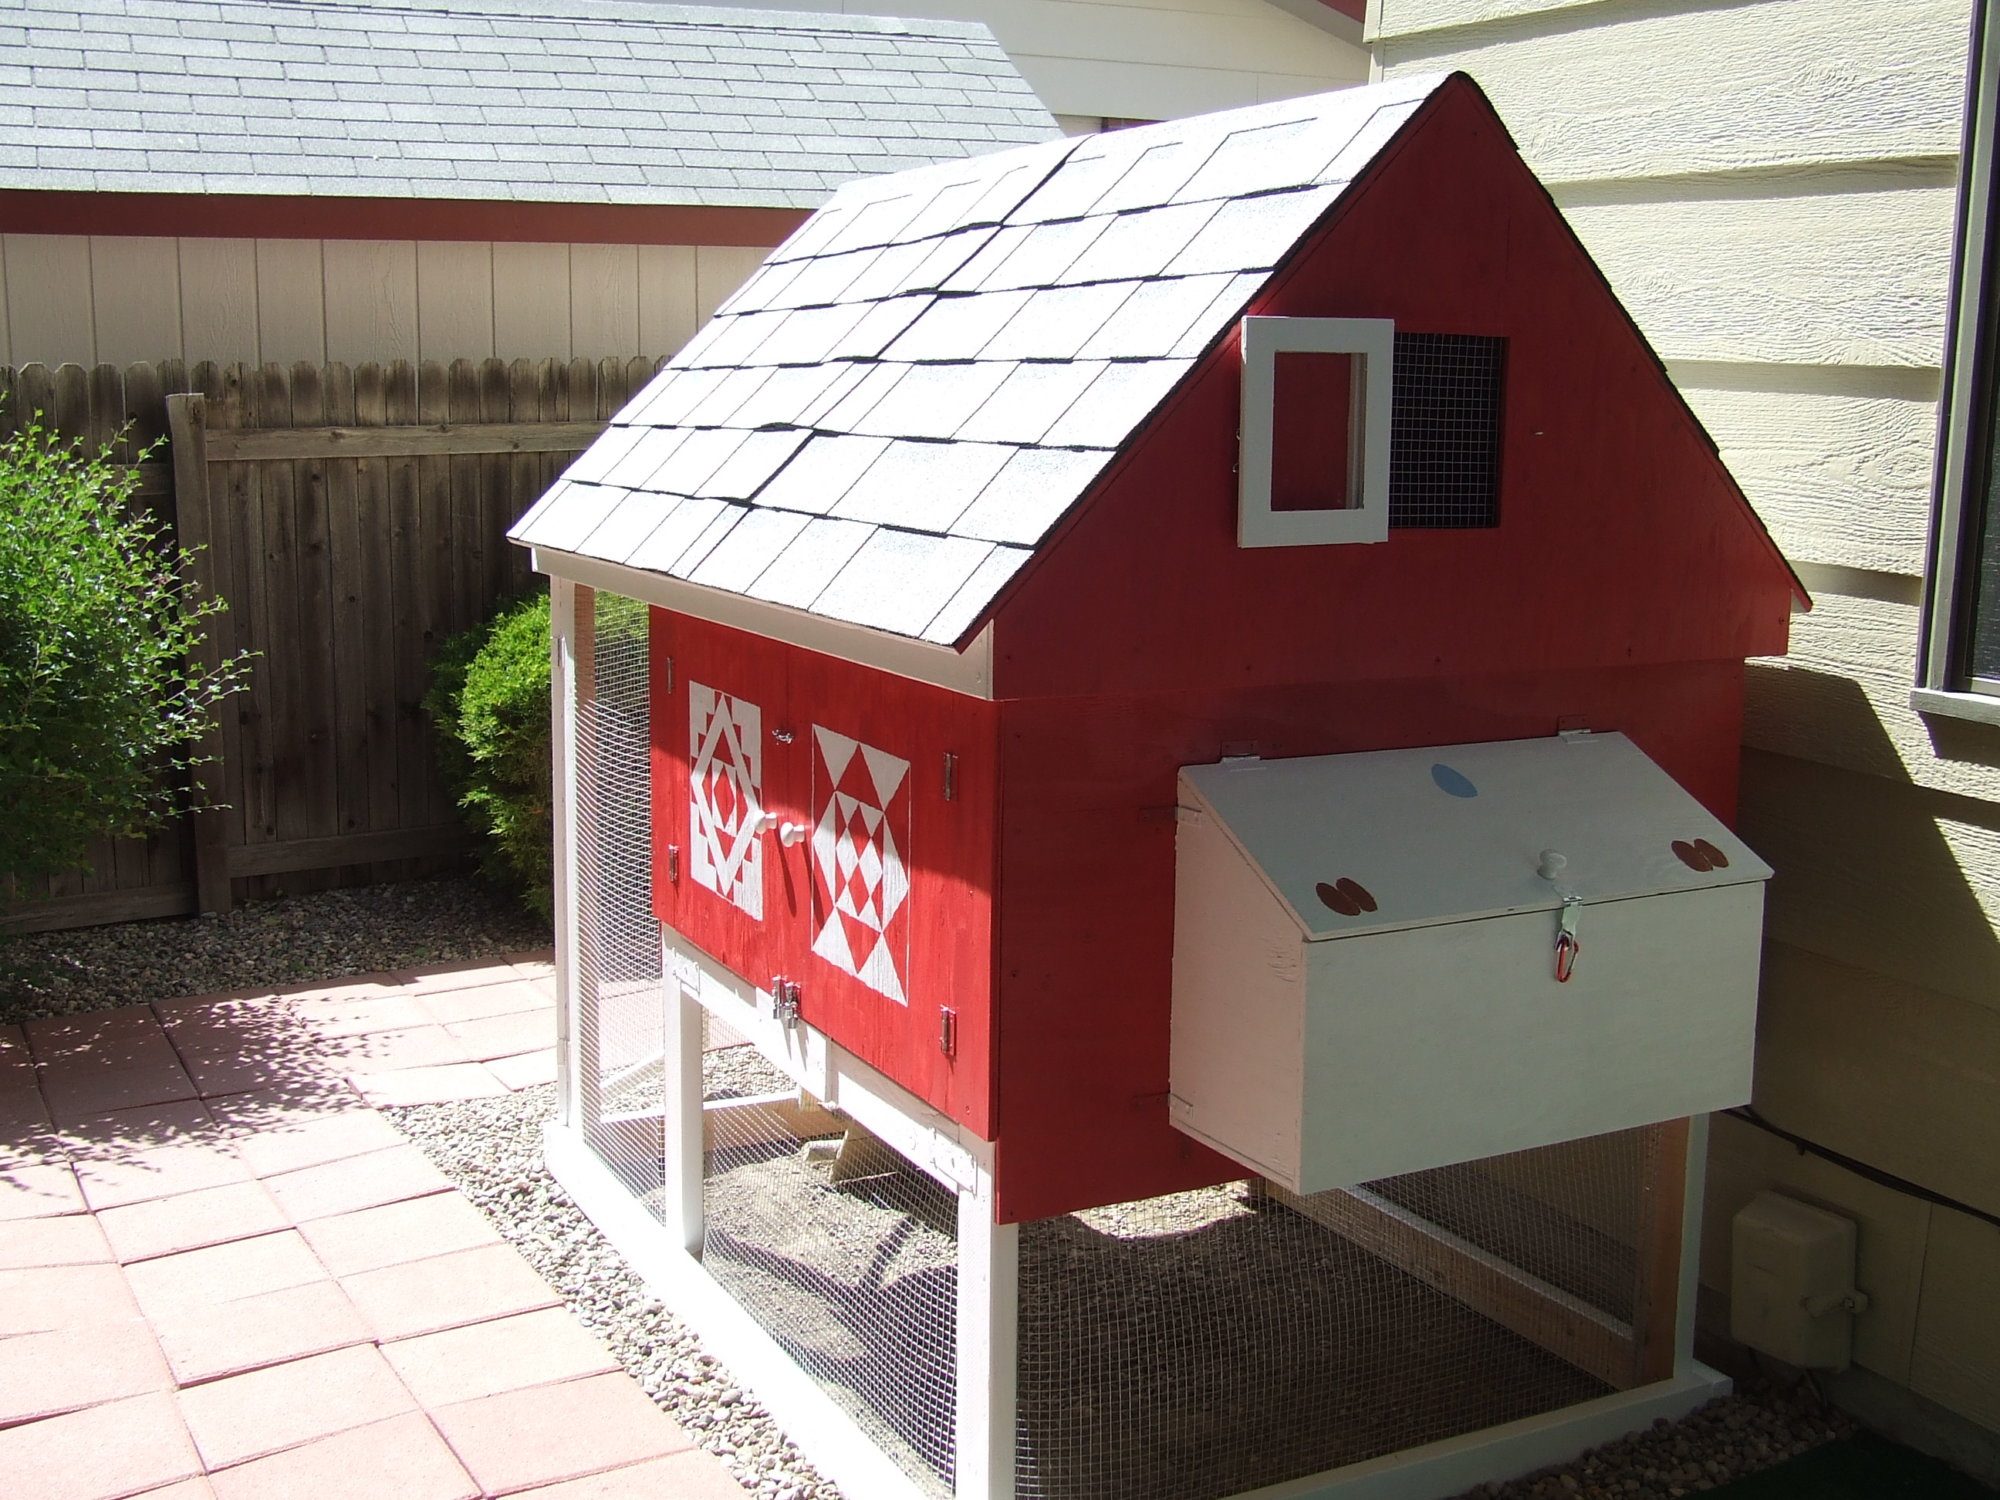
It got a coat of paint with exterior paint and we were done.
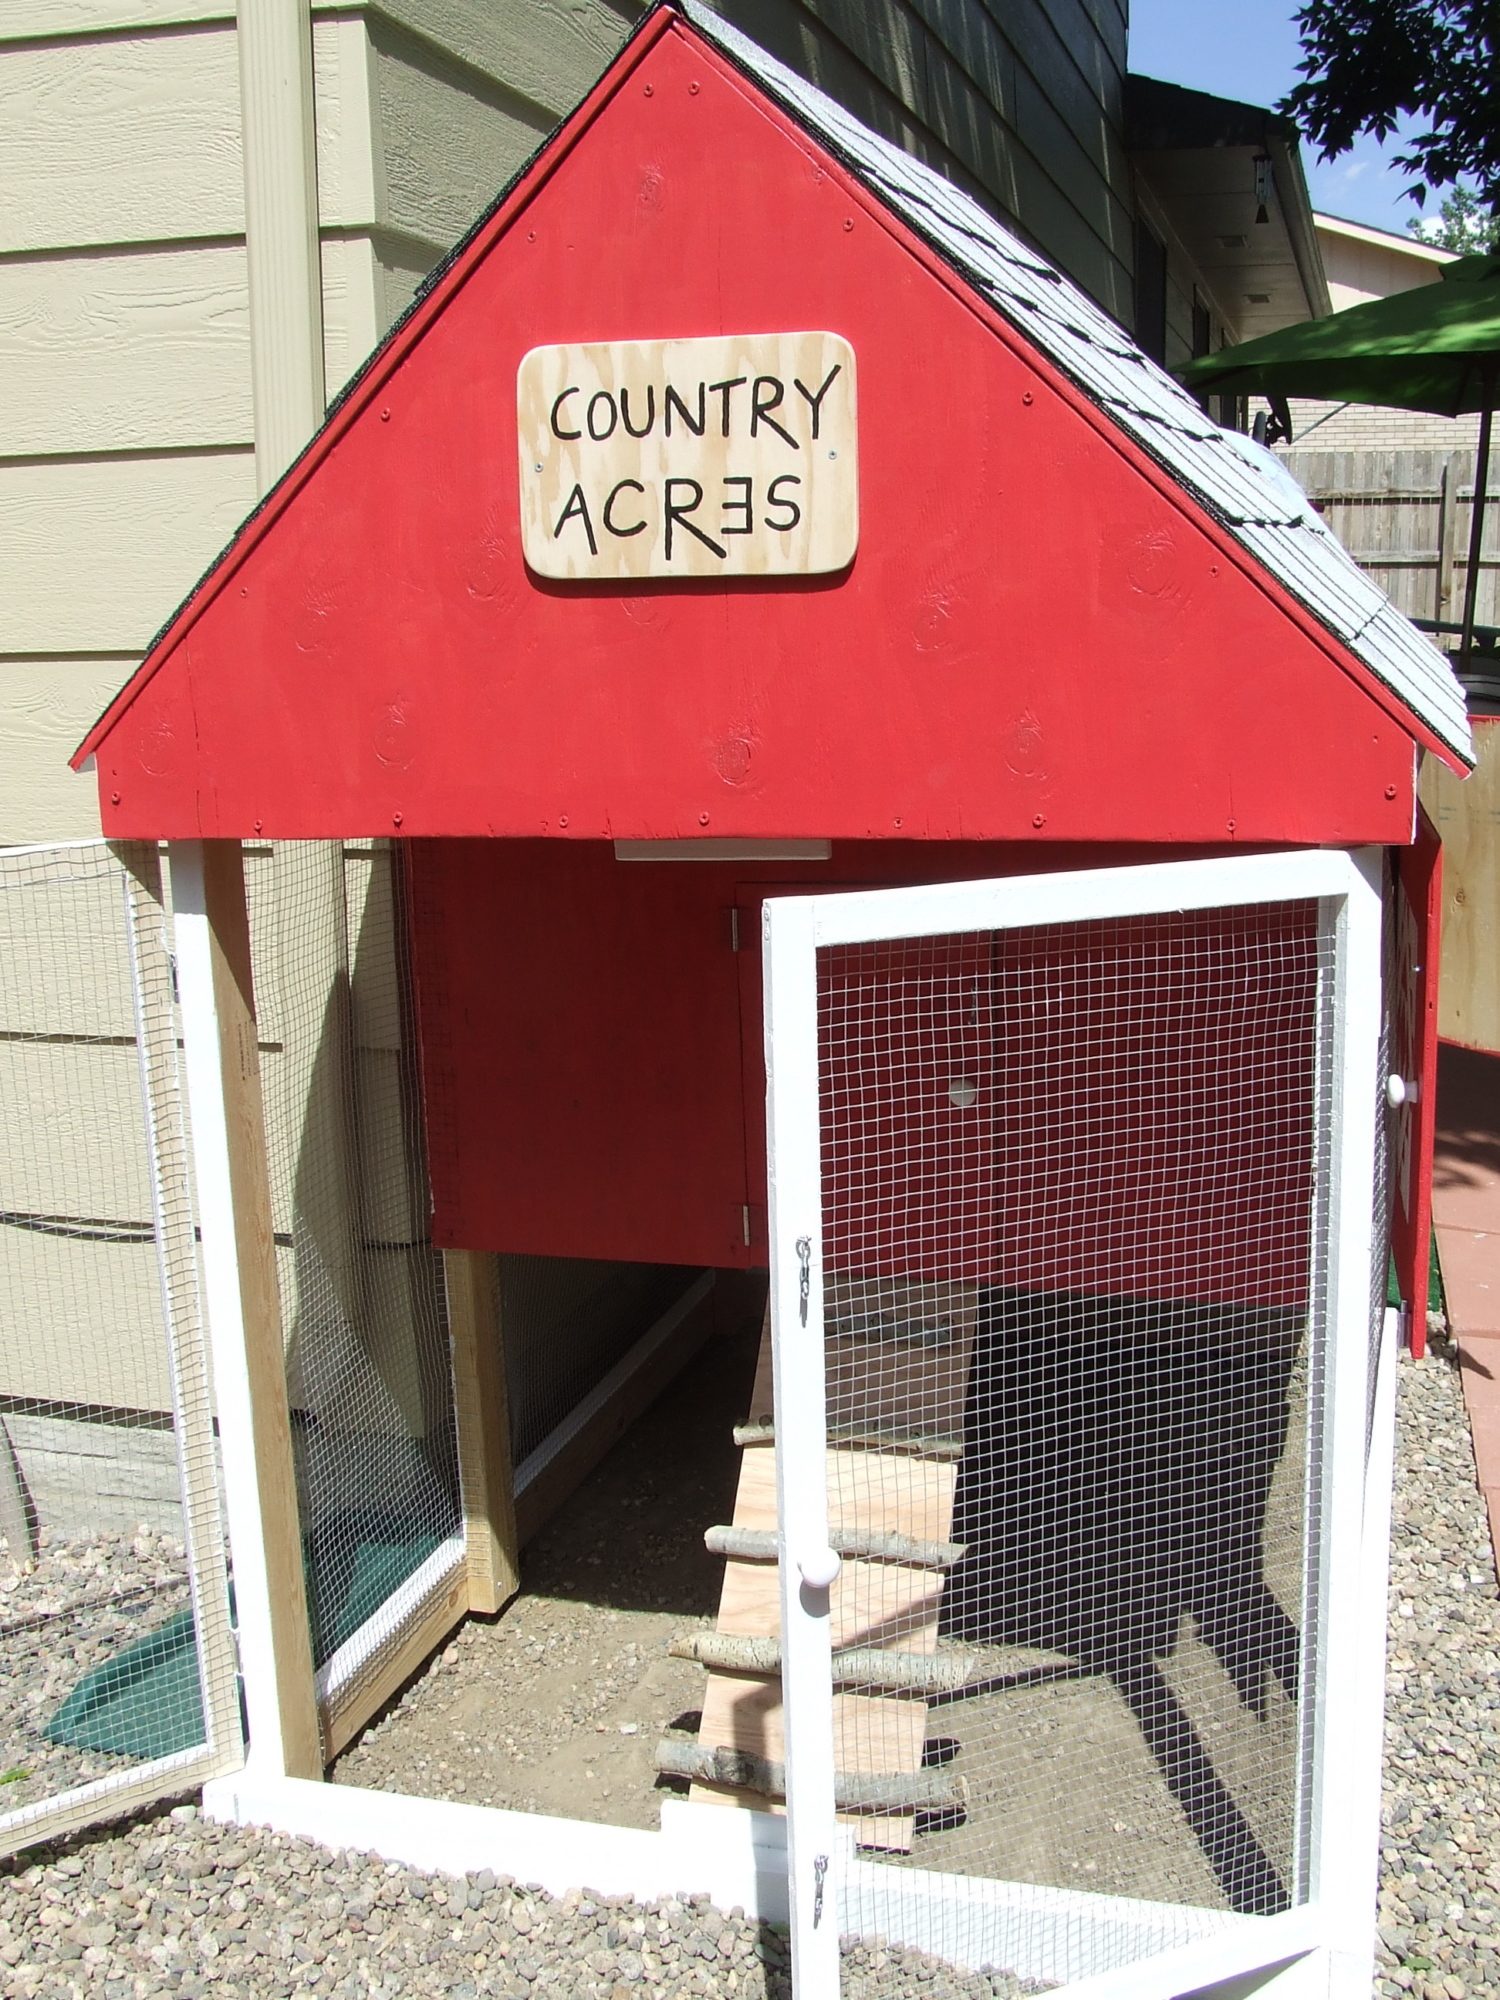
Yes, I know the E is backwards, that's on purpose.
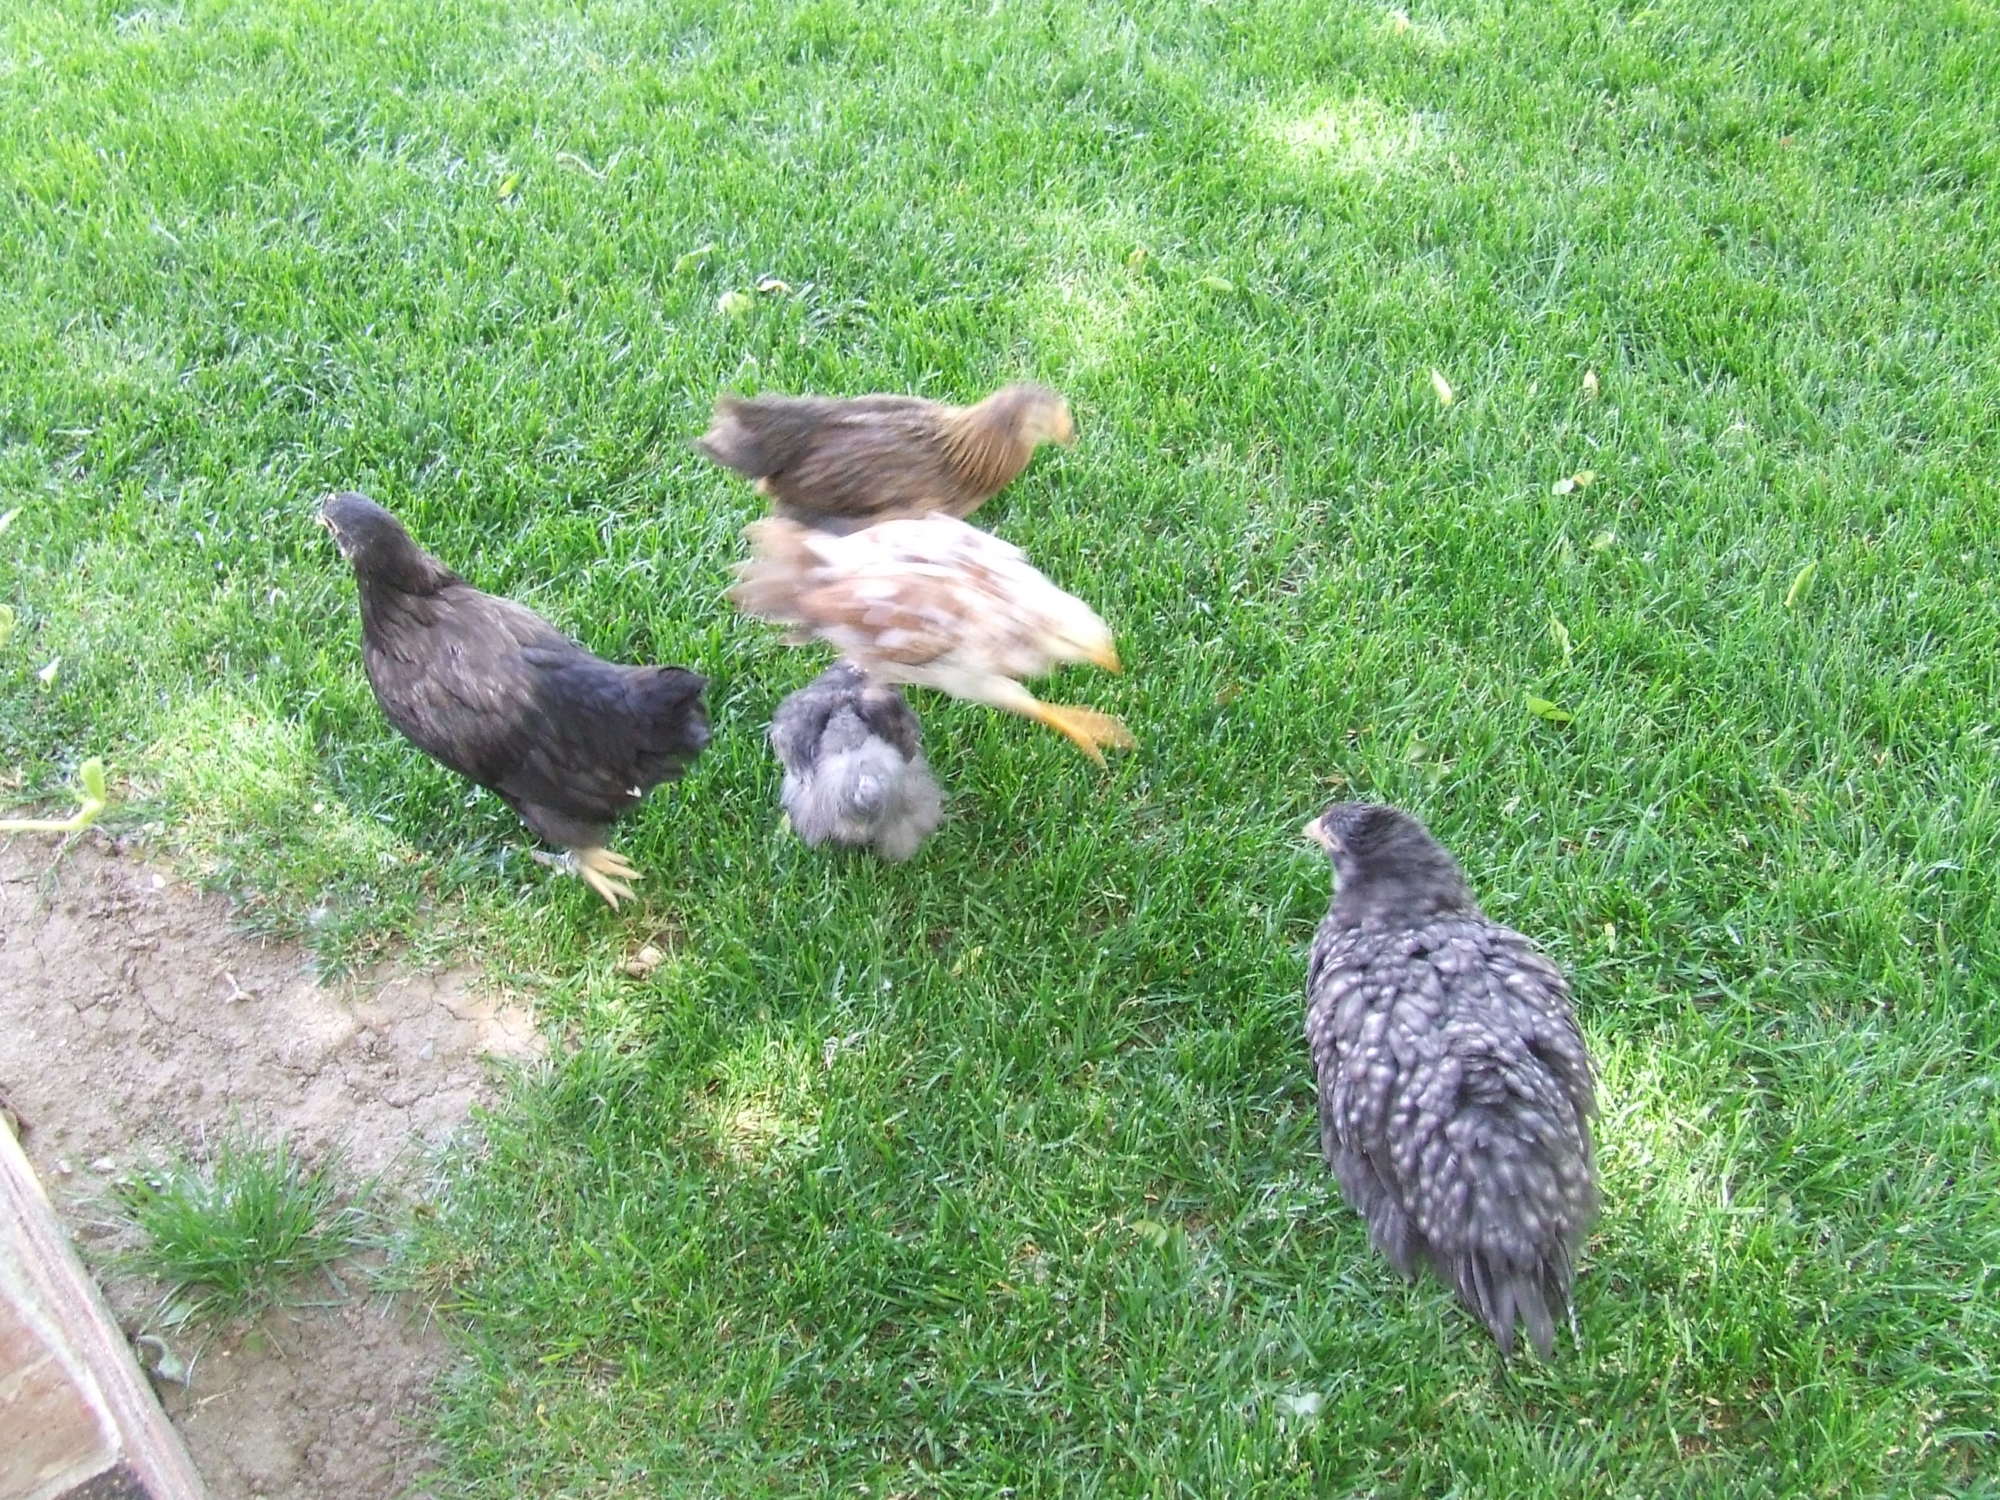
And here are my five girls.
We also added linoleum to the bottom of the coop for easy cleaning out, but I didn't get a picture of that. The only thing I would do differently would be to add a door to the opposite end of the run to be able to get the chickens out from underneath the coop.
In all the coop cost us $333.00 not including tax, but including our 10% military discount. Please tell me what you think of our little coop.