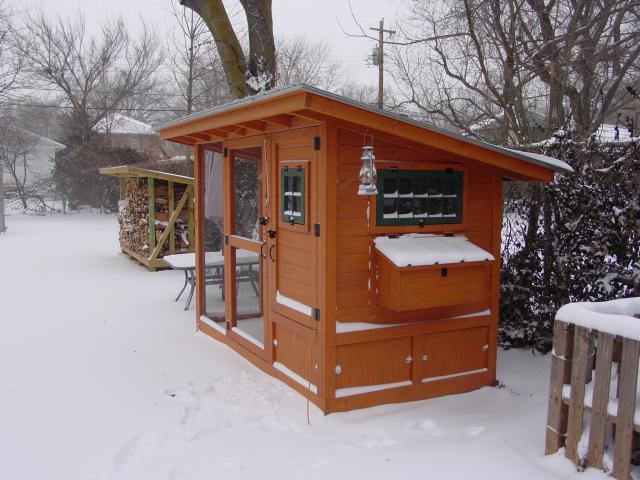
The "WICHITA CABIN COOP"
A simple, secure, & easy-to-use home for any small backyard flock.

3D Computer Models and Material List:
We have received a lot of requests for the "formal plans" to build this coop. Although I didn’t have anything like this when I first built it (see original narrative below), I eventually created a couple detailed 3D computer models of this coop for construction reference purposes. I also put together a building material list, and an accompanying write-up of general build guidelines and recommendations.
If you are interested, for a nominal fee ($10.00 USD), we can send you copies of these files.
Please contact us via PM, e-mail at [email protected], or call (316) 680-2524.
We accept payment via "PayPal", "Venmo", check, or cash.
The "SketchUp" files contain complete 3D computer models of the coop design -- they're basically like having an already built coop to refer to and copy from. You can view all the individual parts, see how they fit together, extract measurements / dimensions for them, and even adjust / modify the design if you wish. Note that you will need the "SketchUp" program installed on your computer to open the model files (available free off the web at http://www.sketchup.com). If you are not familiar with SketchUp, it's easy to learn the basics via online tutorials or similar (ref. SketchUp website above, and/or search YouTube videos e.g. "SketchUp tutorials").
"Entire Coop" model:

"Framing Details" model:
Excerpt from the "Build Material List":

You can use the "Rotate, Pan, & Zoom" features / tools in the "SketchUp" program to view the models from any desired angle and/or magnification:

You can use the "Hide / Unhide" feature / tools in the "SketchUp" program to view all hidden or "buried" component parts:
You can also use the "Tape Measure" and/or "Dimensions" tools in the "SketchUp" program to determine exact measurements of all component parts, distances between points, lines, surfaces, and etc.:
See the link below for our original ad and further information. Also, feel free to contact us anytime if you have additional questions or need further help.
https://www.backyardchickens.com/t/743810/wichita-cabin-coop-sketchup-models-and-material-list
Build Example Video:
Check out this great video clip of the time-lapse construction of a "Wichita Cabin Coop", as built by Andrew Kennedy of Mount Pleasant, SC. Note that his build sequence is very similar to how we built ours. Thank you Andrew for this fun and educational video!
")
"Wichita Cabin Coop -- time-lapse build":
https://www.youtube.com/watch?v=5_XEeTDDP0k
Facebook Page:
You might also want to check out our "Facebook" page dedicated entirely to the "Wichita Cabin Coop". Inside you'll find commentaries and pictures from lots of other folks who have constructed their own coops based off the "WCC" design:

https://www.facebook.com/WichitaCabinCoop/
Original narrative, summer 2010:
Inspired by many of the coop designs so graciously displayed/shared in Backyardchickens.com, I was able to build my own this year. Some of the prime design considerations used while designing/building this project were:
- Sized for 3 to 6 laying hens
- Convenient access & cleaning -- be able to stand up inside, removable ramp & feeders, etc.
- Outside access for egg gathering, window & door opening, etc.
- Good ventilation
- Secure / predator-proof
- Aesthetically pleasing (enough to keep wife and neighbors happy)
I didn't have a set of formal plans -- just some rough sketchs drawn out on scratch paper and made up in stages as I went along. Tried for a sorta rustic farm building / cabin look.
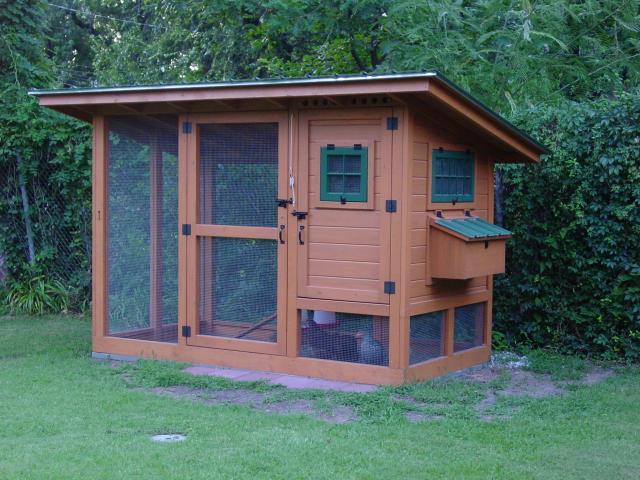
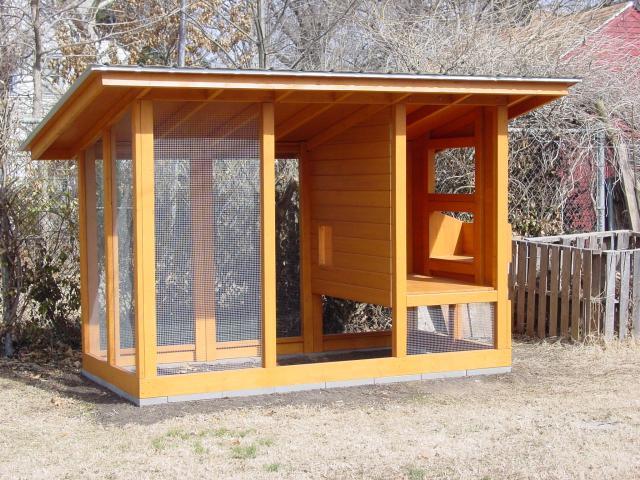
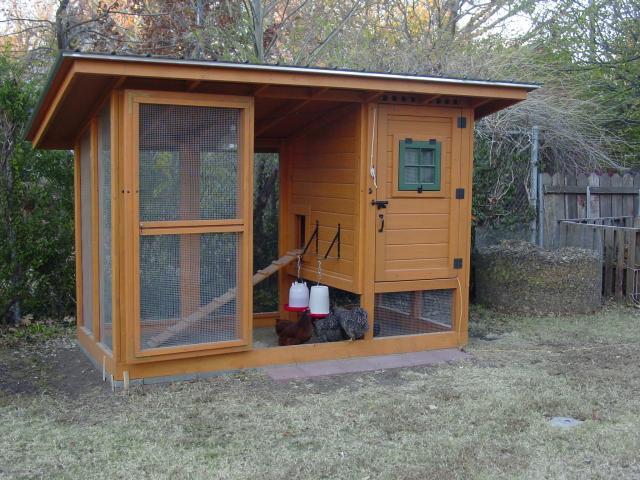
The basic dimensions are a 5' x 10' base footprint, with front wall at 7' high and back wall at 6' high. The floor of the coop sits about 2' off the ground, giving chickens enough room to wander around underneath, but still easy to access/clean out coop portion from the front door. Enclosed coop portion and front door are roughly 1/3 of the overall 10' front width. The shed roof overhangs about 1' on all sides.
Mostly used 8' long 2x4 studs for construction (many were reclaimed wall studs). Also used two 10' long 2x6's for front and back of base, and two 12' long 2x4's for front and back edges of of roof. Walls, floor, and front door made from 1x6 "shiplap" (or "tongue-and-groove") boards. Nesting box is made from 1" flat boards (plywood would work as well). Roof is metal over 1/2" plywood.
Screws (and a little glue in few spots -- e.g. front door) hold it all together. Used a cordless drill, skill saw, sawhorses, and tape measure / levels for the most part -- pretty simple tool layout.
See pics below for more details.
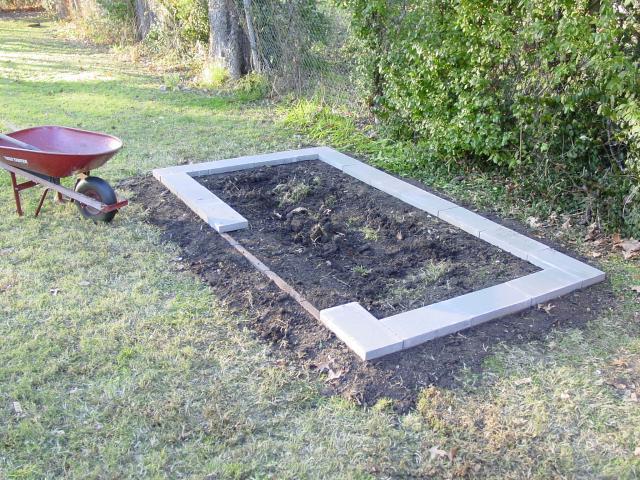
Construction started late last fall, 2009. The "foundation" was made of leftover flat paving stones from our garden (around 12" x 15" each, I think), buried edge-on to help keep things level and discourage our local raccoons from digging under too easily.
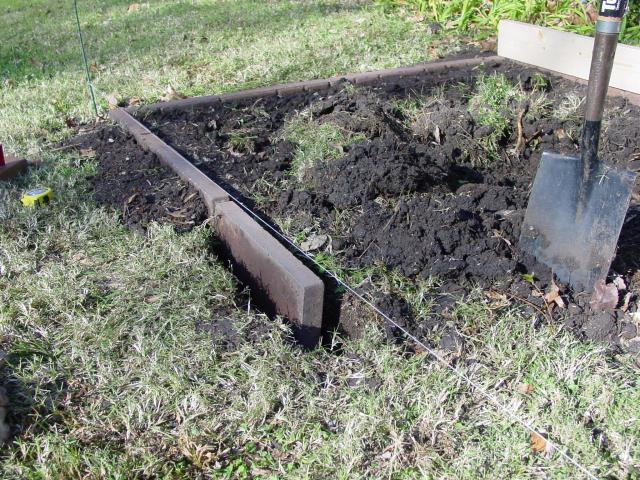
Another row of pavers was laid over the top of the vertically buried ones. Coop frame will sit directly on top of these.
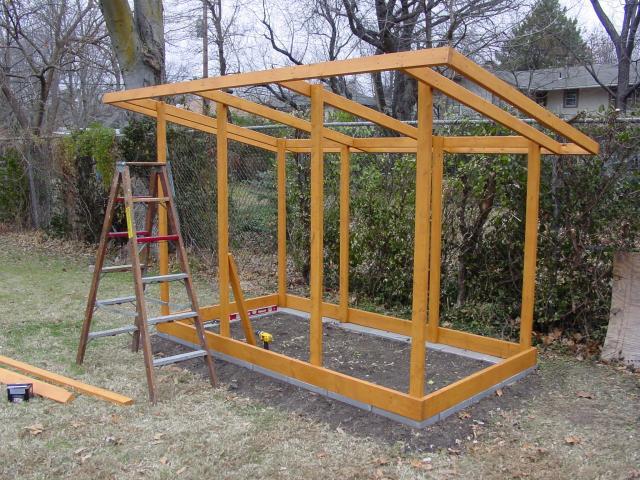
Framing started. Base is 5' x 10'. 7' tall at the front wall, sloping to 6' tall at the back wall. Since too cold to paint outside at this point, all the boards pre-painted inside w/ a couple coats of deck stain before assembling. Used more stain, but no need to paint when finished.
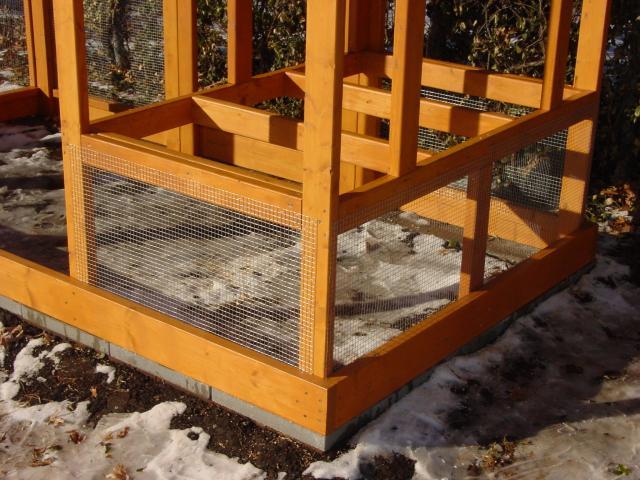
More framing, and screens being installed. Decided to use 1/2" mesh galvanized hardware cloth, after hearing about big dogs charging right through chicken wire, and/or raccoons able to reach though and grab chickens (w/ unpleasant results...).

Close-up of hardware cloth installation. Stapled on after being trimmed to size, and then later sandwiched/secured by the outer framing members.
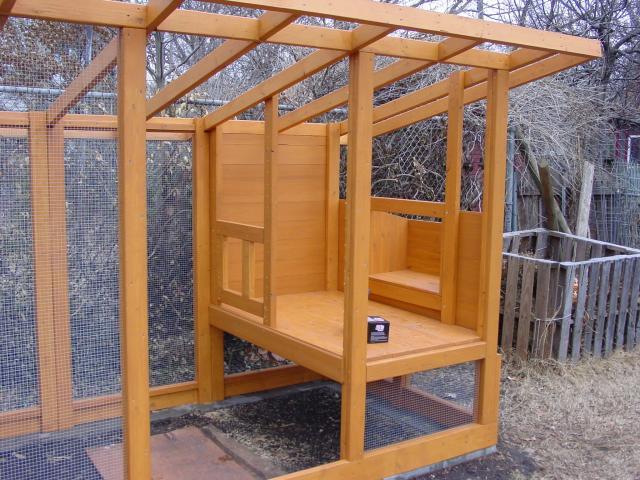
Siding going on (tongue-in-groove / "ship-lap" boards), along with floorboards, and nesting box being fitted. Floor is up about 2' from ground, and coop is about 1/3 over the overall 10' front end width. Floor is slightly sloped from back to front to allow easier water drainage when hosing/cleaning out (same for the nesting box). Framing for the small chicken door was removed later, when modified the design a bit.
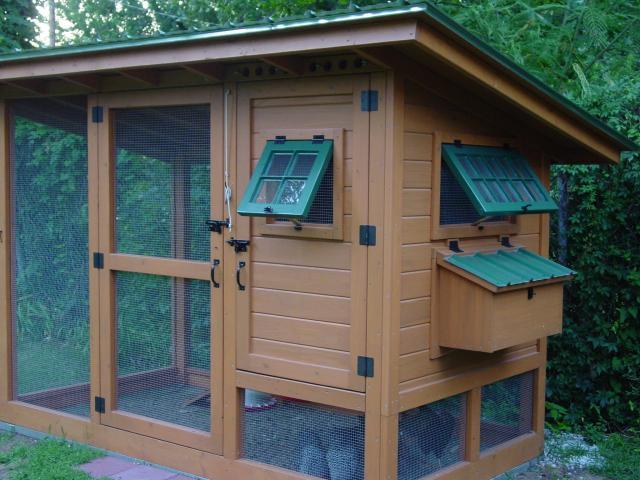
Siding completed and roof put on. Decided to put metal roofing over plywood for strength, weight (help keep coop from blowing over in KS winds), some insulating value, etc. Little $$ pricey, though...
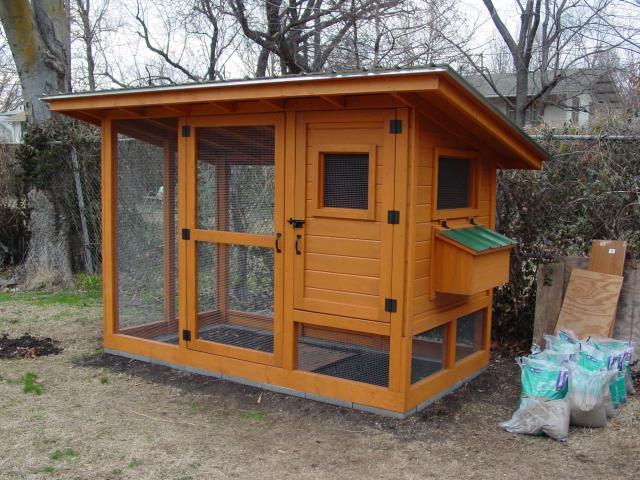
By early next spring, I'd built and installed the doors, trim, and lid for nesting box.
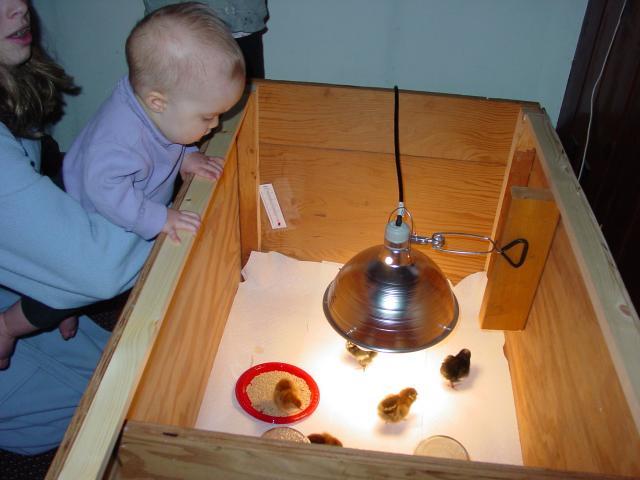
Mid-March (2010), and chicks have arrived! Brooding them in the basement until it gets a little warmer out.
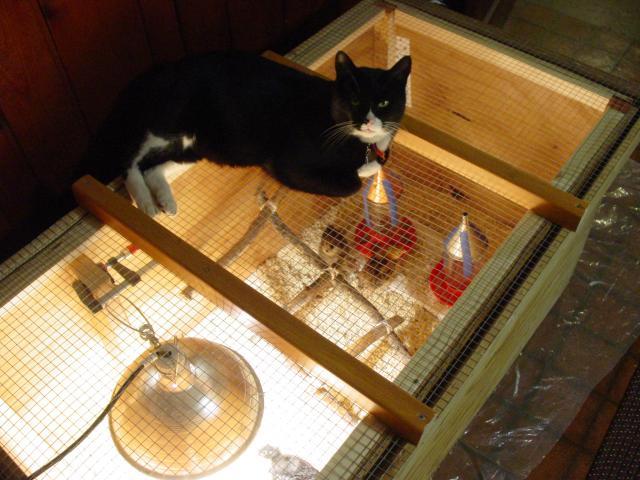
Cat-proof brooder lid.
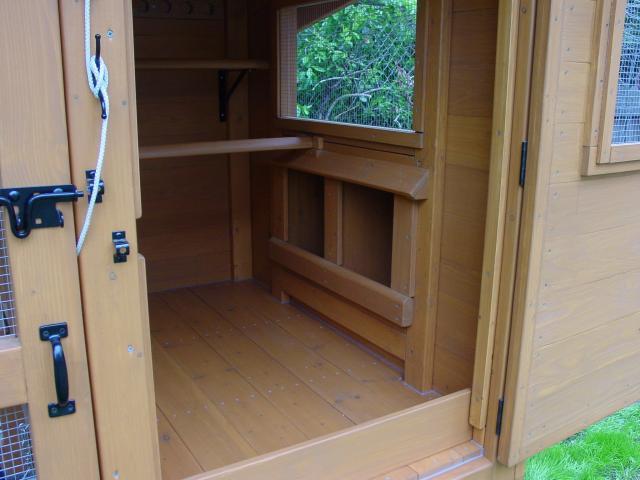
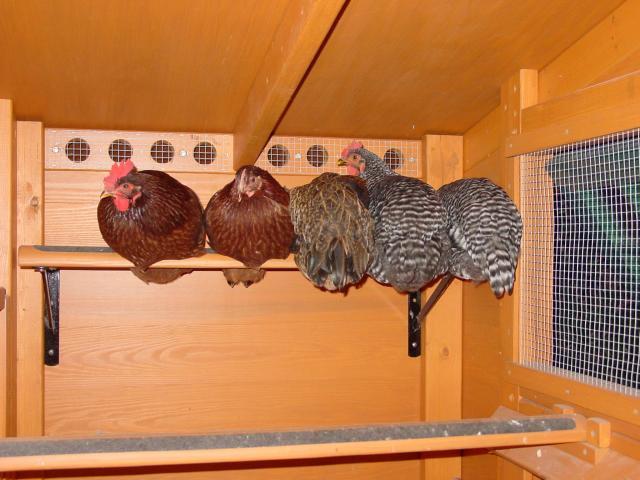
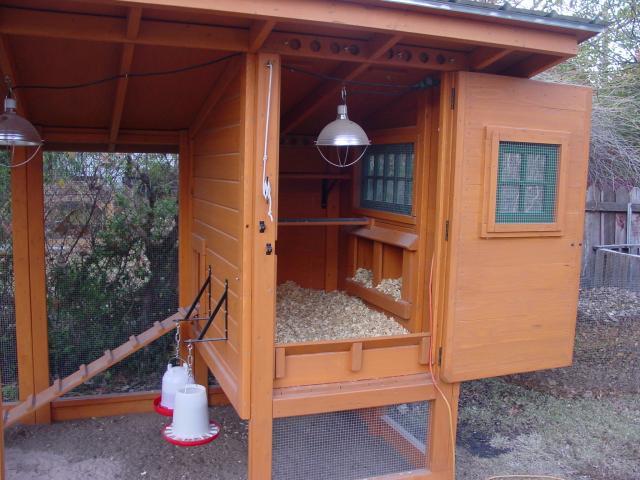
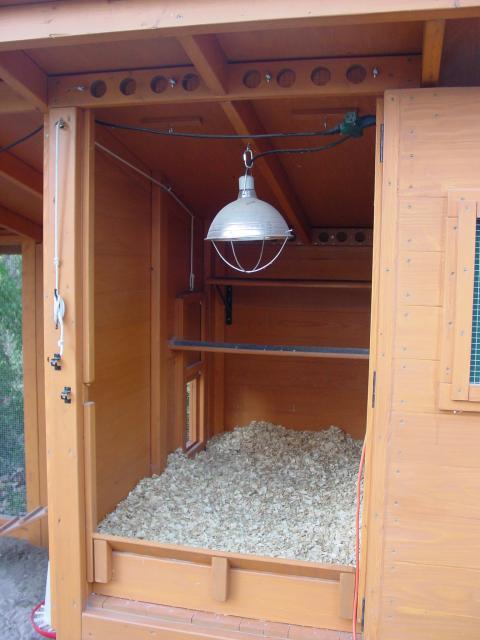
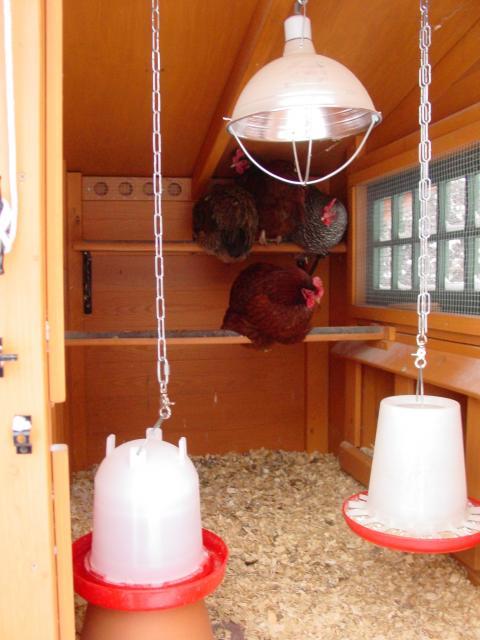
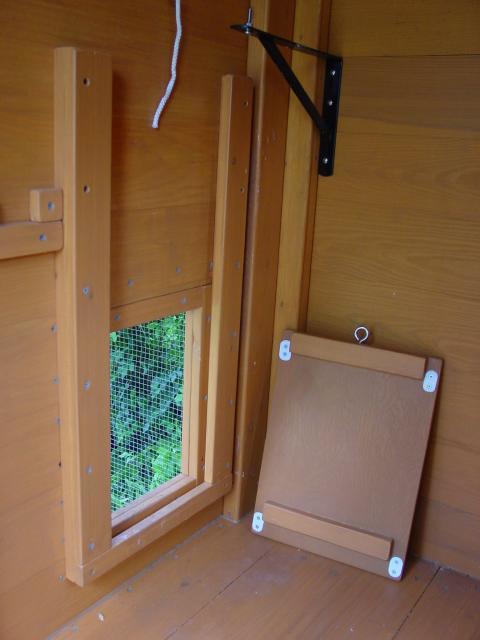
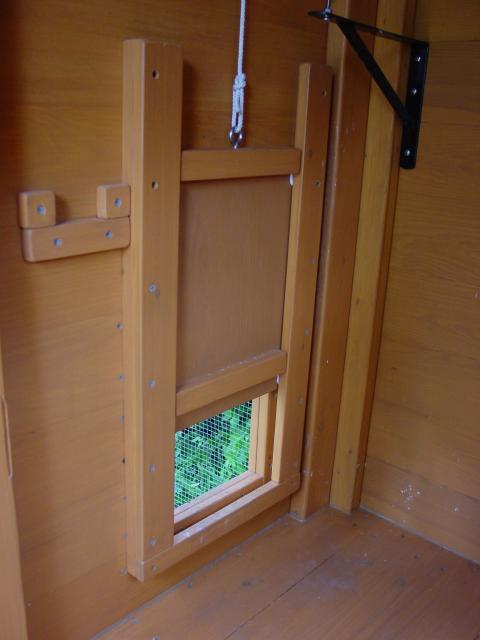
Meanwhile more work on coop completed. Inside shot of nesting boxes, roosting bars, and removable board at door to hold the litter in later on. Left open space in front by door for feeder/waterer placement (and access) while birds young, or in really cold weather. Note rope and cleat used to hold open the inner sliding door.
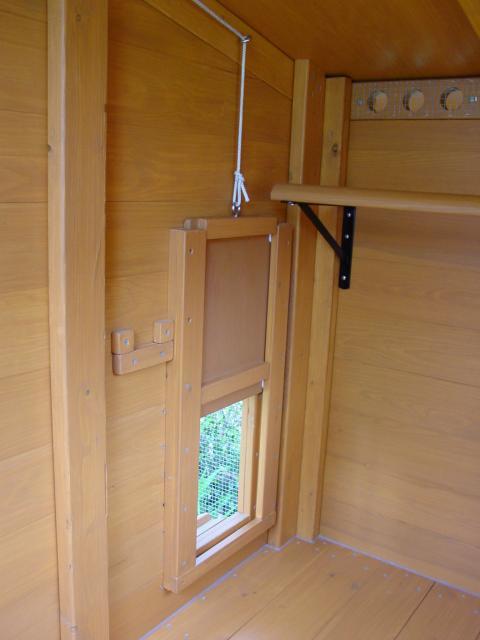
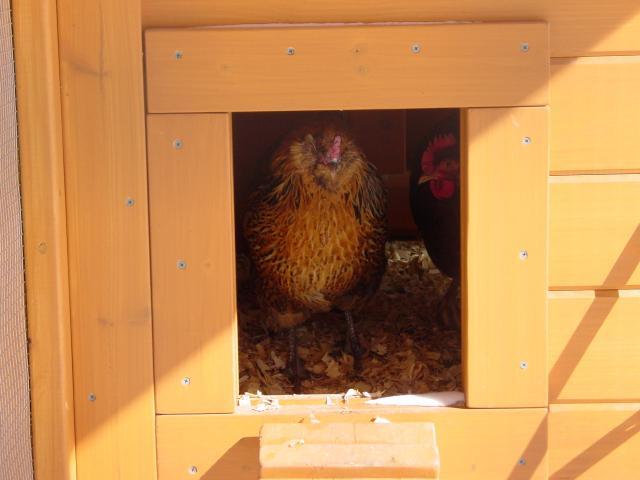
Detail of inner sliding door -- once again, designed to be opened from outside (lower roosting bar removed for the picture). Kept door and ramp near back side of run area so they would be out of the way of us and the feeder/waterer. Opening is about 10" x 13". Door is up off floor to allow for about 5"- 6" deep layer of litter later on.
Some ventilation holes were also cut in the front and back walls near roof level, as shown.
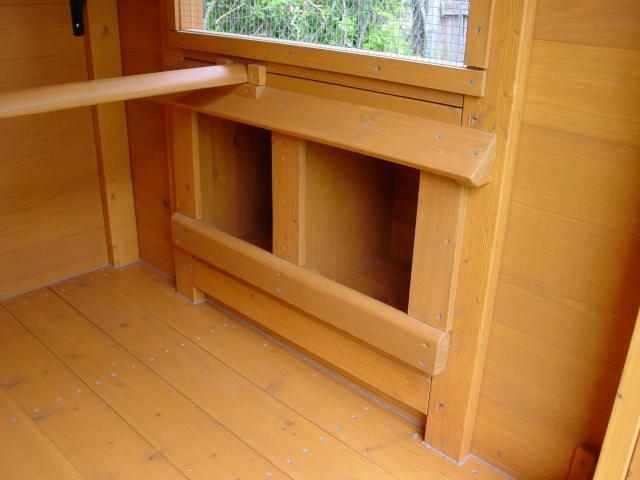
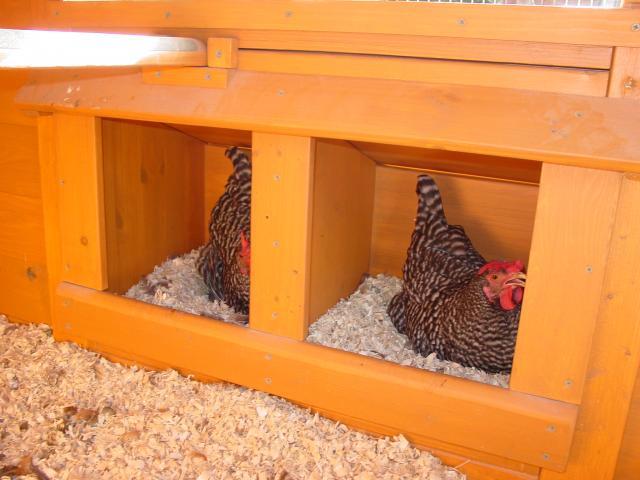
Detail of nesting boxes. They are about 13" wide x 14" deep x 16" high (to allow for layer of nesting material). Floor of the nesting box is slightly sloped from back to front to help w/ water drainage during cleaning. Roosting bars are also removable for easier cleaning, too.
We moved the chicks outside around mid-April, as was getting warm enough by then for them to stay out (and we were tired of the dust!). They are around five weeks old in this picture.
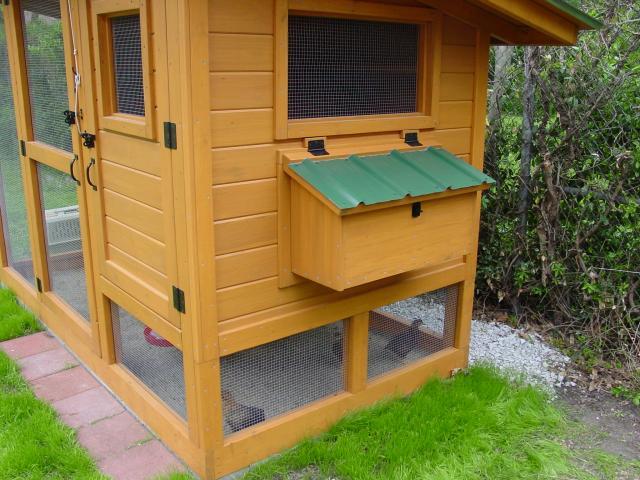
Outside detail of nesting box and lid. Sand placed in the run -- supposedly easier to clean and for chickens to scratch around in.
By early summer, I'd built and installed a couple windows. Will leave them propped open all summer for ventilation -- probably close them in the winter. Ventilation holes at top can be covered/shuttered as well, if necessary.
Evidently does not dig chickens...
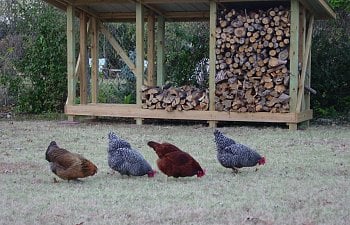
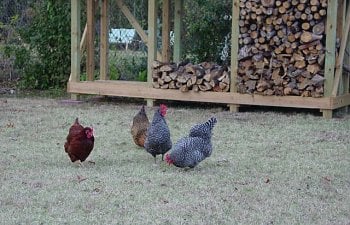
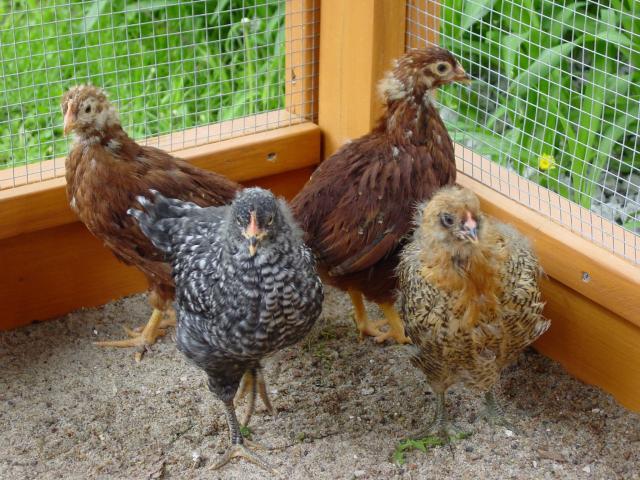
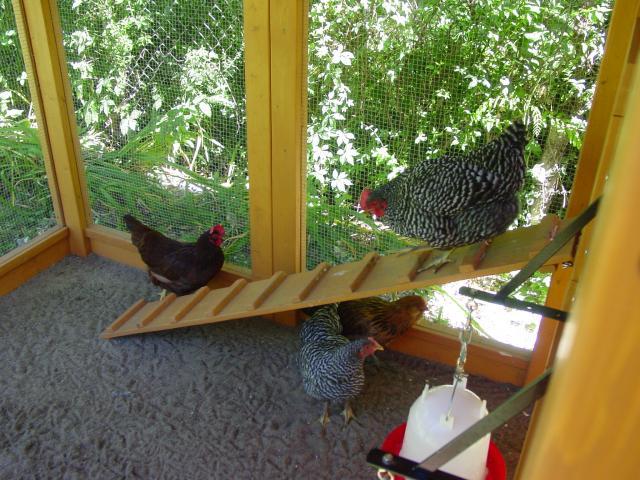
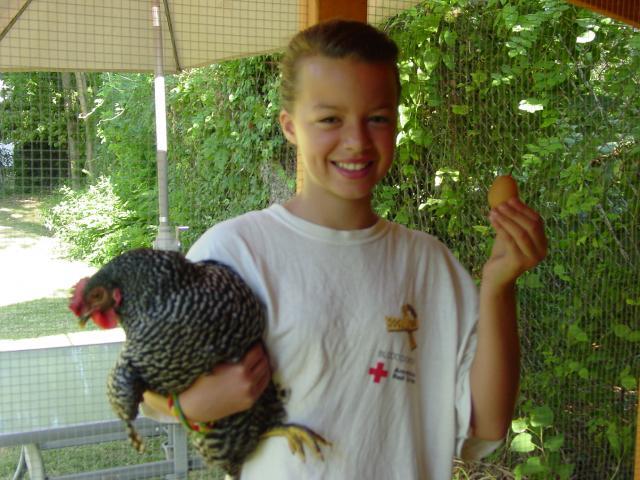
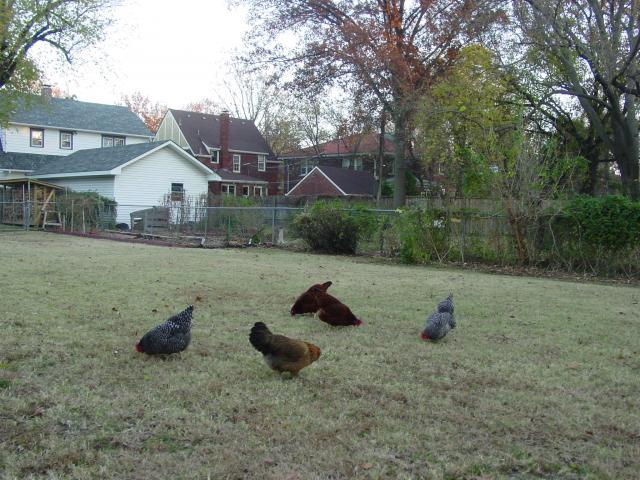
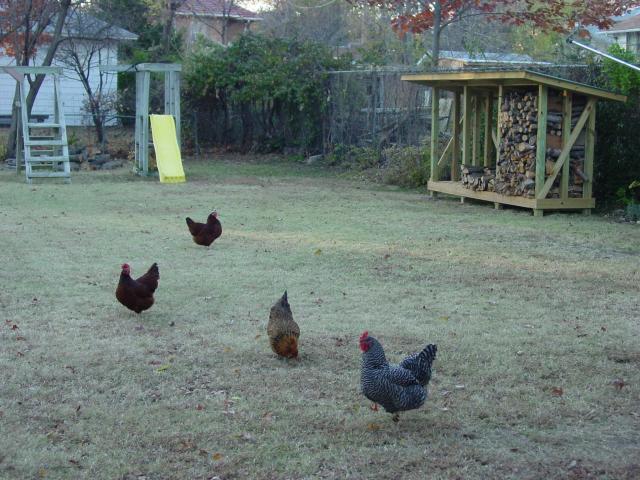
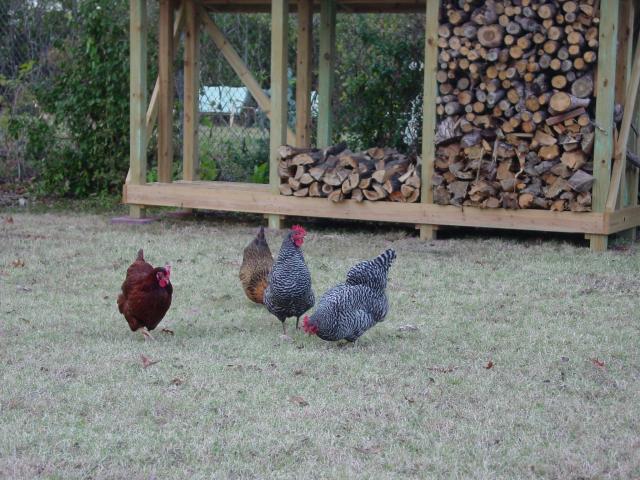
By late July, hens are pretty much fully matured. Just waiting for the eggs to start... We have two Rhode Island Reds, two barred Plymouth Rocks, and an "Easter Egger" mutt.
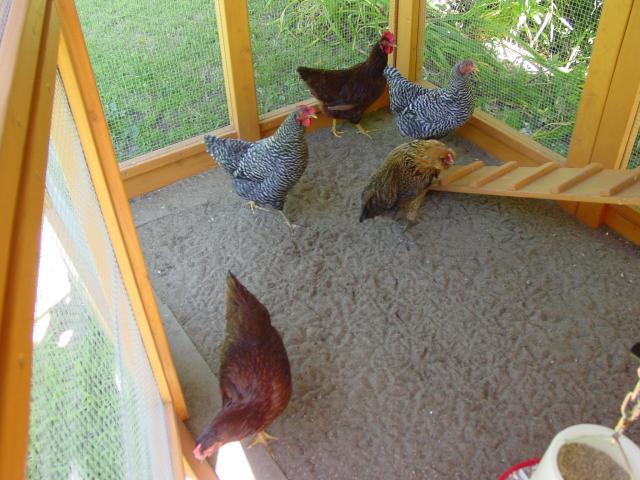
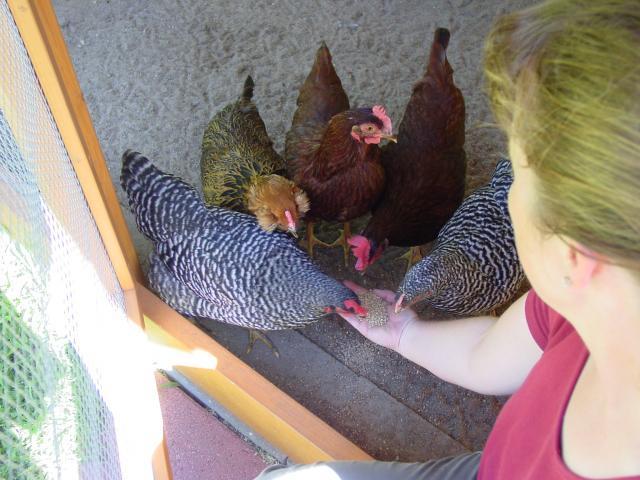
Hand feeding. These are pretty tame/friendly birds so far.
A rude bedtime interruption.
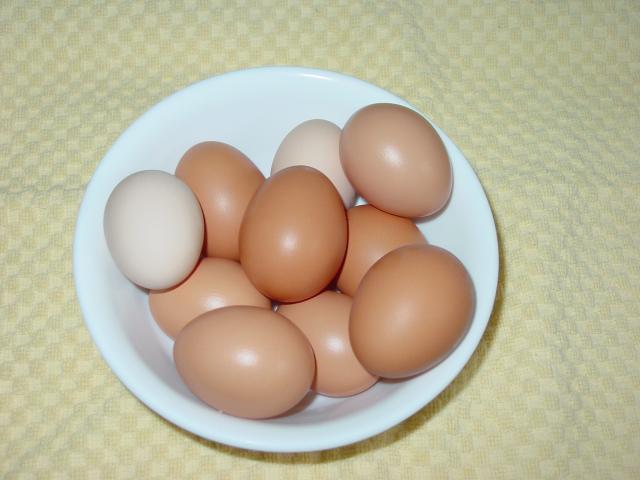
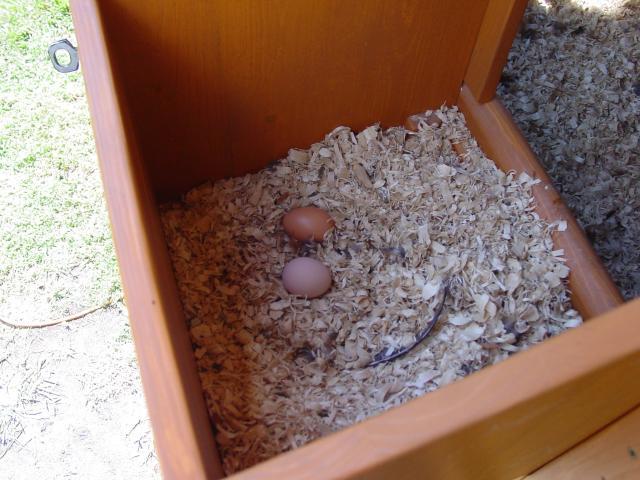
First eggs started arriving around mid-August, 2010. Yay!!!
Fate of our first egg...

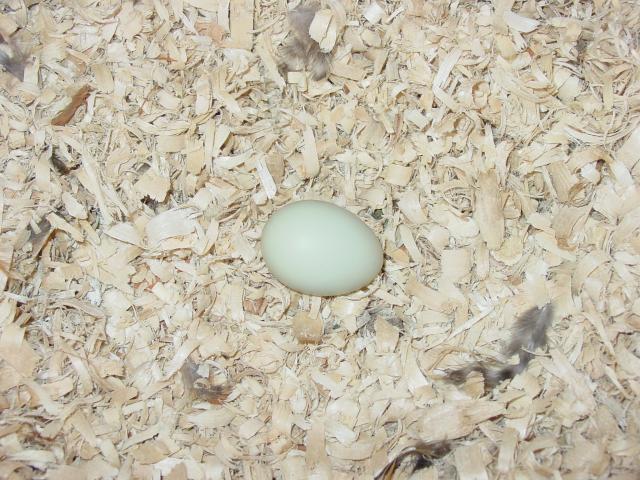
The Rhode Islands lay the bigger darker eggs, Plymouths the smaller, lighter-colored ones. The Easter Egger has only laid a few so far -- they are greenish.
Morning laying routine...
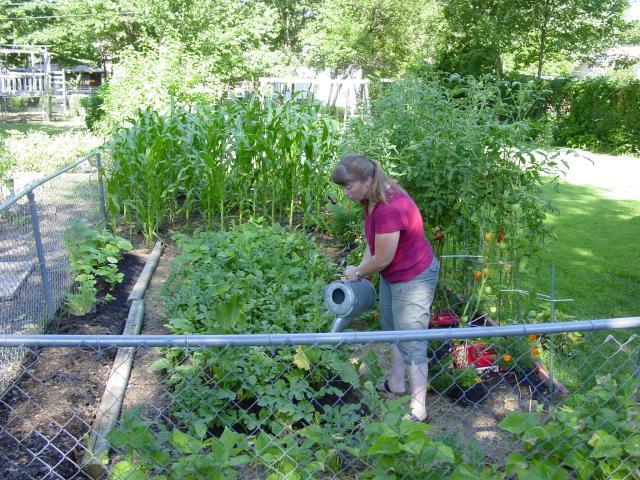
Once we get the yard secured a little better (taller fencing) and clip wings, we'll start letting them out of the run this fall. Gotta wait for the garden to get done producing before we let them attack it, though...
Some things I might do different "next time"?
- Use more reclaimed / cheaper building materials where possible (e.g. pallet platform slats as wall boards, maybe?)
- Used a more natural/wood-toned stain. The one we picked turned out to be pretty "orange" looking.
- Maybe use pressure-treated bottom framing members, although I ought to be able to replace these later if necessary w/out too much trouble.
- Space the "rungs" closer on the chicken ramp -- the hens look like they end up sliding around a little more than they'd like.
Here's some updates / shots from later summer and fall, 2010:
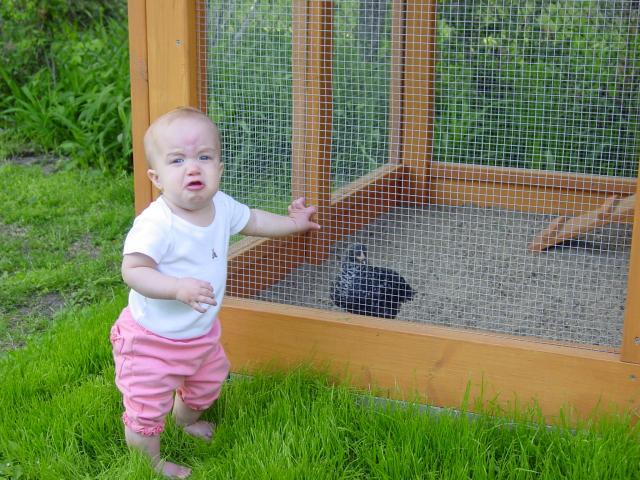
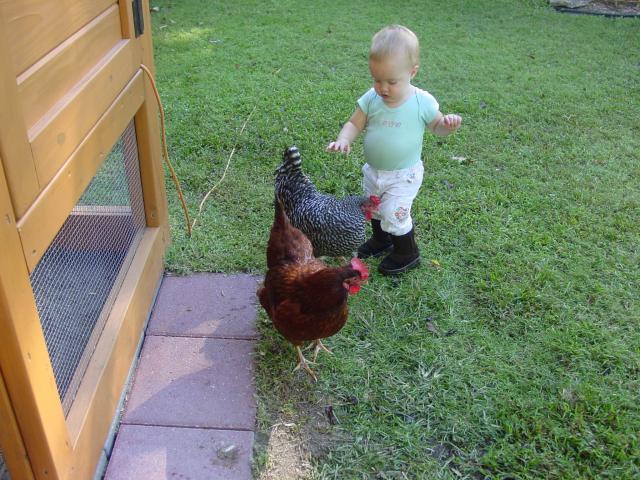
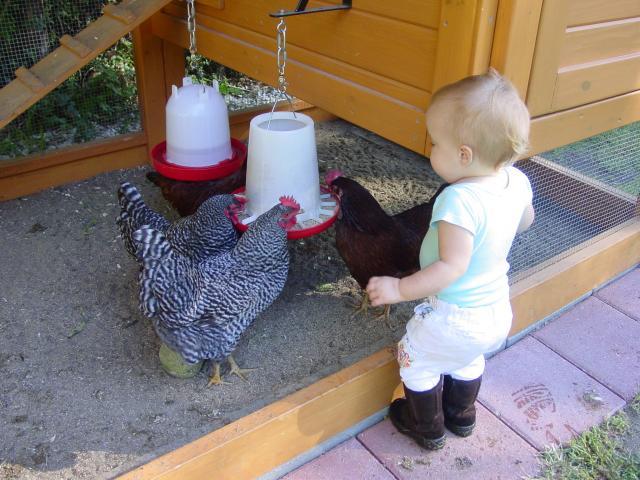
Our youngest has finally warmed up to the chickens and now enjoys following them around and trying to pet / feed them.
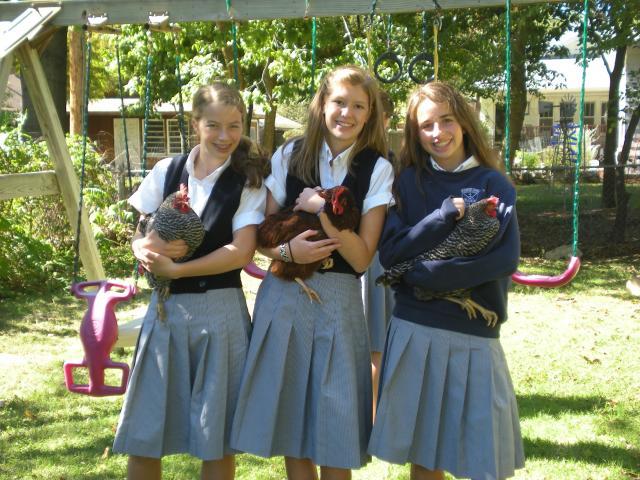
Older girls enjoy the birds, too.
After garden was pretty much done for the season, we started letting the birds out every afternoon to roam the backyard freely. Note the nearby compost bins -- handy for taking care of chicken poop.
Rigged up some lights when days started getting shorter to keep the birds laying regularly. Cut a corner out of the coop door to allow clearance for the power cord.
Had to modify the board that holds back the litter at doorway of coop. Hens kept kicking the shavings up into the gap between door and board, so attached a sloping top board that rests flush w/ the door when it's closed -- no more mess.
Somebody had asked about how we rigged the pop-up door, and you can see the set-up fairly well here. The rope is guided through some larger eye screws at the corners, and uses knots (that won't fit through eye screws) as stops to control the travel limits.
Urban chickens...
These last few shots are taken near Thanksgiving 2010, almost exactly a year after I first started building the coop. It's been a fun project, and the birds are good "pets" and great layers so far!
Winter chickens:
Most chickens (and esp. northern breeds) are relatively cold-hardy, and can handle temps down to 0° F or so w/out much trouble, provided they can stay dry, out of wind / drafts, and have plenty to eat.
Based on this, we did not insulate or use a heater in our coop. However, we do close up the rear ventilation holes and side window in winter (also the pop door, on colder nights), while the front window and ventilation holes are left open. This provides a draft-free "tunnel" area in back of coop for chickens to sleep in, while still allowing adequate ventilation to help combat moisture / humidity build-up.
We initially installed some removable wooden panels under the coop area of the run, to provide a wind break during the day.
However, on the coldest / stormiest days the birds preferred to just stay inside.
Next year (winter 2011), we fabricated some larger wind-break panels out of wooden lattice w/ clear Visqueen plastic stapled to the back side, which were then secured to existing side screening using a few wire ties.

Note the gaps at the top -- these allow plenty of ventilation, while keeping wind and most blowing snow out of the bottom. The clear plastic lets light in, and allows some visibility as well.

Our birds will come out in the snow, but tend to prefer staying in the run when it gets deeper.


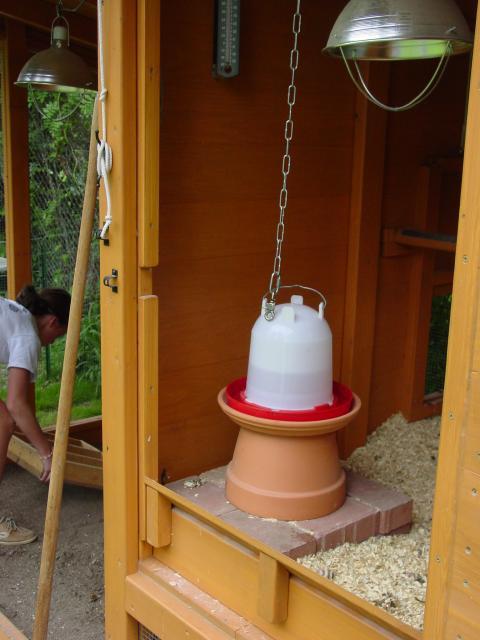
Providing water for your chickens becomes more of a challenge in the winter. Some people haul fresh (warm) water to them a couple times a day in freezing weather. Alternately, you can buy a commercially available electrically heated waterer / dog dish / etc. to keep their water from freezing.
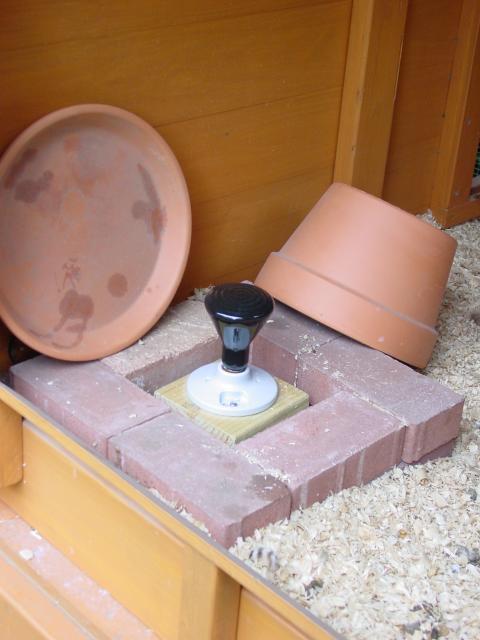
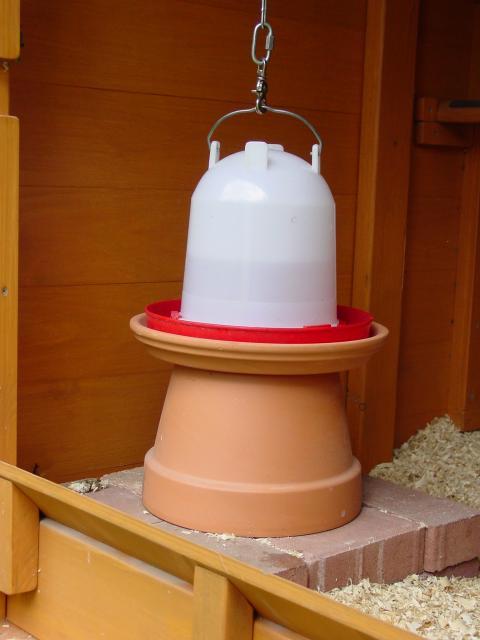
Another option is to build a home-made heater for your existing waterer. We've done so in the past using an upside-down flower pot and light bulb or heating element. You'll obviously want to use terra cotta / stone / ceramic components throughout (no plastic or other meltable / flammable materials), and maintain an adequate air gap between the heating element and pot top / sides (i.e. nothing touching the heating element).
We've found that a 75W or 100W incandescent light bulb or heat element will keep our water from freezing down to around 10° F or so, if kept out of the wind. A thermostatic power source (e.g. "thermocube", or similar) can be used to automatically the shut off power to the heat source when temps rise above freezing.
In areas where it gets REALLY cold in winter (e.g. northernmost states, Canada, Alaska), you will probably need to consider insulating your coop and/or providing some sort of supplemental heat for your birds if temps start dropping to -10° F, -20° F, or even colder. Even with additional heating, remember that the key is to keep your chickens dry / well ventilated, out of wind / drafts, and make sure they have plenty of food to eat so they can stay warm.
If you do decide to use supplemental heat and/or a heated waterer, always use extreme caution to keep flammable materials away from heating elements, electrical sources, and similar. We know of a few other folks whose coops have caught fire or even burned to ground in the winter (!!!).
Coop cleaning:
The proper way to clean a chicken coop is, of course, to have your teenage kids do it! (if you have them) It's not quite as good as having a full-sized family farm for teaching work ethic and etc., but I'll take whatever I can get.
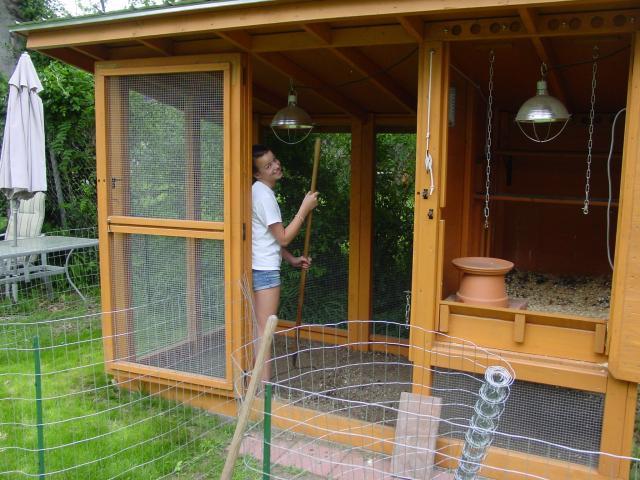
We periodically clean the run and coop out, about once a week or so. Just trying to get as much of the surface poop, feathers, and dirt out of the run and coop as possible.
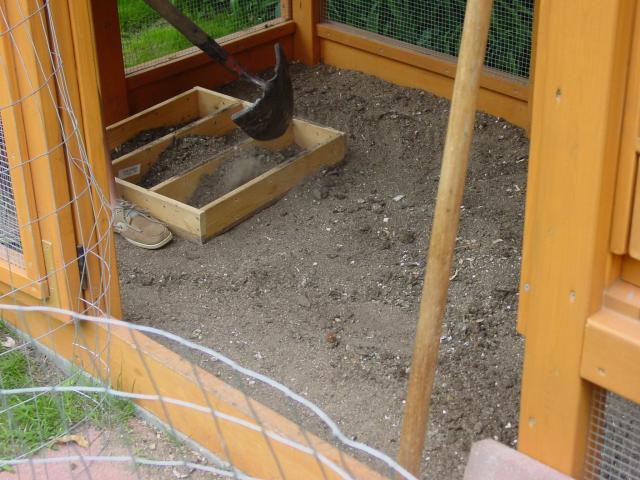
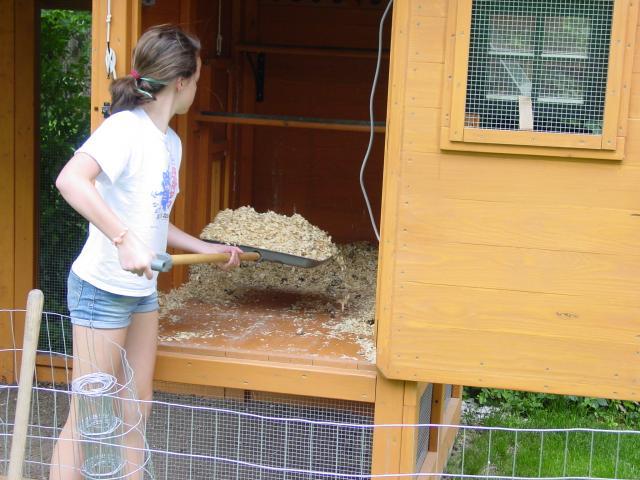
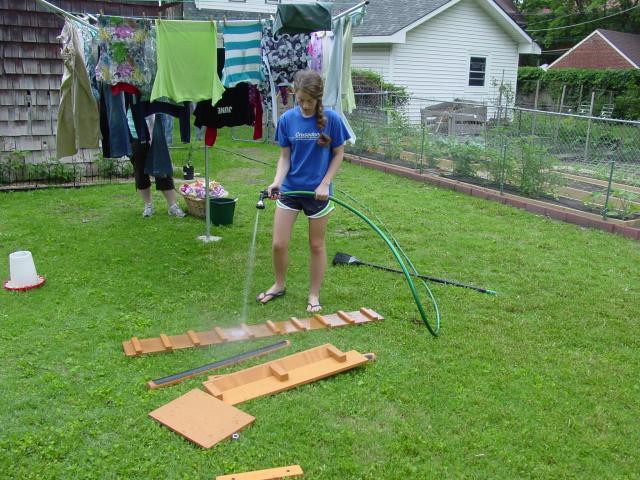
Roughly twice a year (spring and fall), we do a more thorough "spring cleaning", taking it all apart, hosing everything down, and maybe scrubbing with a disinfectant solution if necessary (e.g. bleach and water).
We try to keep the sand in the run somewhat clean by raking all the poop, wasted food, etc. into a pile, and then using a shaker box (with screen on the bottom) to sift it. Sand comes out the bottom, and poop, feathers, and such remains in box, to be thrown into the compost pile.
Sifting box in action, in the background. Just like panning for gold, heh, heh...
A plastic-bladed snow shovel works great for removing poop and old bedding (won't scratch up the wood/paint too much). It all gets tossed into the compost pile.
Everything gets sprayed down with the hose (including inside of the coop and run), scrubbed a little if/as necessary, and then left to air dry.
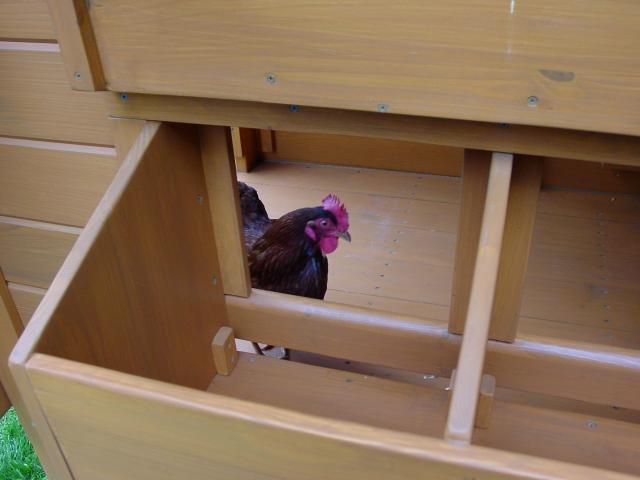
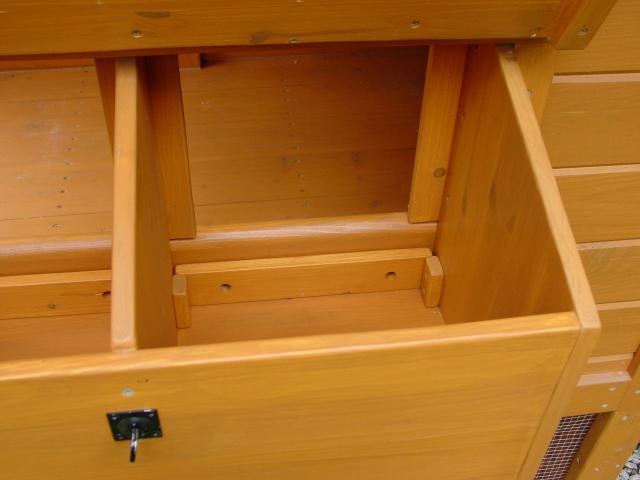
Some of your customers may get impatient to have their nesting box back during the spring cleaning process. Note the built-in gaps at bottom of box -- makes it easier to sweep and hose all the dirt out.
Removable boards fit in at the bottom of the box to hold the nesting material in after you're done cleaning.
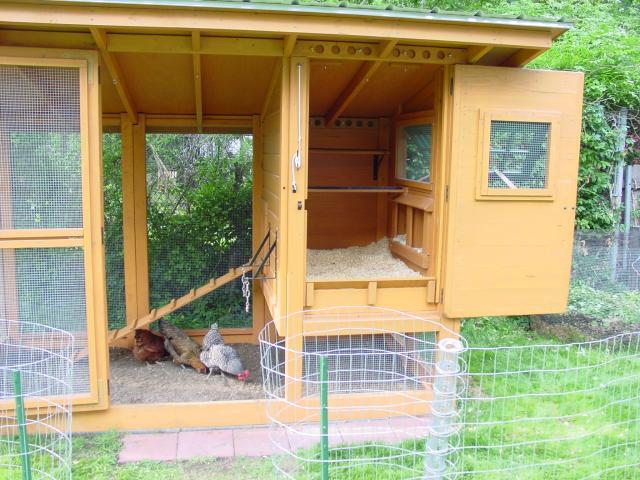
Spring cleaning accomplished, and fresh bedding in place. Your chickens will now dig around and eat all the food on the ground they've been ignoring for the past several weeks -- go figure...
Random construction details and other ideas:
Here's some detailed shots of how the pop door and side guides are constructed:
The door is just a piece of flat board or plywood with a couple reinforcment/guide pieces attached. You can put on some nylon or teflon sliders to help adjust the gap and ease the sliding action of it gets a little sticky.
The side guides are narrow strips of wood with a slightly wider pieces attached on top of them. The brace at the bottom is open across the door opening, to help keep the litter material from piling up and binding or holding the door open at the bottom.
The door's lower edge sits a ways below the bottom of the outside opening when closed, so that raccoons and similar pests will have a hard time getting their paws under it to open the door from the outside.
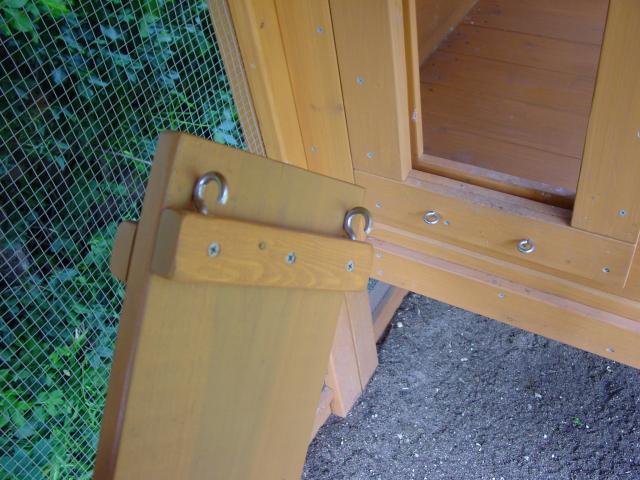
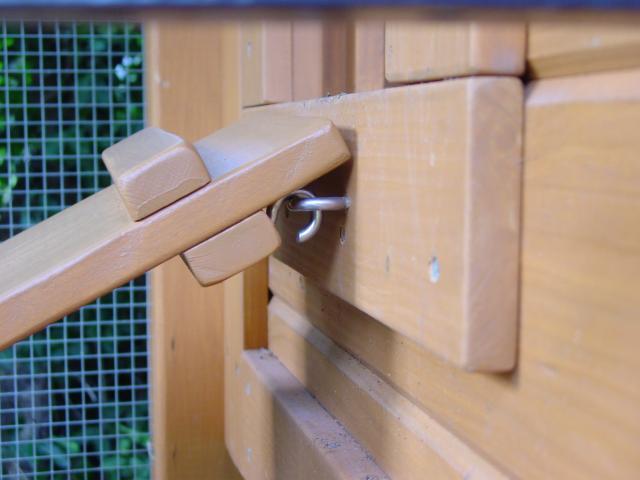
The ramp in the run is removable (for cleaning convenience and etc.). The two eyebolts on the ramp have been modified into hooks by sawing a little off with hacksaw. Two more eyebolts are screwed into the door frame to hold the ramp up. Won't slip or fall off, but still relatively easy to remove when you want to.
Final Pics:
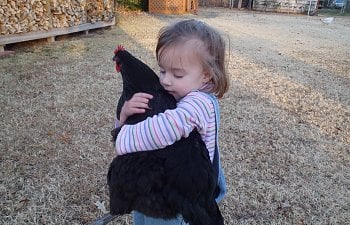
Look who's finally big enough to pick up and carry the chickens around -- !!
They like to follow her everywhere, and will even hop up on the swing set / slide to be with her.
There is a whole lot of "chicken hugging" going on in our back yard nowadays...