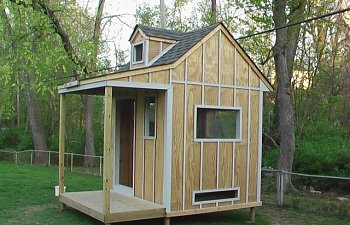
The Suburban Hen House
This all started when I came across a chicken coop while searching for green houses on another site. I google searched chicken coops, found this site, and with the help of all the enablers, have been hooked ever since.")

I started by building two 8'x8' 2x4 boxes, taking time to cross tape and brace them to keep them square. I used one of the boxes to mark the location of the holes. After digging the holes, setting the posts, and pouring the concrete, I used the box to hold the bottom of the posts in place. I used the second box to hold the top of the posts square until the concrete dried. After the concrete was dry I removed the temp boxes. I framed the floor with pressure treated 2x6, laying it out on 2' centers. I used 3/4" OSB to deck the floor. The floor dimensions are 8'x8'.
Next came wall framing. The front (north) wall has a people door and a 16"x30" window. The east wall has a 4'x16" window. The side, (east) will eventually have a 6' tall covered run, so the window was framed above that height to allow light in during winter months.
In the first pic, back (south) of the coop I framed two openings. The upper opening is a 4'x2' window. The lower opening is 4' x20" and will be used for the nest boxes. In the second pic, the side (west) wall of the coop also has two openings. The upper opening is a 4'x2' window. The lower opening is 4'x9" and will be used for easy clean out under the roosts.
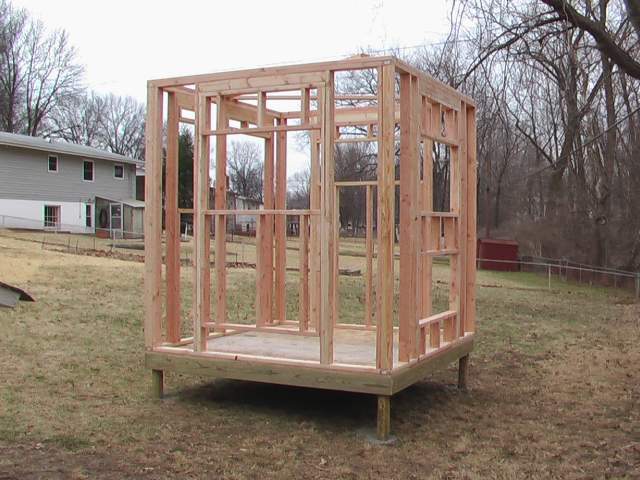
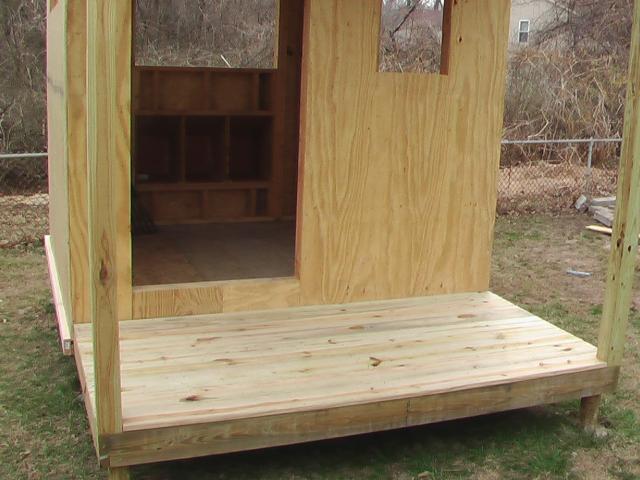
Pic of all the walls up. The walls are framed with 2x4 studs, 8' tall on 16" centers. The doors and windows are all framed with 2x4 headers and jacks. After the walls were stood they all received a second top plate overlapping the joints of the first top plate.
Pic of the roof framing and front porch. The roof was framed with salvaged 2x8 and layed out on 2' centers. The ridge board is two 2x4s. I didn't have anything tall enough, so I put one at the top of the rafters and the other at the bottom. When laying out the roof, I had to keep in mind the future dormer. To allow for the dormer, I found the center of the front wall and went 11 1/4" each way to start my layout. The front porch was framed with pressure treated 2x6 16" on center, joist hangered to the front of the house, and nailed to posts set in concrete.
I used 4x4 pressure treated posts for the front porch beam and columns. The height of the front porch beam is 7'6". This was done to allow more height for the dormer. The rafters are the salvaged 2x8s on the same layout, set on the beam in the front, and rest/butt the existing rafters in the back. The dormer was framed with 2x2s and built to have the peak line up with the peak of the existing roof. The roof sheathing is 1/2" plywood. The pitch of the main roof is a 10/12 and the front porch is a 3/12.
1/2" plywood was used on the walls. The back of the roof has a 1' overhang
The nest boxes were framed on the outside to save space inside the coop. The box is 20" tall in the front, 16" tall in the back, 16" deep, and 4' wide. It was framed with 2x2s and 1/2" plywood. The nest box was divided into three 16" spaces.
The roof was shingled with 30 year architectural shingles. The front porch floor was finished with pressure treated 5/4 board.
In this pic you can see how the coop was trimmed out. I used 2x4s to trim along the roof line and bottom of the coop. I used masonite to trim the corners, windows, and also to cover the seams of the plywood.
This all started when I came across a chicken coop while searching for green houses on another site. I google searched chicken coops, found this site, and with the help of all the enablers, have been hooked ever since.
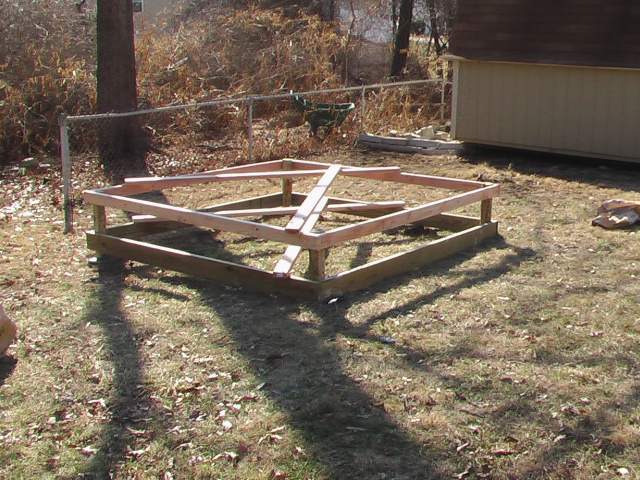
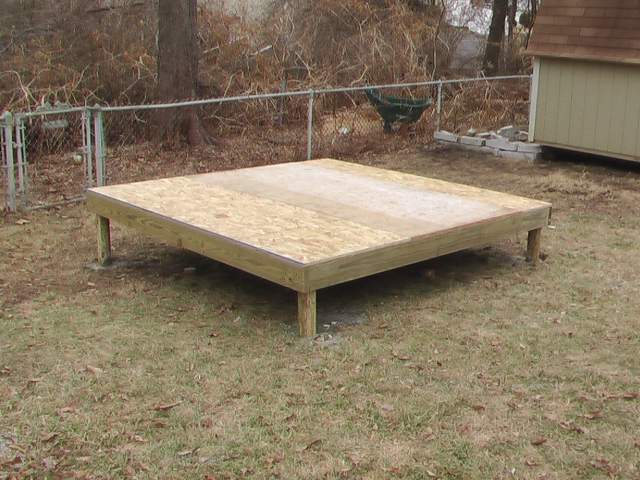
I started by building two 8'x8' 2x4 boxes, taking time to cross tape and brace them to keep them square. I used one of the boxes to mark the location of the holes. After digging the holes, setting the posts, and pouring the concrete, I used the box to hold the bottom of the posts in place. I used the second box to hold the top of the posts square until the concrete dried. After the concrete was dry I removed the temp boxes. I framed the floor with pressure treated 2x6, laying it out on 2' centers. I used 3/4" OSB to deck the floor. The floor dimensions are 8'x8'.
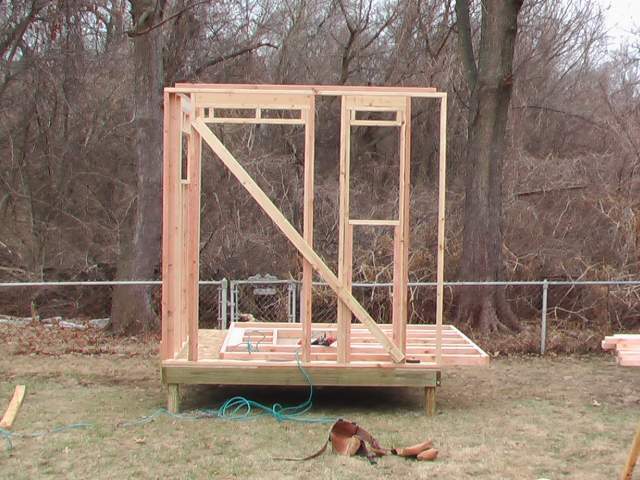
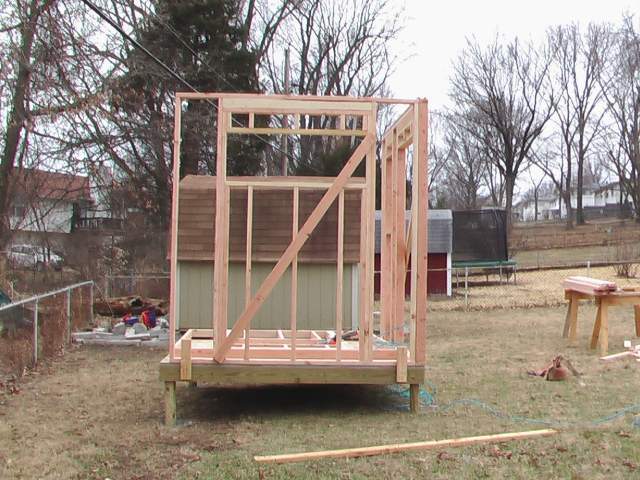
Next came wall framing. The front (north) wall has a people door and a 16"x30" window. The east wall has a 4'x16" window. The side, (east) will eventually have a 6' tall covered run, so the window was framed above that height to allow light in during winter months.
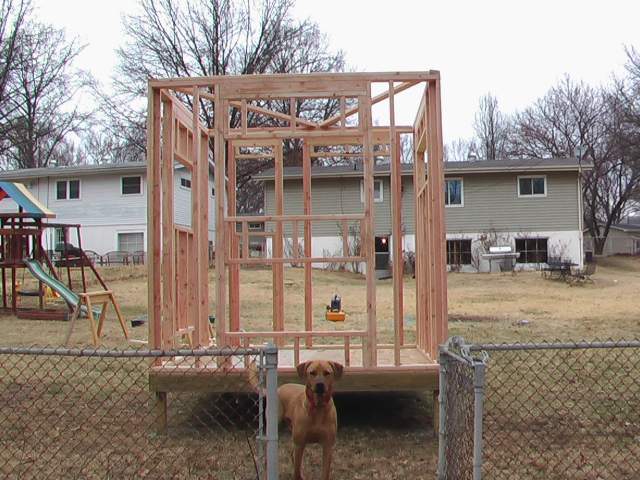
In the first pic, back (south) of the coop I framed two openings. The upper opening is a 4'x2' window. The lower opening is 4' x20" and will be used for the nest boxes. In the second pic, the side (west) wall of the coop also has two openings. The upper opening is a 4'x2' window. The lower opening is 4'x9" and will be used for easy clean out under the roosts.
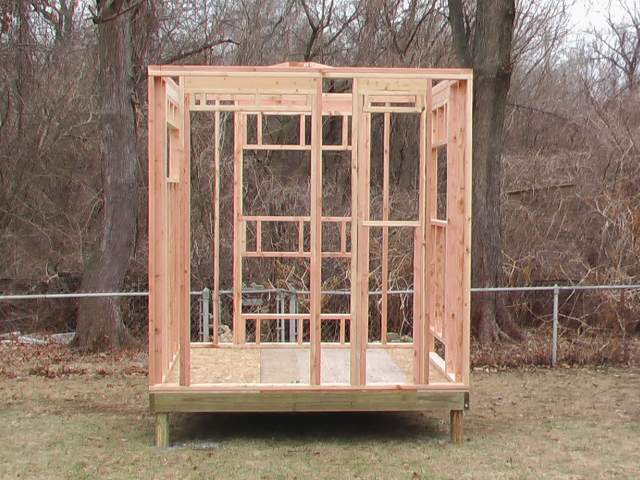
Pic of all the walls up. The walls are framed with 2x4 studs, 8' tall on 16" centers. The doors and windows are all framed with 2x4 headers and jacks. After the walls were stood they all received a second top plate overlapping the joints of the first top plate.

Pic of the roof framing and front porch. The roof was framed with salvaged 2x8 and layed out on 2' centers. The ridge board is two 2x4s. I didn't have anything tall enough, so I put one at the top of the rafters and the other at the bottom. When laying out the roof, I had to keep in mind the future dormer. To allow for the dormer, I found the center of the front wall and went 11 1/4" each way to start my layout. The front porch was framed with pressure treated 2x6 16" on center, joist hangered to the front of the house, and nailed to posts set in concrete.
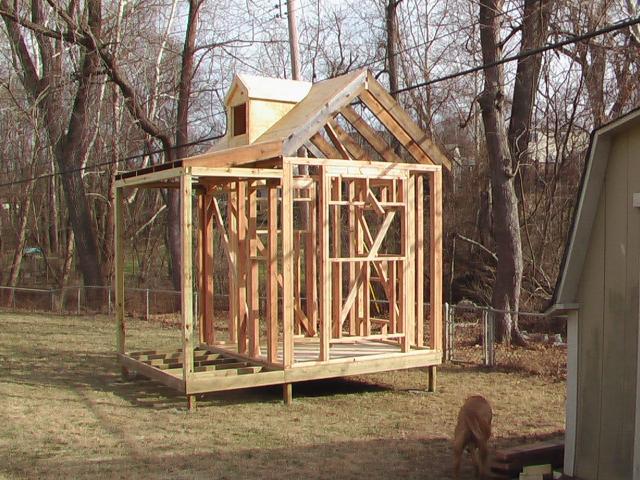
I used 4x4 pressure treated posts for the front porch beam and columns. The height of the front porch beam is 7'6". This was done to allow more height for the dormer. The rafters are the salvaged 2x8s on the same layout, set on the beam in the front, and rest/butt the existing rafters in the back. The dormer was framed with 2x2s and built to have the peak line up with the peak of the existing roof. The roof sheathing is 1/2" plywood. The pitch of the main roof is a 10/12 and the front porch is a 3/12.

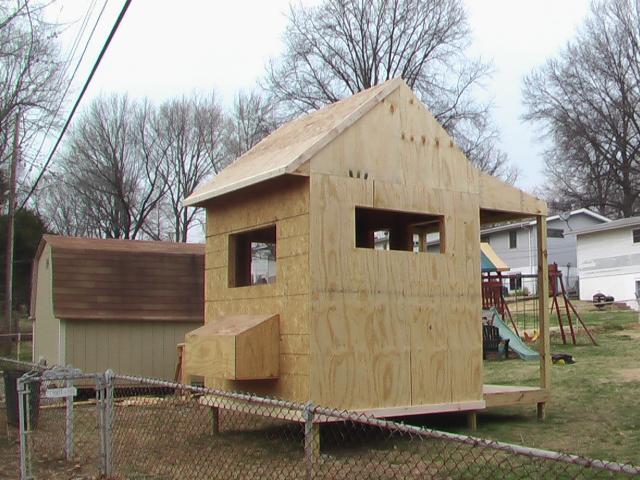
1/2" plywood was used on the walls. The back of the roof has a 1' overhang

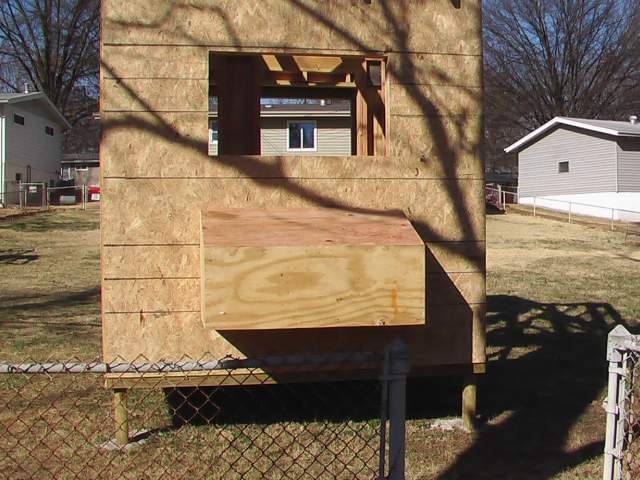
The nest boxes were framed on the outside to save space inside the coop. The box is 20" tall in the front, 16" tall in the back, 16" deep, and 4' wide. It was framed with 2x2s and 1/2" plywood. The nest box was divided into three 16" spaces.
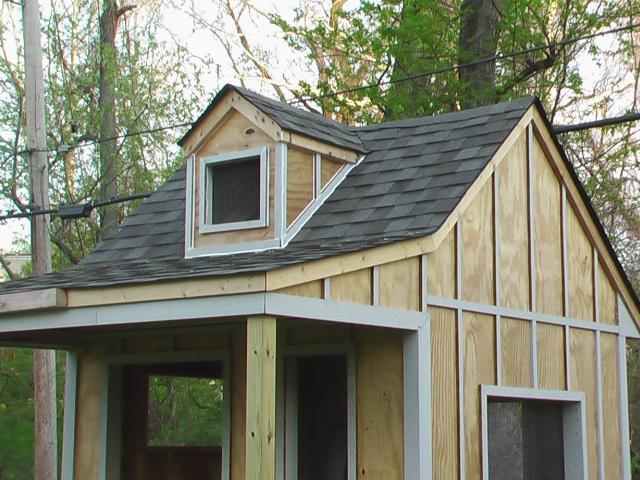
The roof was shingled with 30 year architectural shingles. The front porch floor was finished with pressure treated 5/4 board.
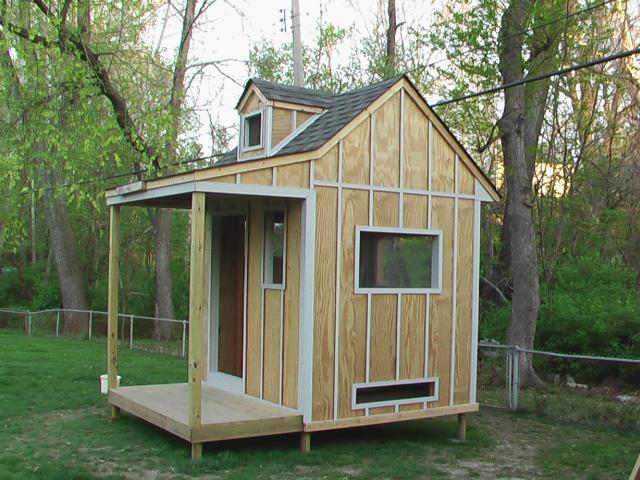
In this pic you can see how the coop was trimmed out. I used 2x4s to trim along the roof line and bottom of the coop. I used masonite to trim the corners, windows, and also to cover the seams of the plywood.