Hubby has lots of access to scrap wood and various sized pallets from his workplace. So I thought I'd try my hand using them to build a small coop. I found that while you don't need a lot of skill to build a (small) pallet coop, you do need time, patience, and a bit of muscle (because those pallets are built from TOUGH wood and seem to be superglued together...lol).

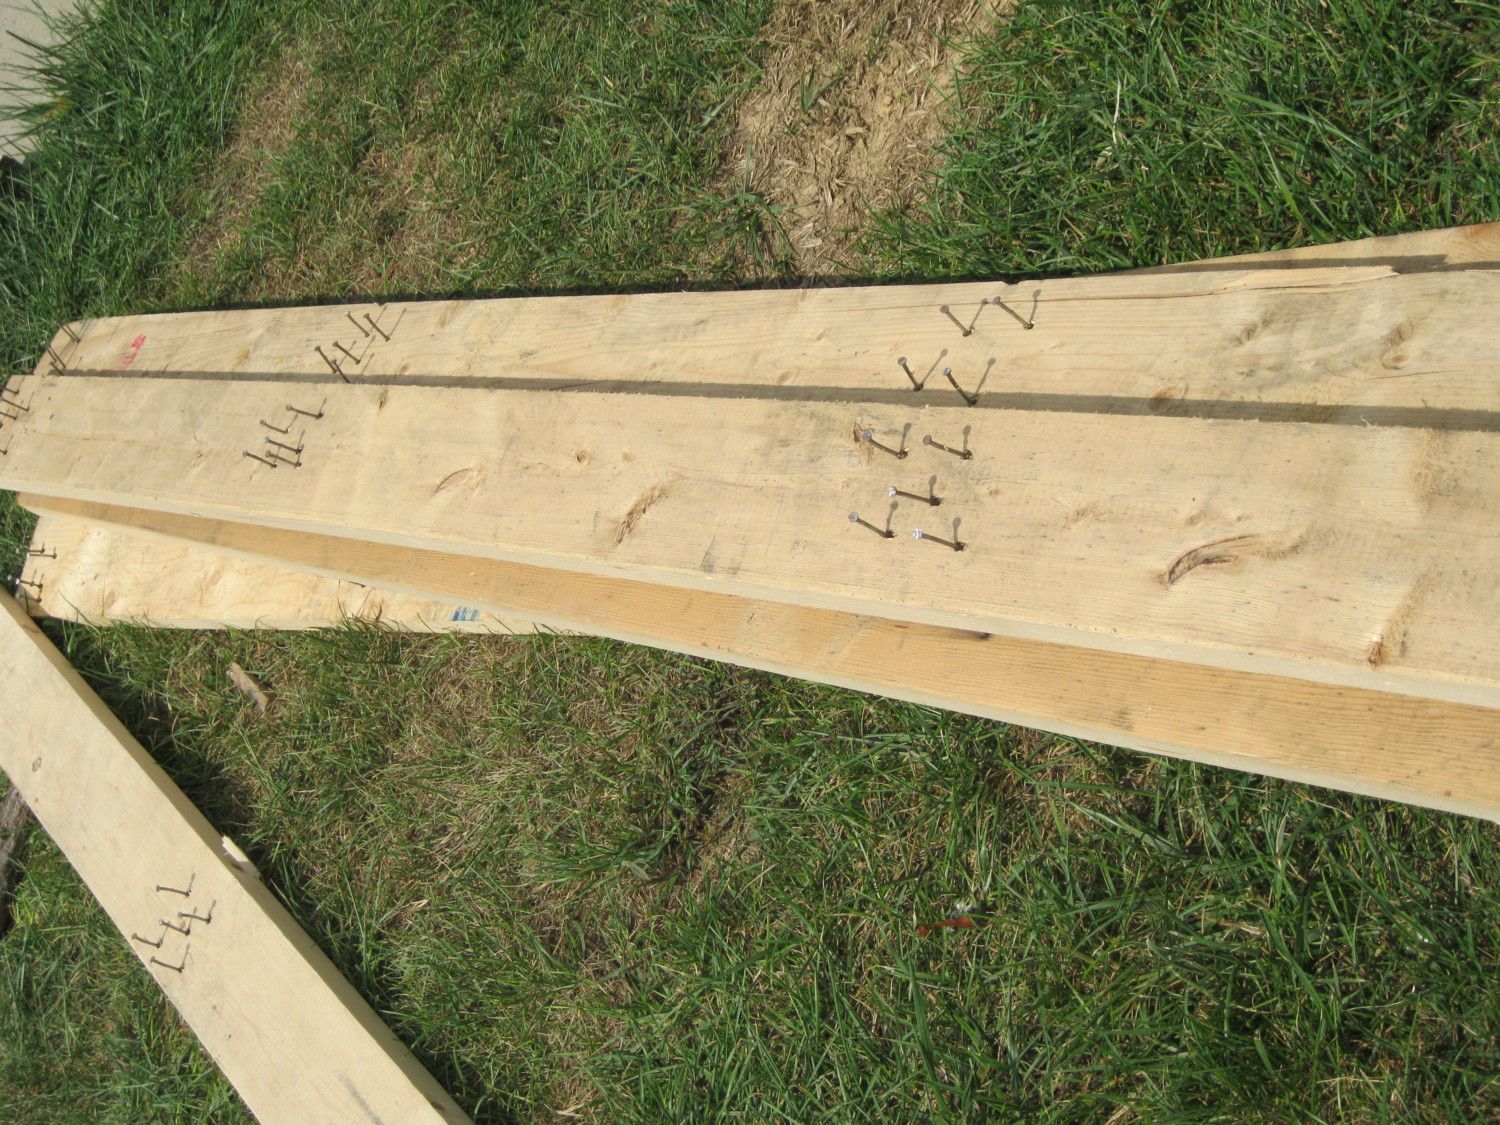
DH drug home two of these huge 50" x 100" pallets, plus some pallets (guess that's what they were) made from 2x4s (all seen below). On hand from other coop and building projects, we had one sheet of slightly scratched up metal roofing, short pieces of 4x4, cheap vinyl flooring, and a few smaller pieces of faux T1-11 siding.
I had no say in how wide the coop was (at least if I was looking for the simplest approach), because the pallets were 50 inches wide. I chose a 48 inch length for the coop because I wanted a size that would be easy to load into a pick-up truck. Plus this was really just an experiment in using as much scrap/found materials as possible, and my contruction skills are limited, so I figured keeping it small was in my best interest. A LOT of time and sweat was invested in removing/prying off pallet battens and 2x4s and removing nails. I'm pretty puny (weigh about 110 on a heavy day), so I'm sure someone bigger could have accomplished this part of the task in lot less time.
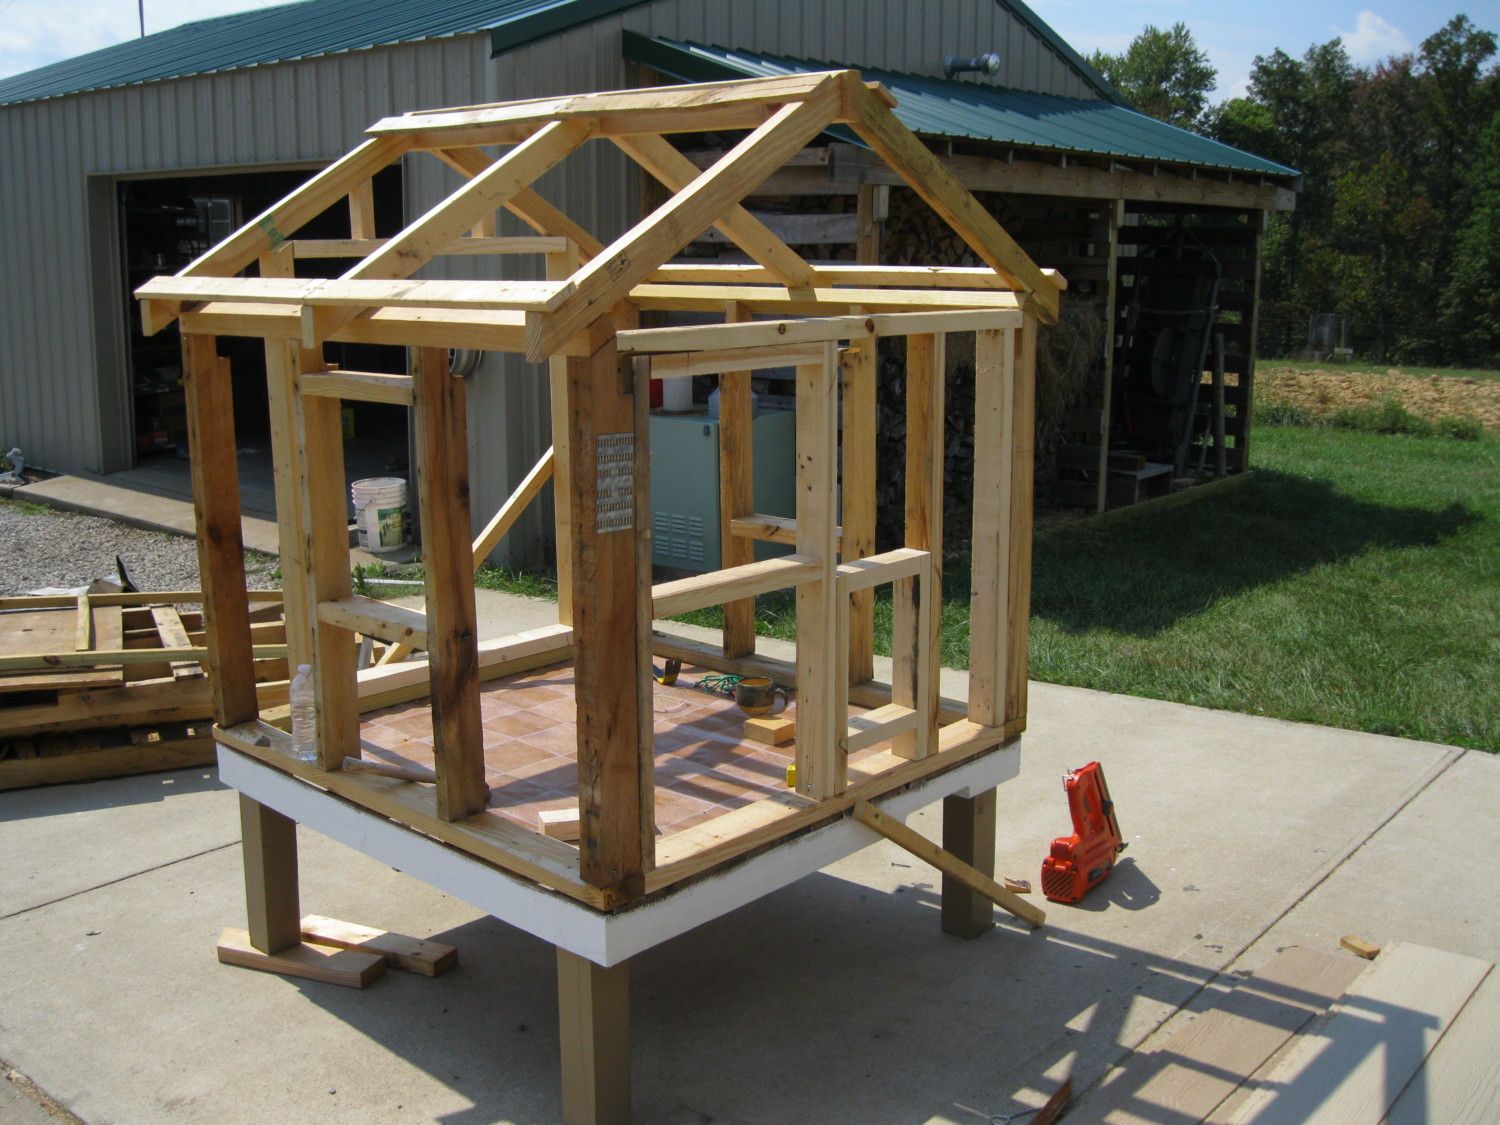
FLOOR/BASE: I cut the size I wanted (48x50"), flipped that piece over and added 18" 4x4 legs to create a "table." The 4x4s I was working with were curved like the rockers on a rocking chair, but that doesn't matter nearly as much when you're just using short sections. Pallet battens were tacked onto the two open ends, as well as into the gaps between the battens already on that pallet section. This created a fairly solid floor. I covered the floor in a scrap vinyl section I had, just so clean-ups would be easier. And I went ahead and painted the legs and around the base. The legs had to be painted because the 4x4s I'd used were not pressure treated.
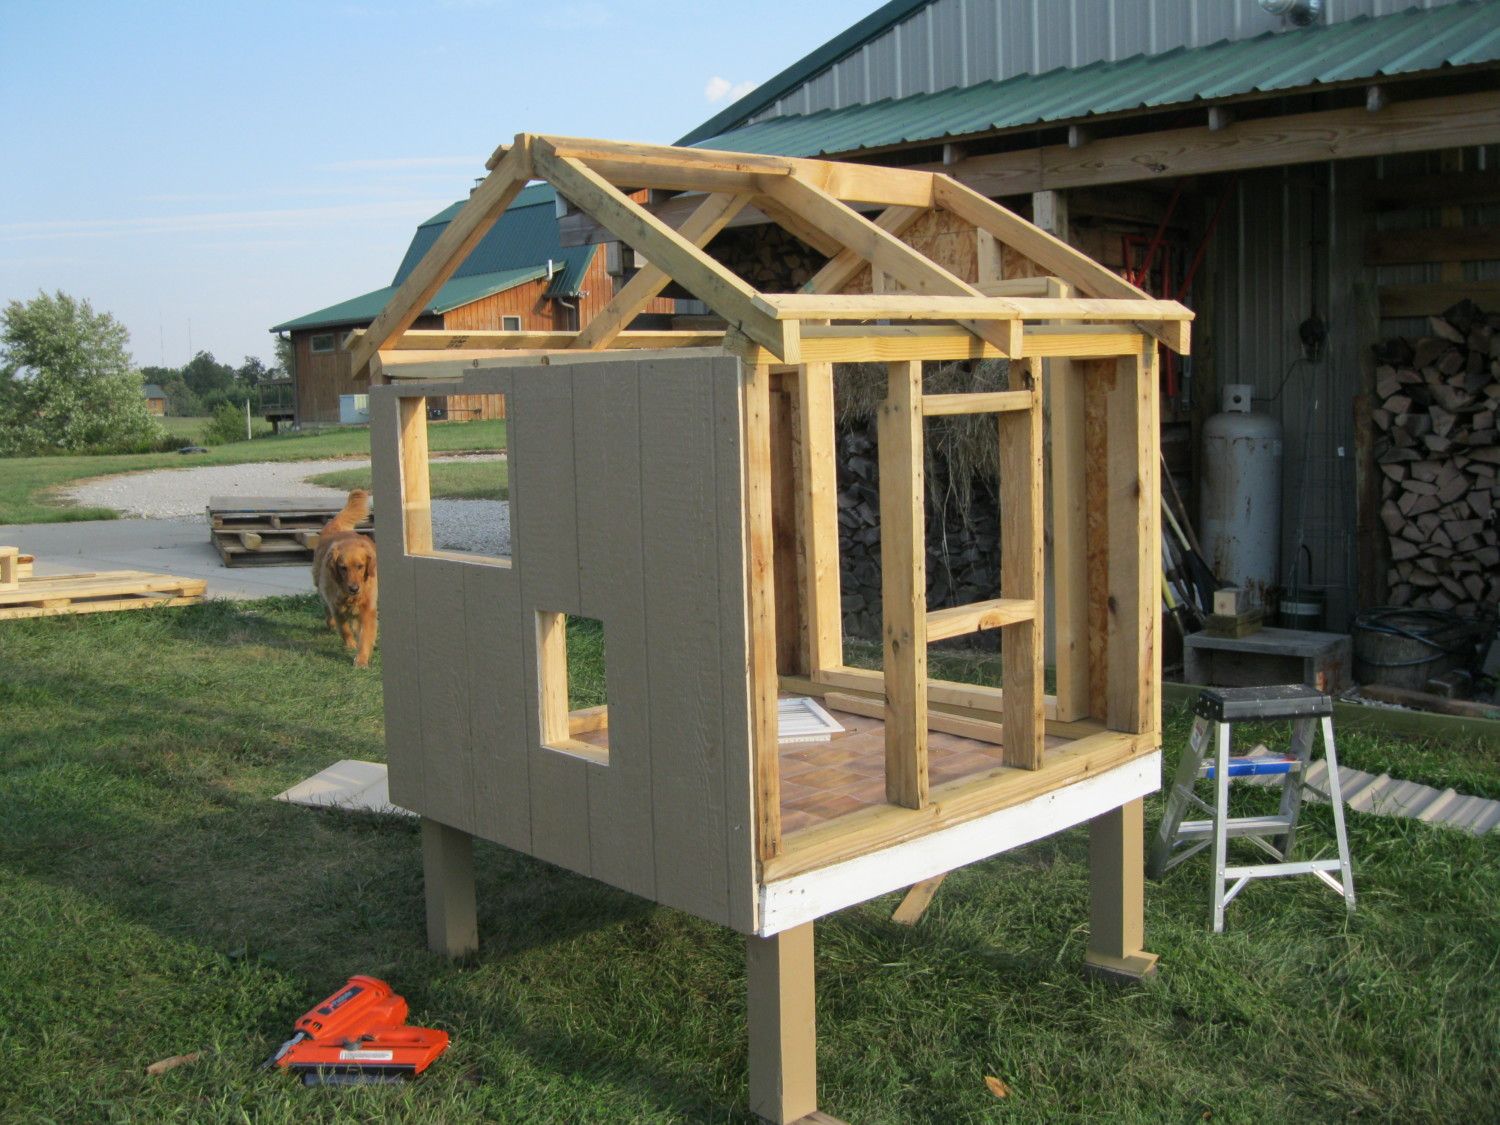
WALLS/Roof: Of course the walls went up next, beginning with the 50 inch sides. Again, I just sawed off a section of pallet in the height I wanted (36") for each of the side walls, and removed all but two of the battens (to hold the 'rails' together). I used scrap 2x4 along the top and bottom of each wall rather than pallet battens. I also used 2x4 in-between the inner two pallet rails to form windows. (In the first pic., I was still experimenting with how I wanted to do the walls. The wall wasn't nailed down yet, just resting there.). The roof I was completely lost on - I looked up several coop pages here on BYC to see how others had done gable style roofs, and just did the best I could. It wasn't pretty, but it felt secure. I saved the 48 inch walls for last, because I wasn't sure how large of clean-out door I wanted, or where I wanted the pop door and another window.
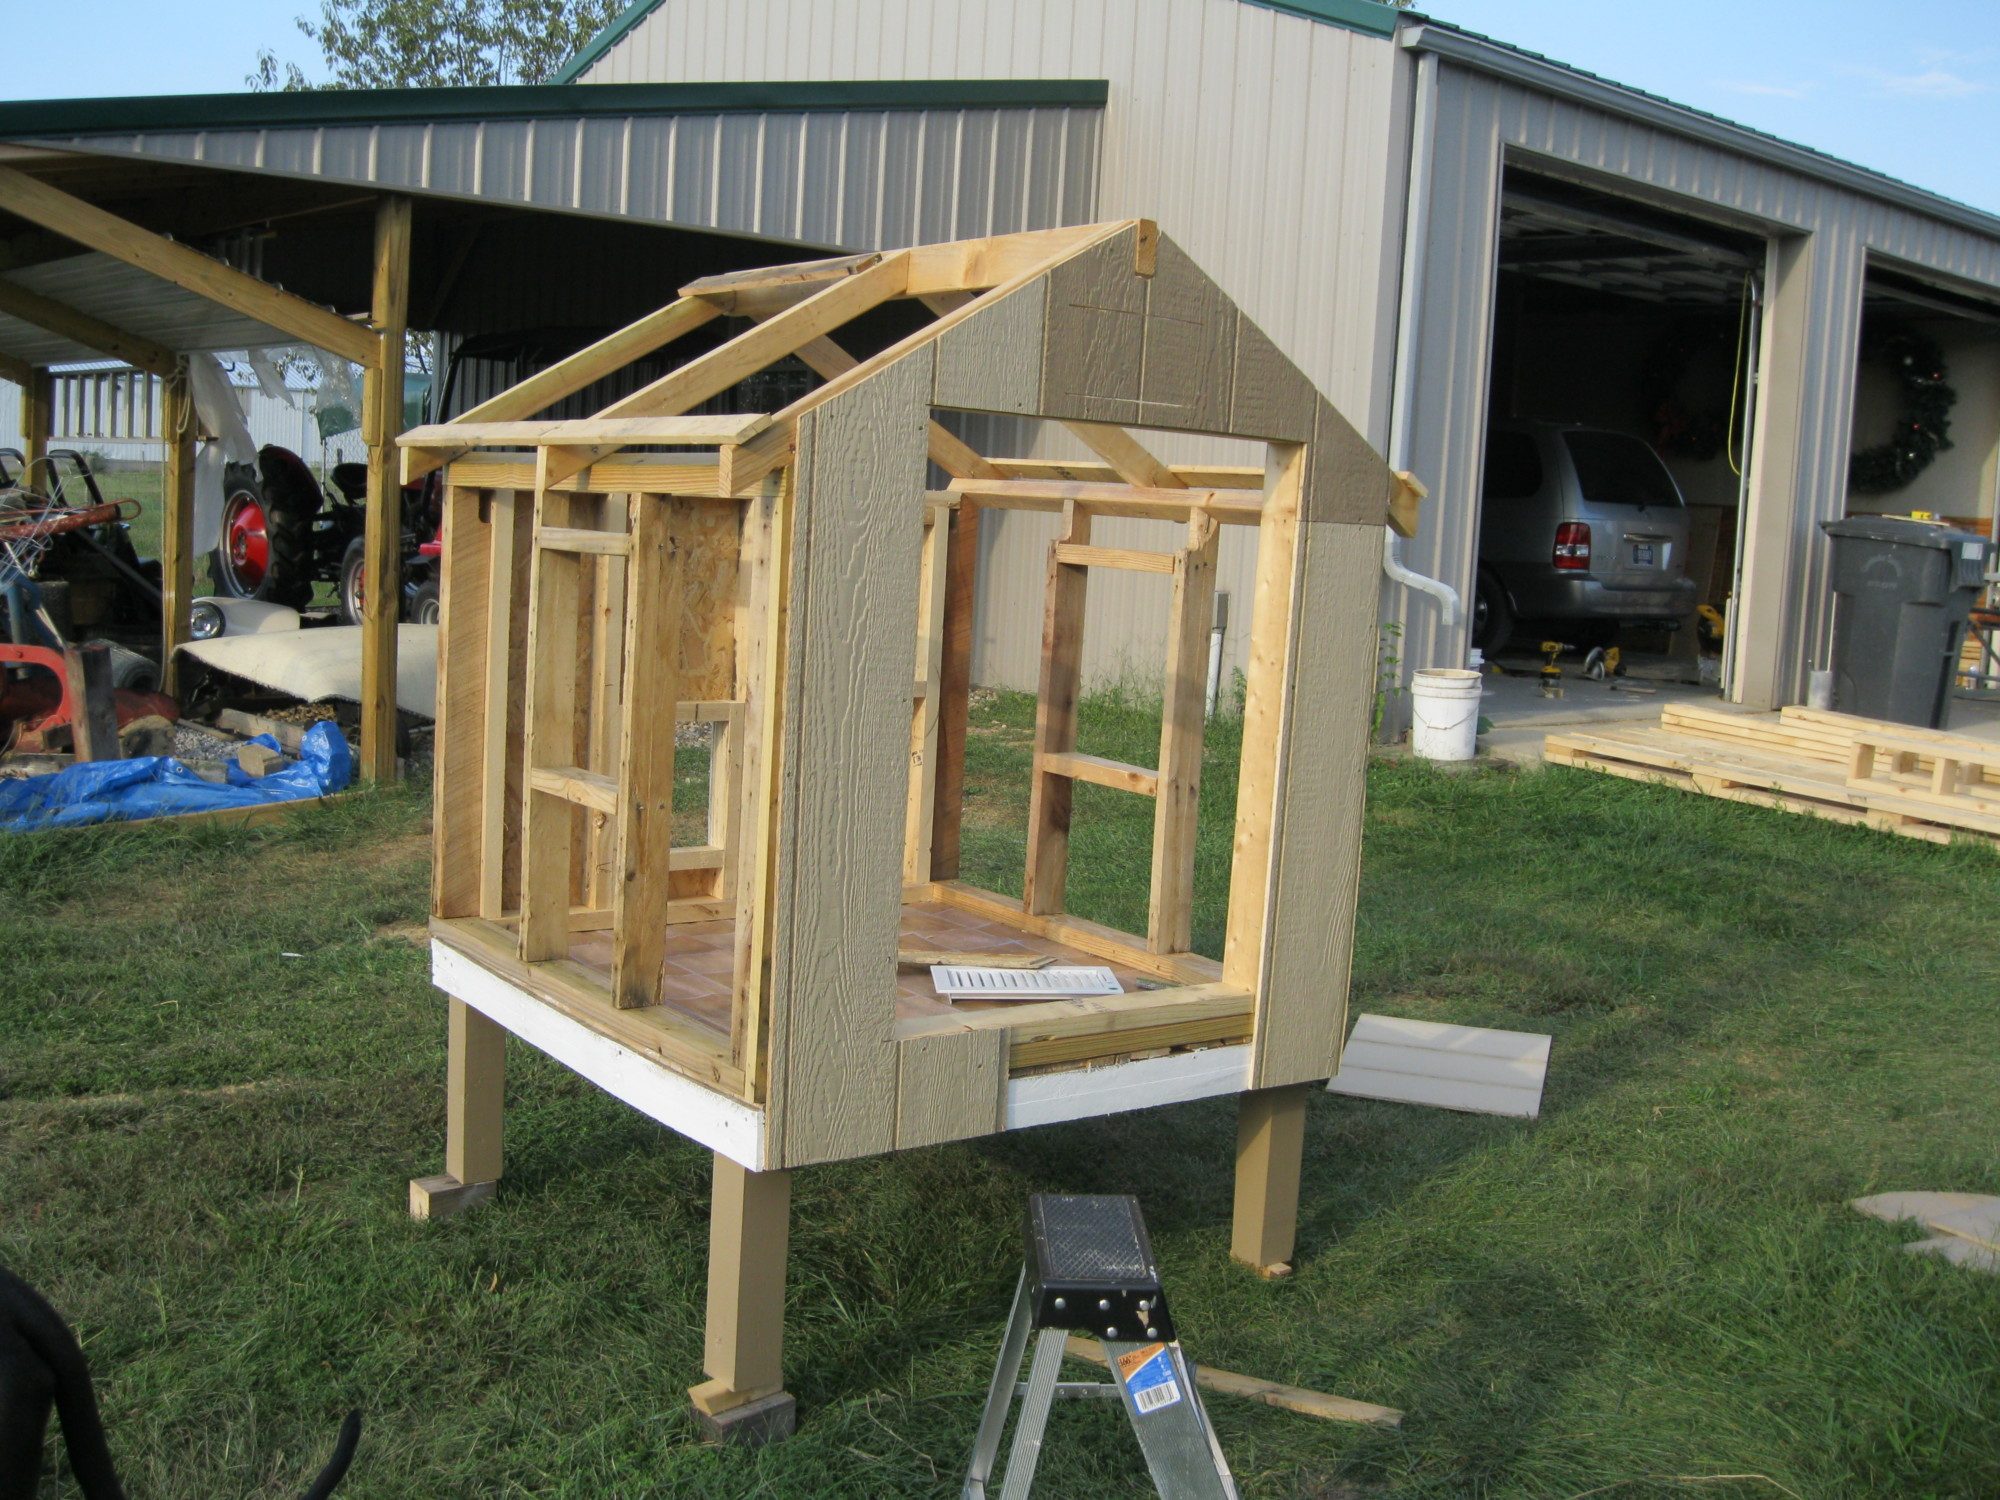
WALLS, Cont'd: I decided to frame in a large clean-out door. I just really like easy access to things. I used 2x4s to frame the front and back wall parts. Pallet battens were used as purlins to screw the metal roofing onto.
SIDING: Okay, I'll admit that even if it's made of scrap, I like a coop to look as cute as possible, so even in the planning stages I knew I'd be using regular board (T1-11) siding. Luckily, we had a large section plus several pieces left over from another coop. I still had to buy a sheet though, and because I went with the cheapest stuff, it didn't match the pieces I already had. But that's okay. The new sheet went on the sides and top triangle area of the front, and I had enough of the old stuff to cover the rest (although the back is really pieced together, and doesn't interlock like it's supposed to). Caulking and paint cover a LOT!!
** Okay, I was very remiss at this point. I needed this coop unexpectedly, so I just finished it really quickly without taking photos, so I'll just have to describe the rest with end product photos.
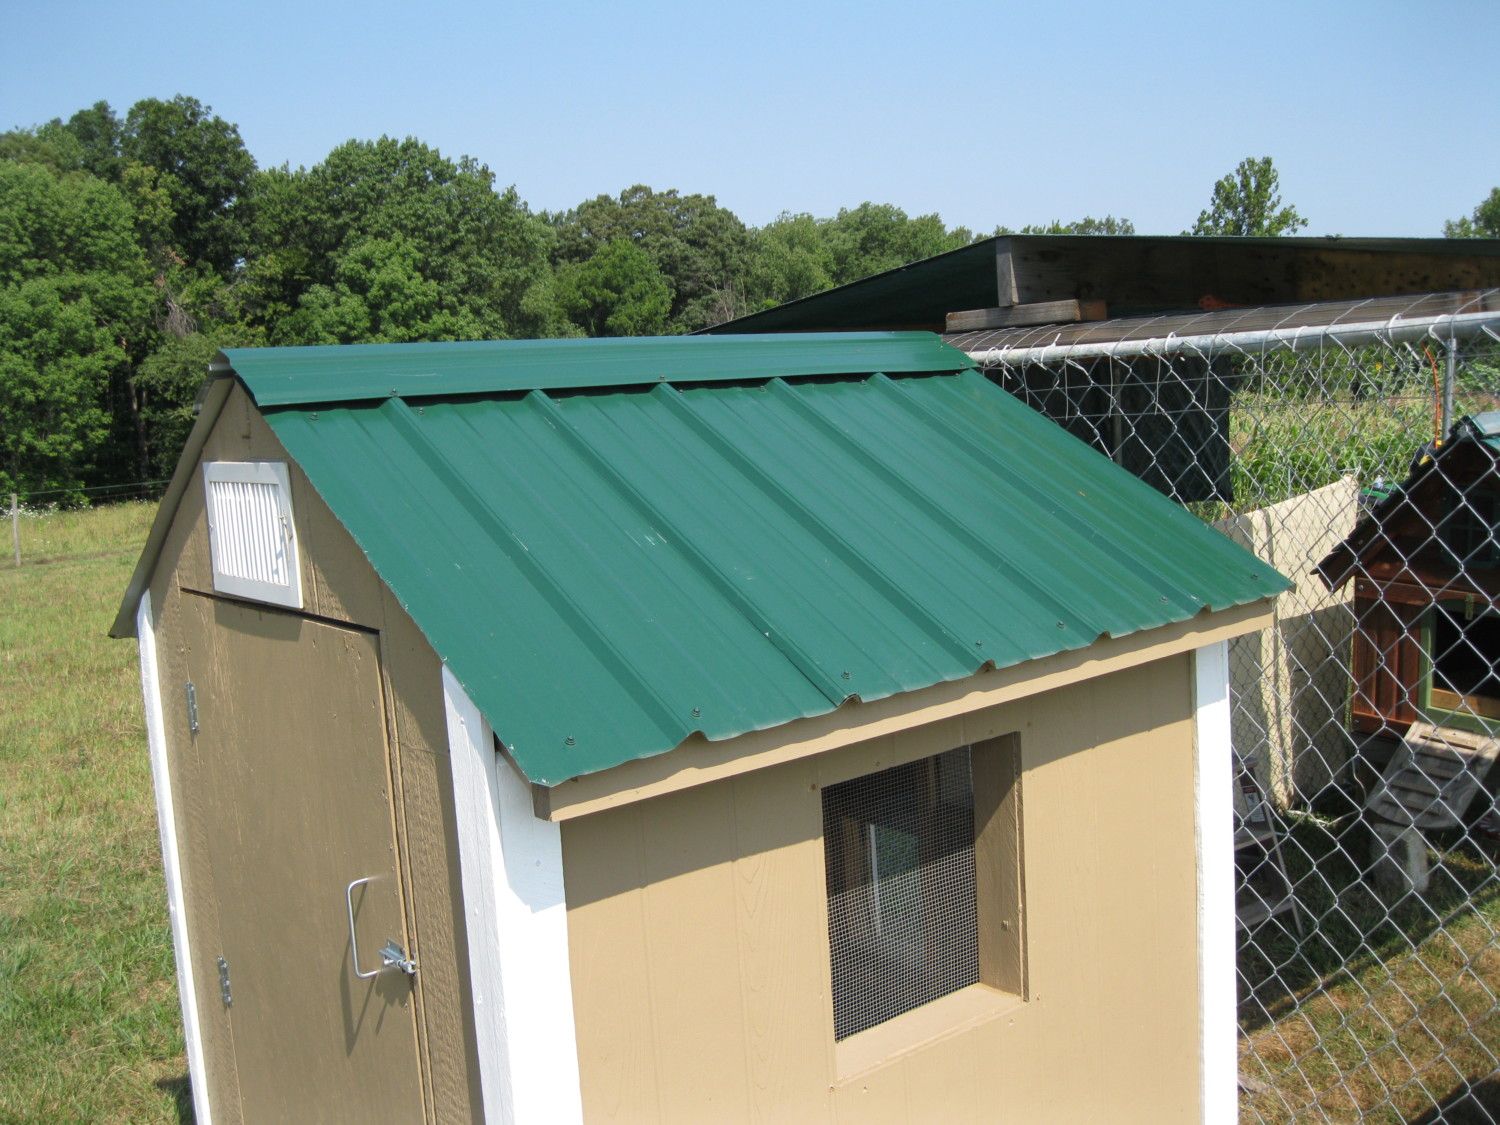
ROOF: I used tin-snips to cut the sheet of metal roofing we had on hand - this was almost as difficult for me to do as pulling pallets apart. Again, a stronger person could have made much quicker (and neater) work of it than I was able to. We'd recently built the lean-to you can see in the background of the one pic above, and they'd stacked our metal roofing on a scratched up "extra" sheet...lucky us! I screwed the roofing onto the purlins. We also had a short (it just fit) piece of ridge cap left over too, from when we'd covered part of our main run.
CLEAN-OUT DOOR: Since I'd used up all of my T1-11 siding, I just used a piece of old plywood we had around here for the door - the frame was made from scrap 2x4. Hinges and a latch were purchased.
FINISHING TOUCHES: Pallet boards used as trim boards. Hardware cloth was tacked over all window openings. I stuck an old floor register for winter ventilation (I cover the windows in plexiglas for winter). Metal roofing gets hot, so to prevent the heat from radiating down inside the coop, I did insulate the ceiling with some R13 scrap we had on hand. I covered that with some thin luan type board, some of which we already had, but I bought one sheet - still not sure why...lol. I made a pop door tract from scrap wood, and used eye bolts to guide my pulley system so that the door could be raised or lowered from outside.
MONEY SPENT @$50: $19 for sheet of fake T1-11, hinges, latch, eye bolts = @$10, quart of white trim paint (we had the tan/green already), $8, sheet of luan type board, @$10
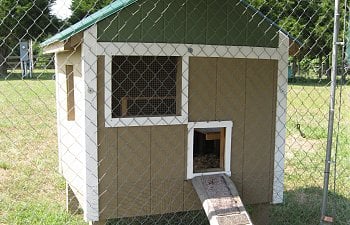
Overall, I was pleased with the way the coop turned out, considering what I spent on it. Pallet wood is HEAVY, so although the coop is only 48 x 50", it weighs a LOT. It's solid, and doesn't leak. I meant to trim the side windows too, but just never got around to it.

DH drug home two of these huge 50" x 100" pallets, plus some pallets (guess that's what they were) made from 2x4s (all seen below). On hand from other coop and building projects, we had one sheet of slightly scratched up metal roofing, short pieces of 4x4, cheap vinyl flooring, and a few smaller pieces of faux T1-11 siding.


I had no say in how wide the coop was (at least if I was looking for the simplest approach), because the pallets were 50 inches wide. I chose a 48 inch length for the coop because I wanted a size that would be easy to load into a pick-up truck. Plus this was really just an experiment in using as much scrap/found materials as possible, and my contruction skills are limited, so I figured keeping it small was in my best interest. A LOT of time and sweat was invested in removing/prying off pallet battens and 2x4s and removing nails. I'm pretty puny (weigh about 110 on a heavy day), so I'm sure someone bigger could have accomplished this part of the task in lot less time.
FLOOR/BASE: I cut the size I wanted (48x50"), flipped that piece over and added 18" 4x4 legs to create a "table." The 4x4s I was working with were curved like the rockers on a rocking chair, but that doesn't matter nearly as much when you're just using short sections. Pallet battens were tacked onto the two open ends, as well as into the gaps between the battens already on that pallet section. This created a fairly solid floor. I covered the floor in a scrap vinyl section I had, just so clean-ups would be easier. And I went ahead and painted the legs and around the base. The legs had to be painted because the 4x4s I'd used were not pressure treated.


WALLS/Roof: Of course the walls went up next, beginning with the 50 inch sides. Again, I just sawed off a section of pallet in the height I wanted (36") for each of the side walls, and removed all but two of the battens (to hold the 'rails' together). I used scrap 2x4 along the top and bottom of each wall rather than pallet battens. I also used 2x4 in-between the inner two pallet rails to form windows. (In the first pic., I was still experimenting with how I wanted to do the walls. The wall wasn't nailed down yet, just resting there.). The roof I was completely lost on - I looked up several coop pages here on BYC to see how others had done gable style roofs, and just did the best I could. It wasn't pretty, but it felt secure. I saved the 48 inch walls for last, because I wasn't sure how large of clean-out door I wanted, or where I wanted the pop door and another window.


WALLS, Cont'd: I decided to frame in a large clean-out door. I just really like easy access to things. I used 2x4s to frame the front and back wall parts. Pallet battens were used as purlins to screw the metal roofing onto.


SIDING: Okay, I'll admit that even if it's made of scrap, I like a coop to look as cute as possible, so even in the planning stages I knew I'd be using regular board (T1-11) siding. Luckily, we had a large section plus several pieces left over from another coop. I still had to buy a sheet though, and because I went with the cheapest stuff, it didn't match the pieces I already had. But that's okay. The new sheet went on the sides and top triangle area of the front, and I had enough of the old stuff to cover the rest (although the back is really pieced together, and doesn't interlock like it's supposed to). Caulking and paint cover a LOT!!
** Okay, I was very remiss at this point. I needed this coop unexpectedly, so I just finished it really quickly without taking photos, so I'll just have to describe the rest with end product photos.
ROOF: I used tin-snips to cut the sheet of metal roofing we had on hand - this was almost as difficult for me to do as pulling pallets apart. Again, a stronger person could have made much quicker (and neater) work of it than I was able to. We'd recently built the lean-to you can see in the background of the one pic above, and they'd stacked our metal roofing on a scratched up "extra" sheet...lucky us! I screwed the roofing onto the purlins. We also had a short (it just fit) piece of ridge cap left over too, from when we'd covered part of our main run.
CLEAN-OUT DOOR: Since I'd used up all of my T1-11 siding, I just used a piece of old plywood we had around here for the door - the frame was made from scrap 2x4. Hinges and a latch were purchased.
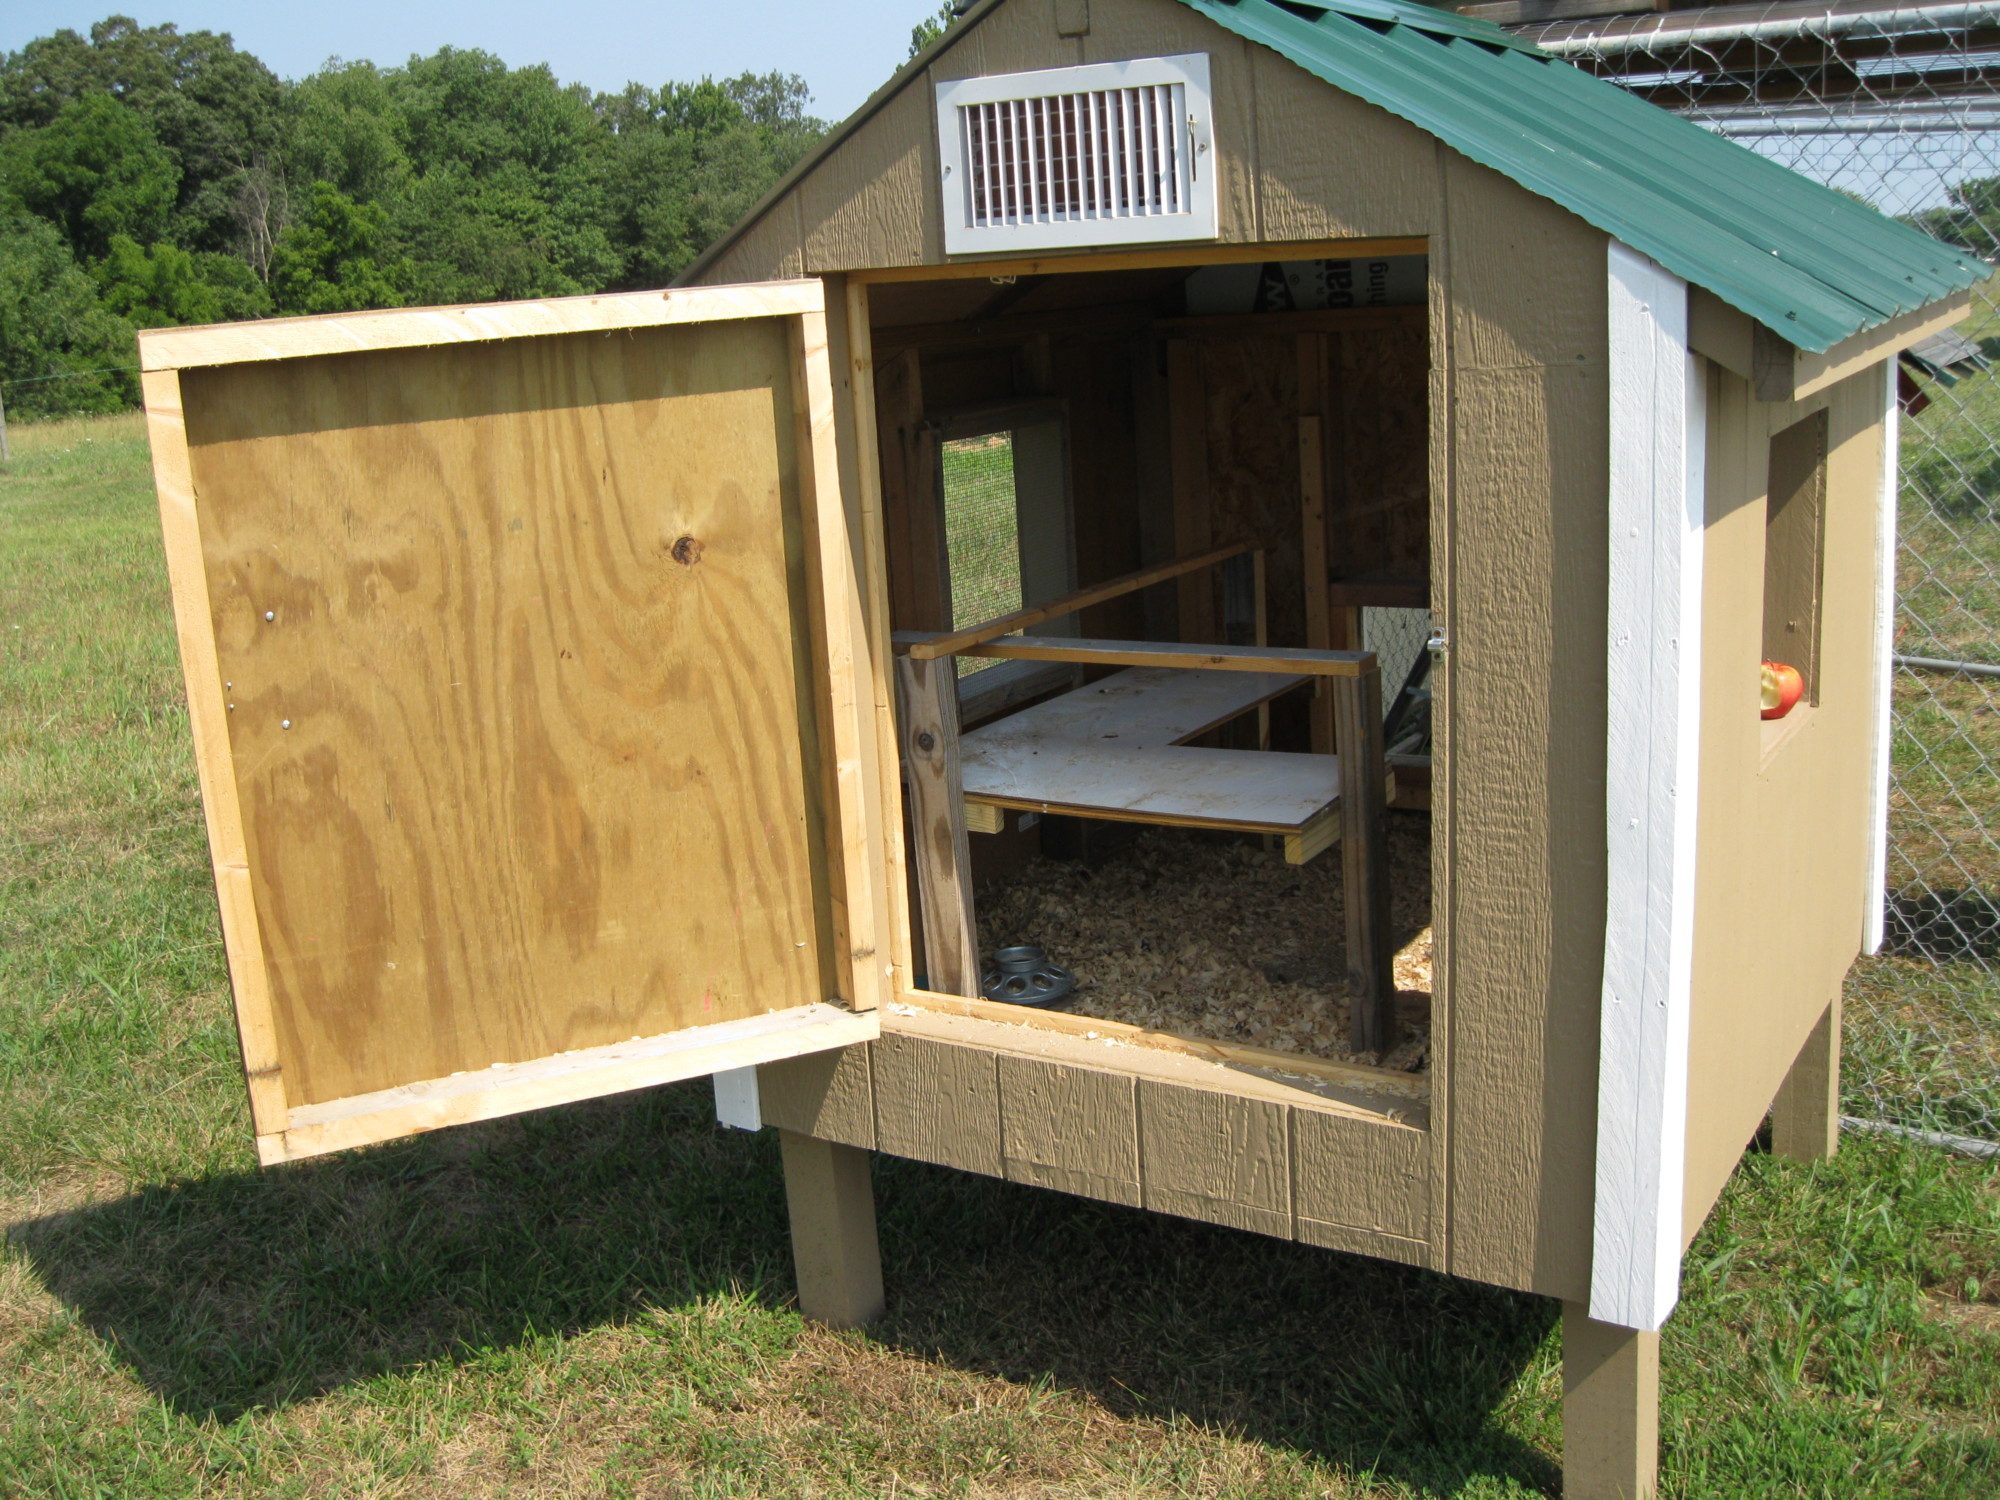

FINISHING TOUCHES: Pallet boards used as trim boards. Hardware cloth was tacked over all window openings. I stuck an old floor register for winter ventilation (I cover the windows in plexiglas for winter). Metal roofing gets hot, so to prevent the heat from radiating down inside the coop, I did insulate the ceiling with some R13 scrap we had on hand. I covered that with some thin luan type board, some of which we already had, but I bought one sheet - still not sure why...lol. I made a pop door tract from scrap wood, and used eye bolts to guide my pulley system so that the door could be raised or lowered from outside.

MONEY SPENT @$50: $19 for sheet of fake T1-11, hinges, latch, eye bolts = @$10, quart of white trim paint (we had the tan/green already), $8, sheet of luan type board, @$10
Overall, I was pleased with the way the coop turned out, considering what I spent on it. Pallet wood is HEAVY, so although the coop is only 48 x 50", it weighs a LOT. It's solid, and doesn't leak. I meant to trim the side windows too, but just never got around to it.