A few years ago my wife got the bug to keep chickens and last year she got busy researching coops, urban chicken keeping, etc. We live in the suburbs but we are permitted to keep a small flock. After clearing it with our neighbors and writing a letter to our HOA stating our intentions my wife got the green light. This spring we broke ground on our coop and we finally finished the build this past weekend. Since we relied on the experience and especially pictures from other folks I thought I'd share the steps of our build. It's a blend of a few existing coop plans we found online and in books as well as modifications and original ideas we came up with.
Here are links to the books we found helpful...
Backyard Chickens' Guide to Coops and Tractors: Planning, Building, and Real-Life Advice
http://www.amazon.com/Backyard-Chickens-Guide-Coops-Tractors/dp/1440316961

We used Feather Factory and Florida Coop as our inspiration and stepped off from there. This was the most useful book we consulted.
Art of the Chicken Coop: A Fun and Essential Guide to Housing Your Peeps
http://www.amazon.com/gp/product/1565235428/ref=as_li_ss_tl?ie=UTF8&tag=craboonow-20&linkCode=as2&camp=217145&creative=399373&creativeASIN=1565235428#_
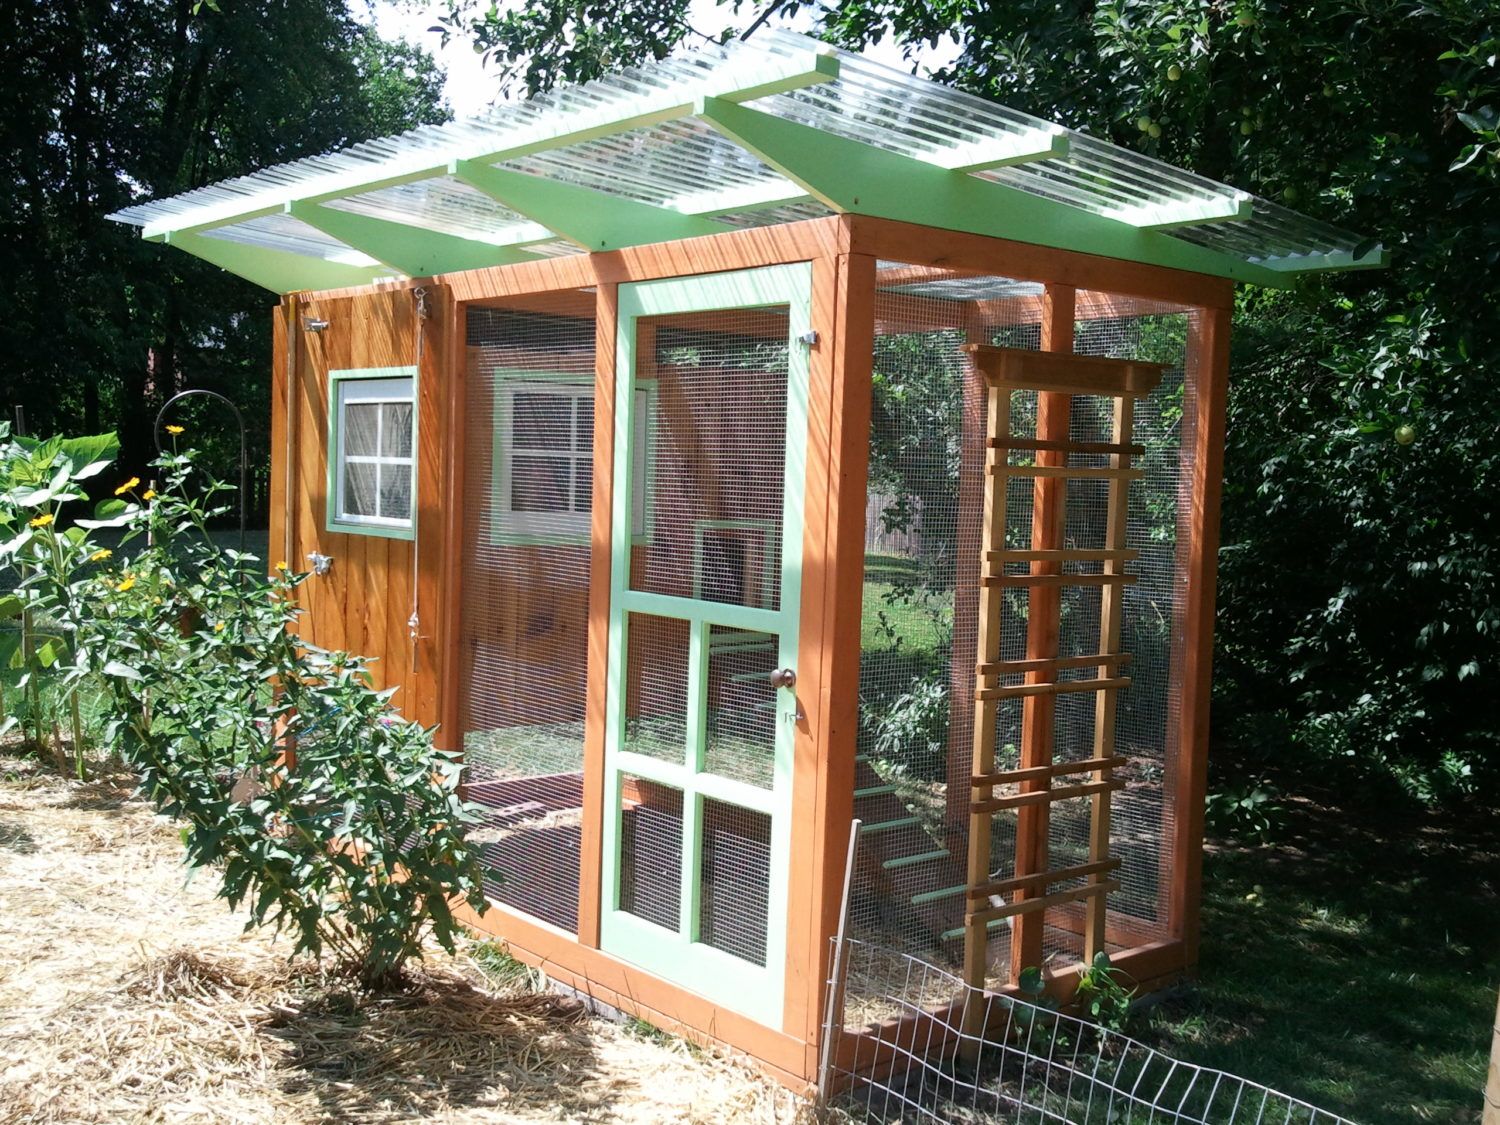
The coop is situated at the back of our garden. We plan to compost the chicken droppings and use it to fertilize the garden. Also, we can let the hens out of the run into the garden for "supervised visits". We've already had to shoo them out of the strawberries a few times.
")
First off, my wife dug out then placed & leveled our concrete block foundation.

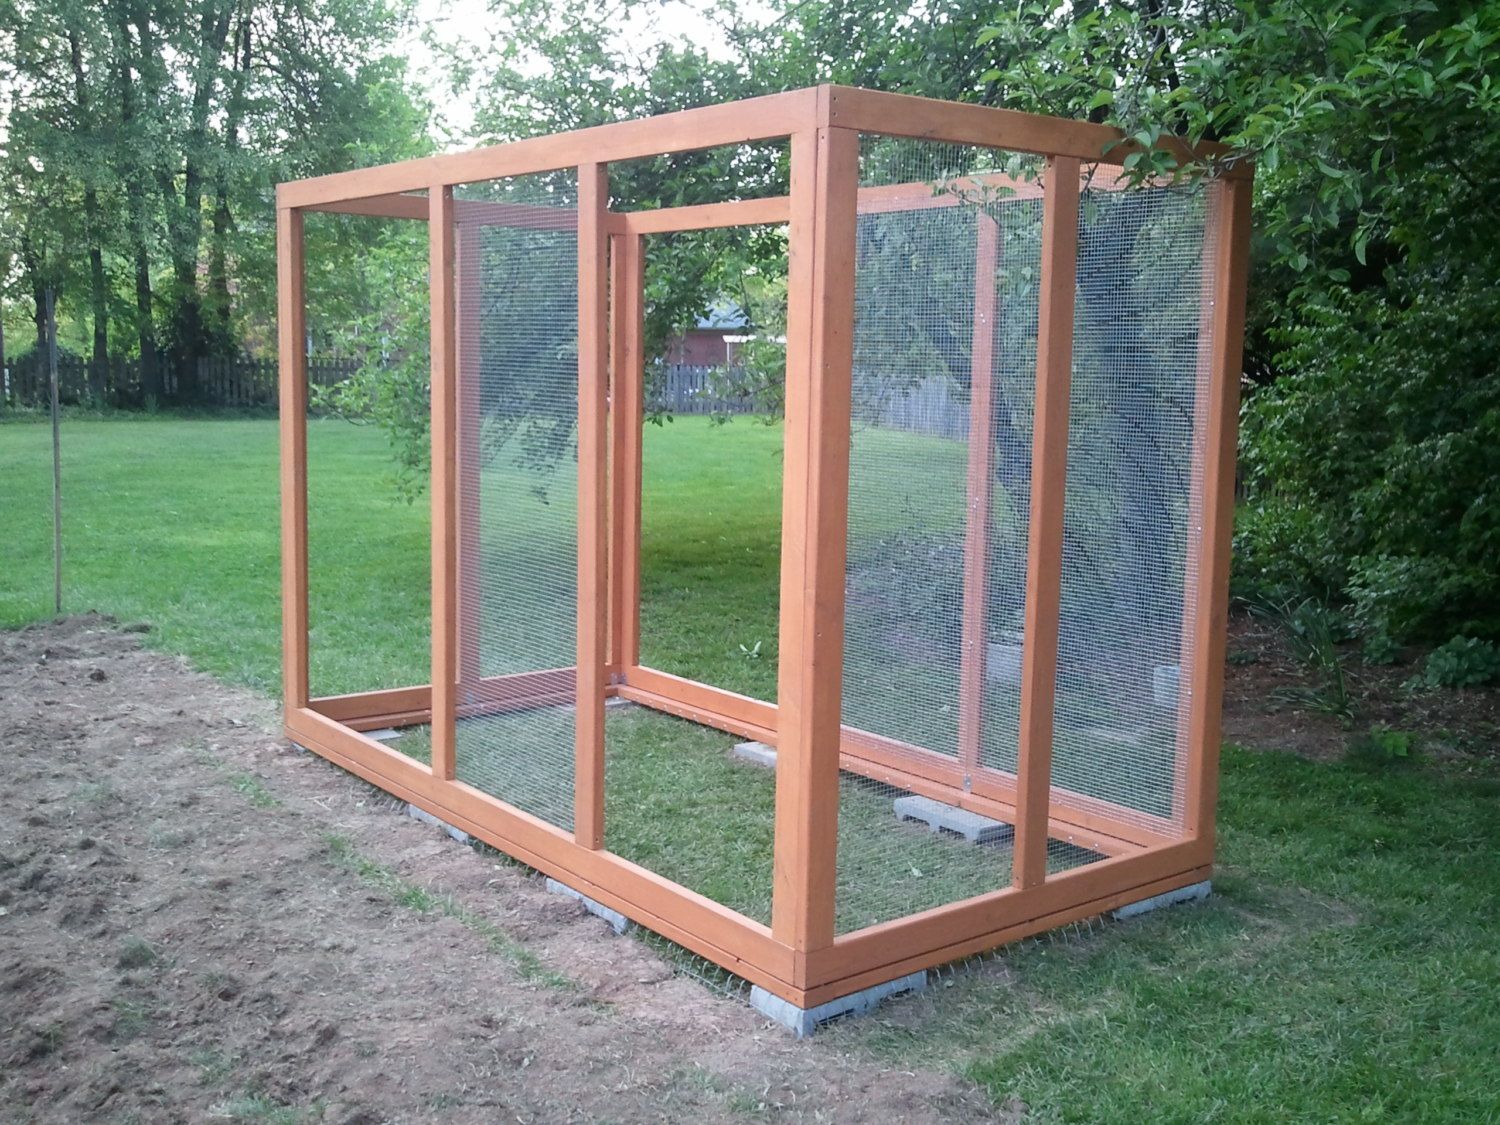
On to the base. It's 5' X 10'. I attached welded wire to the base, flipped it, bent it to fit the trench I dug around the block and back filled with sod. The idea here is a predator trying to tunnel under the coop will run into welded wire instead of breaking through.

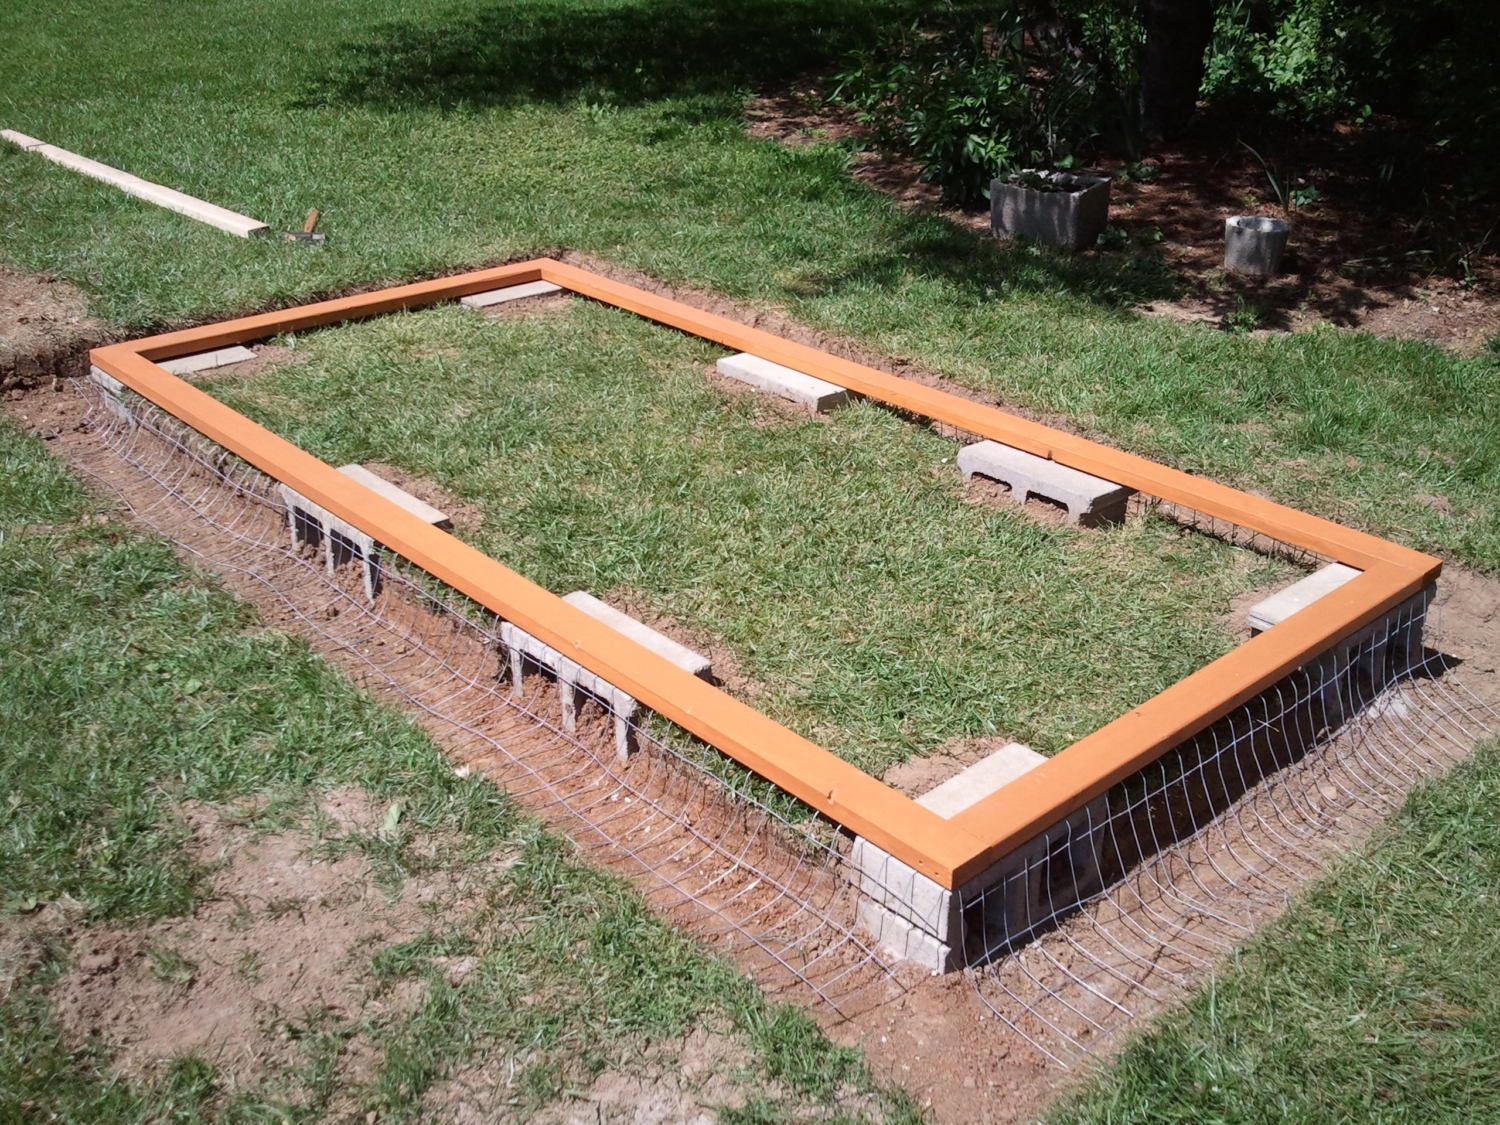
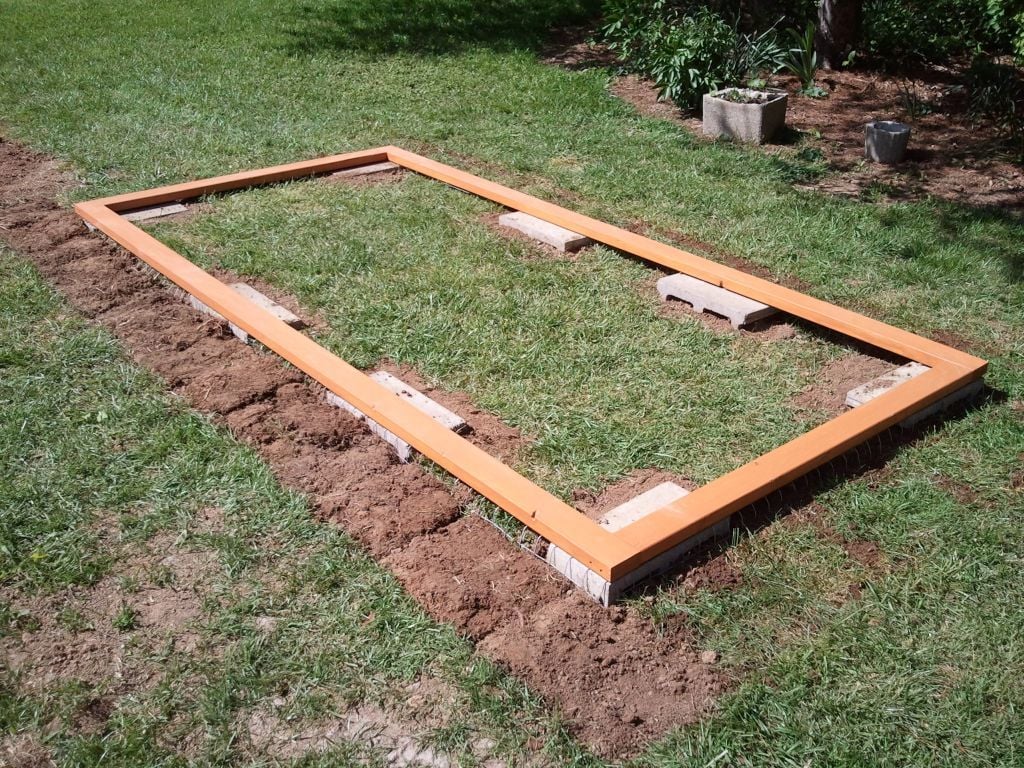
I wasn't happy with the staples I used to hold the wire to the base so I fell back on my safety wiring experience from the Navy to make sure critters couldn't get in through the bottom.

Chicks are here! Time to get crackin'!

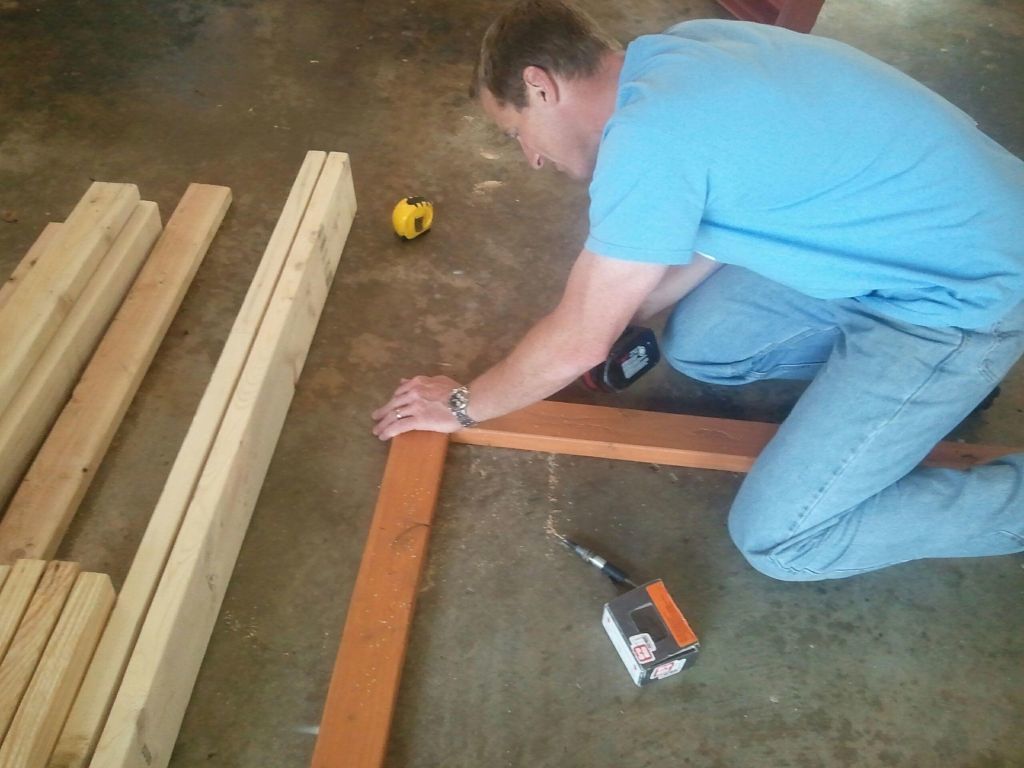
Next up, the frame. I rough cut all the pieces and my wife sanded/stained them before assembly. I also attached most of the hardware cloth while I had individual pieces of the frame on the ground.
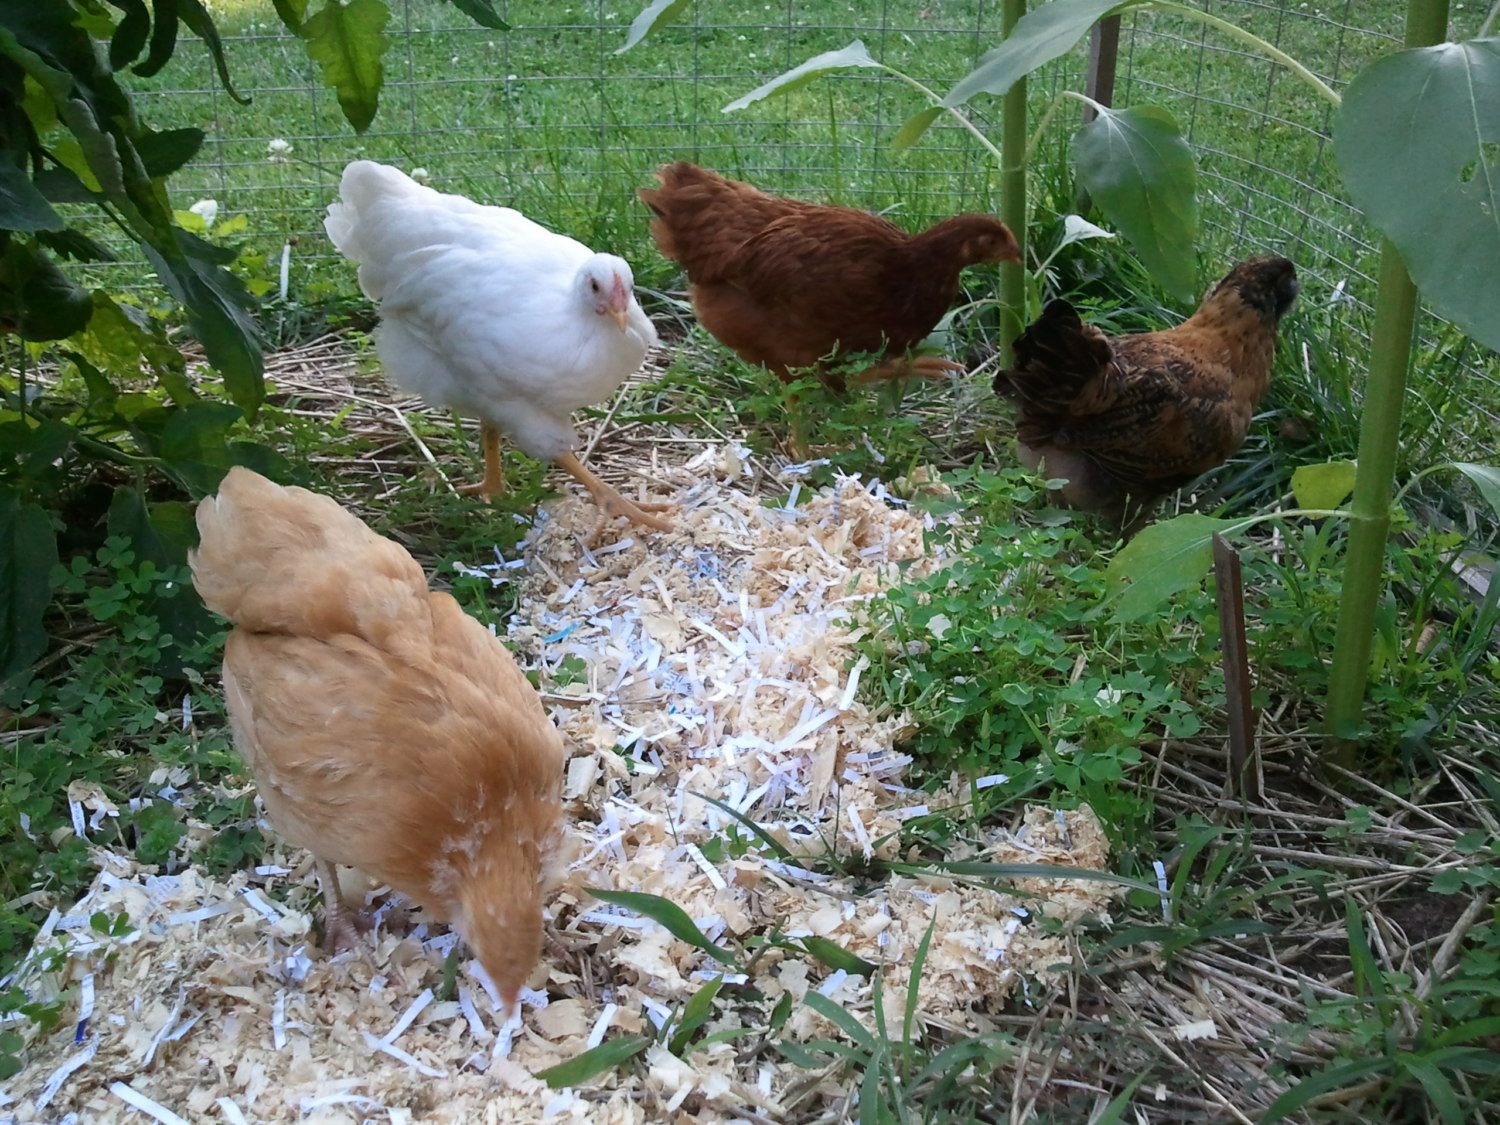
The chicks visit their run for the first time!
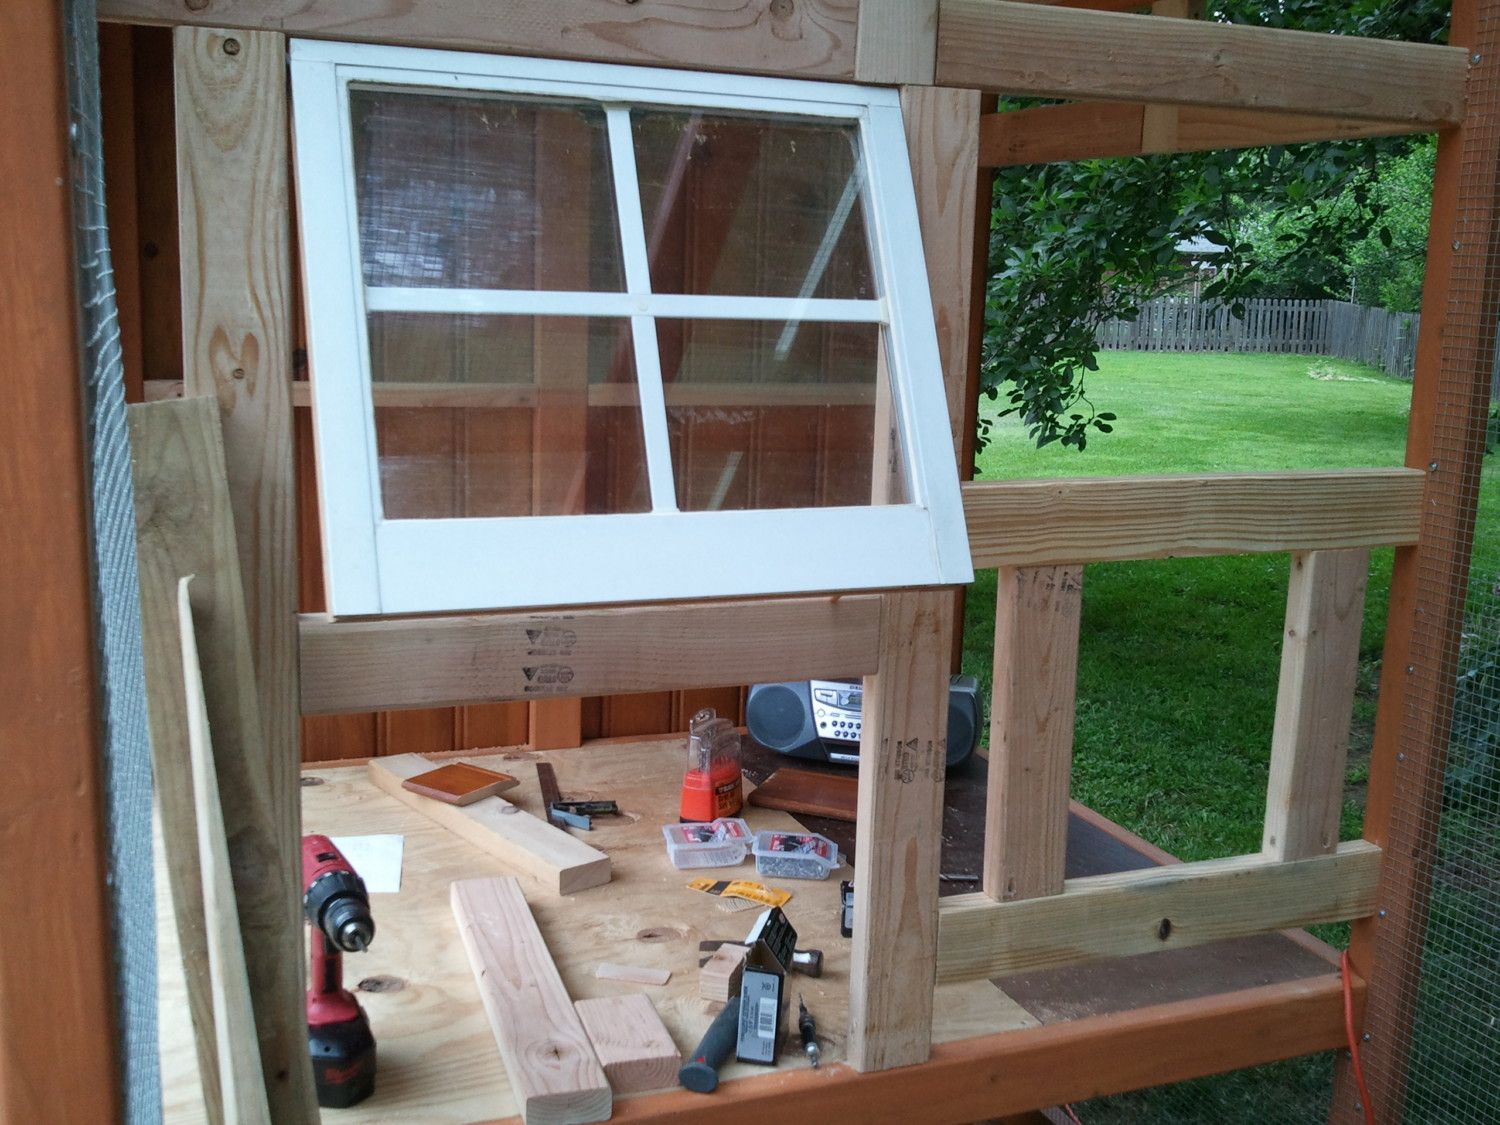
My FIL supplied windows and old knotty pine paneling that had been sitting in his shed for the last 25 years and was originally on my wife's cousin's family room walls in the 70s/80s.
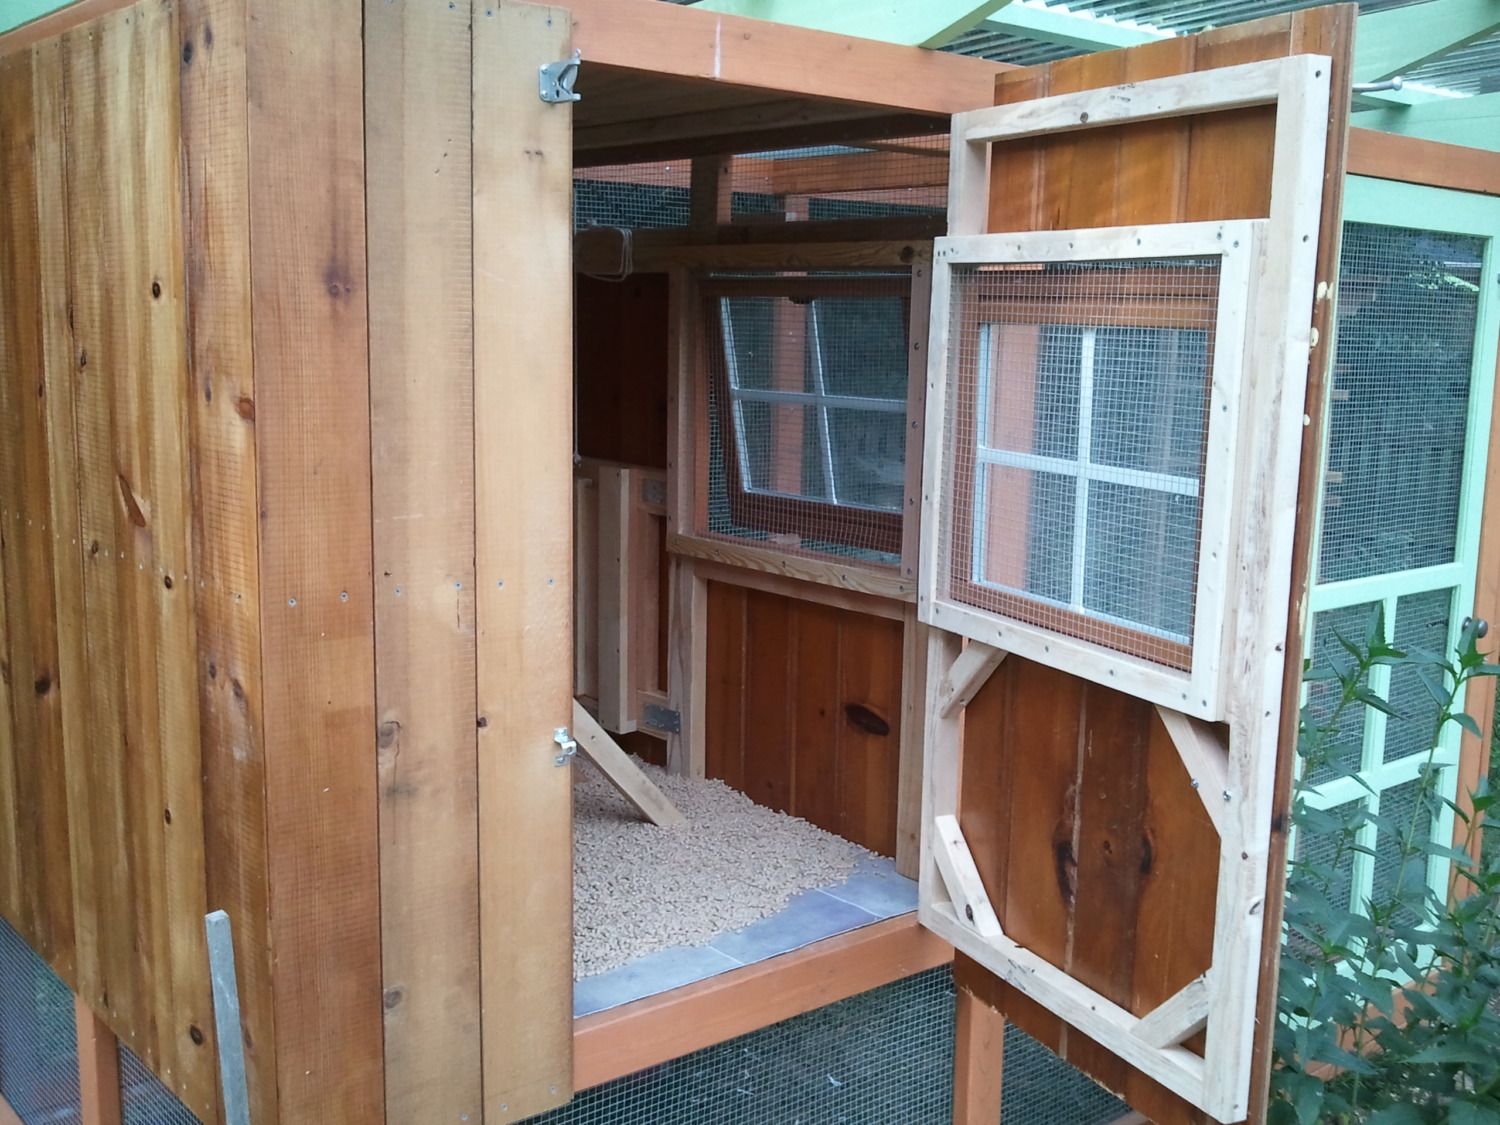
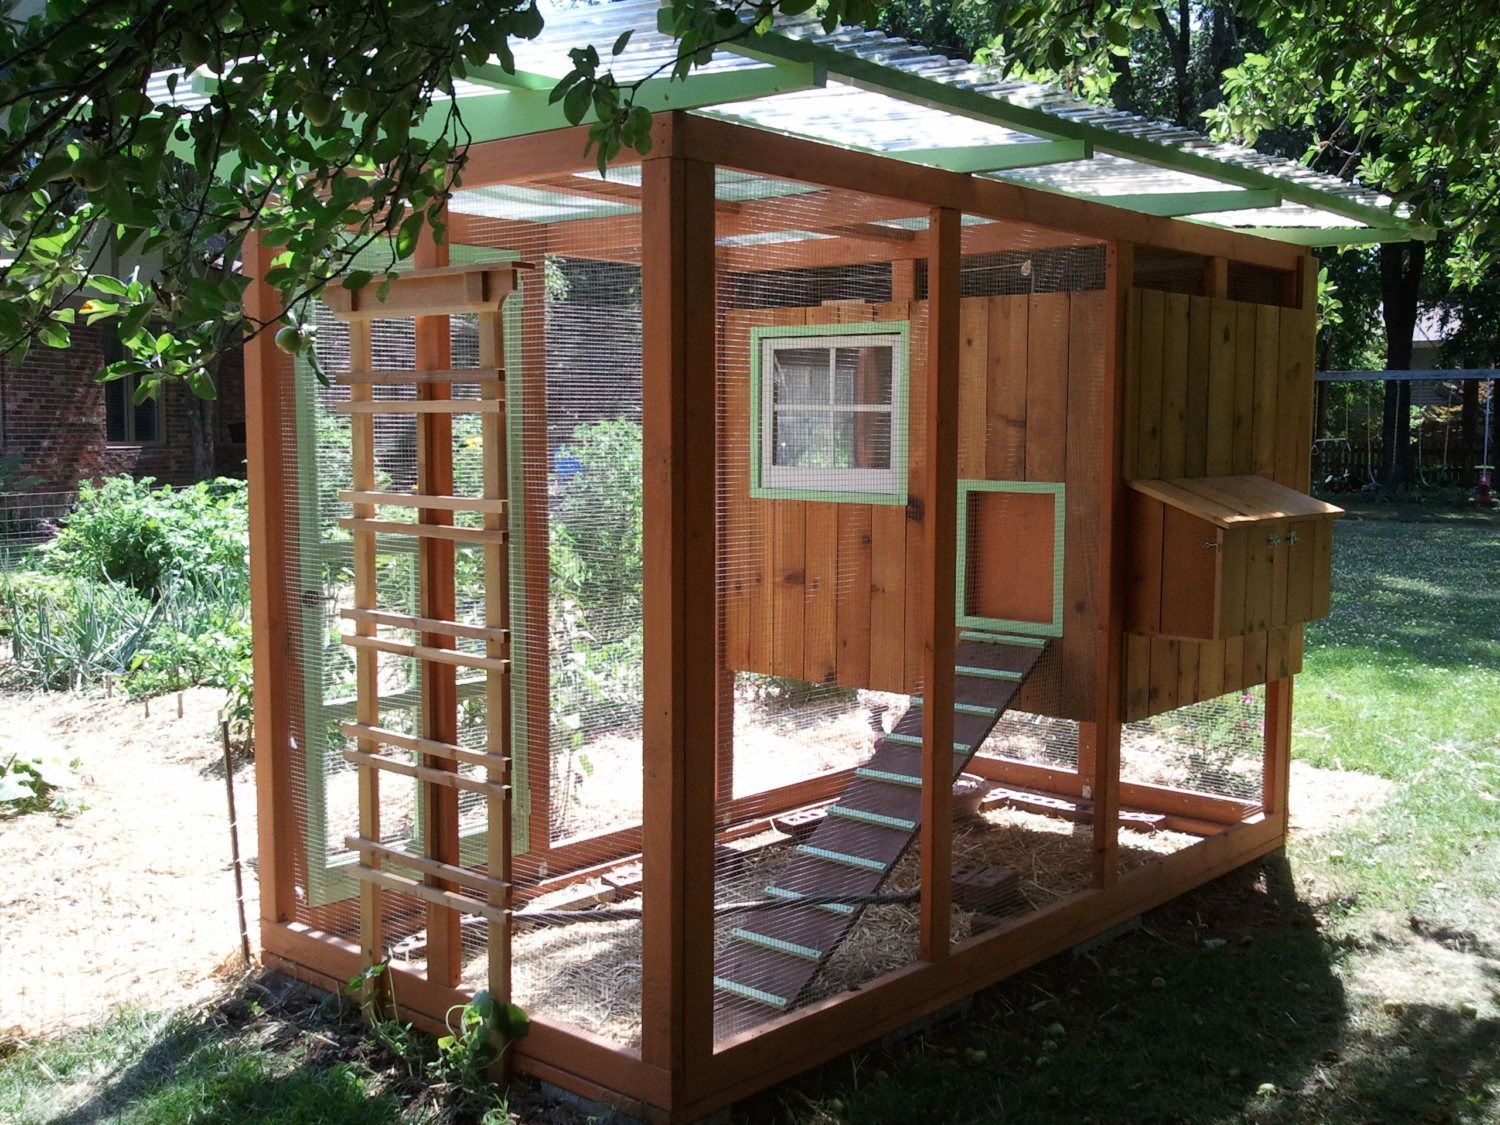
Here's the pop door in action. I rigged it to an overhead pulley and ran the line through a hole drilled in the front of the coop and out through another pulley on the outside.
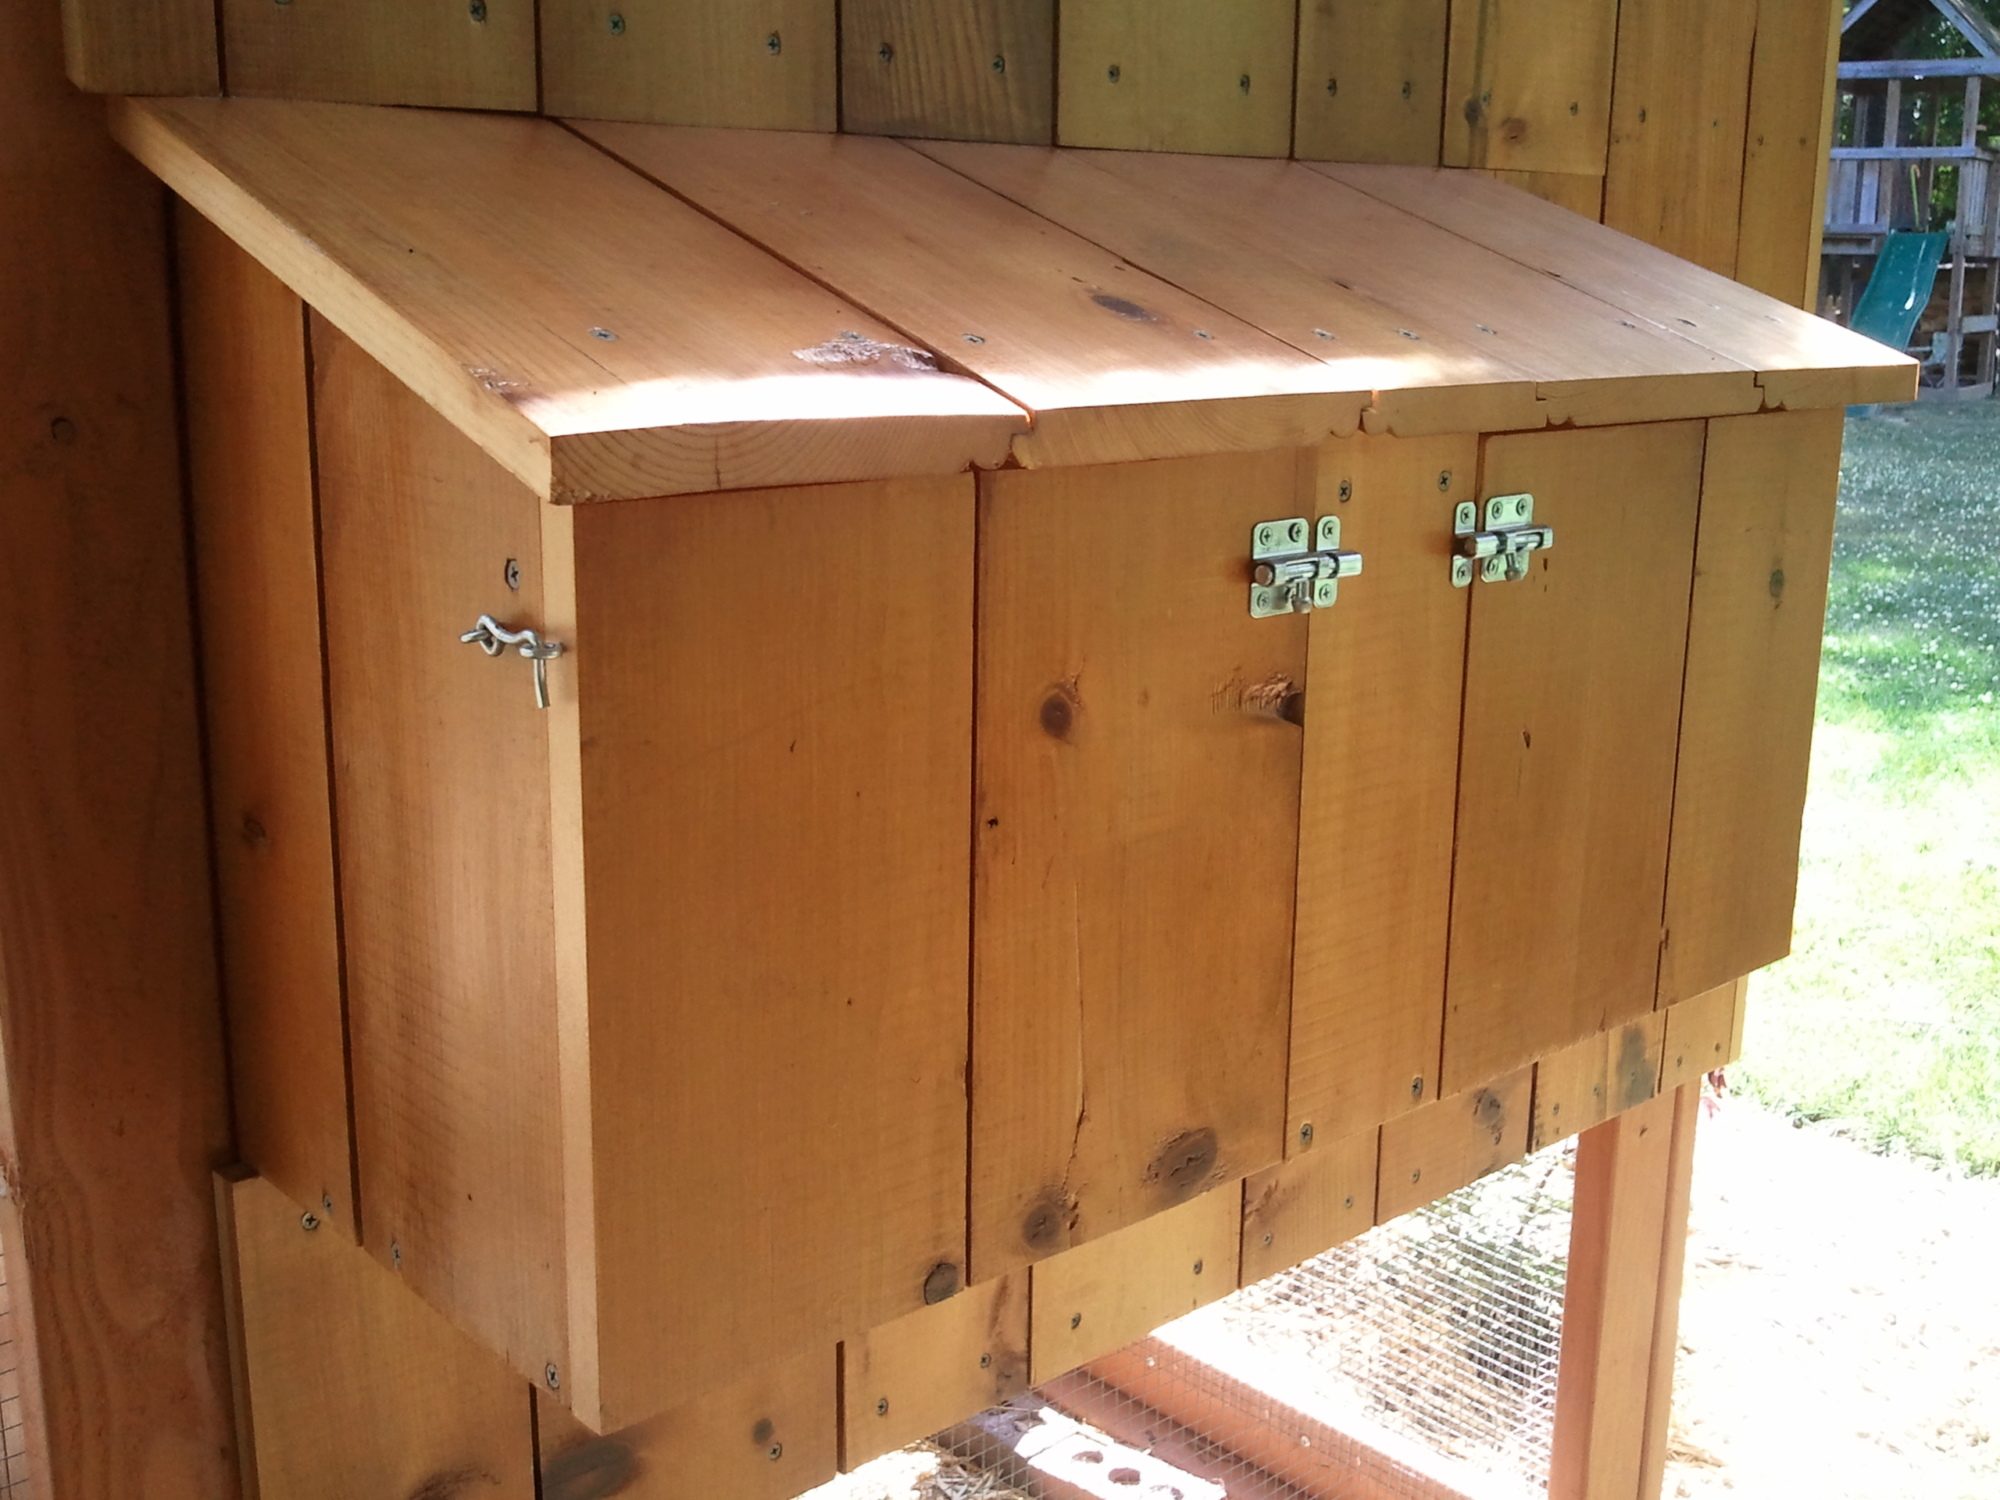
The nest box. We decided on a double nest box. I used the paneling to build it and since it's lapped the doors fit together seamlessly. I used a piece of MDF (I'd run out of wood) and routed out two circular holes in the front of the box.


Here's a shot looking through the front door to the nest box in the back. Also the pop door and the roost. We have vents running at the top above the nest box and pop door as well as two windows that prop open for additional ventilation.

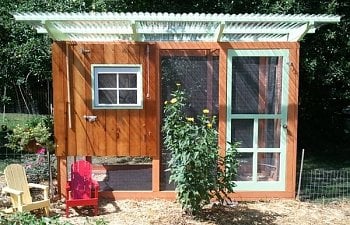
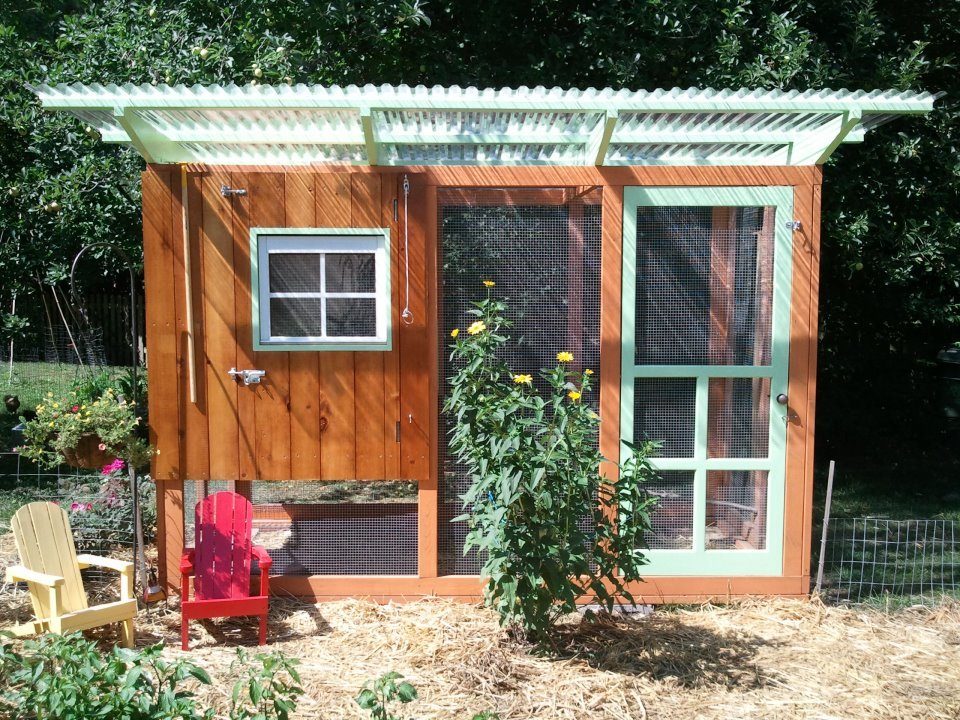
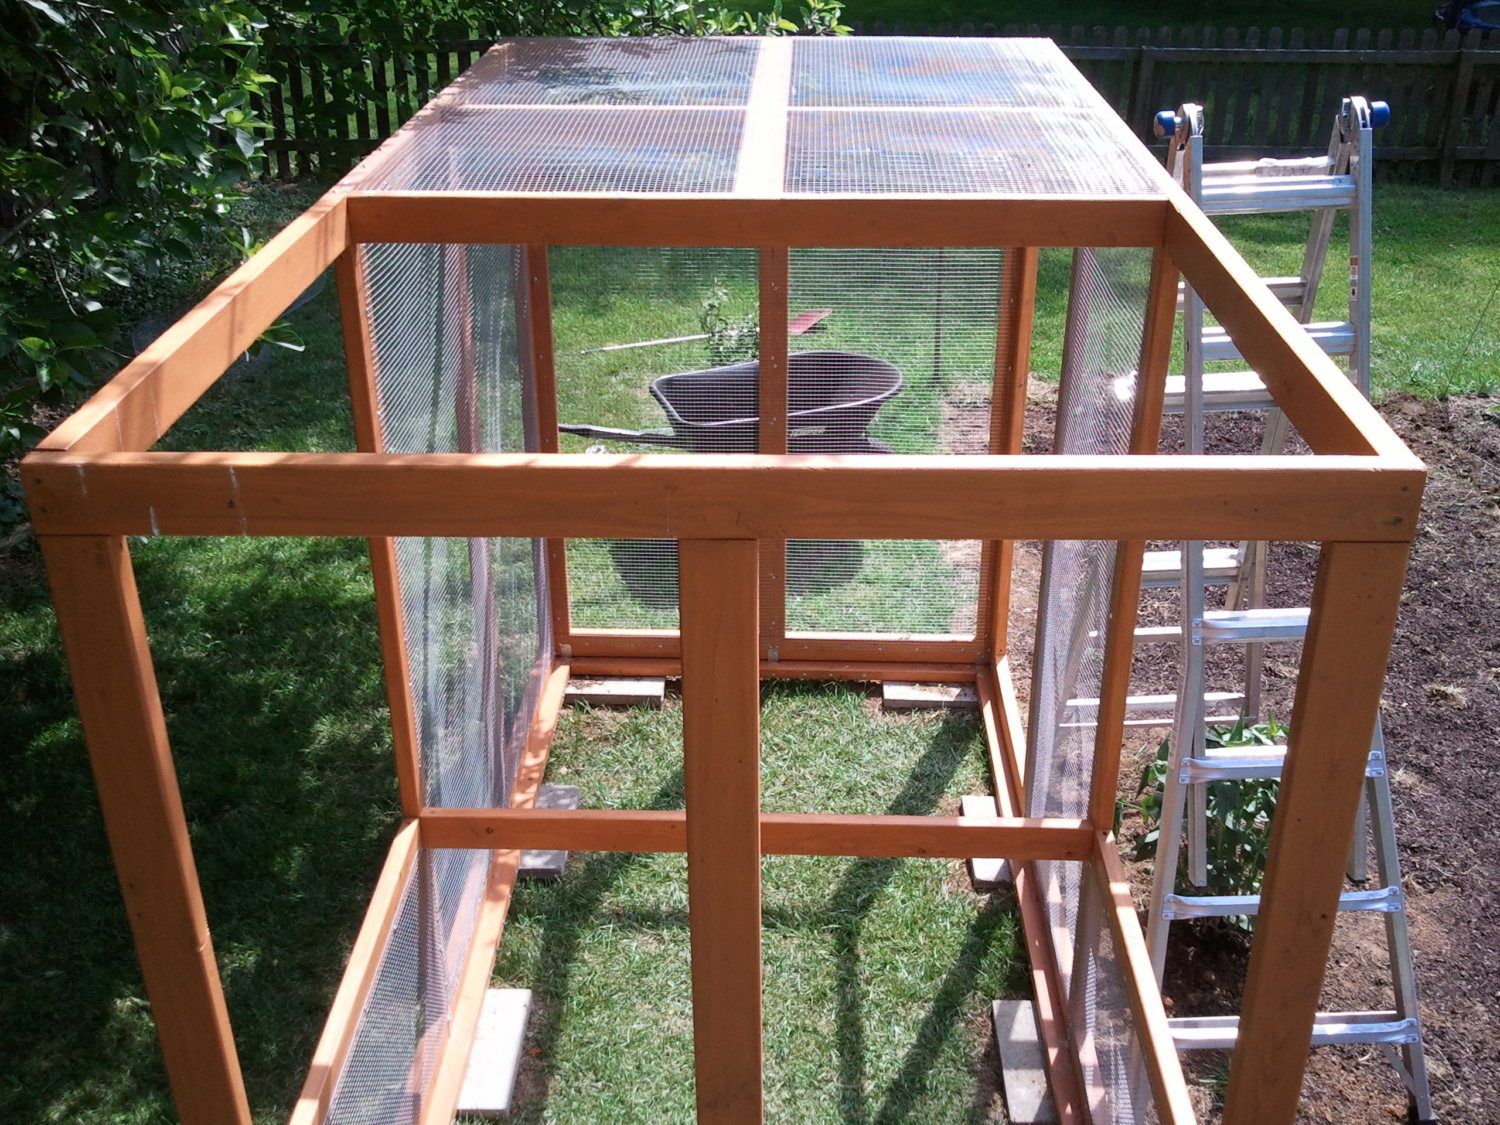
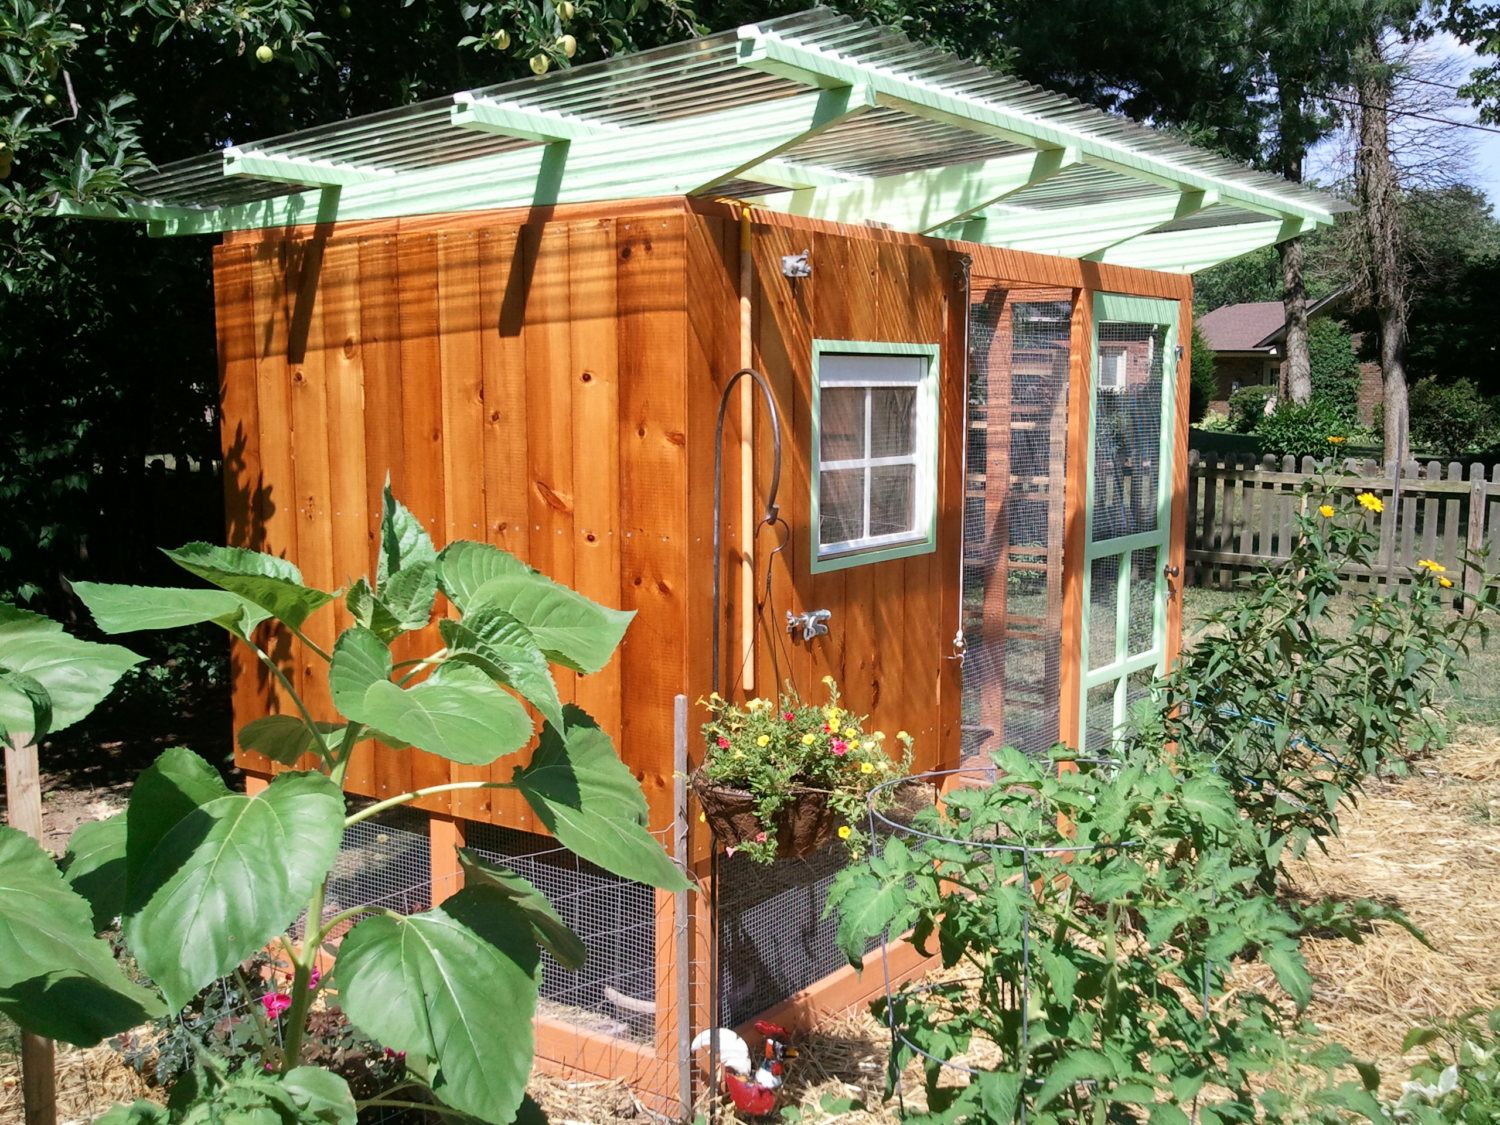
The finished coop with shots from a number of different angles. I sanded and sealed the paneling with marine spar varnish. The screen door came from our local Habitat for Humanity ReStore. The roof is clear polycarb panels from Lowes.
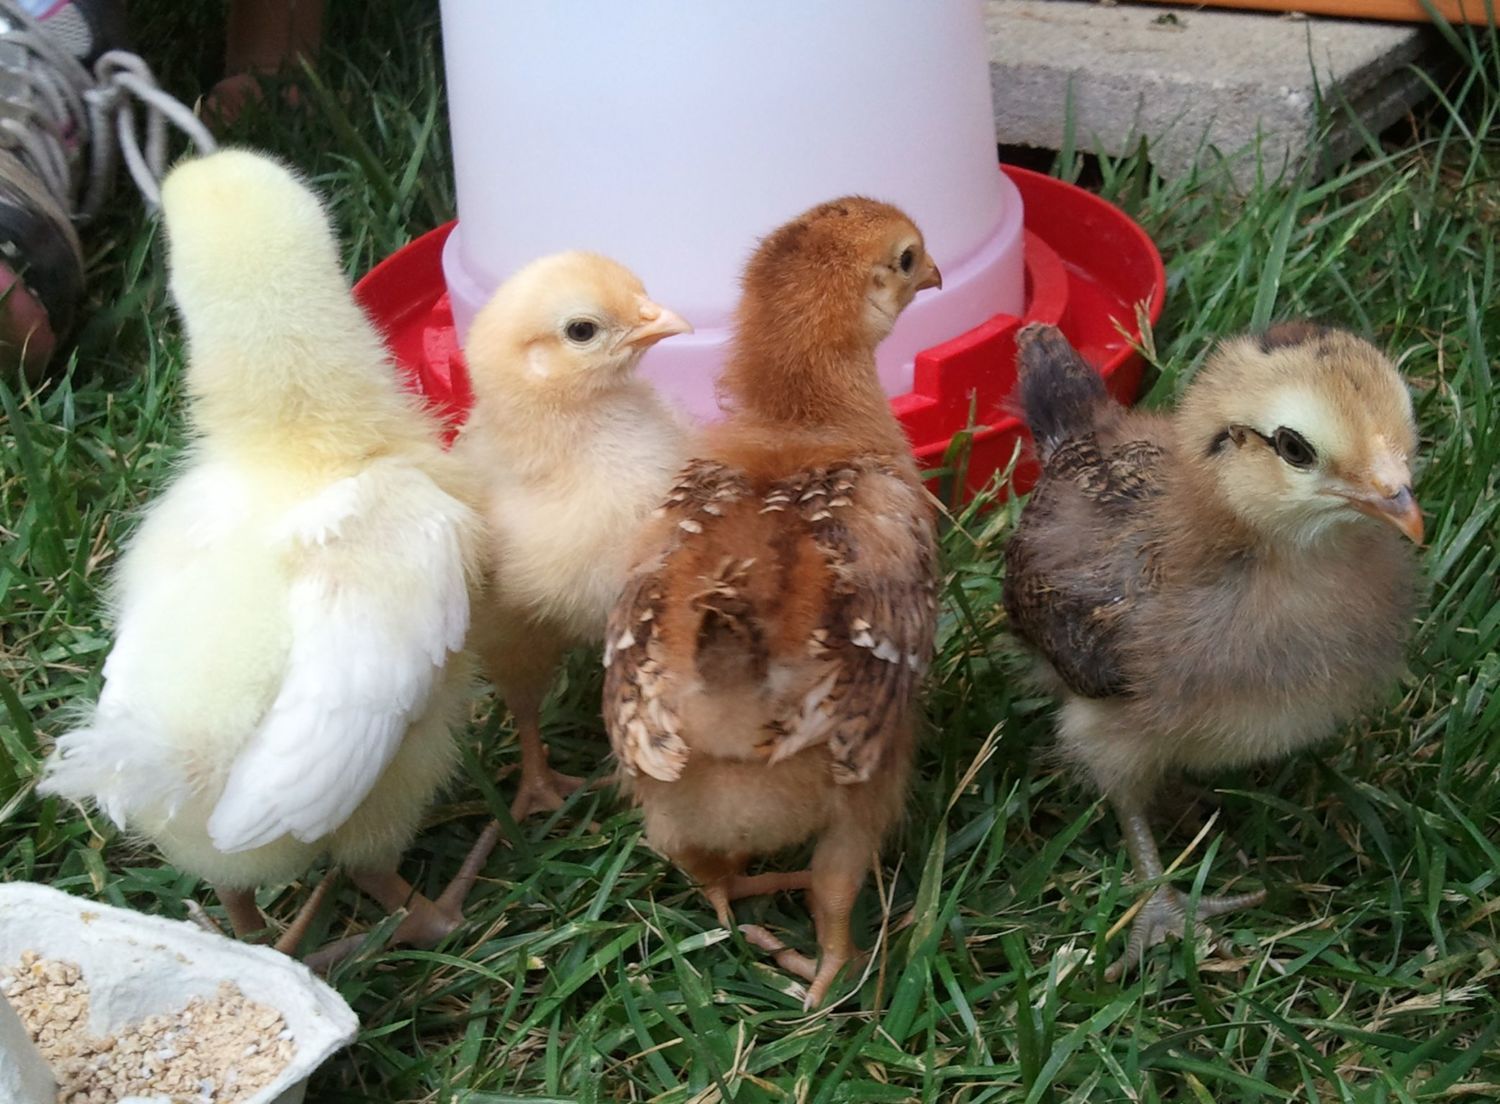
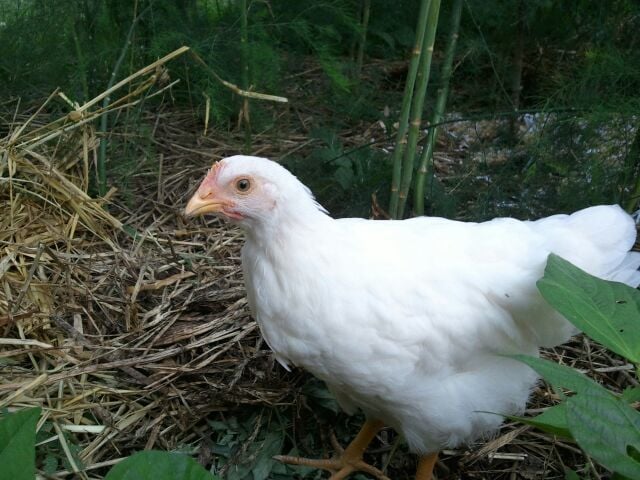
Of course, no coop is complete without chickens! We have 4 hens. (White Rock, Rhode Island Red, Easter Egger and Buff Orpington.)

Here's a close up of each hen. My wife named them after the state flower of states we've lived in. "Freebie" is named after the free chick we got from Meyer Hatchery in Ohio. Under their "Meyer Meal Maker" plan you can get a free chick if you promise to give the eggs the hen produces to a local charity/food bank, etc.
Goldie, our Buff Orpington. She's a total sweetheart and thinks she's a parrot. As soon as you approach her she hops on your shoulder.

Scarlett, our White Rock & the flock leader.
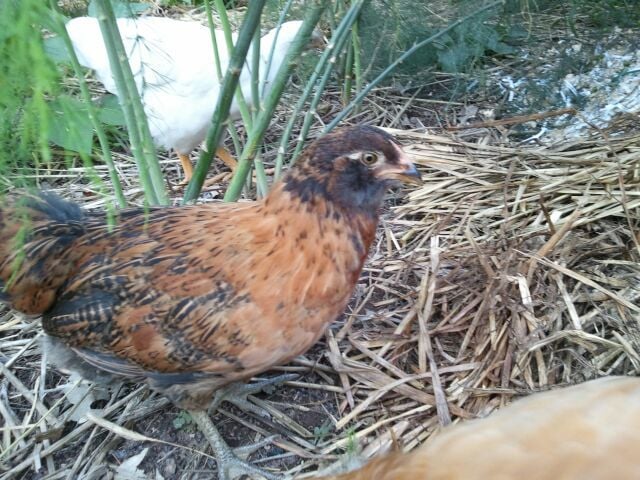
Violet, our Easter Egger. We're hoping green legs = green eggs!
And finally Freebie, our Rhode Island Red. She's a little cautious and likes to challenge Scarlett.

Looking back on the build I would do a few things differently. The first is simple carpentry. I'm not new to building but slowing down and thinking about each cut helps minimize waste. I had a limited supply of paneling and I burned through a few too many pieces making fast cuts. If you're planning on using roof rafters like I did make sure you have a hefty saw and an outfeed table. I struggled with my table and circular saw to get consistent cuts rafter to rafter due to their size and weight.
Also, I think I'd change the stain color. We stained the 2X4s with a cedar stain that ended up looking very orange after the second coat. Lastly, more time. We broke ground in early April and wrapped up in mid June. We spent 2-3 solid weekends busting our tails trying to get this done before the chicks outgrew their brooder. Overall... a wonderful experience, especially for our children.