The story of "Flown the Coop":
Hello! My name is Jennie Jean, my friends and family call me Jenn. I grew up on a small farm in South East Washington where I learned that hard work and kindness to animals was a way of life. If you had the chance to ask my Dad what he raised on his farm he would say “KIDS”… Which is totally true; I am number 9 of 11 kids. The 30 acre farm was just big enough to support such a large family and on days we had extras my Mom would sell to the neighbors. We had a few dairy cows which also gave us beef calves as well as Dad purchased beef calves from auction each year, chickens, ponies, pigs and even tried sheep one year (which didn’t turn out so well) along of course with our pets (dogs, cats, rabbits) and several very large gardens and an alfalfa field to grow our own hay crops to support the livestock through the winter. There was always something to do on the farm and a lot of days during the summer we were out the door at dawn and didn’t come home for dinner till the sun started to approach the horizon. You’d find kids climbing fruit trees or rummaging berry bushes when they got hungry at lunch time because we were to busy to go home for lunch.
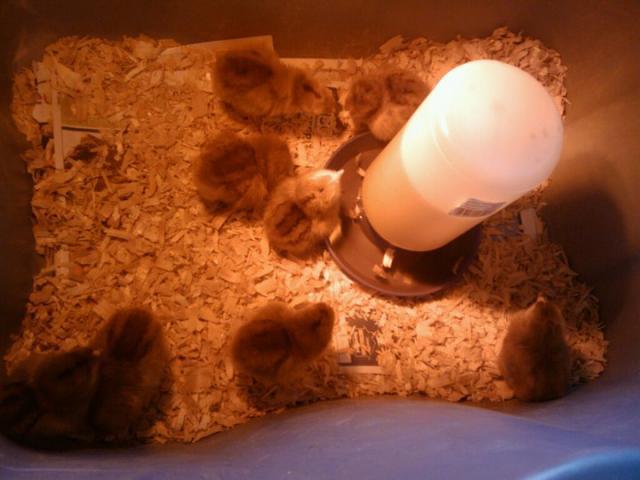
Summer of 2009 my husband and I found a 1 acre property on the Davis/Weber county line in Utah with a fixer upper home that we fell in love with the first time we walked through. From that very first day I knew I wanted chickens and also entertained the idea of having other life sustaining farm animals (yet to happen). In October of 2009 we finally called the property home. I never could get any one motivated to build me a chicken coop plus we were working so hard on the house to get it refinished so the idea of getting chickens got put off. In August of 2010 me and my husband decided would be better for all concerned for him to move out. We are still married and still good friends as well as we co-own 2 horses together, so he helps out as much as he can, where he can and when he can. So when I started seeing chicks come out this spring I decided that maybe if I had chicks it would be a kick in the pants to get motivated about building a coop. So I purchased 8 – 1 day old Rhode Island Reds on a whim one day while at the feed store stocking up on grain for the horses.

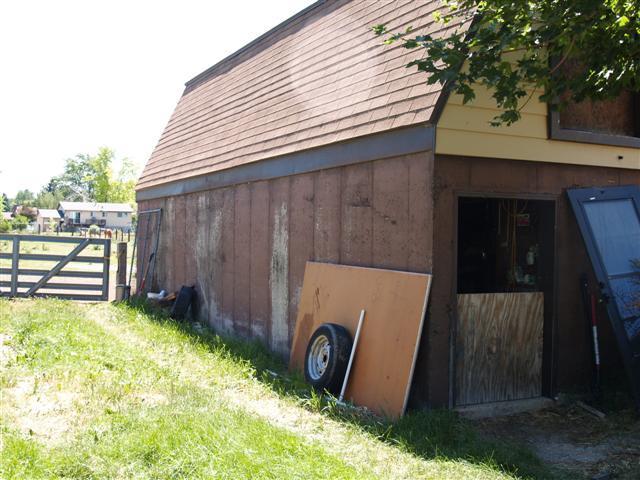
So now that I had chicks I started thinking about where I wanted to build a coop. Even though we have an acre the back yard is small and I didn’t want to take up enough space for a coop and run in the back yard. I didn’t want to put the coop out in the pasture because I felt it would be to inconvenient and wanted more interaction with my chickens then I would’ve gotten with them out in the pasture. I decided that maybe I could give up some room in my tack room, there was a lot of wasted space in there and it had become a catch all room any way and space for just the run in the yard wouldn’t be so bad. So a ‘chicken room’ in the barn became the plan instead of a traditional chicken coop. Our barn is made of concrete and has a tack room and 2 stalls that are accessible by a good sized hallway the length of the barn, there is also a second floor hay loft where we store hay for the horses.
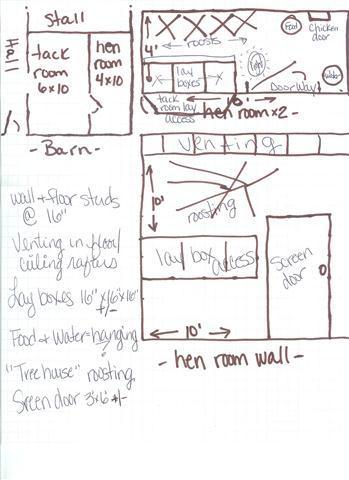
Rough draft of coop plans:
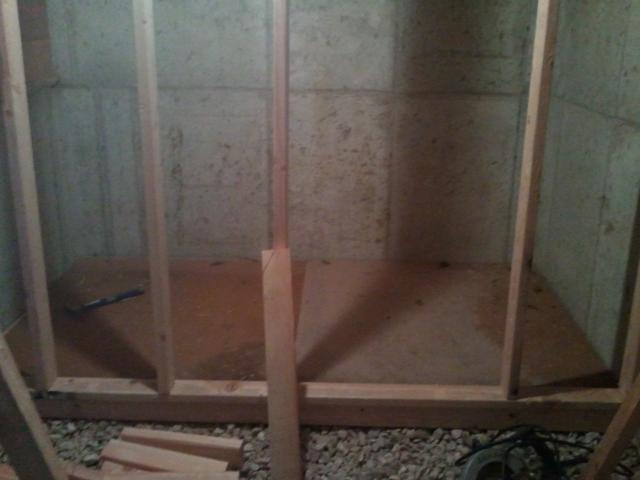
So now I had a plan. Me and the kids worked together to haul in a bunch of small river rocks (1-2" in size) we had brought home last fall while helping a neighbor clean it out of their city strip to plant grass for a base to build on. Then I begged for help… LOL… I had never built anything before and was NOT at all comfortable with power tools. I eventually got my husband to come up and help me frame in a wall and floor in the tack room:
I had several old real-estate billboard signs that are made from marine grade plywood that I used to put in on the floor and wall.
It took several weekends and a rented jack hammer for my husband to finally break through the cement wall to create the chicken access door into the tack room. We were not able to find a cement saw for rent and the jack hammer did it’s job but left quite a bit that was going to need patching.
...need to find first picture of chicken access door...
I had watched carefully as my husband was using the table saw and nail gun while helping with the wall and floor and got frustrated waiting for him to find time to come up to help and took charge and started using the power tools myself. I was able to add a frame inside the chicken access door, thinking it would allow me to attach hinges and fasteners or what ever for a security door (yet to be installed, been using a piece of ply wood wedged in at night to close them in):
I then tackled what ended up being a daunting task of building the lay boxes. Because of the half high cement wall on the interior wall where the end of the lay boxes would attach I had to kind of work around to get them built so they would fit snug and it was not at all a uniform layout but I think it will work. I was not at all comfortable with the power of the framing nailer so I did this all by hand with a regular hammer. The top is actually a metal cubical wall panel stripped of the carpeting. We got a whole stack of them from when my husband's boss was throwing them out. It is removable and should be easy to clean.
Inside view:
From tack room, egg access door:
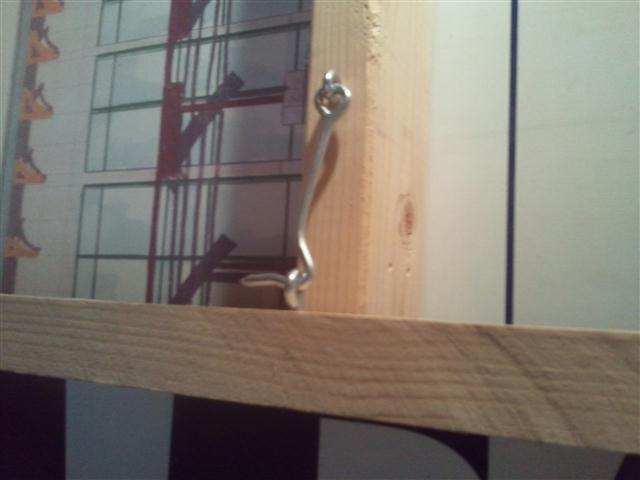
Egg access door latch:
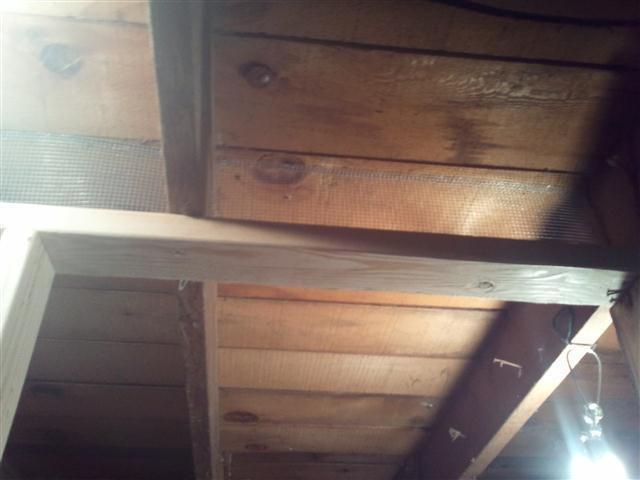
I added utility mesh to all the open areas between my new wall and the floor joists of the hay loft for venting, There is also a vent on the interior wall that I haven’t captured a picture of yet. Thinking I need to get one more vent still in on the outside wall, for four way ventilation:
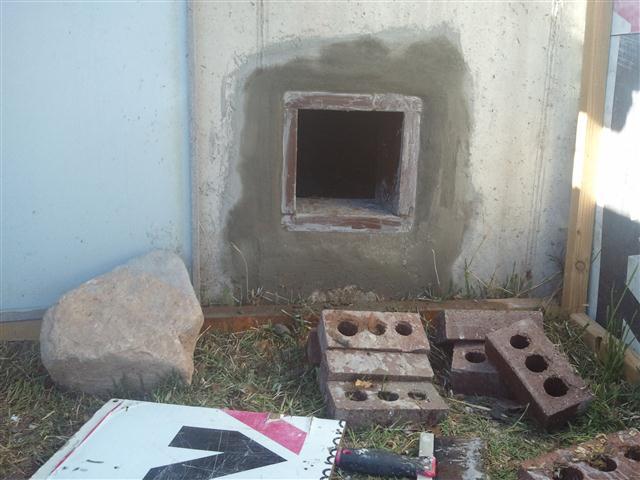
I then decided that I needed to do the patch on the cement around the chicken access door and visited my local Lowe’s and spoke to a sales associate explaining what I was doing and asked him what I needed. He hooked me up with cement leak patch thinking that it would be best to help keep any leaking out. This was my first attempt at working with cement patch and didn’t know at all what I was doing, so read the directions and this is how it turned out.
Outside in chicken run:
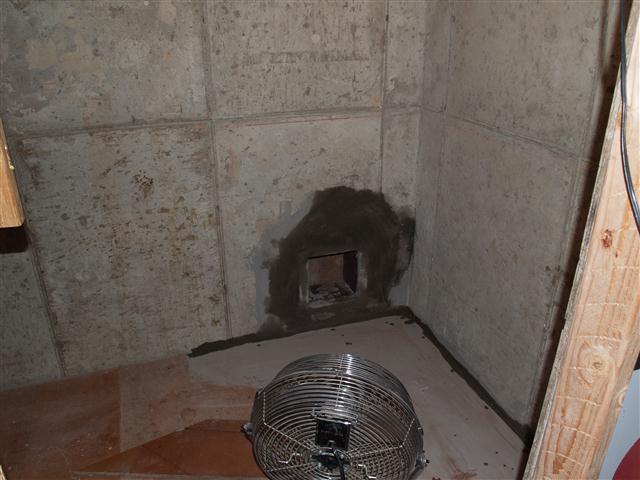
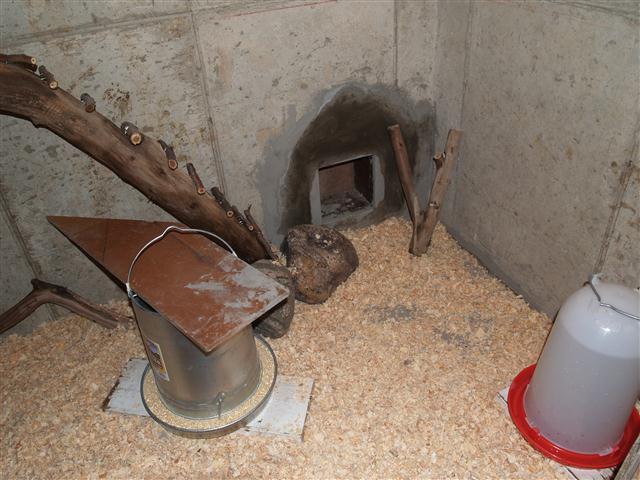
Inside chicken room:
I had been pondering for weeks how I was going to put roosts in on the cement wall and first attempts failed. The gun powder nailer was splitting anything I tried to attach to the cement to have something to work with. With some inspiration from BYC member seanb I decided to just use a whole tree.
We rummaged through the back of the neighbors pasture and with the help of my son we made it out with this dead fall:
After my son spent some time working at cutting it down to size and stripping the bark we ended up with this:
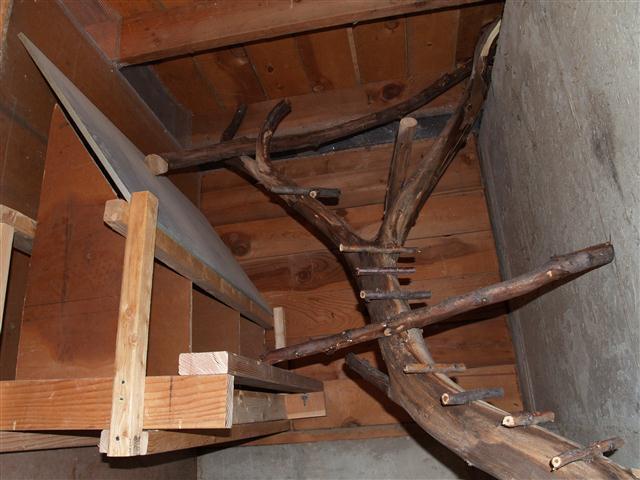
We hauled it into the chicken room and secured it in as many places as we could and added some large landscape boulders around the stump. Then we added some long horizontal branches for roosts and smaller branches for a ladder along the whole length of the tree.
The trunk:
The first ladder:
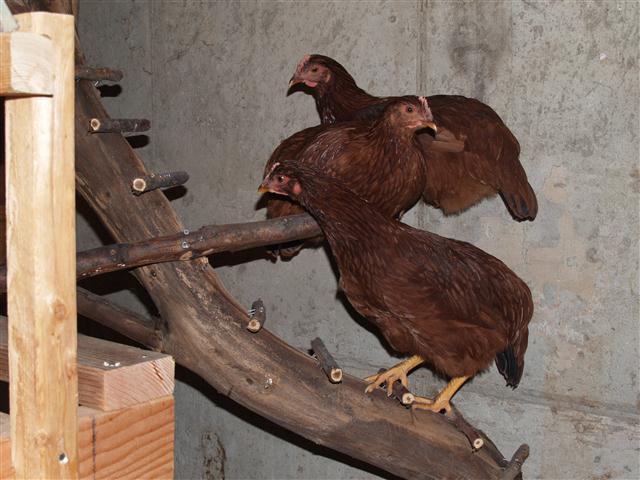
The roosts:
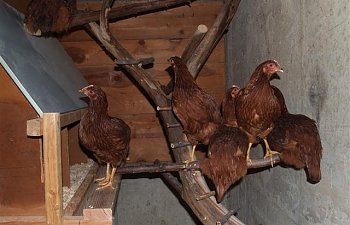
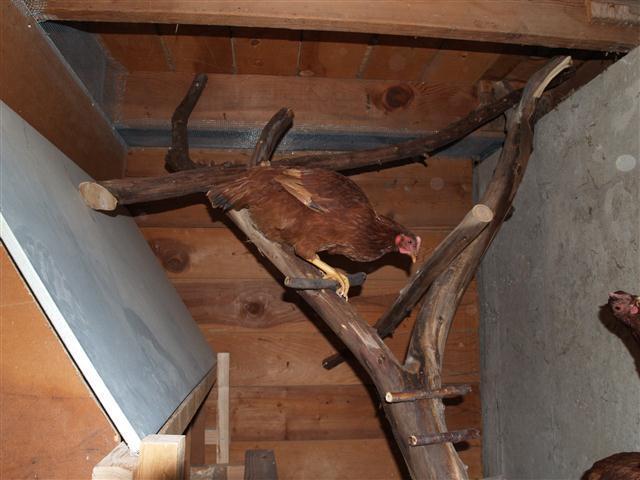
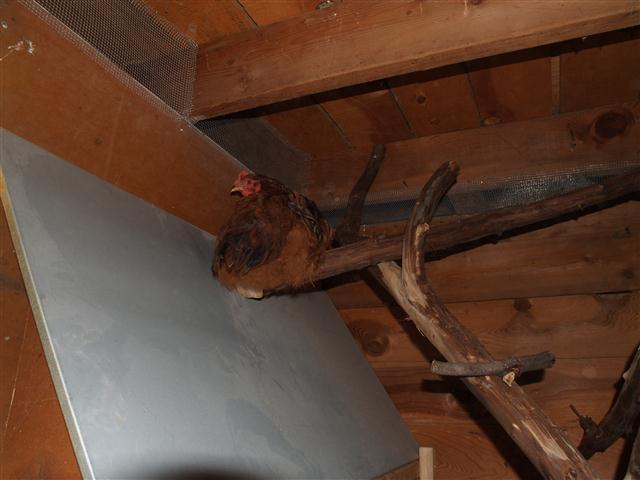
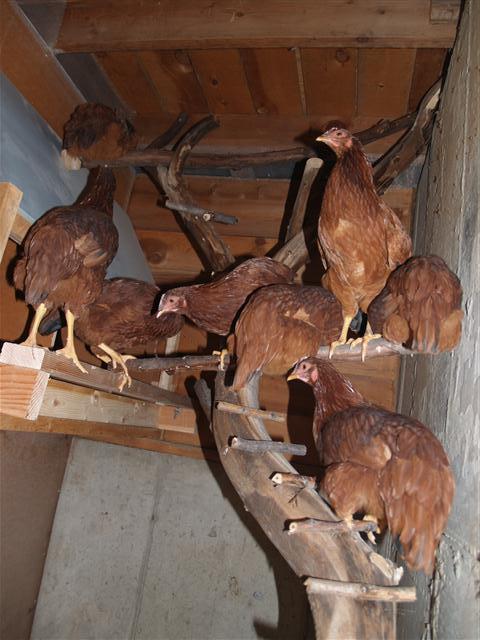
I was worried that it was to vertical and they wouldn’t be able to get up to roost. But as the sun was setting on the third night after the roost had been installed I went to peek in on them to see if they were using it and this is what I found:
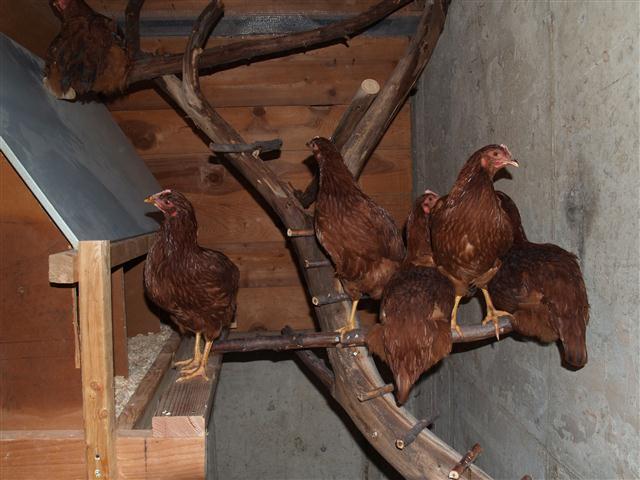
I stepped into the chicken room and there was a 4th pullet up a little higher:
I decided to sit with them to see how the others would manage and my Lil’ Roo, Fancy Man, made his way to the top in two flying jumps from the floor to the lay box landing to one of the top roosts and settled right in and then there was 5 roosting chickens:
The 6th one jumped from the cover I have over the feeder to the lay box landing:
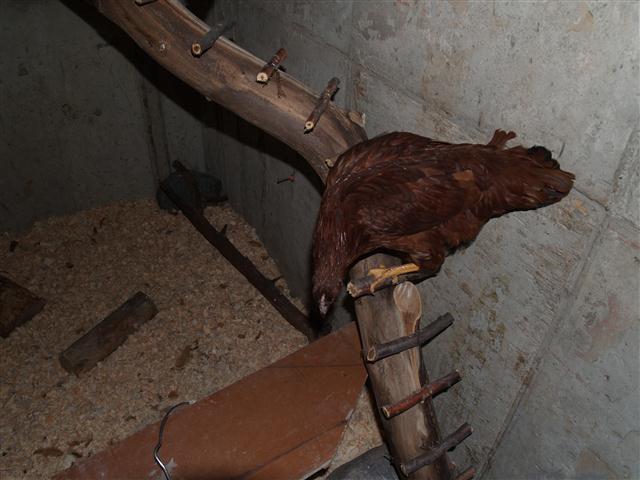
#7 was trying to figure out if she really wanted to climb all the way up or go back down:
#8 jumped up on the feeder and was chattering up a storm asking the others how the heck they made it up there:
And then she also jumped up to the lay box landing, and then there was 8:
I’m glad they let me sit with them and watch them roost in since it gave me some ideas of some additions to make improvements so it is easier and more comfortable for them. I picked up some unsplit fire wood rounds I found through the local classified 'free' section. I'm hoping to get help from someone with a chain saw to cut slices off of the logs and thinking that a couple of these slices added here and there as landing spots will keep them from getting in the habit of using the feeder (which will eventually be hung) as a jumping stool and a few spots where I watched them struggle to get turned around. At least one chick actually used the ladder up the trunk so I will leave that in tacked as well.
With the extra height they got from the roosts one of the pullets had gotten out over the piece of plywood I was using as a make shift door in the tack room. (This by the way, was the inspiration, along with not having a 'traditional' coop that helped us come up with a name for our chicken room: "Flown the Coop". Can't wait to paint a sign with this name on one of my fire wood rounds for display.) Since it opened up into the barn I hadn’t worried to much about it up until that point. So my next task was putting in a screen door. I had gotten comfortable with the table saw and the smaller air tools (finishing nailer and stapler) so measured everything off and got to work. Enlisted my daughter to be my extra set of hands and she helped get the utility cloth cut down to size and holding pieces in place while I measured and marked for cuts.
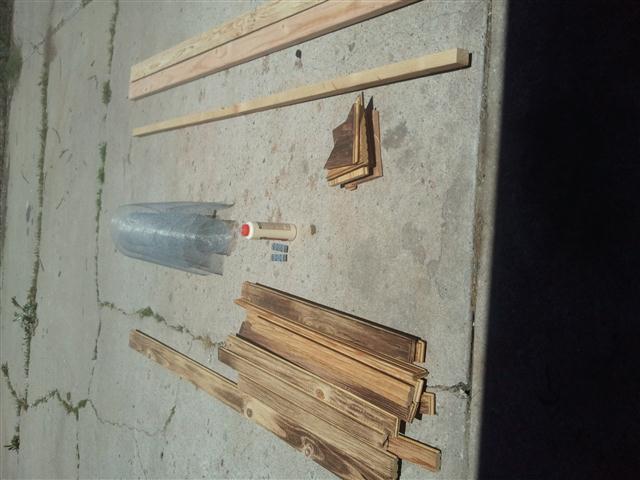
Supplies:
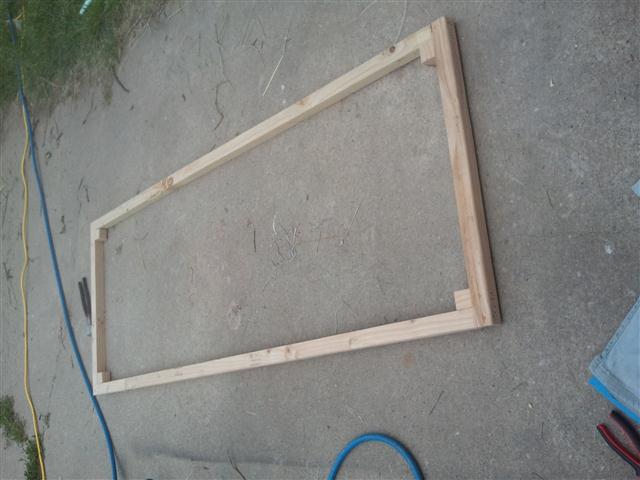
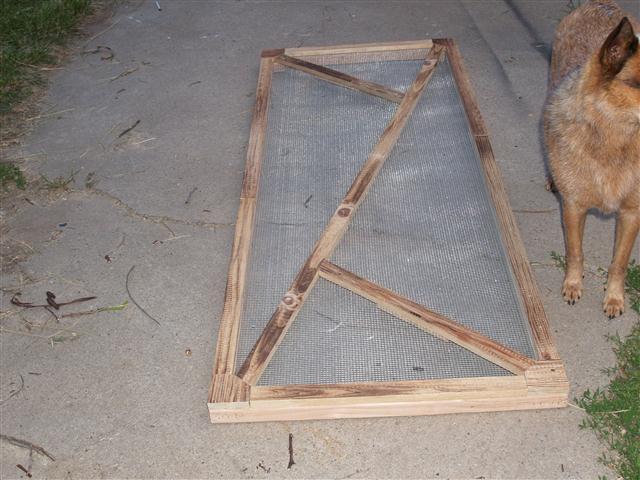
Door frame:
Utility cloth went on:
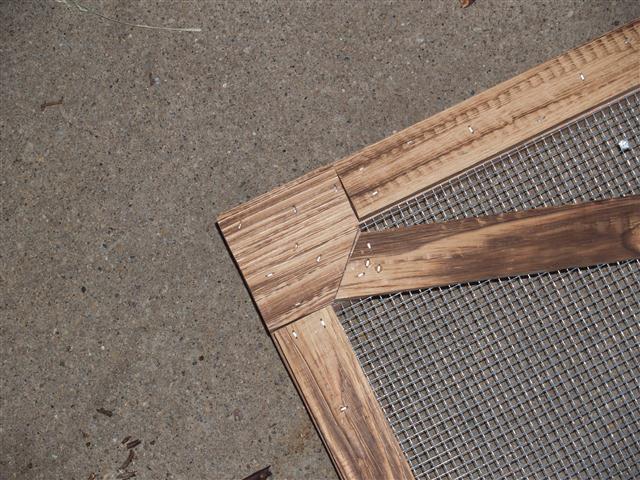
Then used the hard wood floor scraps over the utility cloth to give it a finished look as well as enclose the cloth so as not to give us scratches or catch on our clothes:
I used plate brackets on the back where the smaller support beams meet with the longer support beam:
I was pretty pleased with the finished rustic look of the door:
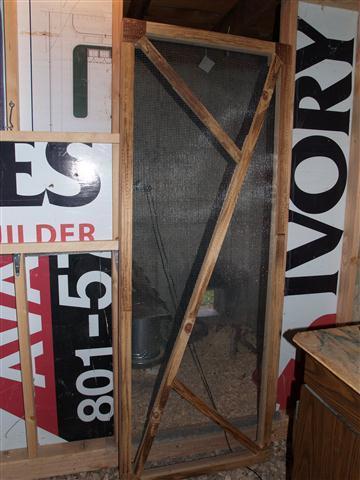
I’m hoping to get it hung today and will need to put in a header and more utility cloth above the door.
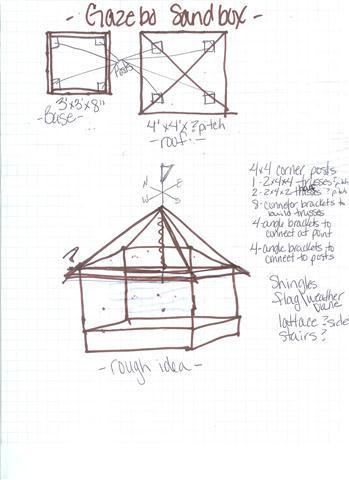
We are also working on a gazebo sandbox for in the chicken run. Using scraps that we salvaged from the neighbors roof pitching project last fall these are the rough plans:
This is what we’ve have accomplished so far:
I’m still not comfortable with the big nail gun so got my son to help with that:
We then used peal and stick tiles we had in the garage and bathroom caulking to give the inside a finished and easily cleaned surface:
Hoping to get the posts in and tresses built for the roof today. I can’t believe that just a few weeks ago I didn’t know how to use anything but a drill as far as power tools and now I’m going to be building roof tresses (took 30-40 mins with my friendly Lowe's sale associate drawing pictures to get my head wrapped around it)… may be just on a small scale, but I think my building skills are coming along just fine. Maybe if I keep at it I will eventually get good at it and start knocking out some quality work… LOL
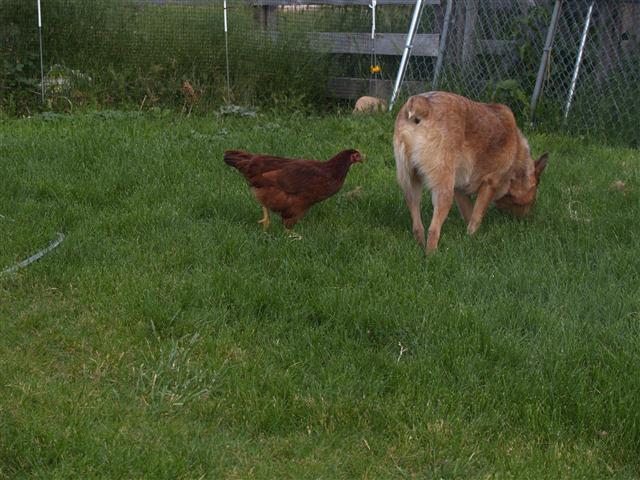
I have totally enjoyed doing the work and learning as well as spending time with my kids and chickens. I’ve been working with socializing my dogs since the chicks were about 2 weeks old hoping that I’d end up with some chicken friendly dogs so we could all spend time relaxing and playing in the yard together. It wasn’t always easy and a lot of times the boys thought that the chicks should be snacks:
(The black copper marans in this picture is the neighbors newest addition that I fostered with my chicks. It ended up being a roo who was being a bully to the chicks especially my lil roo, so he has since gone home.)
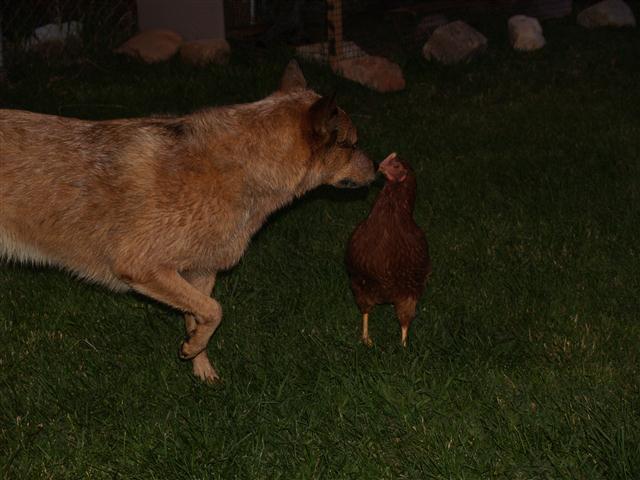
But the time and patience and tons of scolding and correcting paid off and I now have chicken friendly dogs:
Not only are the dogs chicken friendly, but they are becoming celebrities:
And they easily give adoration back to their fans:
One last bed time kiss:
I still need to finish off the wall in the tack room. I'm watching for some used cedar fencing slats in the local classifieds, or may possibly use some more of our hard wood floor scraps to glue together to make a patch work panel. Going to send my son with some of the cubical wall panels to open shop day at the high school to manufacture me some removable, cleanable poop trays to hang in the chicken room as we learn where they need to go. Also need to build the permanent run, just used some ripped, scrap 2x4’s we had from a wall demolition in our basement to put together a temporary run for them. Since I’m currently home during the day they spend a lot of time free ranging in the yard. So this will get them by for now:
For their permanent run I want to build a dome with pig/sheep fencing panels. Thinking of putting in some planter boxes with climbing vines or maybe even some grapes so over time the dome will become a growing arbor.
If I had it to do all over again:
1- I would not put the chicken access door directly across from the human access door. Why - the most convient/accessable place to put the feeder would've been right inside the human door but because the chicken door is there it doesn't leave enough room. Solution = just deal with it. Will have to hang the feeder behind the screen door instead and just deal with having to go all the way in to retrieve it when it needs to be refilled.
2- I would make the egg access door only half the width of the height of the lay boxes for easier reaching. Why - I have short arms and can't reach the very front of the lay boxes over the width of the egg door. Solution = going to adjust how the hinges are attached so the egg door will drop all the way against the lower wall.
I am currently unemployed, being laid off was a huge shocker to me after working for the company for 5 years. So have been using the projects as my stable ground to keep my sanity and stay busy in between looking for work and sending out resumes every morning. Finding used building materials has also become a hobby as money is tight on a limited, single parent income. It has been fun, every minute! I even enjoyed doing my first deep clean and bedding change in the chicken room. The marine grade plywood is moisture resistant and since I didn't worry about putting any type of finish on it I just used a scrapper to losen anything that was stuck on and swept it out and gave it a good scrub with a mop, easy breezy. Thanks for taking time to read my story and getting to know me a little. I hope you have enjoyed my story and pictures as much as I enjoyed putting them all together! My newest favorite quote has become: "The Roster may crow, but the hens deliver the goods"... I adore my little roo (even though he isn't yet crowing) but can't wait for the pullets to start delivering the goods.
Hello! My name is Jennie Jean, my friends and family call me Jenn. I grew up on a small farm in South East Washington where I learned that hard work and kindness to animals was a way of life. If you had the chance to ask my Dad what he raised on his farm he would say “KIDS”… Which is totally true; I am number 9 of 11 kids. The 30 acre farm was just big enough to support such a large family and on days we had extras my Mom would sell to the neighbors. We had a few dairy cows which also gave us beef calves as well as Dad purchased beef calves from auction each year, chickens, ponies, pigs and even tried sheep one year (which didn’t turn out so well) along of course with our pets (dogs, cats, rabbits) and several very large gardens and an alfalfa field to grow our own hay crops to support the livestock through the winter. There was always something to do on the farm and a lot of days during the summer we were out the door at dawn and didn’t come home for dinner till the sun started to approach the horizon. You’d find kids climbing fruit trees or rummaging berry bushes when they got hungry at lunch time because we were to busy to go home for lunch.
Summer of 2009 my husband and I found a 1 acre property on the Davis/Weber county line in Utah with a fixer upper home that we fell in love with the first time we walked through. From that very first day I knew I wanted chickens and also entertained the idea of having other life sustaining farm animals (yet to happen). In October of 2009 we finally called the property home. I never could get any one motivated to build me a chicken coop plus we were working so hard on the house to get it refinished so the idea of getting chickens got put off. In August of 2010 me and my husband decided would be better for all concerned for him to move out. We are still married and still good friends as well as we co-own 2 horses together, so he helps out as much as he can, where he can and when he can. So when I started seeing chicks come out this spring I decided that maybe if I had chicks it would be a kick in the pants to get motivated about building a coop. So I purchased 8 – 1 day old Rhode Island Reds on a whim one day while at the feed store stocking up on grain for the horses.
So now that I had chicks I started thinking about where I wanted to build a coop. Even though we have an acre the back yard is small and I didn’t want to take up enough space for a coop and run in the back yard. I didn’t want to put the coop out in the pasture because I felt it would be to inconvenient and wanted more interaction with my chickens then I would’ve gotten with them out in the pasture. I decided that maybe I could give up some room in my tack room, there was a lot of wasted space in there and it had become a catch all room any way and space for just the run in the yard wouldn’t be so bad. So a ‘chicken room’ in the barn became the plan instead of a traditional chicken coop. Our barn is made of concrete and has a tack room and 2 stalls that are accessible by a good sized hallway the length of the barn, there is also a second floor hay loft where we store hay for the horses.
Rough draft of coop plans:
So now I had a plan. Me and the kids worked together to haul in a bunch of small river rocks (1-2" in size) we had brought home last fall while helping a neighbor clean it out of their city strip to plant grass for a base to build on. Then I begged for help… LOL… I had never built anything before and was NOT at all comfortable with power tools. I eventually got my husband to come up and help me frame in a wall and floor in the tack room:
I had several old real-estate billboard signs that are made from marine grade plywood that I used to put in on the floor and wall.
It took several weekends and a rented jack hammer for my husband to finally break through the cement wall to create the chicken access door into the tack room. We were not able to find a cement saw for rent and the jack hammer did it’s job but left quite a bit that was going to need patching.
...need to find first picture of chicken access door...
I had watched carefully as my husband was using the table saw and nail gun while helping with the wall and floor and got frustrated waiting for him to find time to come up to help and took charge and started using the power tools myself. I was able to add a frame inside the chicken access door, thinking it would allow me to attach hinges and fasteners or what ever for a security door (yet to be installed, been using a piece of ply wood wedged in at night to close them in):
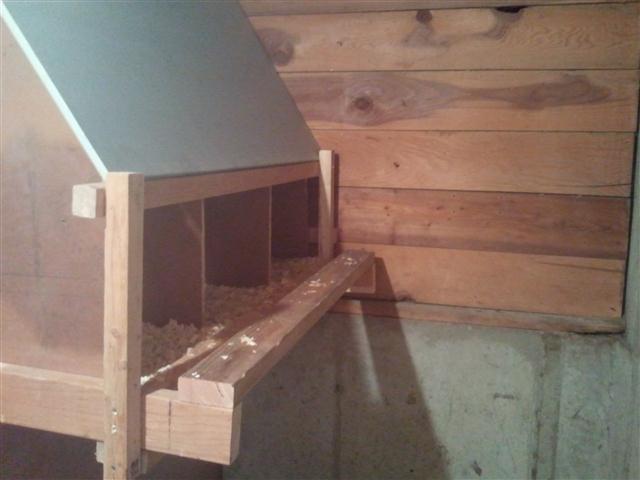
I then tackled what ended up being a daunting task of building the lay boxes. Because of the half high cement wall on the interior wall where the end of the lay boxes would attach I had to kind of work around to get them built so they would fit snug and it was not at all a uniform layout but I think it will work. I was not at all comfortable with the power of the framing nailer so I did this all by hand with a regular hammer. The top is actually a metal cubical wall panel stripped of the carpeting. We got a whole stack of them from when my husband's boss was throwing them out. It is removable and should be easy to clean.
Inside view:
From tack room, egg access door:
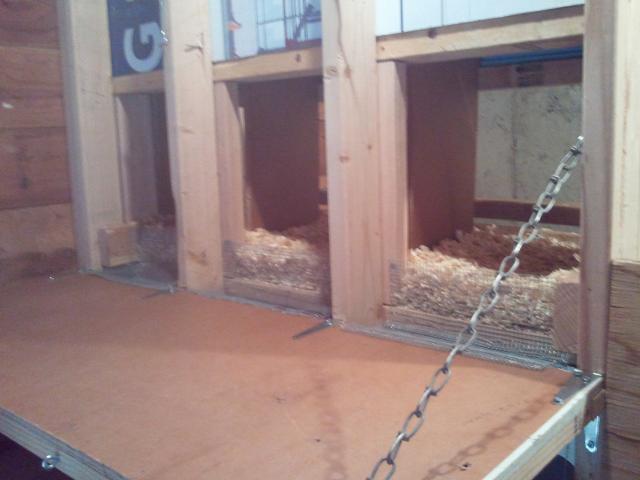
Egg access door latch:
I added utility mesh to all the open areas between my new wall and the floor joists of the hay loft for venting, There is also a vent on the interior wall that I haven’t captured a picture of yet. Thinking I need to get one more vent still in on the outside wall, for four way ventilation:
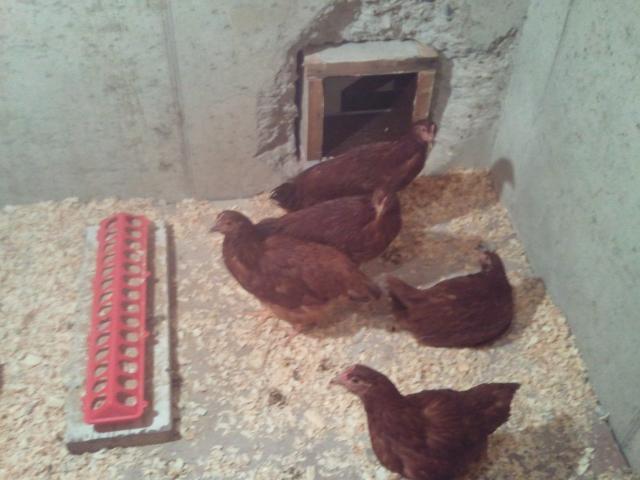
I then decided that I needed to do the patch on the cement around the chicken access door and visited my local Lowe’s and spoke to a sales associate explaining what I was doing and asked him what I needed. He hooked me up with cement leak patch thinking that it would be best to help keep any leaking out. This was my first attempt at working with cement patch and didn’t know at all what I was doing, so read the directions and this is how it turned out.
Outside in chicken run:
Inside chicken room:
I had been pondering for weeks how I was going to put roosts in on the cement wall and first attempts failed. The gun powder nailer was splitting anything I tried to attach to the cement to have something to work with. With some inspiration from BYC member seanb I decided to just use a whole tree.
We rummaged through the back of the neighbors pasture and with the help of my son we made it out with this dead fall:

After my son spent some time working at cutting it down to size and stripping the bark we ended up with this:

We hauled it into the chicken room and secured it in as many places as we could and added some large landscape boulders around the stump. Then we added some long horizontal branches for roosts and smaller branches for a ladder along the whole length of the tree.
The trunk:
The first ladder:

The roosts:
I was worried that it was to vertical and they wouldn’t be able to get up to roost. But as the sun was setting on the third night after the roost had been installed I went to peek in on them to see if they were using it and this is what I found:
I stepped into the chicken room and there was a 4th pullet up a little higher:
I decided to sit with them to see how the others would manage and my Lil’ Roo, Fancy Man, made his way to the top in two flying jumps from the floor to the lay box landing to one of the top roosts and settled right in and then there was 5 roosting chickens:
The 6th one jumped from the cover I have over the feeder to the lay box landing:
#7 was trying to figure out if she really wanted to climb all the way up or go back down:
#8 jumped up on the feeder and was chattering up a storm asking the others how the heck they made it up there:
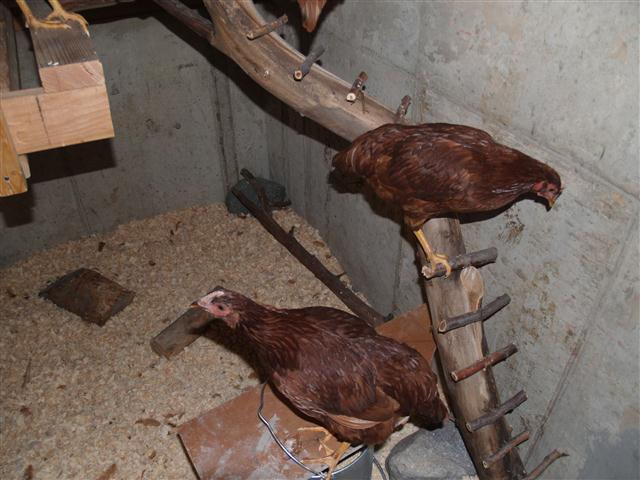
And then she also jumped up to the lay box landing, and then there was 8:
I’m glad they let me sit with them and watch them roost in since it gave me some ideas of some additions to make improvements so it is easier and more comfortable for them. I picked up some unsplit fire wood rounds I found through the local classified 'free' section. I'm hoping to get help from someone with a chain saw to cut slices off of the logs and thinking that a couple of these slices added here and there as landing spots will keep them from getting in the habit of using the feeder (which will eventually be hung) as a jumping stool and a few spots where I watched them struggle to get turned around. At least one chick actually used the ladder up the trunk so I will leave that in tacked as well.
With the extra height they got from the roosts one of the pullets had gotten out over the piece of plywood I was using as a make shift door in the tack room. (This by the way, was the inspiration, along with not having a 'traditional' coop that helped us come up with a name for our chicken room: "Flown the Coop". Can't wait to paint a sign with this name on one of my fire wood rounds for display.) Since it opened up into the barn I hadn’t worried to much about it up until that point. So my next task was putting in a screen door. I had gotten comfortable with the table saw and the smaller air tools (finishing nailer and stapler) so measured everything off and got to work. Enlisted my daughter to be my extra set of hands and she helped get the utility cloth cut down to size and holding pieces in place while I measured and marked for cuts.
Supplies:
Door frame:
Utility cloth went on:

Then used the hard wood floor scraps over the utility cloth to give it a finished look as well as enclose the cloth so as not to give us scratches or catch on our clothes:
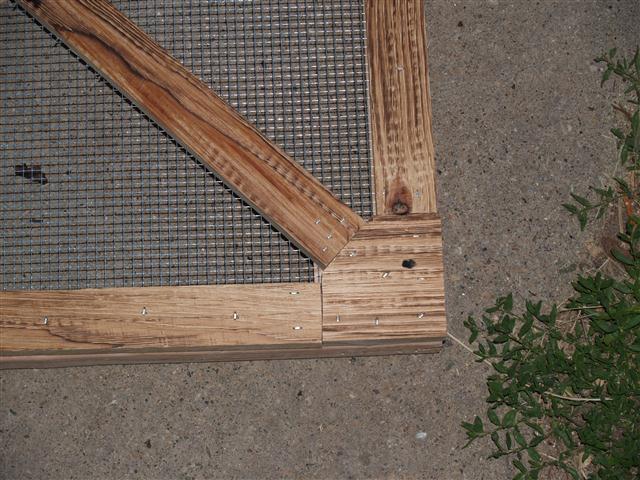
I used plate brackets on the back where the smaller support beams meet with the longer support beam:

I was pretty pleased with the finished rustic look of the door:
I’m hoping to get it hung today and will need to put in a header and more utility cloth above the door.
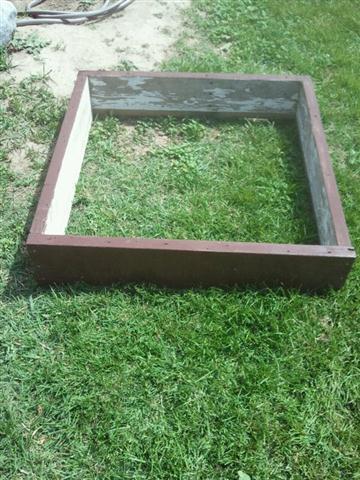
We are also working on a gazebo sandbox for in the chicken run. Using scraps that we salvaged from the neighbors roof pitching project last fall these are the rough plans:
This is what we’ve have accomplished so far:
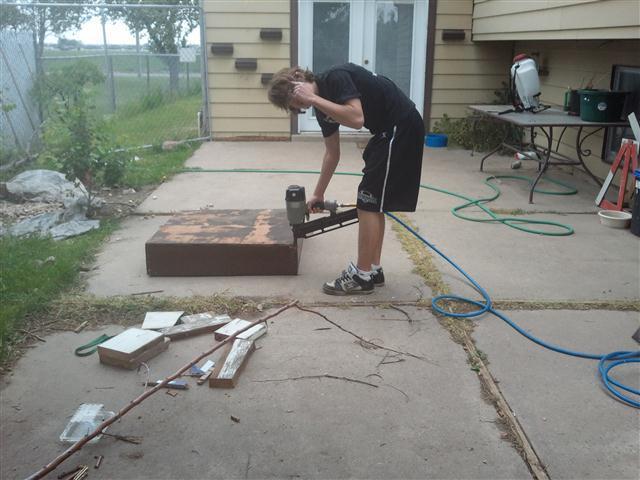
I’m still not comfortable with the big nail gun so got my son to help with that:
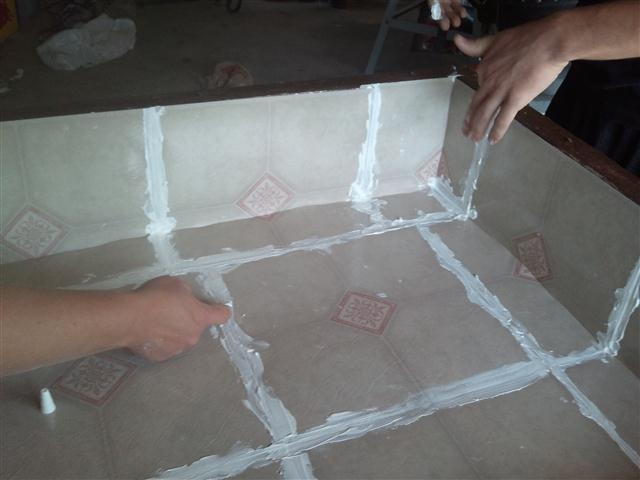
We then used peal and stick tiles we had in the garage and bathroom caulking to give the inside a finished and easily cleaned surface:
Hoping to get the posts in and tresses built for the roof today. I can’t believe that just a few weeks ago I didn’t know how to use anything but a drill as far as power tools and now I’m going to be building roof tresses (took 30-40 mins with my friendly Lowe's sale associate drawing pictures to get my head wrapped around it)… may be just on a small scale, but I think my building skills are coming along just fine. Maybe if I keep at it I will eventually get good at it and start knocking out some quality work… LOL
I have totally enjoyed doing the work and learning as well as spending time with my kids and chickens. I’ve been working with socializing my dogs since the chicks were about 2 weeks old hoping that I’d end up with some chicken friendly dogs so we could all spend time relaxing and playing in the yard together. It wasn’t always easy and a lot of times the boys thought that the chicks should be snacks:
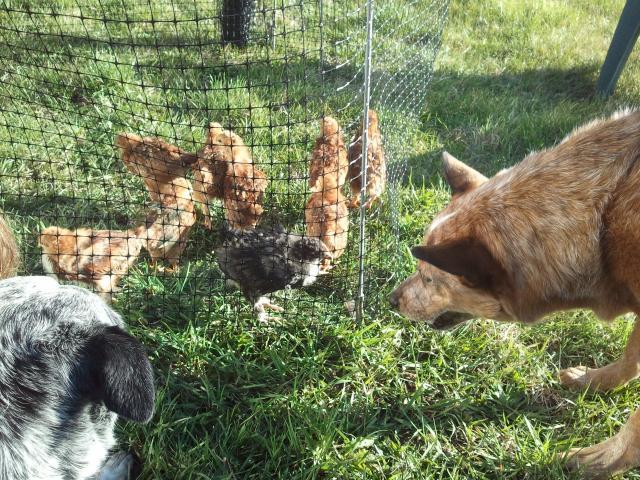 (The black copper marans in this picture is the neighbors newest addition that I fostered with my chicks. It ended up being a roo who was being a bully to the chicks especially my lil roo, so he has since gone home.)
But the time and patience and tons of scolding and correcting paid off and I now have chicken friendly dogs:

Not only are the dogs chicken friendly, but they are becoming celebrities:
And they easily give adoration back to their fans:

One last bed time kiss:
I still need to finish off the wall in the tack room. I'm watching for some used cedar fencing slats in the local classifieds, or may possibly use some more of our hard wood floor scraps to glue together to make a patch work panel. Going to send my son with some of the cubical wall panels to open shop day at the high school to manufacture me some removable, cleanable poop trays to hang in the chicken room as we learn where they need to go. Also need to build the permanent run, just used some ripped, scrap 2x4’s we had from a wall demolition in our basement to put together a temporary run for them. Since I’m currently home during the day they spend a lot of time free ranging in the yard. So this will get them by for now:
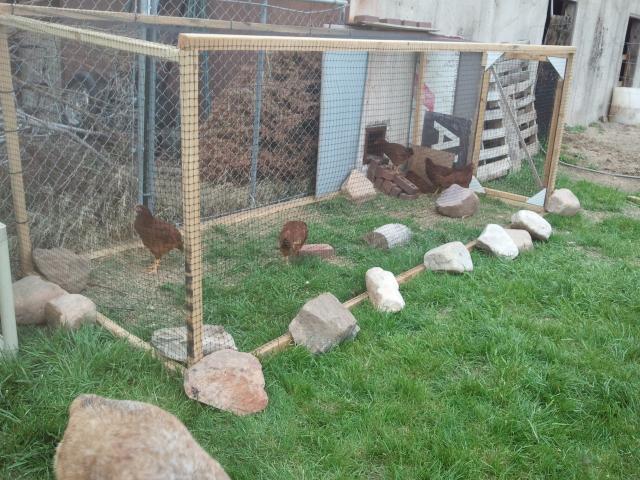
For their permanent run I want to build a dome with pig/sheep fencing panels. Thinking of putting in some planter boxes with climbing vines or maybe even some grapes so over time the dome will become a growing arbor.
If I had it to do all over again:
1- I would not put the chicken access door directly across from the human access door. Why - the most convient/accessable place to put the feeder would've been right inside the human door but because the chicken door is there it doesn't leave enough room. Solution = just deal with it. Will have to hang the feeder behind the screen door instead and just deal with having to go all the way in to retrieve it when it needs to be refilled.
2- I would make the egg access door only half the width of the height of the lay boxes for easier reaching. Why - I have short arms and can't reach the very front of the lay boxes over the width of the egg door. Solution = going to adjust how the hinges are attached so the egg door will drop all the way against the lower wall.
I am currently unemployed, being laid off was a huge shocker to me after working for the company for 5 years. So have been using the projects as my stable ground to keep my sanity and stay busy in between looking for work and sending out resumes every morning. Finding used building materials has also become a hobby as money is tight on a limited, single parent income. It has been fun, every minute! I even enjoyed doing my first deep clean and bedding change in the chicken room. The marine grade plywood is moisture resistant and since I didn't worry about putting any type of finish on it I just used a scrapper to losen anything that was stuck on and swept it out and gave it a good scrub with a mop, easy breezy. Thanks for taking time to read my story and getting to know me a little. I hope you have enjoyed my story and pictures as much as I enjoyed putting them all together! My newest favorite quote has become: "The Roster may crow, but the hens deliver the goods"... I adore my little roo (even though he isn't yet crowing) but can't wait for the pullets to start delivering the goods.