My Automatic Waterer
Any chicken keeper knows how important fresh clean water is to your flock. This automatic water device keeps the water CLEAN first and foremost, and it never runs out!
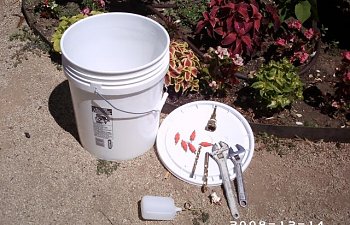
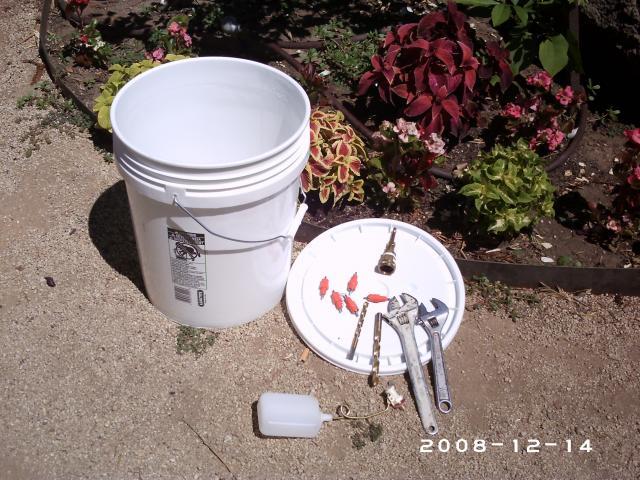
Items needed:
Items needed:
- 5 gallon Bucket with lid $ 5.00
- 4 Water Nipples $ 2.00 each
- Hose fitting $ 3.00
- 1 Swamp Cooler float $ 2.50 (A toilet bowl float can also be used, but this was what we had available.)
Tools needed:
- drill and drill bits
- crescent wrench
- hunky DH is helpful, but not necessary
Drill a hole near the top of the bucket for the float. Drill 4 holes in the floor of the bucket for the nipples.
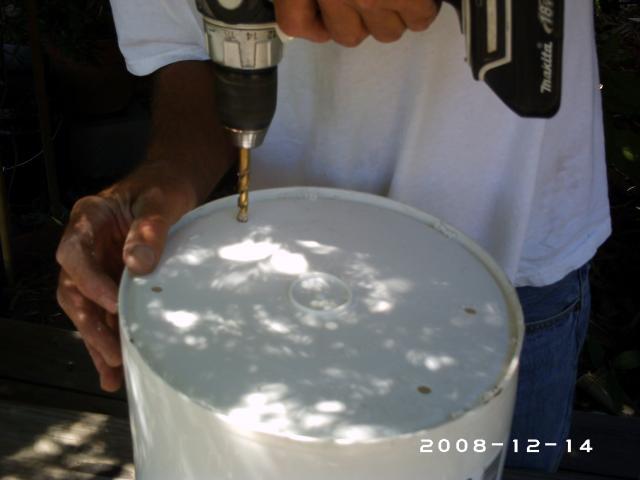
Using a drill bit that is just a bit too small is better than a bit too big... you can always ream the hole a bit if it is too tight, but you can't make it smaller.
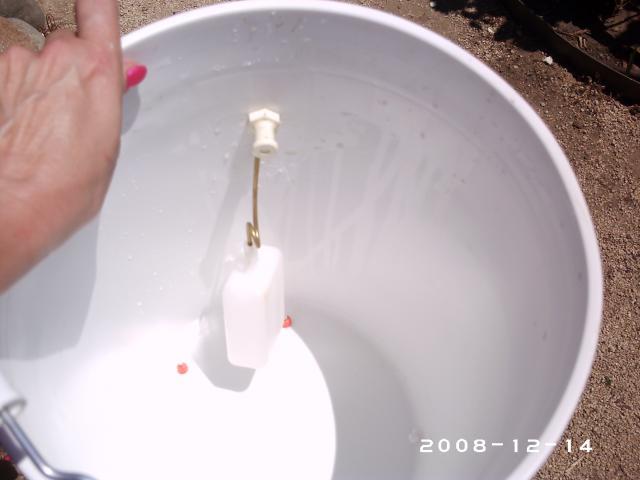
Place the brass fitting through the hole and fasten tightly per package directions. Attach the hose coupling to the brass fitting peeking through the bucket side.
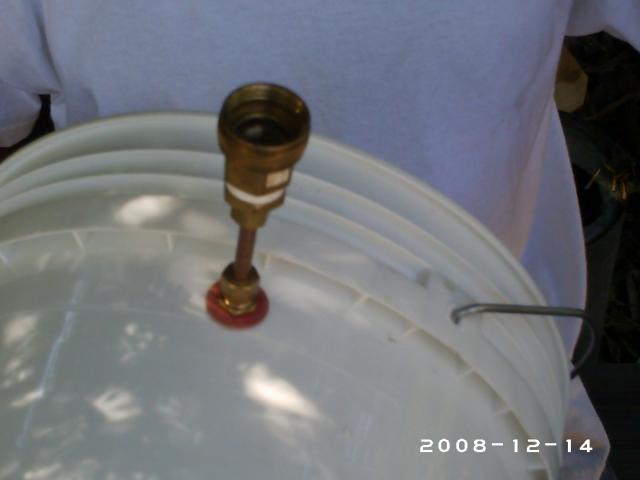
Because the brass float arm was too long to fit freely in the bucket, we had to "loop" the arm so it would fit. By bending the float arm you can make sure that the float height, when filled, is below the hole drilled for the fitting. This way, you will not need to seal the hole to the fitting as the water level will not reach the hole.
Turn over the bucket and screw the water nipples into the holes in the bucket floor. We had to tighten them with a crescent wrench, but only until it was water tight/snug. Do not put the bucket down on the nipples, it can break them or break their seal. If the drilled hole is slightly too large, you can wrap some pipe tape around the threads to make a seal when the nipple is screwed in.

Place the lid onto the waterer.
Hang the waterer in the proper location, and attach a hose. Turn on the water, and leave it on. We are lucky enough to have a spigot within 10 feet of the waterer location, but if you have a hose that will reach, the distance from the spigot is inconsequential. Leave the water on at the source, and you will never run out of fresh clean water. An important note is to have some sort of support for the hose so that it doesn't break the brass fitting. In this case, I have the hose supported over a low hanging branch.

The bucket had not even finished filling when the girls sidled up to the bar!! "BarKeep! Pour me a cold one!"
We needed to supply water to two pens. Instead of building two waterers, we placed the nipples in a rectangular shape to allow each side of the fence access to two nipples, by snipping a bit of the wire fence and bending the wires. When DH described this to me, I thought it was way too complicated, but in reality, this waterer took only 15 minutes to complete, including the attachment of the hose and hanging it! (He does have irrigation and plumbing experience though!)