My Adventures in Chickenhood!
Once upon a time... I dreamt of having a farm! And I still do, every day of every year of my young life! I thirsted for a horses, goats, ducks, pigs. Anything. Luckily, on June 26th 2011, I finally settled with four beautiful 6 week old pullets!

Well, maybe they weren't beautiful at the time, but I knew they would be eventually") This may be a little backwards, getting the chickens before the coop, but I wanted them and knew we could make it work!
This may be a little backwards, getting the chickens before the coop, but I wanted them and knew we could make it work!
By the way, this picture was after the ladies had moved out. I kept it cleaner when they were in it!
And then at the end of July, I found it! A cute playhouse, in a rather dilapedated condition, but workable!
This picture isn't very good! It was taken later so the cute original window trim wasn't up anymore.
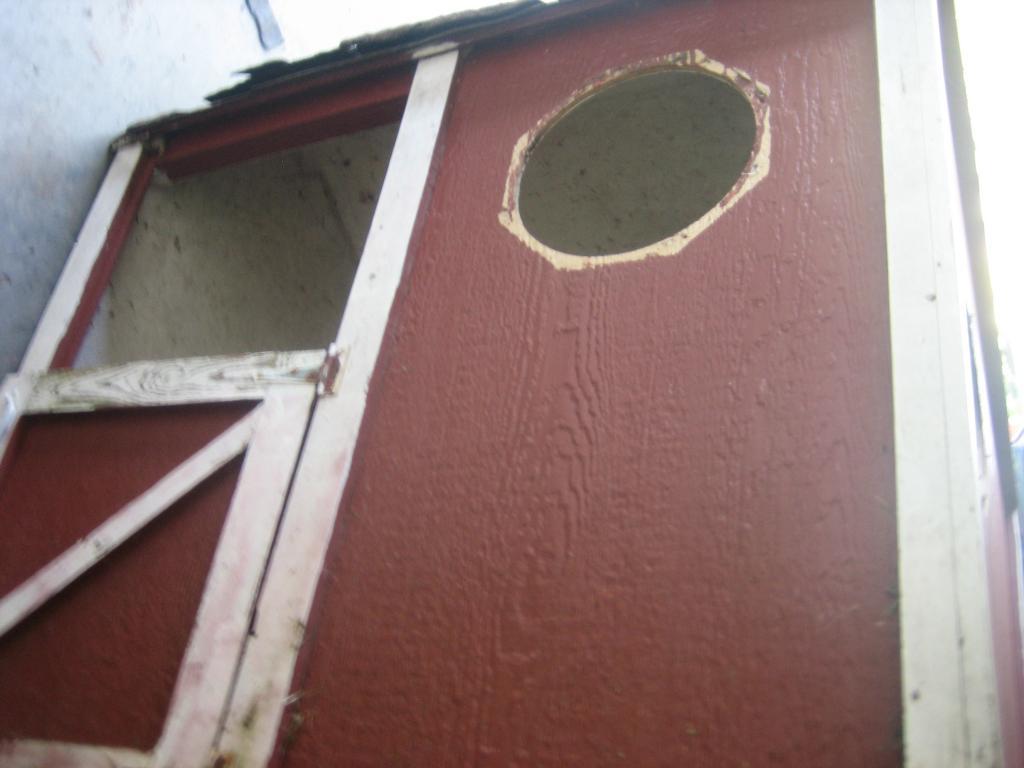
There it is! So cute, but rotten and nasty. I'll fix that up quick!
Eugh. And the rotten bottom boards. It was sort of in a swamp!
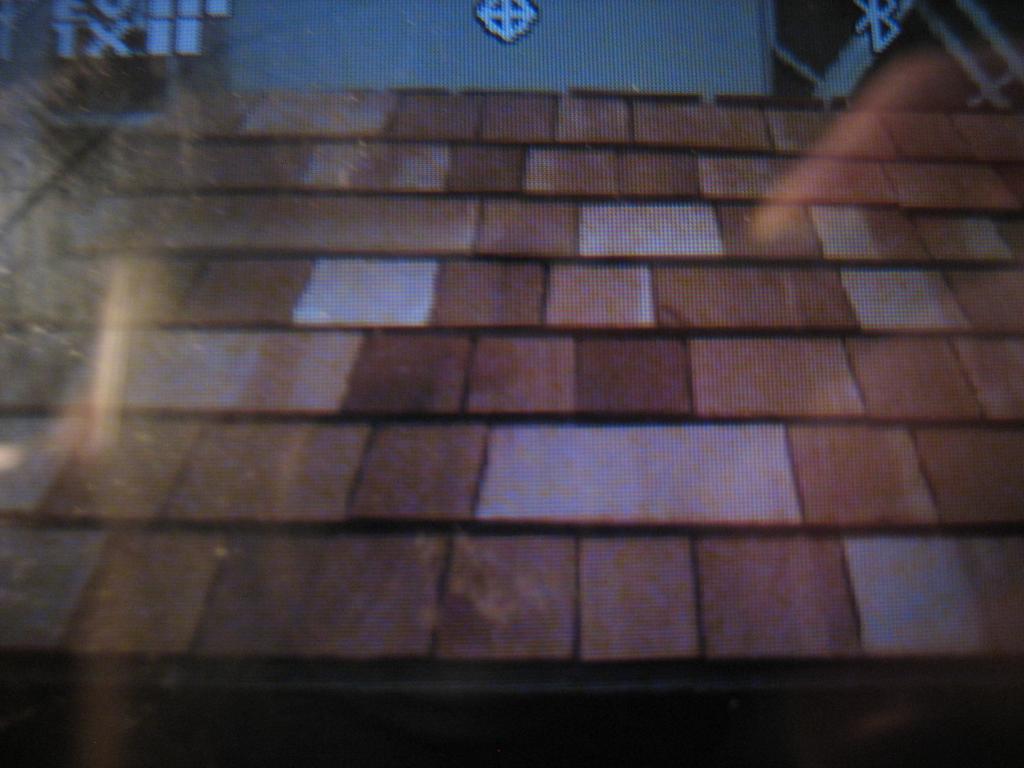
I loved the saltbox roof, but again: gross.
That's the condition the roof was in after a two hour ride in the back of a pick up. At least it made the de-shingling process faster! Oh, and meet our cat Henry!
Taking off the shingles was easy. Just used a hammer and a radio to pass the time! Luckily, the OSB underneath seemed fine! Thank god.
I didn't take picture during the process, or maybe I did... Anyway, we framed it (the playhouse, which was only plywood screwed together) with 2x2 lumber every 16-ish inches. This playhouse wasn't built according to standard builder's measurements, so that made the whole process a little tricky! Then we insulated the ceiling and walls with 1.5 inch styrofoam sheets. They worked great, I just cut them with a "christmas-tree" saw. I am obviously inexperienced... Then we covered with .25in OSB. *Beware of saltbox roof angles, they are tricky to measure out for a beginner*
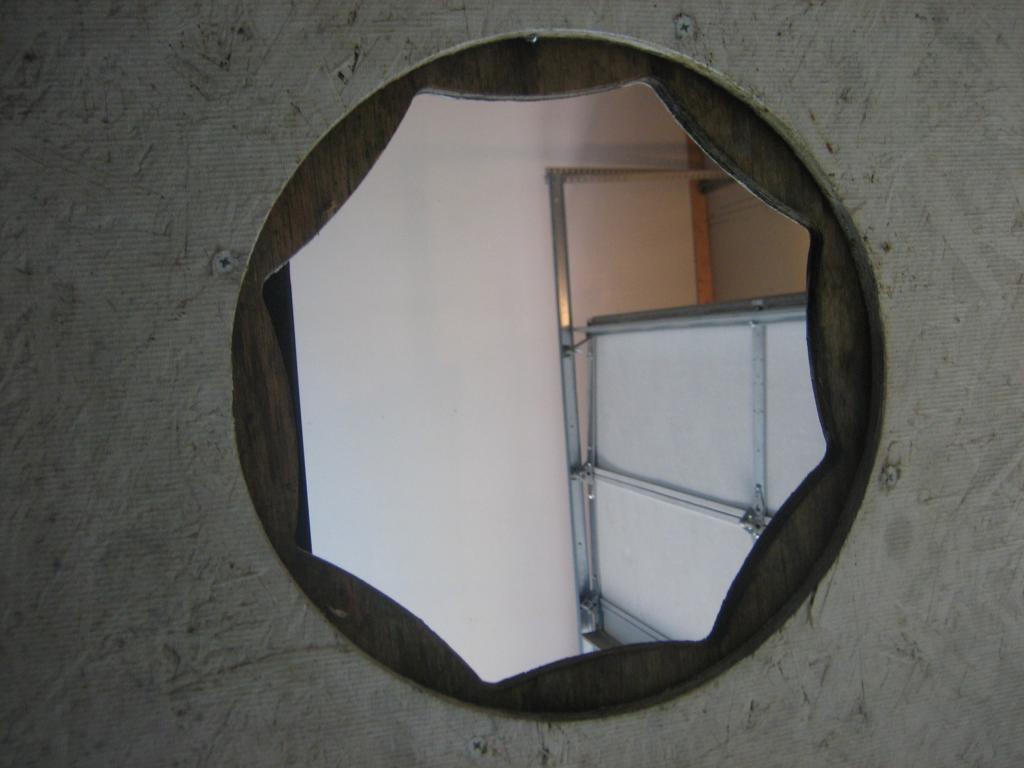
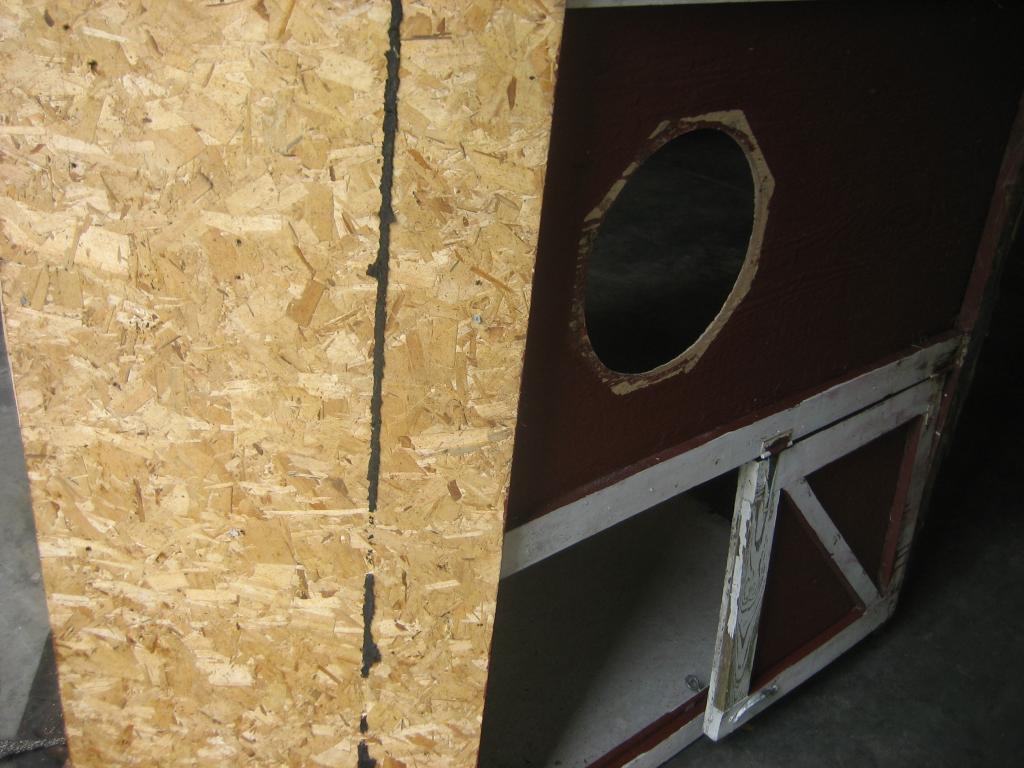
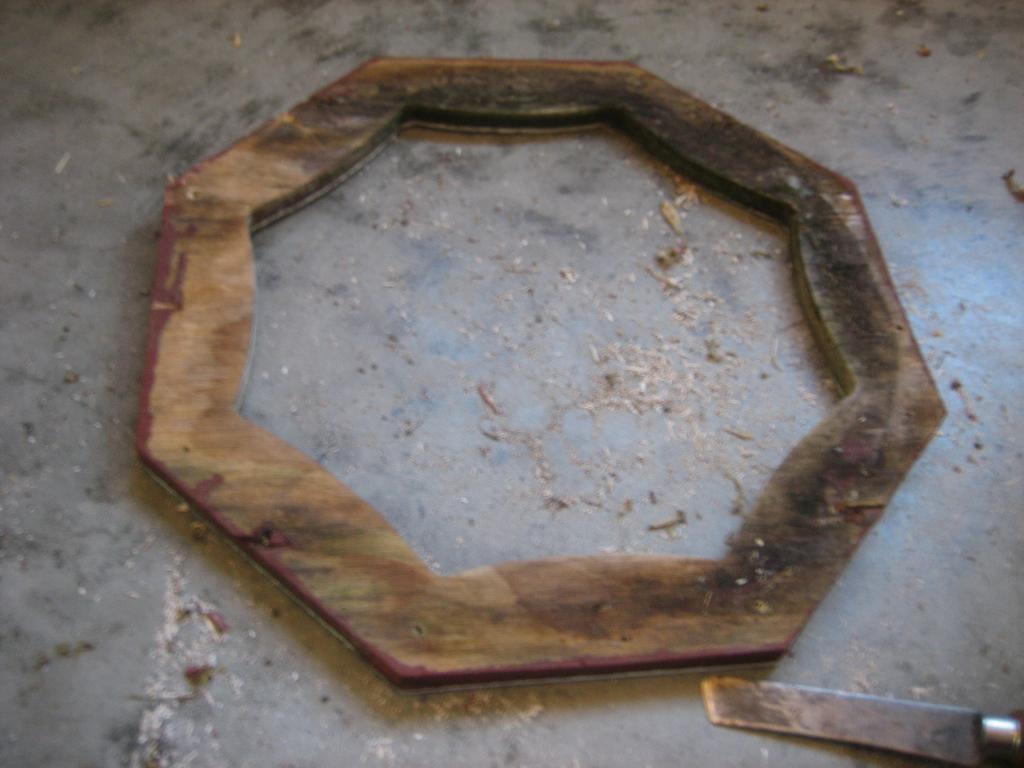
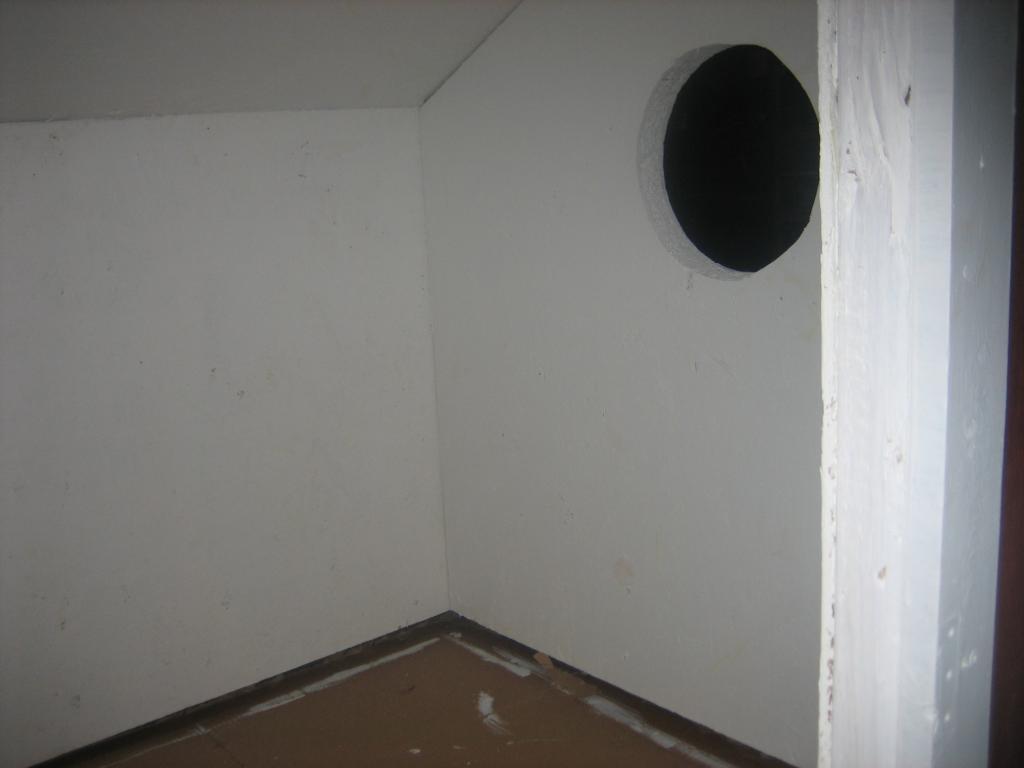
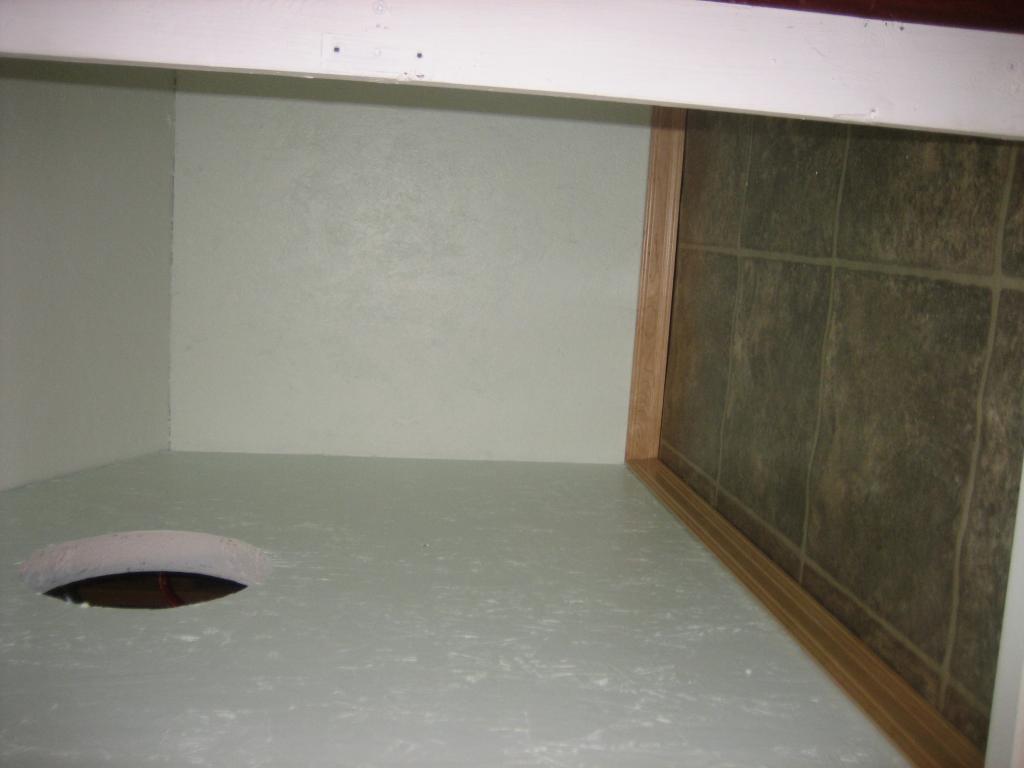
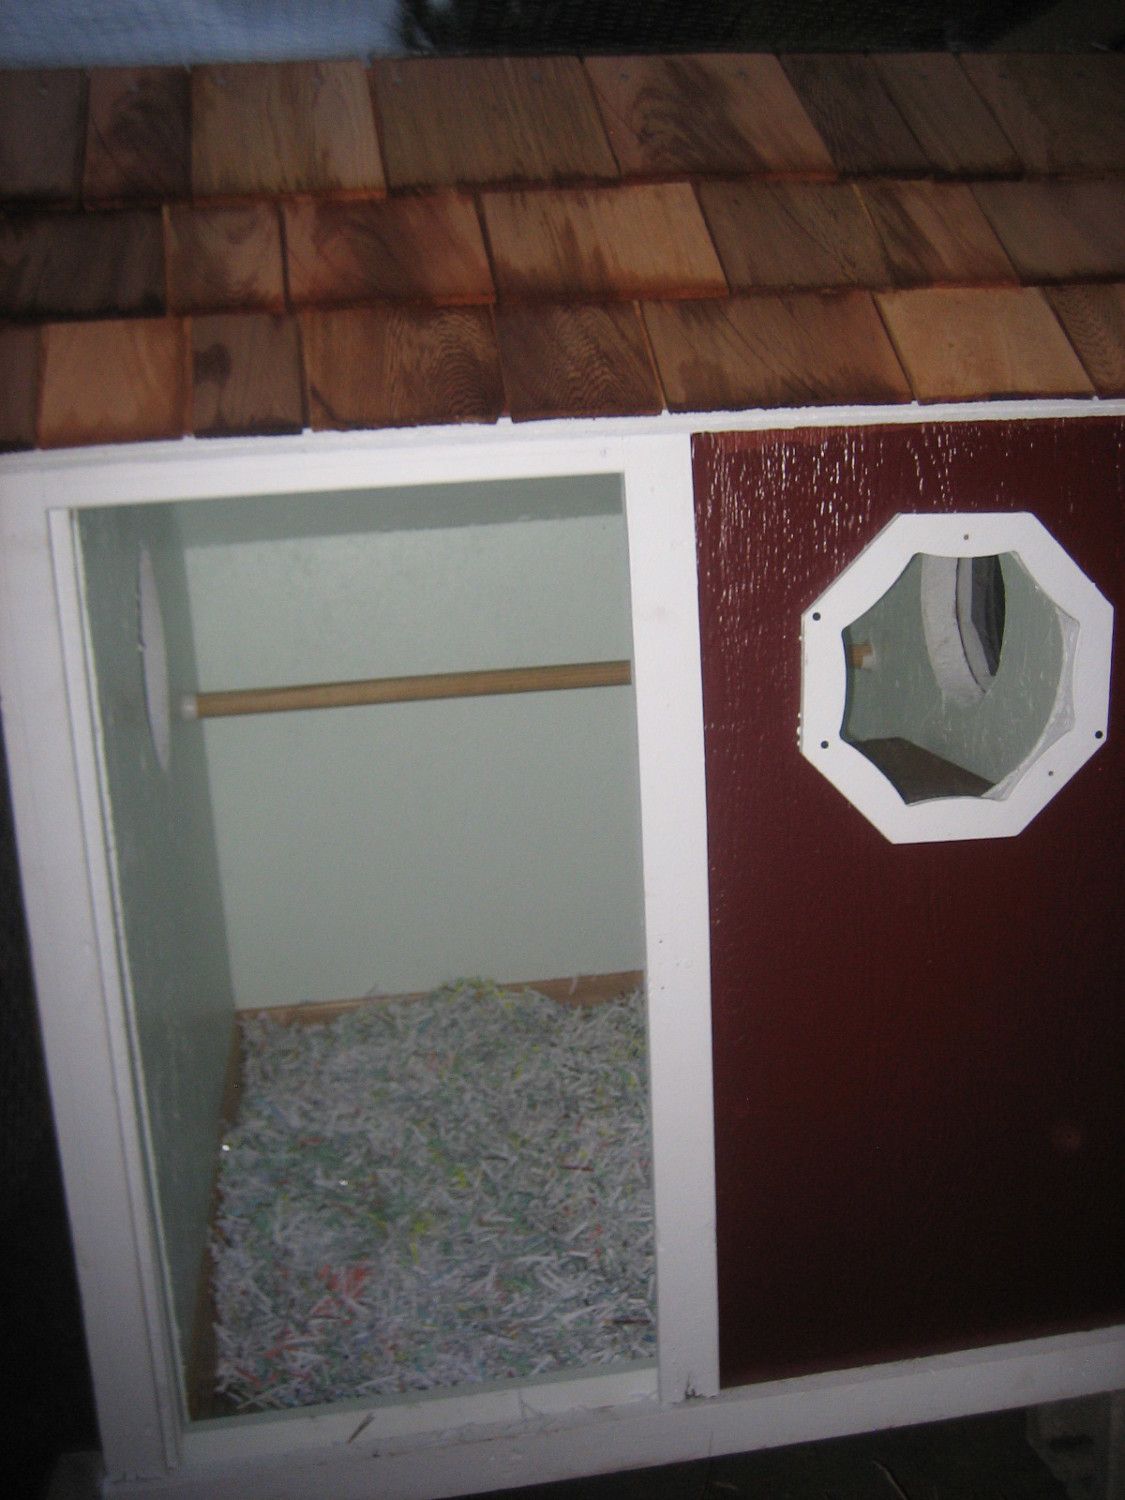
Because the windows are circular (something that sounds great, but isn't!) my dad just used a jigsaw after framing and insulating and punched right through. I thought it looked like an ice cream cookie sandwich.
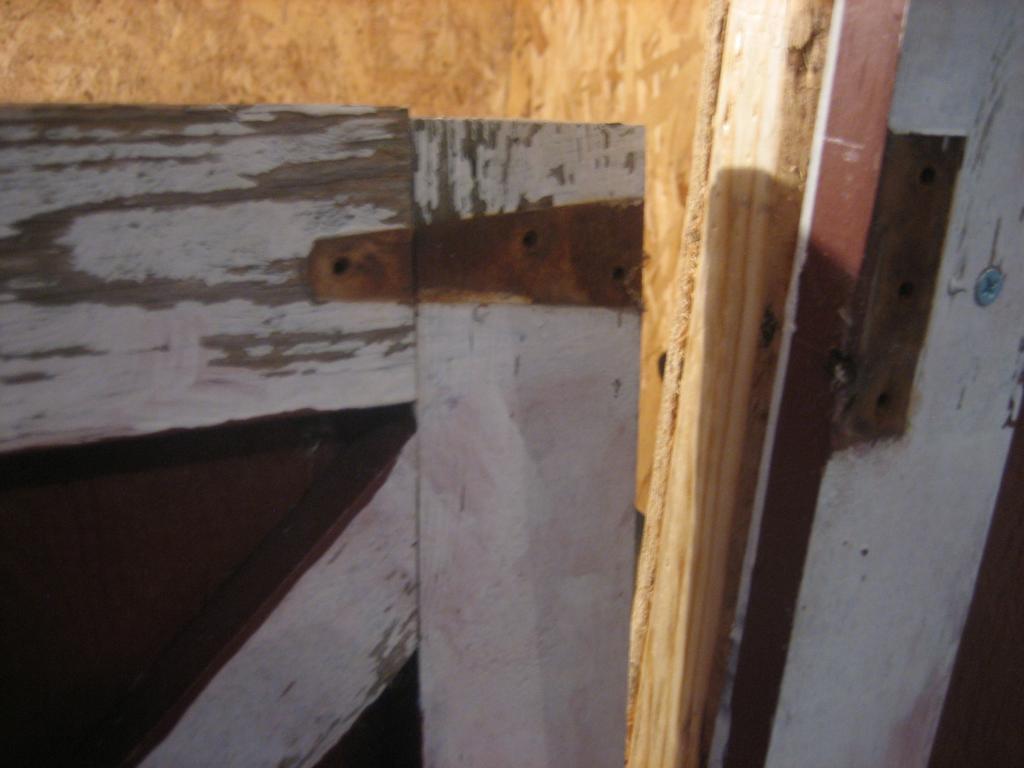
Now, on to the door! There was only the bottom half, which is sad, but I probably would have wanted to make a nice new one anyway. I originally wanted to salvage the door and only have to make a top. I removed the top hinge easily. But then...
This hinge! this thing WOULD NOT COME OFF! We tried: a lot of screw driver...
Luna's second egg! I wanted to keep the first intact so I blew it out and still have it
Paris! All grown up
NOTE: I LOVE, LOVE, LOVE MY LADIES. IF YOU ARE HESITANT ABOUT TAKING THE PLUNGE INTO KEEPING CHICKENS, JUST JUMP ALREADY! THEY ARE SO WORTH IT AND EVERYDAY I FEEL BLESSED I HAVE THEM!
Once upon a time... I dreamt of having a farm! And I still do, every day of every year of my young life! I thirsted for a horses, goats, ducks, pigs. Anything. Luckily, on June 26th 2011, I finally settled with four beautiful 6 week old pullets!
Well, maybe they weren't beautiful at the time, but I knew they would be eventually
This may be a little backwards, getting the chickens before the coop, but I wanted them and knew we could make it work!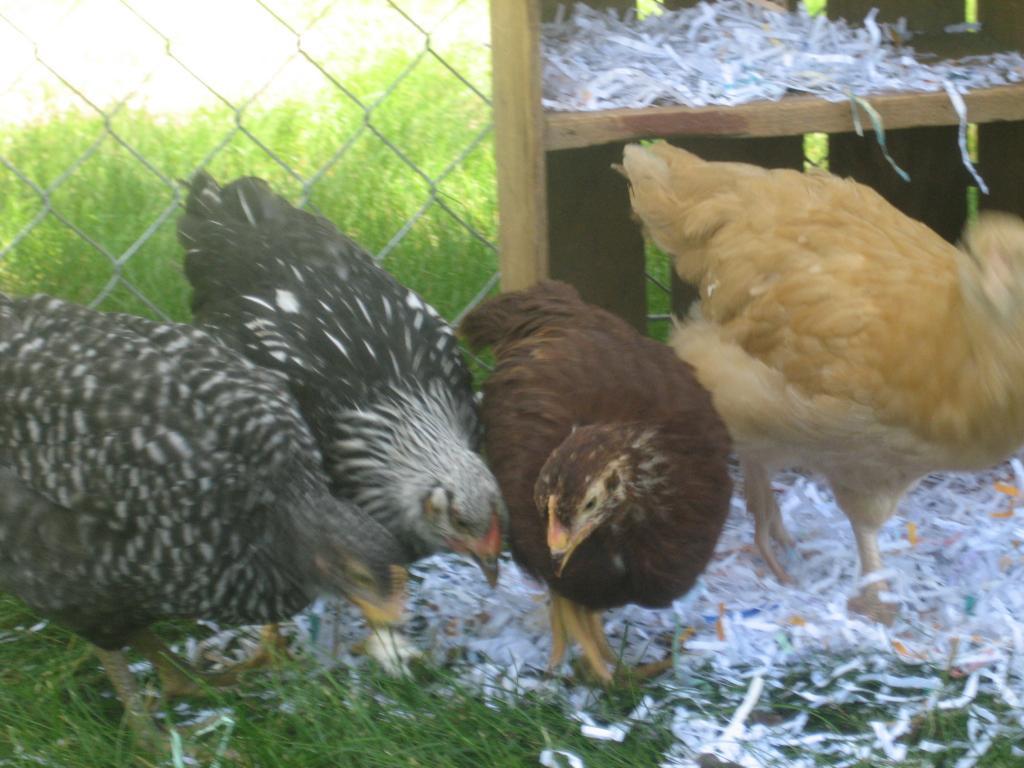
I got them from a sweet lady two hours from our house, I know I could've found some closer, but I'm still glad I got them where I did. Their owner really loved them, and everyone looked happy and healthy. Left to right; Barbie (Barred Plymouth Rock), Luna (Wyandotte), Paris (Rhode Island Red), and Daisy (Buff Orpington). How they got their names? Barbie: BARred rock=BARbie. Luna=luna lovegood and the fact that I wasn't sure she was a girl (I read a book on a transgender who called themselves Luna once). Paris: she pulled a really stupid move, taking out everyone else, while trying to get on the roost. Paris=paris hilton. Daisy= she is yellow, and I didn't like sandy or blondie!
There is our beloved dog Theo. He was recovering from a major vet visit and so was unnaturally calm about four new family members! He is now totally cool with the ladies and will happily sniff their butts and follow them around. He's a nice guardian. Our other dog, however... not so much!
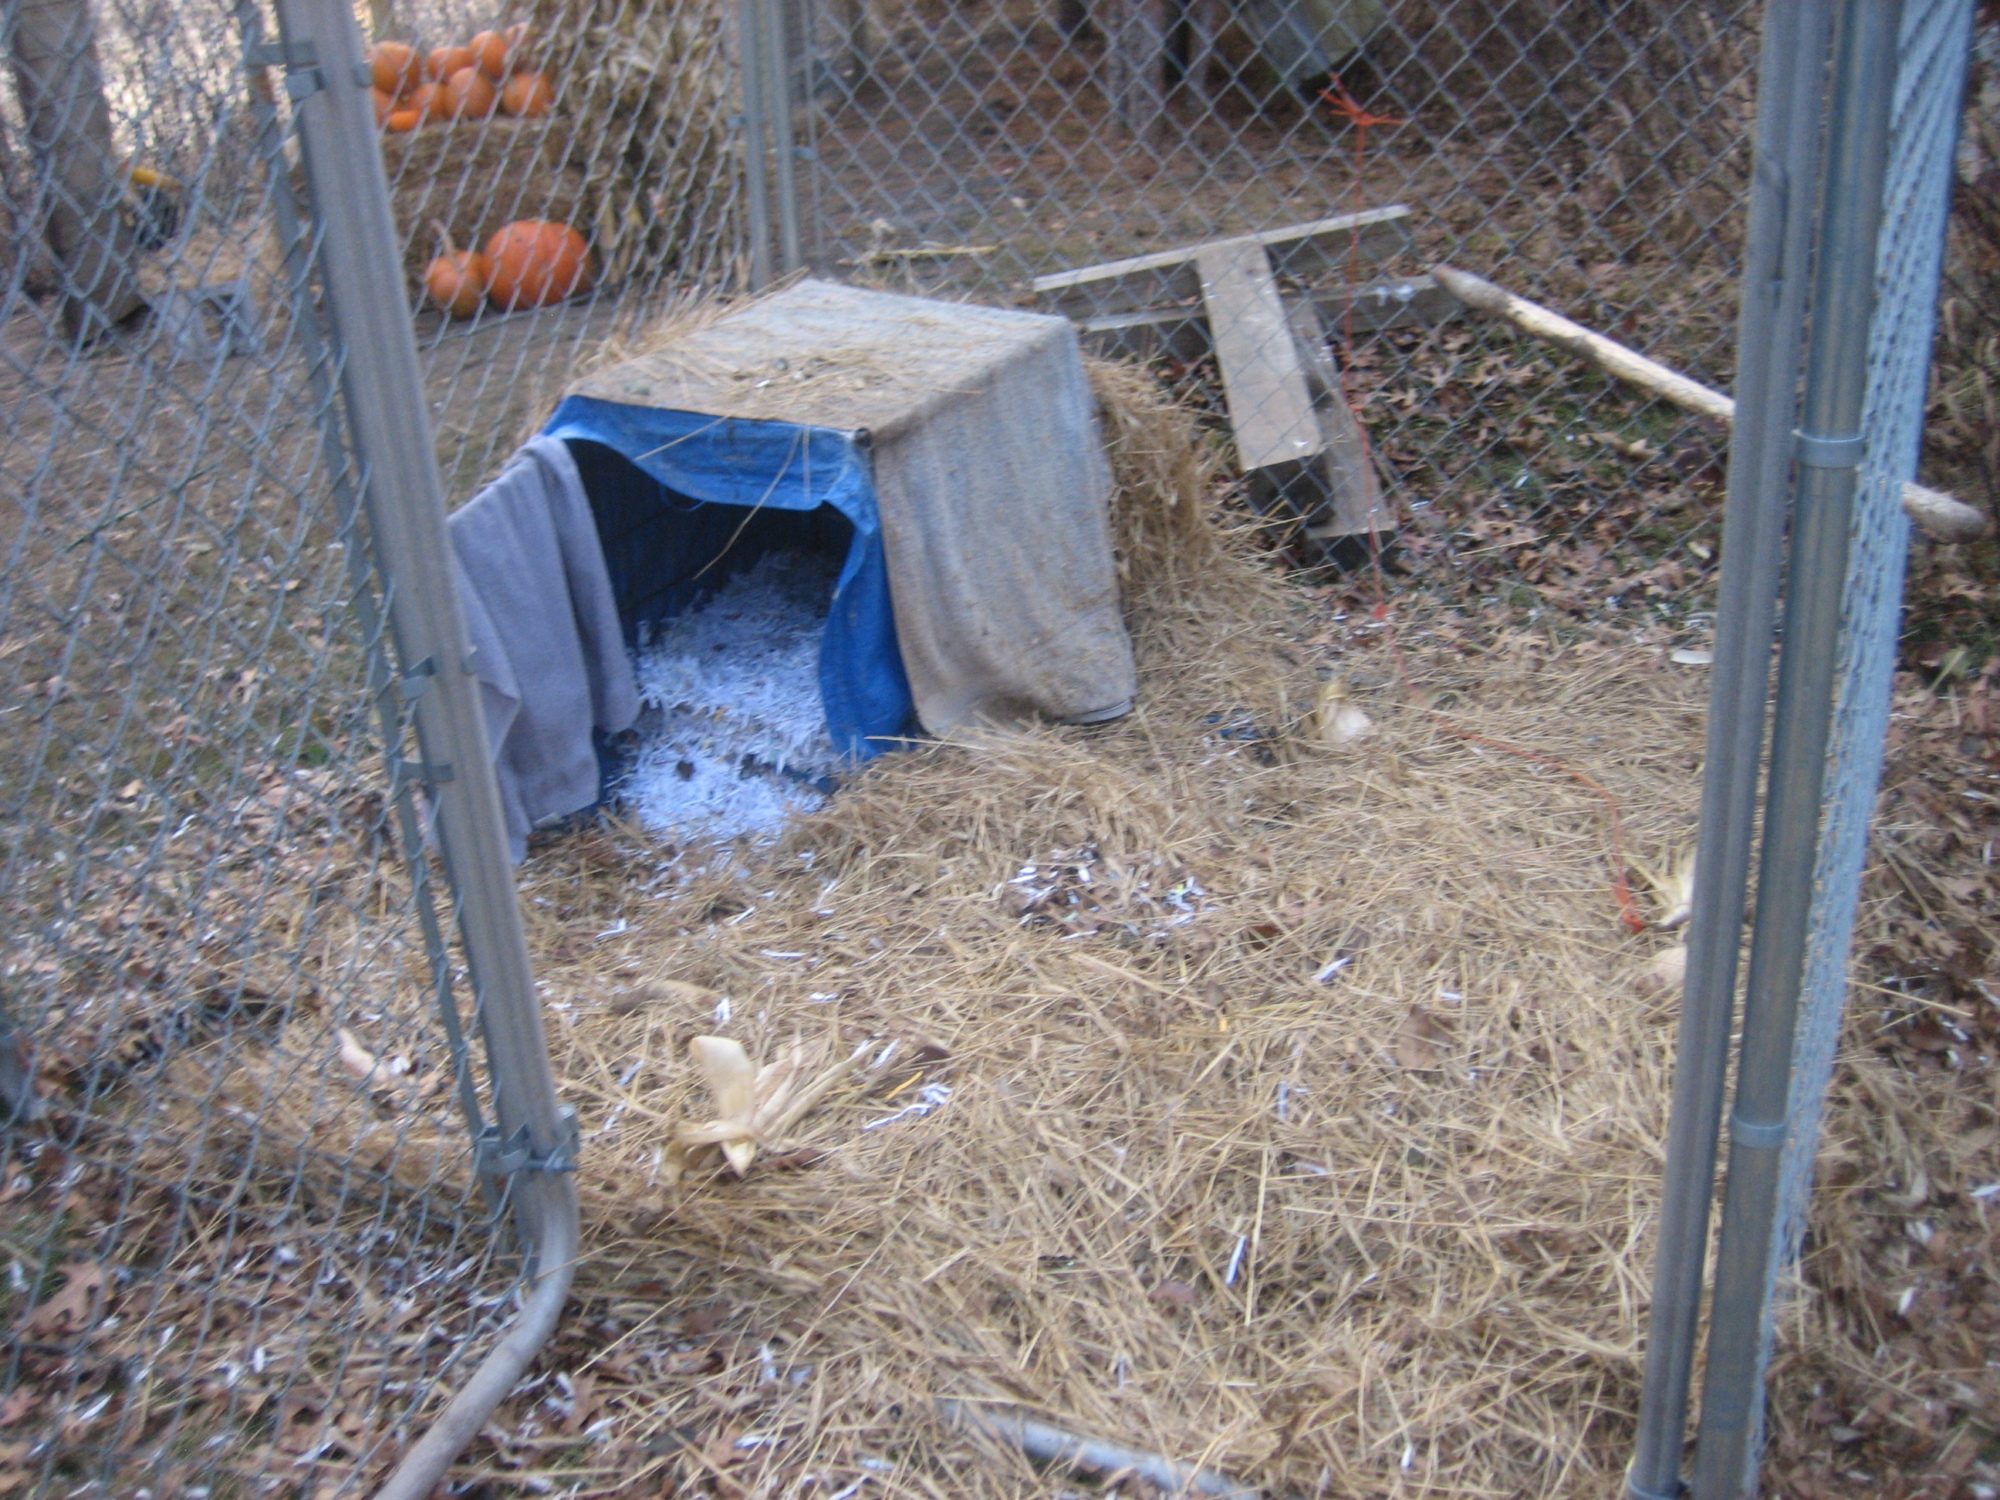
Because of my parents and my own schedule, we didn't buy a coop right away; holding out for "Mr. Right" on craigslist. Until we did, the ladies lived in this very humble shack otherwise known as a dog-kennel-wrapped-in-a-tarp-in-a-bigger-dog-kennel. Well, it worked until we could build my dream coop.
There is our beloved dog Theo. He was recovering from a major vet visit and so was unnaturally calm about four new family members! He is now totally cool with the ladies and will happily sniff their butts and follow them around. He's a nice guardian. Our other dog, however... not so much!
By the way, this picture was after the ladies had moved out. I kept it cleaner when they were in it!
And then at the end of July, I found it! A cute playhouse, in a rather dilapedated condition, but workable!
This picture isn't very good! It was taken later so the cute original window trim wasn't up anymore.
There it is! So cute, but rotten and nasty. I'll fix that up quick!
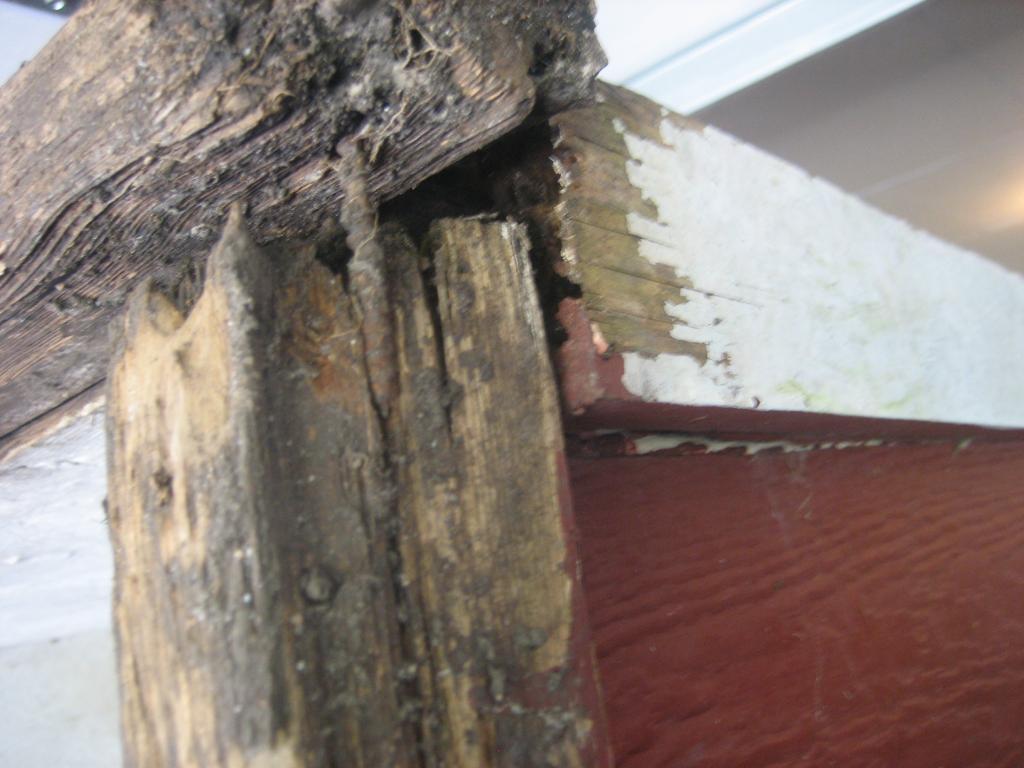
Eugh. And the rotten bottom boards. It was sort of in a swamp!
I loved the saltbox roof, but again: gross.
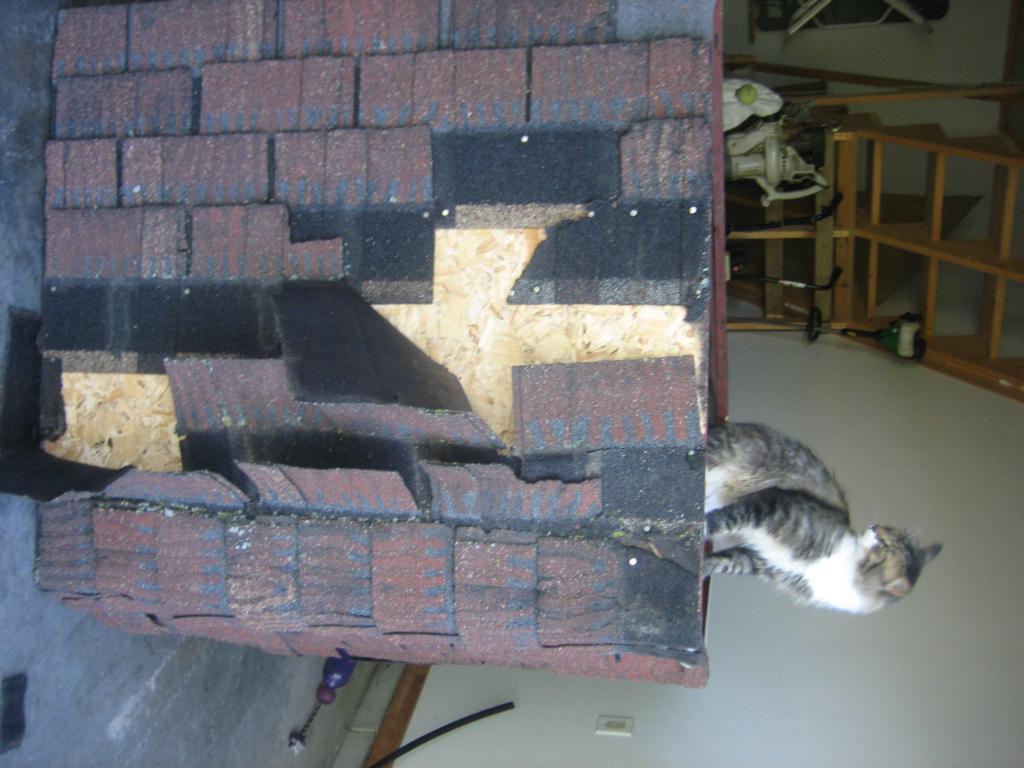
That's the condition the roof was in after a two hour ride in the back of a pick up. At least it made the de-shingling process faster! Oh, and meet our cat Henry!
Taking off the shingles was easy. Just used a hammer and a radio to pass the time! Luckily, the OSB underneath seemed fine! Thank god.
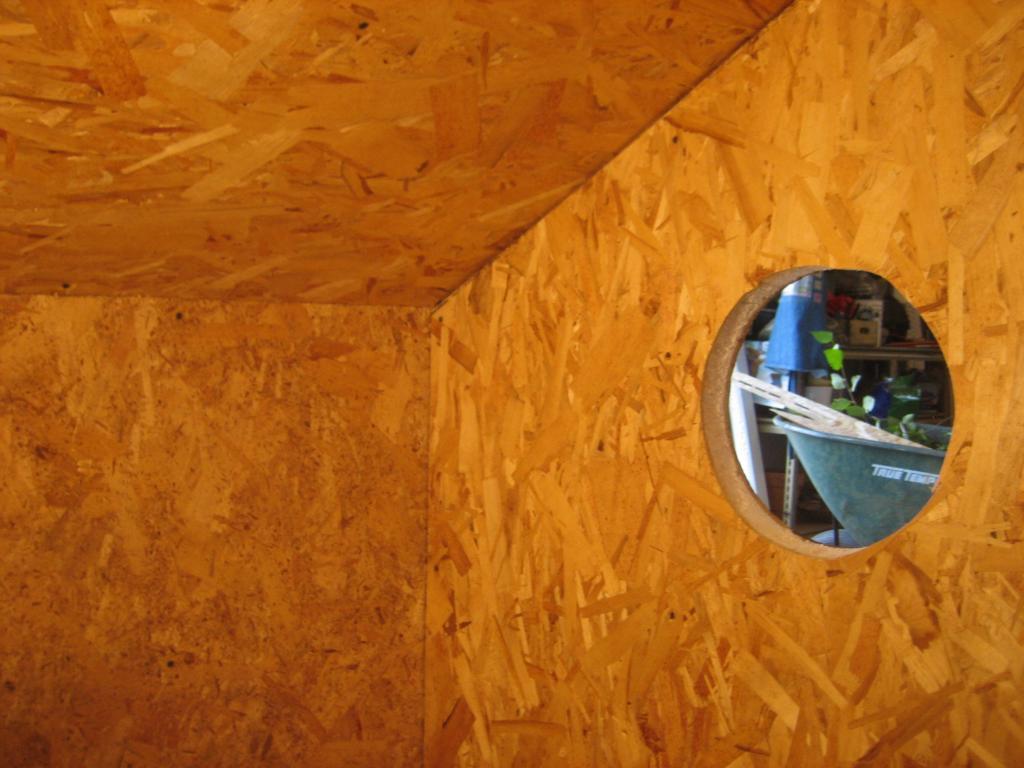
I didn't take picture during the process, or maybe I did... Anyway, we framed it (the playhouse, which was only plywood screwed together) with 2x2 lumber every 16-ish inches. This playhouse wasn't built according to standard builder's measurements, so that made the whole process a little tricky! Then we insulated the ceiling and walls with 1.5 inch styrofoam sheets. They worked great, I just cut them with a "christmas-tree" saw. I am obviously inexperienced... Then we covered with .25in OSB. *Beware of saltbox roof angles, they are tricky to measure out for a beginner*
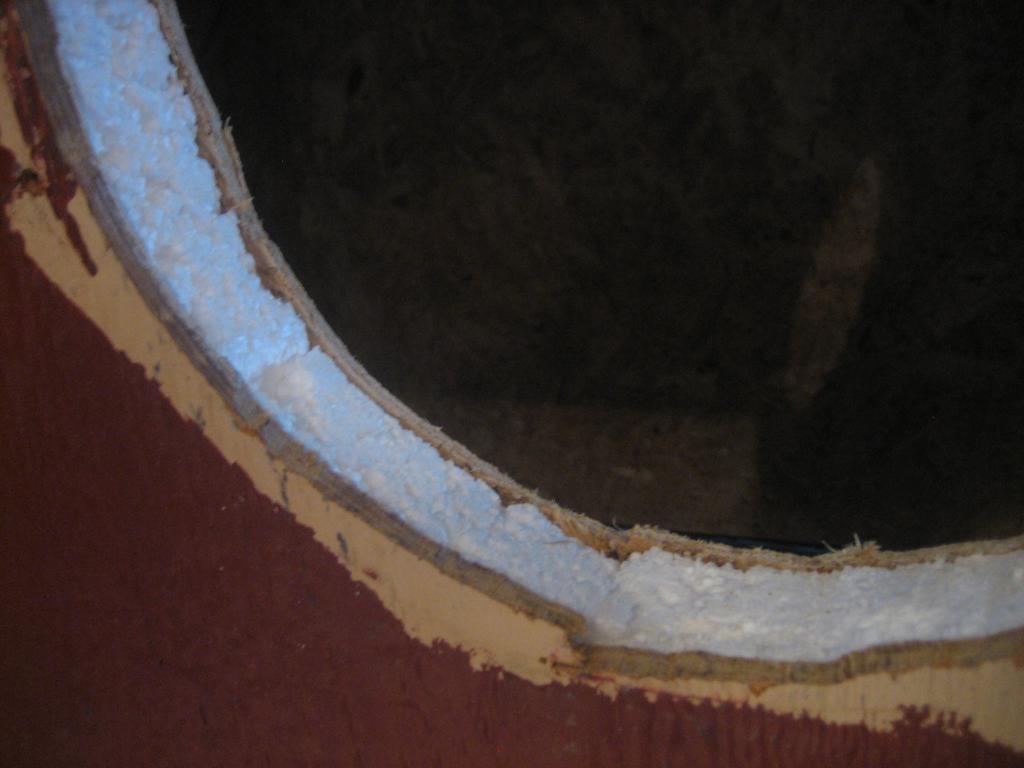
Because the windows are circular (something that sounds great, but isn't!) my dad just used a jigsaw after framing and insulating and punched right through. I thought it looked like an ice cream cookie sandwich.
Now, on to the door! There was only the bottom half, which is sad, but I probably would have wanted to make a nice new one anyway. I originally wanted to salvage the door and only have to make a top. I removed the top hinge easily. But then...
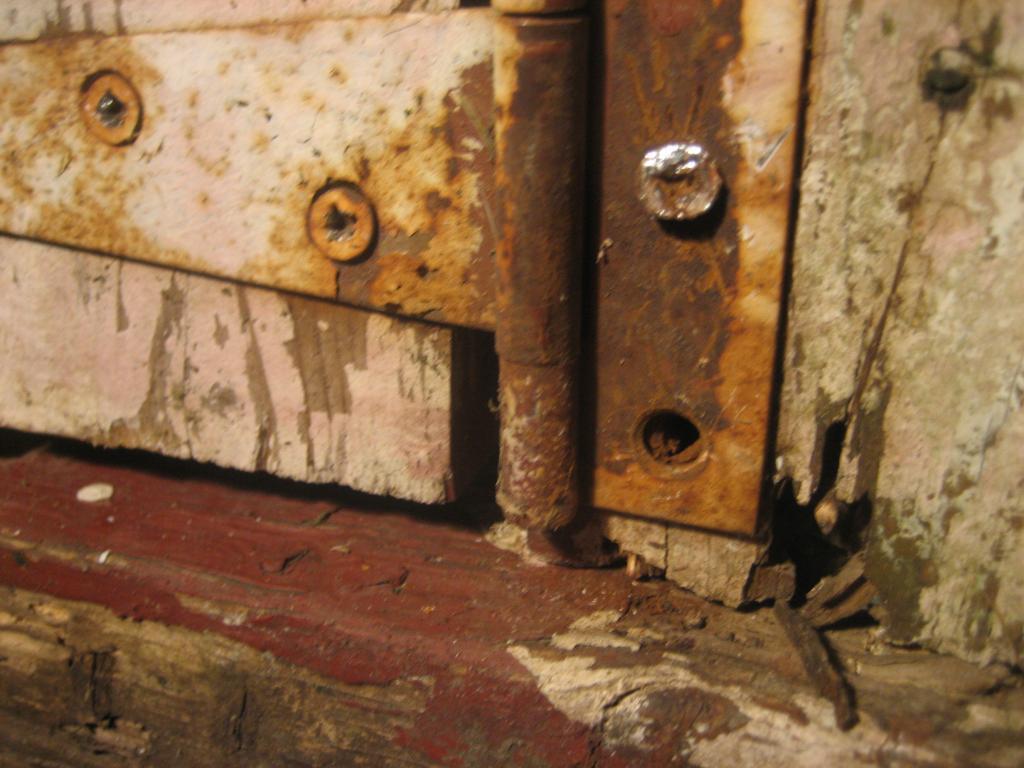
This hinge! this thing WOULD NOT COME OFF! We tried: a lot of screw driver...
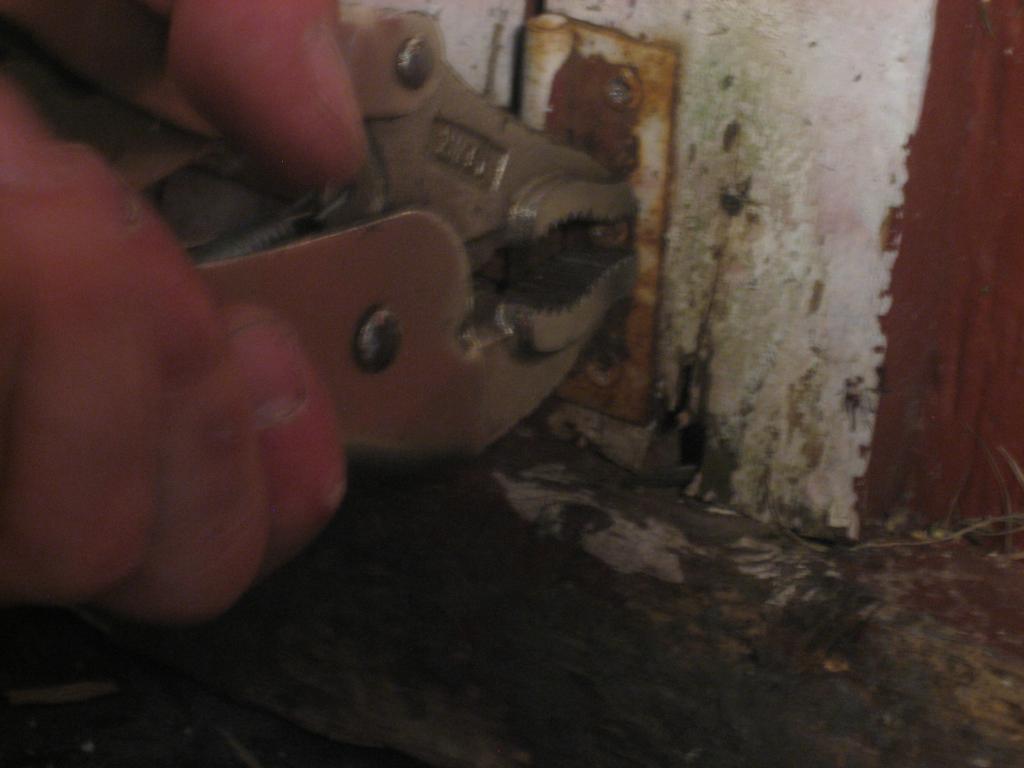
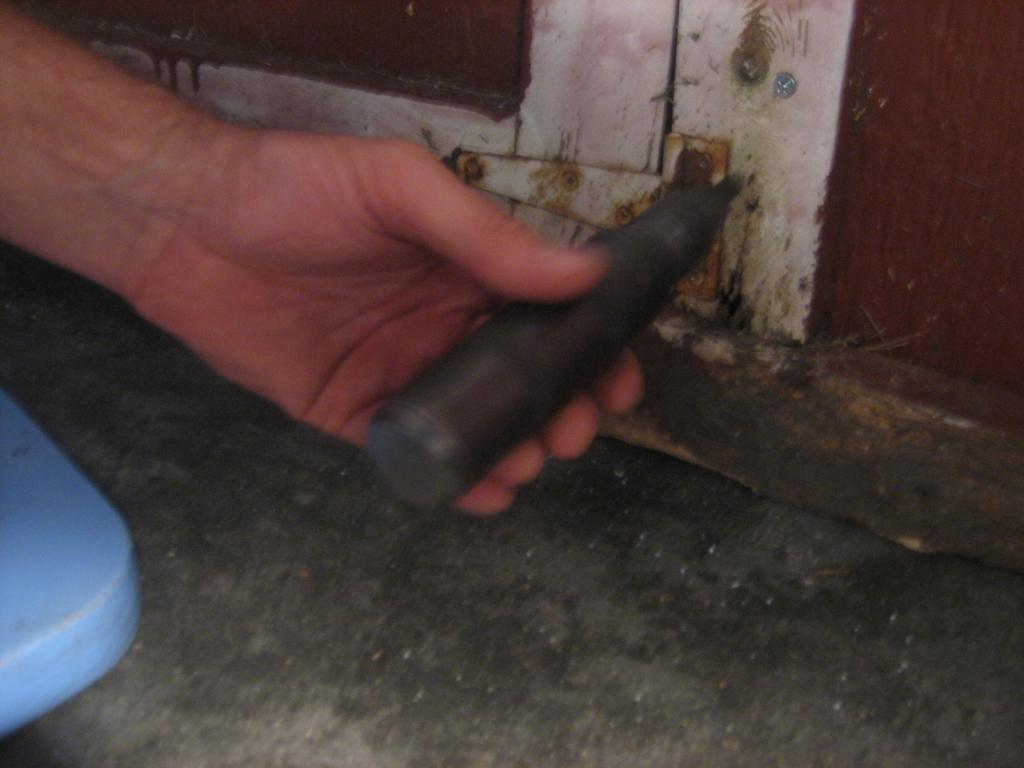
using a wrench... using this thingy...
but to no avail! Let's just say that I decided to make a new dutch door!
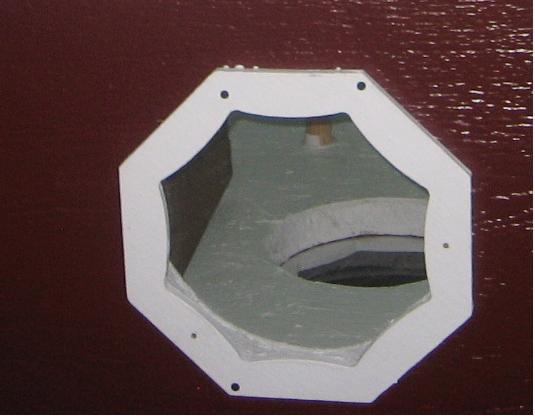
Somewhere around this time I began work to refurbish the rotten window trim. This involved scraping off the soft wood with that tool and sanding down the rough spots. Then I scrubbed them down with soapy water, which took off a lot of the dirt/mildew. I put, like, four coats of paint on before mounting on the coop. We used acrylic instead of glass for cutting reasons, and just sandwiched that between wall and trim. Done!
Much better!
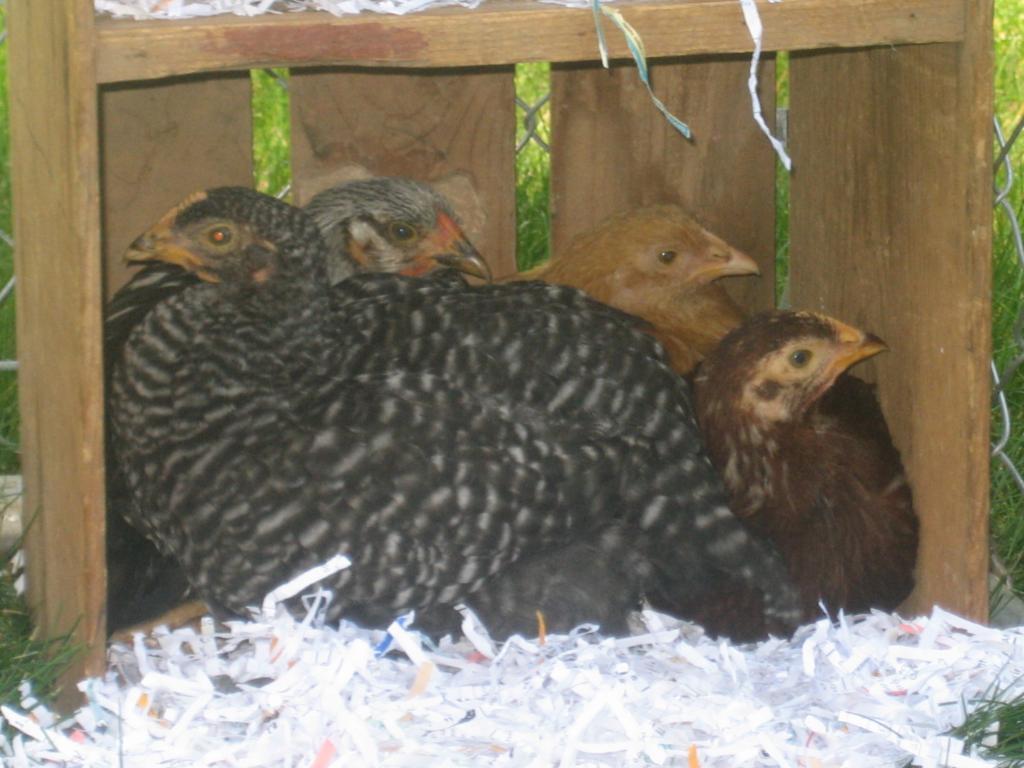
My ladies! Anyway, this picture is showing the crate, not the chickens! I will turn this into a nest box.
I love it. I just scrubbed it with hot, soapy water and that made a big difference. Then I looked for a board to nail to the front, and found this piece of trim (?) that was the perfect size! But it didn't match the worn box. So I did what I do best, customize! I found a couple stains in the basement and mixed them to get the perfect shade and nailed it on. Then I took a charcoal stick from one of my art kits and colored around the existing nail holes and around the nails I just pounded in. To top if off, I colored the nail heads with sharpie so they wouldn't look new. Do I have an odd attention to detail with these things? yes, yes I do.
Then I got to work priming the inside. I think I did two coats.
After that I painted it "Bubble." It's a behr paint. I was going for a subtle minty-robins egg blue. I like it! It keeps it really bright for my ladies.
This is a view from the door frame. I got the scrap linoleum from my uncle, who does flooring. I acually like it. It was really big so I cut two to fit in the coop, so eventually I can take this one out and replace it if needed. I also cut up about 20 nest box liners out of this, which covers the big cracks that you probably noticed, very nicely.
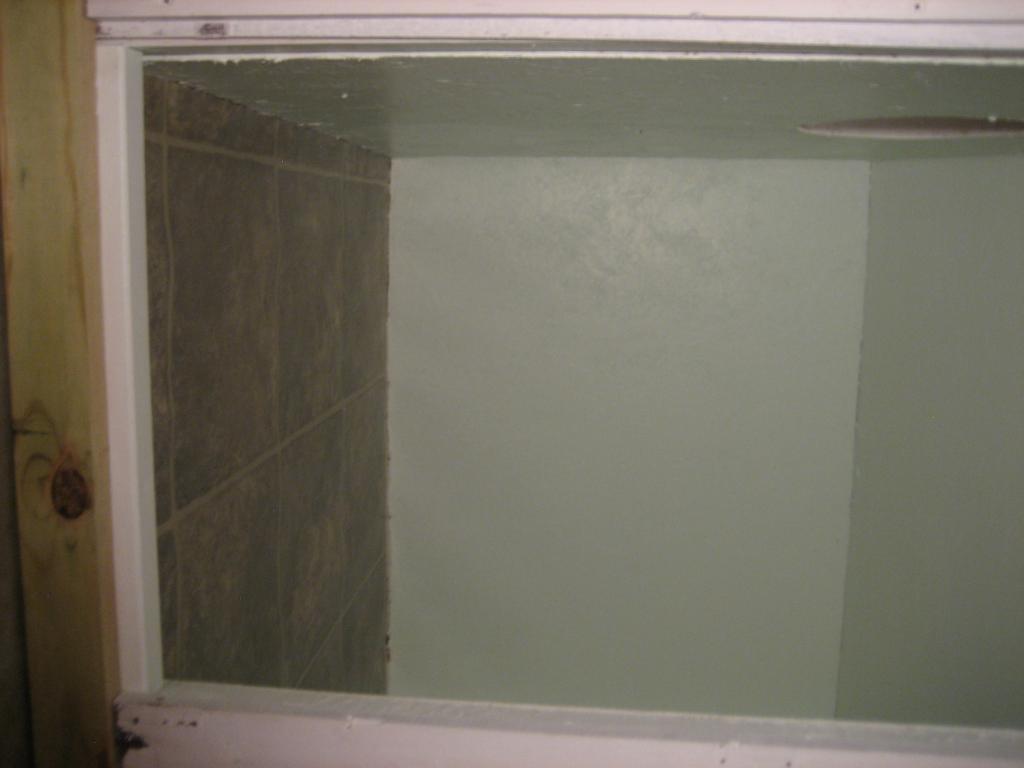
We had a bunch of this nice maple trim in our attic from the previous owners. It worked really nice to hold down the linoleum and make it pretty. Although, the coop started looking too "peopl-y" to me. kind of wrong.
The door before being painted or cut in half! I made it by cutting pieces of 1x3 for the border and 1x2 for the cross-bucks and screwing these to a solid piece of OSB. Later we will just buzz it in half. Fits...great. Had to sand it down a bit. And excuse these upcoming bad pictures: I took them on my phone and then had to take a picture of the picture on my phone to put it on here. There are a couple coming up. You're warned.
The first door I've ever made! This is before we cut in half to "dutch" it up! (The crossbucks are out being painted.)
The posts are in! I hand leveled this plot on a hot summer day. My tools? A spade, level, and rake. It was a nightmare, and that resulted in the posts being "level." My ladies loved the upturned dirt. I like that they got to explore the progress, but I bet they were envious every time they had to go back in their kennel!
This is how we framed in the floor: 0.5 inch plywood supported by 1x3 lumber. It has worked nicely. I'm only 120 lbs, so I guess you can't expect it work for everyone though.
I read a book that included a lesson on installing a cedar shingle roof. He said that for the shingles to last longest, they need ventilation. AKA, I shouldn't put them right on the OSB. Shoot! So I figured this would work: screw 1x2 every 6 inches horizontally across the roof. It didn't make installation of shingles any harder and I hope this qualifies as adequate "ventilation." Fingers crossed.
I love, love, love these shingles! We got one pack at the home depot and it easily covered our roughly 22 sq ft roof. It is beautiful and easy to install (?). I think it was easy because I have never roofed anything else before, but my dad said, "Asphalt would be easier." So I said, "Yeah, but these shingles look nicer!" I won!
Somewhere around this time my mom is repainting the outside red with some of our own paint. She also painted the roof white earlier and all the trim. Thanks!
It was about mid-November before the coop got put outside, thanks to my dad and some other guys. Surprisingly very heavy!
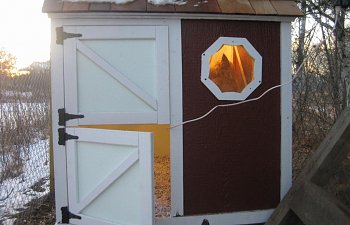
I love it! that weeny board in the doorway is supposed to be a droppings board. No way! The shredded paper (which is the bedding I use due to the fact that I have a network of people who bring me theirs. Free!) falls out all the time. I have yet to fix that, but I plan on upgrading to at least a 2x4. Another note, there isn't any screen in the windows. It was getting pretty cold and I had to get the coop outside! I will work on that this spring.
Here it is with both doors attached! They fit great, and there is even enough gap between to easily run the cord from the light out. Phew. I did not want to drill a hole! And there is daisy's butt in the window. Cute!
We capped the cedar shingle roof with two 1x4 cedar boards. Both were cut at about 50* so they but up nicely to the irregular (grr) angled roof. Then we screwed them together and sealed the gap with glue. Perfect!
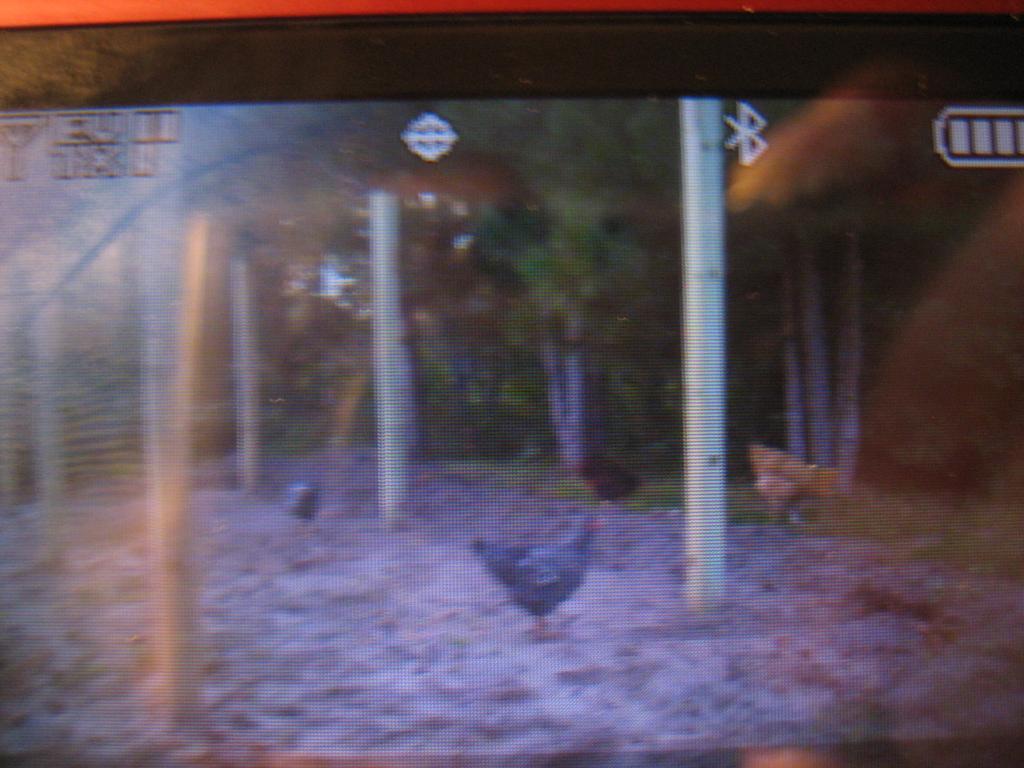
The view from inside the run. In the foreground is my hen (hehe. They are getting so old! I can't believe I have hens) Luna, a wyandotte. In the background is Daisy my buff orpington. I am using a heated pet bowl for water in the winter because we already had one. It works great so far, but it has also been unusually warm. So who knows. That's 6ft chain link that surrounds the run. We stapled chicken wire to the top as well. And, of course, that is my beloved barn door (from the back, so it looks a little ugly). It is one of my favorite thing about the coop/run!
The hinges I got from home depot. They came with the black screws, but on the door, we subbed in bolts. That door is as heavy as it is amazing! I recommend the hinges, they weren't terribly expensive and so far (they've been in a month) work really nicely and smoothly. Even with an insanely heavy barn door!
And the barn door with wreath! The ladies wanted decoration, and I figured if I'm going out there 2+ times a day, I want it to be cheery
The nest box that actually gets used by Luna. The easter egg (there is another half somewhere...) is supposed to comfort Luna and guide her to lay here. Not really! While she is waiting to lay her egg, she passes the time by pecking it until it cracks open! Oh, well!
The heat/daylight light. I screwed a 2x2 to the wall and clamped it on. Easy! Then I got paranoid about burning down the coop if it fell... Hence the ugly green wire. This catches the light if it is pulled off the wood block. Don't judge it's looks, it has already worked! The first night I had it up, actually! Thank god I did!
The coop from the outside, decorated for fall! That concrete block is the current lock on the door. I can't find one I like yet!
More Pictures to come, once I find them!
but to no avail! Let's just say that I decided to make a new dutch door!
Somewhere around this time I began work to refurbish the rotten window trim. This involved scraping off the soft wood with that tool and sanding down the rough spots. Then I scrubbed them down with soapy water, which took off a lot of the dirt/mildew. I put, like, four coats of paint on before mounting on the coop. We used acrylic instead of glass for cutting reasons, and just sandwiched that between wall and trim. Done!
Much better!
 My ladies! Anyway, this picture is showing the crate, not the chickens! I will turn this into a nest box.
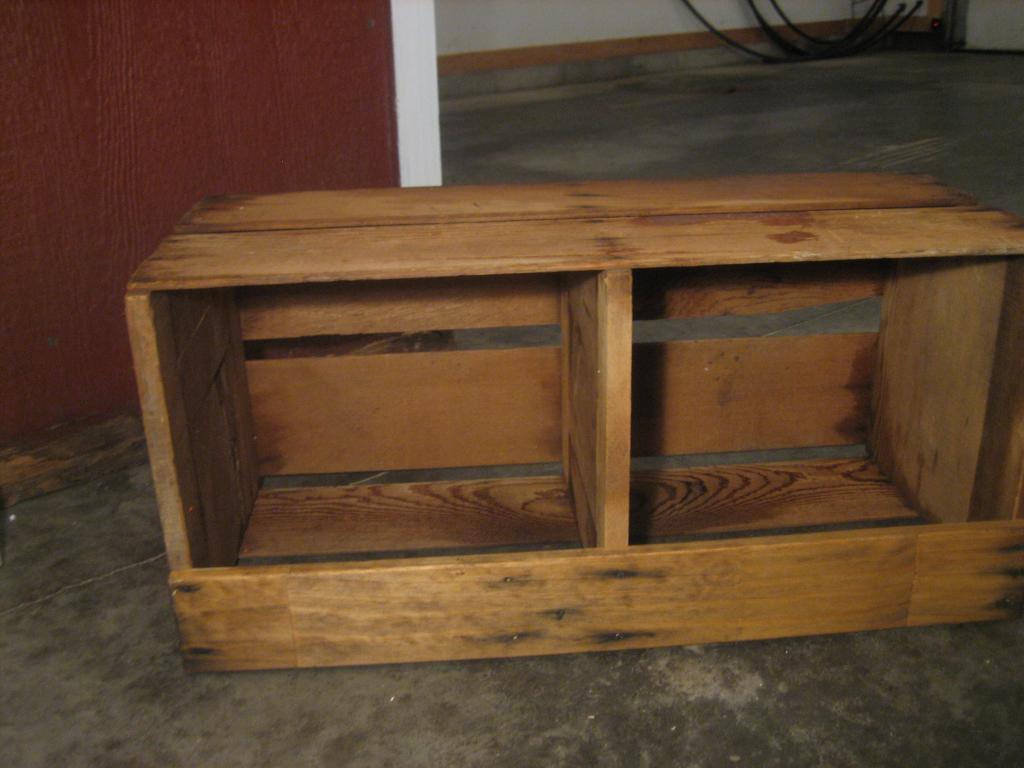
I love it. I just scrubbed it with hot, soapy water and that made a big difference. Then I looked for a board to nail to the front, and found this piece of trim (?) that was the perfect size! But it didn't match the worn box. So I did what I do best, customize! I found a couple stains in the basement and mixed them to get the perfect shade and nailed it on. Then I took a charcoal stick from one of my art kits and colored around the existing nail holes and around the nails I just pounded in. To top if off, I colored the nail heads with sharpie so they wouldn't look new. Do I have an odd attention to detail with these things? yes, yes I do.
Then I got to work priming the inside. I think I did two coats.
After that I painted it "Bubble." It's a behr paint. I was going for a subtle minty-robins egg blue. I like it! It keeps it really bright for my ladies.
This is a view from the door frame. I got the scrap linoleum from my uncle, who does flooring. I acually like it. It was really big so I cut two to fit in the coop, so eventually I can take this one out and replace it if needed. I also cut up about 20 nest box liners out of this, which covers the big cracks that you probably noticed, very nicely.
We had a bunch of this nice maple trim in our attic from the previous owners. It worked really nice to hold down the linoleum and make it pretty. Although, the coop started looking too "peopl-y" to me. kind of wrong.
The door before being painted or cut in half! I made it by cutting pieces of 1x3 for the border and 1x2 for the cross-bucks and screwing these to a solid piece of OSB. Later we will just buzz it in half. Fits...great. Had to sand it down a bit. And excuse these upcoming bad pictures: I took them on my phone and then had to take a picture of the picture on my phone to put it on here.
There are a couple coming up. You're warned.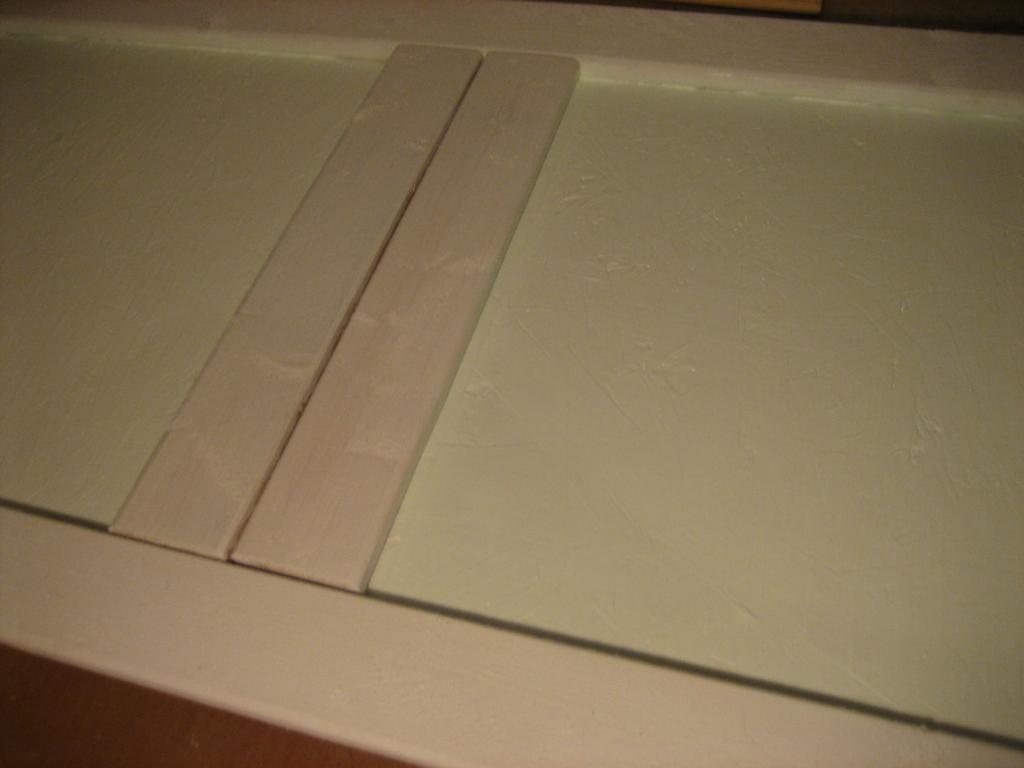
The first door I've ever made! This is before we cut in half to "dutch" it up! (The crossbucks are out being painted.)
The posts are in! I hand leveled this plot on a hot summer day. My tools? A spade, level, and rake. It was a nightmare, and that resulted in the posts being "level." My ladies loved the upturned dirt. I like that they got to explore the progress, but I bet they were envious every time they had to go back in their kennel!
This is how we framed in the floor: 0.5 inch plywood supported by 1x3 lumber. It has worked nicely. I'm only 120 lbs, so I guess you can't expect it work for everyone though.

I read a book that included a lesson on installing a cedar shingle roof. He said that for the shingles to last longest, they need ventilation. AKA, I shouldn't put them right on the OSB. Shoot! So I figured this would work: screw 1x2 every 6 inches horizontally across the roof. It didn't make installation of shingles any harder and I hope this qualifies as adequate "ventilation." Fingers crossed.
 I love, love, love these shingles! We got one pack at the home depot and it easily covered our roughly 22 sq ft roof. It is beautiful and easy to install (?). I think it was easy because I have never roofed anything else before, but my dad said, "Asphalt would be easier." So I said, "Yeah, but these shingles look nicer!" I won!
Somewhere around this time my mom is repainting the outside red with some of our own paint. She also painted the roof white earlier and all the trim. Thanks!
It was about mid-November before the coop got put outside, thanks to my dad and some other guys. Surprisingly very heavy!
I love it! that weeny board in the doorway is supposed to be a droppings board. No way! The shredded paper (which is the bedding I use due to the fact that I have a network of people who bring me theirs. Free!) falls out all the time. I have yet to fix that, but I plan on upgrading to at least a 2x4. Another note, there isn't any screen in the windows. It was getting pretty cold and I had to get the coop outside! I will work on that this spring.
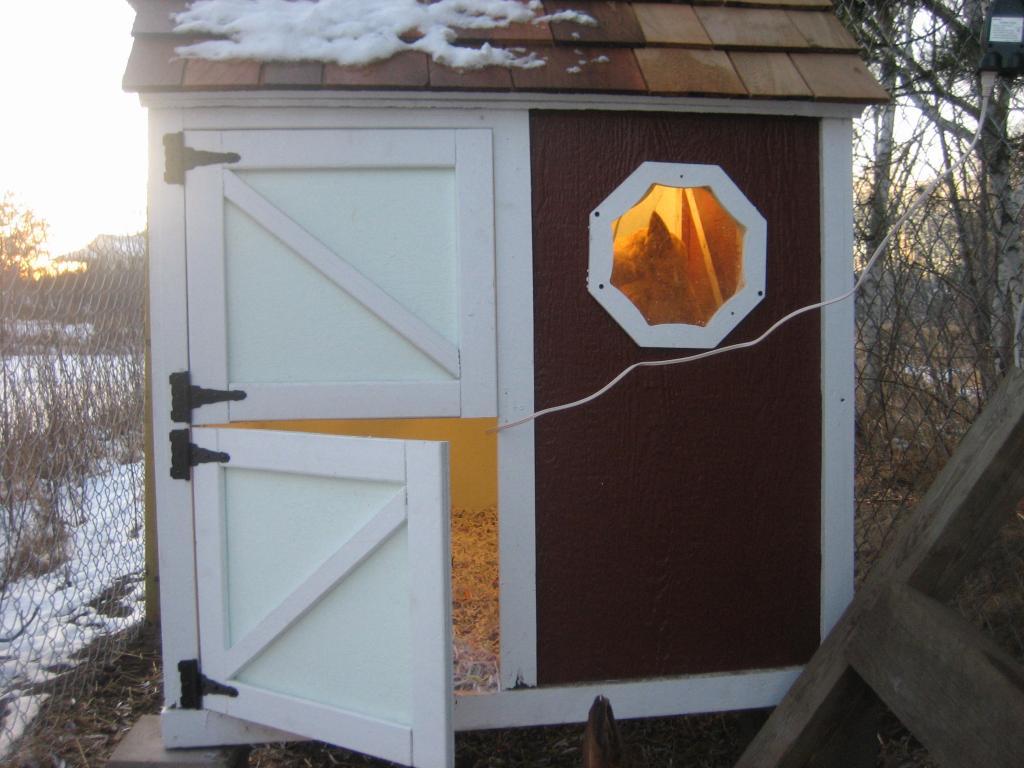
Here it is with both doors attached! They fit great, and there is even enough gap between to easily run the cord from the light out. Phew. I did not want to drill a hole! And there is daisy's butt in the window. Cute!
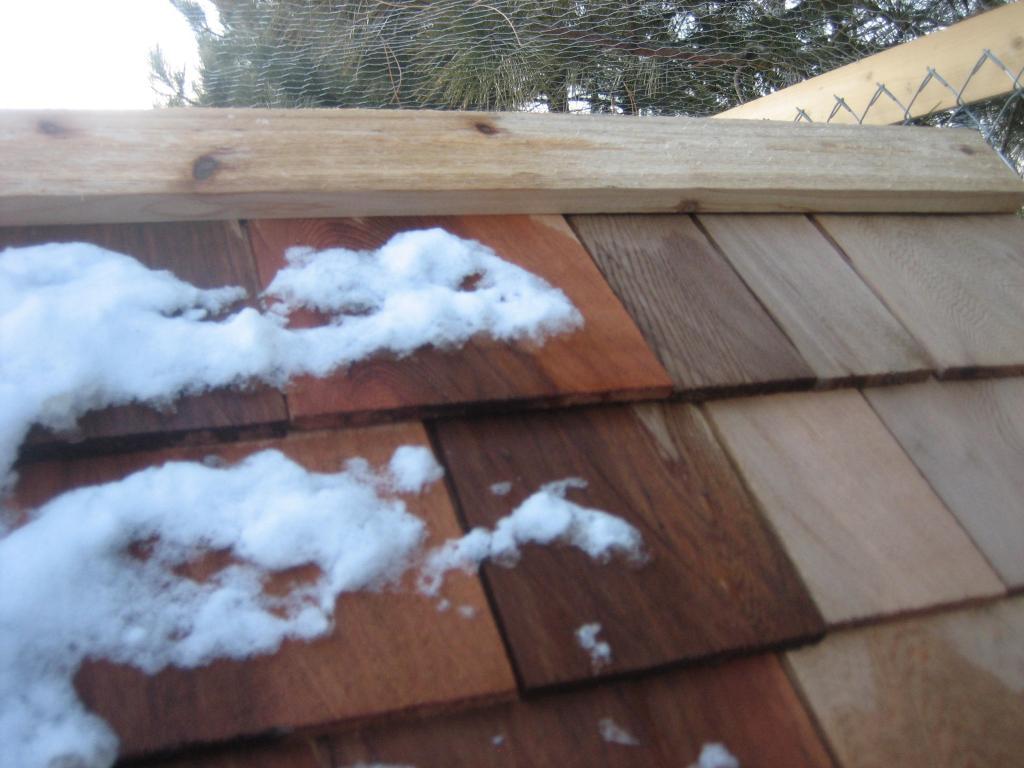
We capped the cedar shingle roof with two 1x4 cedar boards. Both were cut at about 50* so they but up nicely to the irregular (grr) angled roof. Then we screwed them together and sealed the gap with glue. Perfect!
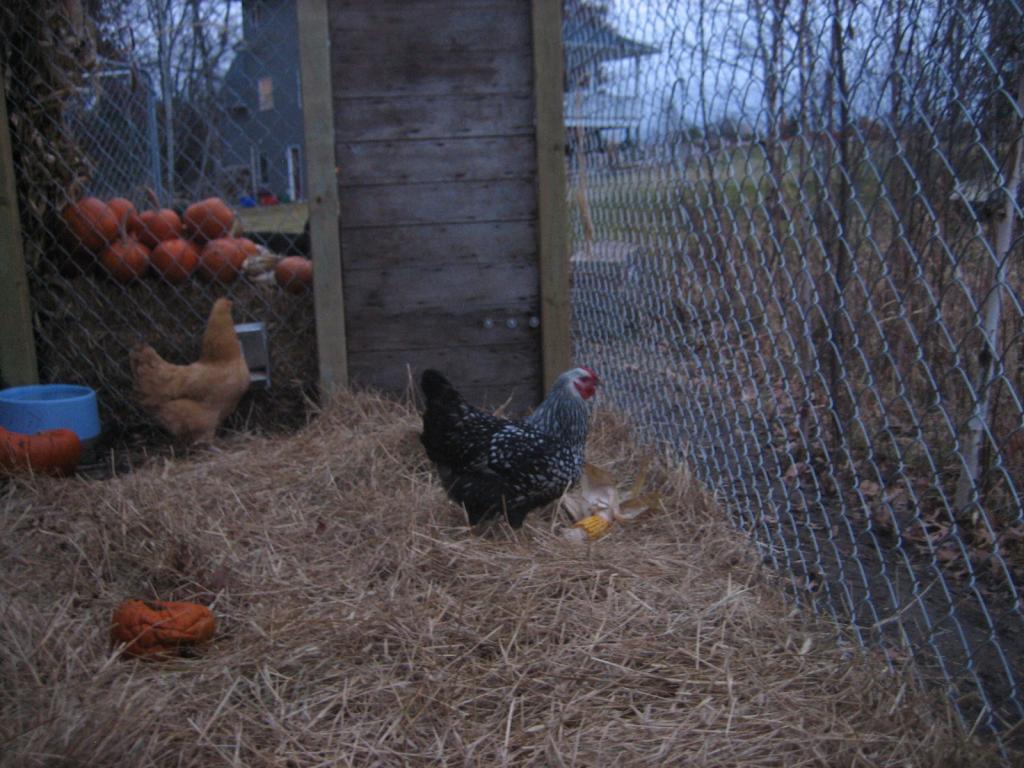
The view from inside the run. In the foreground is my hen (hehe. They are getting so old! I can't believe I have hens) Luna, a wyandotte. In the background is Daisy my buff orpington. I am using a heated pet bowl for water in the winter because we already had one. It works great so far, but it has also been unusually warm. So who knows. That's 6ft chain link that surrounds the run. We stapled chicken wire to the top as well. And, of course, that is my beloved barn door (from the back, so it looks a little ugly). It is one of my favorite thing about the coop/run!
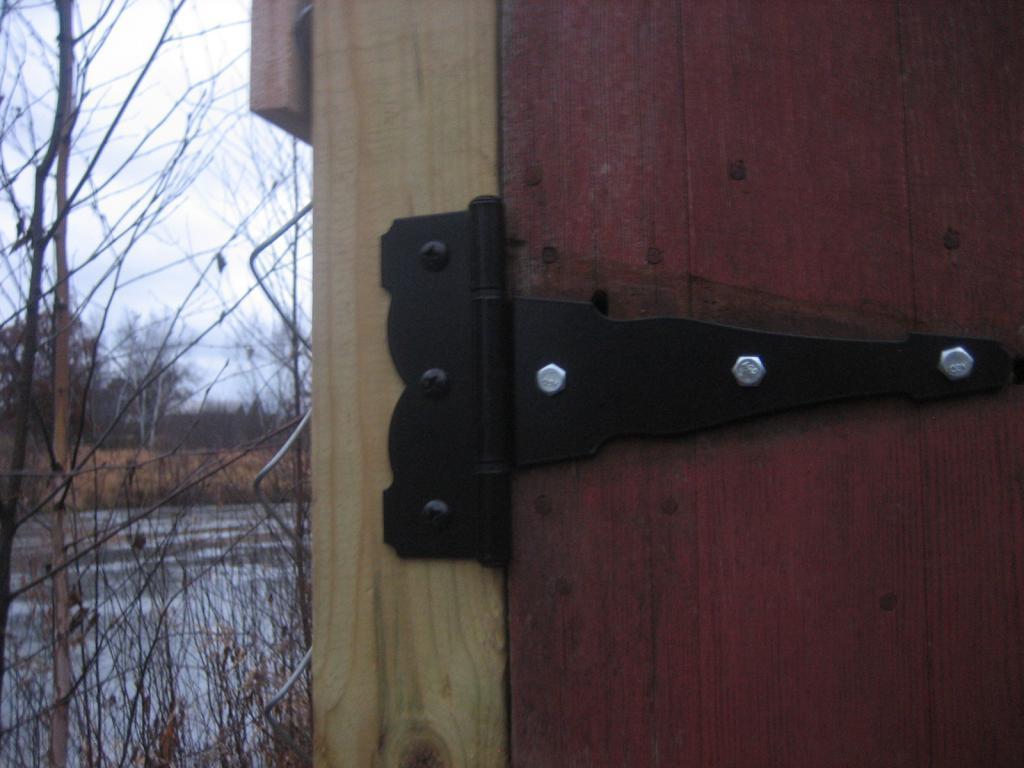
The hinges I got from home depot. They came with the black screws, but on the door, we subbed in bolts. That door is as heavy as it is amazing! I recommend the hinges, they weren't terribly expensive and so far (they've been in a month) work really nicely and smoothly. Even with an insanely heavy barn door!
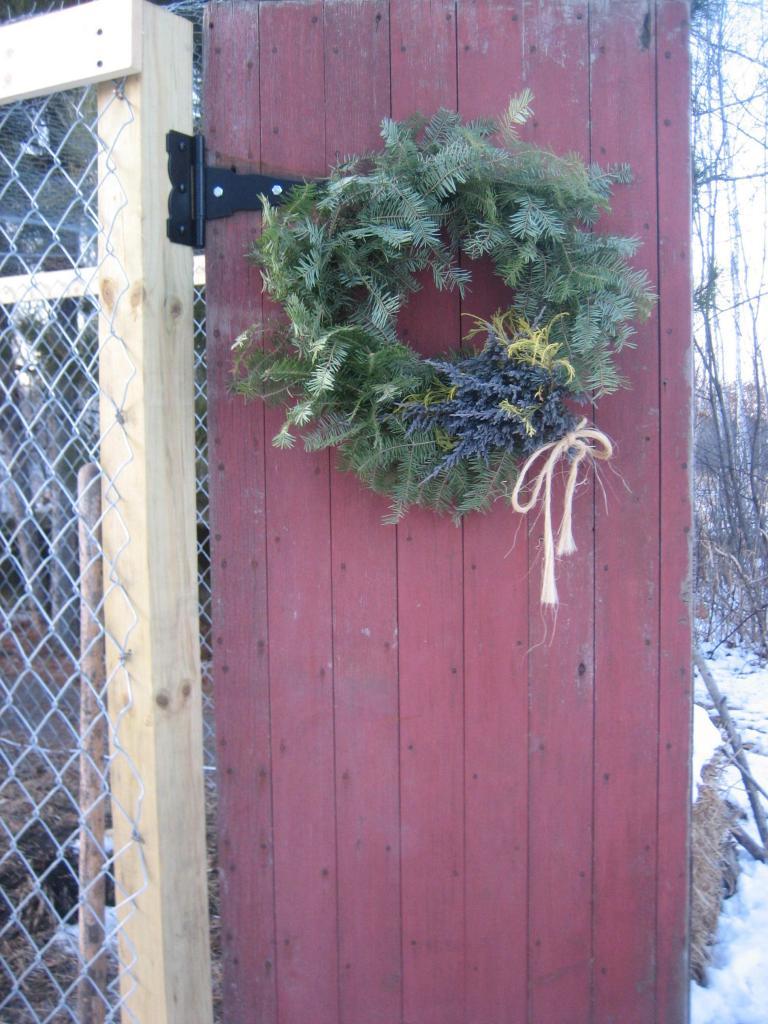
And the barn door with wreath! The ladies wanted decoration, and I figured if I'm going out there 2+ times a day, I want it to be cheery
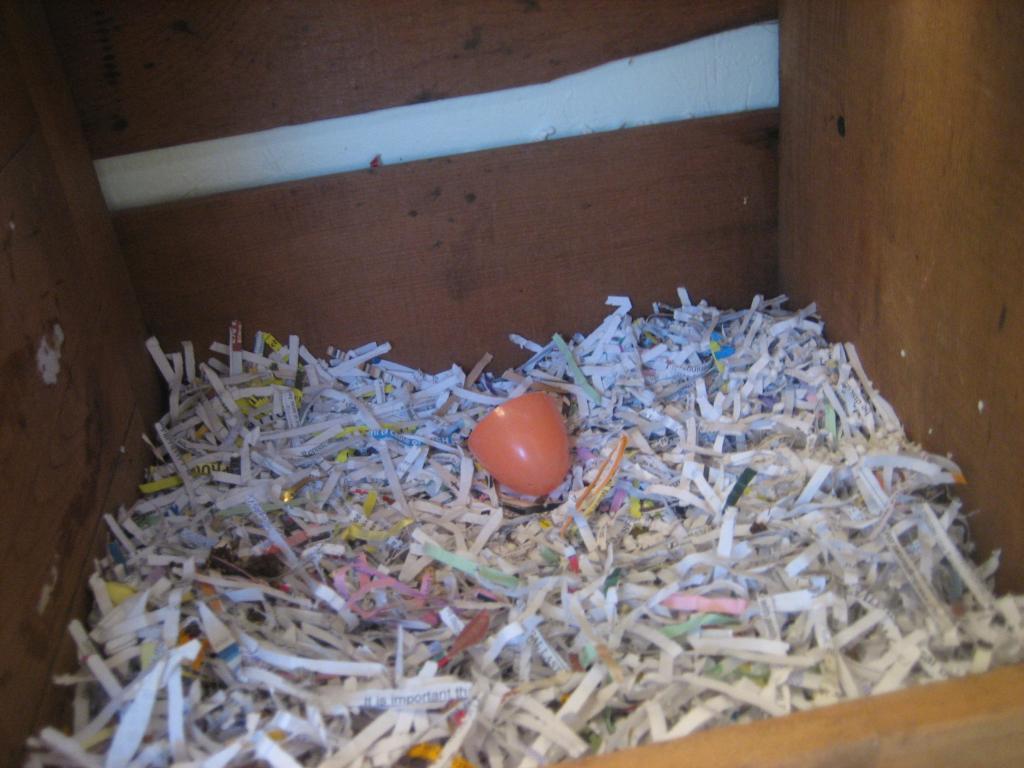
The nest box that actually gets used by Luna. The easter egg (there is another half somewhere...) is supposed to comfort Luna and guide her to lay here. Not really! While she is waiting to lay her egg, she passes the time by pecking it until it cracks open! Oh, well!
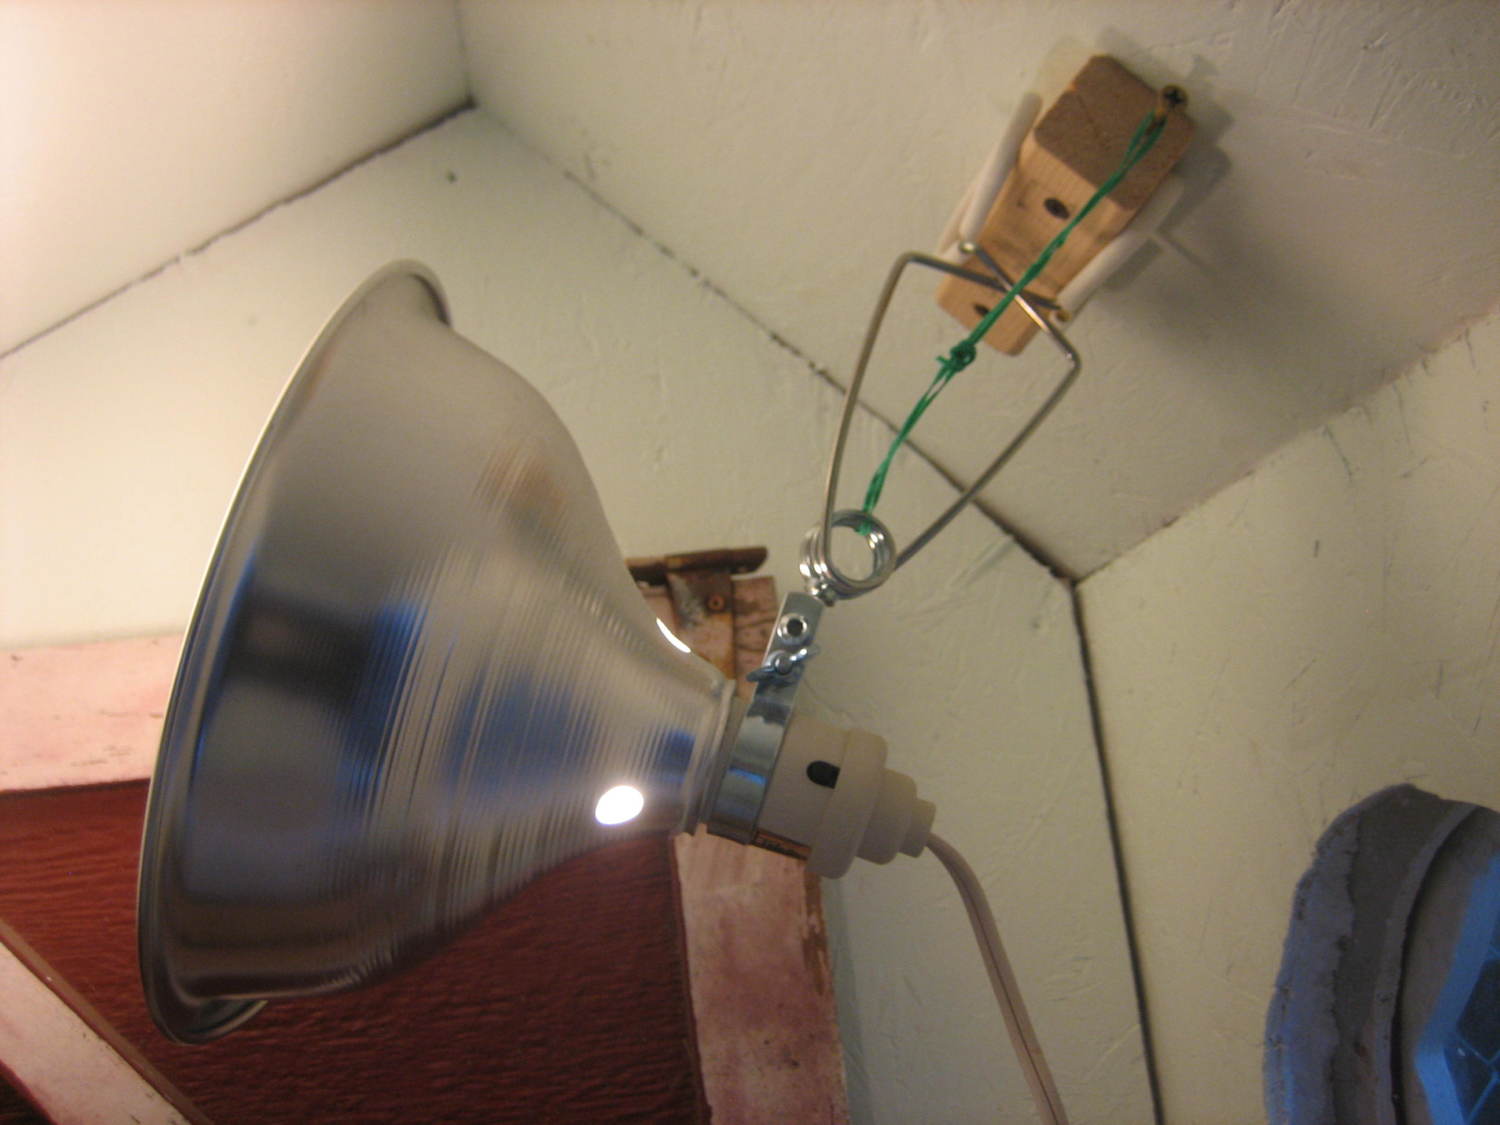
The heat/daylight light. I screwed a 2x2 to the wall and clamped it on. Easy! Then I got paranoid about burning down the coop if it fell... Hence the ugly green wire. This catches the light if it is pulled off the wood block. Don't judge it's looks, it has already worked! The first night I had it up, actually! Thank god I did!
The coop from the outside, decorated for fall! That concrete block is the current lock on the door. I can't find one I like yet!
More Pictures to come, once I find them!
The Ladies:
Luna was the first to lay. She layed her first egg nov. 6th, while they were still in their crappy kennel coop. I was sooo proud!
Barbie was the next to lay. She layed her first egg dec. 28th, in the new coop. on the floor. she refuses to lay in the box!
Paris layed her first egg! It was a rich, round egg found in the nest box on Jan. 5th!
Daisy finally is laying as of Jan. 20th! my last girl, I am so happy!
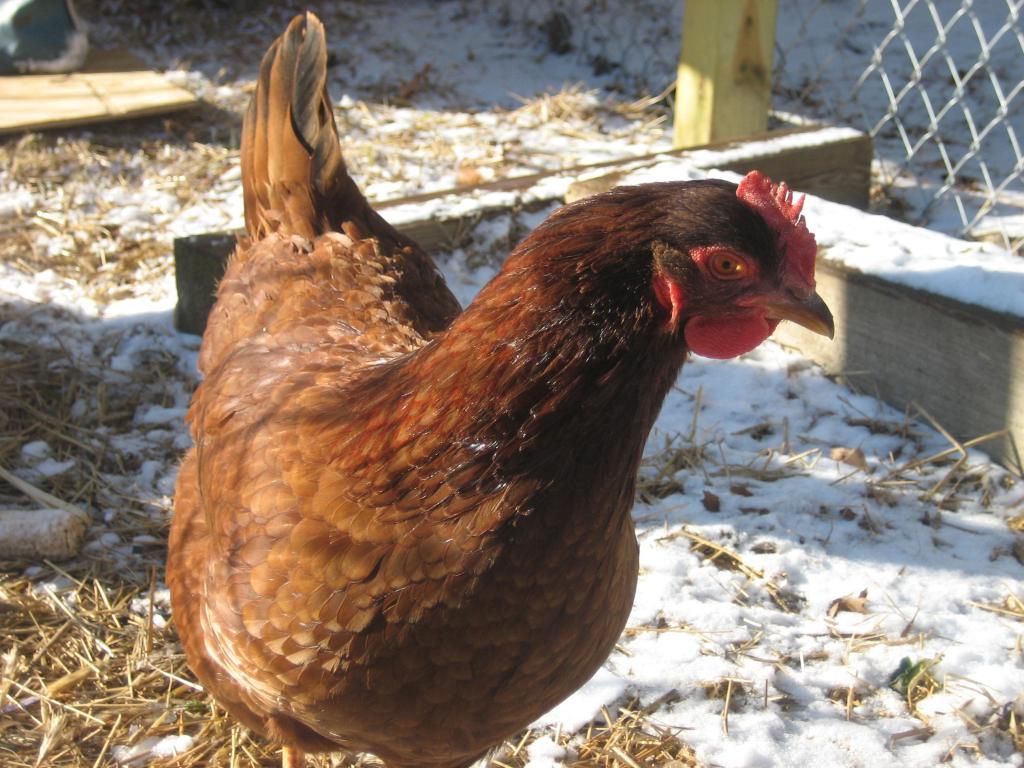
Paris! All grown up
NOTE: I LOVE, LOVE, LOVE MY LADIES. IF YOU ARE HESITANT ABOUT TAKING THE PLUNGE INTO KEEPING CHICKENS, JUST JUMP ALREADY! THEY ARE SO WORTH IT AND EVERYDAY I FEEL BLESSED I HAVE THEM!
Dimensions:
-Nest box: each box is about 10x12 and 12in high. Smaller than recommended but the girls all fit. Daisy is cerainly more snug, though!
-Overall coop: it started out as 48in x 48in and 52in high, but because of insulating, it is now 44in x 42in and 50in high. Just under recommended space for four hens. (I figure a little smaller space will be helpful in the winter anyway, to keep the body heat close.)
-Roost: 42in long, made of a 2in closet pole and sockets. It's about 1.5feet off the ground and 1foot from the wall.
-Run: 6ft by 18ft. It's just under 6ft tall. There are 6 posts, with the middle two being placed at 9 feet (center).
-Barn Door: 29inches by 70inches. Perfect height, although the width doesn't allow a wheelbarrow through. I'm ok with that though.
-Coop Door: (doubles as pop hole) 19in wide and 41in tall. Split in half, this makes a very large pop hole but that seems to work just fine.
-Windows: 11in diameter
-Run Posts: 8ft posts that are 4in thick. We sunk them 2feet. No concrete. I hope that holds up well. As we are about 6 feet from a pond, they are treated.
-Chain Link: 6ft, 50ft roll. We had about 3 feet of leftover. It was worth buying a new roll, though.
-Capping Boards on Run: 1x4 lumber. 10 feet long.
-Chicken Wire (on top of run): 4ft wide, 25ft rolls. We used about 2 rolls.
Keep in mind:
-I live in central minnesota, so it gets cold
-The closest thing to building a chicken coop I've done is a 6in model out of popsicle sticks (all- be- it a very good model
-I was extremely busy summer through fall so this wouldn't have had to take five months
-I live on three acres
-I let the ladies out to excercise/eat/poop about 3-4 times a week
-I positioned the coop door so that I can reach in and collect eggs, clean the coop, and use it as a pop door. All in one. That is the only opening, other than windows, on the coop.
-The coop+run is in a spot that gets lots of southern sun. Grass out front, pond to the west, pines to block wind on east side, and the coop wall without windows faces the cold, windy north-west side.
-I live in Minnesota and it's freezing!
What would I change?-Nest box: each box is about 10x12 and 12in high. Smaller than recommended but the girls all fit. Daisy is cerainly more snug, though!
-Overall coop: it started out as 48in x 48in and 52in high, but because of insulating, it is now 44in x 42in and 50in high. Just under recommended space for four hens. (I figure a little smaller space will be helpful in the winter anyway, to keep the body heat close.)
-Roost: 42in long, made of a 2in closet pole and sockets. It's about 1.5feet off the ground and 1foot from the wall.
-Run: 6ft by 18ft. It's just under 6ft tall. There are 6 posts, with the middle two being placed at 9 feet (center).
-Barn Door: 29inches by 70inches. Perfect height, although the width doesn't allow a wheelbarrow through. I'm ok with that though.
-Coop Door: (doubles as pop hole) 19in wide and 41in tall. Split in half, this makes a very large pop hole but that seems to work just fine.
-Windows: 11in diameter
-Run Posts: 8ft posts that are 4in thick. We sunk them 2feet. No concrete. I hope that holds up well. As we are about 6 feet from a pond, they are treated.
-Chain Link: 6ft, 50ft roll. We had about 3 feet of leftover. It was worth buying a new roll, though.
-Capping Boards on Run: 1x4 lumber. 10 feet long.
-Chicken Wire (on top of run): 4ft wide, 25ft rolls. We used about 2 rolls.
Keep in mind:
-I live in central minnesota, so it gets cold
-The closest thing to building a chicken coop I've done is a 6in model out of popsicle sticks (all- be- it a very good model
-I was extremely busy summer through fall so this wouldn't have had to take five months
-I live on three acres
-I let the ladies out to excercise/eat/poop about 3-4 times a week
-I positioned the coop door so that I can reach in and collect eggs, clean the coop, and use it as a pop door. All in one. That is the only opening, other than windows, on the coop.
-The coop+run is in a spot that gets lots of southern sun. Grass out front, pond to the west, pines to block wind on east side, and the coop wall without windows faces the cold, windy north-west side.
-I live in Minnesota and it's freezing!
Not much. It was a pain in the butt accomadating the off-kilter playhouse, but I'm not sure me and my novice father could have handled starting from scratch.
-not chain link? It is tricky to staple down using standard fence staples. I think I would have been equally/more happy with woven wire livestock fence.
-no circle windows! they are hard to fit glass/acrylic to. hard to trim. hard to cover insulation. I still haven't figured that out yet!
-position the roost 16+ inches away from wall. I thought, "18 inches, no way!" Yes way, my girls are a little pinched. Well, their tailfeathers are!
-but mostly, DON'T USE BUILDINGS NOT BASED ON STANDARD MEASUREMENTS OR AREN'T LEVEL/SQUARE. Lots of headaches because the playhouse was so off. A lot.
-the door is a little big for these cold winter days. it allows a lot of heat escape!