The Farm At Whippoorwill Creek
Glen, Mississippi.
Main barn and coop page.
New, updated pictures coming soon!
Glen, Mississippi.
Main barn and coop page.
New, updated pictures coming soon!
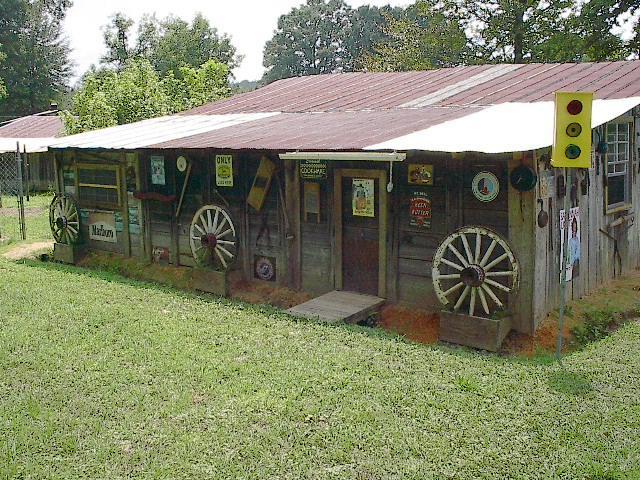
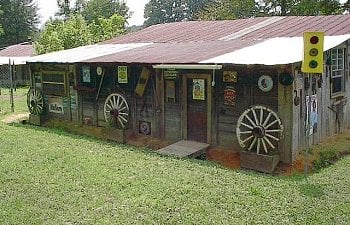
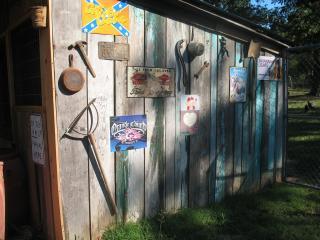
Here is a tour and the story of our main barn including the four chicken coops, two stables and feed room. It is roughly 32’ X 32’ and made out of at least 90% used and recycled materials. The building was originally built by my Grandfather around 40 or 45 years ago as an equipment shed to store plows, lumber and tractor parts. Over the years it had gradually became a place for everyone in the family to throw any junk that they didn't want to haul to the dump. When I bought the old family farm and started fixing everything up it was full of every kind of junk imaginable and on the verge of collapse. All the tin and most of the rafters on the side-shed was missing and several pieces of tin on the main roof had blown off in storms. It only had a complete wall on the west side (made out of old rusty metal billboard material) and had a dirt floor that had settled down and washed out on the east side that was lower than the outside pasture so that side of the barn was a muddy mess and it filled with water every time it rained.
My first step was to clear all the brush and weeds from around the barn and haul off all the junk and trash. Working every evening and on my days off it still took around a month to get all that finished. I hauled several truck loads to the landfill and several more to the scrap yard. Everything from old used transmissions and engine blocks, old car seats, rotten stacks of post and lumber, old appliances, rotted leather harness, broken furniture, broken concrete blocks and bricks, even several old burlap feed sacks full of black walnuts that had to be at least 20 years old! Next I tore out all of the old lumber, rafters and lathing that wasn't worth saving. I cut the good sections out of anything that I thought I might could use then burned the stuff that was too far gone to save.
Next I straightened and braced all the support post as best I could. The support poles are made of old railroad cross-ties and used telephone poles. I replaced what rafters, lathing and bracing that I had torn out with used lumber and scrounged up enough used tin to recover the roof. I used several buckets of roofing tar and roofing patch on the seams in the tin and to fill all the old nail holes. I've started putting a coat of mobile home roofing coating on it to fill in any cracks or tiny holes I might have missed and as it’s light colored it should reflect the sunlight and help keep the barn from being so hot in the summertime.
I bought a dump truck load of local red sand from a sand pit just up the road and using a shovel and wheelbarrow I started filling in the low side of the barn and leveling the floors. I framed up the outside walls and covered them with old sawmill lumber that I salvaged from several other old buildings around the farm. I did buy a few treated 4” X 4” post along with some 1" X 2" lumber for trim, and used some 2” X 10” treated boards from an old porch I tore down to use on the walls at ground level to keep rot to a minimum. I then dug a drainage ditch around the perimeter of the building on both sides and the rear of the barn, shoveling the dirt back up against the barn, to turn any water away from the building. Over the past couple of years I've added a few flower boxes and other items to the outside of the barn, added rain gutter sections over some of the pop doors and built a little “bridge” over the ditch in front of the pop doors.
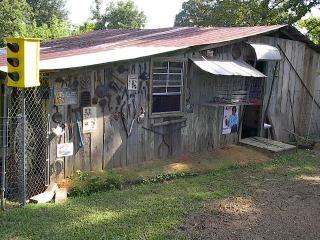
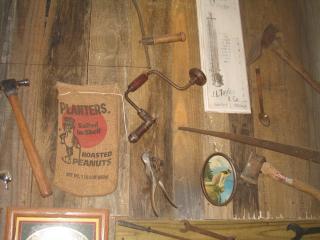
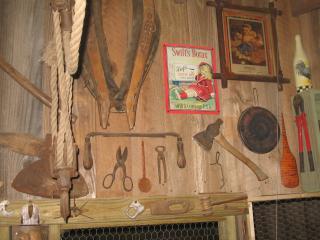
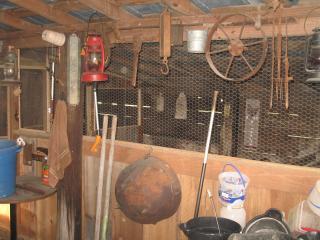
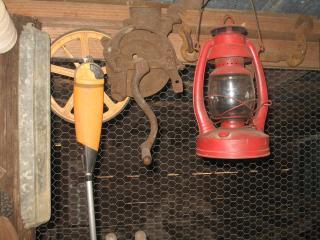
Several people have asked about all the junk hanging on the barn. It started years ago as I was cleaning up around the place. I would find an old wrench or tool, and just to get it out of the way, I hung them on the barn. After a while I started to like how it looked and just kept adding to the growing collection. It wasn't a planned thing, just one of those things that evolved over the years.
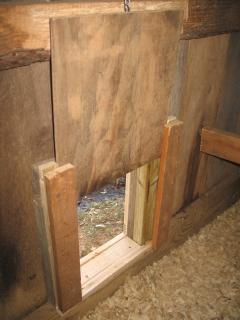
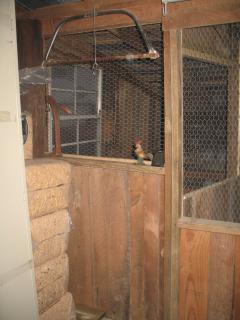
At this point I had a roof and four walls, the floor was dry and fairly level and I had everything around the barn drained and cleaned up. Next I installed an old door in the rear of the barn (This door faces the rear of our house, saves me walking all the way around the barn to get in. The door came from the old house I was raised in!) and built a small mud stoop in front of the door and hung an old set of buggy shafts above the door. After I covered the top of the buggy shafts with a piece of used tin I had a nice small awning over the door, I then installed a used window in the back wall and another in the west side wall for both light and ventilation. I built another window in the east wall and covered it with a heavy wire rack section I salvaged from a storage unit. I plan on adding a few more windows soon to add more natural light into the barn. Also on my project list is to build a welded wire door for a screen door at the back so I can use it during the summer months but still have the old wooden house door for wet, windy winter weather.
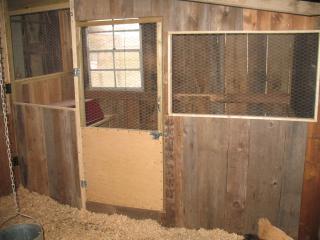
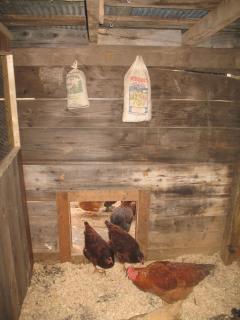
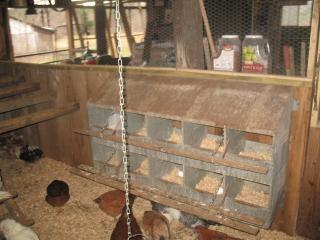
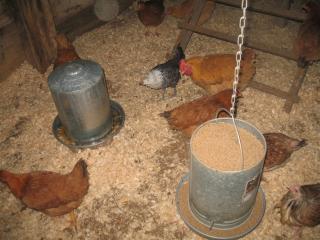
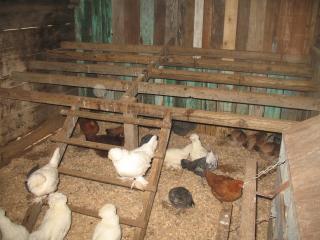
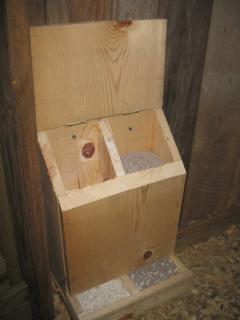
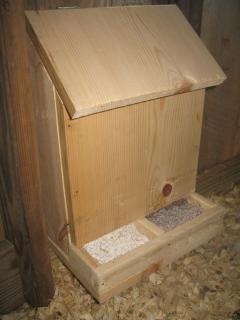
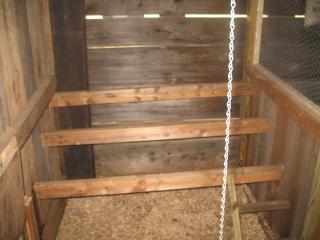
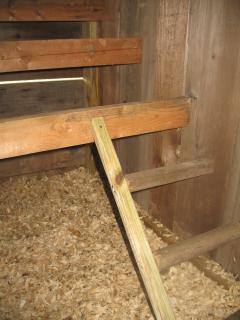
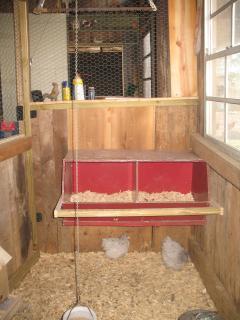
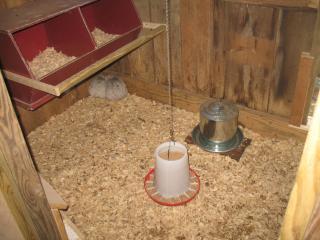
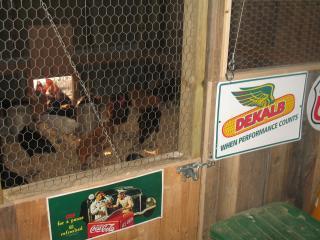
Next I framed up the interior walls making three long rooms to start. On the east side I divided it again into a small goat stable around 10’ X 10’ at the front and a chicken coop about 10’ X 22’ in the rear. The chicken coop interior wall I covered with chicken wire from the low ceiling down 3’ and the length of the chicken coop, the rest I covered with old barn lumber and trimmed out with 1’ X 2’ pine lumber. I built and installed an entry door that opens inward with a latch and self closing hinges on the chicken coop and regular hinges and an outward opening door on the goat stable. I used small gauge steel cable, “S” hooks and plywood framed with 1’ X 2’ and 1’ X3’ lumber to make a pop door I can open from inside the barn. I built a set of roosting poles with old weathered treated 2” X 4” lumber (turned with the 2” side up) and added a ladder to help the chicks and smaller chickens make it up onto the roost using 2” X 4” and 2” X 2” deck rails. I built a self feeder out of 1” pine lumber divided into two compartments with a sloped hinged lid to prevent roosting for oyster shell and grit and mounted it on the wall. I hung a 12 pound galvanized feeder from a chain and eye hook in the ceiling at back height to the smallest chicken I would be housing in this chicken coop. I placed and leveled landscaping pavers on the floor and set a five gallon galvanized waterer on these to raise it up to the proper height for the chickens. I add more pavers during the year as the shavings get deeper to keep the waterer raised to the proper height. I covered the floor with pine wood shavings to the depth of around 2” and I add more shavings and rake and mix the shavings as needed during the year. I use a version of the deep litter method and usually only completely clean the chicken coop out about twice a year (Spring and fall). However, I do spot clean any wet spots or poop build up as needed weekly. It’s been dry and has very little smell. I added a set of old metal nest boxes that a friend had donated to the project and added our chickens.
Later I divided the big chicken coop by partitioning off the back 4’ X 10’ area to make a separate area for our splash Cochin bantams. I then added a pop door to the north wall so they had access to a pen of their own. The nest box in this coop is made of an old discarded corner bookcase turned on it's side with a small perch added to the front.
The main chicken coop houses all our larger growing birds during the spring and summer and we use it during the winter to house our flock of laying hens for eating egg sales.
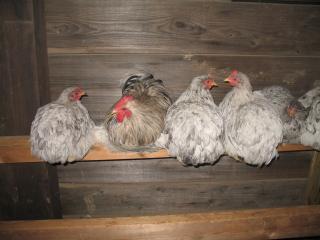
Next I divided the other side into 3 rooms about 10’ X 11’. The front room is a stable and the other 2 are chicken coops. I finished them with roost poles, nest boxes, feeders and waterers as I did the main chicken house. Currently one of these is housing our Whippoorwill Creek strain of spangled Russian Orloffs and the red shouldered Yokahamas and black East Indie ducks are in the other one. The nest box in one is made from old vegetable packing crates and the other has a nest box made from an extra section of kitchen cabinet I modified to work.
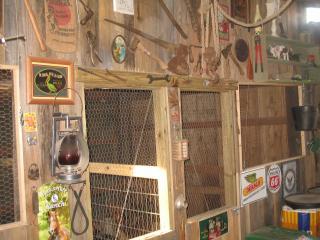

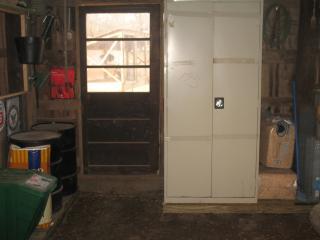
The center room I divided into a feed room that opens towards our home and a hallway that opens into the barn lot in front of the barn. We store most of our feed in metal and plastic barrels in the feed room with lids to protect it from mice and other vermin. I built a “Pallet" floor out of treated 2 X 4’s and treated decking lumber along three walls under the feed barrels, the big metal cabinet that I store medications and extra stuff in, the area we store bag feed and the area for shavings storage. The rest of the floors are all hard packed dirt floors.
We feed all our chicks 20% chick starter from hatch until they are around 3 months old. At that time we gradually switch them over to 15% starter/grower. At 5 months old we gradually switch them again to 16% laying pellets. When we are switching feeds we always gradually change by adding a bit more of the new feed to the old feed each day until we are totally changed over. It usually takes about two weeks to change feeds but they don’t get stressed by having it all change at once. Unlike some people, I pay more attention to the feed content tag than the name on the bag, so brands of feed change from time to time. Currently we are using Faithway and a local Co-op brand.
All our chickens are feed a bit of scratch grain every morning and every evening, less in the summer, more in the winter. We feed only non-medicated feed along with extra garden waste and a few kitchen scraps. They get grit free choice from hatch onward and oyster shell free choice once they start eating laying pellets. I separate any chicken that needs medicated to a quarantine coop I built out of an old kitchen table instead of treating the entire flock like some people do. I do not medicate unless I see a real problem as I think over-medicating and “blanket” medicating Isn't good for the chickens and builds up a resistance to the medications. I must say though, that we almost never medicate a chicken. I think I've medicated twice in the last 20 years, both times for just minor things they would have probably gotten over anyway. I have a cabinet in the feed room with all the common medications and such on hand, but truthfully, Blue-Cote is about the only one that ever gets used. Usually if one shows any sign of being ill, unthrifty or "off", it gets culled and life goes on. Nothing wrong with medicating, and if I had the need I would, but I prefer to raise healthy, disease resistant chicks myself.
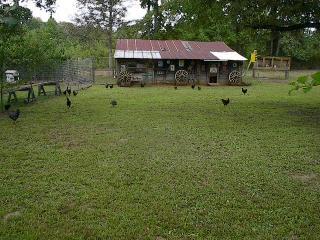
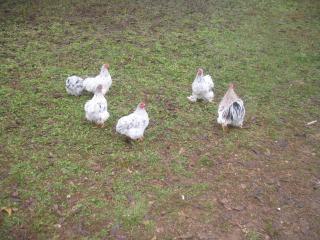
All our chickens have either large outdoor pens or are free range so they also get all the bugs, insects, grass seeds and other goodies that they can find.

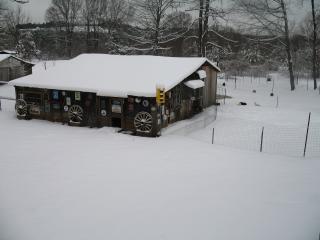
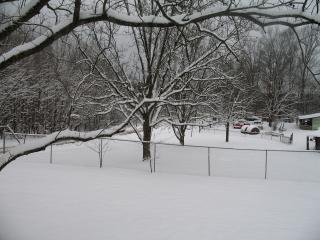
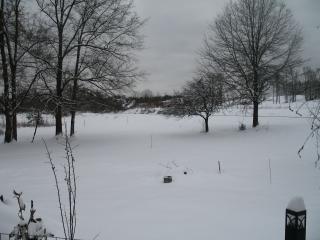
We do not heat or insulate any of our chicken coops or add any supplemental lighting in the winter and don’t even have electricity or running water in or near the barn. The hens will slow down or stop laying without extra lighting during the winter, but I look at it as God’s way of giving them and me a break. If I need to go to the barn after dark I use either a flashlight or a kerosene lantern. We do shut all the coops and houses up at night when I remember to and let them out each morning. We gather our eggs twice a day as we feed and water the flocks. For fertility we run on average one rooster to each five hens. All our breeding flocks are small, either a rooster and five hens or two roosters and ten hens. We keep more than one flock of some breeds to allow for genetic diversity. We keep records of how many eggs we get from each coop so we can average what each group of hens lay in any given year. We also record feed consumed, temperament, percent of eggs hatched from each clutch, notes on color, plumage, weight, broodiness and any other tid-bits that help us decide which lines to keep for future breeders. Besides our breeder flocks we usually have around a hundred chickens of various ages that we raise to sell locally and for table fowl. You can see in these pictures that even here in the deep south we get winter weather sometimes, but I have never lost a grown chicken to cold. In the summer temperatures can reach well over 100% with near a 100% humidity, and I've lost very few over the years to heat.
We compost all our animal's manure, used shavings, leaves, grass clippings and such and spread it on the garden every spring and fall. We do eat the eggs from the birds we raise and butcher and eat most of our culls. We sell eating eggs, hatching eggs, chicks, and started birds every spring, and extra roosters for meat birds the year around. There is very little waste on this farm.
I hope you can get some ideas from this and our other pages. Feel free to use any of the methods or ideas we have used, but remember - we all must find our own way. My methods work for me, but your mileage may vary.
My way of looking at raising chickens is this; It's not rocket science. Chickens have lived for thousands of years with no help from us humans. Give them the basics such as suitable housing, decent feed and clean water and they will do fine.
Also take a look at my "About Me" page to see more pictures and read a little more about the farm. The link is in my signature line. Thanks!