What do you get when you combine a Child's School House with a Chicken Coop?
Well, a Schoop of course!
")

After being the recipient of the neighbor's extra eggs over the past 18 months, and enjoying them immensely (my husband included), I was presented with a leverage opportunity this past winter...when said husband decided to renew his competitive bass fishing this coming season. Yes, that's correct, I said "leverage"....the conversation was fairly simple... "If you want to start fishing in tournaments again, I want chickens." Then he sputtered a bit, and realized that somehow he'd been bamboozled...but had no argument that I wasn't ready for.
I should also mention that my husband loves me, and eventually would have "caved"...but I believe having that fishing leverage made the difference between having chickens now vs. chickens in 5 years. HA!! So, the planner that I am, I began my research. First determining what chicken breeds I wanted to order from our grain store (we have horses/donkeys) so I've envied the new chick arrivals there every spring. I wanted friendly, low key,cold hardy chickens that would be good with kids (I have two sons 7 & 9), and easy for a novice chicken owner (me.) After lots of reading on temperaments, I settled on 2 Buff Orpington's, 2 Black Astralorp's and 2 Araucauna's (yes, I know the Araucaunas don't quite fit the requirements but I wanted the colored eggs.) We were slated to get them in two installments based on the hatchery's hatching schedule. 4 on April 19th, and 2 on April 26th. It was late March, I felt that we were in good shape.
I began searching for a used kid's playhouse to buy and convert. Searching with no luck. Either they were totally dilapidated, very expensive, too small or located too far away. I think I was naive. And I now believe my neighbor's hit the jackpot when they found theirs. So I switched my train of thinking to one of building a coop that looked like a playhouse instead. I bought a book with some chicken coop plans in it, but again wasn't overly excited about the "looks" of them. Then I found the BYC site, specifically the coop section and felt like a kid in a candy store! So many ideas to choose from. I started drawing up plans, picking my favorite aspects from each photo I looked at and combining them to create the look and functionality I was hoping for. What I didn't take into account, was that building from scratch was going to take a lot longer than we had planned. My husband is very handy, but he owns his own business of which the busy season starts in the spring and runs through the summer. That was going to put a serious crimp in my "building a chicken coop from scratch" plans. Meanwhile, we were now in possession of the chicks (our original 6 plus 3 more unclaimed "leftovers" (2 Barred Plymouth Rocks and 1 White Plymouth Rock) that I couldn't help but bring home after seeing them sitting by themselves in the grain store's brooder (I experienced first hand the affliction that BYC members call "chicken math" even before I realized it had a name!) My panic level was starting to grow, as I witnessed how fast they were all growing. I knew by the stories I had read on the coop pages, that this coop building business was not a weekend project start to finish...that for some folks it took them months to complete. YIKES.
Enter into the equation, my casual stumble upon BYC member TheSpoiledChicken, and her post about Poop Boards. I was making notes about her great idea of using sweet PDZ on the poop boards, and as I was reading the thread, I noticed someone asked her about her own coop (which is a large, white, very cool rounded roof coop.) She graciously answered their questions, and mentioned that she bought it as a kit from a company out in Ohio called Little Cottage Co. It was enough to peak my interest, so I followed the link. BINGO! Guess what Little Cottage Co. makes?! Yep, sheds, chicken coops AND children's playhouses!
Their chicken coops were nice, but wasn't what I was looking for, however I couldn't click on the pictures of their playhouses fast enough. A bunch of different styles...and all seriously high up on the cute meter. I emailed Trish (TheSpoiledChicken) to ask her if her experience was a good one with the company, and if she would recommend them. She kindly and quickly responded, telling me about her experience and recommended them highly. That night when my husband got home, I showed him the site, and said it might be the answer to what we were looking for (ok, yes...what I was looking for)...as well as solve our time constraint dilemma's as far as construction was concerned. Little Cottages offers DIY kits for their products...whereas they ship everything in flat packing, so that all that needs to be done is assemble it. The buyer is responsible for prepping the area, building a floor base, painting and roofing...but the main structure comes ready to assemble. with all trim work and hardware (including nails, screws, hinges etc.). We agreed that it was the right match for us. I showed him the structure that I liked, and felt that it offered the best ability for conversion to a coop, with the amenities I wanted to include. It was in the shape of a School House (complete with school bell on top!) It was offered in 3 sizes...we chose the smallest, which was 8 x 8, and had 6 operating windows (2 on each side, and 2 in front) and two doors (one front child's dutch door, and one rear adult dutch door.) The cost is not cheap (the one we selected was $1200), and shipping was an additional $250 (we live outside of Boston, MA.) But honestly, we could not have built it better ourselves for less, within the time it took us, and the result was perfect. We placed our order the 3rd week in May, and they shipped it in order for us to receive it the following week, on the Tuesday before Memorial Day...giving us the coming long weekend to assemble it.We realize that this is not an option for everyone, but it might serve as a great solution to those that find themselves in a similar situation to us; looking for something specific as far as design, and having some time constraints as far as construction from scratch. (A side note - they do offer their products for sale already assembled, and will ship it that way, but the cost is obviously more - for both the building, and for shipping - I believe they charge per mile etc.)
Below is our photo journal of the "construction" of our Schoop...
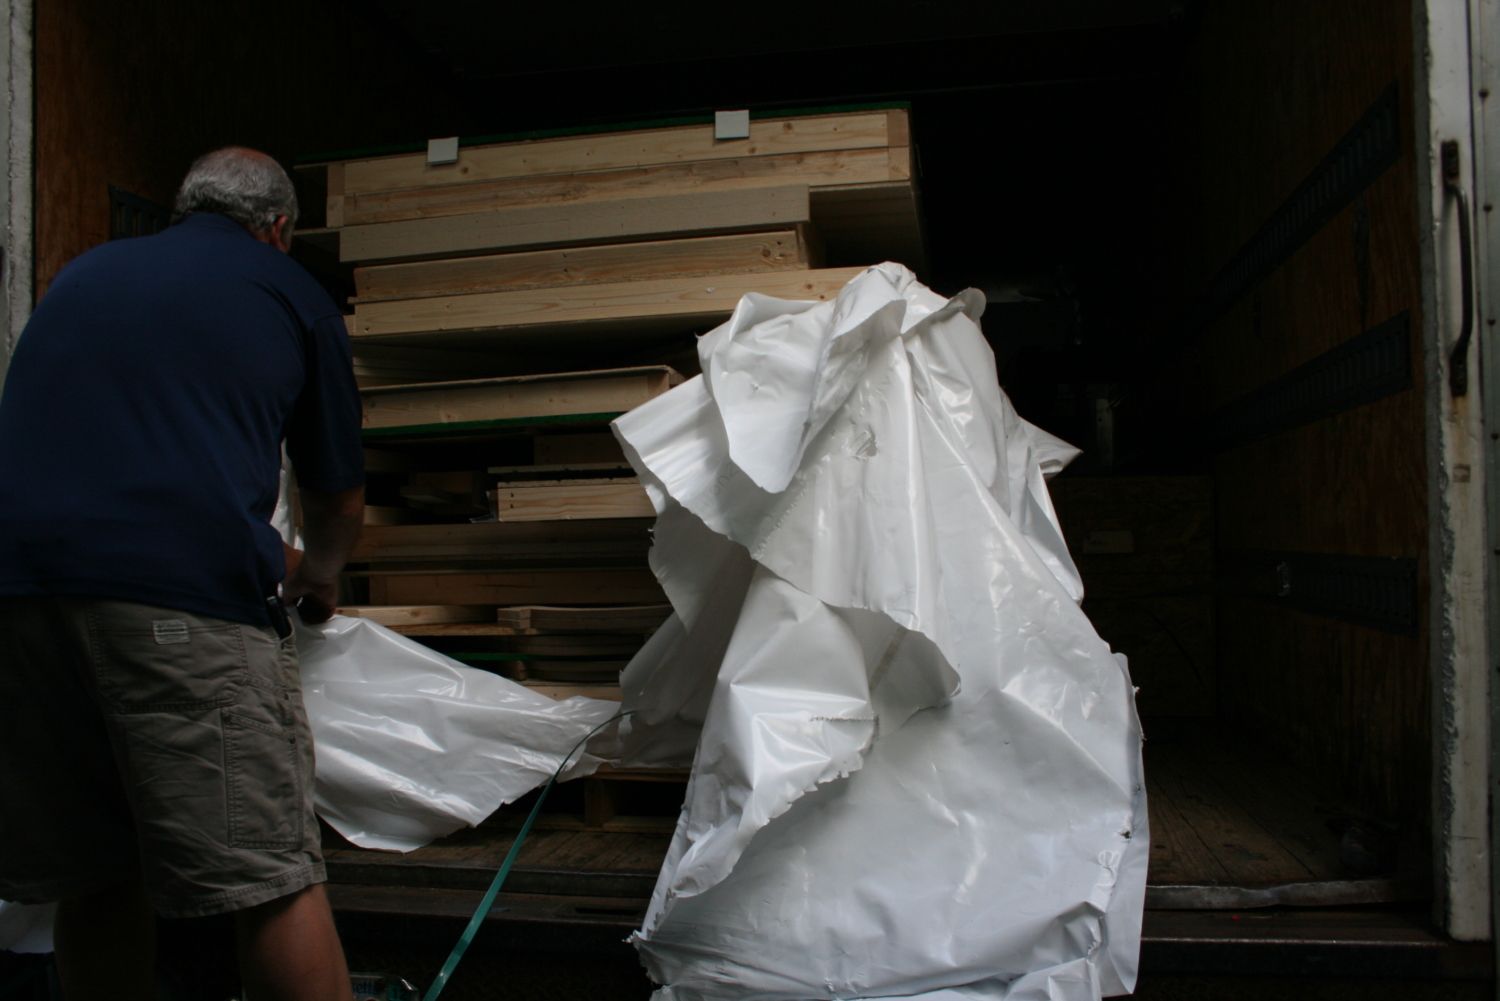
It began with the delivery. We had it sent to my husband's business, because we selected the drop shipment option, meaning that we had to be prepared to off load it ourselves (the shipping company requires two people be present to receive it.) Although I'm strong, I'm not that strong...and was home alone with the kids. My husband has equipment at work (a bobcat with forks) that made off loading it much easier, and then he brought it home in one of his box trucks, at which point we opened it up and off loaded it into the garage in pieces. Everything was on one pallet...and the cupola with school bell came in a separate wooden box. As I mentioned earlier, they do give other options for shipping.
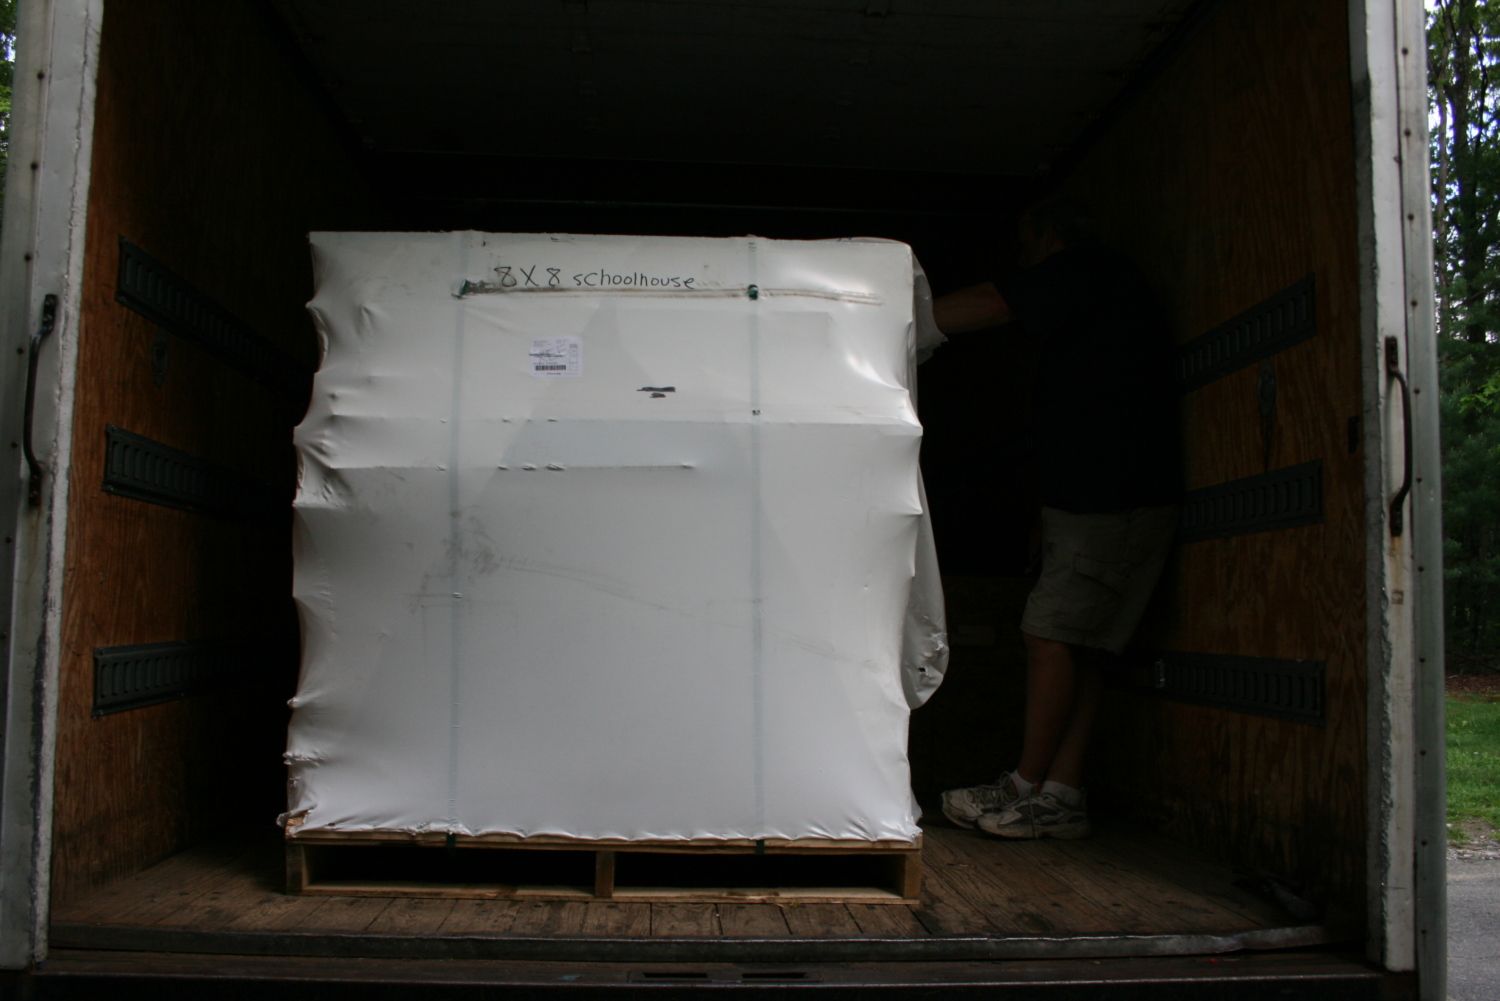
It was truly amazing how they fit it all on one pallet. The main structure was shipped in 4x4 sections. All the pieces came primed, and with windows already installed.
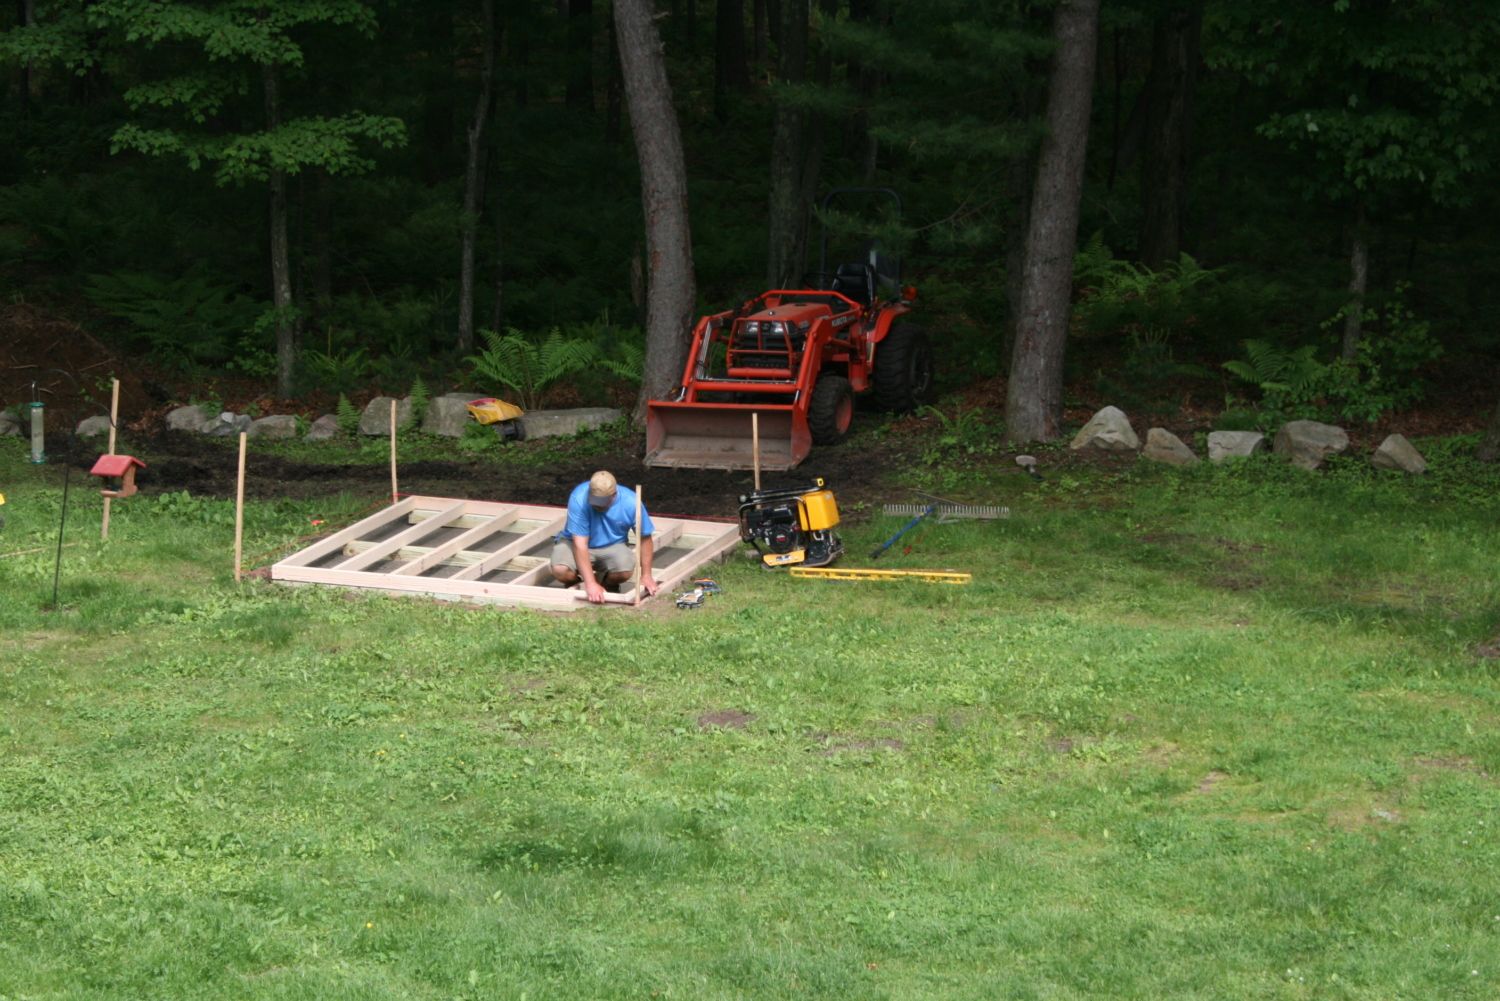
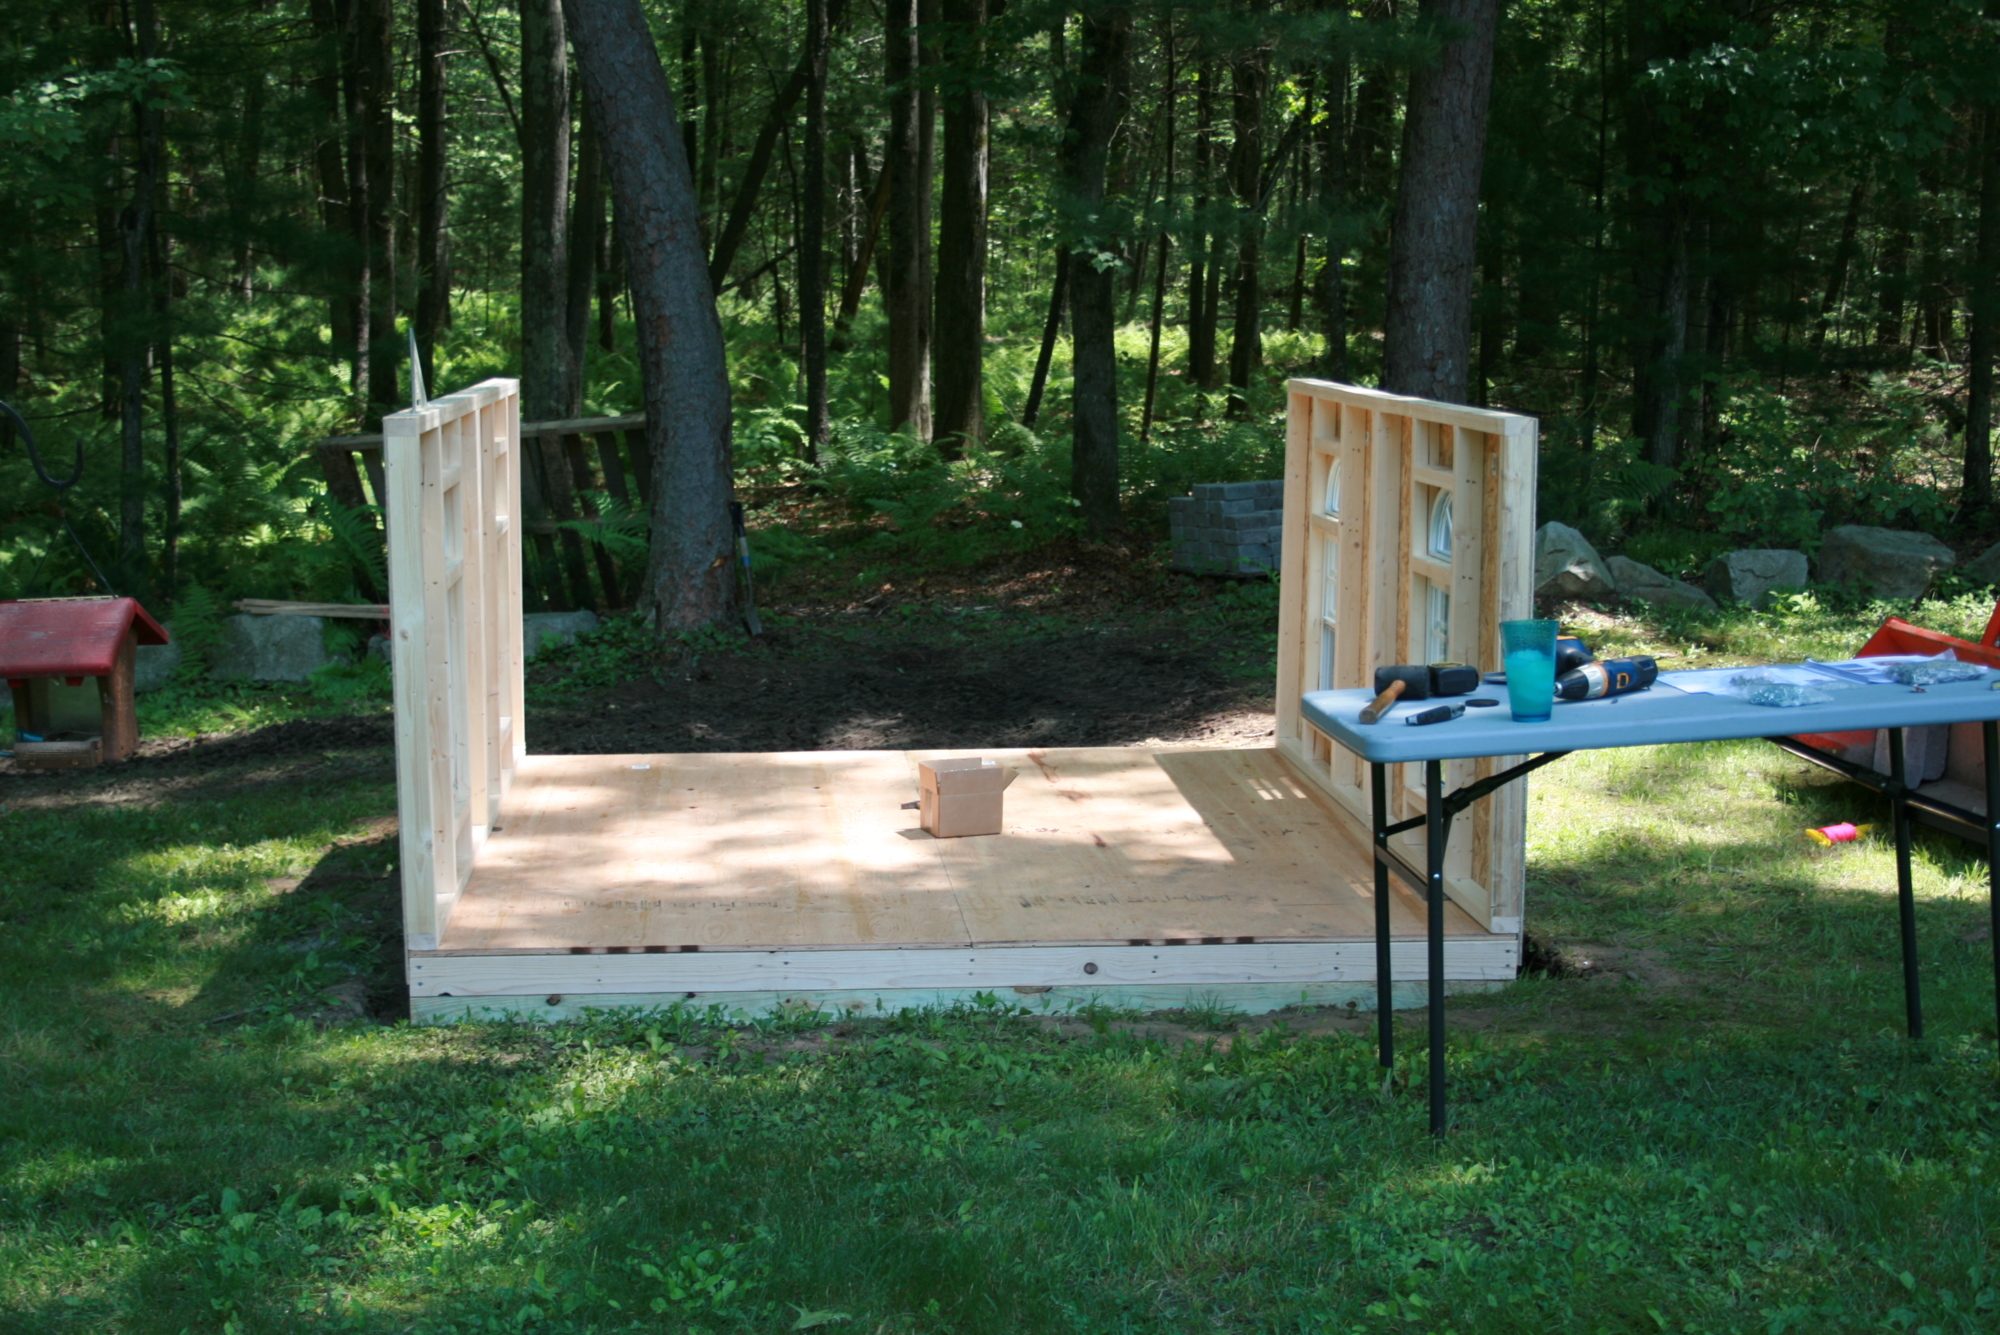
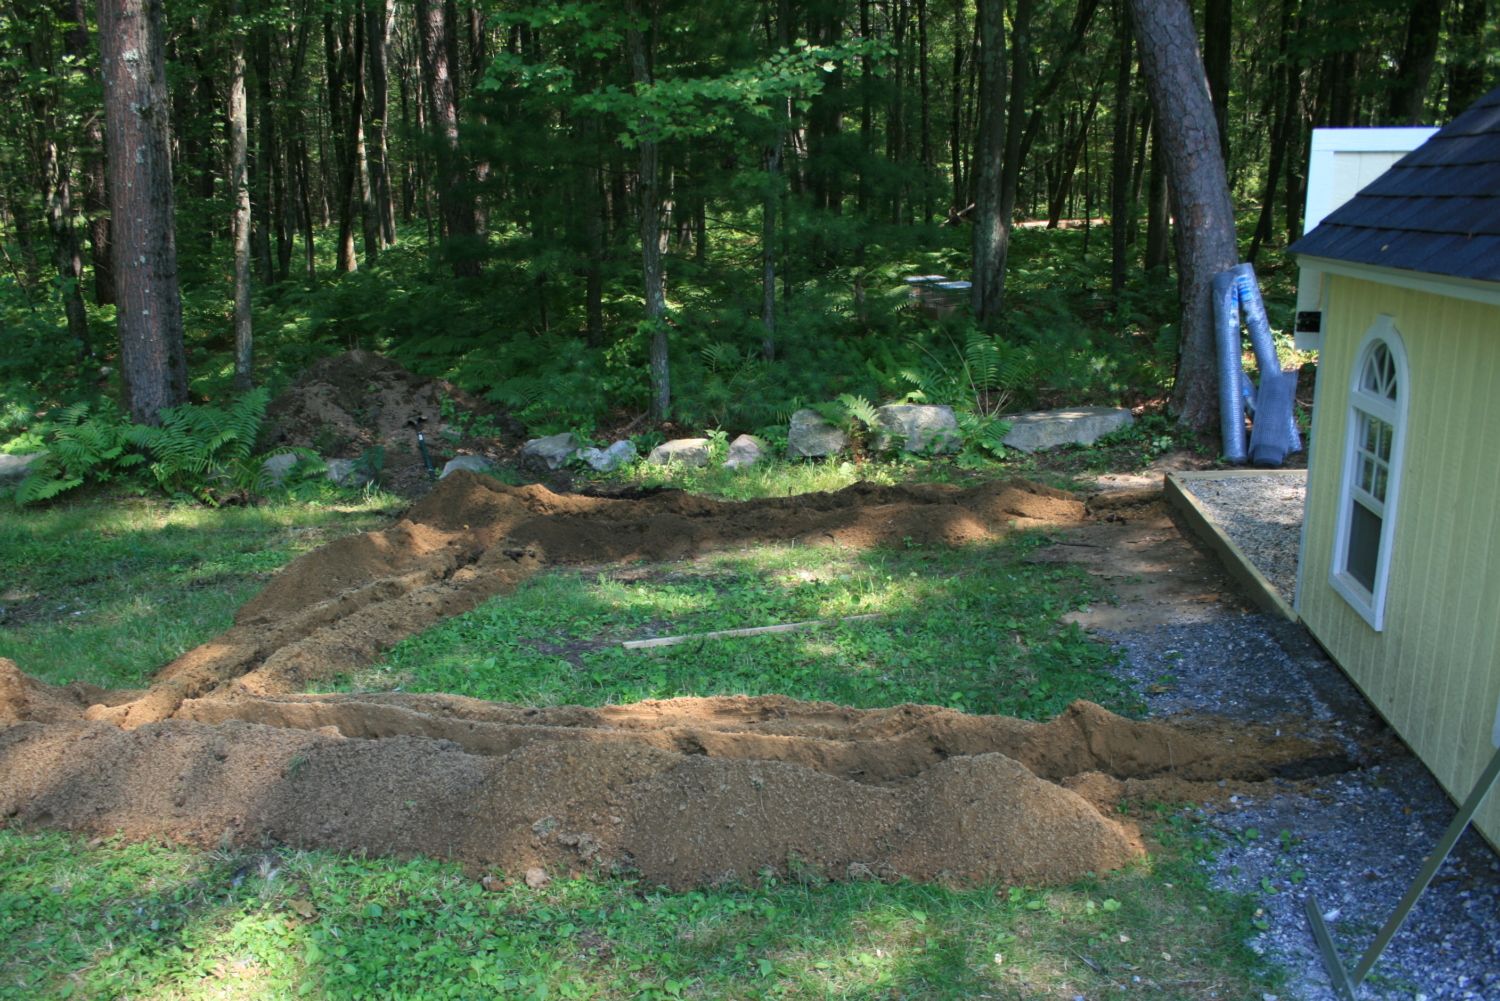
A few days before we received it, my husband had prepped the site by excavating a 9x9' area about 12 inches down, and then back-filled it with gravel. We chose the option of building the floor ourselves (the company will send you a prebuilt floor if you want to, but we wanted to save that additional cost.) We used pressure treated 2x6's to create an 8x8' base based on the requirements they sent.
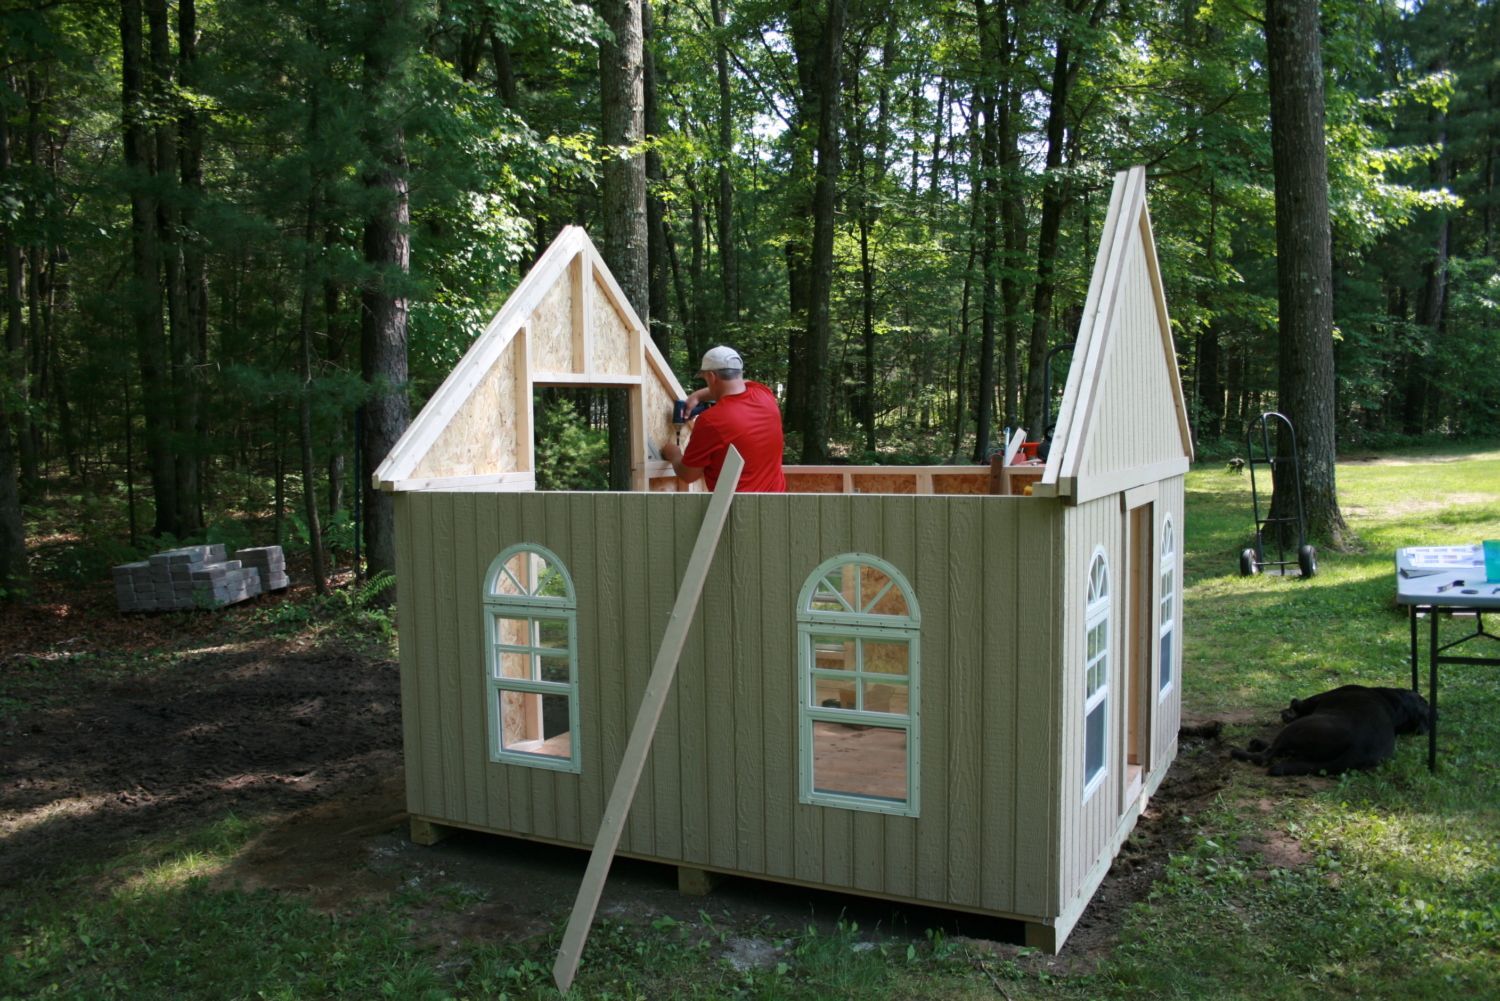
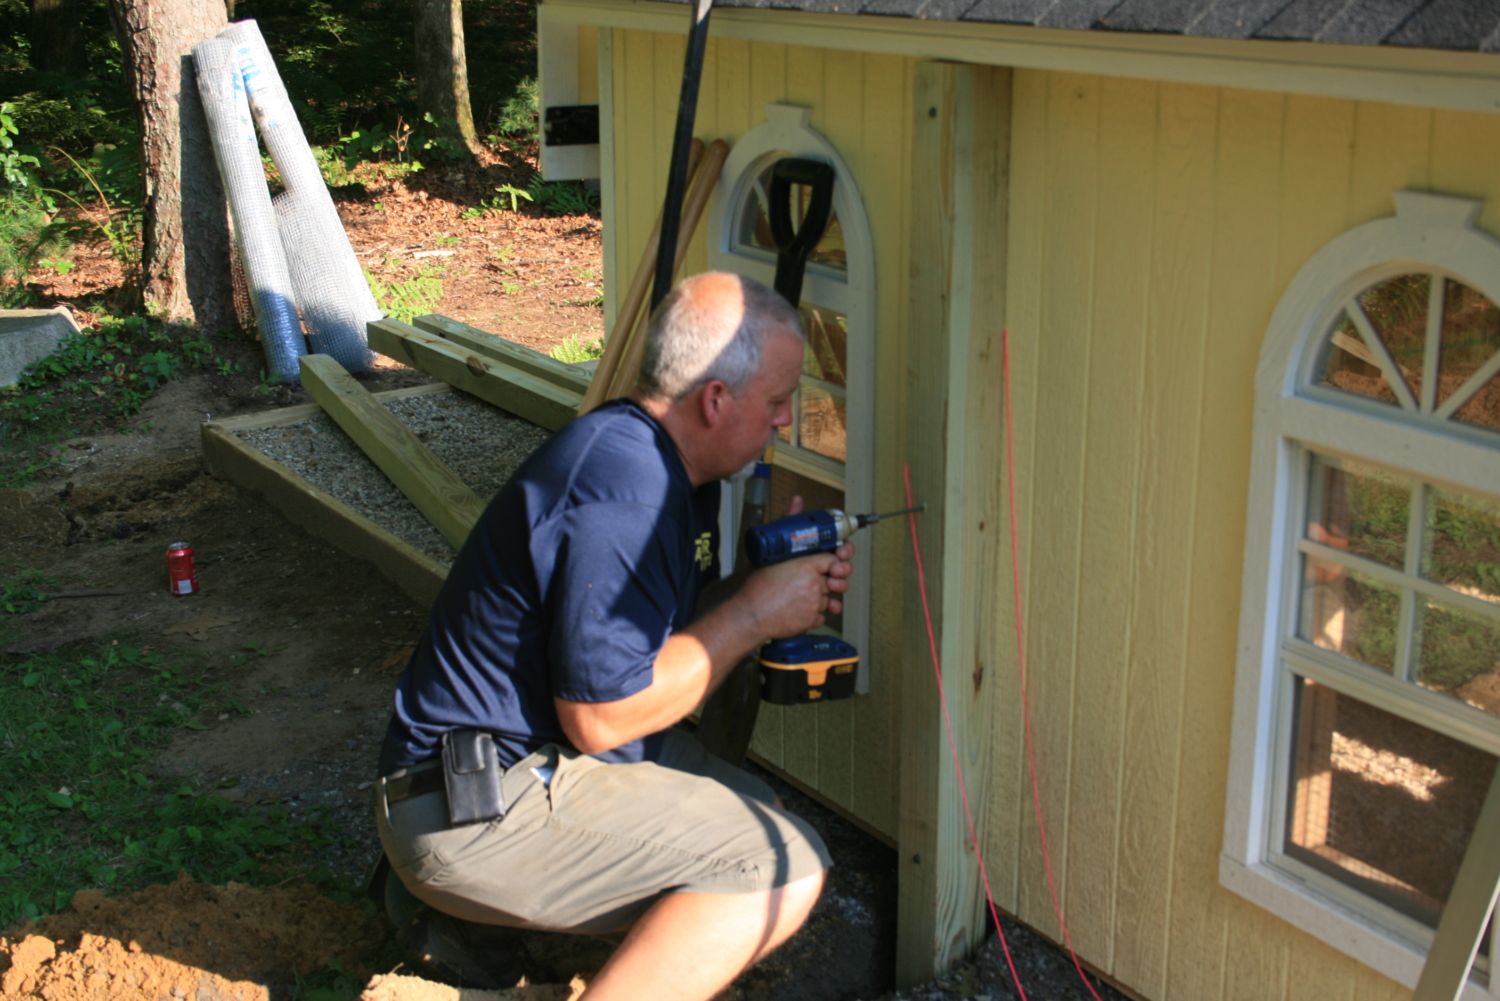
Bright and early on "assemble" day, we started. This was the first wall.
See how the windows were already previously installed by the company? The kit comes with very detailed but easy to read instructions (with step by step photos to clarify) which we followed. We had no difficulty doing the assembly, but are definitely experienced "do it yourself-ers". Folks with no construction/tool experience would probably benefit from having someone experienced with basic home handyman skills help them.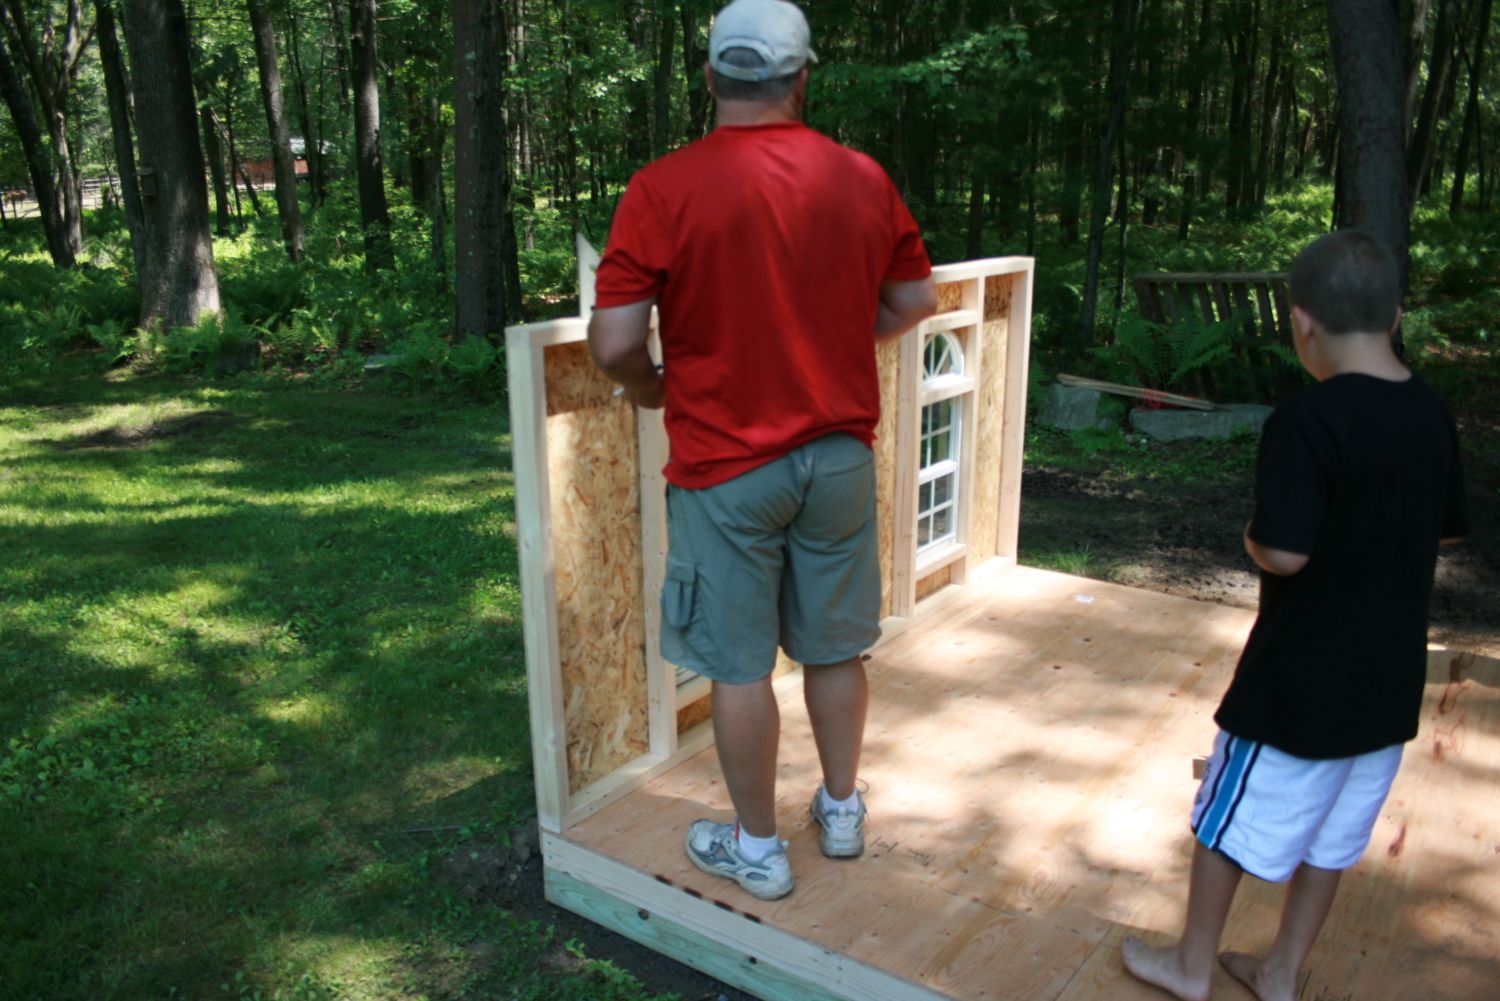
Second wall up.
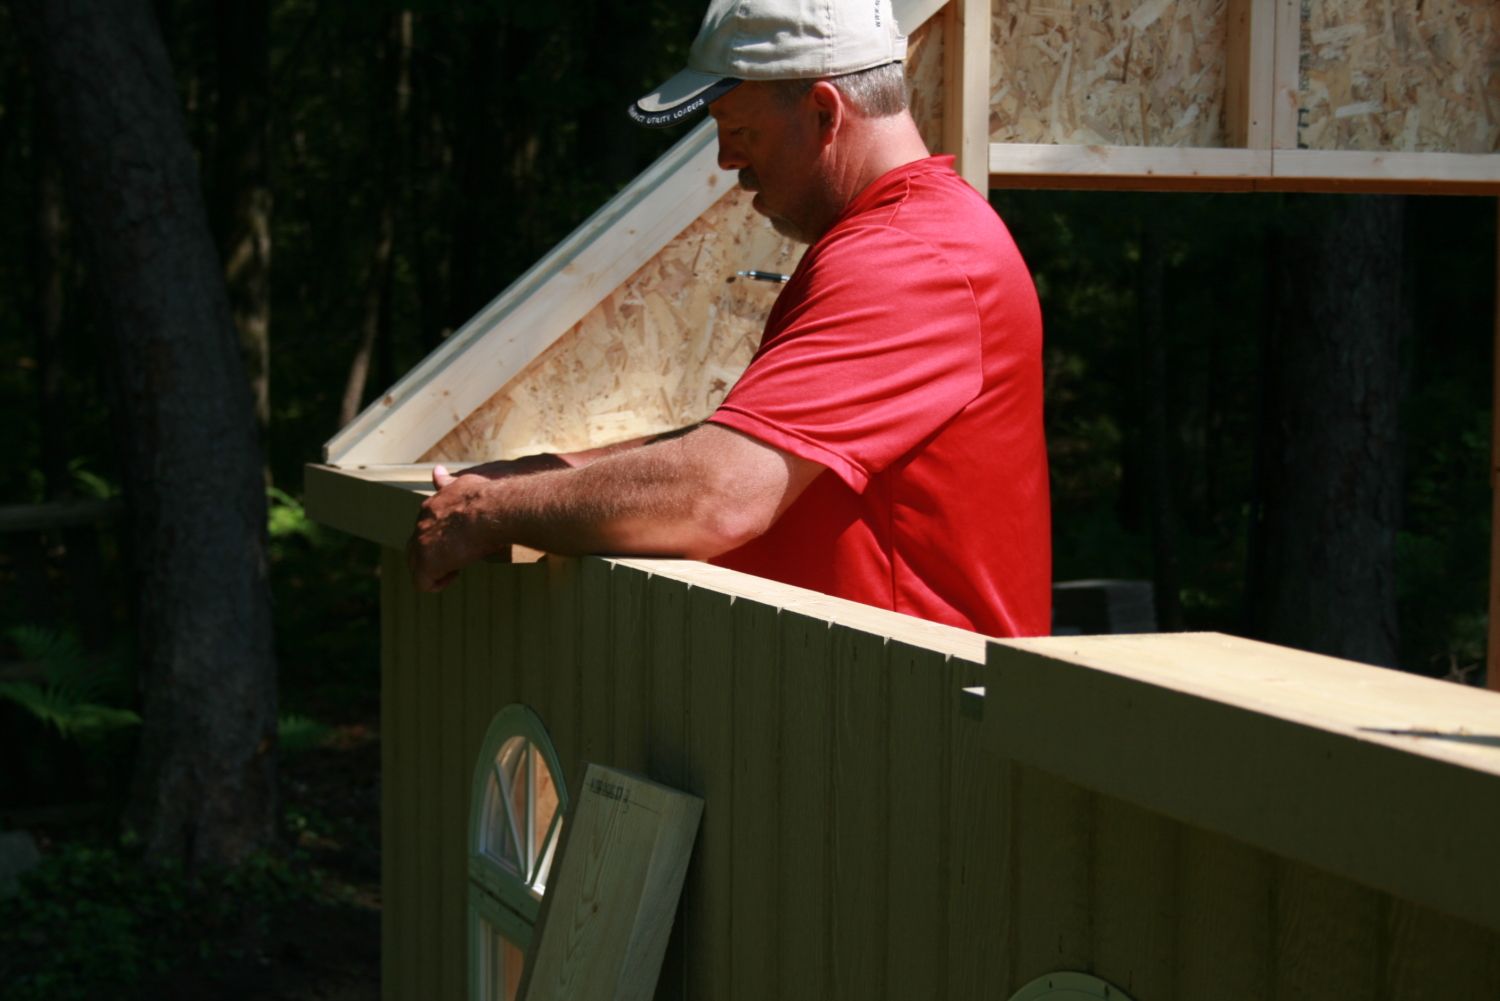
We had brought out all the panels, so that everything was convenient and we didn't have to run back and forth to the garage. Here he's getting one of the last two window panels for the front...

I should mention that each time, I was the person holding the panel in place (and offering counter pressure) while he used his hammer screw gun to secure the panels. This is not something that one person can do alone. On a separate note...don't you just LOVE the windows? I do. They make me smile.
There is a trim piece for over them that was installed later in the week, once I painted them. You can see them in the final pictures. All the windows work...they are miniature double hung windows, and come with screens.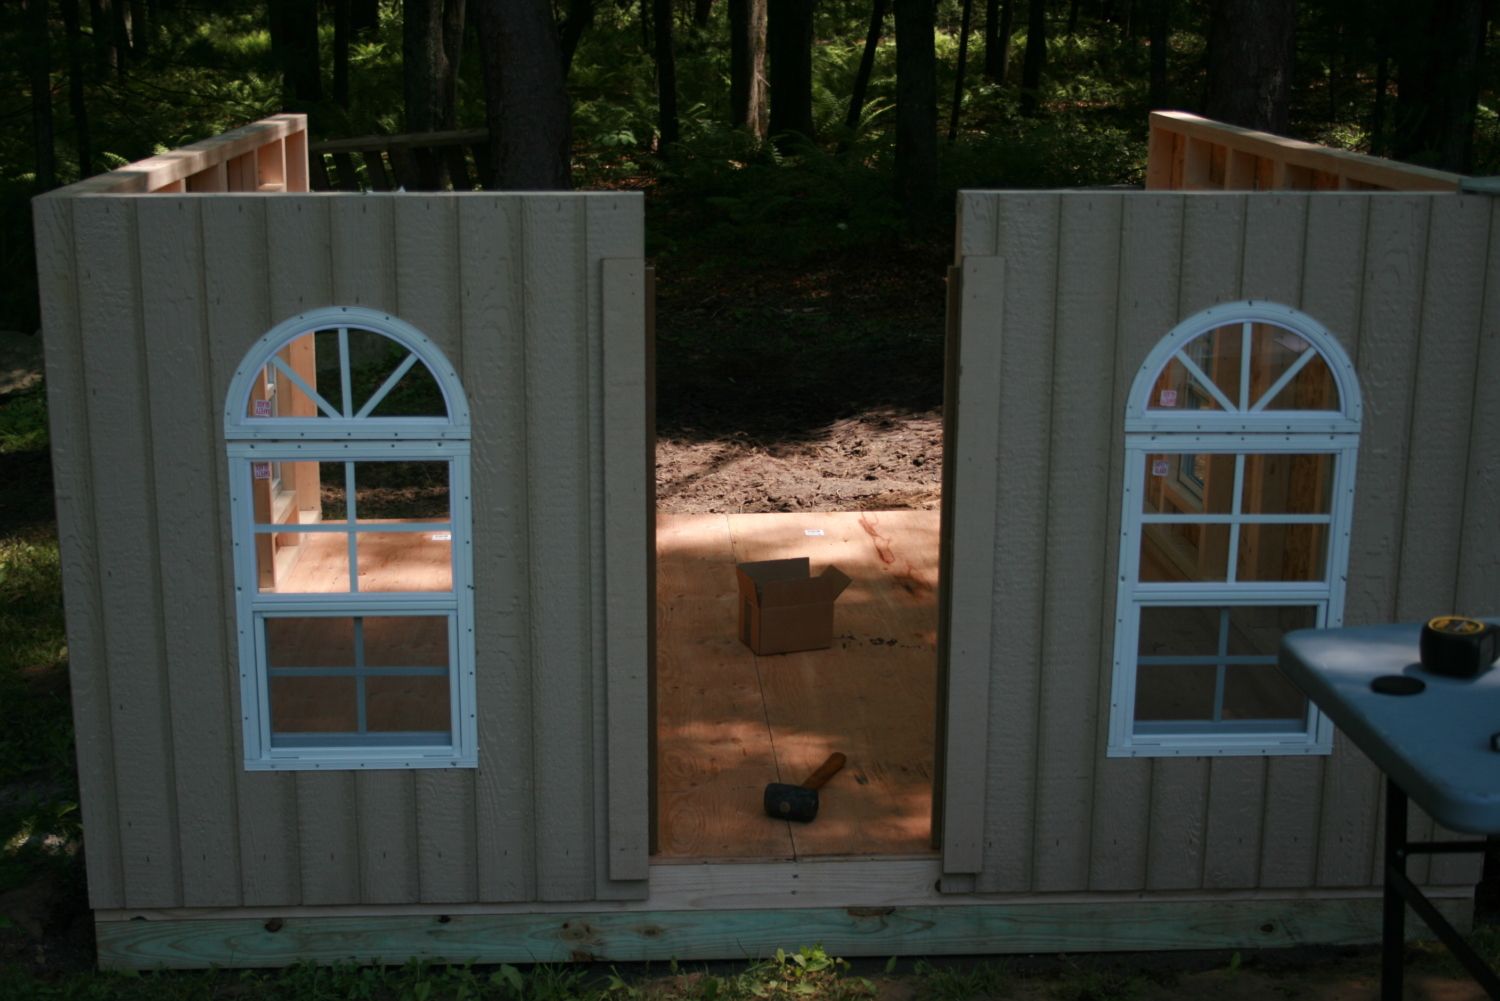
The back was on at this point (no windows back there, an adult dutch door gets mounted between those two sections. The front is being framed for the child size dutch door there. The door came already assembled in two pieces (top and bottom) and hinges were included. We just had to line them up and put spacers in to make sure they were level (so they would open properly) and screw in the hinges (that were included.) It did come with a manual wooden latch, but we opted to not use that one. We instead later purchased two gate latches, so that the doors were closed more securely, and gave us the option of opening the top, while leaving the bottom closed if we chose to do so.
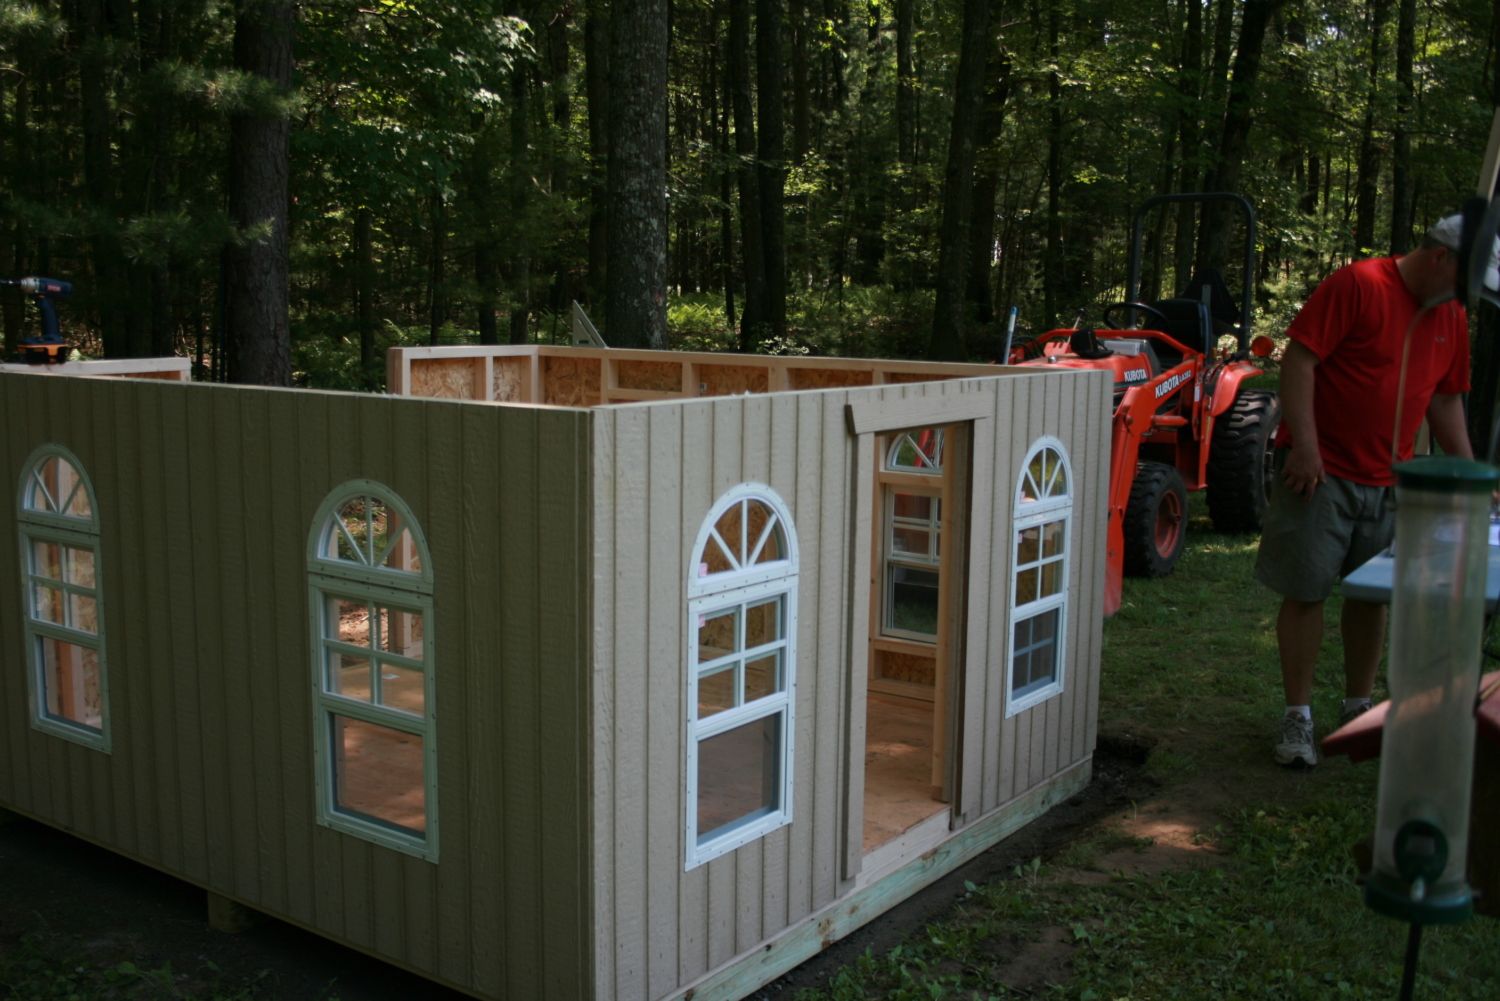
The front top fascia board is mounted in place....It's looking like a house!
Back one is now in place...next up prepping for the roof joists.
I love my husband's arms....eh, sorry...I got sidetracked.
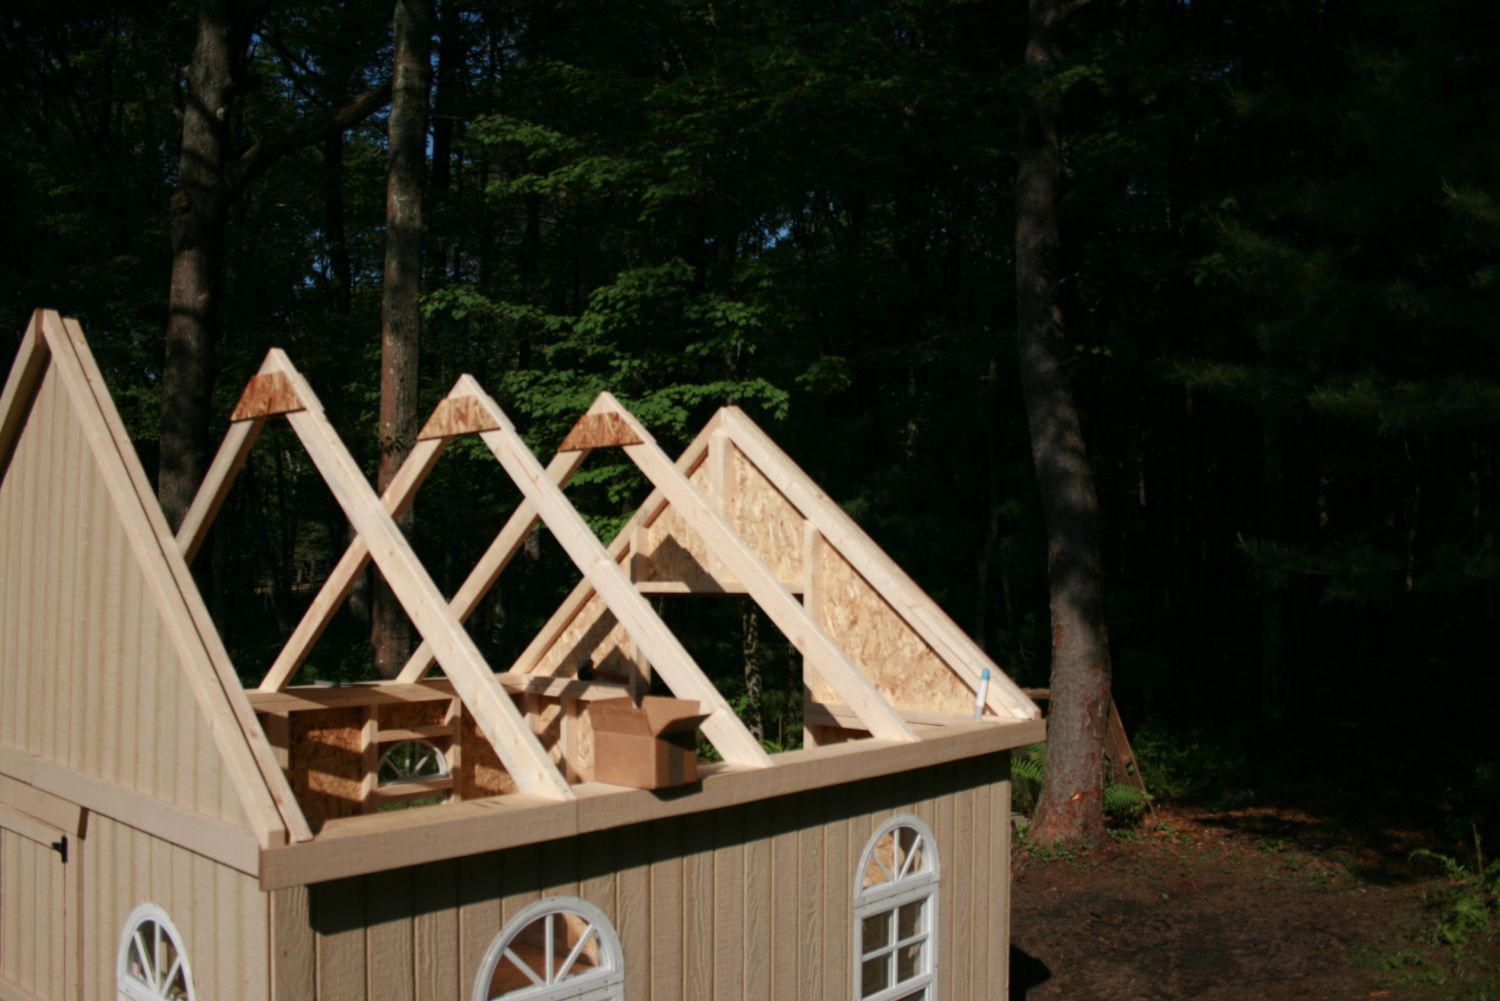
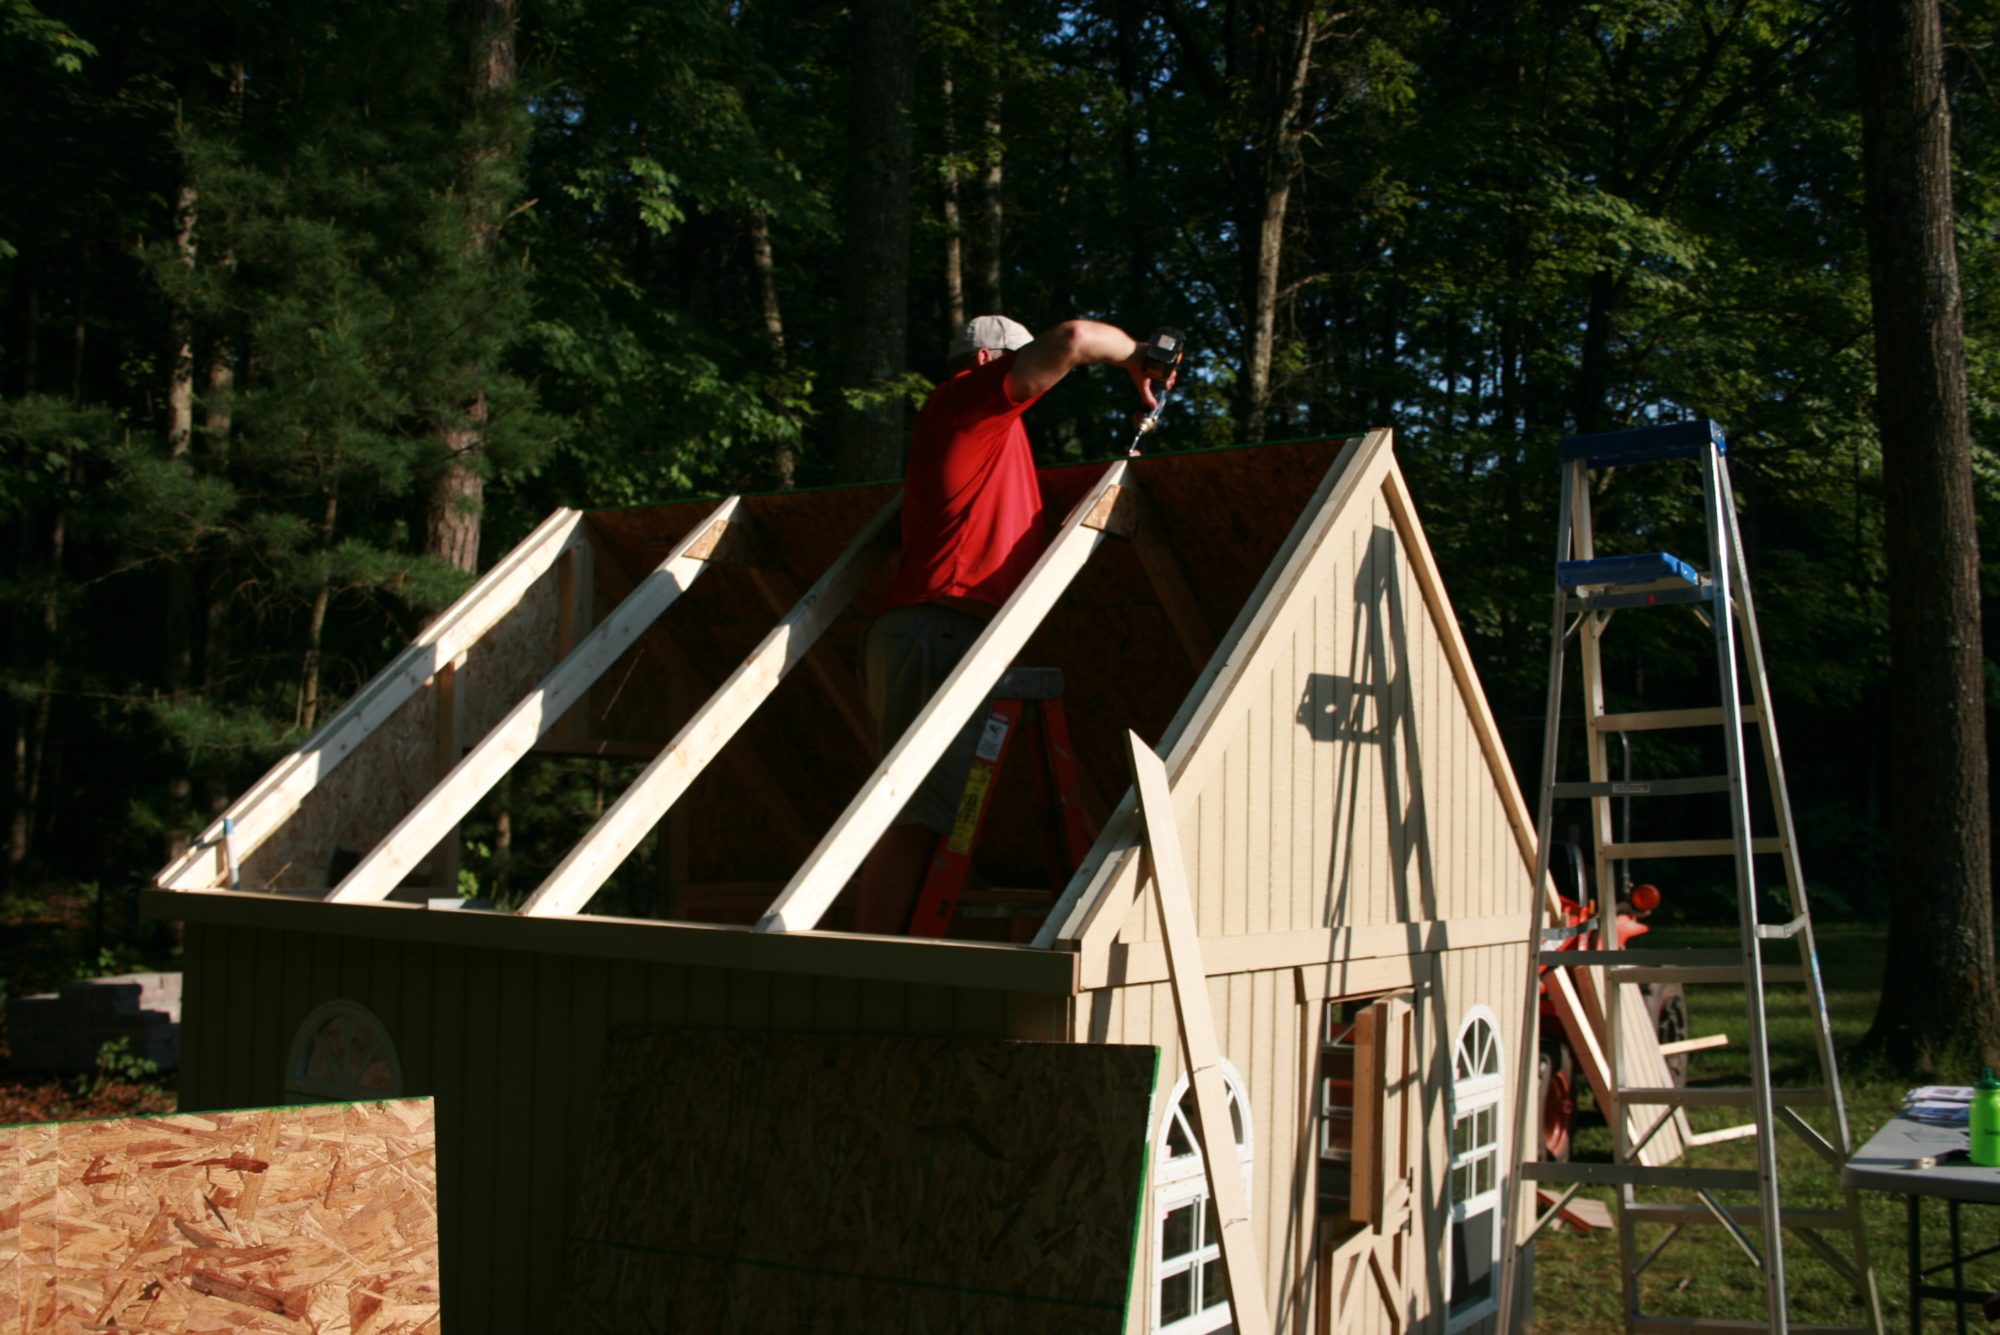
Roof joists complete! We actually assembled them on the ground first, then lifted them into place to secure.
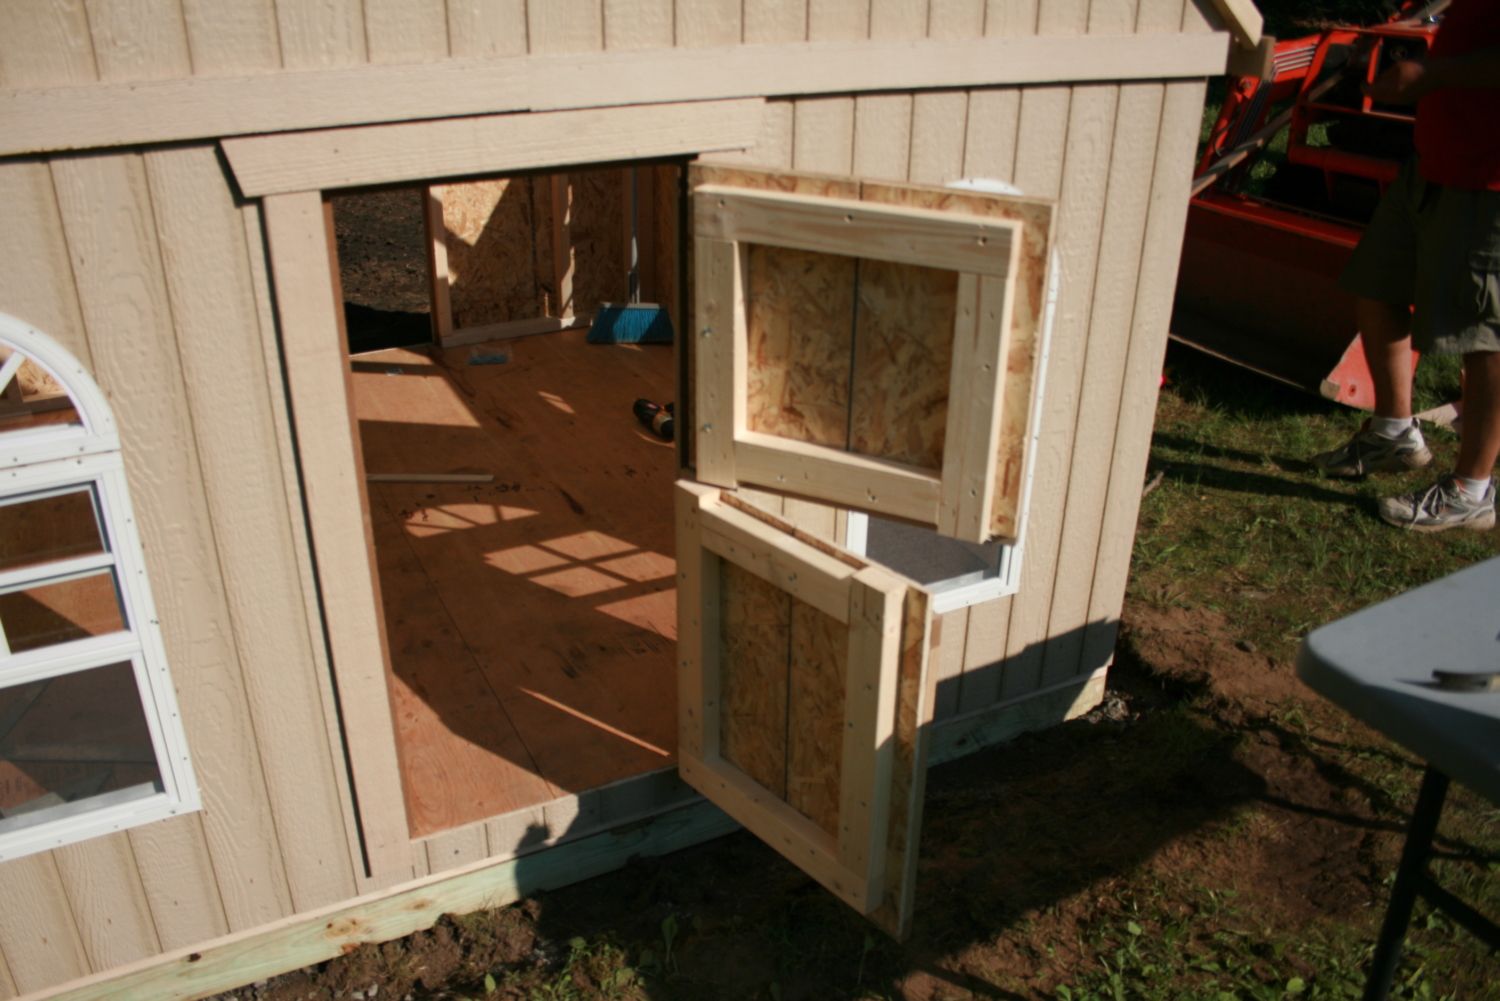
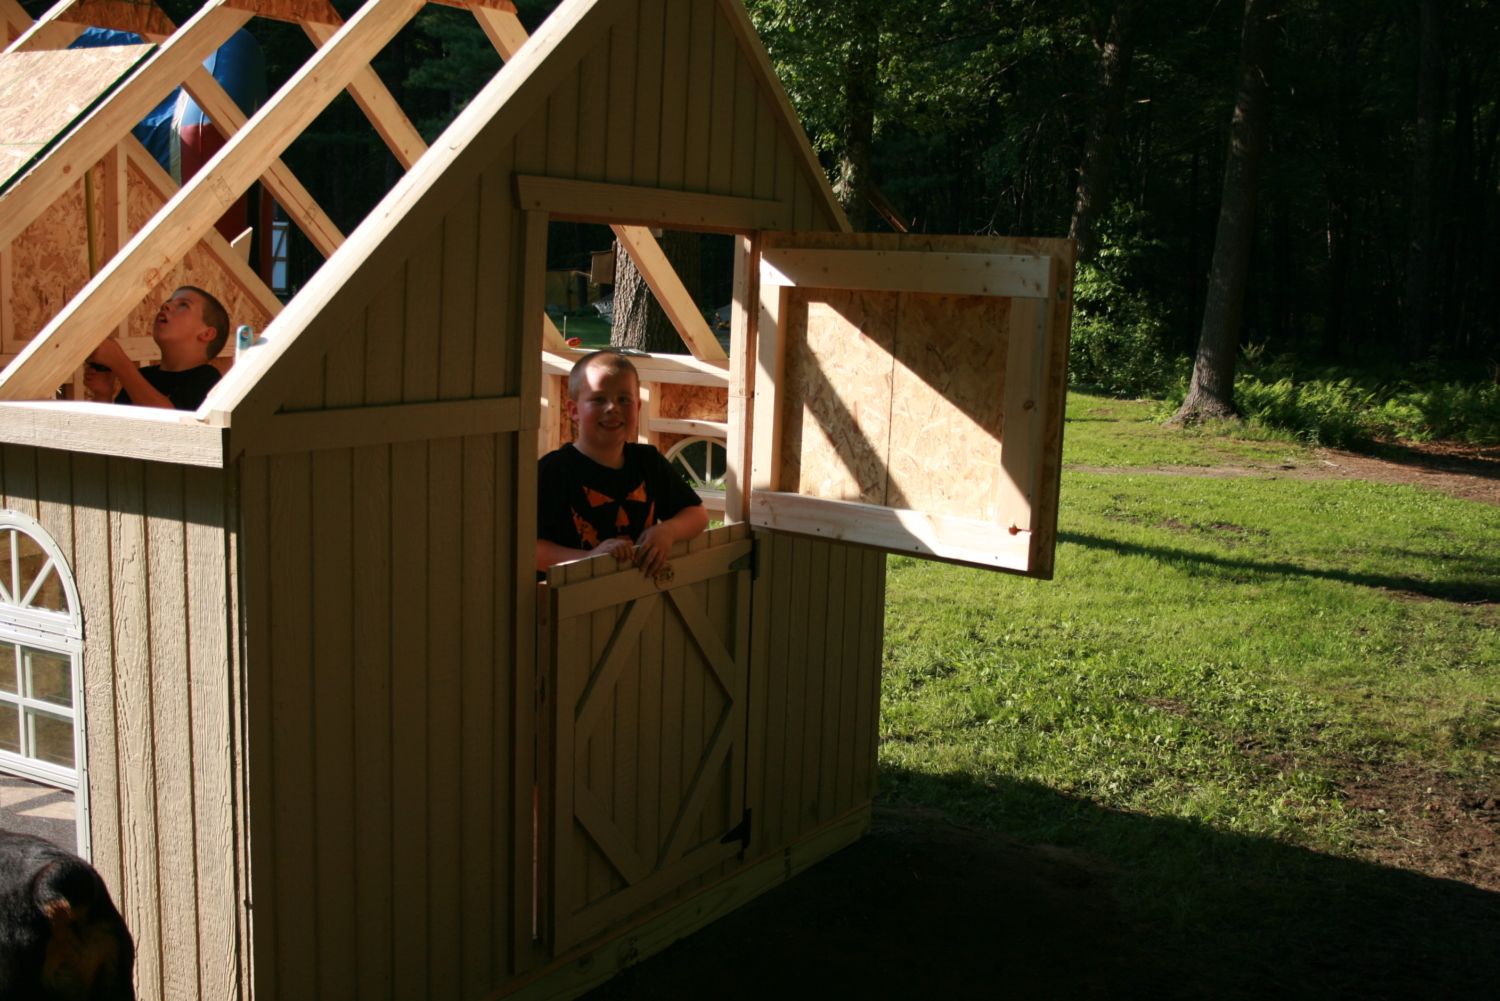
This is the front child sized dutch door I mentioned earlier (above), after being installed. I am going to use this as access for cleaning the poop board under the roosts. I've found since the chickens have moved in, that I love keeping the top door open while the chickens are in their temporary run, as it just adds to the ventilation. My hope is to put a hardware cloth framed screen on hinges inside the top door section so that I could keep the door open while the chickens are even in the coop, and not have to worry about predators. Might do the same on the back dutch door as well. With both top doors open (on the front and back side), it gives great cross ventilation higher up in the coop than just the lower windows alone.
My son Wyatt demonstrating the back adult dutch door, and it's completion. There was a door latch included for the top portion of the door, which we did use. However, we ended up adding slide bolt latch to the lower door half (not installed in this picture), to allow for keeping the lower door closed, while the top one is open. Again, now that we're experimenting a bit more with it, I'd like to do the same thing with the back door that I'm contemplating with the front door...adding a framed hardware cloth screen on a hinge, to give us the option of keeping the top door open for ventilation, while preventing predators from entering. Still have to work out some logistics with it though.
Roof base board going up. OK, I know there's another "official" name for them, but my husband ran out to do an errand, and I'm left to create construction terms on my own. As you can see by the light...it's getting later on in the day. Our goal that first day was to have the structure up. We were getting close.
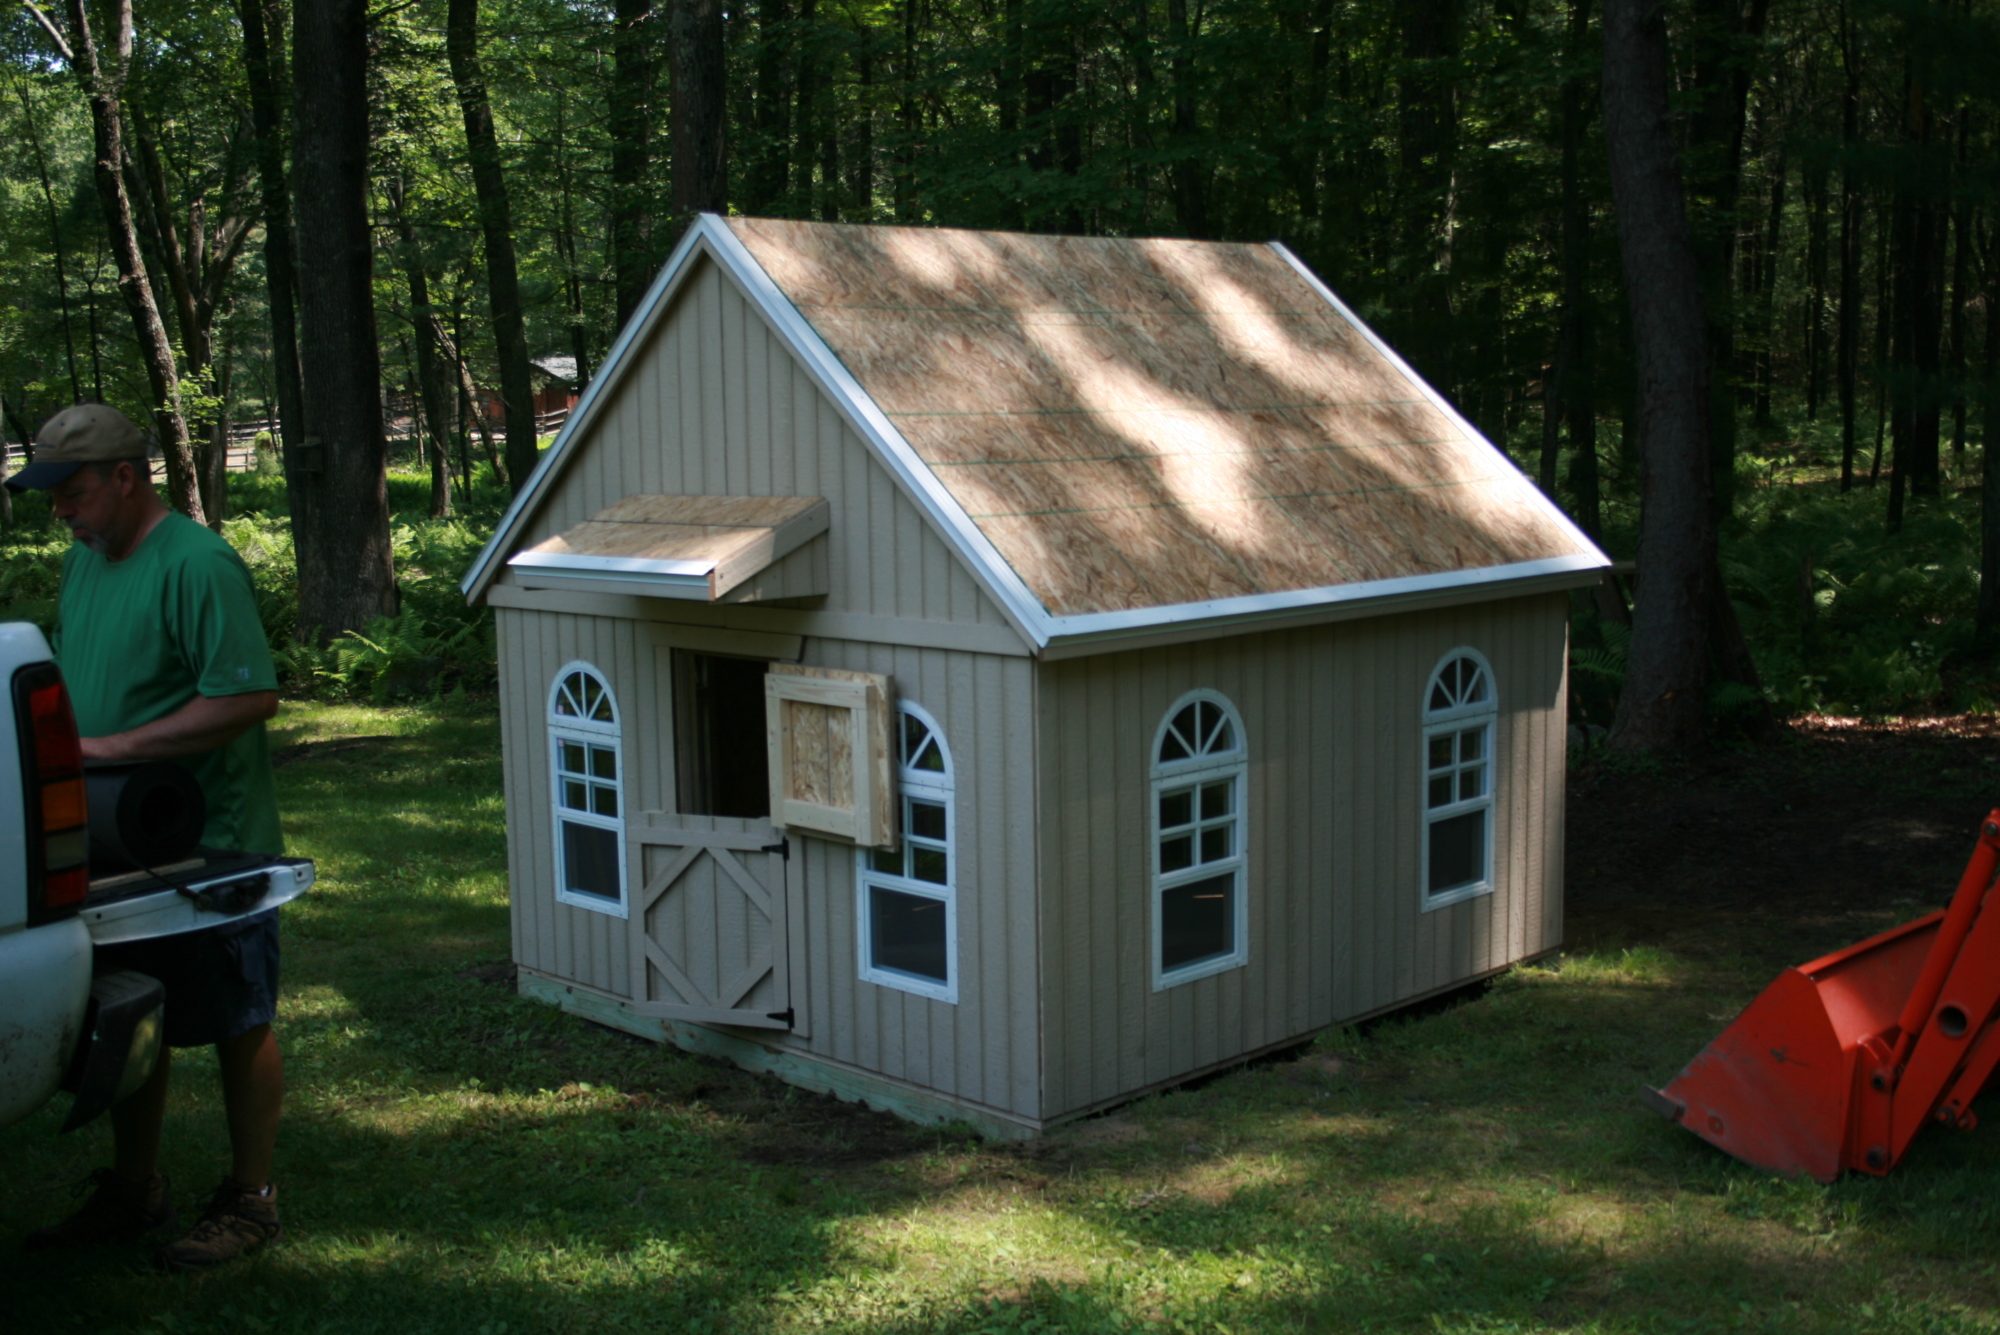
Once the roof boards were in place, there was one final piece to attach to the front. The little portico/awning over the front door, which just adds to that school house charm. This was the end of Day 1. Woohoo!! Day 2 = Roofing!
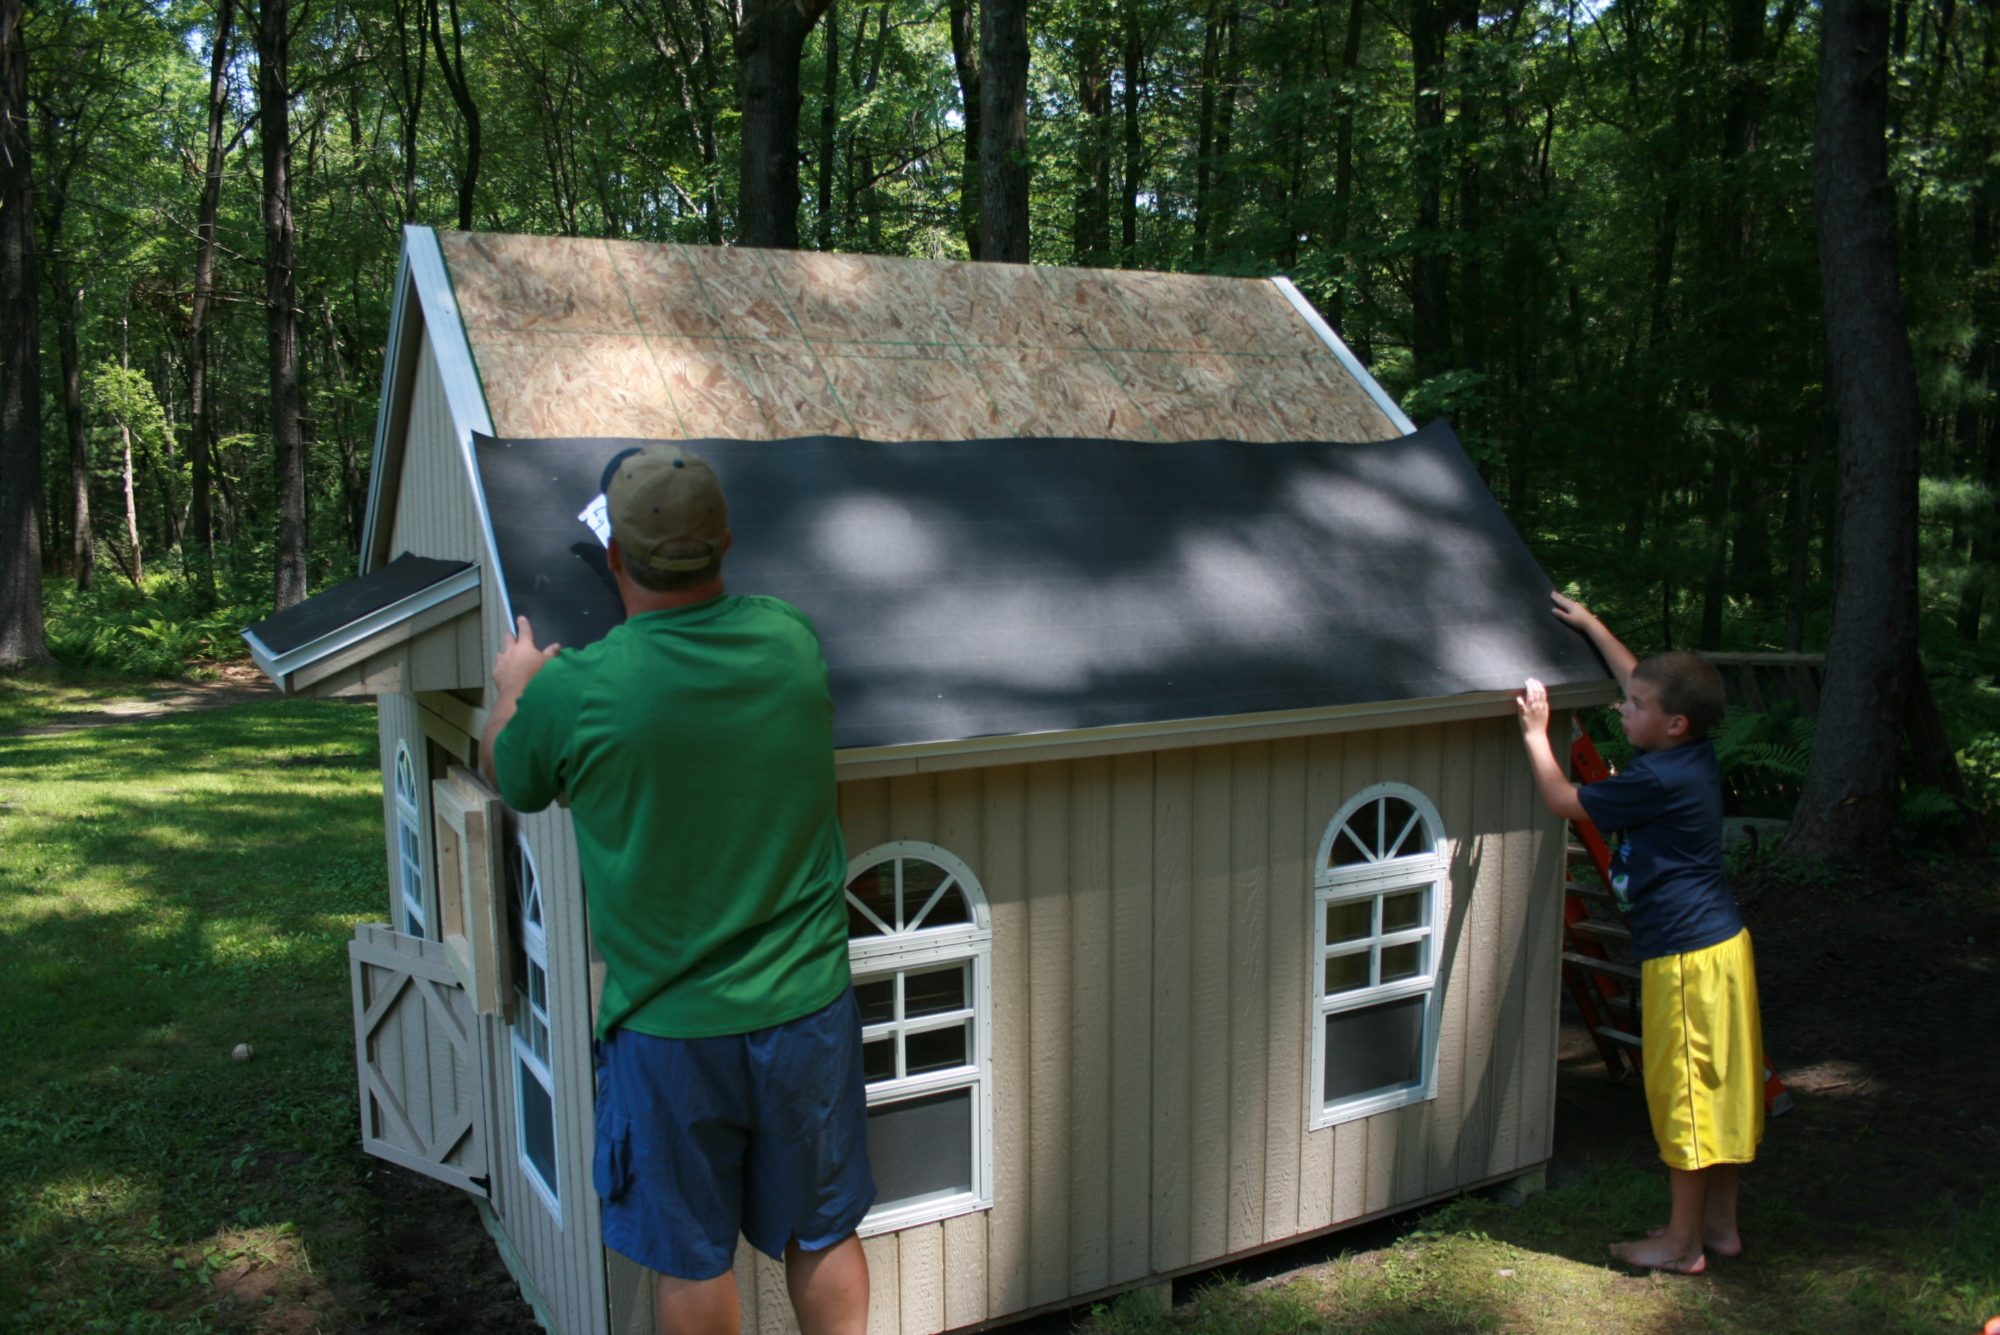
So Day 2 started with attaching the drip edge (the white metal edging you see on the roof lines.) And then cutting roofing paper (again, a highly technical roofing term on my part.)
Roofing paper getting measured and attached. Roofing materials (edging, paper and shingles) were not included with the kit. It is something the buyer has to supply. We chose to match our house's shingles and went with a standard architectural shingle. We used 3 bundles I believe...I'll have to check with the hubby, because I know we had one extra bundle that we didn't use and returned to Home Depot.
This day turned out to be a surprise timing wise. You would think it would be a relatively quick job...small roof=couple of hours. Eh, not so much. Turns out my husband wasn't able to use his nail gun/air compressor because they went too deep into the wood (coming out the other side which would be a detriment to my head inside the coop, and the chickens as well if they were to fly up and get scraped by the sharp points of the roofing nails poking through. SO instead he had to hand nail them with smaller roofing nails. Took almost the whole day. But it came out beautiful.
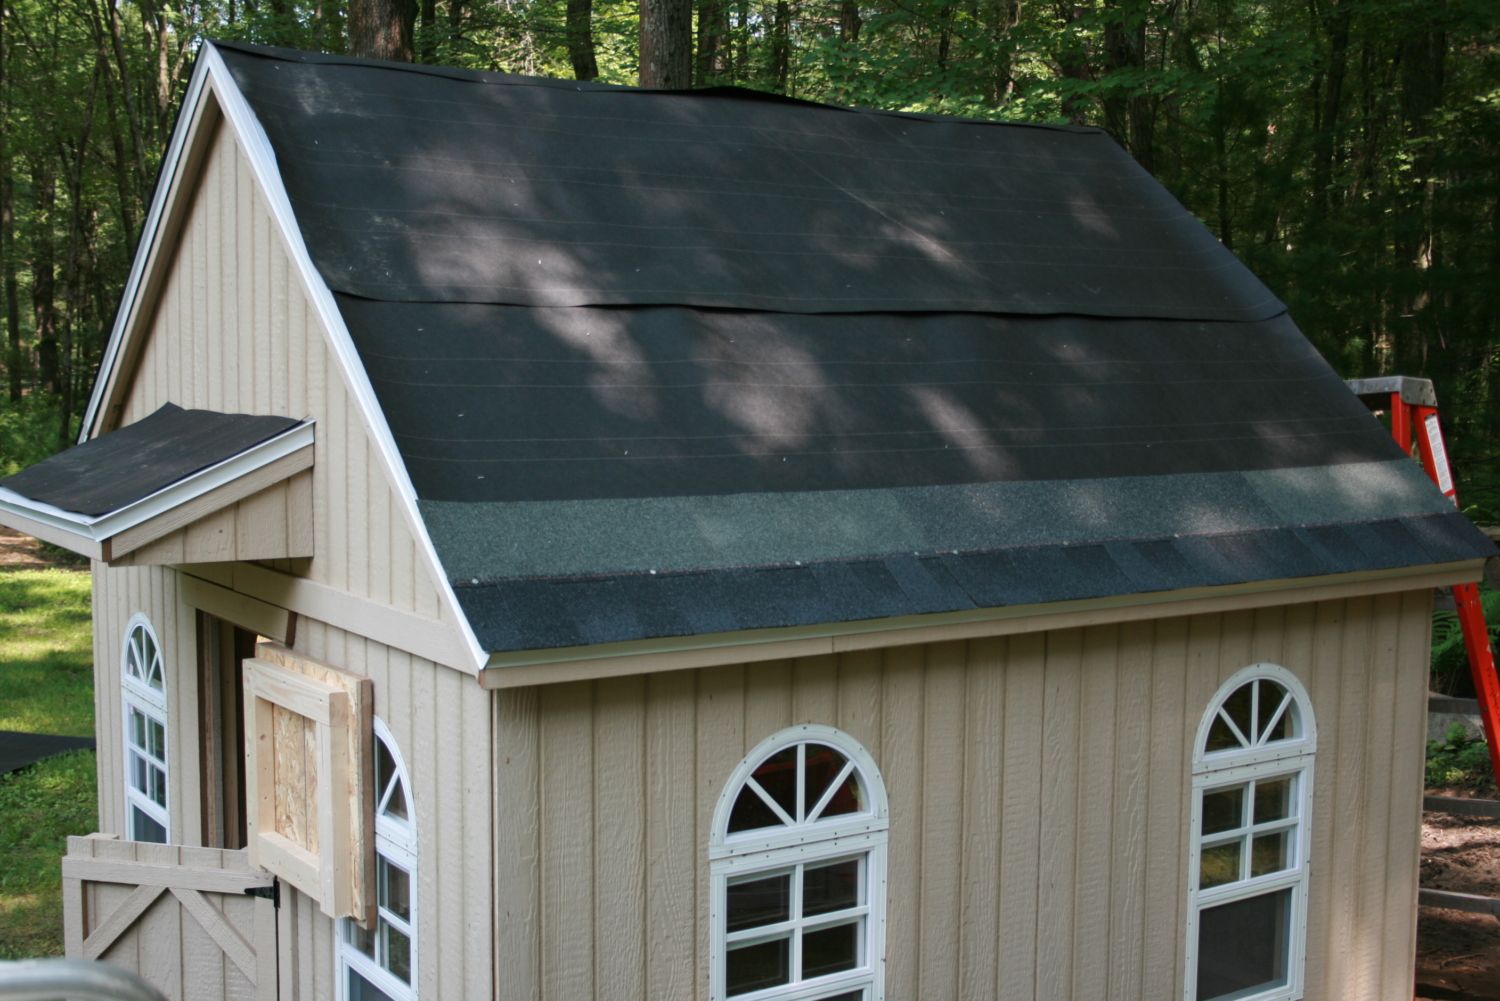
Finishing the last roofing section...the little portico/awning.
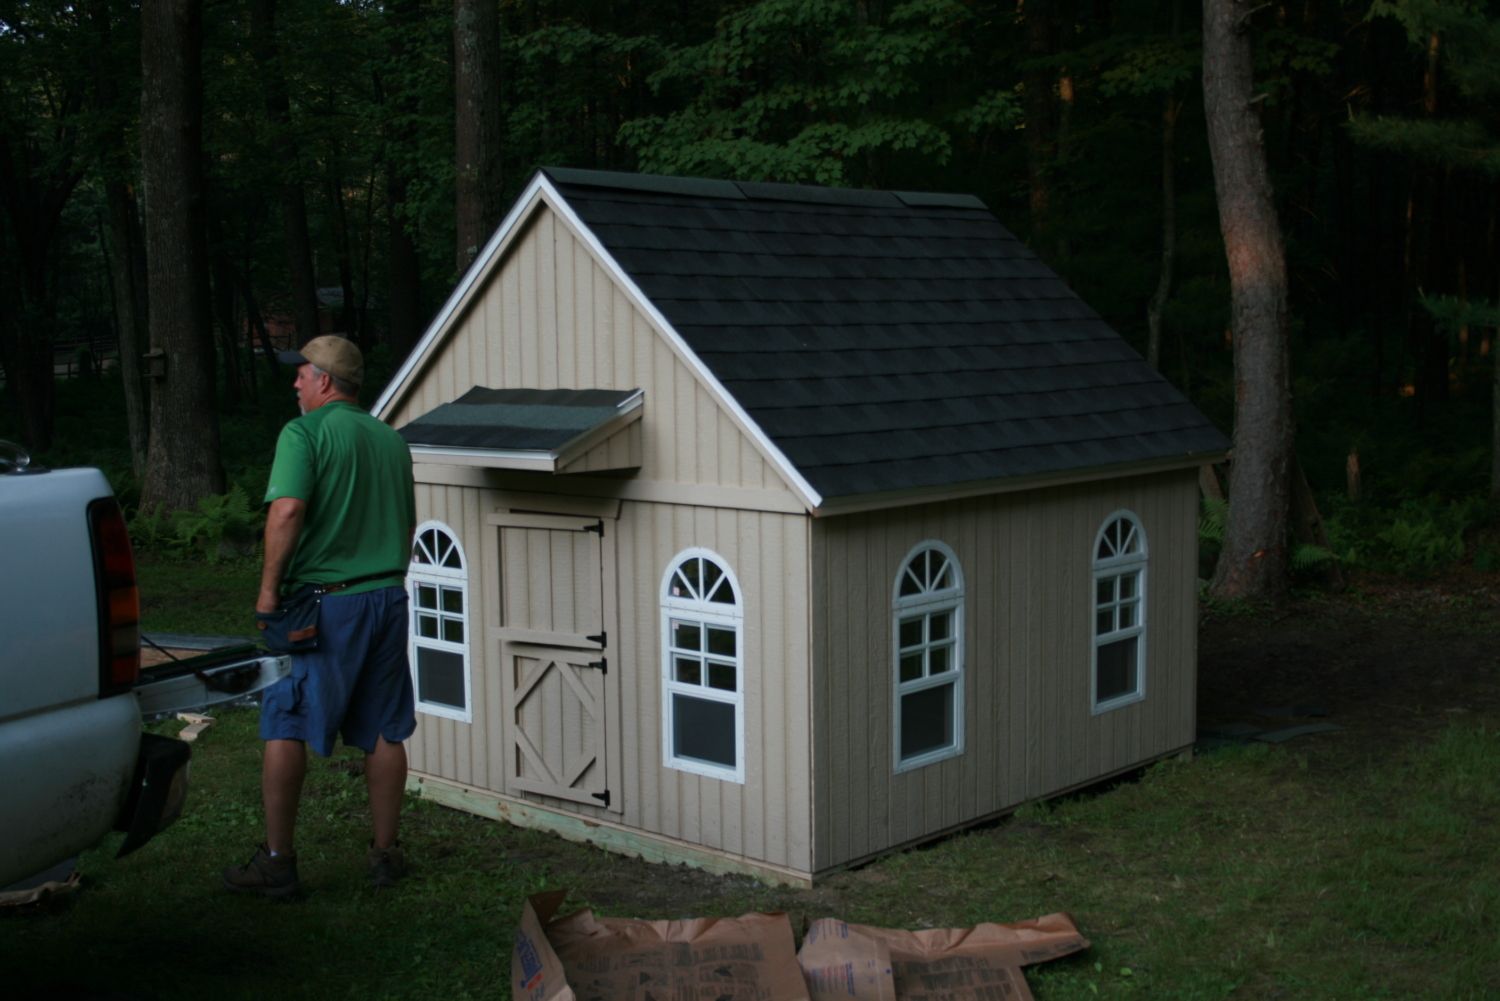
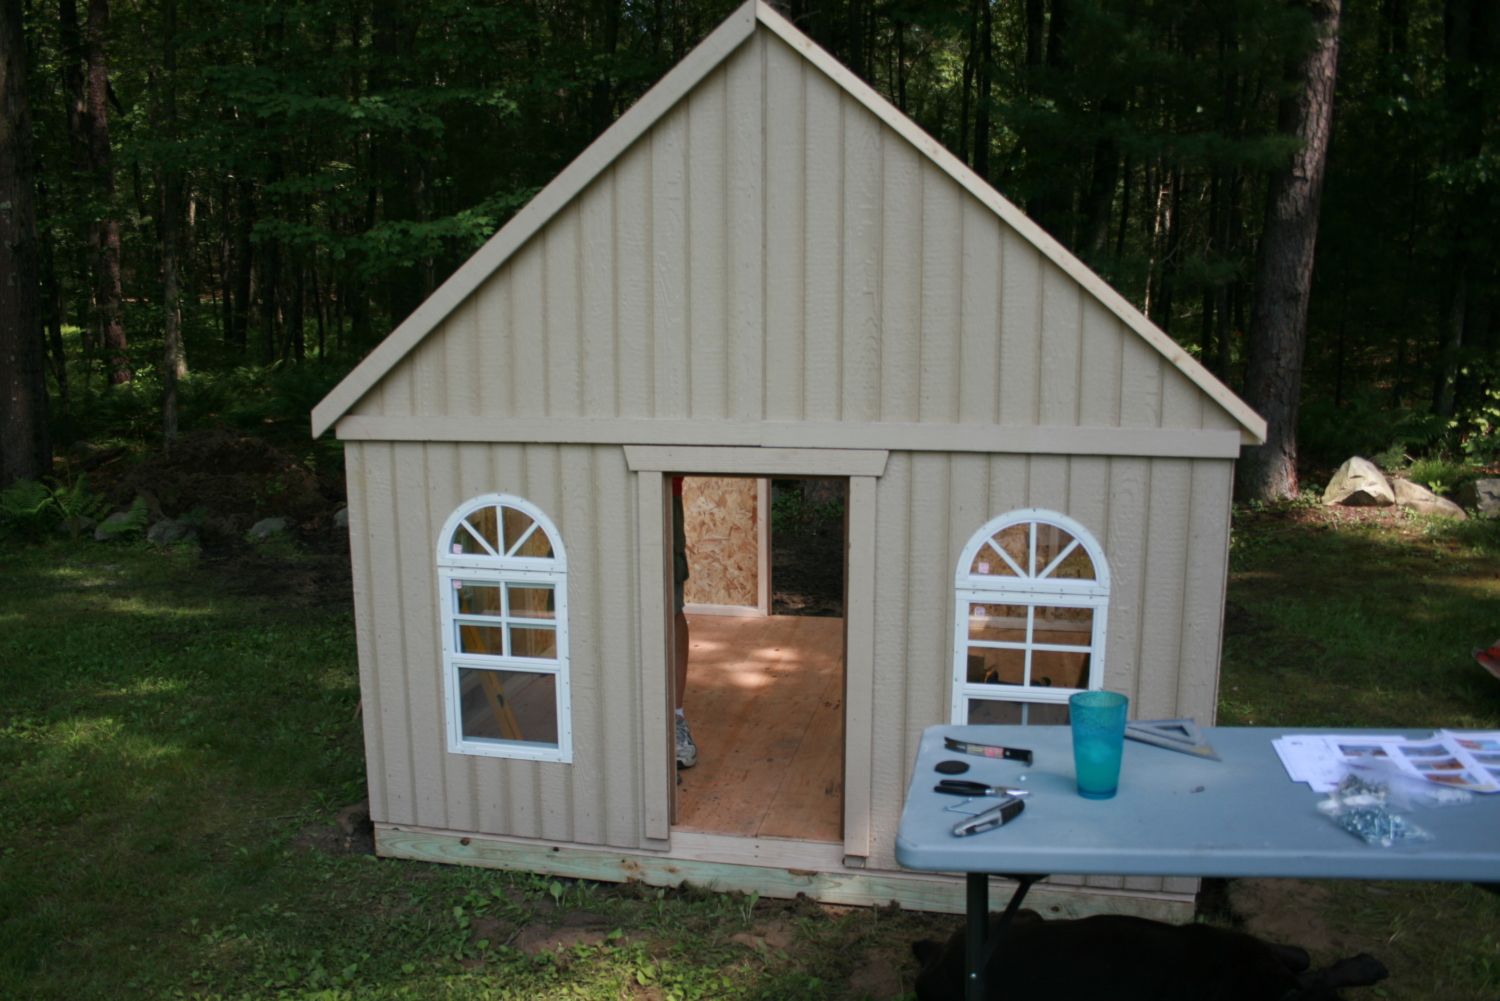
So basically, 1 day to assemble, 1 day for roofing. Then I allotted one day for painting two coats of the main color (yellow to match our house) and another 2 days to paint the trim (white.) I needed the second day for the trim simply because I got a late start the first day working on the trim. Once all the trim was painted, we were able to attach the window trim pieces, the corner edging, as well as the cupola with bell onto the roof. I don't have pictures of all those steps...I forgot to take them as we were doing it. whoops.
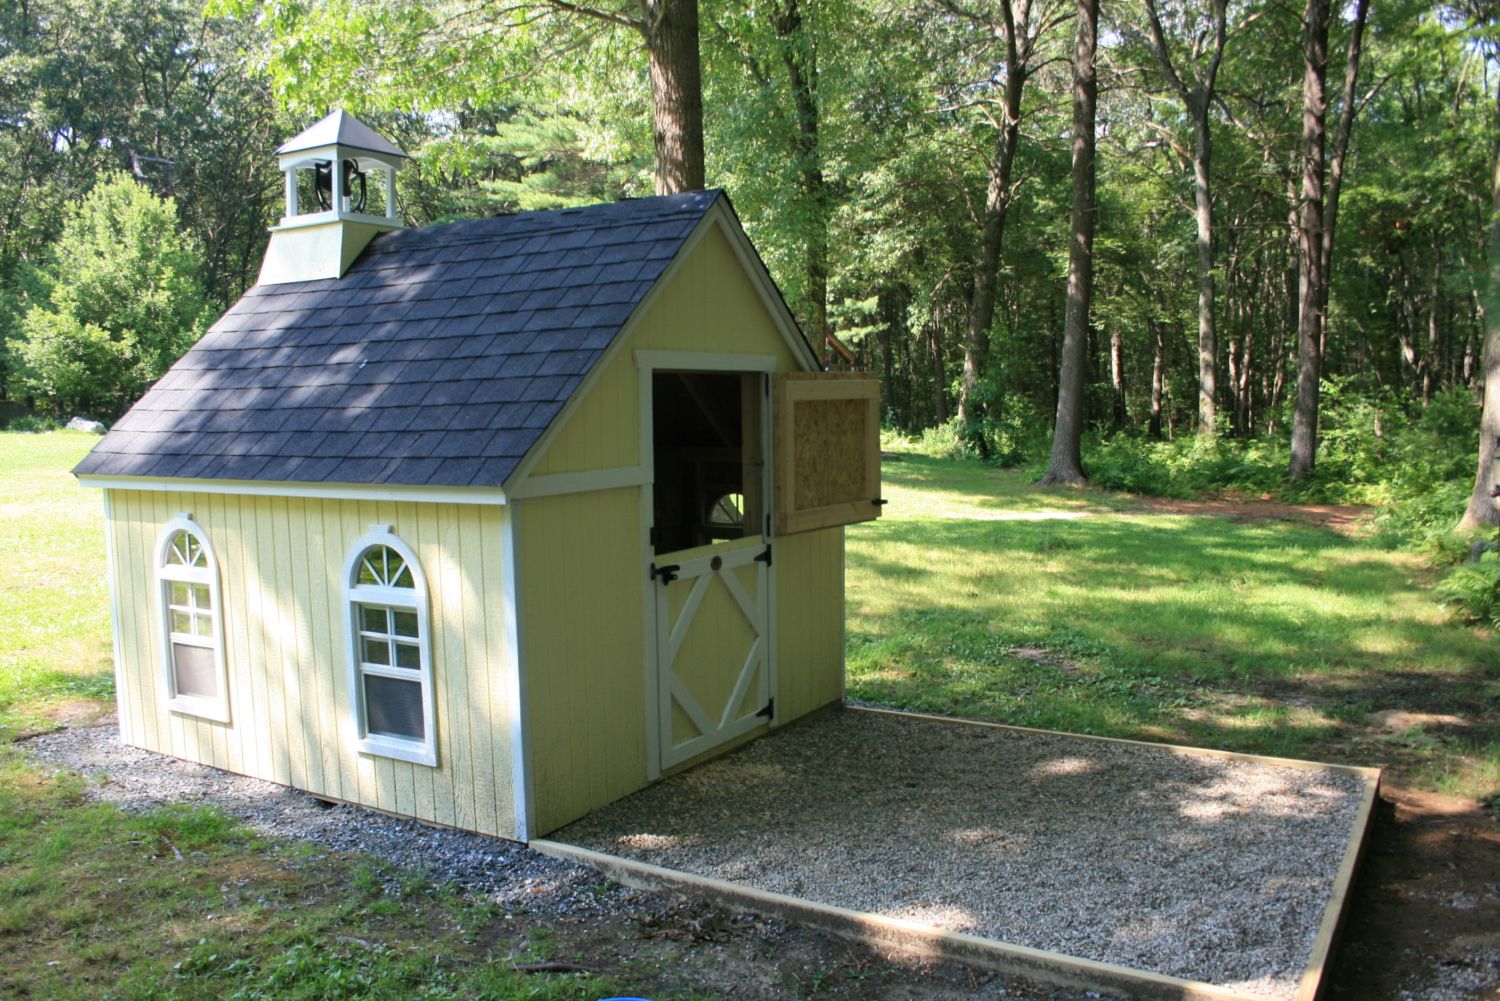
This picture was taken during a party we had to celebrate the Fourth of July (we'd finished the outside about a month earlier), you can see how it looks all painted, and with the final trim pieces in place (window trim, bell cupola and corner pieces.) After seeing it decorated with the patriotic swag above the door, I'm definitely going to hang a wreath there for the holidays.
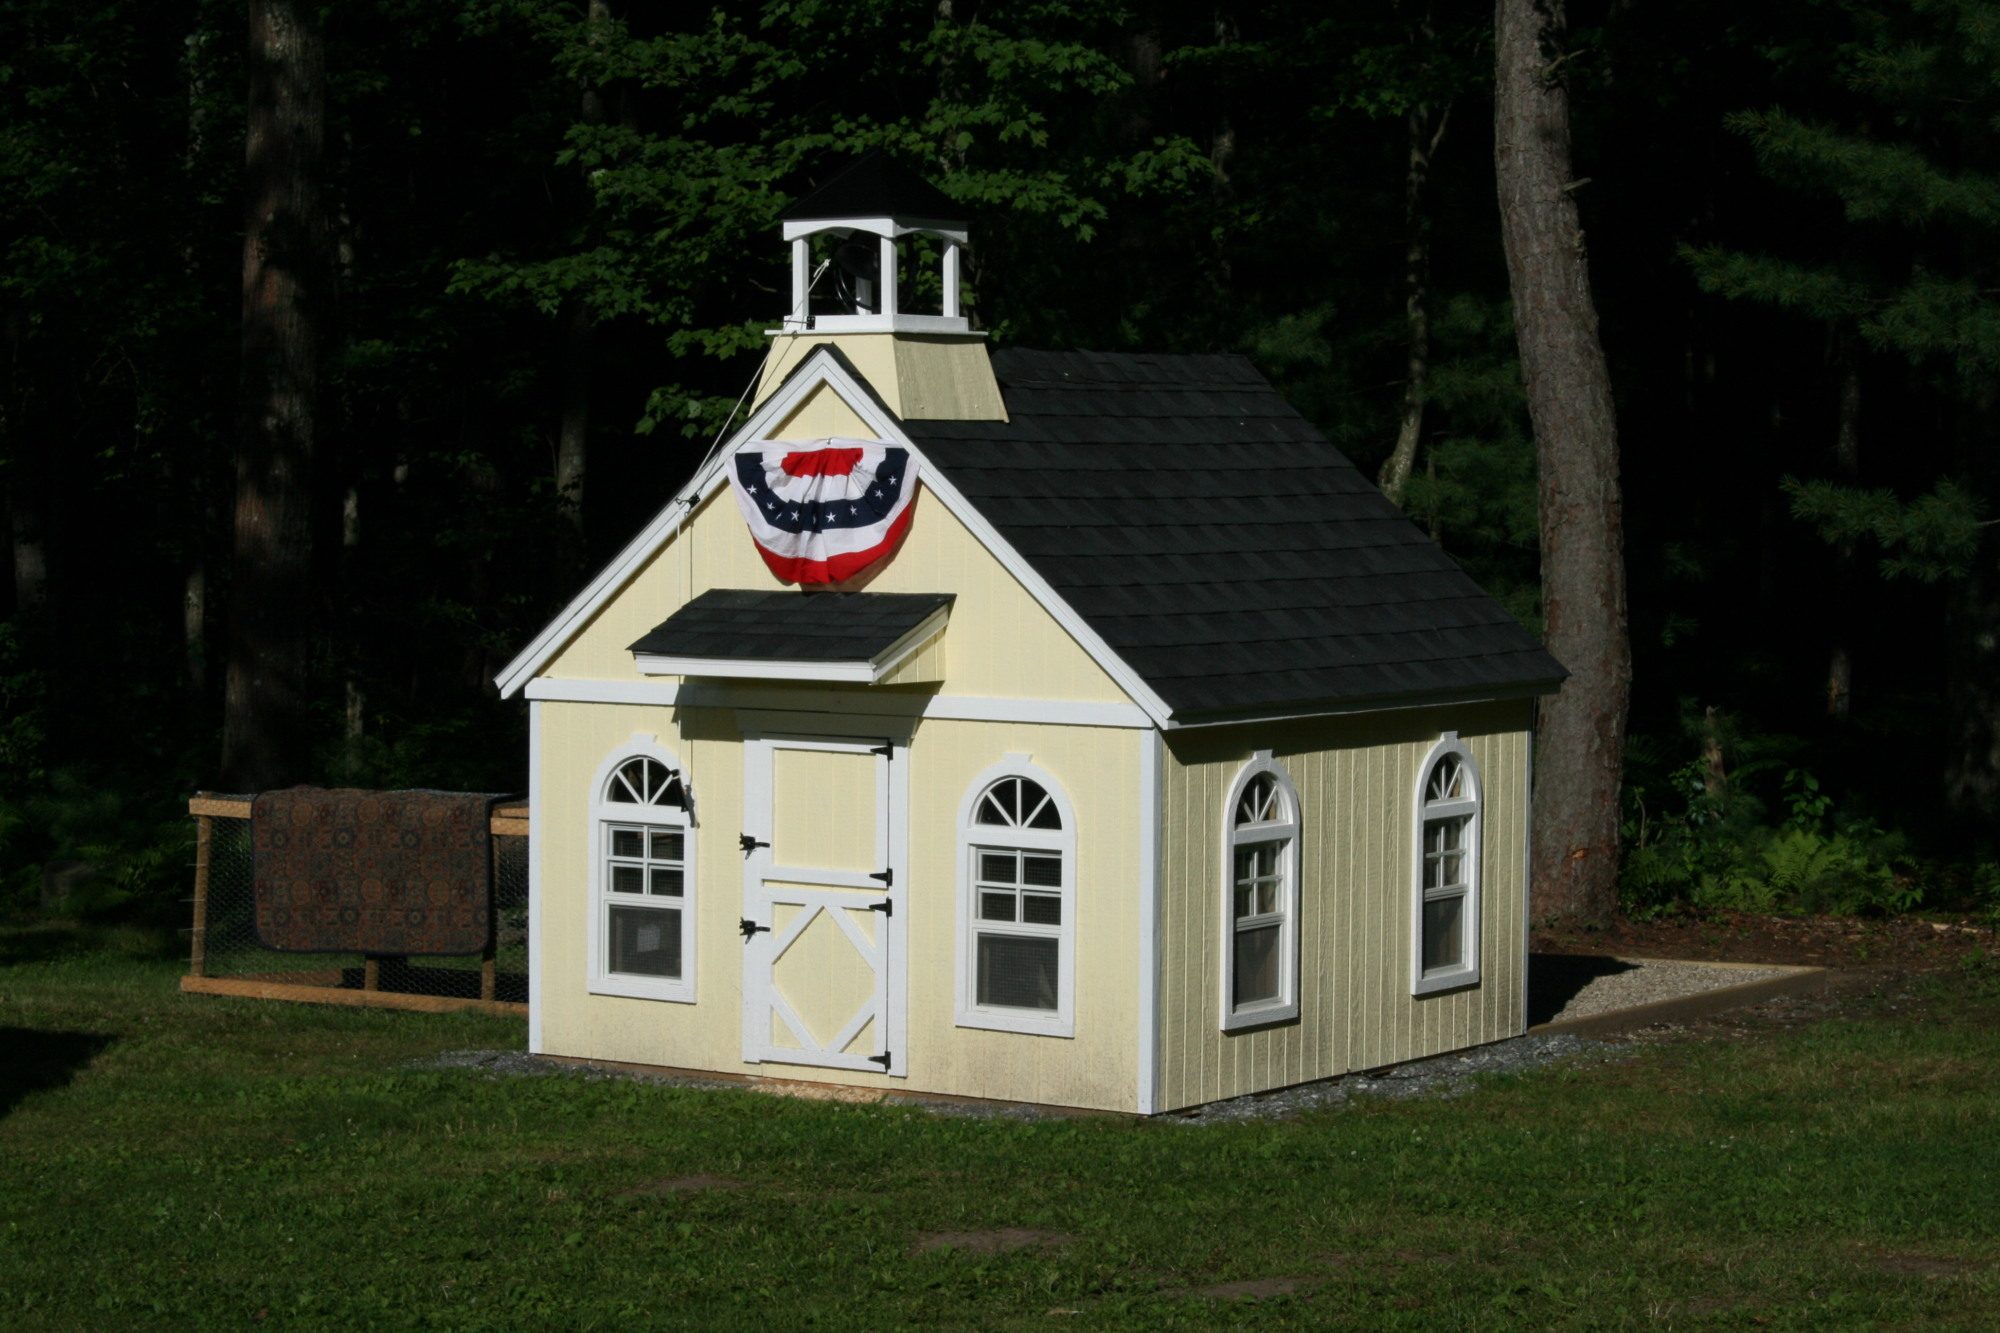
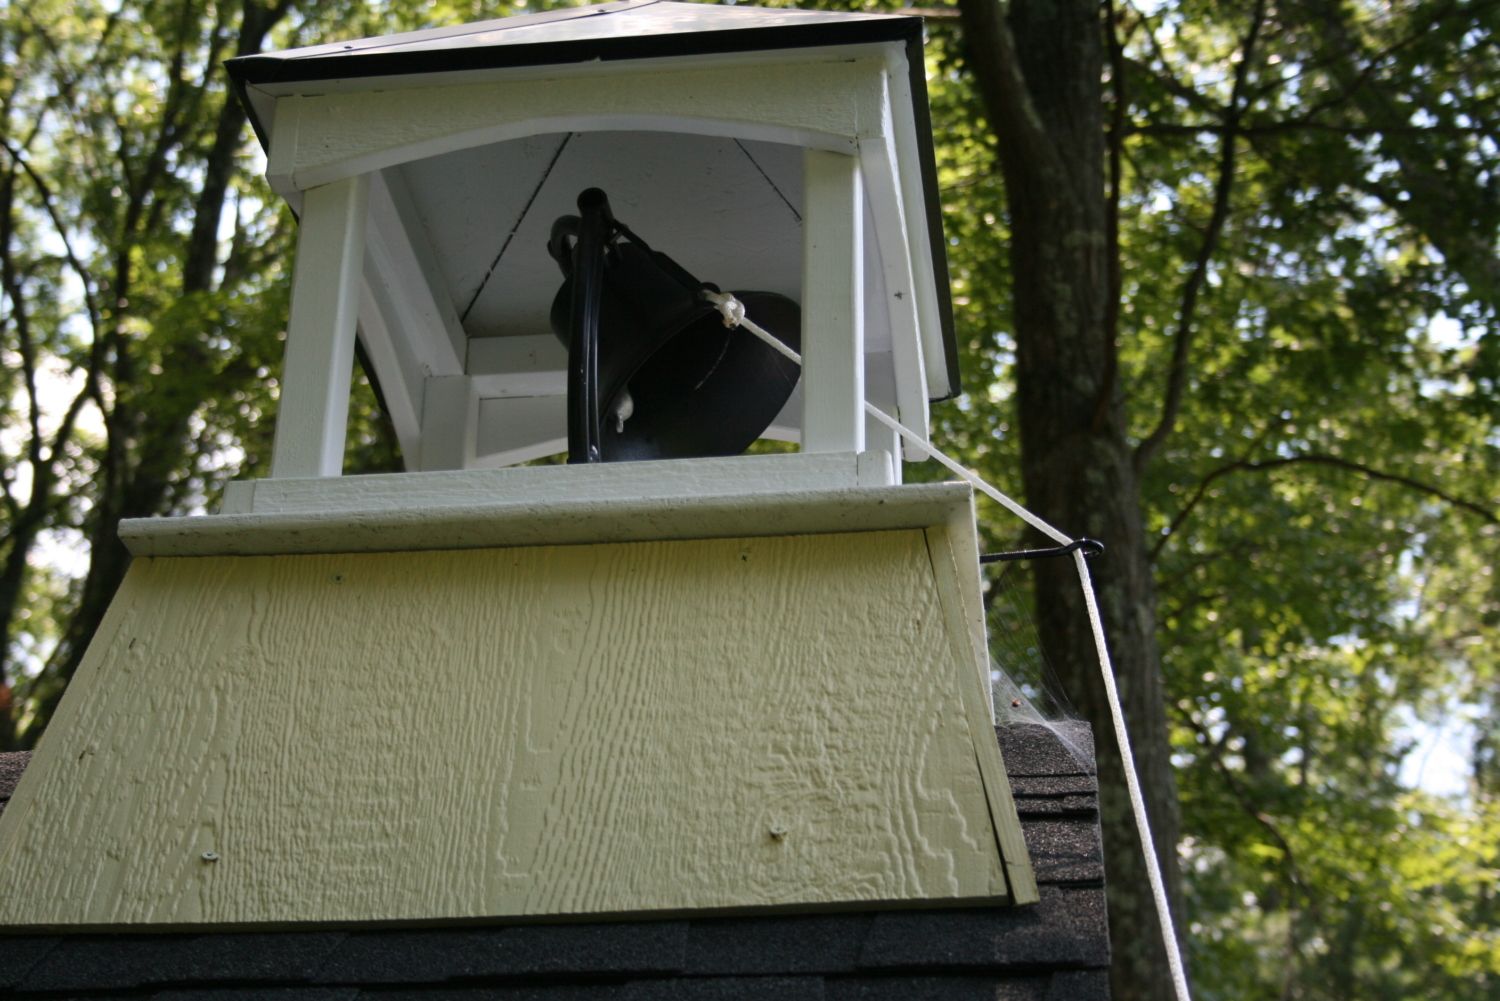
And what's a School House without a bell? How stinkin' cute is that!! And it WORKS!! It came with a rope and handle that are mounted to the side of the school. The kids love this and can't resist giving the bell rope a tug. The bell rings a soft clang, not an obnoxious sharp noise...which I'm sure the neighbors are grateful for. oy.
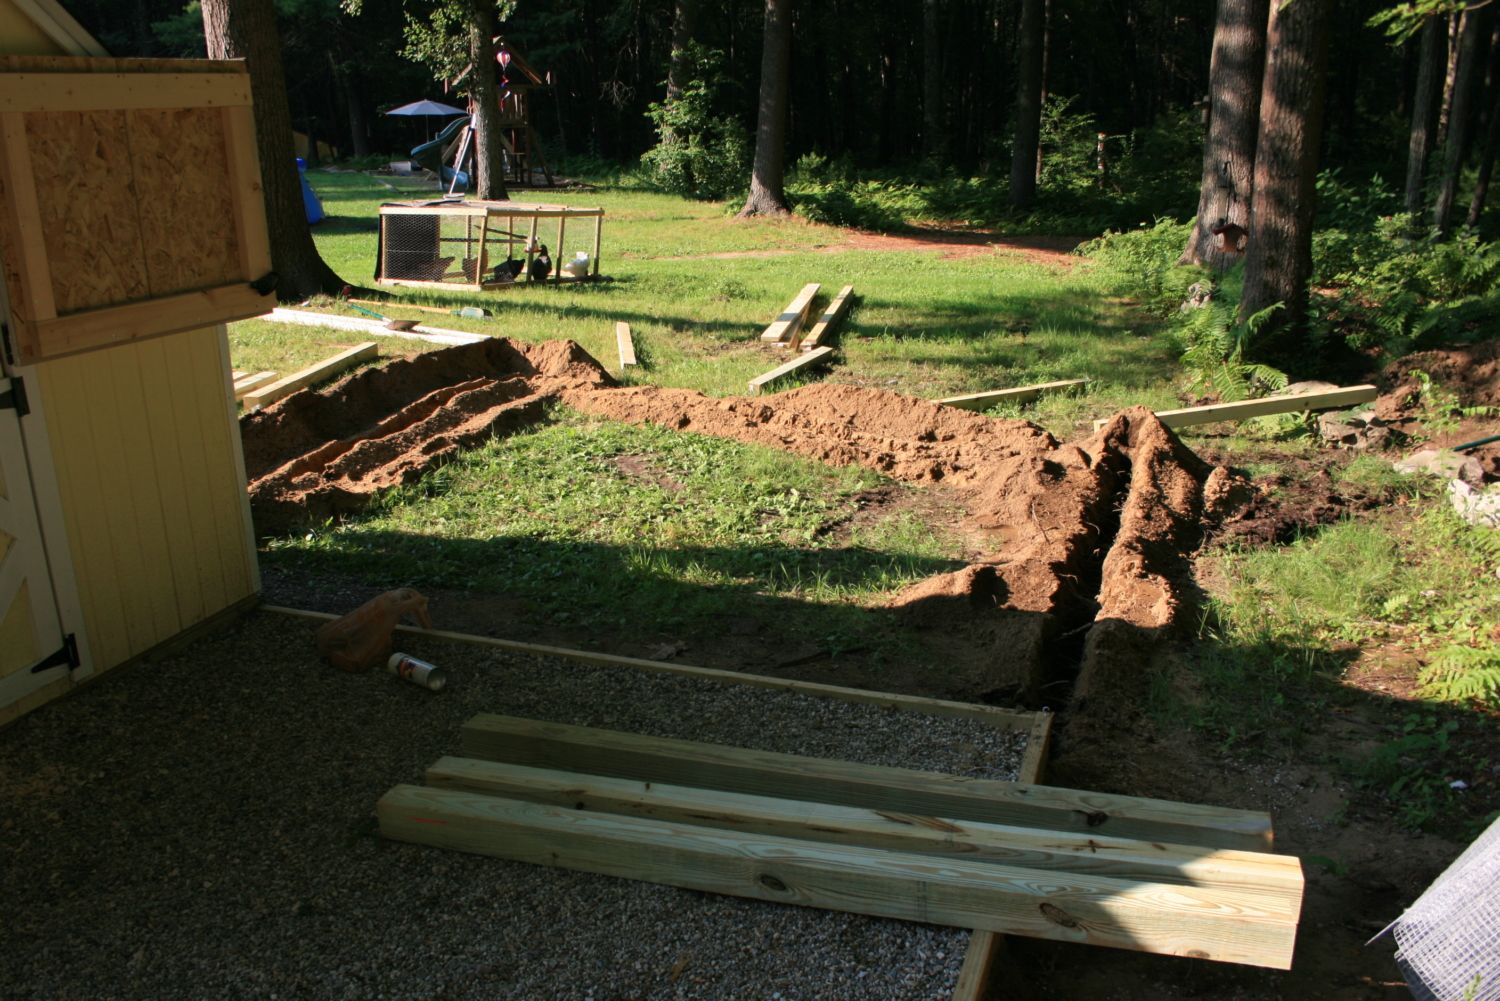
A spur of the moment decision, but so happy we did it, below you can also see that we added a pea-stone gravel pad in the back that will keep the mud down back there, and also access the run for the chickens which was not yet completed. We simply squared off three 2x4x8' pressured treated pieces, leveled and staked them into the ground, and then backfilled the area with extra pea gravel we had on hand from a project we had done earlier in the spring. It really neatened up the area, and gave it a finished look.
The run will attach to the left side of the coop, and will be approx. 16' long by 12' wide. We have a lot of predators in our area, so sadly full time free ranging is not an option.
Next up: Inside the Schoop!
When I was planning the inside layout of the coop, I had some definite ideas I wanted to incorporate after all the reading I had done. After we completed the assembly of the Schoop (playhouse), we needed to convert the empty "room" inside to function as a coop. We were dealing with literally a blank space, an 8x8 area, with a peaked roof line. Our Schoop needed to house 9 chickens. So the basic list I had included the following ideas:
1. A storage closet for food, shavings and chicken supplies. I wanted a door on it, so the chickens would stay out of it, and so it was easy to keep organized yet accessible.
2. 4 nest boxes I felt was an appropriate amount based on reading so many threads concerning the subject.
3. A roosting area with a poop board underneath, using sweet pdz to keep the smell down and make cleaning easy.
4. Area for food hanging and water.
5. A pop door for the chickens to access the chicken run once it's built.
6. I wanted to use the deep litter method with shavings, so I wanted to make sure there was a way to control keeping them IN the coop, and not falling out of it.
7. Finally, because of the windows already being built into the coop walls when we got it, I had to think of a way to secure them from predators ripping the screens and coming into the coop when the windows were open (which is pretty much all the time.)
So, this is how we handled my list (in order of how we did it...rather than in the order of my list.)
First off, I bought a linoleum remnant from Home Depot (it was 8x6...so not perfect, but the next size they had was 10x15...so too big.) I glued it down to the main section of the coop, from front to back, but cut out where the closet was going to go, and used that extra piece to cover an uncovered section. There is about a 2x2 foot section in front of the back door that is not covered, but I'm not worried about it. Worst case scenario, I can paint that part of the floor to just seal it.
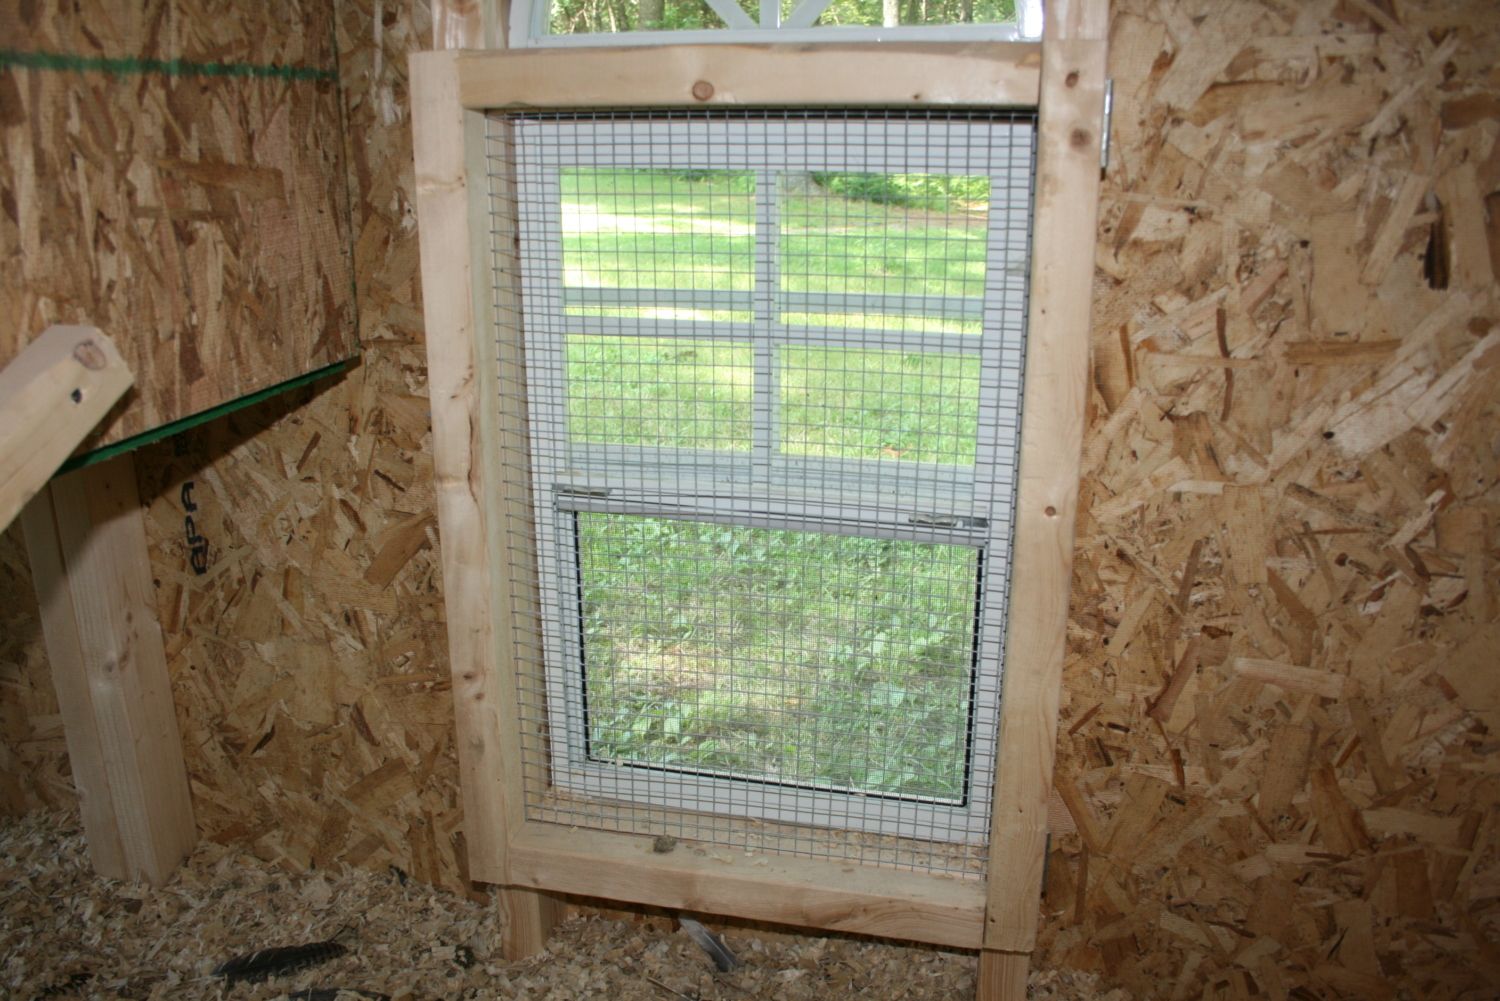
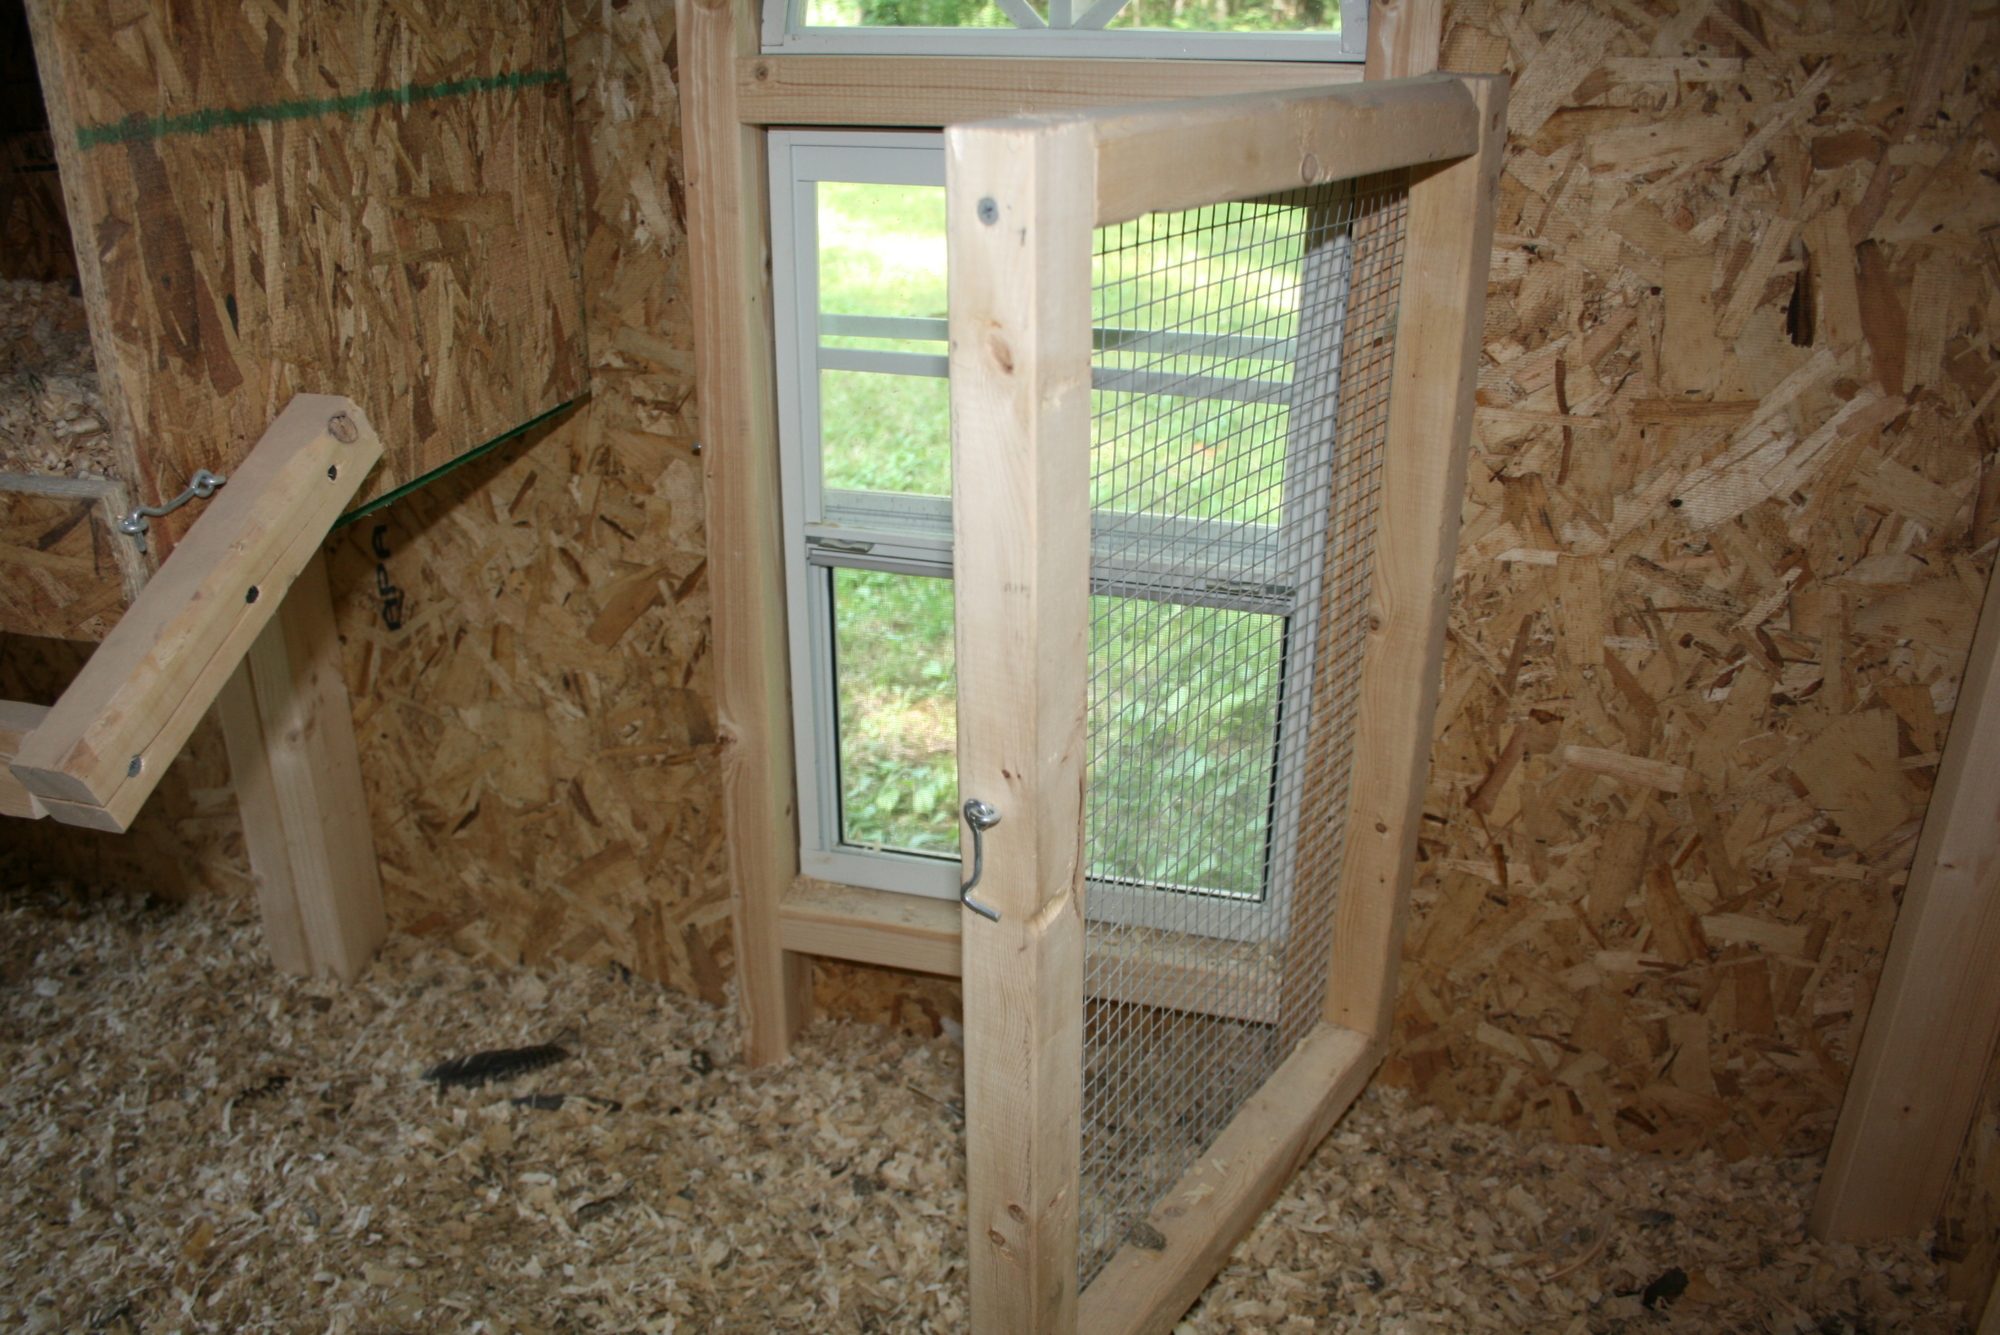
Next we brainstormed about the window security issue. The 6 windows are miniature double hung, and have built in screens on the lower part of the window. The upper window and arch window on top are both stationary and do not open at all. The lower window does open and has two selections of "open-ness"...the first click opens them about 5 inches, and the second click opens it all the way (about 10 inches.) I didn't want to put hardware cloth on the outside of the windows because I felt would take away from their charm and aesthetic on the outside. But I couldn't attach the hardware cloth directly over the windows from the inside of the coop, because I needed to have access to sliding them open and closed for ventilation depending on the weather and time of year. So we came up with a shutter type screen. I made frames with 1x1's to fit over the windows. I then stapled hardware cloth securely around the perimeter of the frame. Then I mounted it with hinges to the side of one of the 2x3's that the window is mounted between. I put a hook and eye closure on the opposite side, so they would close securely, but be easy to open in order to adjust (open/close) or clean the windows as needed. I attached two pictures below, of the shutter closed, and then open. I did shutters for all six windows, and so far it's worked great.
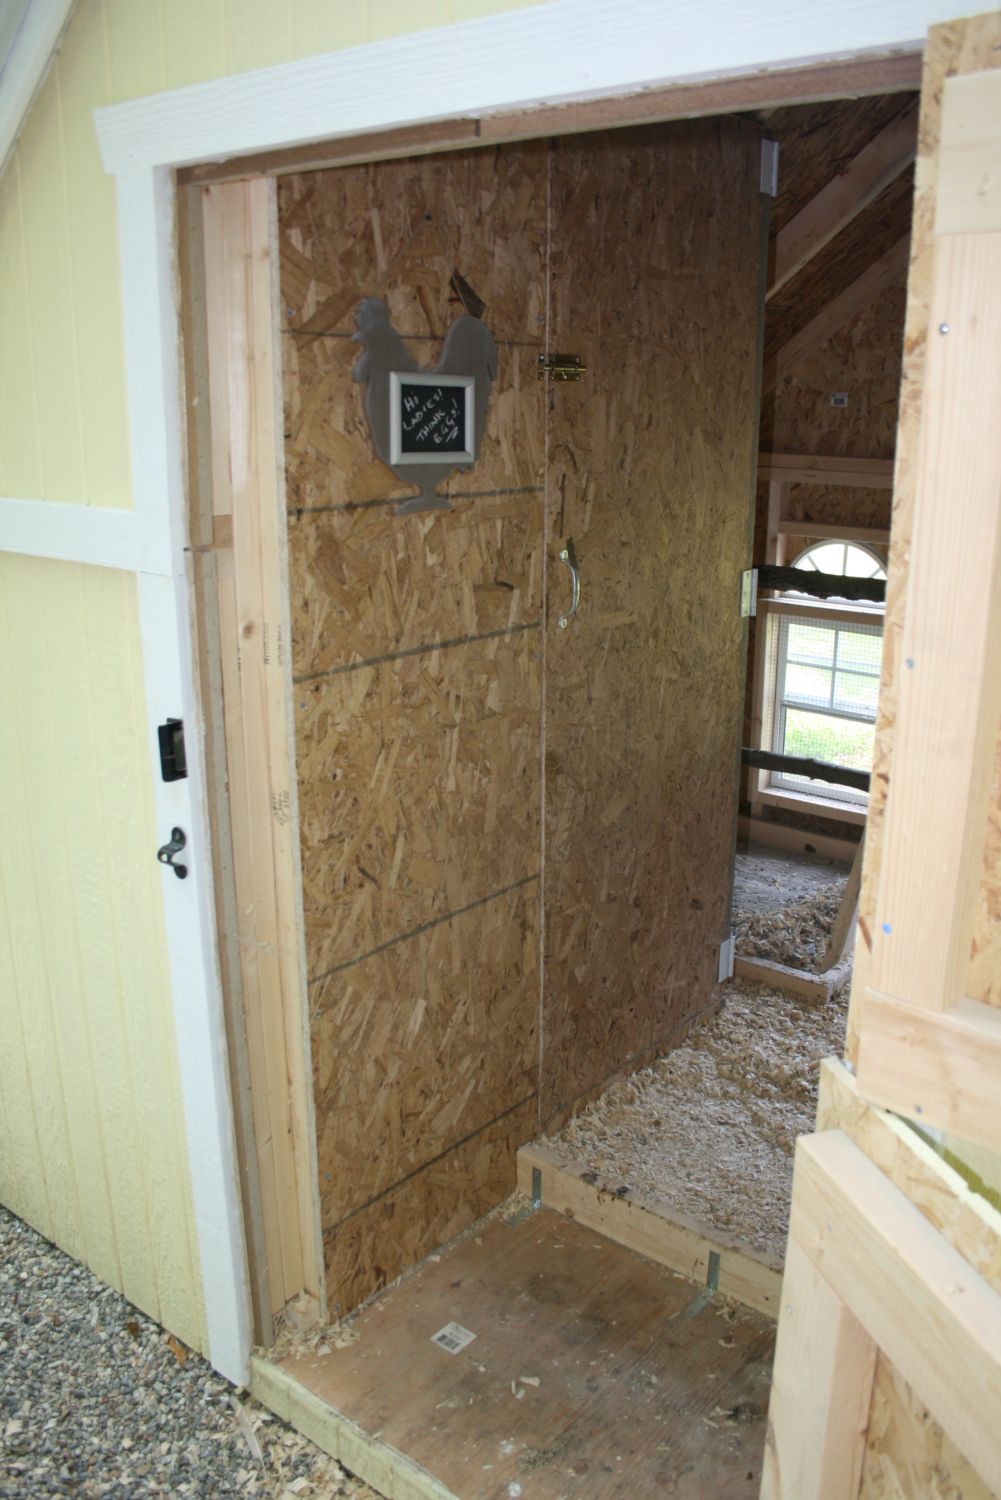
Next up was the closet. I wanted it easily accessible when I opened up the back door, so my husband framed it out in the rear left corner of the coop. It's about 2 feet deep, and about 40 inches long. The height goes right to the slanted roof, which is about 7 foot, so I can stand up in it (at least right inside the doorway), and the door is full size. It is just a simple structure, made out of plywood and framed with 2x4's. We made it big enough to hold a 24 gallon steel trash can (which holds their food) as well as a bale of shavings, with enough room for a couple of shelves, and hanging tools. It encompasses one of the windows, so has natural light...which is a definite plus.
Here's the view of the closet from the back door. (below) The door doesn't go all the way to the floor of the coop. We left a 4 inch ledge at the bottom to keep the shavings from falling in, and to keep the door from bogging down in them when trying to open it. Over the years we've inadvertently collected extra miscellaneous hardware from other home projects we've done, so we sorted through that stuff to find things that could be used for this project. The door is a perfect example...notice the hinges are white, the slide bolt is brass, and the door handle is galvanized. I don't think the chickens mind the mismatched-ness of it.
Inside the closet door...I used simple screws and a leftover hook to hang the broom and hand rake etc.
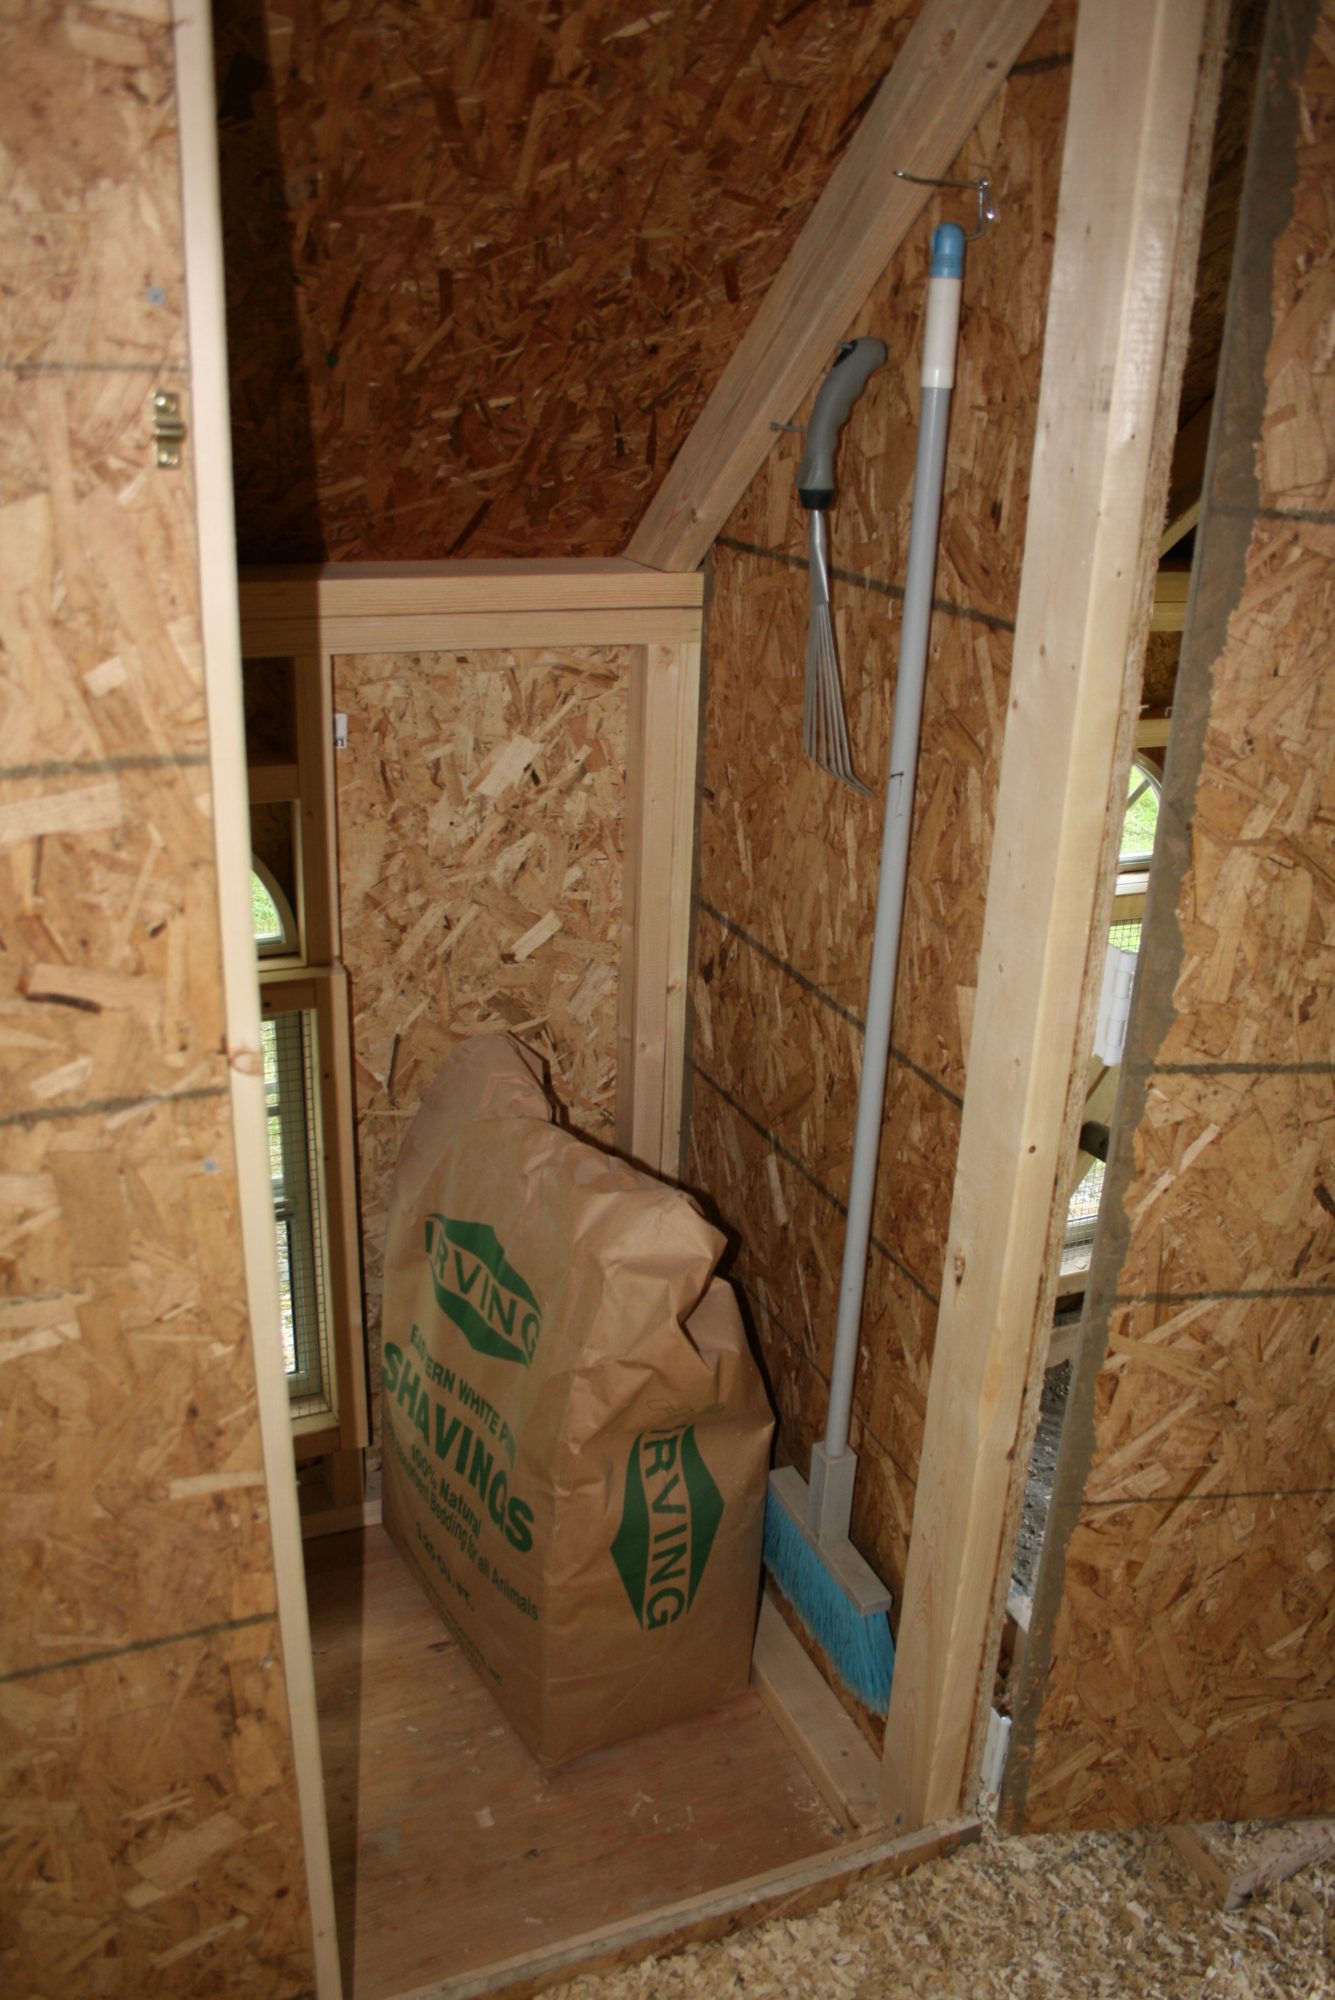
Further in the closet. Notice that this is where I stole the linoleum from...I felt that I didn't need it in the closet. The only one going in there is me (or the hubby and kids) no chickens.
Two scrap pieces of wood from the project used as a shelves. There's another one on the opposite wall that you can't see.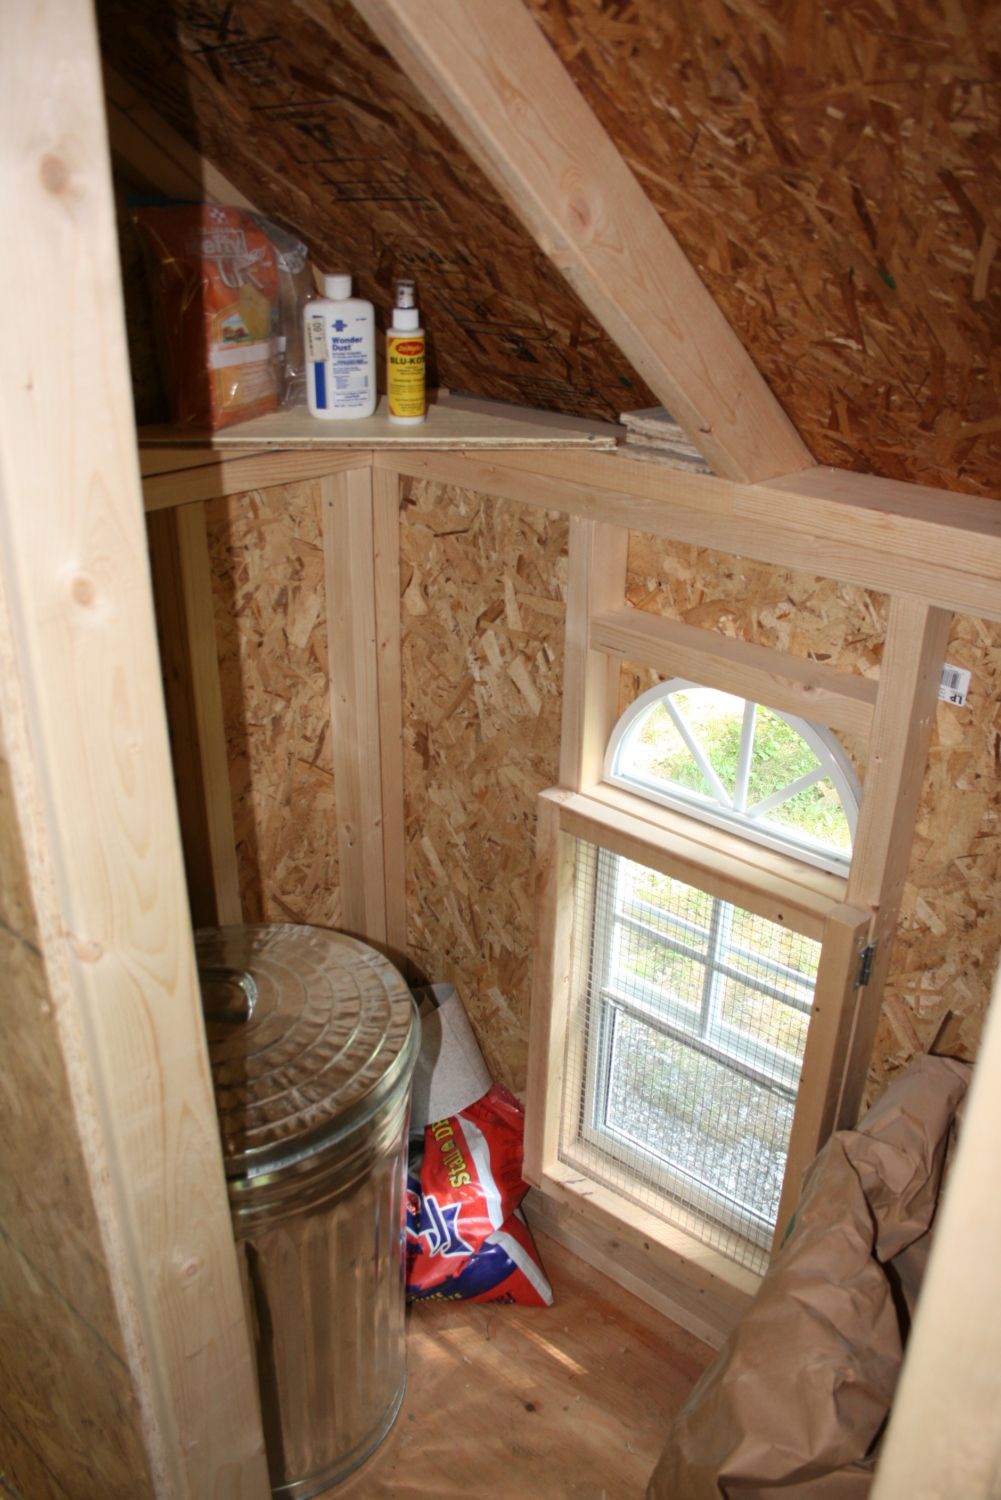
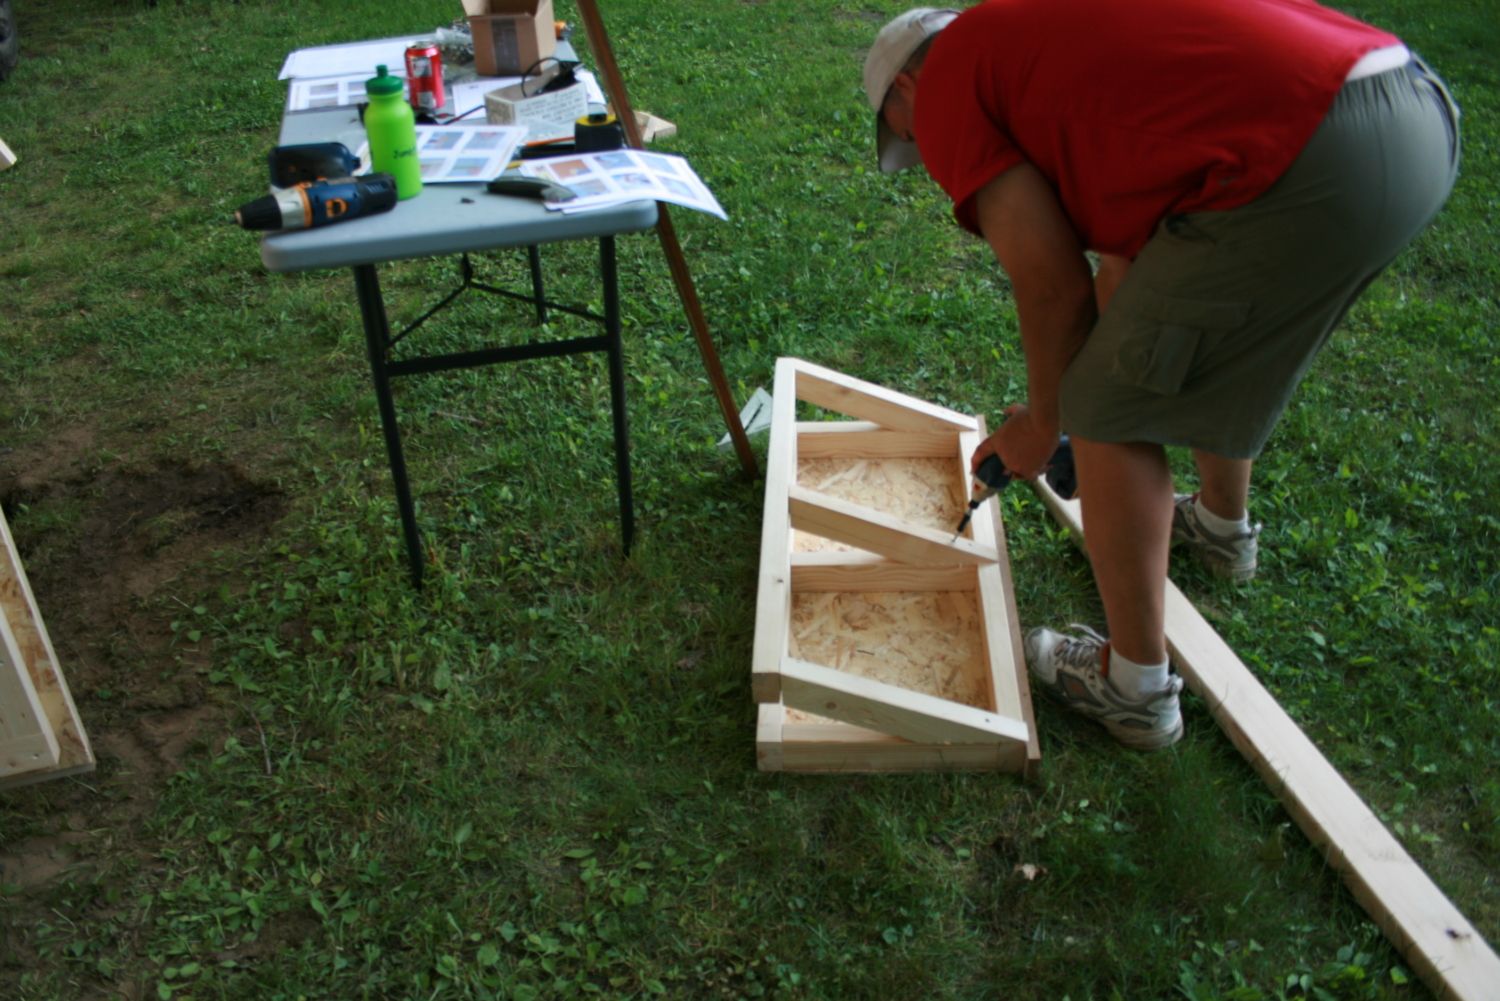
Next up were the nest boxes. Although initially we were planning on making these from scratch...when the schoolhouse materials were delivered, they had sent the cupola (including bell) packed separately in a large wooden crate. The crate was made out of the same heavy plywood the roof boards were, and measured about 24x24x24. The edges were all framed for strength to support the cupola and bell (which were heavy.) The more my husband looked at it, the more his imagination started churning. He took his circular saw and ran it around the circumference of the box, cutting it half. Then turned it on it's side, and put in a shelf. It made two next boxes that are 24 inches long, by 12 inches high, and 12 inches deep. We are going to see if this trough-like nesting box will suffice for the chickens. Worst case scenario, we can add a partition to the center of each level to divide them into 4 separate boxes that are 12x12x12 each. And we also have the option of going up one more level (in the space between the top of the box and the slanted roof line, to add two more if needed. I'm really glad we were able to recycle the box, the measurements couldn't have been any more perfect! (UPDATE: The nest boxes have worked perfect, and we've left them as troughs, not needing to add middle dividers.)
We added 2 inch strips of the scrap plywood to the front of each of the nest boxes to prevent the shavings from falling out. They have hinges attached to them (you can see the black hinges on the front - which were also leftovers) so they can be dropped down to make replacing shavings/cleaning easier. The fronts are held up by simple hook and eyes screws. To finish off the nest boxes, he used scrap 1x1's to add perches to the front in order to make access easier for the chickens to get in them.
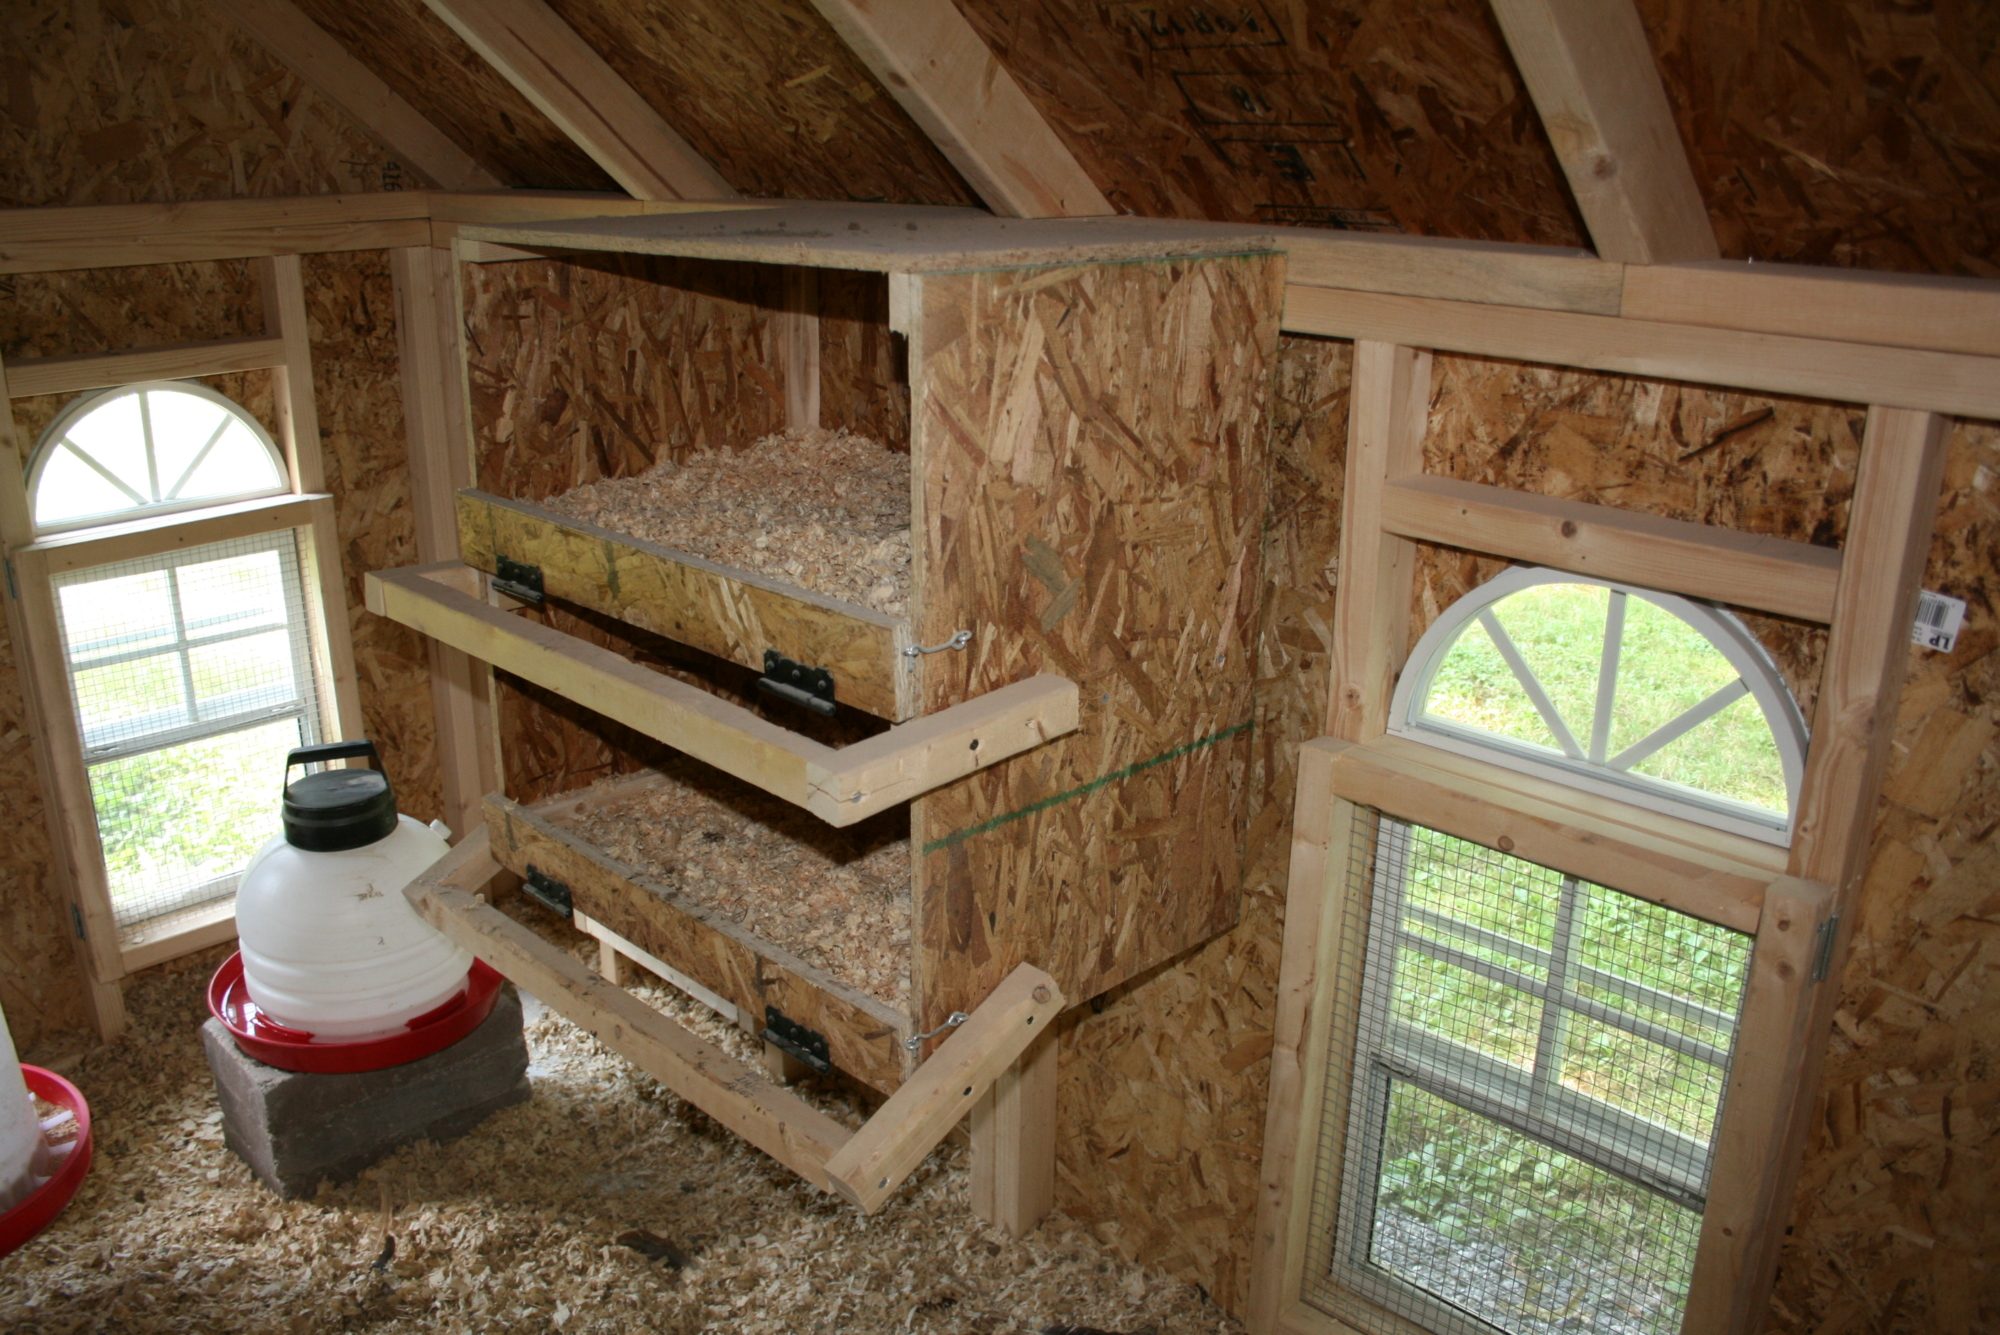
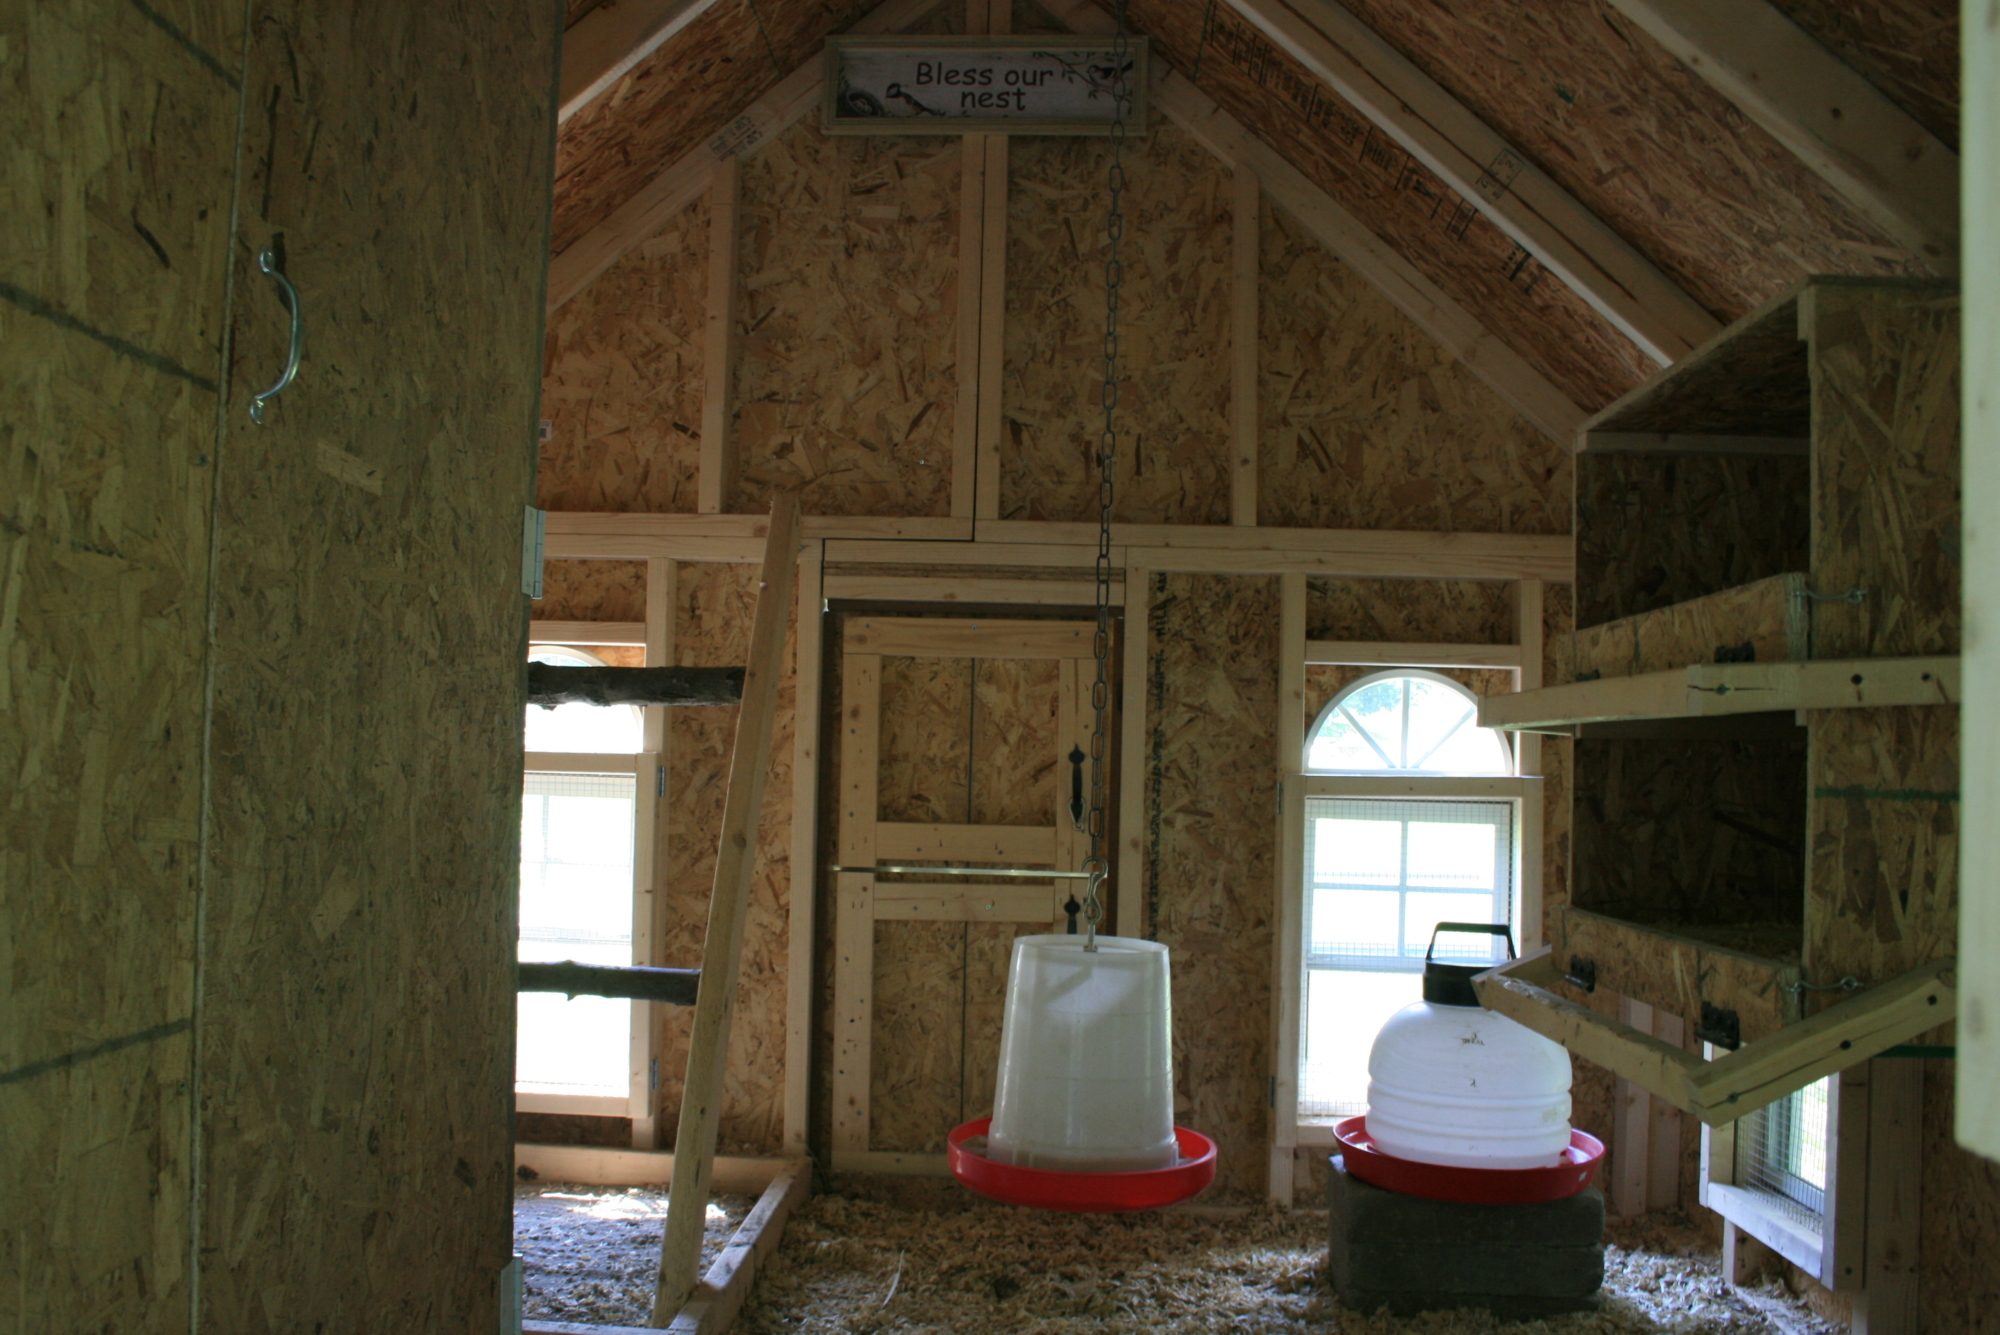
Next up, were the roosts. I really liked the ladder idea that I had seen so many people do, so we tucked one into the cozy space behind the closet. We used 2x4's for the lengths, and then went out into the woods and cut two natural wood (oak) pieces from some previous pruning we had done earlier in the spring. The branches were nice and thick, giving the chickens a comfortable perch to roost on. The ladder is positioned in such a way that they have both great light as well as ventilation from both windows. One roost is at 18 inches high, the other at 36 high with a 15 inch space between them (so the higher roosting birds don't poop on the lower roosting birds. The ladder is actually attached to the wall at the top with hooks, making it easy to remove for cleaning, or repositioning if needed. We are currently using only two roosts, as the birds are only 3 months old, and still cramming themselves (many times all 9 of them) together on one roost (usually the top one.) If this becomes an issue later on once they're mature, I can change up the set up (removing the ladder system) and instead placing a roost above the windows (and small dutch door) allowing it to span the width of the house, and mount a poop board underneath it. This would free up more floor space for them, and allow them more roost space on a single level. We'll see...the roosting issue is one we're watching, and willing to adjust if needed. Right now it's working out great. We made a poop board for under the ladder, which is filled with Stall-Dry (similar to sweet PDZ, whereas it absorbs odors and makes cleaning up easy-peasy.) I have horses, so had some on hand. Once I've used up the stock I have, I would like to try the sweet PDZ to compare it. The poop board is not nailed down, just sitting on top of the linoleum floor, so can be removed if needed. Update: We did change the roosting configuration in late fall. I've included new pictures at the end of the original story to show what it looks like now, and why we did what we did.
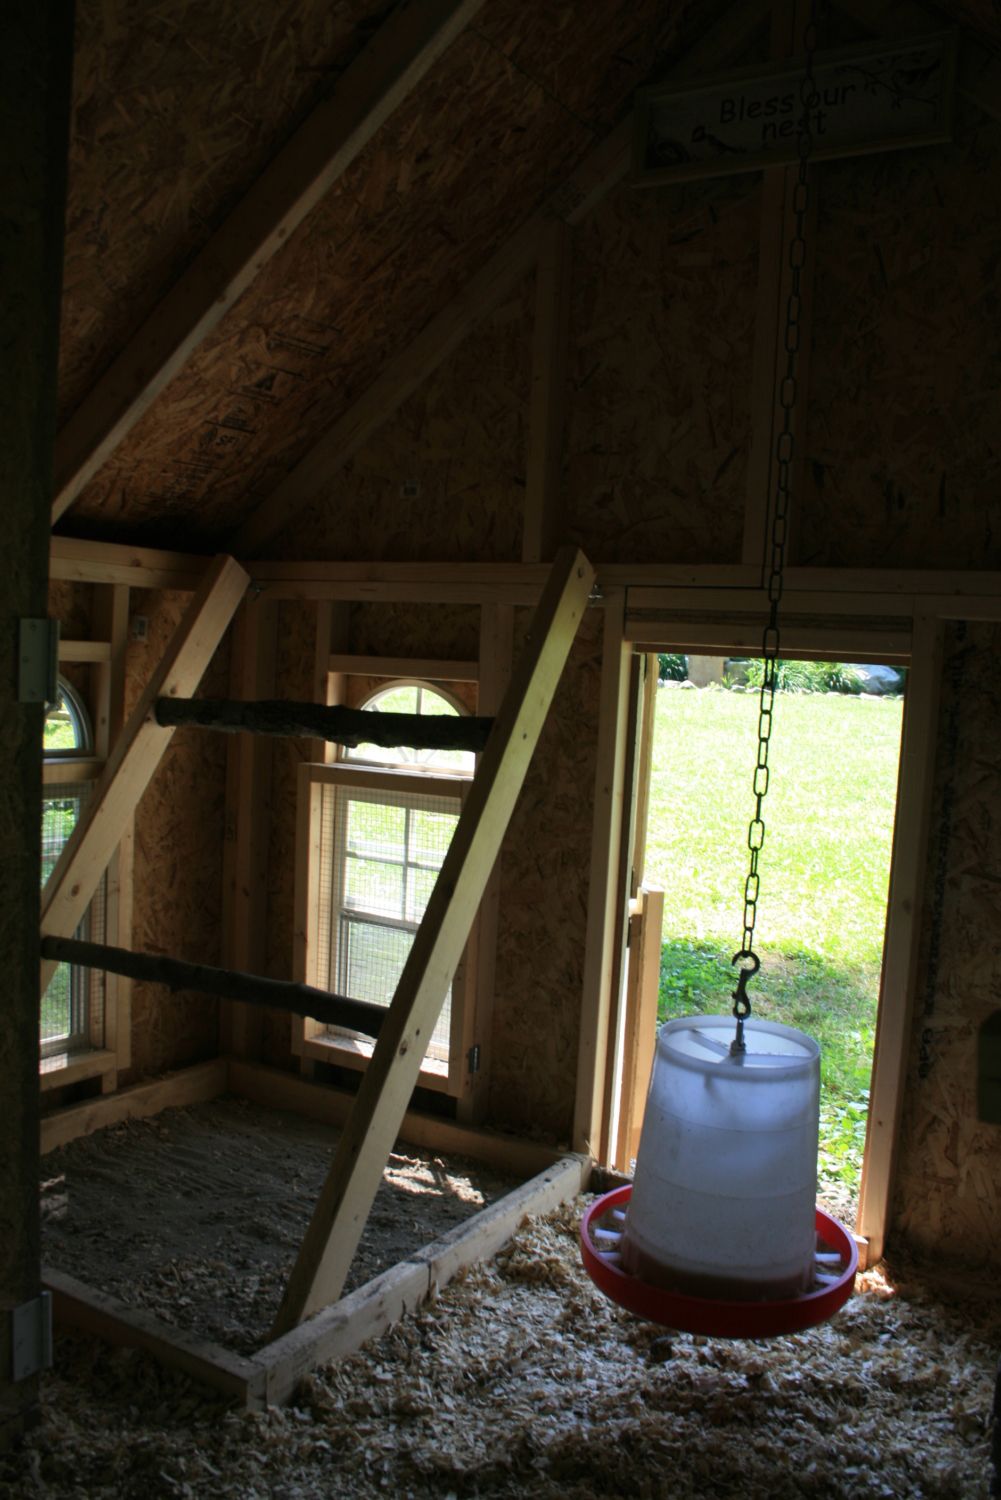
Below gives you an idea of where the roosts are, in relation to everything else.
Well folks, that about sums up the tour of the Schoop as it stands so far!
Last Up: The Run!
Due to a very busy summer, the building and completion of the run took longer than we thought. We squeaked in just under our deadline (which was having it finished before we left on vacation for two weeks the beginning of August.) We ended up working on it sporadically throughout the month of July. Here are the steps we took to build it....
My husband changed the size from 16'x12' (my idea) to 12'x12' (what he was willing to build.) Ok, beggars can't be choosers. 12'x12' it is.
The first step was using the Dingo to trench out the perimeter. Dingo = A human back muscle's best friend. Oh, and 9 year old boys love them too. It's a testosterone thing.
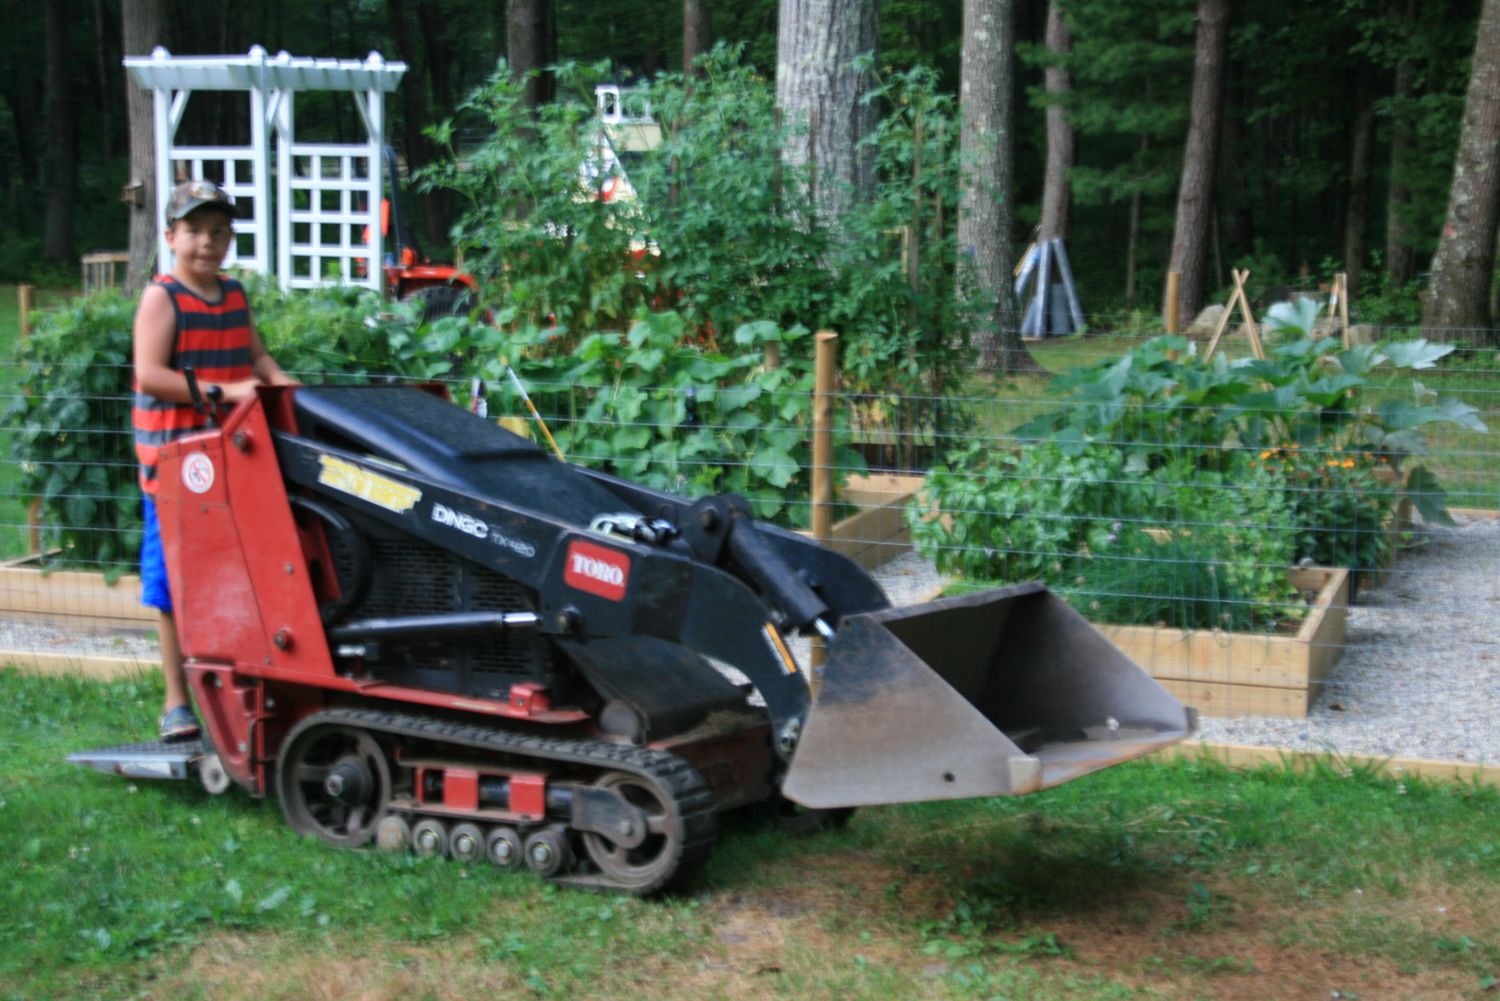
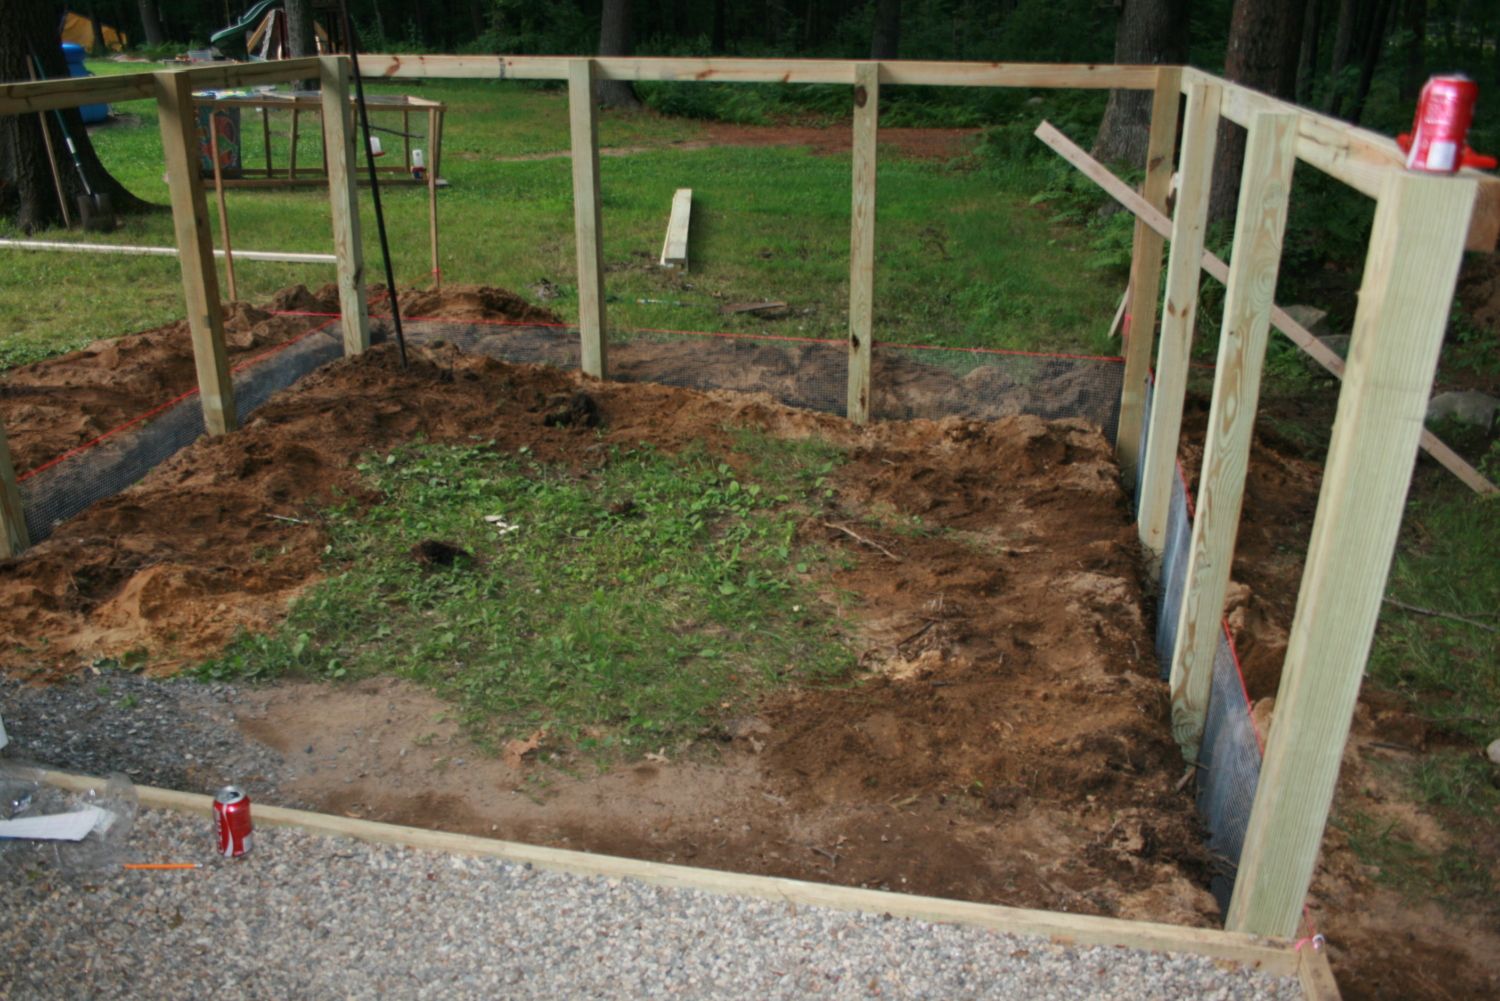
The perimeter was trenched 24 inches deep (some areas were a bit shallower due to big ol'rocks the size of Volkswagen's!)
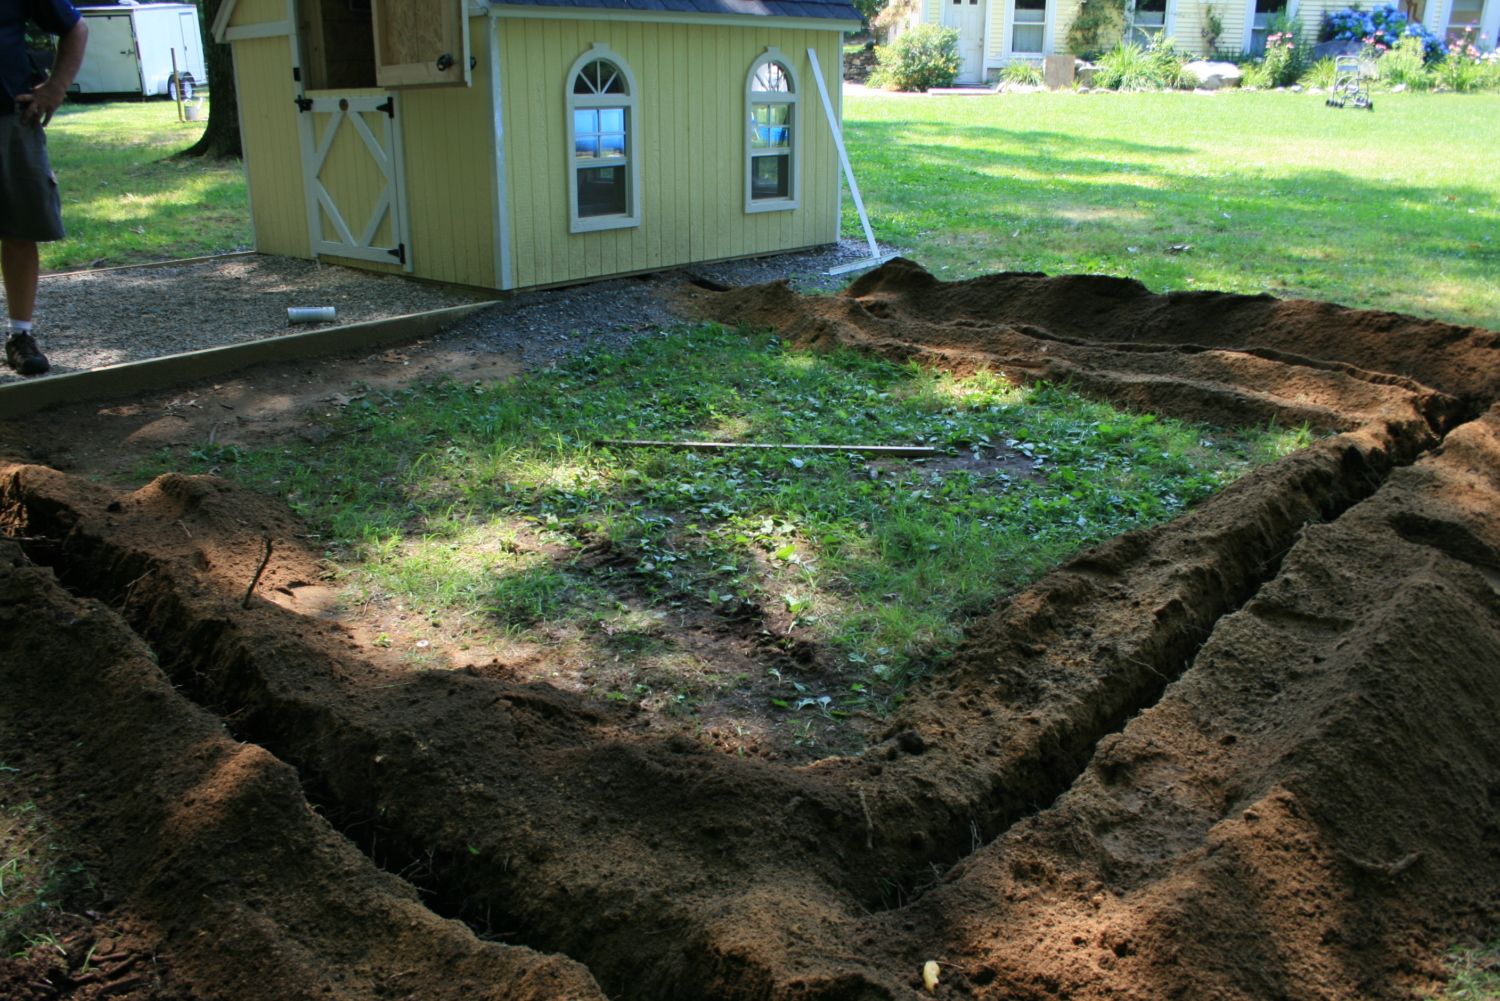
The trenching was needed for two reasons. First, so we could set in ten 6 foot 4x4's for support, and second so that we could sink hardware cloth 18-24 inches underground to protect against predators. We have active populations of coyote, fox and fisher cats in our area, along with raptors (hawks and owls) nesting on our property...so a secure run and coop are paramount to keeping the chickens safe.
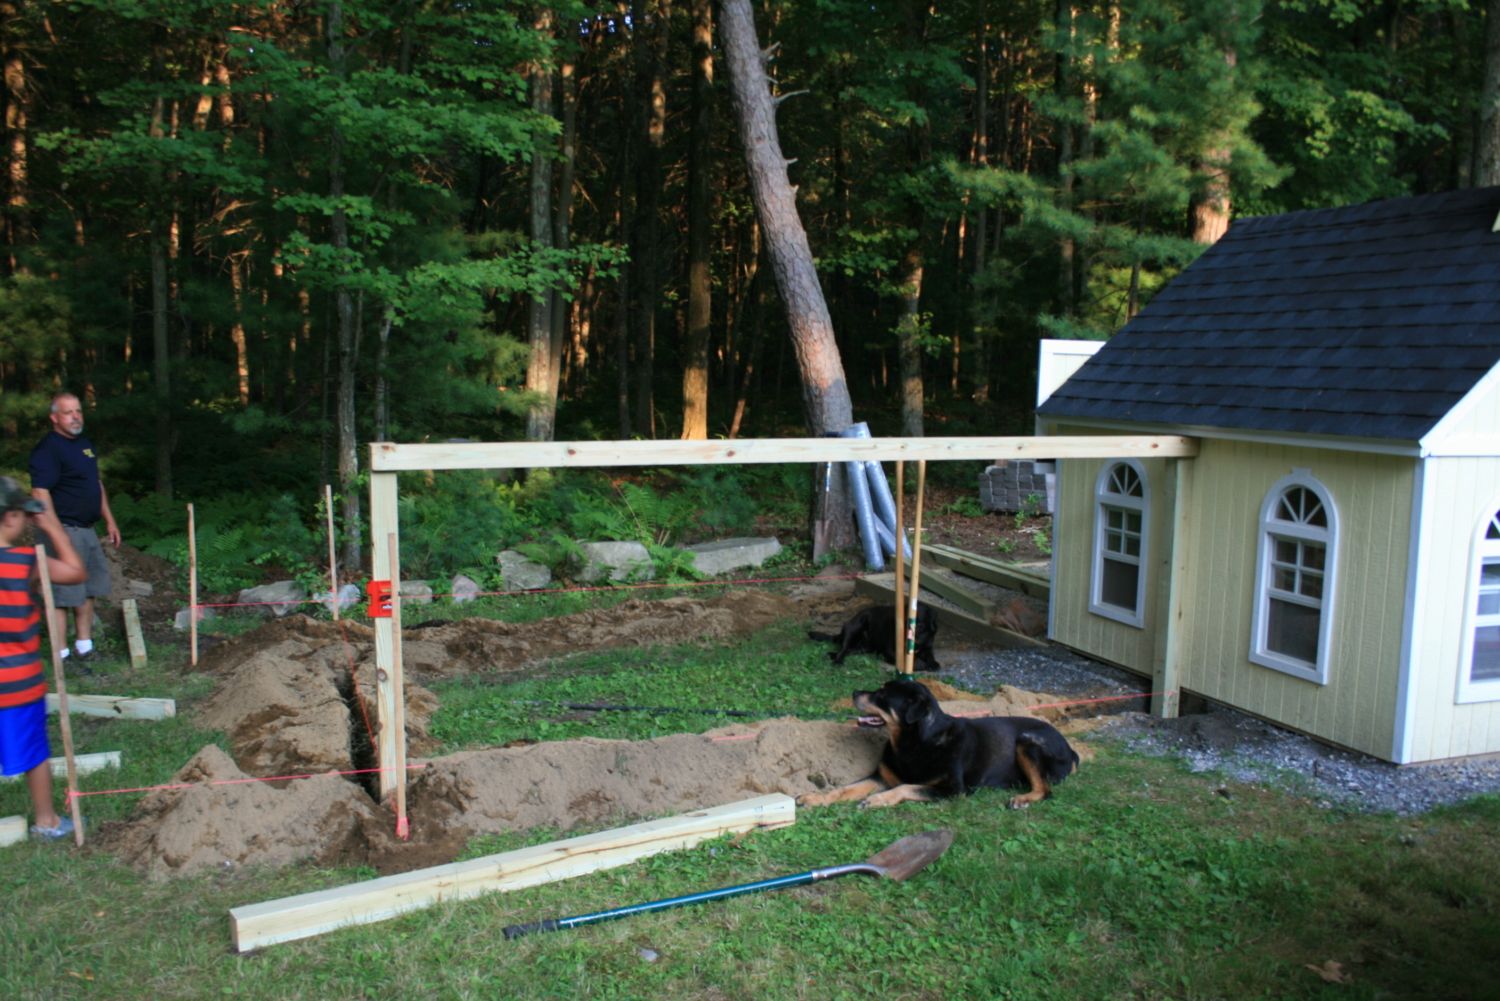
Once the trenches were dug, my husband then measured out the area, and staked out his strings for square and level. The area is sloped to the back, so we will have to add fill to the pad of the run...but we're going to frame it first, and back-fill afterwards.
We offset the position of the run to the Schoop, so that the two structures didn't overwhelm the area. I wanted the Schoop to be the main focus (sitting more forward), with the run being secondary (offset 4 feet back from the front of the coop.)
Here my husband is sinking and then securing the first post to the coop. He used three 6 inch exterior lag screws.
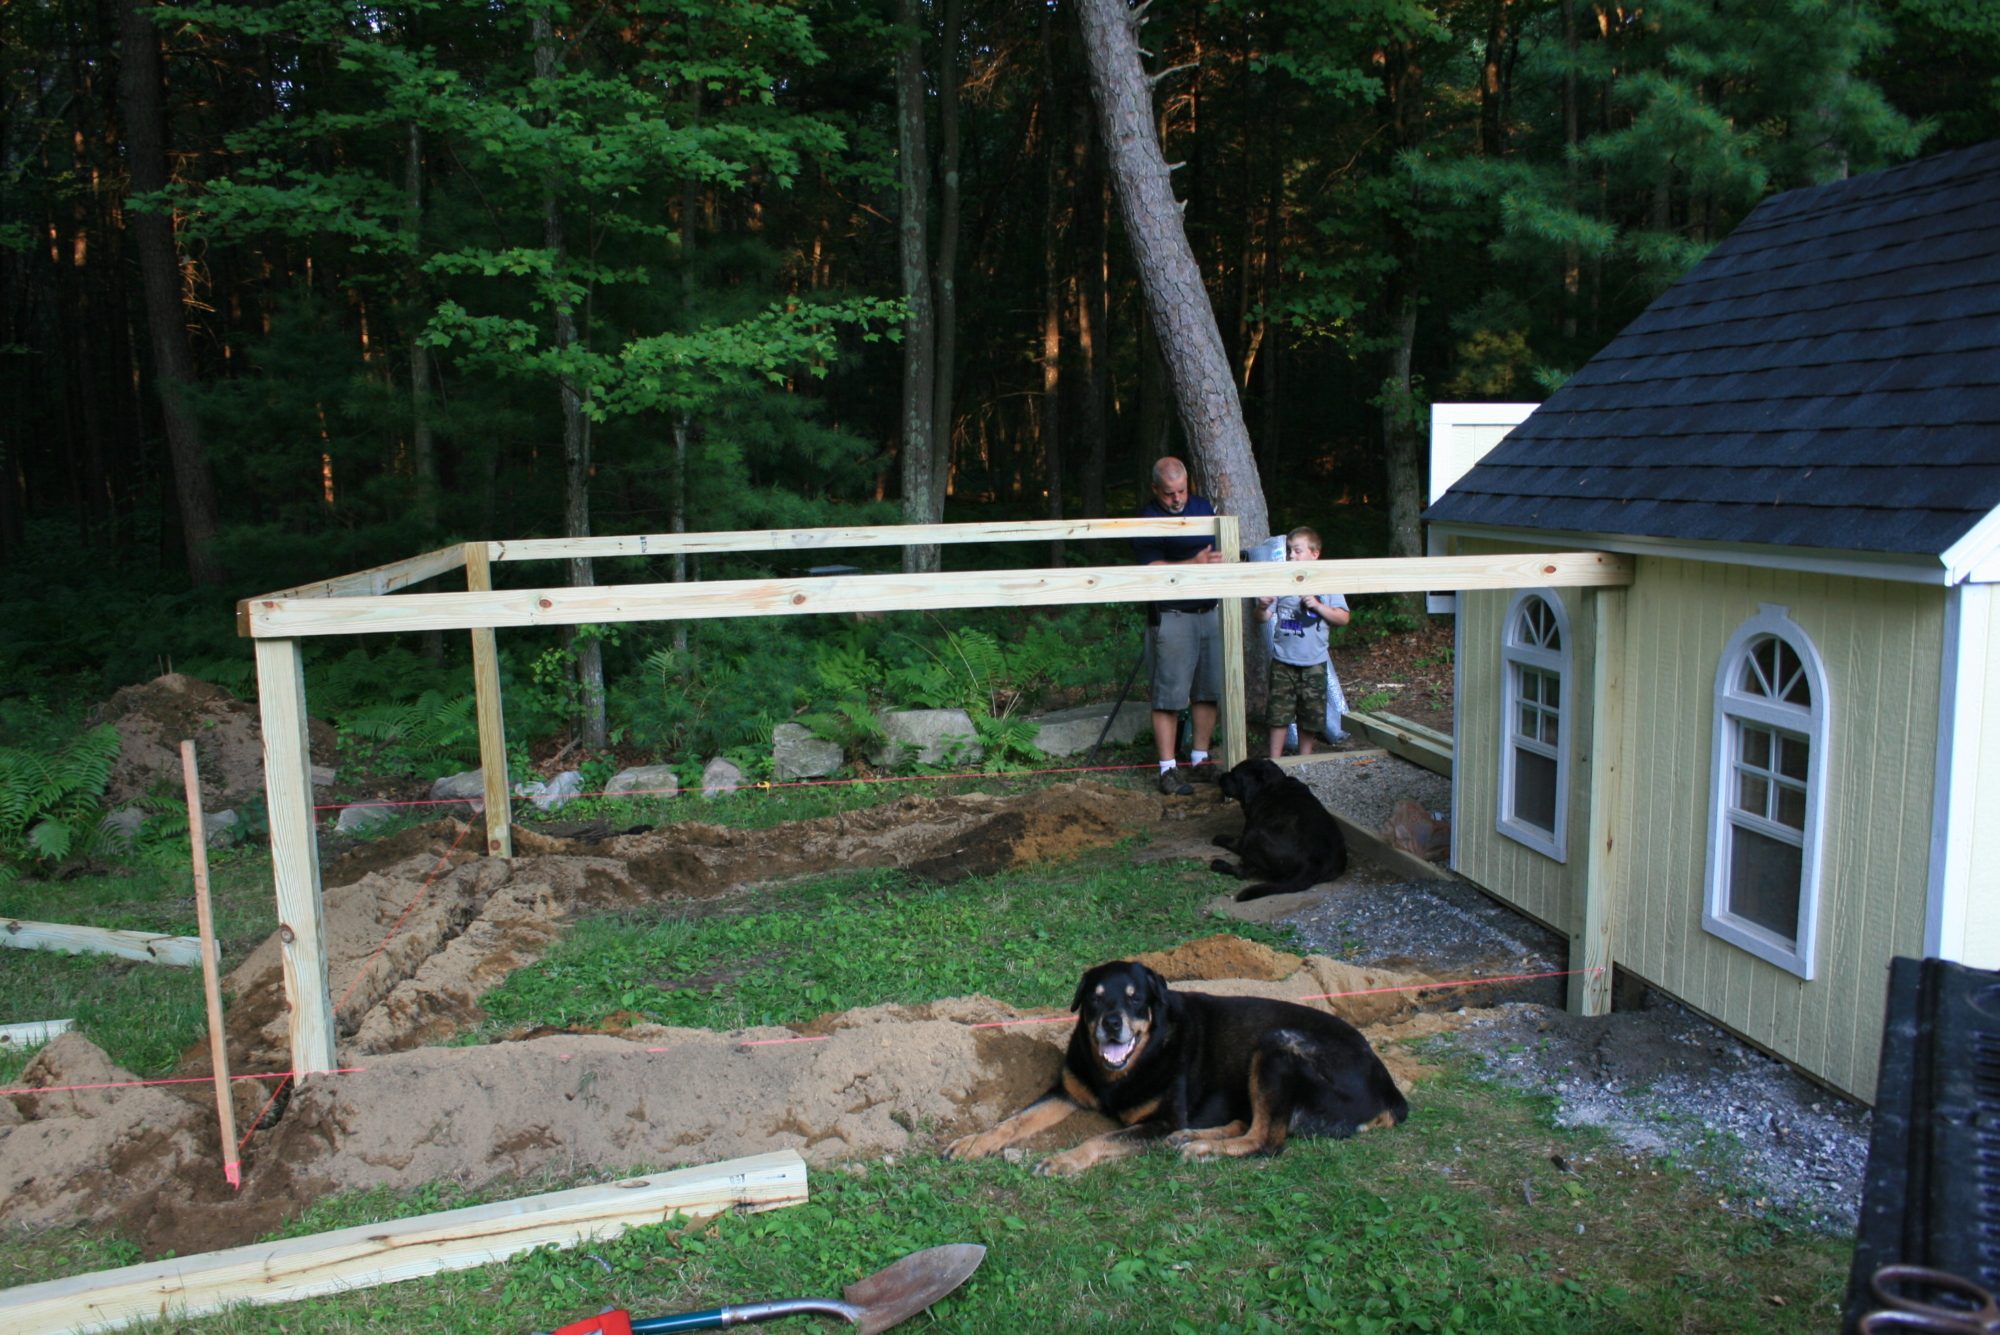
Then he set out the other three corner posts.
Next we secured the first two corner posts to each other using a 12x2x4's, at a 48 inch height, which is going to be how high the walls of the run will be. My rottweiler Cypher will now play the role of Vanna White in the picture below. Ta-da!
I should mention that all the screws we used were exterior...ranging from 2.5" to 3.5", depending on what we were securing.
And then the process continued with the other two corner posts. Connecting each to one another with a 12x2x4.
On a non-construction note...there is nothing more heartwarming to this particular mama, than to see her two boys concentrating so hard on wanting to help their daddy. Makes my soul happy.
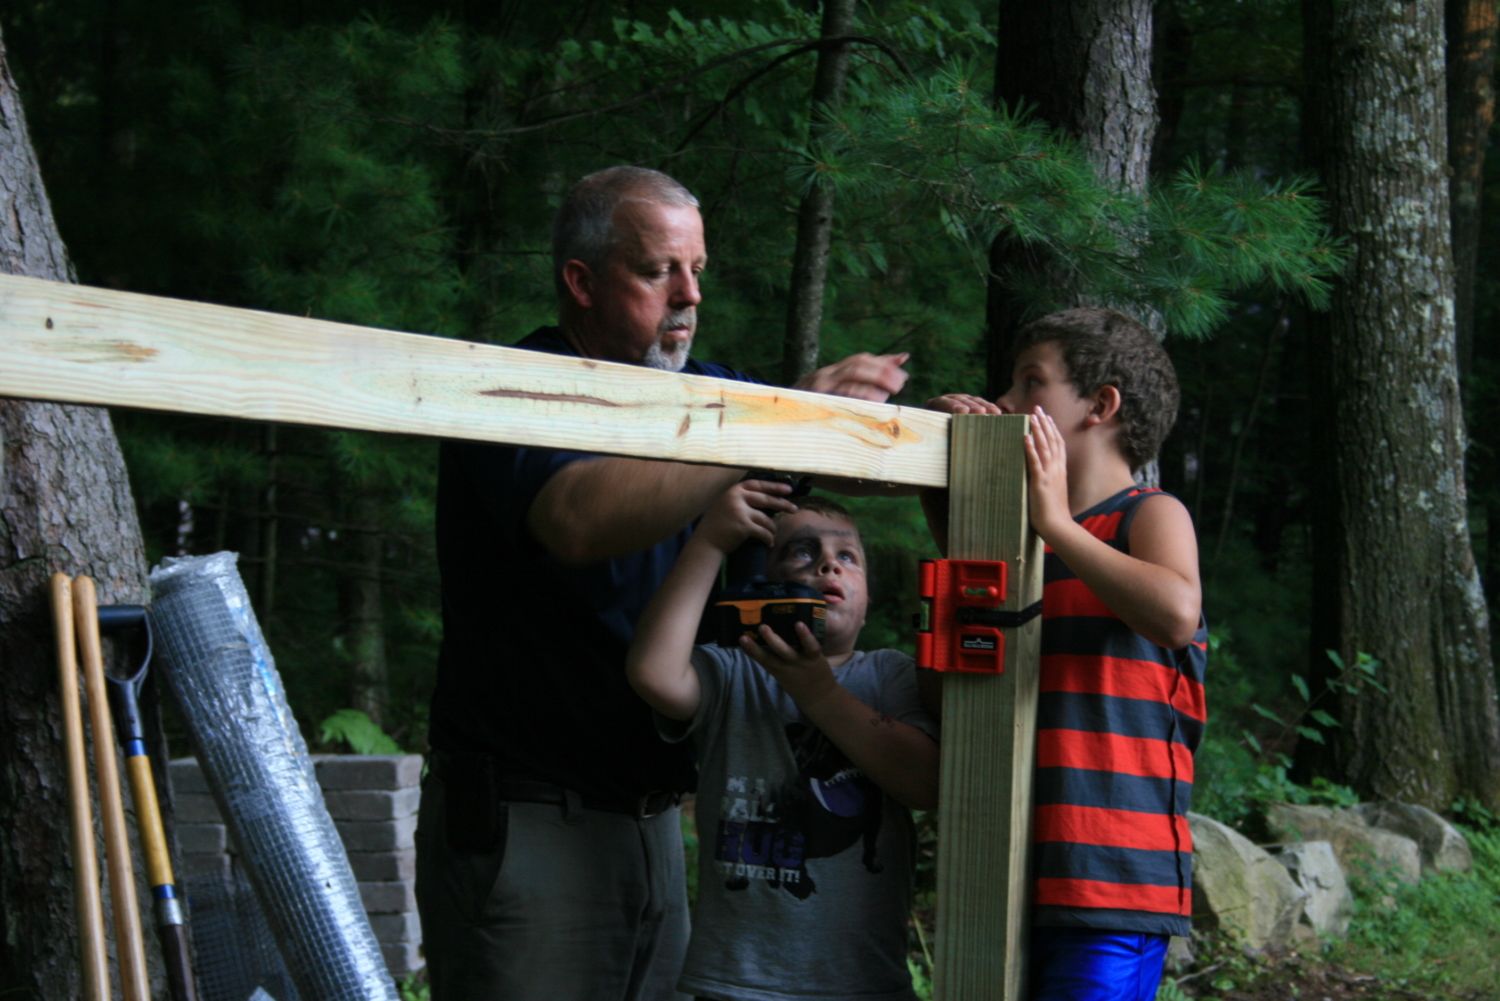
Eh....after looking closer at this sweet picture, I had to laugh. Please disregard the fact that my youngest son's face has black paint around his eye, and on his cheeks and chin....he had just gotten home 30 minutes earlier from a Pirate Birthday Party at his friend's house. And as for my older son, yes I too have just noticed that his shirt is on inside out. This is my reality...but hey, we're a happy bunch.

We ended the day at this point. The mosquitoes were out full force, and it was time to call it quits. The corner posts are all connected and square.
Ok, Day 2 began with me on my own (my husband had one of those fishing tournaments I mentioned, and would be gone most of the day.) We wanted to get three things accomplished: posts, hardware cloth buried, and cement. My job was to start on the first two, and my husband would help me finish when he got home later in the day.
First off, sinking the remaining 6 posts, 48 inches on center. Initially, I just wanted them level with the top 12x2x4. attaching them with a single screw (I would level them vertically later.). Easy peasy.
Second, my focus for the next several hours was digging out the trench as much as possible...to give it a consistent "clean" depth of 18 inches for burying the 24 inch hardware cloth around the permenter of the run. This took me FOREVER!! Although the Dingo did the main work, digging the depth of the trench. But it was narrow, about wide enough for me to stick my hand in, and deep enough for my arm to reach to the bottom in order to scoop the loose dirt out. I also needed to widen it in places with a trench shovel and digging bar, so the hardware cloth could fit around the posts etc. There are no pictures during this step...laying in the dirt does not bode well for picture taking (basically, I was too dirty, hot, sweaty and cranky to keep getting up to take pictures of me with a handful of dirt...or fighting with an unruly 25 foot roll of hardware cloth.) So you will only see AFTER pictures. Sorry.
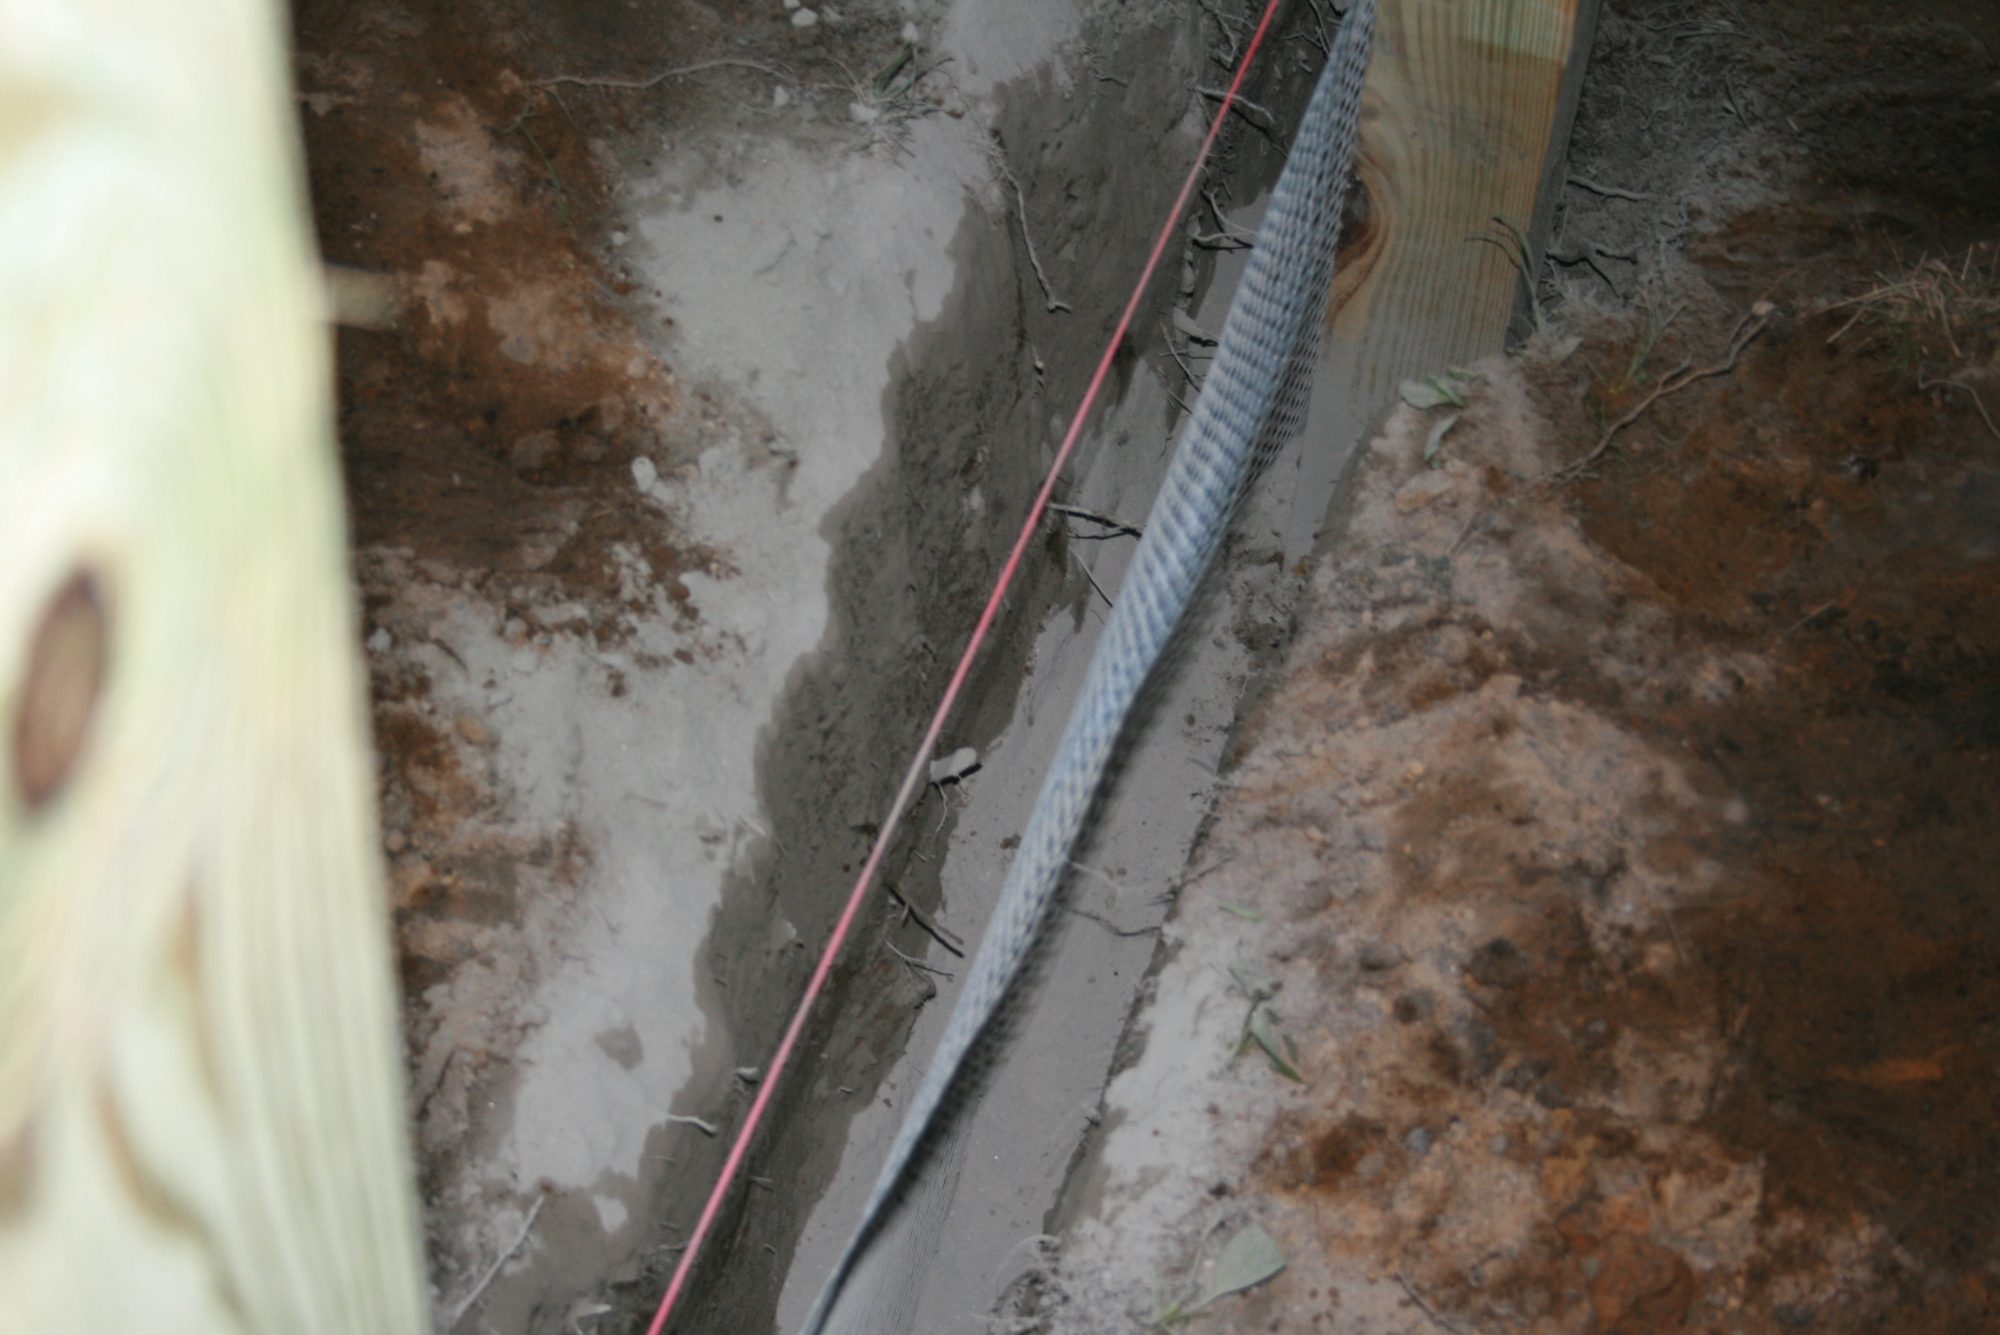
Below (when I finally took the time to take a picture) you can see where I was about 3/4's way around the perimeter with rolling out and sinking the hardware cloth in the trench.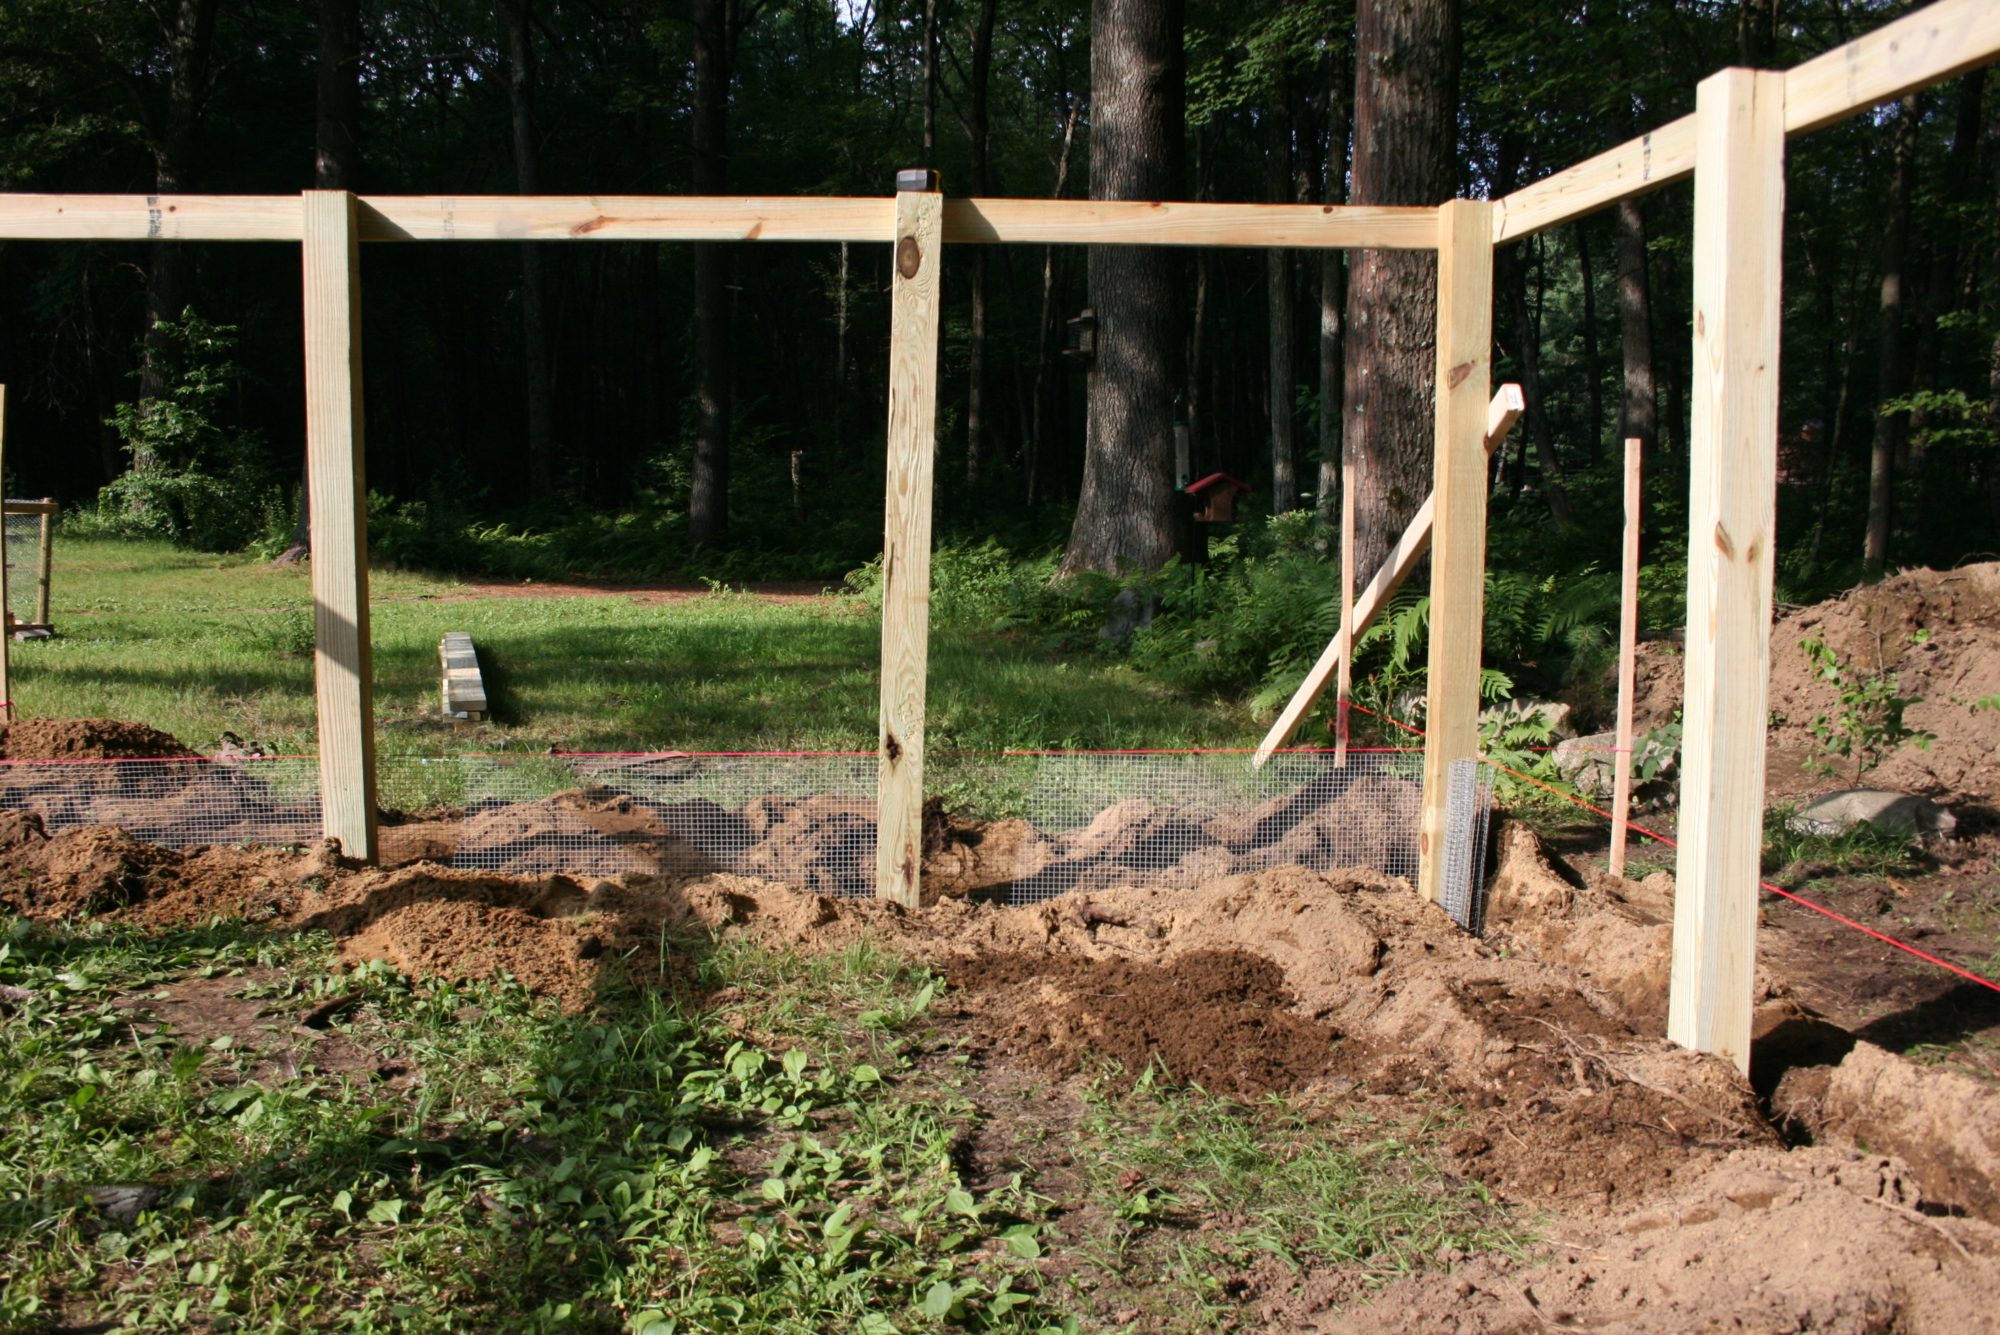
In this picture below you can see the hot pink string line (about 6 inches above ground level on the left.) That level line represents the top of where the 2x6x12' (not in place yet) will be nailed to the bases of the posts. The underground hardware cloth needed to stay below that line, because it will later be stapled to those 2x6x12'. I mentioned earlier that the inside run is not yet leveled...and that it was higher in the front (left side), than the back back (right side.) This is very evident when you see more of the hardware cloth poking up on the right than you do on the left. Once the inside pad of the run is back-filled and leveled, all the hardware cloth will be buried a consistent 18 inches deep all the way around. Once all the hardware cloth was in place in the trench, we then went post to post and leveled them vertically.
Finally, the last goal for the day: It was cement time!! We used three 80 pound bags of qwuick-crete and two 60 pound bags of leftover mortar we had. We poured them into the trench, (ok, that's a not a literal description - my husband lifted those bad boys...I'm strong, but 50 pound bags of grain is pretty much my limit) on either side of the hardware cloth, and around the posts. I then evenly spread it throughout the trench with my hands. We were using cement as a final way to secure the posts and hardware cloth to the bottom of the trench for stability and security.
And then we added water...and stirred...and added more water...and stirred more...
...and added yet more water...and stirred some more. You get the idea.
Finally, once it was at the pudding consistency we wanted, we let it set up overnight. And we called it a night...and the end of Day 2.
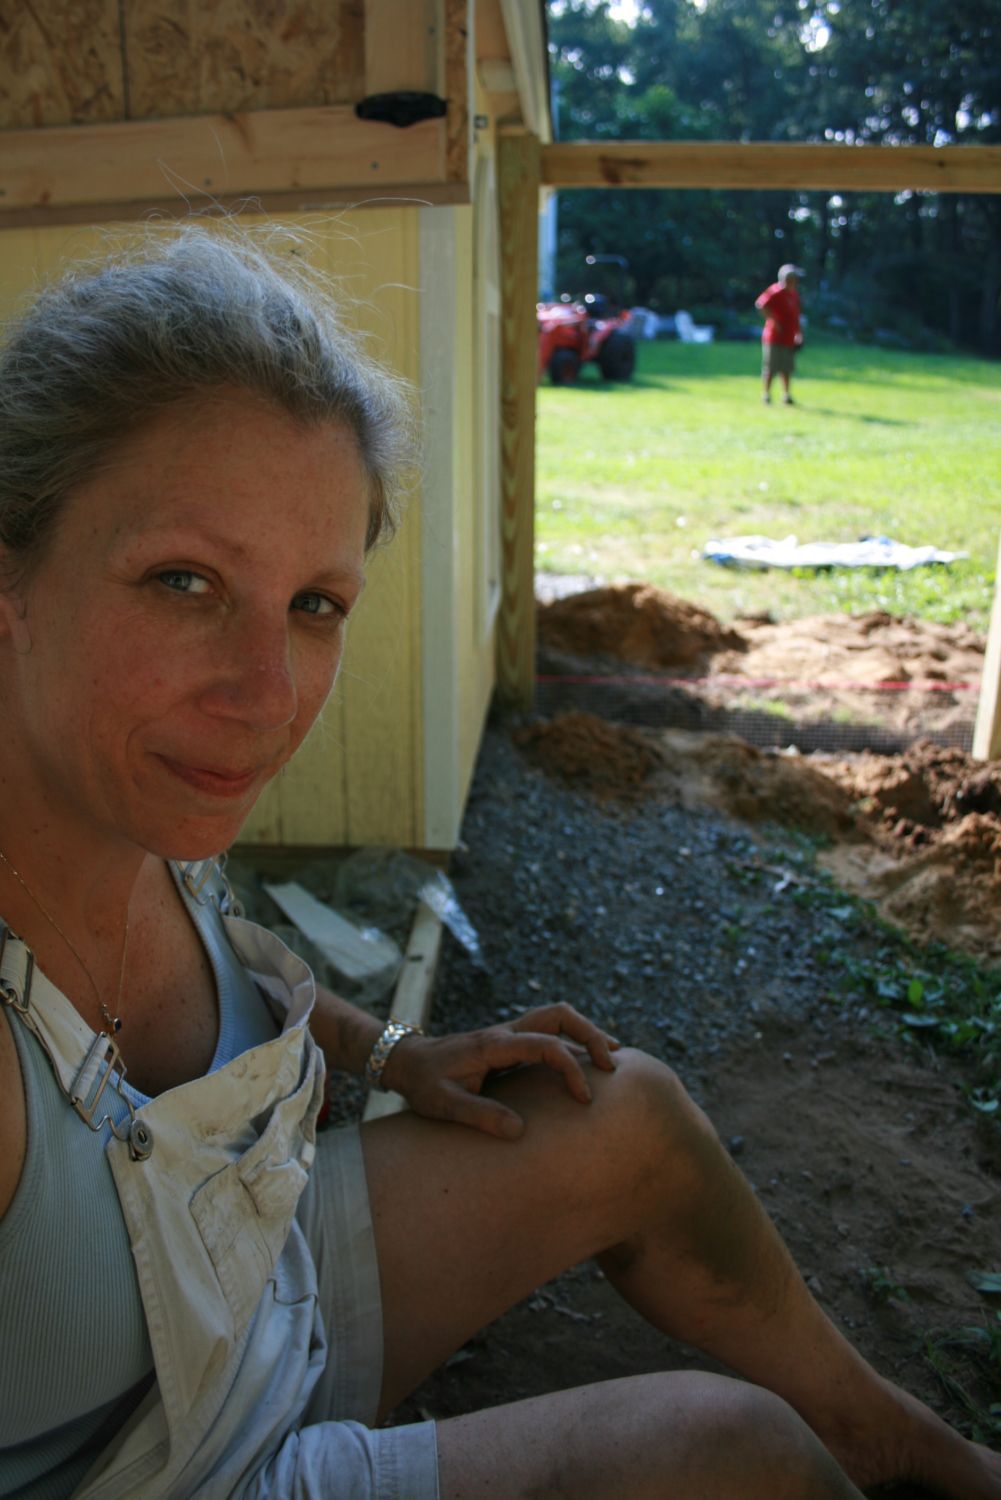
It has been a very long time since I have been such a sweaty, dirty mess (and this picture is BEFORE I turned a weird shade of gray from the cement dust.) Between kneeling and laying in the dirt while working on that blasted trench, and then being doused in clouds of concrete dust while the temperature sat at 95 degrees with 100% humidity....well let's just say the grub factor was pretty high. You know it's bad when you can see the dirt accumulating in the bottom of the shower.

The next big step was tackling the hardware cloth, and attaching it to all the sides. Joy. Rapture. Not. Actually, it went much faster and easier than I expected...maybe because my husband decided to cut it all himself.
Woohoo! Reason #347 why I love him.When we were framing out the run, we placed the posts at 48 inch wide widths (we had purchased 48" wide rolls of hardware cloth), so when cutting and attaching the hardware cloth, it would be a much easier task. We purchased 3 rolls total of 48"x25' hardware cloth (this didn't include the 2 rolls of the 24"x25' for burying in the trench.) My husband used sheet metal shears to cut it with (which are longer nosed than tin snips.) They were awesome and made quick work of the job (and SO much faster than the blasted wire cutters I used when cutting the hardware cloth for the shutters inside the Schoop.) He wore gloves to protect his hands.
Bonus Tip: A digging bar makes a great end weight for holding down the end of the hardware cloth!
Let me introduce you to a hardware cloth installer's BEST FRIEND! The pneumatic staple gun. (Presented here for the camera by my son Jack.
We used 3/4 inch staples.
Before working on each side of the run, we unscrewed the top 2x4 so that we could attach the panel of hardware cloth all the way to the top of each 4x4 post. We did this so that when we then reattached the 2x4 to the top, it would overlap the hardware cloth, thereby securing it even better, and gave a clean line to the outside of the run. Later, we also attached an inner 2x4...so in essence, the hardware cloth was sandwiched between both pieces making it VERY secure.
Here we have two sides completed...working on the last side (you can tell because the top rail 2x4 has been removed.
Before we called it quits this particular night, we had a beetle already testing the security. I have a feeling he would have been toast if the new tenants were home.
One section of the third side complete...In this picture (on the left) you can see how the top of the cloth was attached to the inside of the top 2x4 after it was screwed back into place. Later we then sandwiched that cloth with an inner 2x4 for additional security.
Ok, yes it's a different day...and here you can see that the bottom 2x6x12' has been added. This piece acted to join the lower buried hardware cloth, and the above ground sections because we stapled both to the same piece. Once that was done, we then sandwiched the hardware cloth with another 2x6 on the inside...again allowing us to "hide" the staple seams as well as provide additional reinforcement for security.
Here's a close up of how the hardware cloth is now sandwiched between the lower 2x6's (on the lower left of the picture.) Also visible here, is how we laid the hardware cloth over the ground on the side of the run where it butts up against the gravel pad. We were unable to trench this area...but still needed to make it secure from predators digging under the gravel to get in. We saw this method used by several of the BYC members. We stapled it to the 2x6, and sandwiched another against it (after we did the upper portion), then buried the wire when we back-filled the inside of the run.
For the section under the coop, we did it very similar...stapled the hardware cloth to the bottom of the coop, then laid it flat on the ground about 18 inches in. I have to tell you, up till this point, we'd had a resident chipmunk burrowing under the coop (we'd see his holes in the gravel every morning) but that is no longer the case. He's moved on because access is no longer possible. Unfortunately, the little pisser has moved into my garden...so I shouldn't sound too smug.
Here are the 2x4's that we later attached to each side, to cover the hardware cloth seams on each of the 4x4 posts, again making a hardware cloth sandwich, for both asthetics and additional security.
Then it was time to make the roof trusses. My husband figured out the pitch he wanted to use, and cut everything according to that. We have a lot of snow here in the winter, so needed to keep that in mind, as well as the weight it presents. After reading how so many folks regretted not putting a cover on their runs, we knew this was something we wanted...and needed to do. As I mentioned before, we're unable to allow our chickens to free range many days (without supervision) so their run is going to be their main outdoor area...no matter what the weather. Having an area protected from the elements will allow them the freedom to go out when they want to.
I wasn't able to help him during this stage, so he built a temporary frame in order to support things as he worked.
Another view once the temporary frame was removed.
Framed on the opposite side, under the rafters...so we can put hardware cloth on that upper section.
Posts in place to begin framing the door, which will be a full size screen door and 30 inches wide (we purchased a basic wooden screen door from Home Depot to use, rather than build one.) This near side overlaps the coop a bit, so we are jigging the roof around it slightly. You can see how close to the coop one of the door frame 4x4's are. This happened because of the way we wanted to offset the run on the side and slightly to the rear of the coop, and that we wanted the door centered under the peak of the roof (so we could get the height we needed to put in a full size door.)
Another view...
A view from the "front" of the coop.
At this point, we were planning on using a dark grey plastic corrugated roofing material for the roof. Purchased it all...and then had second thoughts. Again...concerns about the snow and it's weight....and after all this work, not wanting to have regrets in the future. We ended up changing our minds, returning the other materials and instead decided to roof it with plywood and shingles instead. Matching it to the architectural shingles that we used on the Schoop.
After finishing all the hardware cloth on the both upper end sections (using the same methods we used on the lower sections), and then back-filling and leveling the ground within the run (using the front loader on our tractor to dump dirt in over the sides), my husband started putting up the plywood base for the roof.
Almost done....and don't worry, I'm NOT going to make any more comments about what I love about my husband. Let's just say that men with cute behinds, and nice muscled calves should do more roofing work in the summer. *sigh*

Ok, back to whatever it was we were talking about?? Gah, I've lost my train of thought.
DRIP EDGING....That's where we were!! We installed it along the entire roof line.
This is a picture of the screen door installed. We attached hardware cloth to it as well, and it is attached with gate hardware. Not installed in this picture are two slide bolts at the top and the bottom, for more security (so the top or bottom of the door can't be pulled out.)
Tar Paper and then shingling....which I do not have pictures of. I'm sorry, I was slacking on the job.
One of the very last steps was cutting in the pop door. We opted for a hinged door, cut to 11x15 inches because that is the dimension of the automatic pop door that I would like to keep as an option for the future. We have a hasp attached on the bottom so it can be secured closed if needed. For now (during the summer months) we have it hooked open 24/7 so the chickens can come between the Schoop and Run as they please.
Once we (HE) finished the shingling of the roof, I landscaped around the perimeter of both the Schoop and the Run with some hosta's and ferns, filling the beds with pea gravel (so the dirt won't splash up on the siding when it rains etc.) Here the girls are out exploring the final product...and thrilled at the idea of having a hosta snack! oy.

I dragged our hammock over too, it's the perfect place to kick back and watch the girls in the run.
A view from the back....Oh, and please notice the two small signs staked in the gravel outside the run (one on either side of the screen door - one short, and one tall.) Unbeknownst to my husband or I, my two sons each used my husband's tools and scrap wood, and made up directional signs for the Schoop and Run....I guess in the event the chickens have a lapse in memory, or have relatives visiting from out of town. Clarification is a good thing.

Here's what they say....Sign #1 (tall):
Sign #2 (short) :
Here are a couple more final views of the finished coop and run....
I smile every time I look at it. I'm absolutely thrilled at how it has turned out. My husband is too...however, feels that for the effort and expense, the eggs we hope to begin to enjoy in a month or so....better be golden.

A few things we're still contemplating:....
Insulation for the winter? There is room for it (in between the studs) but we're not sure if it's necessary yet. I think it's going to be one of those wait and see things.
Electric? Currently we have not run it. I want it, my husband isn't convinced we need it. He feels running an extension cord from the house for a heated water bucket/heat lamp will suffice for the winter. Let's just say it's still up for discussion.
If we do run electric, then I would love to install an automatic pop door (I've been reading about the Automatic Pullet Door, which sounds like a great product, but expensive ($180)...and after all the money we've already spent, it makes me cringe to spend more. The solar options for it are not feasible for our coop location because it does not get direct sun until late in the afternoon...so solar charging would not be long enough.
A Big Thank You
A special thank you to all that participate on this site. I couldn't begin to list all the threads I visited (still do) and all the knowledge and ideas I've gained from reading of people's real life chicken experiences...what works, what didn't work etc. which allowed me to apply it to our own planning and building project. I hope to repay that generosity of spirit through this post, by offering up documentation and pictures of our experience as a result.
It's been a lot of fun.

Update PS: On September 15th, we got our first egg! Though not golden, it was instead a perfectly beautiful green/blue little egg courtesy of one of our Araucauna's. (seen here in relation to a store bought egg.)
And so it begins....
Spring Update 2013 -
So it's been 1 year later this month since that we brought home our first 6 chicks, and started on this adventure. I wanted to follow up with an update on a couple of modifications we've made to the Schoop, as well as how our set up and chickens made it through our first winter.
One of the first changes I made, was to their water supply. When we first put water in the coop, I had used a gravity fed waterer inside the coop. But, it drove me crazy because it was constantly getting dirty. After researching some alternative water options, I bought a water bucket with nipple system. We hung it out in the run, so that if it dripped, it wouldn't get the inside of the coop wet. As the weather got colder, we ran an extension cord from the house to the Schoop's run, running it along the inside of the run's roof line, and plugged in a bucket heater. It worked even on the coldest days. However, if I let the water level drop too low (like 2 inches) it was too low for the heater to touch, so the water would freeze, and as a result, so would the nipples. I became very diligent in making sure it never went below 1/3 full.
The next change, was the biggest. In our original set up, you saw that we used a roosting ladder, with a poop board set up underneath it. It worked like a charm, but as the chickens continued to grow and gain weight, it was apparent they were getting a bit smooshed, when all 9 were roosting. So I wanted to change to plan B, which I mentioned was a possibility at that time. We removed the ladder and poop board (neither of which were permanently attached) and built a poop board to span the width of the Schoop, 8 feet long by 22 inches wide. It sits right above the windows, about 40 inches off the ground. We used plywood as it's base, and then framed it with a 2x3" to act as a lip, to contain the Sweet PDZ we use to control odors, as well as make clean up a breeze.
We then went searching in the woods out back for a nice long straight natural hardwood branch that we could use for a roost. We wanted one that was nice and thick...about 4-5 inches in diameter, so that roosting in the winter would allow them to keep their feet warm in the cold weather. We mounted it about 6 inches above the board, and about 10 inches out from the wall it spanned. Our hope was two fold. First, we felt that it would allow all 9 chickens to fit very comfortably on the roost, and second we thought it might help keep them a bit warmer, off the cold floor (heat rises and all that.) The added bonus was it freed up more floor space in the coop.
In order to make it easier to access, we built a simple gangplank out of scraps. Surprisingly, it took them several weeks to figure it out. Initially, they roosted on both the branch, and on the edge of the poop board. I think after using the ladder, they became accustomed to roosting at two levels. Ever so slowly, they soon all started roosting on the single branch. Now, it's the norm.
With the new layout, we moved the feeder to hang underneath the poop board. Over the winter, we started to experience some "pecking order" issues, especially around the feeder. Basically the more dominant hens determining who could eat, and when. So to combat that, I hung a second feeder on the opposite side. It's proved very successful at easing some of the stress.
I was also asked by some readers if we had any issues with the cold this winter. Being outside of Boston, we had a pretty hellacious cold, snowy winter. We didn't use a heater, or supplemental lighting. We let nature take it's course and just bedded them down with about 8 inches of shavings (which compacted to 4-5 inches.) We had all the windows closed all winter, with the exception of the pop door, which stayed open 24/7, with the exception of 2-3 brutally cold nights where it was windy and below zero temps. The chickens came through it like champs. They used their run every day by choice...some days it was just for a short period of time. During a couple of the big snow storms (one that was 18 inches and another that was 28 inches), we had to shovel path from the pop door to the waterer, so they had access to water.
So, at this point, we are shelving the idea of adding insulation to the coop. If we feel the need to, we can always revisit the possibility at another time.
Despite not using artificial light, we continued to get eggs right through the winter, with the exception of 3 weeks in early February. However, we had enough eggs on stock to squeak by, for at least two of those weeks.
Well, that's the latest update!
Hope you all survived your winter months, and are looking forward to spring and summer. I know I am.

