Chicken Gym

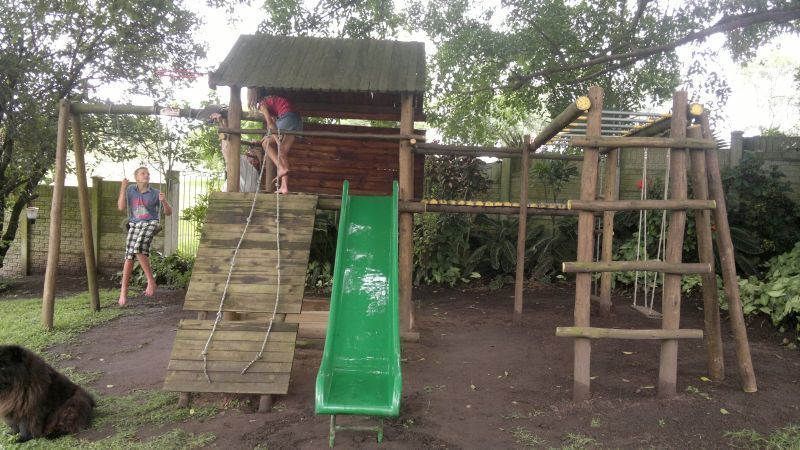
Chicken Gym started life as a Jungle Gym. As the children grew older they lost interest in playing on the jungle gym. We live in a warm humid area in South Africa and have to consider heat and rain much more than cold. Summertime is HOT and HUMID and even the middle of winter is frost free. The placing of the coop was predetermined as we could not really move the jungle gym.
Neither my husband nor myself had any carpentry skills although we are both quite technically minded.
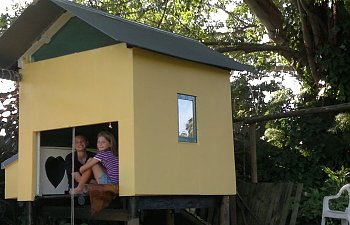
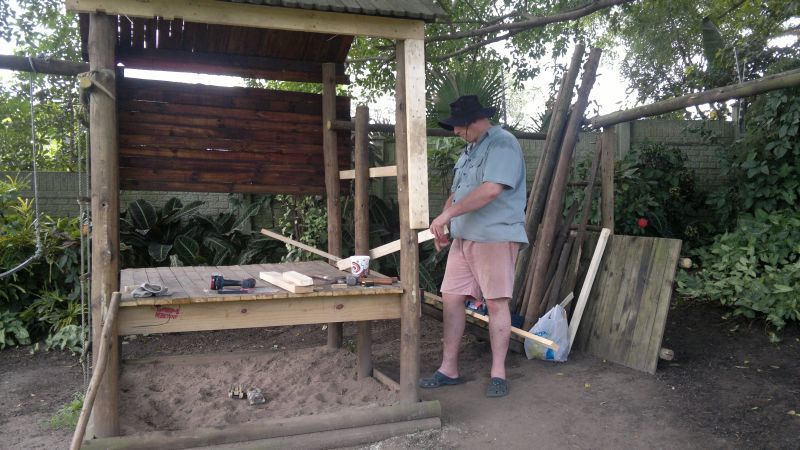
We started with this:
First we had to drop the floor of the jungle gym as it was too near to the roof and we wanted better ventilation and more space.
We dismantled the jungle gym and sold the slide and "monkey bars". The bridge was shortened to become the ramp leading to the chicken door.
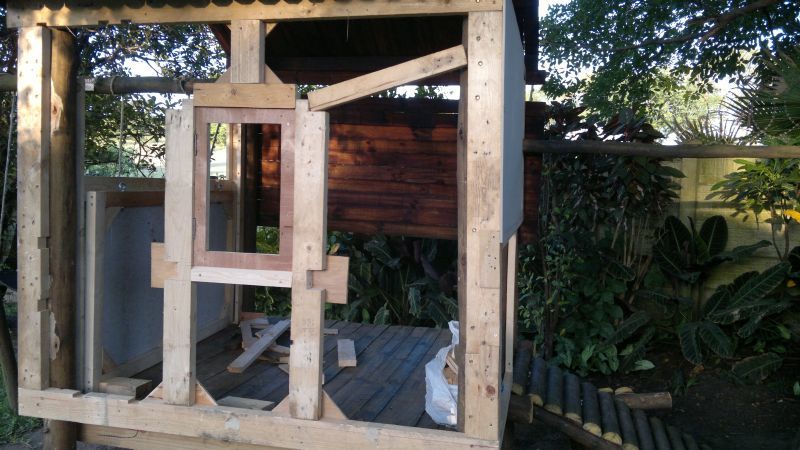
You will notice that the roof is not waterproof at this stage- yes, it is sky that you see through the roof.
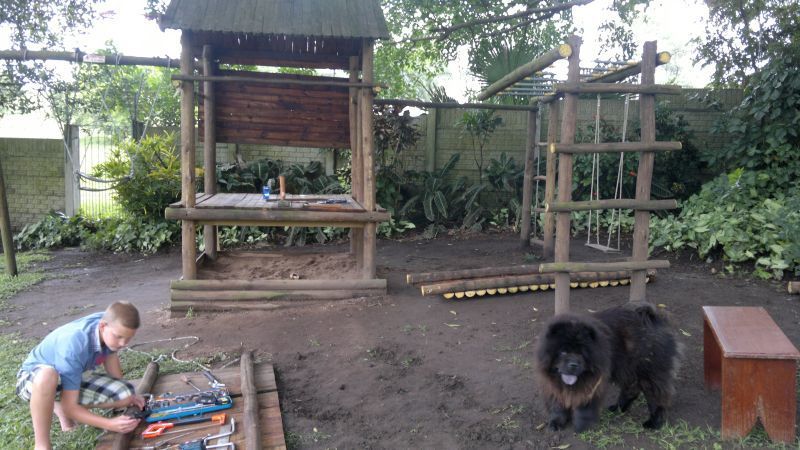
My son was the chief tool boy, and the other "person" is the building inspector.
We tried to use (free) recycled material as far as possible.
We got fiber cement board from a school that was remodeled: they discarded the door and window cut-outs and were too glad that we removed it for them.
The pine 1 X 2's and 2 X 4's were recycled from shipping crates of BMW motorcycles
The plywood came from salvaged crates for a new elevator at the hospital.
The OSB was donated by a friend who salvaged it from who knows where.
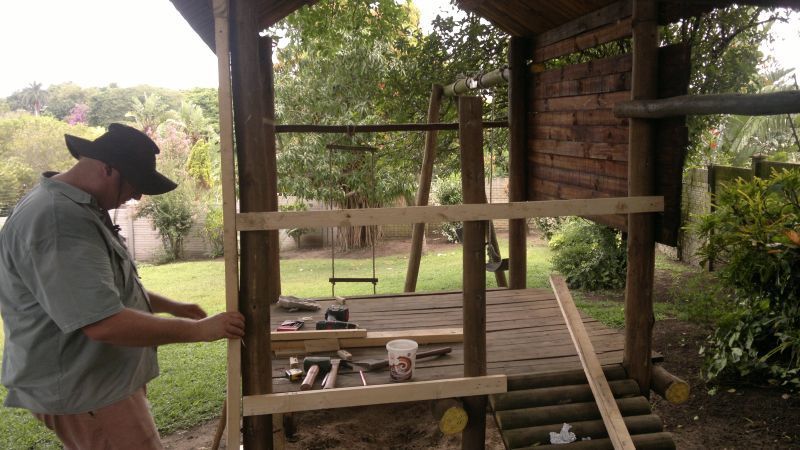
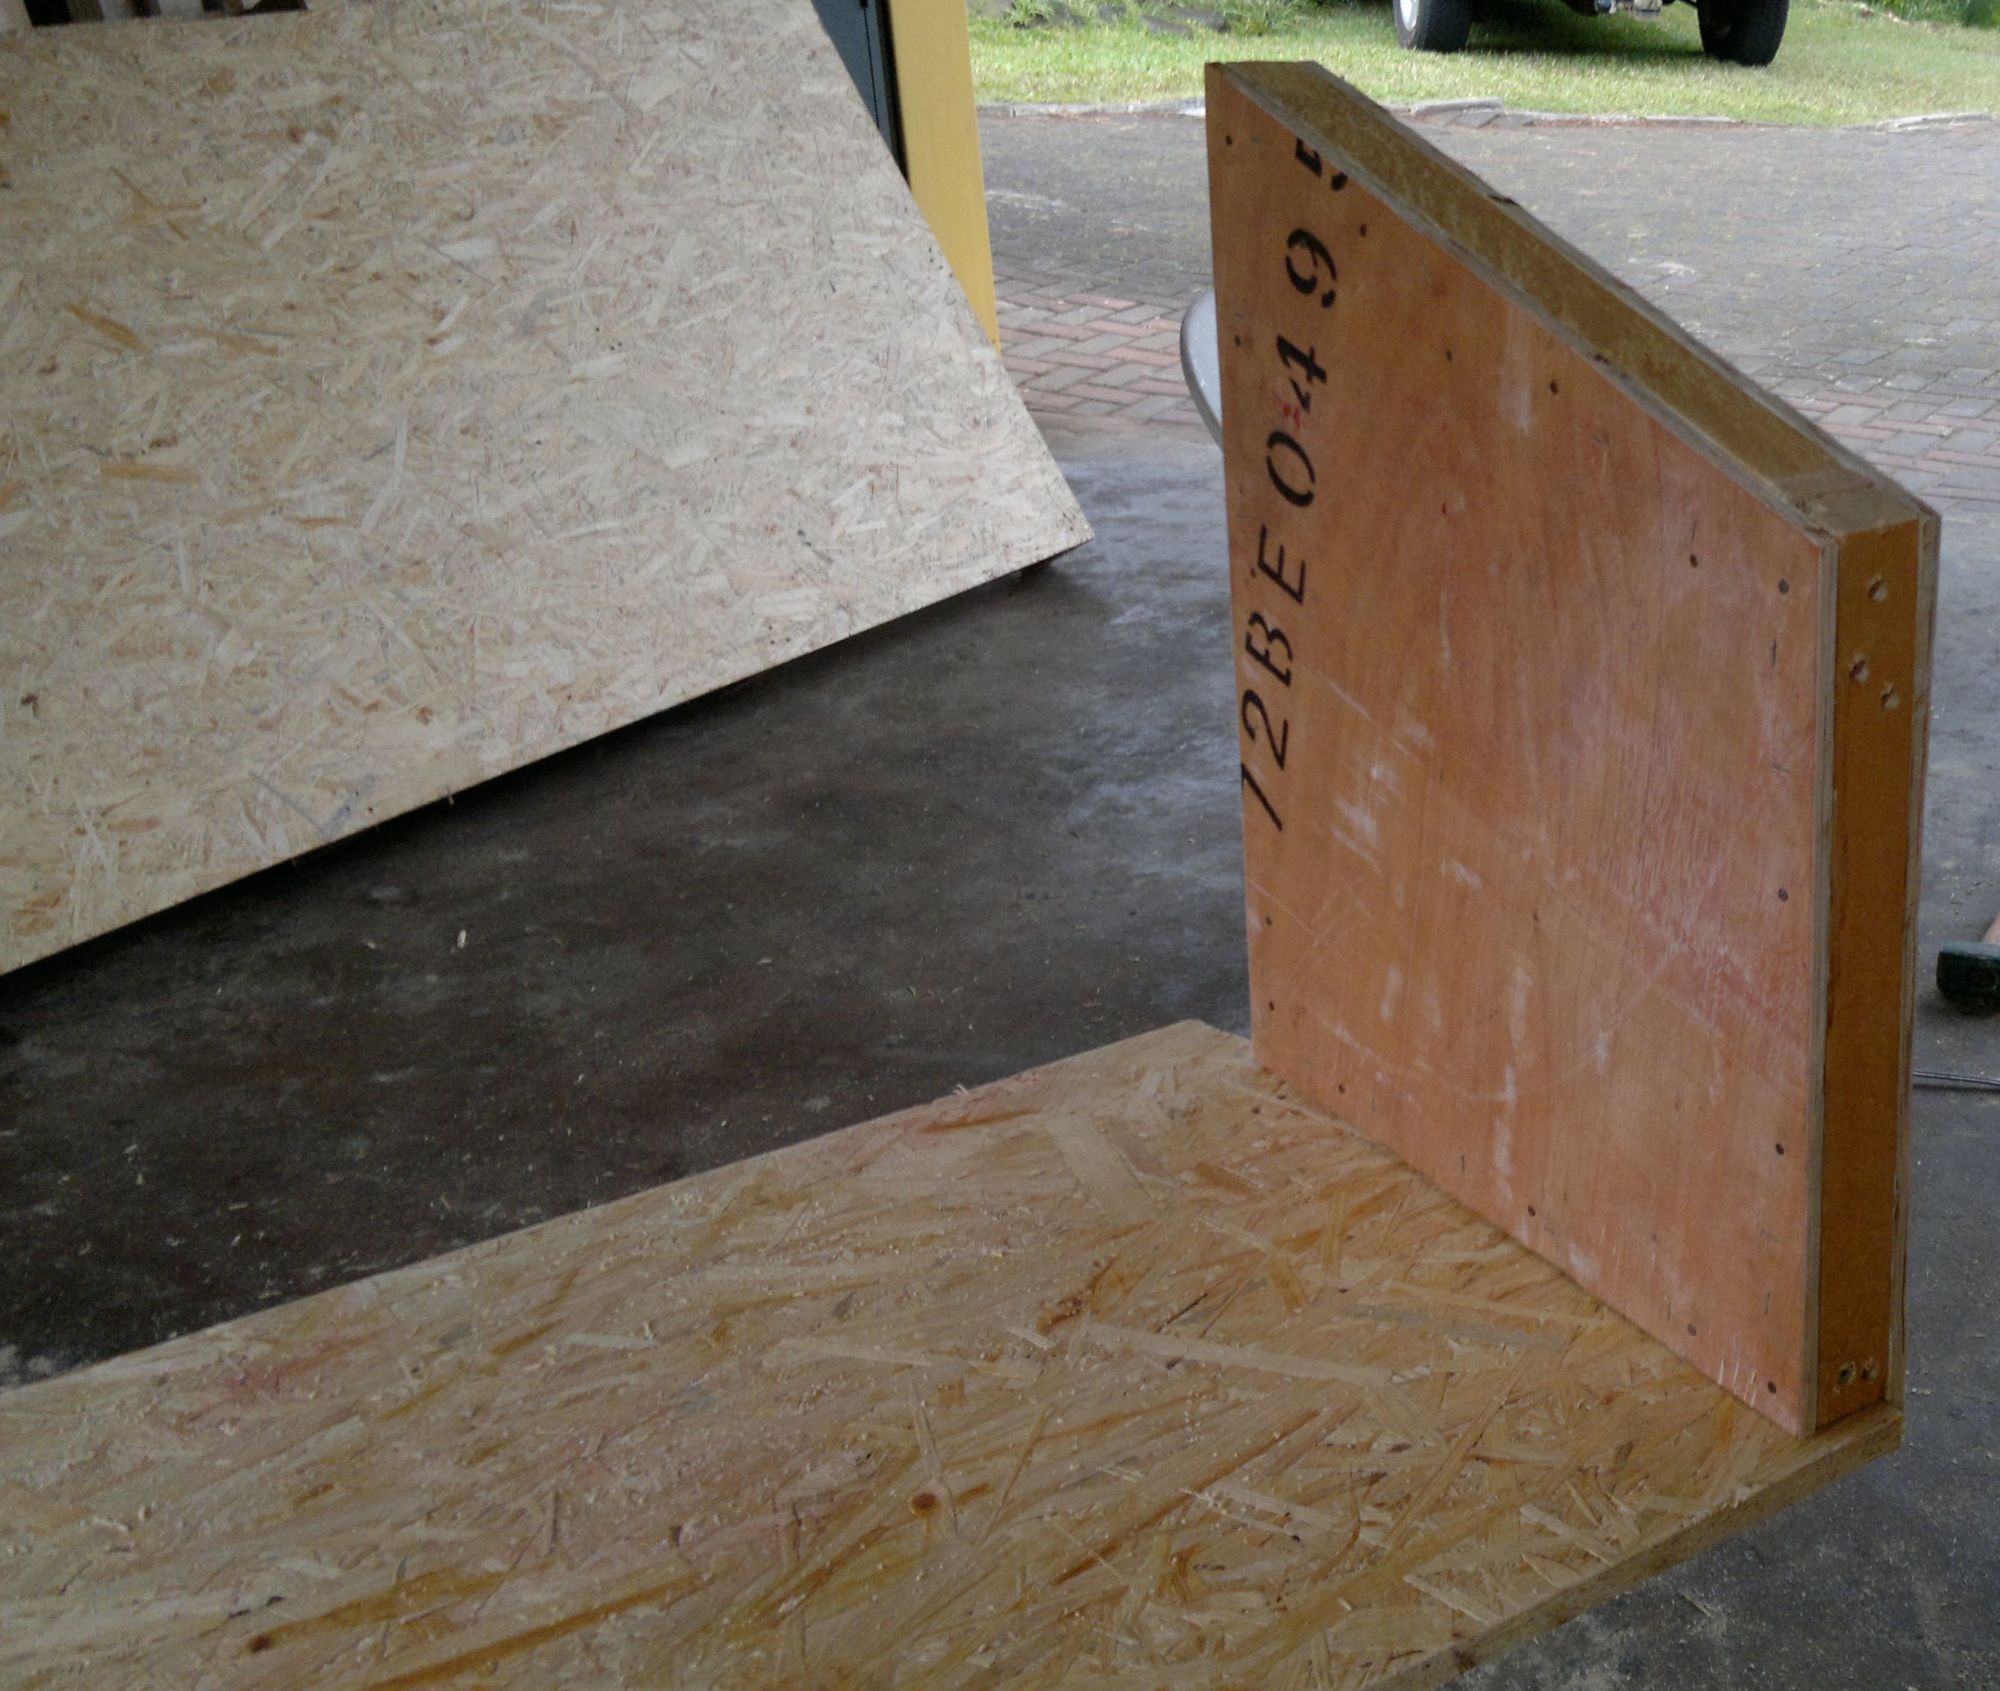
Next we had to create flat surfaces to attach the cement board to and built approximately straight frames on decidedly crooked round poles.
My husband often says that I dream up castles in the air and he has to furnish and paint them.
There weren't many plans on paper. We measured, cut, re-measured, re-cut and fitted as we went along.
Sizes were dictated by the existing structure, the dimensions of the cement board and the length
of our "scavenged" wood.
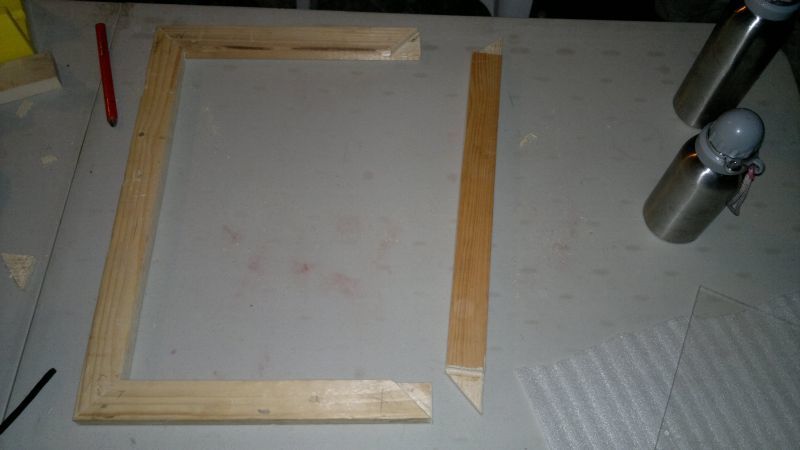
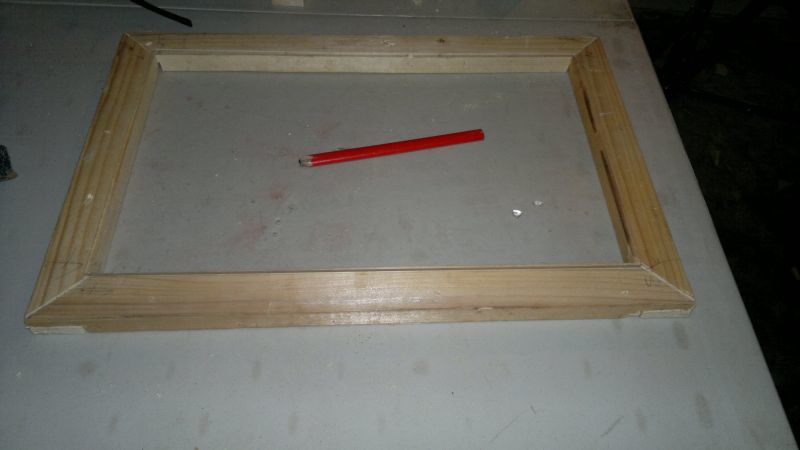
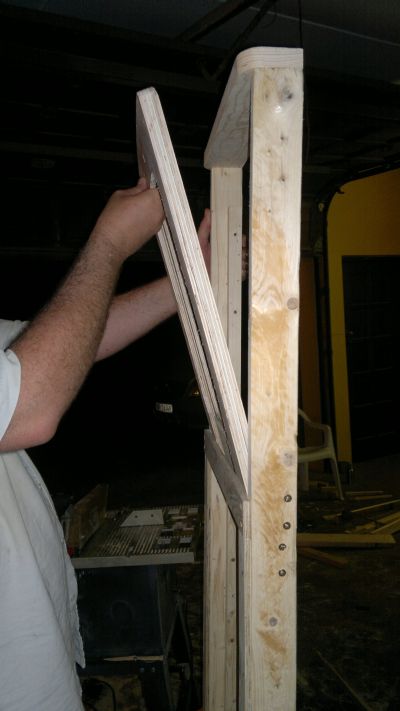
We sourced a free perspex off-cut and decided to build a window to be able to spy on our chickens.
Since the off-cut was a non-standard size we had to build the window and frame from scratch. (And scratched our heads we did).
Did I mention that neither of us had any carpentry skills when we started this project? Or that the power tools we bought is going to cost us more than all the materials to build the coop?
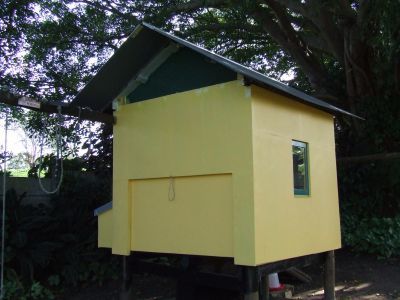
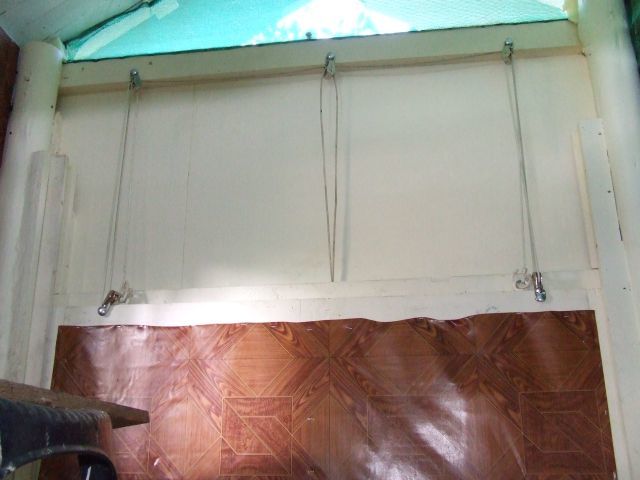
We opted for a high wide heavy vertical sliding door for easy human access during cleaning and maintenance- visible on the left hand side of the previous picture. It is a very simple design: 2 X 2 pine frame with fiber cement board cladding on one side. The door runs up and down in a channel built by attaching two 1 X 2's to a 2 X 4 frame. At present it has to be opened by pulling on a nylon cord that lifts the door via a pulley system.
The smaller chicken door on the opposite side of the coop is also a vertical sliding door. We plan to automate the chicken door by using a recycled battery powered screwdriver as motor, eventually to be powered by solar panels charging a Li ion or Li-Po battery pack. Still debating whether to open and close via timer, infrared remote control, or even cellular phone (texting actuated).
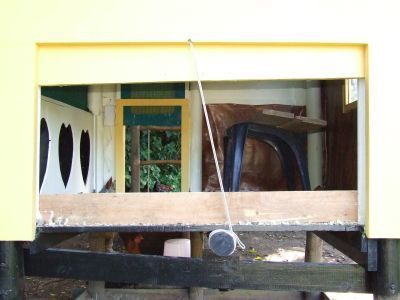
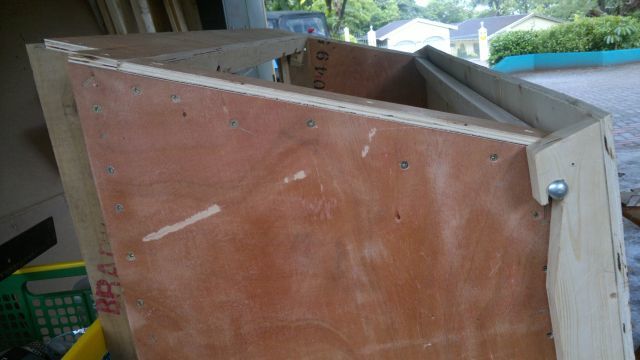
Next the cladding- Cutting fiber cement wreaks havoc with circular saw disks and causes huge heaps of dust. It is also very noisy. On the positive side- it is very rigid and helps to strengthen the frame. Looking in from the back of the coop (where the nesting box will go), one can see the chicken door frame on the left- hand side, the window frame in the middle and the service door on the right- hand side. The holes on the left-hand bottom and right- hand top sides still had to be clad.
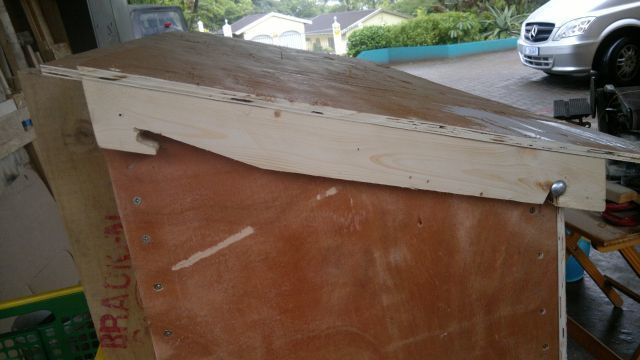
Then followed the nesting box- an oriented strand board floor and 2 X 2 pine frames boxed with 7 ply crate quality plywood for the sides- because that is the recycled material we had!
The back of the nesting box: more 7-ply and a an angled 2 X 2- You know why.
We decided on a sliding lid to access the nesting box from the top, as doors at the back would be too low, and we wanted to avoid having to waterproof hinges. (We have had more than 200mm (8") of rain in 2 hours on occasion). The lid was constructed of 2 X 1 pine on 3 sides covered with plywood.
Hubby is quite happy with his "latch and catch" "patent" to close the lid and to keep it hanging when opened
To open the lid, you lift it at the back and pull it towards yourself until it hooks on the front, and then gently lower it to hang.
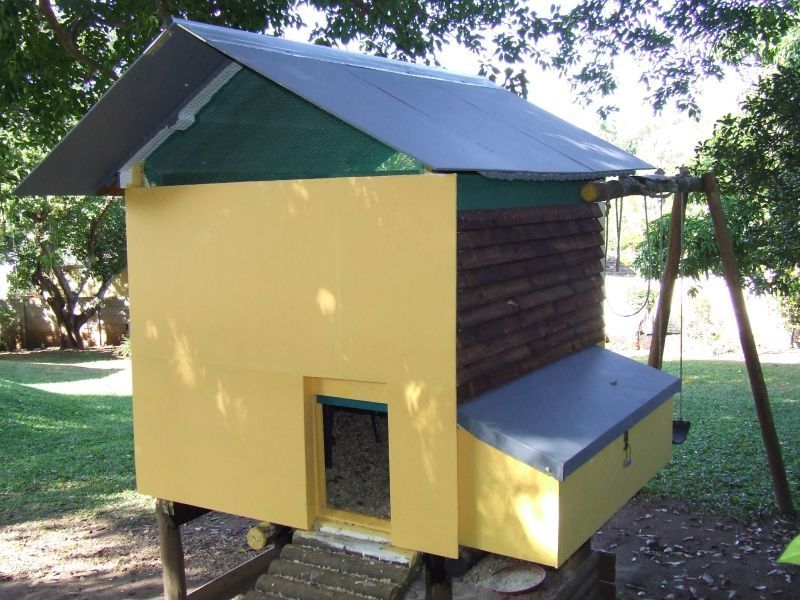
A layer of plastic sheeting on the roof, topped by fiber cement boards took care of our leaky roof problem
The crevices were filled using poly- urethane foam.
We attached the nesting box and covered the open area with shade cloth and louvers.
Notice how snugly the lid of the nesting box fits under the louvers to keep out the rain.
Also noticeable in this photo is the very expensive roof paint covering the fiber cement board roof panels
What price dry chickens!
The paint for the inside and outside of the coop was leftovers from previous renovating projects.
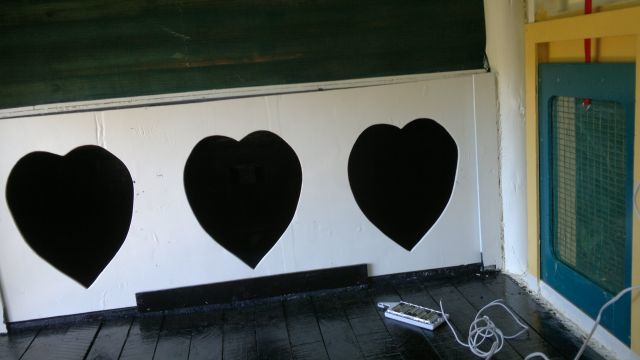
The front of the nesting box is a slide- in piece of plywood- if we ever change from Brahmas to a smaller breed, we can increase the number of "doors" very easily. The dividers inside the nesting box are also removable for the same reason. The heart shape makes it uncomfortable to sit in the "doorway" and helps to keep the nests poop free.
The chicken door is made from plywood sandwiching shade cloth and wire grid to keep out creepy-crawlies and nasties.
Also some evidence (a battery pack and some flex) that the automation of the chicken door has started can be seen lying on the floor
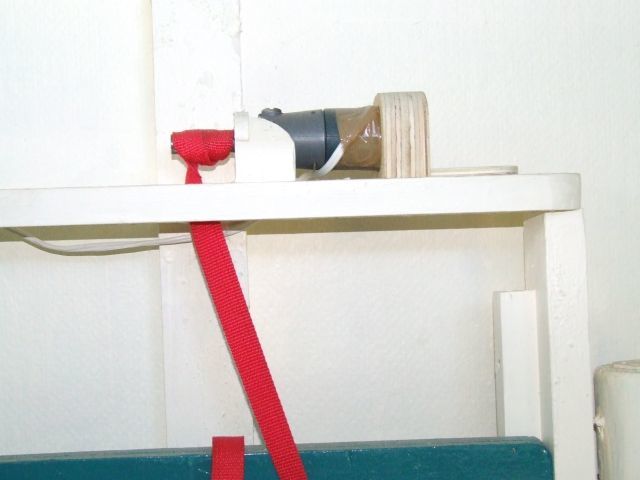
Some more proof that one day the chicken door will be automated- the battery driven screwdriver, the plywood brackets, the tether and some flex.
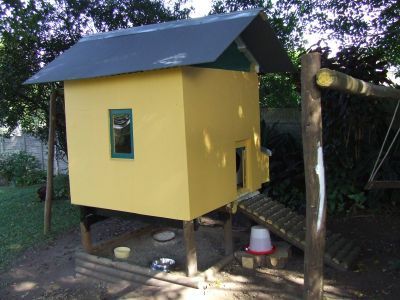
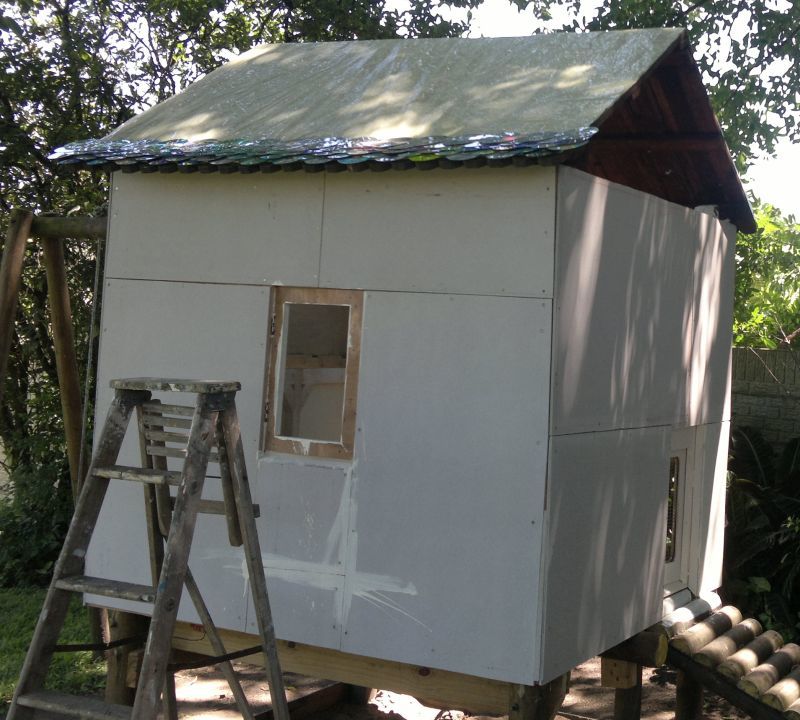
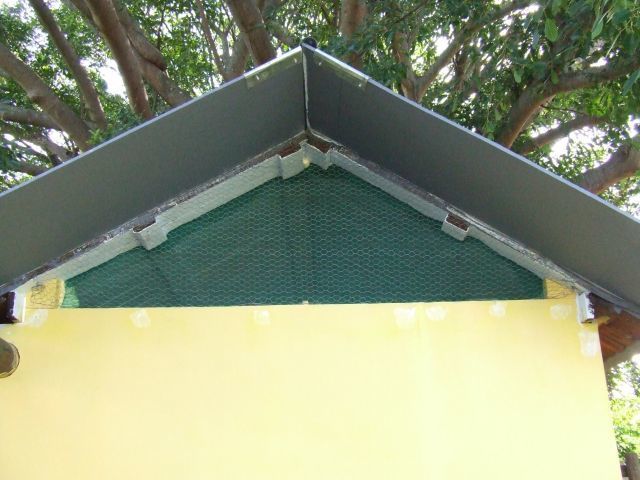
The triangles between the roof and the walls were covered with chicken wire and shade cloth for ventilation. We left quite an overhang to keep the rain out. If we find the chickens are too cold or if it rains into the coop, we'll board up the bottom part of the triangle.
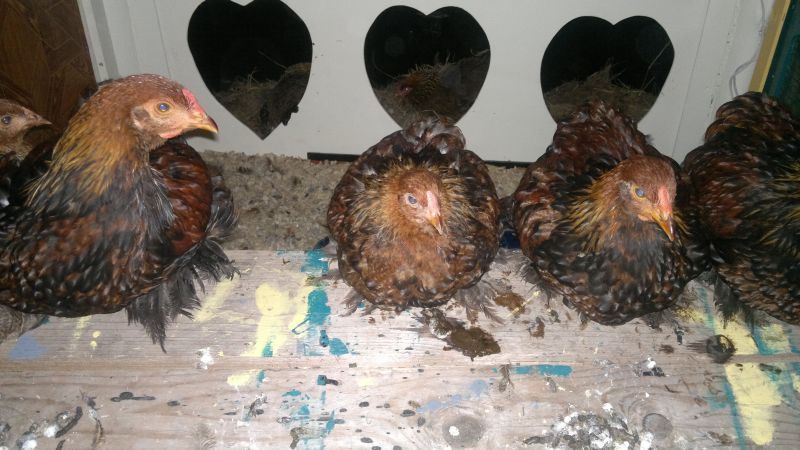
Happy sleepy young Partridge Brahmas? I hope so. The two Mrs. Broodies in the Left- hand and center nests may be seen if you look hard and use a bit of imagination.
Things still to be done:
Proper roosts
Automate the chicken door.
Invent a better way to open the service door.
A latch for the window- kept close at this stage by a nail driven into the frame.
Final layer of paint outside
Treadle feeder
Automatic waterer
Chicken run around coop
Solar powered LED lighting inside the coop: the better to spy on the chickens at night.
Chicken Gym started life as a Jungle Gym. As the children grew older they lost interest in playing on the jungle gym. We live in a warm humid area in South Africa and have to consider heat and rain much more than cold. Summertime is HOT and HUMID and even the middle of winter is frost free. The placing of the coop was predetermined as we could not really move the jungle gym.

Neither my husband nor myself had any carpentry skills although we are both quite technically minded.
We started with this:
First we had to drop the floor of the jungle gym as it was too near to the roof and we wanted better ventilation and more space.
We dismantled the jungle gym and sold the slide and "monkey bars". The bridge was shortened to become the ramp leading to the chicken door.
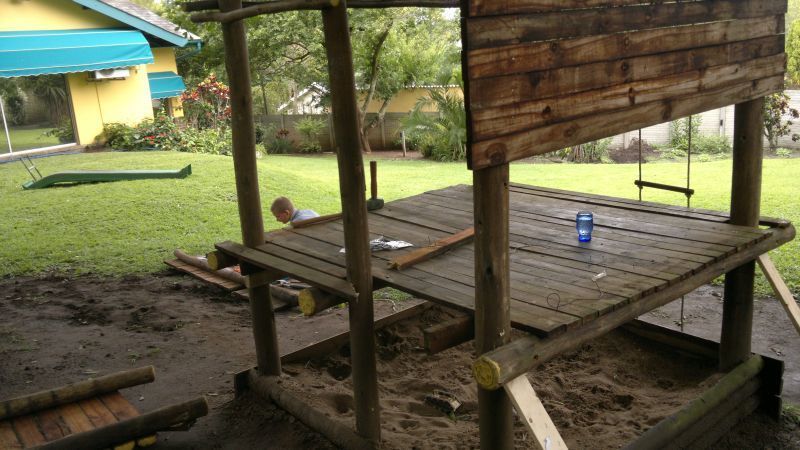
You will notice that the roof is not waterproof at this stage- yes, it is sky that you see through the roof.
My son was the chief tool boy, and the other "person" is the building inspector.

We tried to use (free) recycled material as far as possible.
We got fiber cement board from a school that was remodeled: they discarded the door and window cut-outs and were too glad that we removed it for them.
The pine 1 X 2's and 2 X 4's were recycled from shipping crates of BMW motorcycles
The plywood came from salvaged crates for a new elevator at the hospital.
The OSB was donated by a friend who salvaged it from who knows where.
Next we had to create flat surfaces to attach the cement board to and built approximately straight frames on decidedly crooked round poles.
My husband often says that I dream up castles in the air and he has to furnish and paint them.
There weren't many plans on paper. We measured, cut, re-measured, re-cut and fitted as we went along.
Sizes were dictated by the existing structure, the dimensions of the cement board and the length
of our "scavenged" wood.
We sourced a free perspex off-cut and decided to build a window to be able to spy on our chickens.
Since the off-cut was a non-standard size we had to build the window and frame from scratch. (And scratched our heads we did).
Did I mention that neither of us had any carpentry skills when we started this project? Or that the power tools we bought is going to cost us more than all the materials to build the coop?
We opted for a high wide heavy vertical sliding door for easy human access during cleaning and maintenance- visible on the left hand side of the previous picture. It is a very simple design: 2 X 2 pine frame with fiber cement board cladding on one side. The door runs up and down in a channel built by attaching two 1 X 2's to a 2 X 4 frame. At present it has to be opened by pulling on a nylon cord that lifts the door via a pulley system.
The smaller chicken door on the opposite side of the coop is also a vertical sliding door. We plan to automate the chicken door by using a recycled battery powered screwdriver as motor, eventually to be powered by solar panels charging a Li ion or Li-Po battery pack. Still debating whether to open and close via timer, infrared remote control, or even cellular phone (texting actuated).
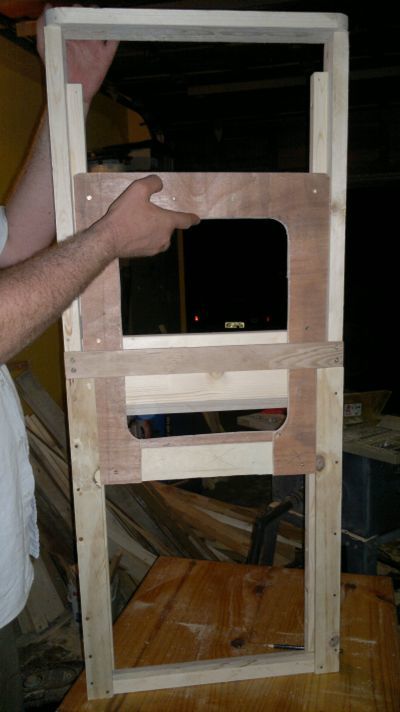
Next the cladding- Cutting fiber cement wreaks havoc with circular saw disks and causes huge heaps of dust. It is also very noisy. On the positive side- it is very rigid and helps to strengthen the frame. Looking in from the back of the coop (where the nesting box will go), one can see the chicken door frame on the left- hand side, the window frame in the middle and the service door on the right- hand side. The holes on the left-hand bottom and right- hand top sides still had to be clad.

Then followed the nesting box- an oriented strand board floor and 2 X 2 pine frames boxed with 7 ply crate quality plywood for the sides- because that is the recycled material we had!
The back of the nesting box: more 7-ply and a an angled 2 X 2- You know why.

We decided on a sliding lid to access the nesting box from the top, as doors at the back would be too low, and we wanted to avoid having to waterproof hinges. (We have had more than 200mm (8") of rain in 2 hours on occasion). The lid was constructed of 2 X 1 pine on 3 sides covered with plywood.
Hubby is quite happy with his "latch and catch" "patent" to close the lid and to keep it hanging when opened
To open the lid, you lift it at the back and pull it towards yourself until it hooks on the front, and then gently lower it to hang.
A layer of plastic sheeting on the roof, topped by fiber cement boards took care of our leaky roof problem
The crevices were filled using poly- urethane foam.
We attached the nesting box and covered the open area with shade cloth and louvers.
Notice how snugly the lid of the nesting box fits under the louvers to keep out the rain.
Also noticeable in this photo is the very expensive roof paint covering the fiber cement board roof panels

What price dry chickens!
The paint for the inside and outside of the coop was leftovers from previous renovating projects.

The front of the nesting box is a slide- in piece of plywood- if we ever change from Brahmas to a smaller breed, we can increase the number of "doors" very easily. The dividers inside the nesting box are also removable for the same reason. The heart shape makes it uncomfortable to sit in the "doorway" and helps to keep the nests poop free.
The chicken door is made from plywood sandwiching shade cloth and wire grid to keep out creepy-crawlies and nasties.
Also some evidence (a battery pack and some flex) that the automation of the chicken door has started can be seen lying on the floor
Some more proof that one day the chicken door will be automated- the battery driven screwdriver, the plywood brackets, the tether and some flex.
The triangles between the roof and the walls were covered with chicken wire and shade cloth for ventilation. We left quite an overhang to keep the rain out. If we find the chickens are too cold or if it rains into the coop, we'll board up the bottom part of the triangle.
Happy sleepy young Partridge Brahmas? I hope so. The two Mrs. Broodies in the Left- hand and center nests may be seen if you look hard and use a bit of imagination.
Things still to be done:
Proper roosts
Automate the chicken door.
Invent a better way to open the service door.
A latch for the window- kept close at this stage by a nail driven into the frame.
Final layer of paint outside
Treadle feeder
Automatic waterer
Chicken run around coop
Solar powered LED lighting inside the coop: the better to spy on the chickens at night.