Our Backyard Duck House / Pen
In the spring of 2010, a neighbor of a co-worker saw two ducklings on the road so he rescued them and kept them in a plastic tote for a couple weeks in the garage but the ducklings grew so fast that the tote was too small. The co-worker knew we have a couple ponds in the backyard so asked if we were interested in having the ducks. We were just thinking about buying a couple ducklings from Tractor Supply Company so we, of course, said yes and adopted the ducklings as pets.
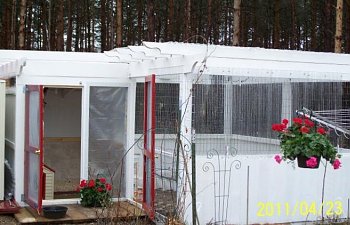
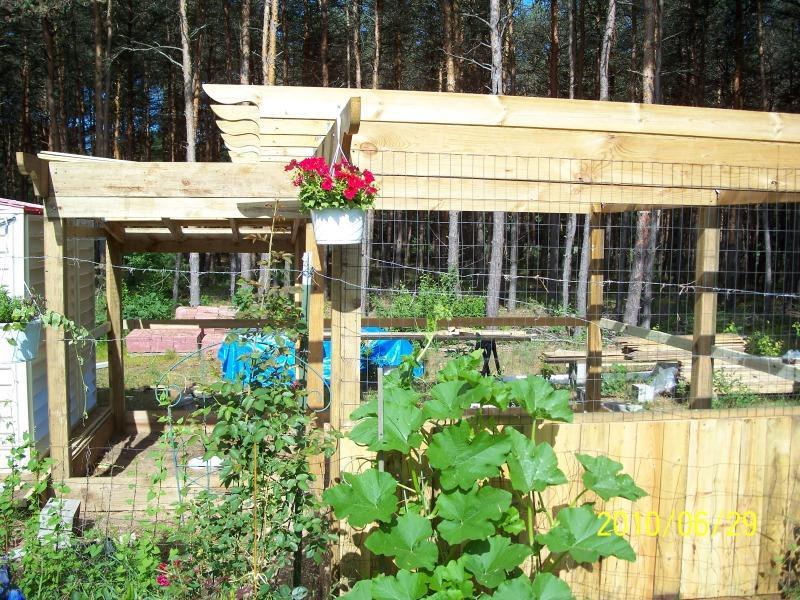
We then built a duck house and an attached pen and here is a picture. Both doors were made with 2 x 4's and assembled with pocket holes / screws. The skirts and beams are 2 x 10's. The posts started with 4 x 4's. Then another 2 x 4 vertical cleat was used to flush support the beam, and finally another 2 x with a width of 5" cleat was used to effectively make the posts 5" square. So the 2 x 10's were initially lag screwed onto the 4 x 4's but the extra 2 x 4 and 2 x 5 cleats really vertically support the weight of the beam plus any load on top of the beam. A few 2 x 10 joist hangers were also cut in half to tie the beams to the posts in a few strategic locations. The loads of the doors and windows are not on the beams, rather on extra vertical 2 x 4's or 2 x 6's which sit on 8" x 16" brick pavers on the ground or on existing posts. We planted a few more of these brick pavers in case we need to use more vertical support when heavy snow falls. However, we think the structure is strong enough and we certainly hope so. The Southern Pine Span Table shows that my roof structure can support 50 pounds per square foot of total load (without considering the extra 1 x 4's and 2 x 4's on top of the rafters). The polycarbonate panels hardly have any dead load.
 The duck house and pen are of pergola style because the pergola was actually built before we adopted the ducks. The duck house was added later. The pergola was initially built for the purpose of climbing roses and summer gourds.
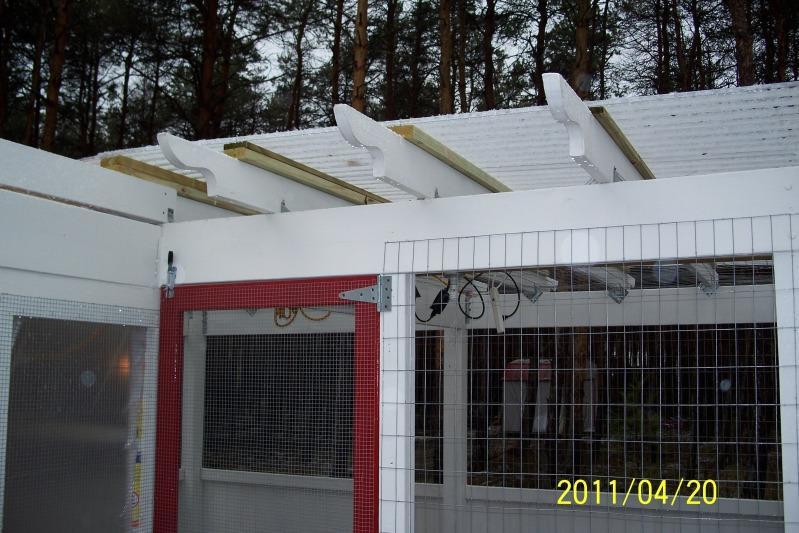
We came up with our own rafter end pattern design.
The 2 x 10 and 2 x 6 have slightly different pattern due t the different lumber sizes.
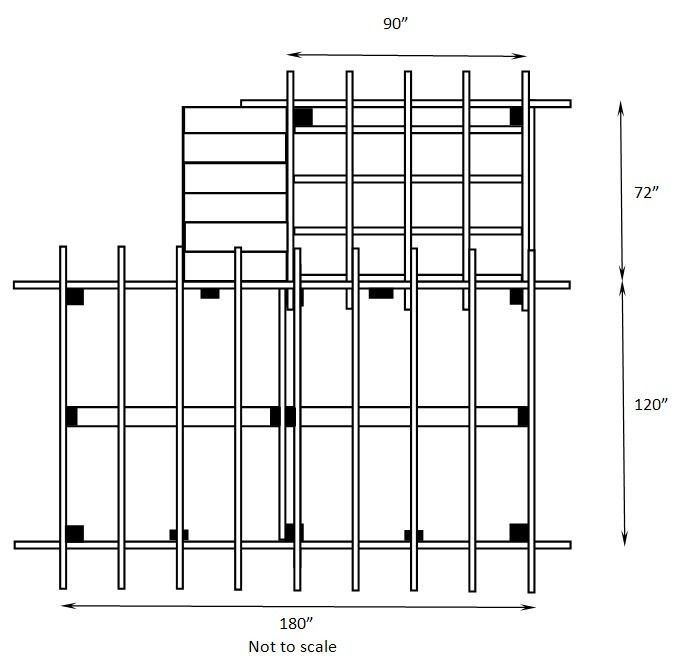
The duck house (on the left in the photograph) is 6' x 8' and the attached pen (on the right in the photograph) is 10' x 16'. The lower 3' of the duck pen wall is enclosed with 5/8" boards and the upper 4' is covered with 2 x 4 welded wire and then clear polycarbonate panels. Right now, the side walls are only partially covered. In the winter, all the side walls will be covered by polycarbonate panels while there will still be plenty of ventilation from all the eaves. Basically the 20" by 6" spaces between the rafters are open but covered with 2 x 4 welded wires. The same polycarbonate panels are also used as the roof for the pen. The structures are in the woods and we are in Michigan so heat is not a huge issue in the summer. There is enough shade and ventilation to keep the pen cool and with enough fresh air. If it becomes too hot, some of the polycarbonate wall panels can be easily removed.
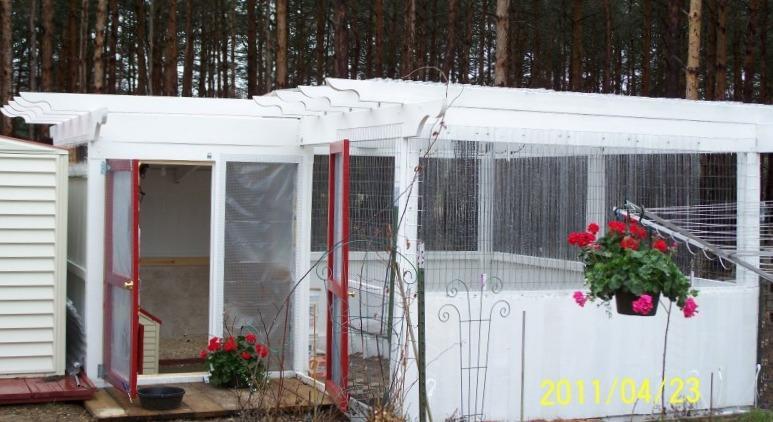
Here is another view of the duck house and pen. You can see the polycarbonate roof and wall coverings of the pen. This is the east view.
The pen was not roofed last winter and we had an awful time with blowing snow and rain so we decided to roof the pen this spring. We did a lot of reading about what roof materials to use for the pen. Once we found the polycarbonate panels in our local Menards and tested them out in the store by standing on top of them, we were sold. The polycarbonate panels are very strong and come with a long warranty even for hail damage. (The manufacturer even recommended a minimal support spacing of 48" for the polycarbonate while the PVC and fiberglass panels is 24" - 36". Our support is like 18" spacing due to the snow and the fact that the rafters were already in place.) There is a coating for blocking UV on one side so that side should be installed to the outside. The stuff is a little more expensive than the normal "plastic" panels made of either PVC or fiberglass but the little extra cost should be well worth it. When on sale, the 2' x 8' panels sell for $18 each at Menards. We bought the panels for the roof first. During installation, we were able to walk on the panels as long as there were rafters below them. We then decided to use them for the side walls to block wind, snow, and rain. They, of course, cost more than the 6 mil poly films but the panels are very light and extremely easy to put on or take off so they should give many years of more convenient service.
Here is a picture of the roof. You can even see a little snow here in Michigan near the end of April! In order not to alter the pergola style of the structures (looking from a distance), the roof is only with a very small slant. The original pergola rafters were 2 x 6 spanning 10' (the rafters are 14' long due to the end patterns) with a 20'' spacing. A combination of 1 x 4 and 2 x 4 were used to gradually raise the center of the pen slightly for rain run-off. The roof structure was also re-enforced with more vertical posts, lateral braces, blockings, etc, in order for it to carry the snow loads in the winter. We may paint the 1x4's and 2x4s later to match the rest of the structure.
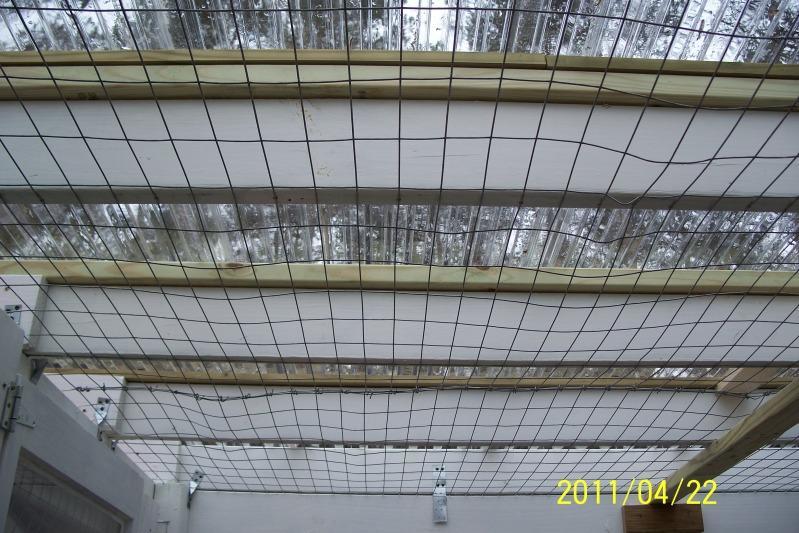
Here is a more detailed look of the roof from inside. The 2 x 4 welded wire was first stapled, the rafters were installed and more staples were used to attach the wires to the bottom of the rafters, then the 1 x 2's and 2 x 4's were screwed on top of the rafters, and finally the polycarbonate panels were screwed onto the 1 x 4's or 2 x 4's on top of rafters. The rafters were initially only toe-nailed and held by 90 degree brackets. To carry the wind and snow load of the roof, two different styles of hurricane ties were used for each rafter at both ends.
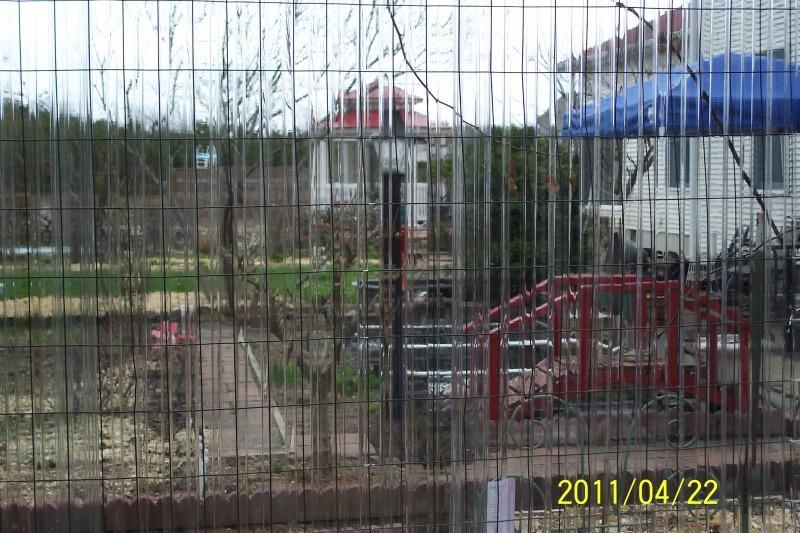
And the look-through of the clear polycarbonate side walls to the backyard. The corrugations of the panels made this picture a bit artistically fuzzy, LOL.
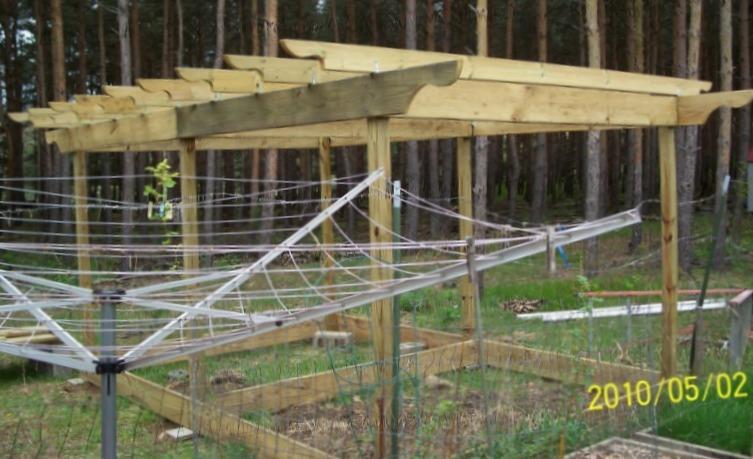
The structures were started last summer and here you can see a couple of pictures during different phases of the project. In the picture below, you can see original pergola and the skinny 4 x 4's and the beams and skirts are only lag-screwed onto the posts.
The duck house has a metal roof on 5/8" decking. The roof is actually hidden from three sides of the pergola so as to maintain the pergola style of the structures. (You can actually see one of the angled rafter in the picture below, near the top of the windows. The edge of the roof was flashed and caulked so there is no leak.
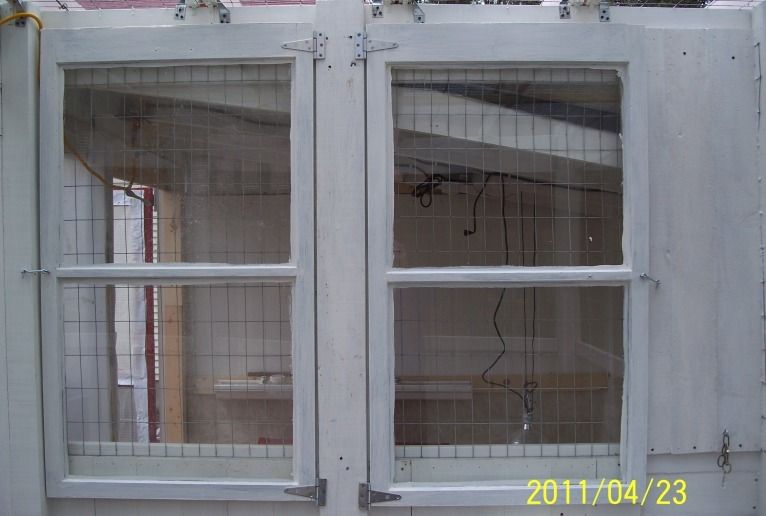
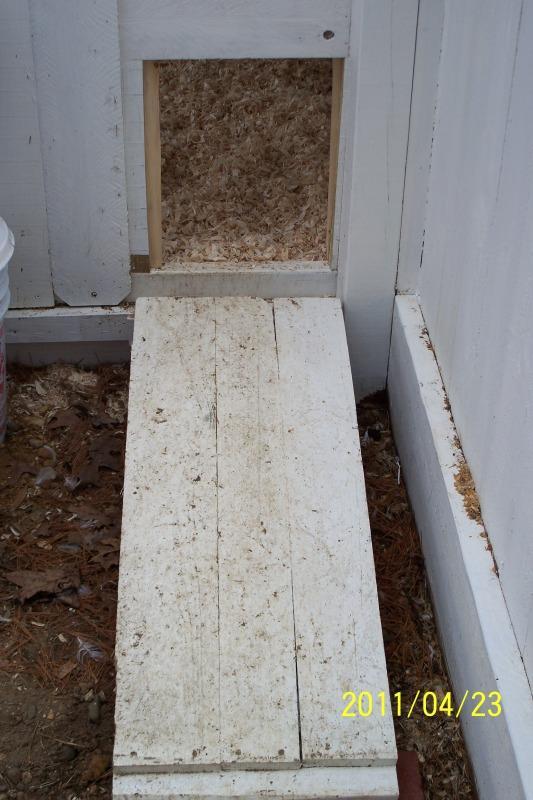
Two walls of the duck house are covered with the same 5/8" thick boards. One side is with two large windows and a small duck door that are connected to the pen. The duck door opens as a ramp from the house to the pen. Here you can see the extra 2 x 6 in between the two windows. It not only carries the weight of both windows, it also acts as extra vertical support for the 8' section of the 2 x 10 beam. A combination of nails and screws were used to attach this extra support to the 2 x 10 beam, skirts, and the middle 2 x 4 section that support the bottom 3' of the 5/8" boards.
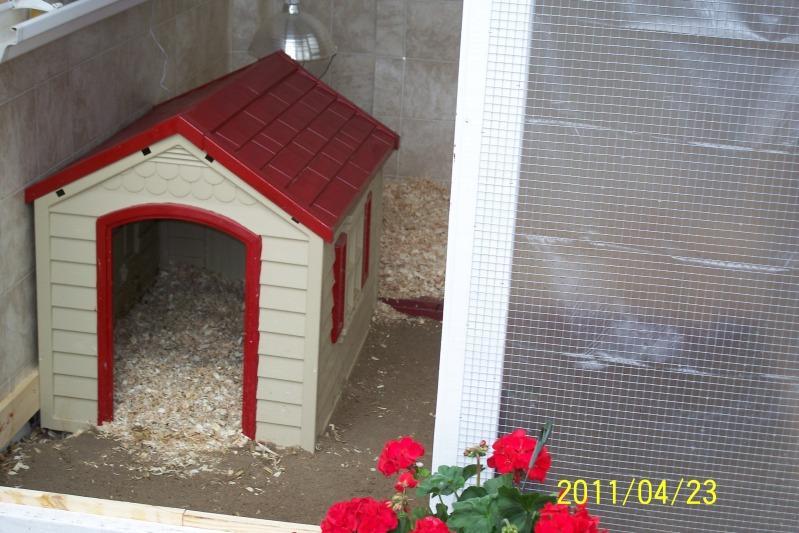
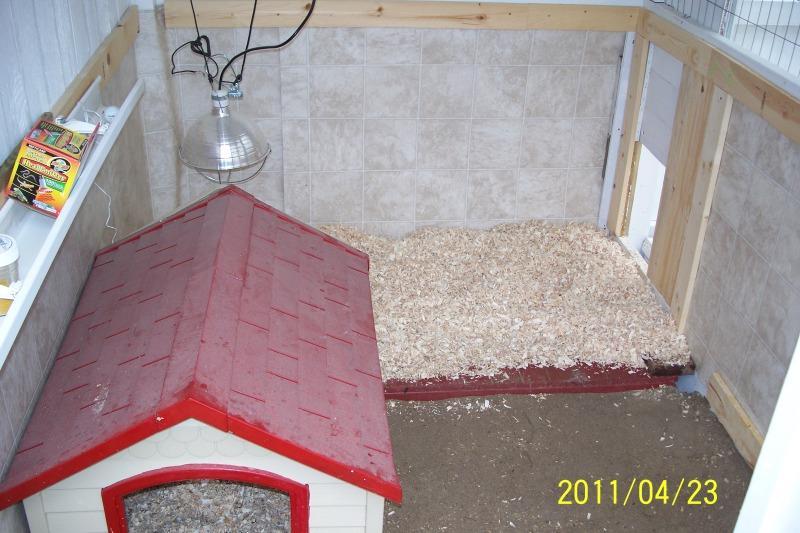
Inside the duck house, there is a small deck area where pine shaving is used. The rest is covered with washed sand. We also put a dog house inside because the ducks like to sleep in the dog house. The lower 3' of the wall is also covered with vinyl floor material.
Below the sand and deck, brick pavers were used to stop any potential digging predators. A 4" drain was also installed in the center of the house floor in case we need to hose down the whole house. Initially, we were going to simply use the bricks as the floor but later read that concrete products are not good for the ducks so we added sand and shavings.
You can see the the duck door to the pen from inside the house.
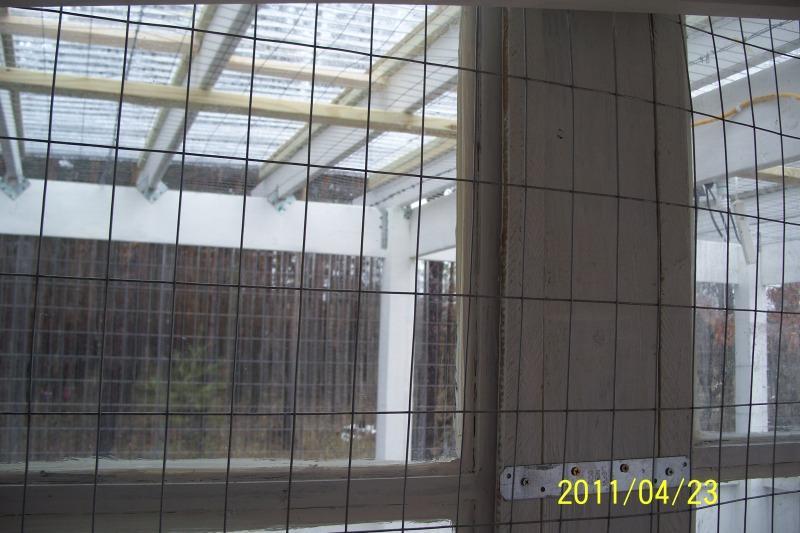
Below is a picture looking from inside of the duck house to the attached pen. Through the window and polycarbonate panels, you can see the woods behind the pen.
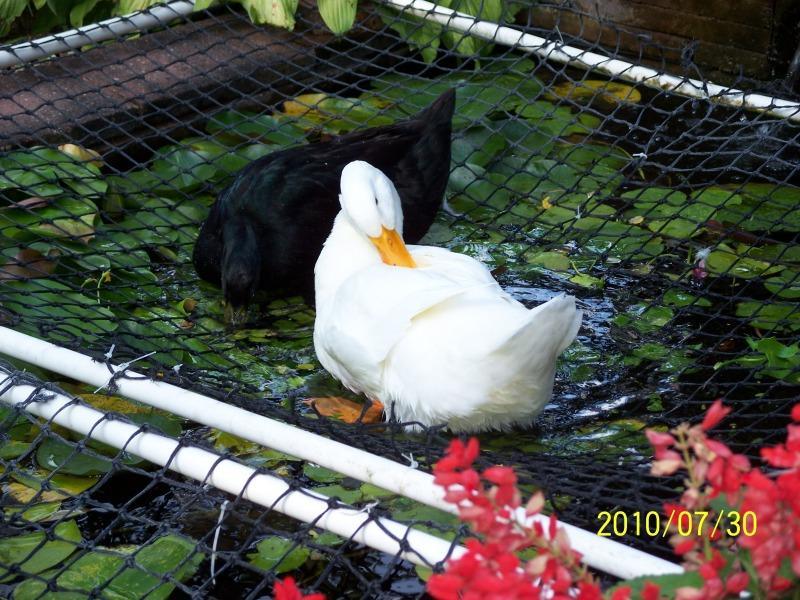
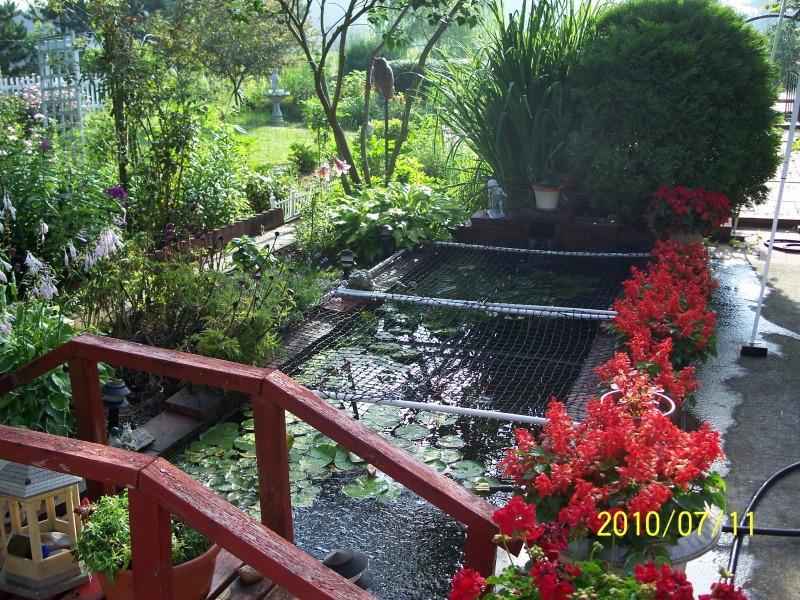
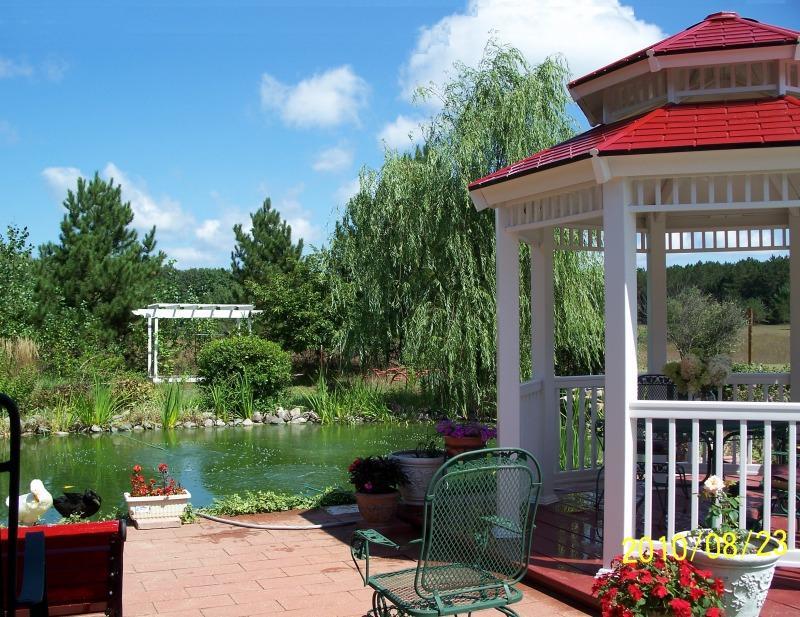
We have two man-made ponds in the backyard and the ducks love to play in them. One is a small lily / goldfish pond that measures only 5' x 15' with a 2' depth. The other is 20' x 40', 6' deep, and there are many large koi in it. The ducks never bothered any of the fish but like to eat the lily pads. When the fish are fed, the ducks would also eat the fish food, faster than the fish!
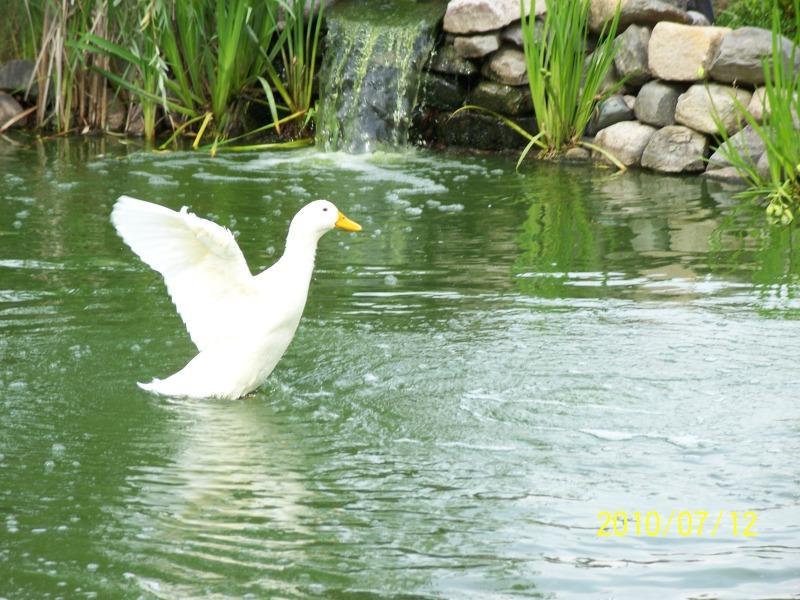
Here are a few pictures of both ponds and the ducks.
In the picture above, you can see a little bit part of a large (24" - 30") Yamabuki Ogon (yellow koi). It is right above and between the two ducks in the lower-left corner of the picture, right above the red garden bench. This koi is about 10 - 11 years old and was imported from Japan.
When we are at home, the ducks free-range in the fenced backyard and play in the ponds unless it is too cold or windy. We have not had predator problems yet. However, we have seen a few dogs and cats roaming around. One time, the neighbor's cat came through the fence and our Cayuga miraculously chased the cat away. Another time a few Canadian geese flew over the property and the ducks jumped into the pond at the speed of light. It was very funny. When they free-range, we do keep our eyes on them periodically.
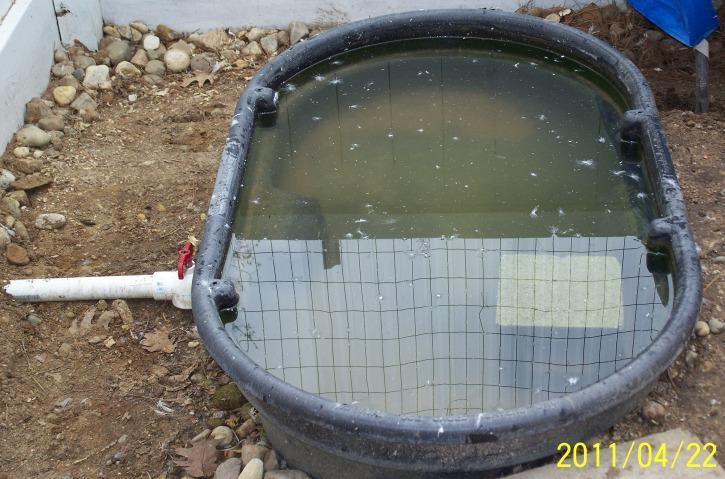
Inside their pen, there is a 50-gallon Rubbermaid stock tank. These stock tanks are of very high quality and come with a 1-1/4" threaded female drain. All we needed to do is to add a 1-1/4" threaded male fitting, a length of PVC pipe, and a ball valve to drain the pool water. We also used the larger 100-gallon and 300-gallon tanks for pond filters. The only thing that could be better for these stock tanks is the location of the drain. It is on the side rather than on the bottom so you cannot drain all the water. For this 50-gallon one, about 7 gallons of water is left on the bottom. It has to be either bailed out or diluted with a garden hose before the valve is closed and the pool is refilled. Tractor Supply Company does sell the same bulkhead for about $15 if you want to put another drain on the bottom of these stock tanks.
We love our ducks and they are treated the same way as our Bichon Frise, Jazmine.
Thanks for looking.
loubapache
We then built a duck house and an attached pen and here is a picture. Both doors were made with 2 x 4's and assembled with pocket holes / screws. The skirts and beams are 2 x 10's. The posts started with 4 x 4's. Then another 2 x 4 vertical cleat was used to flush support the beam, and finally another 2 x with a width of 5" cleat was used to effectively make the posts 5" square. So the 2 x 10's were initially lag screwed onto the 4 x 4's but the extra 2 x 4 and 2 x 5 cleats really vertically support the weight of the beam plus any load on top of the beam. A few 2 x 10 joist hangers were also cut in half to tie the beams to the posts in a few strategic locations. The loads of the doors and windows are not on the beams, rather on extra vertical 2 x 4's or 2 x 6's which sit on 8" x 16" brick pavers on the ground or on existing posts. We planted a few more of these brick pavers in case we need to use more vertical support when heavy snow falls. However, we think the structure is strong enough and we certainly hope so. The Southern Pine Span Table shows that my roof structure can support 50 pounds per square foot of total load (without considering the extra 1 x 4's and 2 x 4's on top of the rafters). The polycarbonate panels hardly have any dead load.
We came up with our own rafter end pattern design.
The 2 x 10 and 2 x 6 have slightly different pattern due t the different lumber sizes.
Here is another view of the duck house and pen. You can see the polycarbonate roof and wall coverings of the pen. This is the east view.
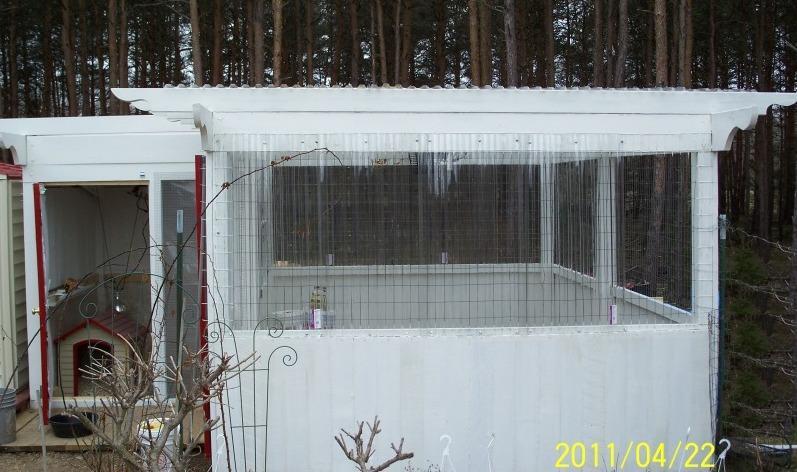
Here is a picture of the roof. You can even see a little snow here in Michigan near the end of April! In order not to alter the pergola style of the structures (looking from a distance), the roof is only with a very small slant. The original pergola rafters were 2 x 6 spanning 10' (the rafters are 14' long due to the end patterns) with a 20'' spacing. A combination of 1 x 4 and 2 x 4 were used to gradually raise the center of the pen slightly for rain run-off. The roof structure was also re-enforced with more vertical posts, lateral braces, blockings, etc, in order for it to carry the snow loads in the winter. We may paint the 1x4's and 2x4s later to match the rest of the structure.
In this picture, the duck house was added and the 4 x 4 posts have been beefed up with two more 2 x cleats to flush-support the beams.
Two walls of the duck house are covered with the same 5/8" thick boards. One side is with two large windows and a small duck door that are connected to the pen. The duck door opens as a ramp from the house to the pen. Here you can see the extra 2 x 6 in between the two windows. It not only carries the weight of both windows, it also acts as extra vertical support for the 8' section of the 2 x 10 beam. A combination of nails and screws were used to attach this extra support to the 2 x 10 beam, skirts, and the middle 2 x 4 section that support the bottom 3' of the 5/8" boards.
Below the sand and deck, brick pavers were used to stop any potential digging predators. A 4" drain was also installed in the center of the house floor in case we need to hose down the whole house. Initially, we were going to simply use the bricks as the floor but later read that concrete products are not good for the ducks so we added sand and shavings.
Here are a few pictures of both ponds and the ducks.

Inside their pen, there is a 50-gallon Rubbermaid stock tank. These stock tanks are of very high quality and come with a 1-1/4" threaded female drain. All we needed to do is to add a 1-1/4" threaded male fitting, a length of PVC pipe, and a ball valve to drain the pool water. We also used the larger 100-gallon and 300-gallon tanks for pond filters. The only thing that could be better for these stock tanks is the location of the drain. It is on the side rather than on the bottom so you cannot drain all the water. For this 50-gallon one, about 7 gallons of water is left on the bottom. It has to be either bailed out or diluted with a garden hose before the valve is closed and the pool is refilled. Tractor Supply Company does sell the same bulkhead for about $15 if you want to put another drain on the bottom of these stock tanks.

loubapache