
This is my cantilevered coop. The " FOWL FRONTIER"
Its built so that the coop is only supported in the middle creating a smaller footprint while still allowing the birds access under the coop.

I finally got started on the coop yesterday. I feel like i made pretty good progress. I've worked in construction for 20 + years. I've always wanted to try some of the older building techniques and the coop seemed like a good place to try them.
.
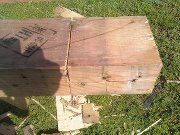
 cut half way through & remove the peice. same thing other side.
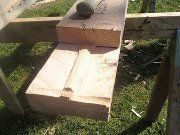 same thing other side. remove the small hump with a chisel.
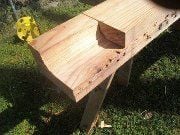
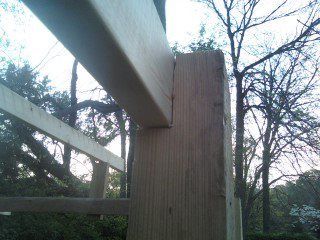
 this is the mortise for my cantilevered coop. make a lot of small cuts then pry out with pry bar.
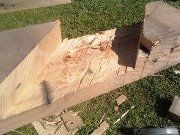 all cuts removed. this will make a very strong joint for my cantilevered coop
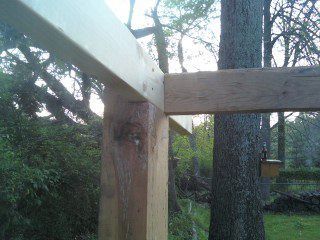
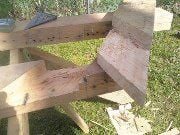 upright for the coop to rest on. mortised just like the bottom runner.
 upright installed
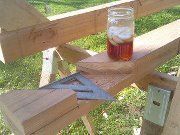 other runner done the same way. My wife was kind enough to bring me some tea. Yes we still drink it from a mason jar.
 both uprights installed.
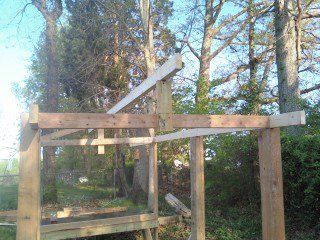
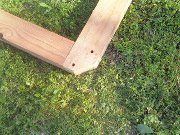 i put an angle on the front so i can drag it if necessary. upright for door area attached.
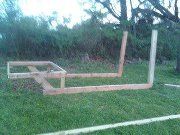 both door uprights installed and my cantilevered floor joist installed with braces underneath to support some of the weight. stopping point for the day. the actual coop size is 48 x 67'' the run will be 67'' x 120''.
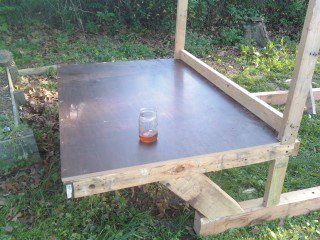
With the help of my son, i put the floor joist in and decked the floor

i mortised in the bottom center brace on the side wall.
. the top of the wall.
and the header over what will become the door.
we temp'd up the ridge board.

and i cut a pattern for the rafters. So far i have exactley 20.22 in the coop all the wood except the ridge pole and top plate on the walls was reclaimed from a pallet or picked up on a jobsite.

north wall is up, i put a window in just for a little extra light and natural heat. it will open and be screened on the inside.

A little bit of the frame work on the nesting box.The space allows for 4 boxes approximatly 14 inches deep, 16 inches wide, by 16 inches tall at the shortest point

the walls are covered with 3/8 plywood

The rafters went in, I laid them on the 1 1/2 side just because it was easier.

The walls were also covered. I put a window in the south side,its hinged and has a turn latch to lock it up in the winter.


i drilled 5/8 inch holes in the gable ends for ventilation.
 i cut a 1/2 in. by 1 1/2 in notch in 2 2x4's for the pop door to slide in.
door in place, i still had to add my pull rope.
 run door in place, all my wire is already in. I sandwiched the wire between a 2x4 and a 1x4 for added strength and security.
 roost inside the coop, i secured 1/2 x 1/2 hardware cloth to the inside window frame with large washers and screws.as you can see i also have my roofing on at this time.
 inside of nest boxes each one is roughly 16 in. tall 14 in wide and 16 in deep.
my cleanout door. with 1 latch and 2 turn latches. i figured this was my week point and wanted to secure it as well as possible.
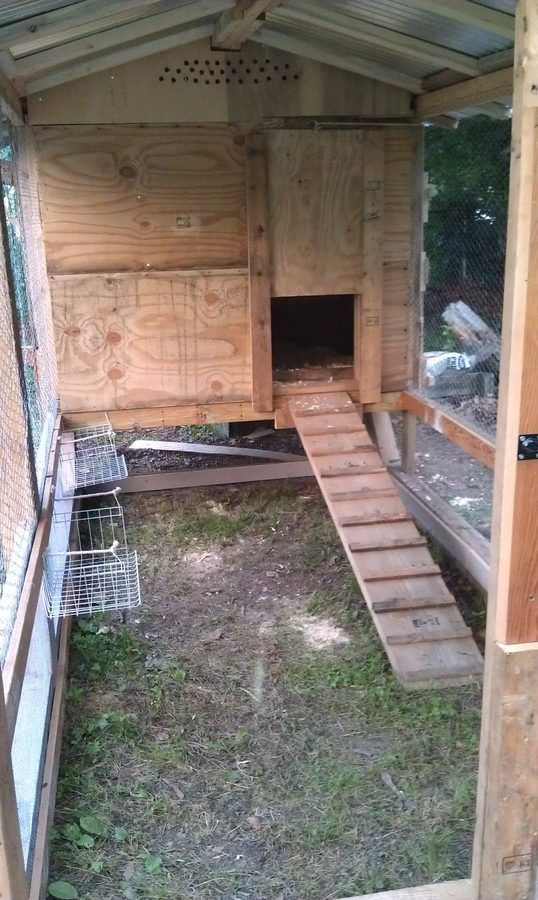 here you can see my pull rope for the pop door. simply ran through 2 eyebolts. and held in place with carabiner. i also added some wire baskets ive since filled with grass clippings. if they decide they want to lay here they will come out. the walk board is in place. And you can see more ventilation holes on this side.
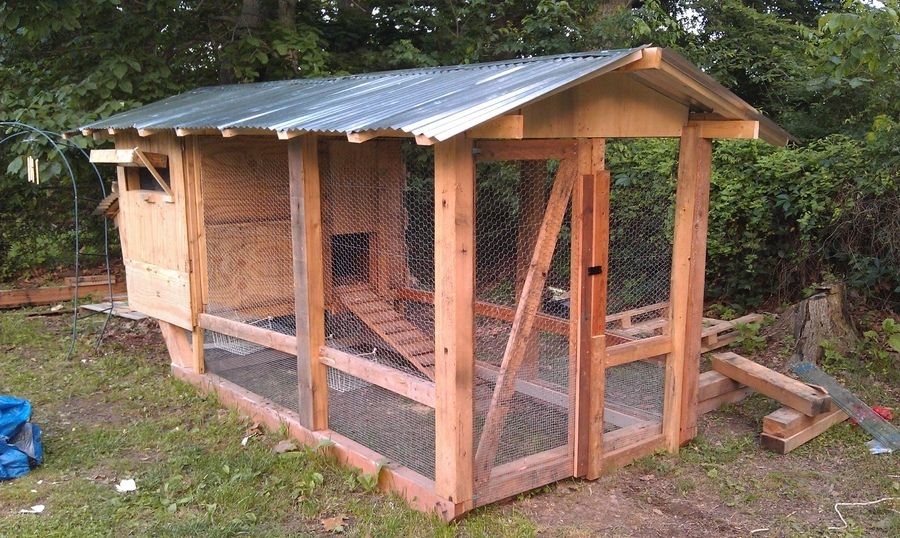 pretty much complete. just a few finishing touches to add. A few more roost in the run etc...

I'm waiting for my sign with the coops name. I have decided to call it the " Fowl Frontier "
 Birds in coop
.
 my Blue Copper Marans Cockrel
 one of my Black Barred rocks
 Blue Rock Cockrel
 Blue Rock pullet.
I locked all the birds down in the coop for 2 days then let them out in the afternoons. the first night i had to help them into the coop, night 2 everyone tucked themselves in.
