Wine cooler incubator
(Winner of the 2009 DIY incubator contest)
Hi, I'm a complete newbie from England and don't have any chooks at the moment but I'm hoping to put that right very soon. I grew up with backyard chickens many years ago and I suppose the wanting them back again has been dormant within me for many years. The reason for action at this time was prompted by my acquiring a small shed that my daughter didn't want. After the arrival of a greenhouse, she decided there was no room for the shed so I took it home and decided to make a chicken coop out of it.
I looked all over for information and design ideas which eventually brought me here. After much pondering I decided the only thing you could say was standard in all chook houses is that they're all different.
Whilst learning about chickens, I was surprised at the price of the "good looking" ones (yes! I know they're all lovely) which brought me to looking at hatching eggs on Ebay. The price of these was more to my liking and I started to learn about incubating. I came across a listing for a "faulty" wine cooler. What a great start for a DIY incubator thinks I and jumped in with both feet and bought it. Cost me £30 delivered to my door.
And so we begin:
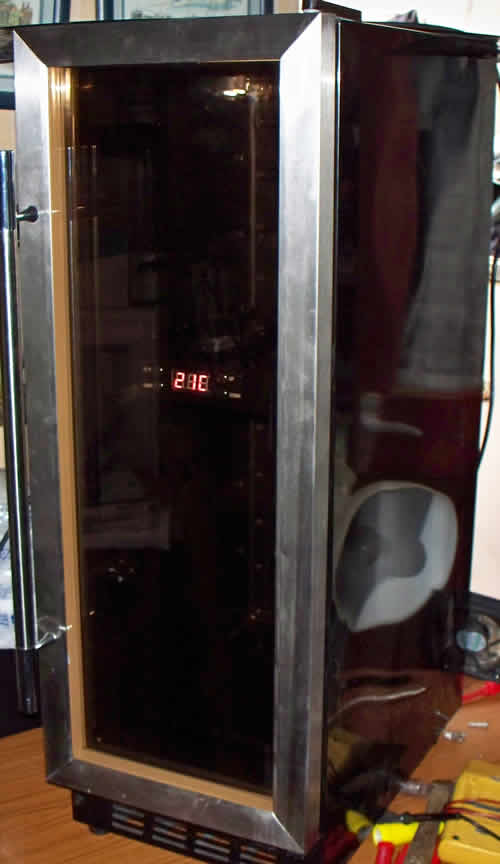
HERE IS THE WINE COOLER
As you can see, it already has lots of the requirements for an incubator.
- A sealed acrylic glass door.
- Lots of insulation
- Built-in light
- Built-in mains to 12v transformer
- Three 12v fans
- A false back to keep things out of sight.
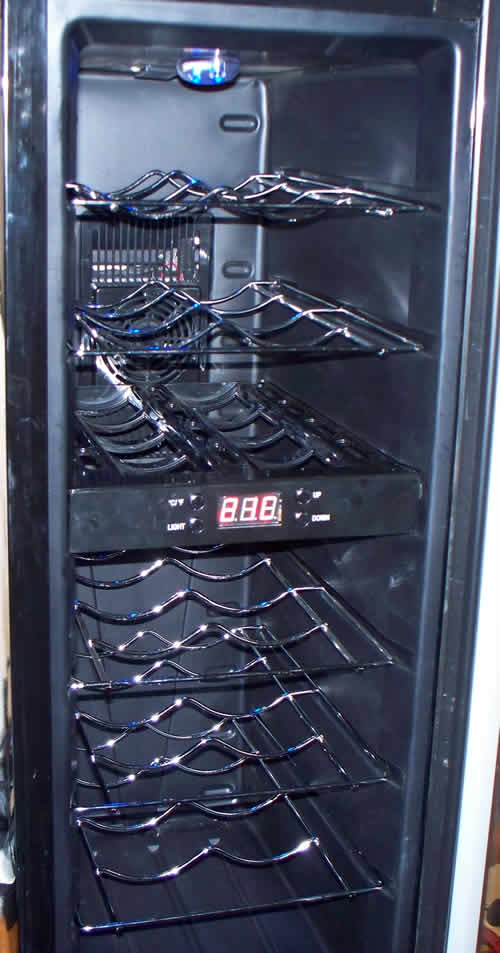
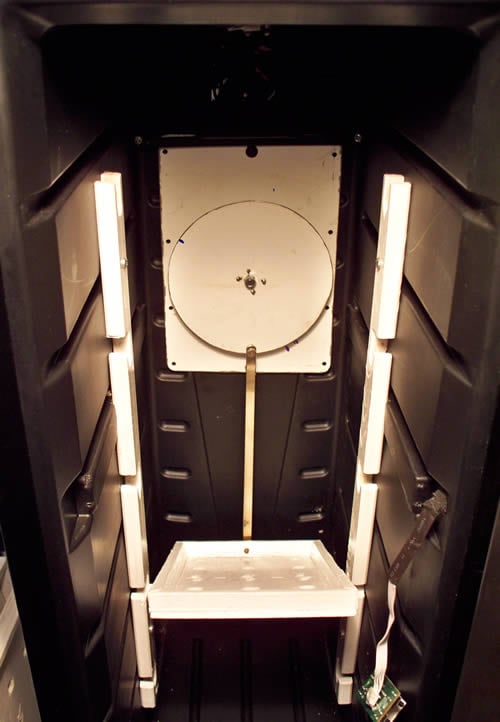
HERE'S THE INTERIOR
Showing the light and the switch panel and the central fans/cooling bits.
Would like to retain the panel but don't know enough about electronics. Will have a go though.
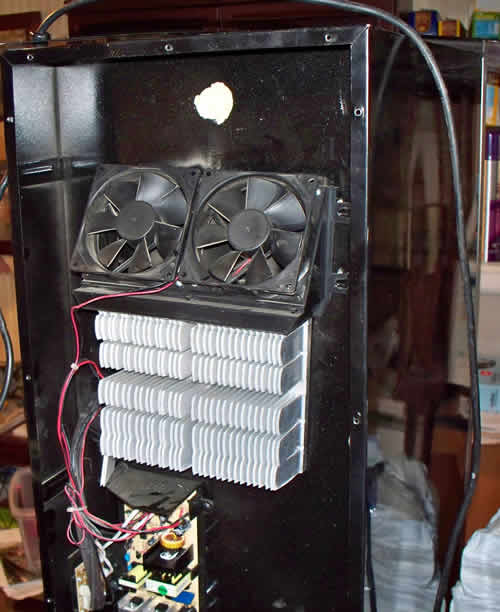
HERE'S THE FALSE BACK SHOWING TWO OF THE FANS AND THE COOLING UNIT
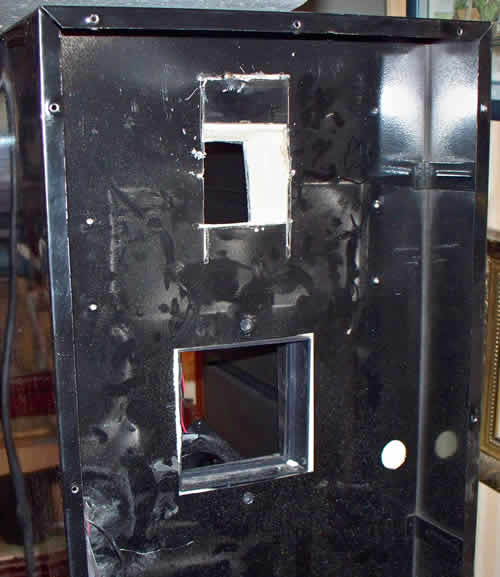
COOLER AND FANS REMOVED AND THE TOP HOLE CUT OUT
The hole in the middle is where the central fan was. We'll be utilizing this space later for the auto turning mechanism.
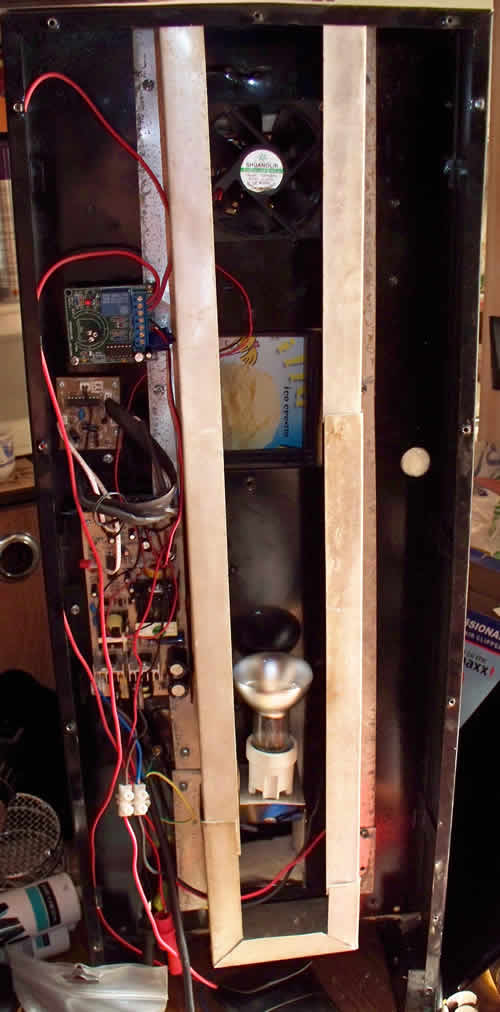
The idea is to create a channel down the middle which will hold the lamp and the fans.
THE SIDES FOR THE CENTRAL CHANNEL
I found some aluminum channel at the scrapyard. cut it long ways, turned one piece around and riveted it together to make this z shape.
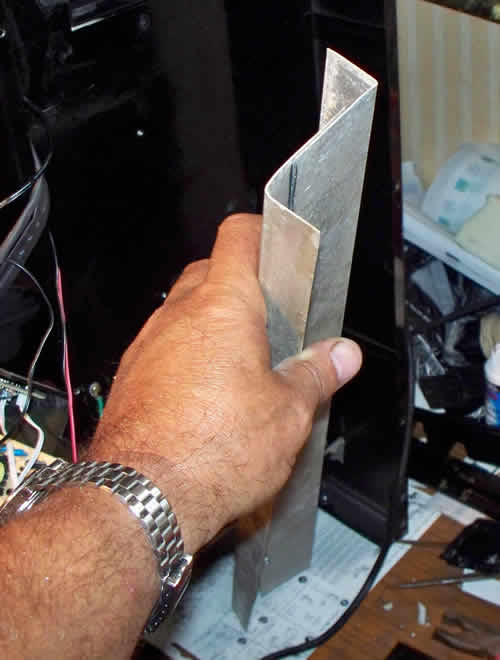
LEFT SIDE OF THE CENTRAL CHANNEL IN PLACE
Note the temporary ice cream lid. Just so I could do some temperature tests.
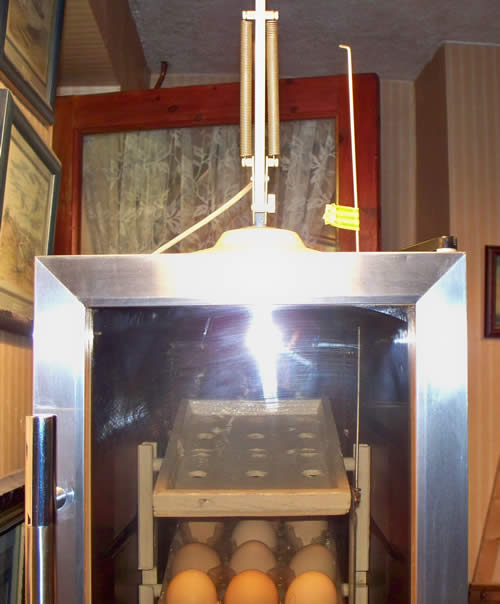
Here you can see the top fan in place. The bottom hole is cut out and the ceramic lamp holder is in place.
Note the small green circuit board swinging in the breeze. This is the thermostat. We'll get to that later.
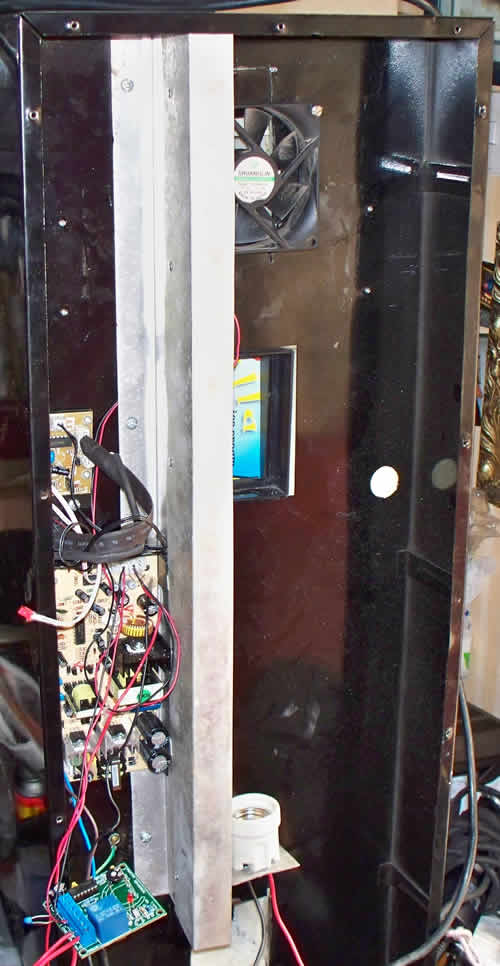
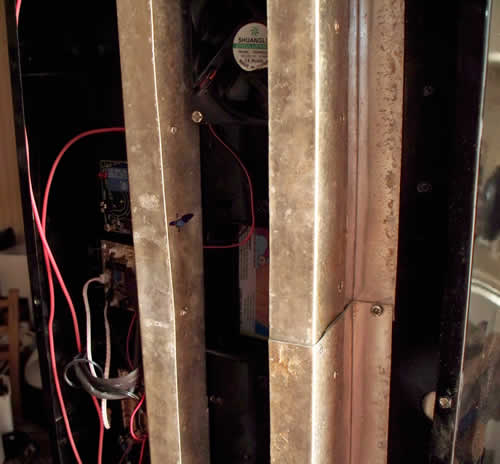
HERE'S THE CENTRAL CHANNEL WITH THE THERMOSTAT TO THE SIDE
The idea is that when the back is on, the air will circulate through this central duct and into and out of the incubator.
There is a fan at the top sucking air out and another at the bottom blowing hot air in. There's no real need for two fans but if one fails it will work perfectly fine with one.
I've cut the back panel into three parts so I can work on the electrics without interfering with the bator.
Here you can see the thermostat. The bit that measures the temperature (the thermistor) is sticking through a hole in the side plate a bit below the exhaust fan which will be the coolest air.
Fine tuning thermostats are hard to come by. This one comes as a kit from Maplins. It will switch on/off mains stuff just by connecting to the blue bits.
http://www.maplin.co.uk/module.aspx?moduleno=31698
It's cheap (bout 5GBP) but doesn't reach egg temperature so I had to change four resistors and the potentiometer. It's not hard to do, I'd never soldered anything before and enjoyed doing it.
Now it works really well and is up to temperature. On it's test run, it kicked in about 2/3 seconds after switching off with no drop in temperature at all.
If anyone wants to know how to do the changes, just let me know
There's a guy selling these kits on Ebay and he says they will get up to temperature. I asked him how he got it up to temperature and he told me that all he did different was to supply an extra thermistor which took the temperature range higher. Haven't tried this one so don't know.
OK Here's the front of the Maplins instructions.
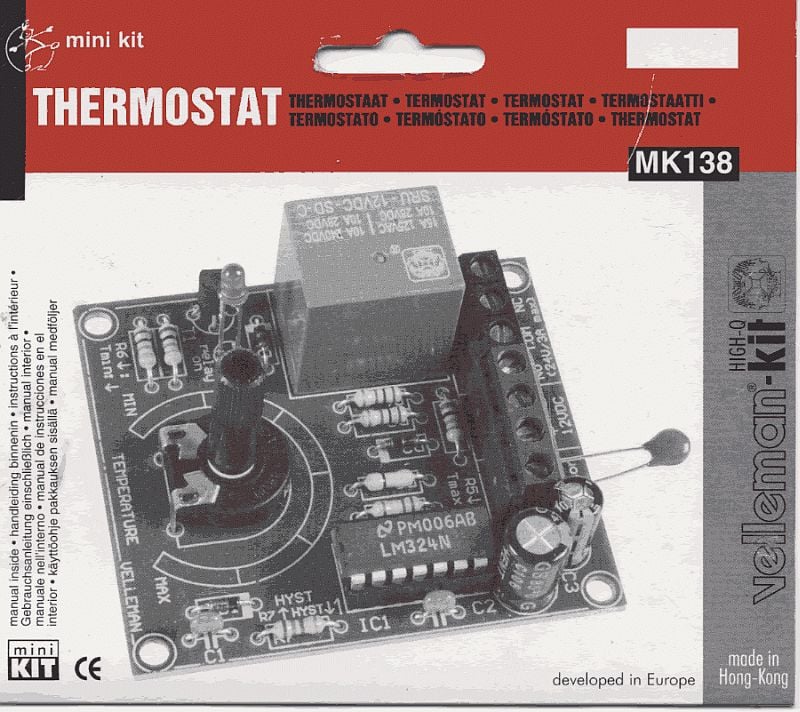
AND HERE'S THE INSTRUCTIONS
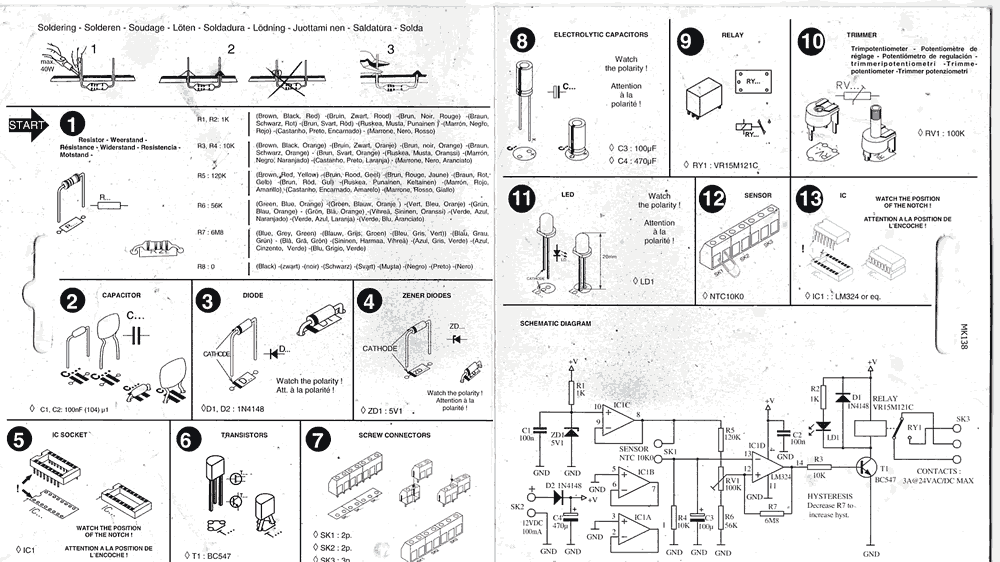
AND HERE'S THE CHANGES YOU NEED TO MAKE TO GET IT UP TO TEMPERATURE
(I hasten to add that I'm no electronics expert. This information was provided by a nice man on Ebay)
There are 4 resistors to change.
R4, R5, R6, R7
Change to;
R4 - 4k7
R5 - 3k9
R6 - 2k7
R7 - 10M
1K Horizontal potentiometer - UH00
These are needed to change the upper and lower limits of the thermostat and also the temperature difference required before the thermostat switches in/out (hysteris)
Also, the potentiometer needs to be changed for a linear one which allows you to better fine tune for the exact temperature.
The new potentiometer doesn't fit exactly on the board because it's slightly bigger. All you do is solder three tails that you've cut off from some of the other components (you'll start off doing the resistors which have long tails which you cut off after you've soldered them.) and solder the pot to them.
This probably sounds more complicated than it is. If you spend some time looking at the instructions you'll see that It's hard to make a mistake. Look carefully at which way round the components need to go and it's easy peasy. I actually enjoyed building it and the end result is a thermostat that doesn't waver from where you set it.
THERMISTOR SHOWING THROUGH SIDE PLATE.
You can just see it where the pen mark is. A blob of sealant will hold it in place and stop it touching the metalwork.
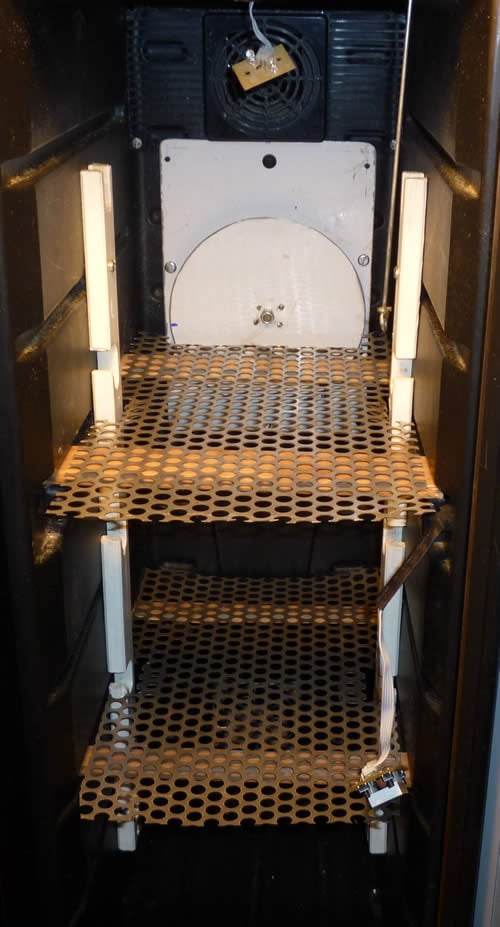
THE INTERIOR DESIGN
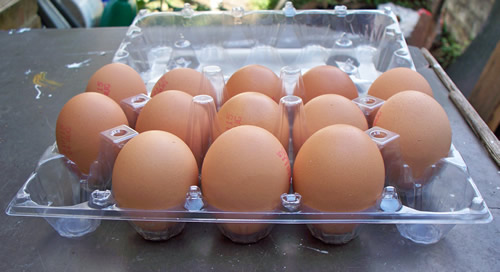
We have "Iceland" over here who sell eggs in cartons of 15. The carton was a good fit and so was the basis for the interior design.
They're plastic and so easy to clean. I'm buying eggs now but that's gonna change soon, right!
AND SO TO THIS
GUIDES WERE CUT OUT

AND THEN
THEN I THOUGHT ABOUT AN AUTO TURNER. TOO EXPENSIVE TO BUY SO...
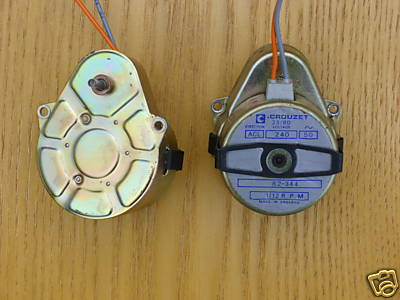
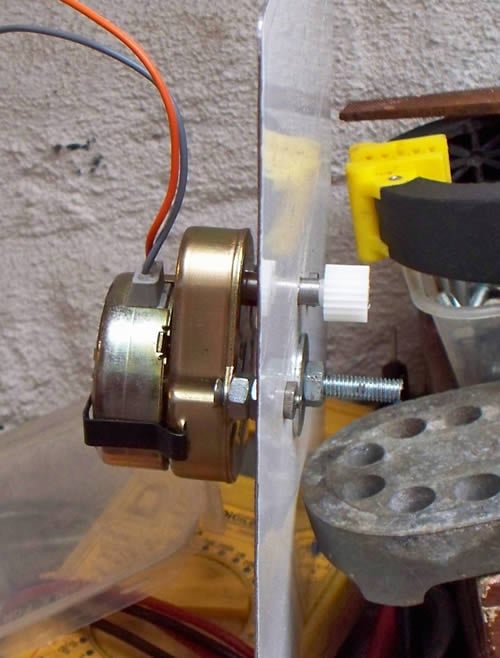
I found a motor on Ebay. It was 1/12th per minute revolution. Slow, but not slow enough. I had some plastic gears lying around and started to experiment.
When I finished (for want of the right sized gears) it was down to 44 minutes per revolution more than the normal recommendation but much less than a hen.
I'm still thinking about whether to stop/start it with a time switch.
HERE'S HOW I GOT THERE.
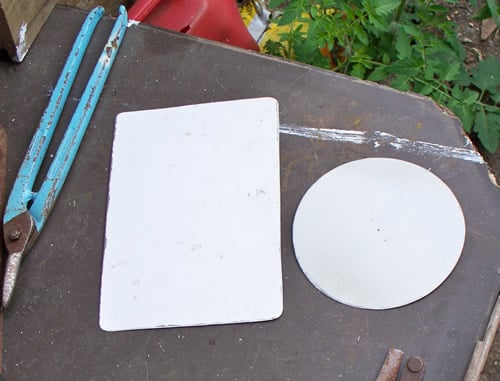
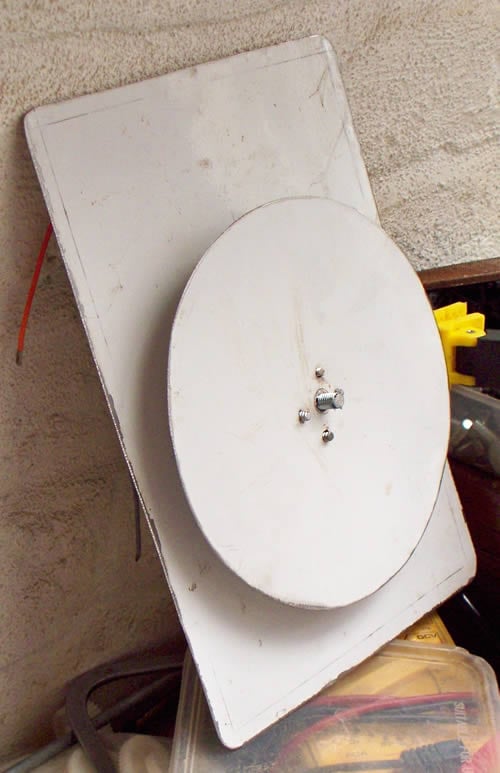
These plates were cut out of the side of a scrap dishwasher with Guilbows.
The size of the rectangle was purely to cover the center hole that was left by taking out the cooling system.
The size of the disc (cam) was governed by the distance to take the trays from 45 degrees up to 45 degrees down.
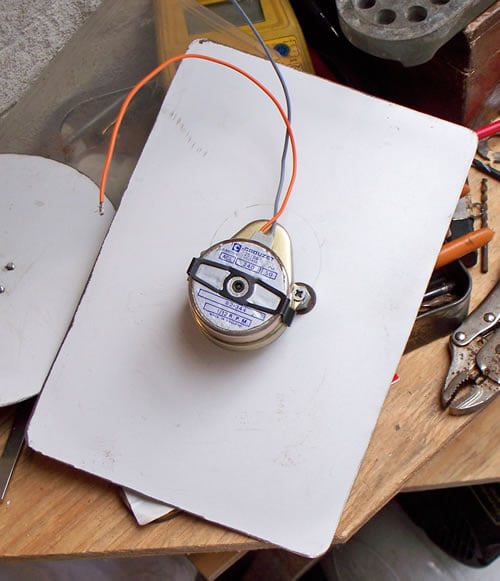
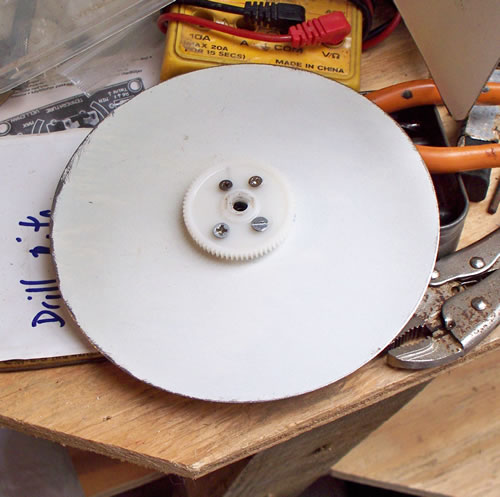
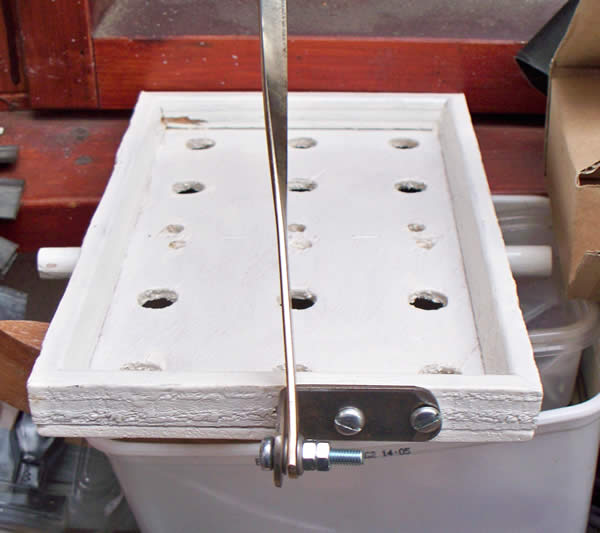
HERE THE DISC (CAM) IS ATTACHED TO ONE OF THE TRAYS.
Could've been any of the trays because they will all be attached to each other.
Just make sure you have the travel and clearance you need.
This is the down position.
This is the up position
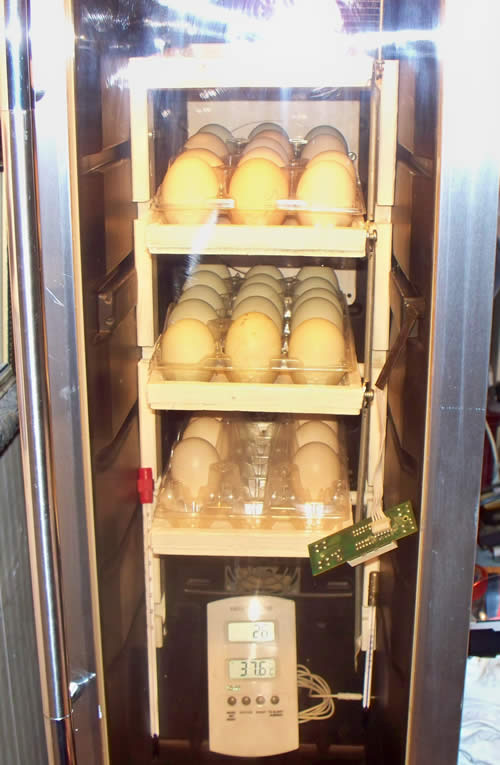
With cooking eggs in.
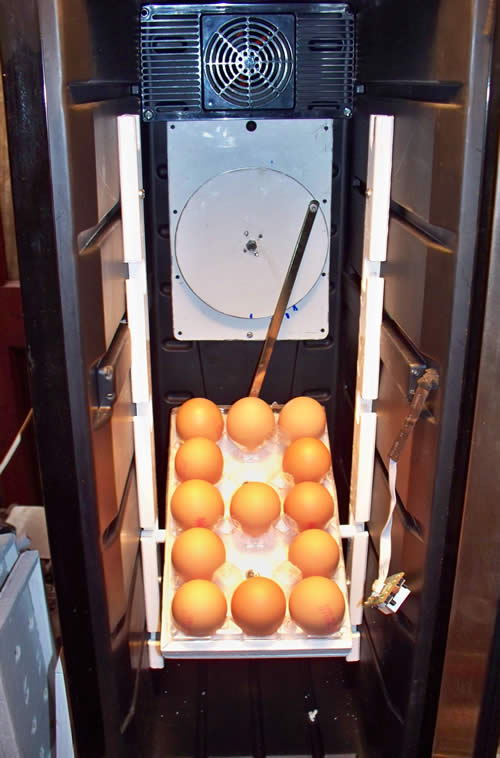
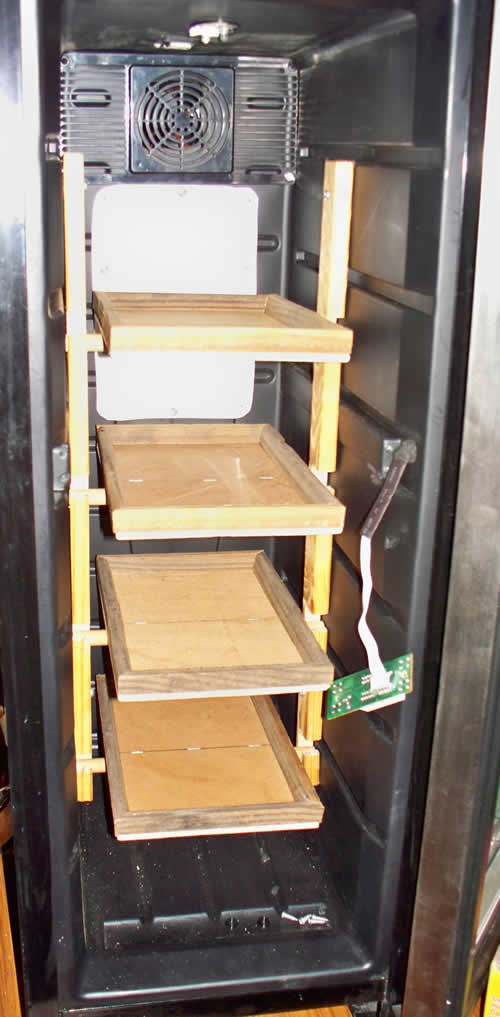
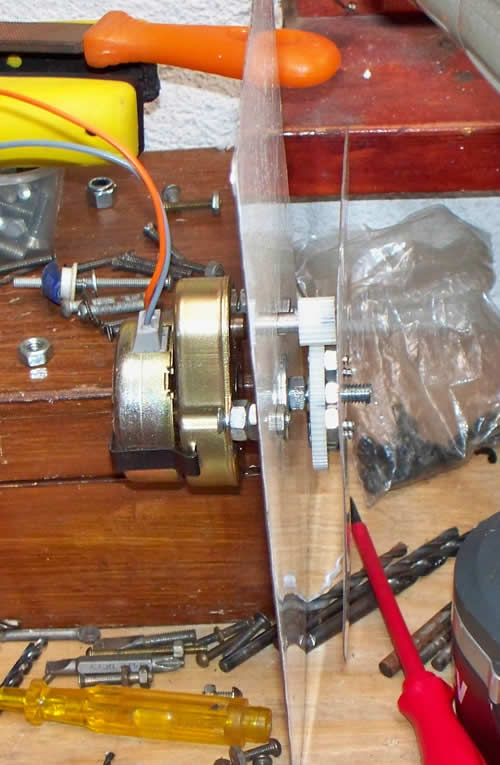
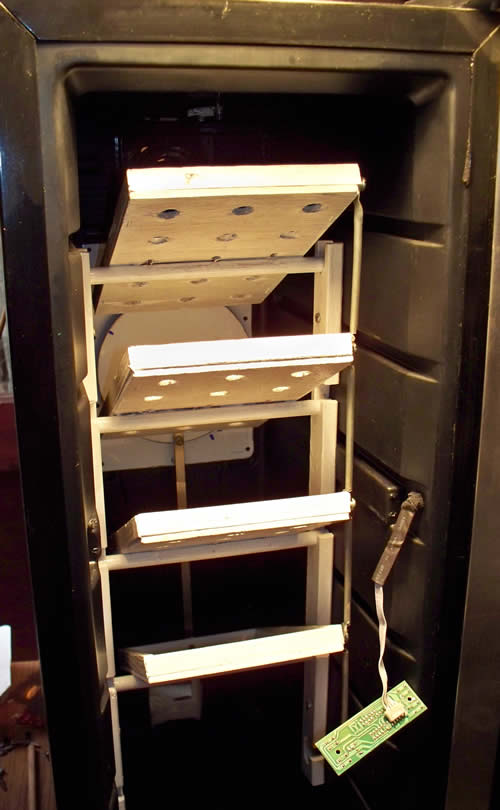
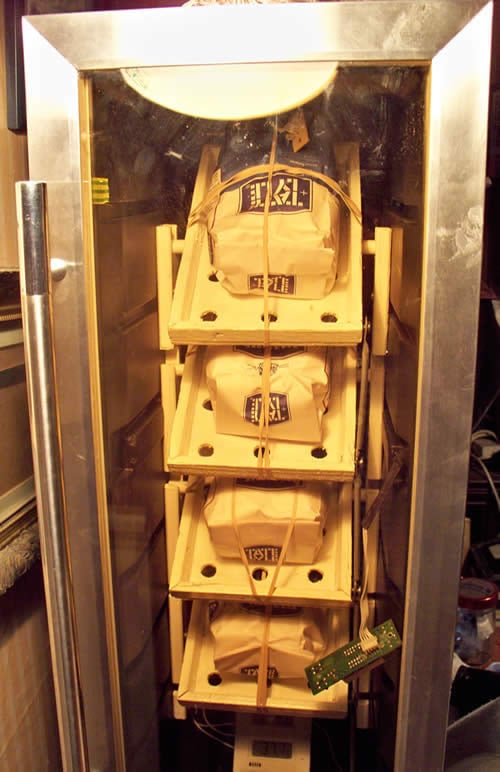
With four trays in place. Could fit one more if necessary.
Note the connector on the right. I happened to have a thin walled tube so could open it where necessary and drill some screw holes but you could use a slightly bigger tube and just drill straight through.
You could also use a flat strip of whatever is thick enough not to buckle.
Before this is finished, I'll drill a hole in the top so this bar can be extended through the top. In case of motor failure, just pulling this bar up/down will turn the trays. This is the way to go for those who don't want to be fussed with motors and stuff.
If, for any reason you want to keep the top clear (maybe yours is under the counter) You could achieve the same result by making an elongated hole in the side and making a lever. Just make sure you have enough travel to get from 45° up to 45° down (ish). Drill the hole level with the tray in the flat position. If the travel is not quite right you can adjust by fixing to the tray nearer to/further from the center of the tray.
On reading this, I'm aware it might sound more complicated than it is. If anyone wants any clarification or help, just PM me. I'll be more than happy to help out if I can.
At this point I was a little worried about whether the little motor would take the weight of four/five trays of eggs.
I weighed a tray of 15 of my hens eggs which came to 900 odd grams. So I had to overdo the testing and did this.
It was too much. 4 kilos is a lot of weight. The small plastic gears in the motor gearbox gave out. :-(
Part of the problem was the couplings to the tray and the cam. It wanted a ball and socket type linkage which I didn't have so every now and then it would snag.
This end was no problem but the other end has to go through 360 degrees.
"PLAN B"
I was out of time because the eggs had arrived.
16 Salmon Faverolles from two different ebayers and 18 supposedly Cream Legbars from a farm where I collected them myself.
I had to utilize "Plan B". Notice the wire coat hanger that goes through a small hole in the top and is connected to the top tray.
Pull it up /down to turn the trays. This is a perfect way to do it for those that don't want to mess with a motor. And much quicker too.
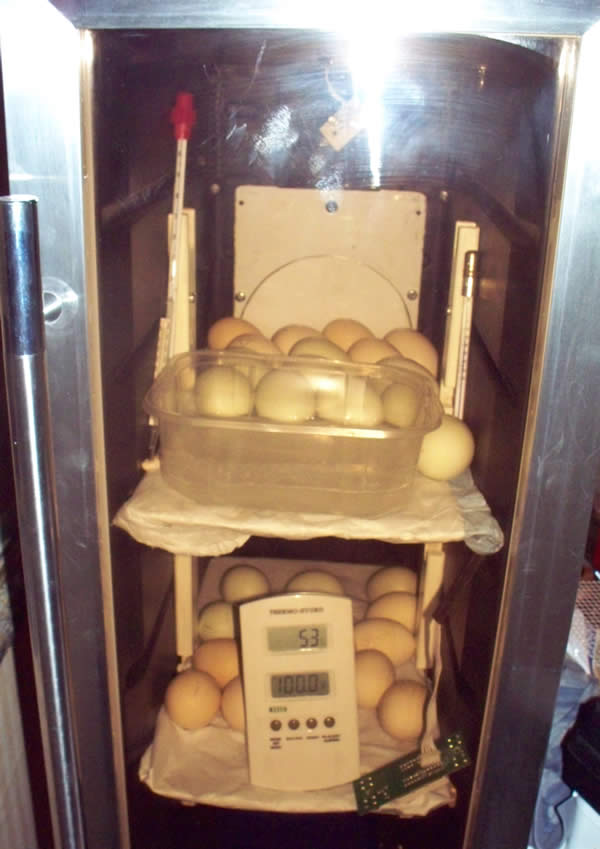
And here we are at last. Loaded with eggs, hopes and anxiety.
Roll on 21 days.
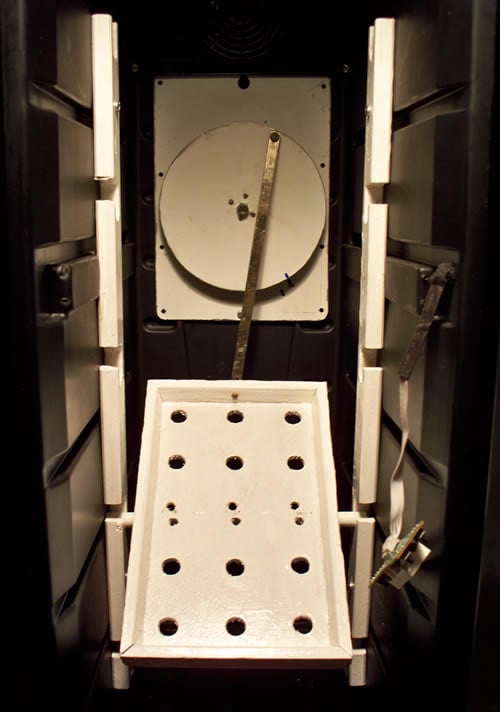
HATCHING TRAYS
I had to work out what I was going to do at lockdown.
The trays the eggs were in were no good for hatching so I found some of this and thought it would be good because it would allow the air flow.
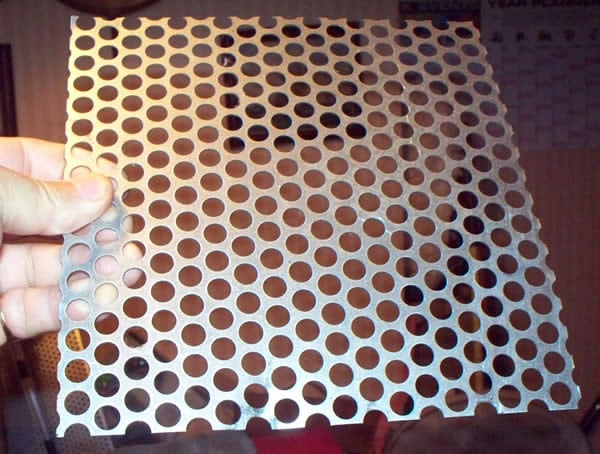
So I made up two trays which fitted tight to the sides all round so no chicks could fall down the sides.
Fits tight to the door also when it's closed.
I didn't allow for a lip on the front which I would regret later.
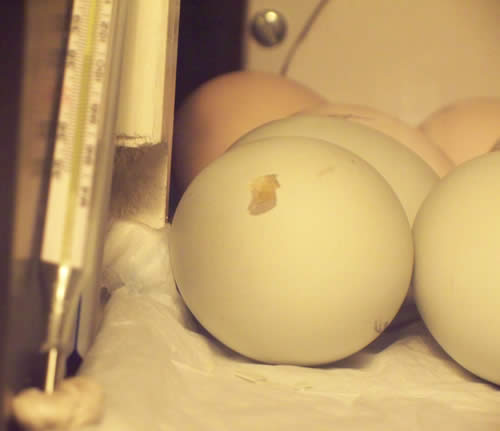
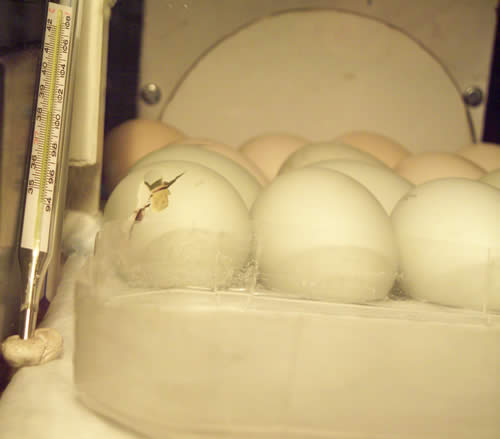
LOCKDOWN!
Note the FOUR thermometers, and still the hatch was late.
I wasn't sure where the humidity should be but after lots of reading, I kept it in the low 30s til lockdown and then raised it to 50/60s
After candling, I'd tossed 4/5 but I didn't see any classic signs after that.
When we got to the end of day 22 I was really despondent. I was convinced that none would hatch at all.
Then I saw this.

Which turned into this
And after a while.......
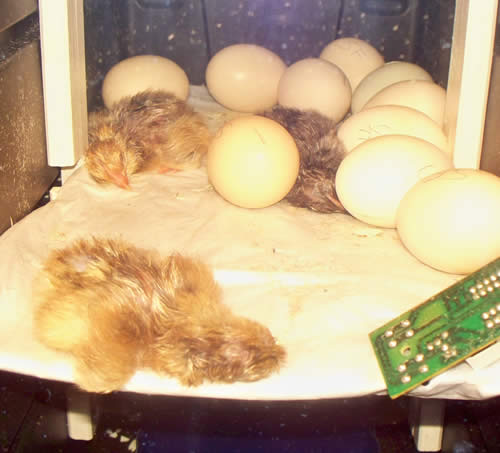
I woke up to 7 chicks in the morning with more pipping and zipping.
In this next picture you can see that the chicks are right up against the door.
This is where I regretted not putting a lip on the front of the tray.
Whenever I opened the door I would have to quickly slide my arm in to stop them falling out.
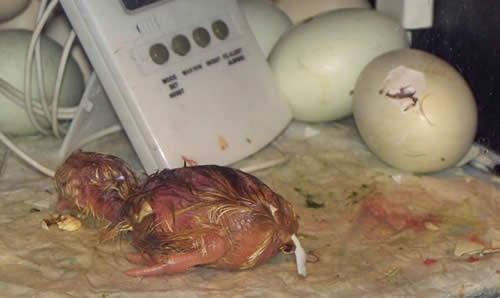
This is Number 10. She had zipped around lunch time but no movement three hours later.
I decided to investigate and found that the poor thing was stuck to the floor where the fluids had leaked out and dried.
I got her out but it wasn't pretty. The poor mites's belly was heaving. She had tried so hard to get out. I really didn't think she was gonna make it.
I'll try to post a short video clip later where you can see that happily, number 10 did make it after all.
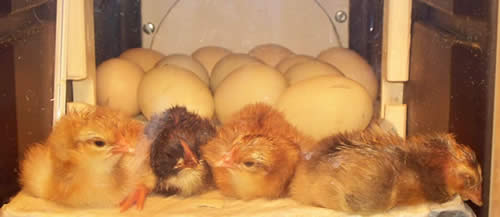
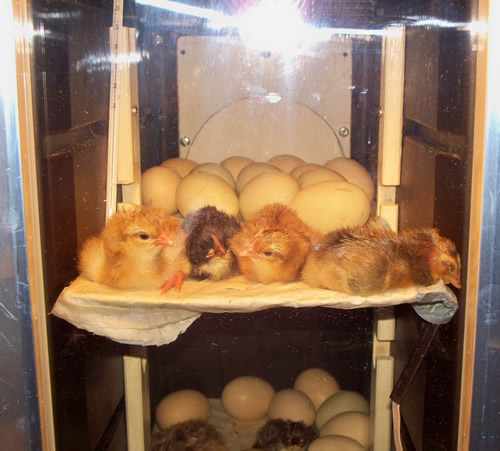
Cutting a looooong story short, we got to the end of day 23 and I had 15 Cream Legbar chicks and no Salmon Faverolles.
I was about to give up on the Faverolles and decided to try something I'd read in a very old chicken book.
I filled a bowl with hand hot water and put the Faverolles eggs in.
The idea is (and I think it's a good one) that anything dud would sink and anything alive would start moving after a minute or so.
There was no movement at all although they all floated. At the end of day 24 I was thinking about cleaning out the incubator when I saw a pip.
Just two Salmon Faverolles hatched out and sadly, along with two Cream Legbars they died in the first two days. They just got weaker and weaker.
The worst of it was, on doing an eggtopsy, they were all fully formed and were all soaking wet.
I have no way of knowing if they had died before I put them in the water (too much humidity) or the eggs sucked in the water from the bowl (osmosis).
Anyway I have to put it down to a mistake on my part. From the incubators point of view it was a fantastic hatch.
THE BROODER
Here's the brooder I made from the box that the wine cooler came in.
It was nice and big and was two boxes in one, An inner and an outer.
It was simple to cut out the hole and insert the (borrowed) glass top from my coffee table in between the two layers.
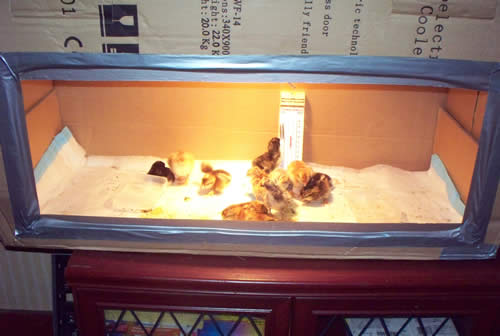
It was like having an aquarium in my back room.
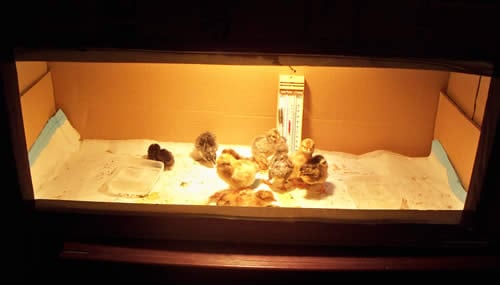
These are all supposed to be Crested Cream Legbars.
All the eggs were a pale blue/green colour but clearly there is some mixed ancestry here.
Number 10 is the one on the left. She still has bits and pieces stuck to her. She was too frail to clean.
Here's a video clip of my first egg hatching;
Find a video clip here of them in the brooder; http://www.youtube.com/watch?v=A0jbNnS6cII
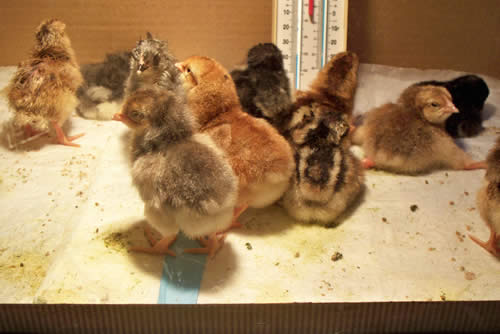
A couple of weeks later;
And finally, just before they came out of the brooder;
And that brings me to the end of this particular journey. I hope you enjoyed the ride.
Check out my chicken coop page. Bye for now.
https://www.backyardchickens.com/web/viewblog.php?id=33362-toxos-chicken-coop
Paul

