The Plans
as complete modular panels. I wanted to be able to walk in.While I was waiting for the chicks I went on the Austin Funky Chicken Coop Tour (this was great fun), I noticed everybody had more than one coop, I took this to mean that I should build as big as practically possible right off the bat.Two months between ordering my chicks and their arrival meant I had plenty of time to plan the coop. I rent my house so I need to be able to move it someday, therefore the walls are designed And of course it needed to look good. after a bit of brainstorming and lots of sketches on napkins and envelopes this is what I came up with: 7' 5" wide and high, 12' long, with the house elevated above the run. This should be plenty big enough for 7-8 chickens with room for growth.

Sketchup
I like Sketchup, using it to make the final draft of my plans really helped me get exactly what I wanted, it also made it easier to spot and problems that might come up in constuction.

Constuction
I built the wall panels one at a time outside the workshop.

Test-fitting everything before fitting the clading and chicken wire.

The Experiment
I read about Architect Terunobu Fujimori siding some of his projects in charred ceder, a 15th century Japanese technique that seals against insects and rot but is nearly forgotten.
I was intrigued, after an afternoon of experiment with scraps I had a method that yielded results I really liked.


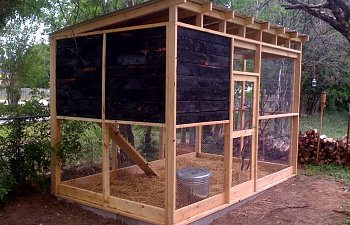
Almost Finished
After attaching the charred ceder, laying the foundation and rebuilding the coop on it's permanent site I had something that was starting to look pretty good.

The Details
This keeps the door from slaming on chicken toes

Secret access to the nests.