We have five baby chickens in the basement bathroom. They are so cute and growing FAST! Below are pictures and descriptions of the hen house and run we are building. It is a work in progress, so I will add more pics as we go along. Thanks to all who have posted their beautiful coops. I am not working off a "plan" as I am the type to not really read directions, but I have taken multiple ideas from other peoples posts and pictures. I own and operate a painting and drywall company and I end up doing a lot of demo so you will see lots of materials I took from demo projects. This is such an exciting adventure for us! Enjoy!

This is the spot we chose for the coop, near the house but behind a blind from our back deck. Should get plenty of sun, but still be somewhat protected from the powerful Colorado winds.
I built this frame, 12x4, then dug a trench, stapled 20 inches of chicken wire to the base and buried it. This chicken wire was in a client's backyard where I was working, she said "Take it!" One of the 2x4s is from home depot, but the others came off an old work bench I disassembled.
OK, below I have started putting up the posts, it is 7 feet high in the front and six feet high in the back. I also started framing the base of the hen house, but actually ended up taking these off and toeing them into the inside... this is definitely a learning curve for me. You will see in the following pictures.
This picture is the coop with roof on and back wall and the nesting box framed out.
Below is the floor, I got this linoleum from a restore place for $3.
Below is part of the roof over the hen house. I put plastic between the plywood and the corrugated metal, (which I got for free from a demo project I did), on the roof. In the front it hangs over three inches, in the back, six
Below is the far end of the run, the last four feet. Here I bought the clear plastic for extra light... $14 at Lowes, $24 at Home Depot, where do you think I shopped?
Well that's all for now, must go make dinner! The small humans are waiting... more to come soon.
OK. Its been a while since I updated this. I have been only able to put in an hour here and there due to my work schedule and also weather... we are so excited for this spring to really take off and to be WARM!
So, here is what I've done:
Above is the door I made. A friend had given me a storm door with frame that I was going to use but of course, I didn't measure it or anything, and when I brought it over to the coop, I realized it was WAY too big. No problem, I made this door from left over fence pickets that had been sitting in backyard for over a year. It is 70 inches high and 24 across. I made the frame, then stapled hardware cloth to the inside, then made another frame and put it on top. This way the hardware cloth is sandwiched in between. I did use the hinge set up from the storm door. I was able to cut it down with a metal blade on my jigsaw. It may no be the most beautiful door, but it seems like it should work...
Above is the chicken door to the hen house... I think people call this a "pop door?" I made it from Lexan that I bought at Lowes. When I was buying it I thought it seemed really expensive for the thicker pieces... like $25 or something, so I bought the super thin flimsy one, cut it in half and just glued them together. So it is definitely thick enough and I only spent $9. I got the idea to do the clear pop door from BYC. I seemed like a good way to get a little extra natural light in the place. Thanks BYC members! BTW, that ramp is not attached or anything. I just set it there to see what it looked like. I'm afraid that piece of wood may be too narrow?
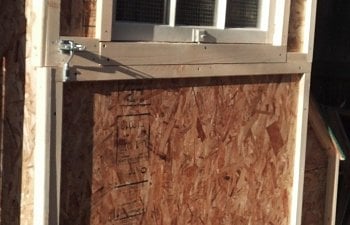
Above is the window, open obviously. I put the hardware cloth in yesterday, then trimmed it out on the inside so that the chickens won't hurt themselves on it. All the trim I'm putting on here by the way is from Home Depot. It is all 8 foot 1x2s. At Home Depot these are about $1.30 a piece, at Lowes, $3.30. I have no idea how these two stores can have these huge differences in their pricing??? Luckily for me, I have both stores about equidistant from my house so when I need something I research it at both places before I go...
Above is the pop door from the inside. You can see it is about three inches up from the floor. Again, I saw this idea here on BYC as a good way to keep bedding from being kicked out of the hen house every time the girls go outside. There is a hole at the top of the door and after I took this picture I put the rope on it and threaded it through some eye hooks and out a hole at the top of the hen house so that you can open and close the door from outside. It totally works! I was even thinking I could run the rope all the way onto our deck so that I could open my back door and let the girls out in the morning without having to walk around to the coop. Am I lazy or what")
Above is a boring picture, I know but I want to show what I did with the interior. So behind all this horrible 70s paneling, (free from a demo job I did), is insulation... yup, I insulated... the entire thing. All of the walls are insulated with rigid insulation. This I did have to buy. I bought two 4x8 sheets of it... can't remember if it was Lowes or Home Depot because I think they were pretty comparable on this price, somewhere around $12 a sheet. It is crappy stuff made of styrofoam and when I cut it the little balls went everywhere... I finally realized the way to do it is to treat it like drywall: Instead of trying to cut all the way through it, just score it along your line and snap it, then cut the plastic film on the other side. It still made a mess but way less. The ceiling and floor of the hen house are insulated with fiberglass insulation leftover from a drywall job I did. I know not everyone insulates their coop, but I decided I wanted to do it because... well, I can. It will keep the coop cooler in the summer and warmer in the winter. The front range here in Colorado is HOT in the summer and we have pretty chilly winters. When my husband I were deciding whether or not to insulate, one of us brought up the fact that 200 years ago in North Dakota people had chickens and they likely made it through the winter without fiberglass insulation in their hen house... that said, I bet those chickens were cold! I guess I just figure if you can keep your coop a more comfortable temp, why not? I also don't feel comfortable heating the hen house in any substantial way during the winter because of the fire hazard. I would like to have nothing more in there than a light... I'm sure this will all be part of my learning curve as a new chicken mommy. Also in this picture you can see the vinyl baseboards. I bought 12 feet of this at the Re-store and I think it cost around $5 or $6. I attached them with Locktite, one of my favorite products, kind of like liquid nails, but I think its easier to work with and it works on just about everything... and it dries clear so if you're messy with it, it doesn't matter.
Above is the front of the hen house. The window was free, came out of a friend mine's garage. I like it, I think it gives it character. The big door here is the full side. I wanted to whole thing to open so that when I need to clean I can just park the wheelbarrow next to it and just dump right into it. I'm also making everything inside the hen house removable for easy cleaning.
Here is the door open and you see I put a big sheet of the rigid insulation, and then covered it with the paneling. Its pretty tight when its closed, but I may actually line the whole thing with weather stripping too. It is such a big door that it seems like during the winter super freezy air could totally get in. All of my venting is at the top, hopefully well above where the girls will be when they are on their roost. I want to try to make the rest of the coop pretty air tight.
Above is the last picture for today. These are the nesting boxes. Same deal as everywhere else: vinyl floor, vinyl base, insulation and paneling. I am going to make all these divider boards removable as well so that when I clean, everything comes out and its just one big open, vinyl, space. Just FYI if anyone does use my idea with the rigid insulation and the paneling, that crappy 70s paneling is not super easy to work with. I tried basically all my saws on it and ended up switching back and forth between circular saw and jigsaw. It just sort of disintegrates if you have to say, shave off a quarter inch... I see this paneling all the time though at the restore and it is dirt cheap.
So things are moving along and the chickens are getting big! I will post pictures of the girls next time I update this. I really want to at least get the pen area all closed in with the hardware cloth soon so that they can start to come outside on warm days. They are living in our basement bathroom shower, which BTW, needs to be totally gutted an redone so we don't feel too bad about having farm animals in there, and they just look so big. My daughter keeps saying "We gotta get these chickens outta the house
This is the spot we chose for the coop, near the house but behind a blind from our back deck. Should get plenty of sun, but still be somewhat protected from the powerful Colorado winds.
I built this frame, 12x4, then dug a trench, stapled 20 inches of chicken wire to the base and buried it. This chicken wire was in a client's backyard where I was working, she said "Take it!" One of the 2x4s is from home depot, but the others came off an old work bench I disassembled.
OK, below I have started putting up the posts, it is 7 feet high in the front and six feet high in the back. I also started framing the base of the hen house, but actually ended up taking these off and toeing them into the inside... this is definitely a learning curve for me. You will see in the following pictures.
This picture is the coop with roof on and back wall and the nesting box framed out.
Below is the floor, I got this linoleum from a restore place for $3.
Below is part of the roof over the hen house. I put plastic between the plywood and the corrugated metal, (which I got for free from a demo project I did), on the roof. In the front it hangs over three inches, in the back, six
Below is the far end of the run, the last four feet. Here I bought the clear plastic for extra light... $14 at Lowes, $24 at Home Depot, where do you think I shopped?
Well that's all for now, must go make dinner! The small humans are waiting... more to come soon.
OK. Its been a while since I updated this. I have been only able to put in an hour here and there due to my work schedule and also weather... we are so excited for this spring to really take off and to be WARM!
So, here is what I've done:
Above is the door I made. A friend had given me a storm door with frame that I was going to use but of course, I didn't measure it or anything, and when I brought it over to the coop, I realized it was WAY too big. No problem, I made this door from left over fence pickets that had been sitting in backyard for over a year. It is 70 inches high and 24 across. I made the frame, then stapled hardware cloth to the inside, then made another frame and put it on top. This way the hardware cloth is sandwiched in between. I did use the hinge set up from the storm door. I was able to cut it down with a metal blade on my jigsaw. It may no be the most beautiful door, but it seems like it should work...
Above is the chicken door to the hen house... I think people call this a "pop door?" I made it from Lexan that I bought at Lowes. When I was buying it I thought it seemed really expensive for the thicker pieces... like $25 or something, so I bought the super thin flimsy one, cut it in half and just glued them together. So it is definitely thick enough and I only spent $9. I got the idea to do the clear pop door from BYC. I seemed like a good way to get a little extra natural light in the place. Thanks BYC members! BTW, that ramp is not attached or anything. I just set it there to see what it looked like. I'm afraid that piece of wood may be too narrow?
Above is the window, open obviously. I put the hardware cloth in yesterday, then trimmed it out on the inside so that the chickens won't hurt themselves on it. All the trim I'm putting on here by the way is from Home Depot. It is all 8 foot 1x2s. At Home Depot these are about $1.30 a piece, at Lowes, $3.30. I have no idea how these two stores can have these huge differences in their pricing??? Luckily for me, I have both stores about equidistant from my house so when I need something I research it at both places before I go...
Above is the pop door from the inside. You can see it is about three inches up from the floor. Again, I saw this idea here on BYC as a good way to keep bedding from being kicked out of the hen house every time the girls go outside. There is a hole at the top of the door and after I took this picture I put the rope on it and threaded it through some eye hooks and out a hole at the top of the hen house so that you can open and close the door from outside. It totally works! I was even thinking I could run the rope all the way onto our deck so that I could open my back door and let the girls out in the morning without having to walk around to the coop. Am I lazy or what
Above is a boring picture, I know but I want to show what I did with the interior. So behind all this horrible 70s paneling, (free from a demo job I did), is insulation... yup, I insulated... the entire thing. All of the walls are insulated with rigid insulation. This I did have to buy. I bought two 4x8 sheets of it... can't remember if it was Lowes or Home Depot because I think they were pretty comparable on this price, somewhere around $12 a sheet. It is crappy stuff made of styrofoam and when I cut it the little balls went everywhere... I finally realized the way to do it is to treat it like drywall: Instead of trying to cut all the way through it, just score it along your line and snap it, then cut the plastic film on the other side. It still made a mess but way less. The ceiling and floor of the hen house are insulated with fiberglass insulation leftover from a drywall job I did. I know not everyone insulates their coop, but I decided I wanted to do it because... well, I can. It will keep the coop cooler in the summer and warmer in the winter. The front range here in Colorado is HOT in the summer and we have pretty chilly winters. When my husband I were deciding whether or not to insulate, one of us brought up the fact that 200 years ago in North Dakota people had chickens and they likely made it through the winter without fiberglass insulation in their hen house... that said, I bet those chickens were cold! I guess I just figure if you can keep your coop a more comfortable temp, why not? I also don't feel comfortable heating the hen house in any substantial way during the winter because of the fire hazard. I would like to have nothing more in there than a light... I'm sure this will all be part of my learning curve as a new chicken mommy. Also in this picture you can see the vinyl baseboards. I bought 12 feet of this at the Re-store and I think it cost around $5 or $6. I attached them with Locktite, one of my favorite products, kind of like liquid nails, but I think its easier to work with and it works on just about everything... and it dries clear so if you're messy with it, it doesn't matter.
Above is the front of the hen house. The window was free, came out of a friend mine's garage. I like it, I think it gives it character. The big door here is the full side. I wanted to whole thing to open so that when I need to clean I can just park the wheelbarrow next to it and just dump right into it. I'm also making everything inside the hen house removable for easy cleaning.
Here is the door open and you see I put a big sheet of the rigid insulation, and then covered it with the paneling. Its pretty tight when its closed, but I may actually line the whole thing with weather stripping too. It is such a big door that it seems like during the winter super freezy air could totally get in. All of my venting is at the top, hopefully well above where the girls will be when they are on their roost. I want to try to make the rest of the coop pretty air tight.
Above is the last picture for today. These are the nesting boxes. Same deal as everywhere else: vinyl floor, vinyl base, insulation and paneling. I am going to make all these divider boards removable as well so that when I clean, everything comes out and its just one big open, vinyl, space. Just FYI if anyone does use my idea with the rigid insulation and the paneling, that crappy 70s paneling is not super easy to work with. I tried basically all my saws on it and ended up switching back and forth between circular saw and jigsaw. It just sort of disintegrates if you have to say, shave off a quarter inch... I see this paneling all the time though at the restore and it is dirt cheap.
So things are moving along and the chickens are getting big! I will post pictures of the girls next time I update this. I really want to at least get the pen area all closed in with the hardware cloth soon so that they can start to come outside on warm days. They are living in our basement bathroom shower, which BTW, needs to be totally gutted an redone so we don't feel too bad about having farm animals in there, and they just look so big. My daughter keeps saying "We gotta get these chickens outta the house