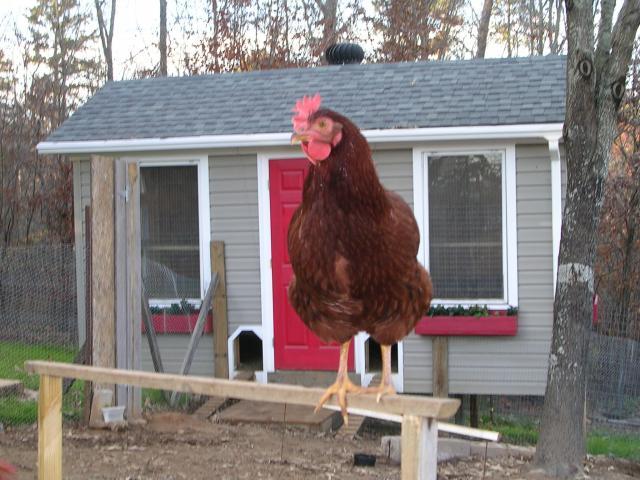
Taj McCluck
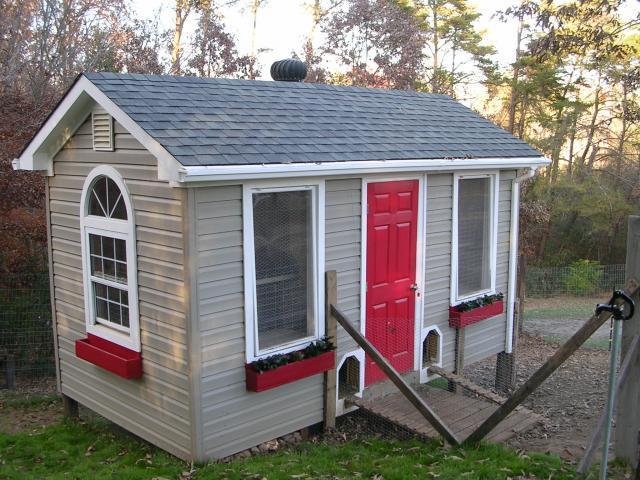
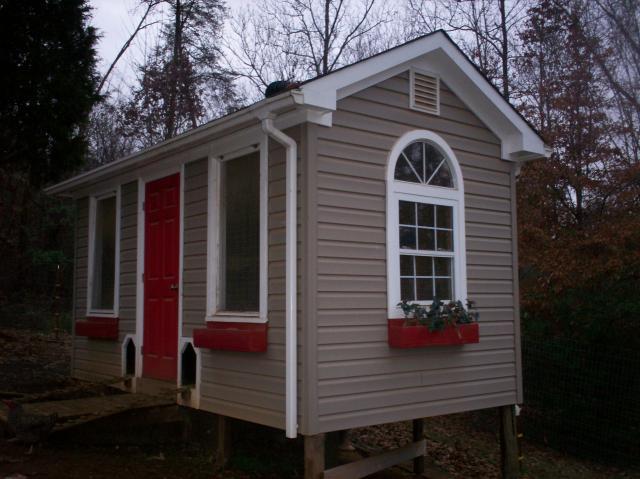
The "v" shaped thing was part of a temporary fence made to grow grass in the run. Notice the turbine vent on the roof. It works with the two gable vents and two full-length soffit vents to provide 6 sq ft total full-time ventilation for the coop. Windows and pop doors provide additional ventilation for warmer weather. On 90 + degree days, the front door is open too. The deck and chook walkboards are built of recycled pressure treated deck boards. Note on extreme right side is the yard hydrant.
Greetings to all who visit our web page at BYC. We began to build our coop in the spring of 2009. It has taken me until now (Dec 2010) to get motivated enough to post our project to BYC.
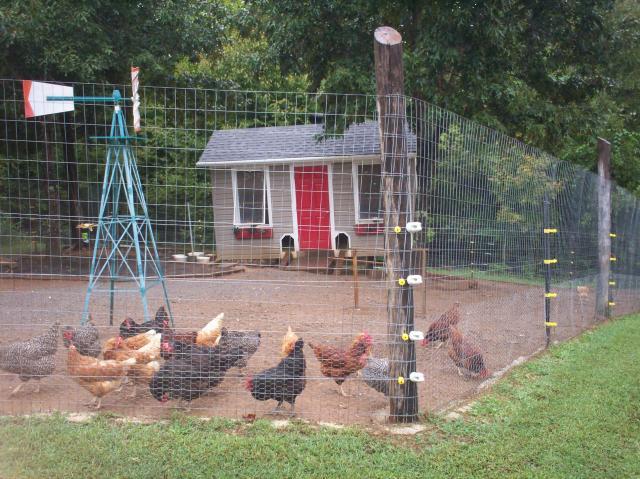
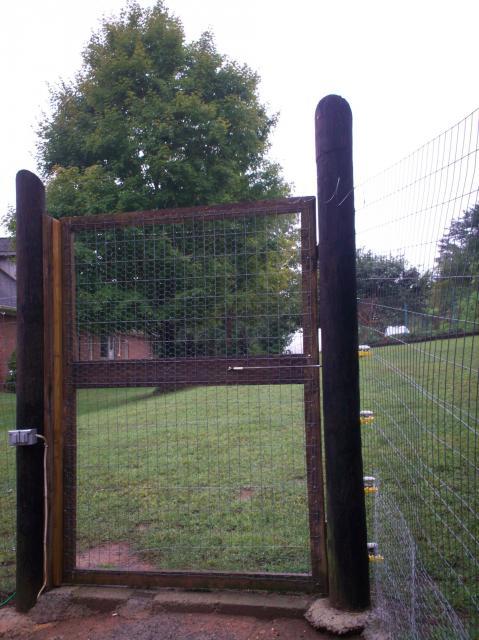
Fence for run is 2x4 welded wire, 6 ft tall, set in cement. Corner posts are 6" dia creosote poles
set in cement. It is electrified with 4 courses of hot wire all around including even the gate itself.
No land predators have yet made it inside. Only loss so far has been one hen to a hawk.
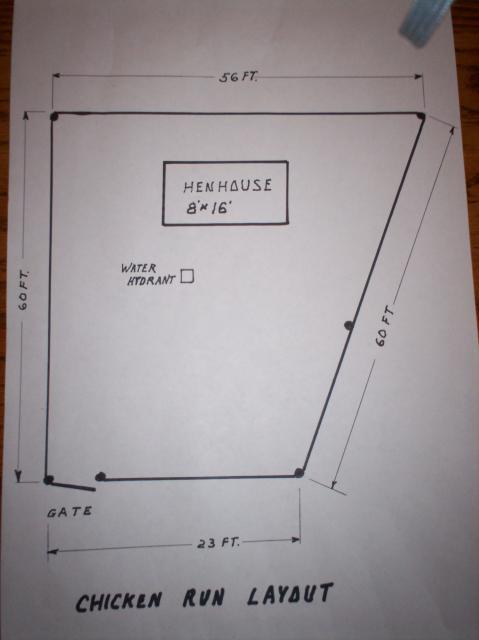
Layout gives bird's eye view of run/coop. Area is about 1900 Sq ft.
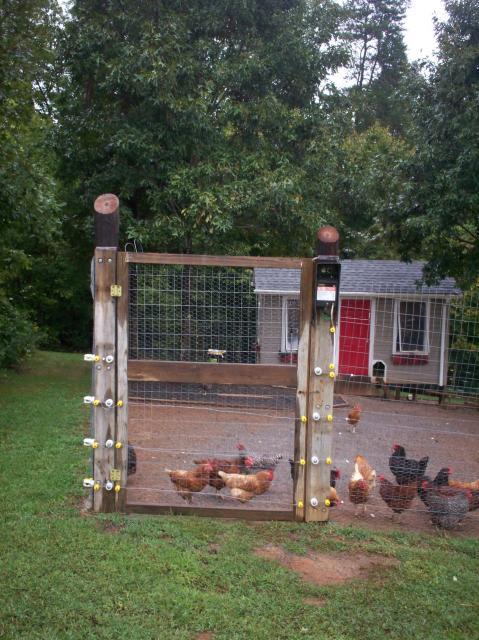
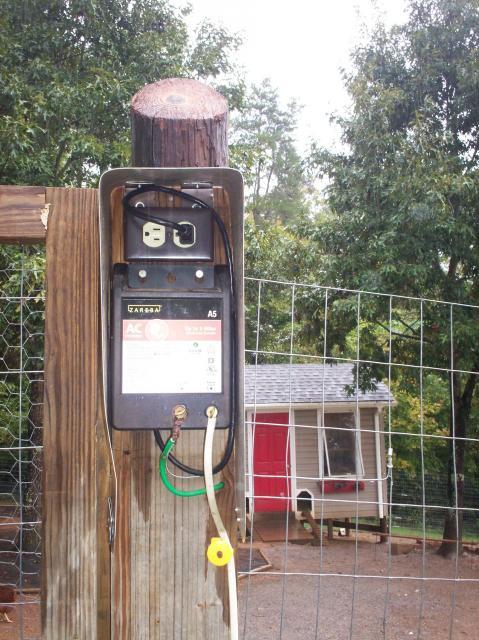
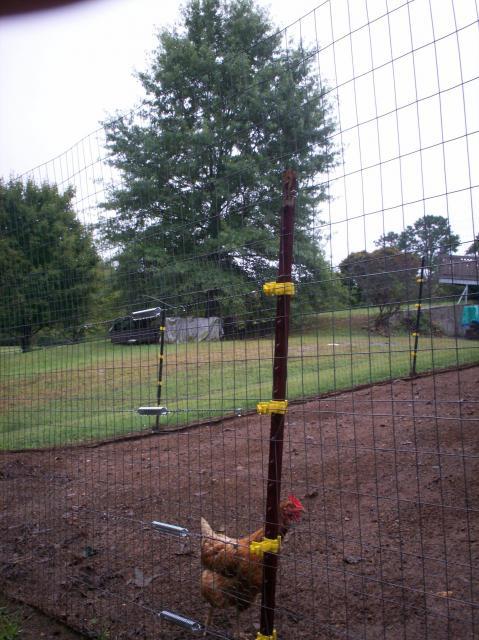
Gate to run with some of inmates present. Gate posts are two 6" creosote poles set in cement. Power comes up at threshold to gate in a foam-filled splice box to make two all weather AC outlets here. One is shown in picture and one is inside gate.
I first had to extend water and power to the site, so I rented a trencher and did that, killing two birds with one stone by first extending water to my garden, then onwards to the area of the coop and run. I think it was around 140 ft or so to get there. I used 3/4" PVC water pipe, sch 40. I installed a 3/4" ball valve so as to be able to shut water off in the extension any time I needed to. I terminated the water line in a yard hydrant about 8 ft from the coop, in front of it. May I suggest that you do NOT buy a yard hydrant made in China like I did. Buy an American made one, no matter what. The chinese ones will develop an underground leak after about a year. I ran a 12 guage/20 amp line to the site in the same trench, along with a quad telephone line. So I can put a phone or a quality audio monitor in the coop if I ever want to. Very inexpensive (free in my case since I had the wire already). I just used interior wire since it is only an extension for the chicken coop. I did a splice to make a power terminal at the gate site to install two all weather outlets there. One is outside for the fence charger, and one is just inside for anything that I might do in the run that could require power. I used Great Stuff foam to fill up the blue plastic box that I put the splices into and thereby sealed same against ever becoming wet. I then extended the line on down to the coop, past the hydrant site and up one of the support legs and through the floor and through the 2x4 base plate of the 2x4 framed wall, to get both power and telephone inside. My power line is not even direct outdoor burial grade. It is only interior grade romex. (I have one such that used to feed a night light I put up when we were living in a trailer before building our house. It still works over 20 yrs later, so I figured that my soil would not hurt the interior grade power wire insulation.)
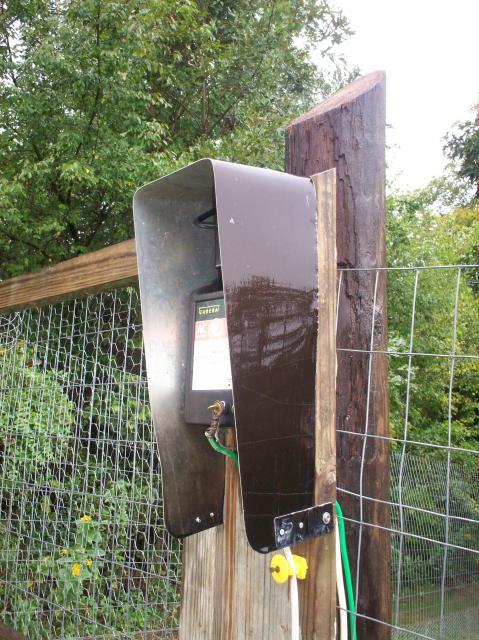
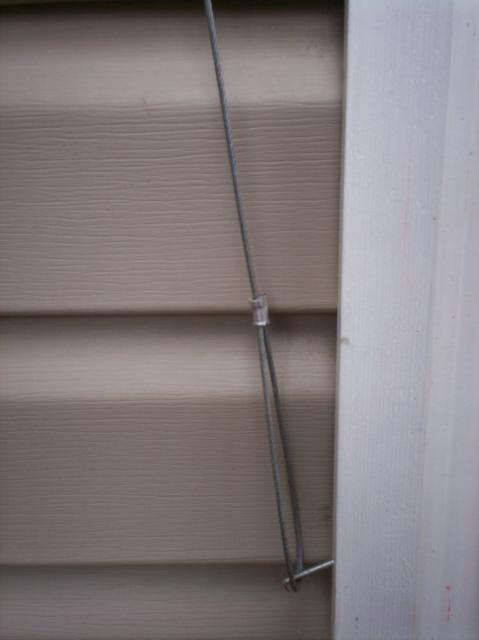
Home made weather shield for fence-charger, at gate.
Fence-charager is grounded via house-type copper rod not shown in pic. Connection via green wire. Fencing grounded all around via being set in continuous run of concrete. Fence is also bonded to ground behind the gate post, to the copper ground rod.
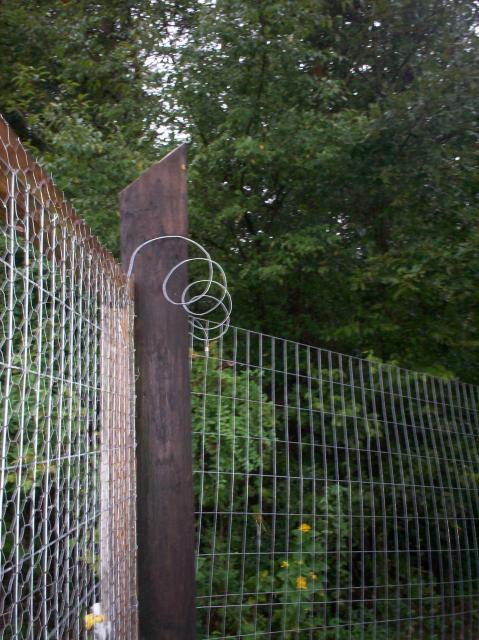
Gate is hot too. Coil is means by which gate itself is grounded. Made to flex with opening and closing of gate but provides a constant ground to gate wire fencing.
View from run towards cluckmore house and gardens. Note all weather outlet inside of run. Splice box is just visible as a part of the gate threshold. Chicken wire surrounds run on inside up to 24" height to keep chickens from poking their heads through the fence to nibble grass. This protects them from attacks by land predators.
Note insulators and how large porcelain ones were used to make hot wire go smoothly around the corners. The plastic mesh on the ground is a failed attempt to grow grass inside of the run so that chooks would have both grass and bugs.
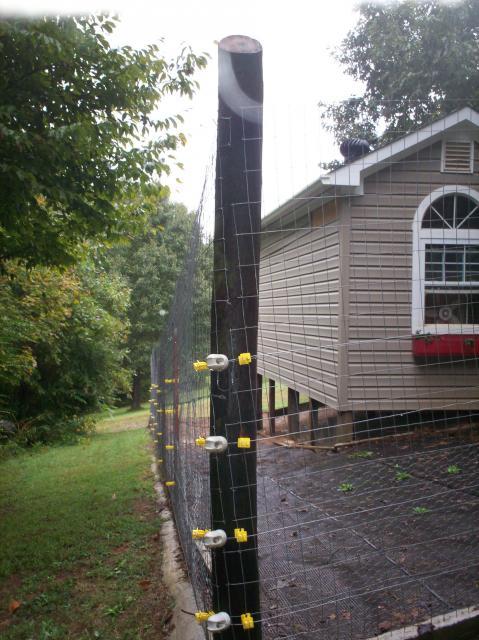
Note tensioning springs located in all four of the hot wires. These keep the hot wires taut at all times, permitting no sagging. A jumper wire connects both sides of the hot wire together. It is so that the hot wire does not rely on it's contact with the springs to have continuity. I pre-stretched each spring on a 16" 2 x 4 with two nails driven into it about 12" apart. Then after forming eyes around both end of the spring with each side of the hot wire, I just pulled one nail our and voila! The spring pulled tight and the hot wire was taut all around the run.
Note cinder blocks set in this place. It is the lowest point of the run, and all of the leaves, silt, and twigs end up here as silt/compost. I did this to stop this compost from passing through the wires and grounding out the hot wires. If one is grounded, all 4 go dead. As a bonus, this can be put in my garden once a year when I clean it out. Nonetheless, I am going to be forced to do some terracing work with RR ties throughout the run, to prevent my entire run from being eroded by rainfall. Only three trees remain to hold the dirt in place, and they cannot hold enough of it to prevent it from becoming badly eroded. So I have a project ahead of me involving some heavy RR ties and some digging.
After extensive reading in the BYC forum about predators, I decided to build my coop on legs of a height to discourage rodents and snakes from living under the coop. I used 6" creosote poles that I had on hand for the legs. The coop is 8' X 16'. I decided to have 6 of the large creosote legs to support the coop. I dug holes for them with a post hole digger and set them in cement after much careful measurement using a plum bob to be sure they were located properly. Several diagonal measurments were necessary to be sure that all six of them were located accurately in a perfect rectangular shape. Slope of this site is 5:1, so it was a bit of a challenge to get it right. The floor joists and perimeter joists are all recycled 2x6 pressure-treated pine that I got from two of my kids who rebuilt decks at their own homes. I framed the perimeter first on the ground, then my son helped me to set it on top of the 6 big creosote legs. We then used a measuring tape to make it perfectly square by comparing diagonal measurements until they were equal. I then tacked two diagonal braces on top of the perimeter to lock it into a perfectly square/rectangular shape and we used lag screws to fasten it to the legs. I took care to be sure that the front edge was 1/2" lower than the rear wall. That way when I do my annual coop cleaning, I can hose out the floor and it will be easy to sweep the water out the door with no puddles at the rear of the coop.) I then added 7 recycled pressure-treated 4 X 4 legs in between the big legs, with 3 of those in a line running lengthwise down the center of the coop in order that the floor not have any bounce. They too were set in cement but their holes were not as wide nor as deep as for the big legs. Note though that I did not set the pressure treated 4 x 4's directly in cement. They will rot if you do that anywhere but the desert. I used recycled 5/8" threaded rods with a nut and large washer to support each of the seven 4 x 4's 2" above the cement so those posts will not ever rot. At that point, I had the frame of a platform sitting on 13 legs.

West side of coop. Note gable vent. All window casing is home made. Both end windows were two different units that just by chance were the same width as two of the half-round units at the same salvage outfit.
I then nailed in the floor joists, using joist-hangers and also toe-nailed them into place on 16" centers. Then I nailed four 4 x 8 sheets of 3/4" OSB subfloor sheets into place using #8 ring-shank nails. I had gerry-rigged the wiring temporarily to have 220 Volts on site, so as to be able to use my air compressor. That allowed use of my pneumatic nailers, which saved me a lot of hard labor. I immediately applied linoleum glue to the OSB and glued a sheet of linoleum down tight to the subfloor. I filled up my old water filled drum roller to half full, and rolled the linoleum repeatedly until all air bubbles were gone. I made a few pinpricks with a nail to let out the trapped air where the bubbles were too far from the edge to get rid of. The reasons I glued and installed the linoleum at this point are:
1. It is easier to do on an open platform.
2. Once the walls were built and nailed down on top of it, I could caulk the seam where the four wall's frames meet the floor, and there would be no place for insects or mites to hide and breed.
3. There is no chance this way that an edge can come loose to allow the linoleum to peel.
I was now ready to put up my sidewall framing. 3. There is no chance this way that an edge can come loose to allow the linoleum to peel.
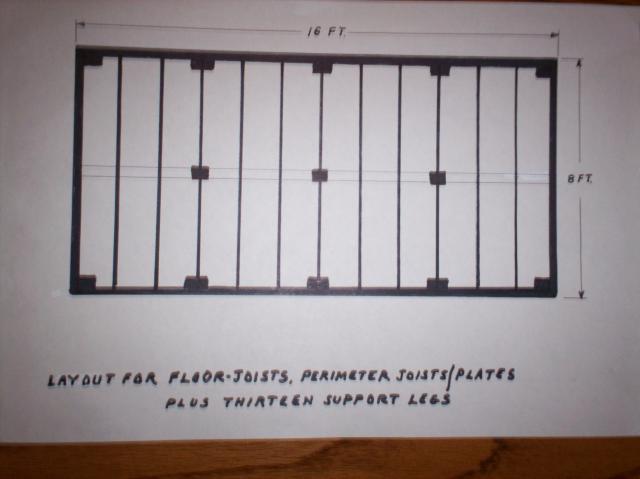
Layout for floor joists and support legs. Note light double line across center. This represents a full-length 2x6 under structure to keep floor extra firm/solid feeling. It sits on the three center legs. End sills are doubled.
I cut and formed the back wall first since it was lacking any features such as door or windows. Plus it would be heavy and I had my son with me that day to help stand it up. We chalked a line on the linoleum so that it would be straight and true. All four walls were cut/framed to be 91" tall. That way, a standard 96" piece of OSB or plywood sheathing would lap over the floor joists all around the perimeter and tie the four walls to the floor framing so that even a high wind could not pull a wall up from this floor. (A house should be built in this fashion too, by alternating sheets of OSB or plywood sheathing so as to alternately lap over the top header (doubled 2 x 4's) of each outerwall with one sheet,and lapping down over the perimeter joists/sills including the mud board with the next sheet. This is a tremendously strong way to tie everything together.) On the back wall though, I installed all four sheets before I stood that wall up, since the slope of the ground would make it hard to do from that side afterwards. I simply laid each sheet of 4 x 8 OSB on the back wall's frame and nailed it in place using the #8 ring shank nails. Then my son, wife, and I stood it up and nailed it down onto the floor platform, making sure it was exactly on the line we had chalked. We toe-nailed it to our chalk line before standing it up to prevent sliding it off onto the ground. We also had two 2x4 blocks nailed to outer edge of frame so that if those nails let go, it would not slide off on to the ground. (we would have never gotten it back up on the floor deck without ripping all 4 pieces of sheathing off had that happened). Then we nailed 4 temporary diagonal deadleg braces into place to hold it plumb and true. We then nailed the skirt of that wall (overlapping sheathing) to the perimeter joist/sill, two nails every 16", and that wall was installed. The eastern wall was done the same way because it was 3 to 4 ft above the ground so I cut and installed the sheathing before standing it up. The other two walls were framed and stood up without the sheathing because I was working alone at that time. I could easily cut and install the smaller sheets to fit around doors and window openings since the coop was not far above the ground on those two sides. After the 4 walls were up and sheathed, I fetched the steel bands that I had gotten for free at the lumber yard. I cut 6 strips, each around 4 ft long. These were the 1" wide steel bands. I used a drill and a 1/8" bit to do a starter hole at one end of each of the 6 strips of steel. I drove a #16 fluted steel masonry nail through the hole to fasten each strip to each of the 6 creosote legs that the coop stands on, about 12" down from their tops. Then using vice grips to hold the masonry nails, I proceeded to drive them through the steel into the creosote legs for about 12" then continued up the sides of the walls nailing the strip to the corners of the building upwards about 3 more feet. I nailed it about every 6". This way, the coop is tied down to the 6 concrete legs and it is far less likely that high winds can get under it to lift it up. It also affords a lot of protection against an earthquake shaking the coop off of it's legs.
East side of coop. Note gable vent.
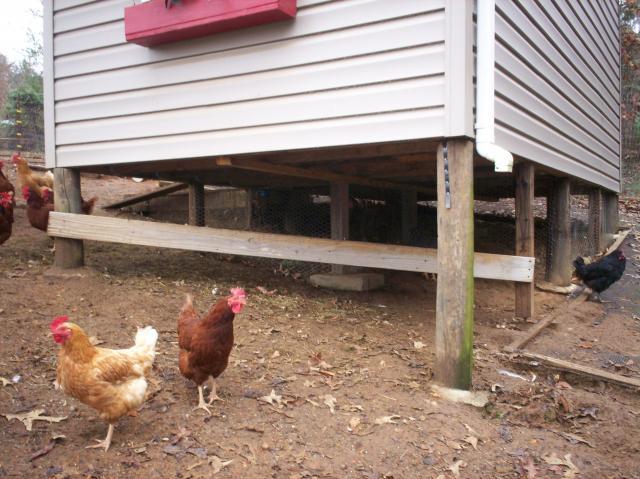
East side. Note the long diagonal roost. A favorite rainy day hangout. Very helpful in keeping the coop clean. Note areas further back are fenced off to keep chooks and rodents out of that area. Just visible adjacent to the downspout is one of the 6 steel tie-down straps that anchors the building to the 6 large creosote legs. Just behind that leg is a secondary leg and at it's bottom you can see that it stands on a steel threaded rod that is in cement. That way the pressure treated lumber secondary legs do not touch ground or cement. The 6 larger creosote legs are set in cement.
I built the roof trusses on my back patio using my pneumatic nailer. There are 13 of them, each made of three 2x4's and each one with six OSB gussets to reinforce the joints. I used liquid nails glue and #8 ring shank nails to fasten the gussets to the 2 x 4's. The trusses are designed to make a 6/12 pitch for the roof with about an 8" overhang on each end. My wife and I installed scaffolding all around the coop on all 4 sides. (I own 10 sets that I bought while building our home.) We had to first pull the back wall header into a straight line. I nailed a 2x4 block at each top corner of that back wall first. I put the string over those blocks, stretching it tight. Then I used a short length of 2 x 4 as a gauge to tell if the wall header needed to be moved in or out.Then we pushed/pulled the top until it lined up with the string so that the gauge block would just slip in between the wall header and the string. After straightening the header of the back wall and spot measuring the distance between back and front walls to be sure all was uniform and true in front, we installed the trusses, toe nailing them to the doubled 2 x 4 wall headers. We did each end first, carefully measuring to be sure to set them true with equal overhang front and rear. Then we did the other eleven trusses. We marked the front and rear wall headers for placement of each truss on 16" centers. We stretched mason's twine to the two end trusses corners on one side, and made sure that each truss that was installed just touched that string. That way the trusses were installed straight, true, and properly spaced so as to make nailing up the roof sheathing easy. I then framed and built out the overhang on each gable end. In Tennessee, these structures are sometimes called "bird rafters" or "fly rafters". Once those were framed, I was ready to cut and install the roof sheathing.
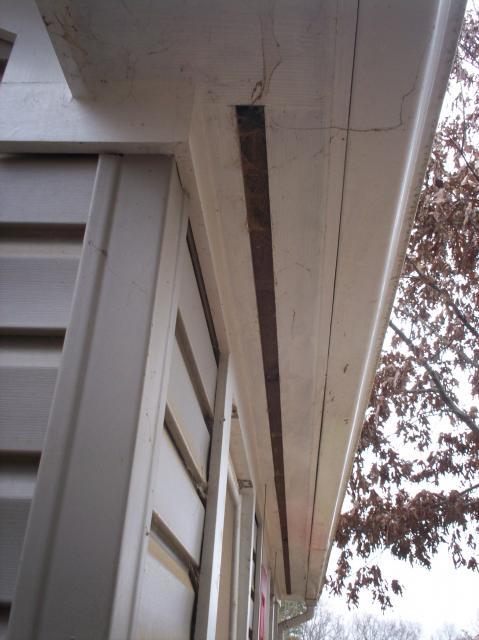
Note continuous full-length soffit vents, just like in a properly built home. Soffit on rear side has same type full length vent. Ventilation in any chicken coop is very vital to the health of any flock.
Note here that steel pop-door cable anchors here in entrance casing on a roofing nail when pop doors are open. The cables are routed up through the soffiit to a short angle iron that is mounted on top of the wall header. I has two aircraft pulleys mounted on it. There are two pulleys/one angle iron for each pop door. To close at night, simply take loop off of nail and let the OSB pop door drop down in closed position. The loops were formed using swages and a swaging tool that was left over from my hang gliding and ultralight days.
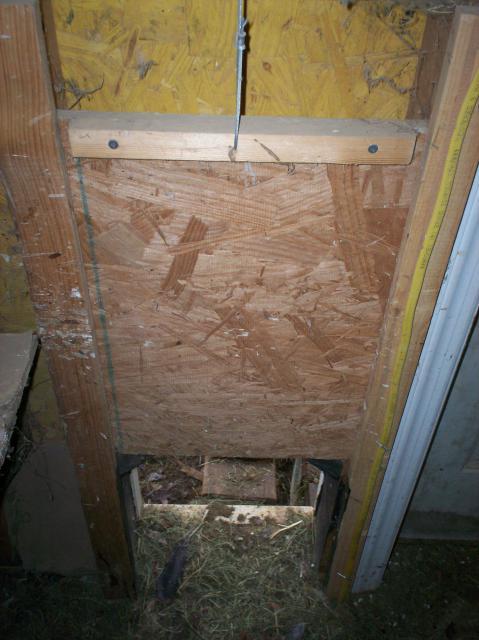
Inside view of one of the two guillotine-style pop doors. Doors are OSB and their tracks are wood.
When my son was available to help me, we wrestled each sheet of OSB up to the top of the roof trusses and nailed it in place. It took a day to do that and the roofing felt. Before doing the roof shingles, I cut a hole so I could install a salvaged turbine vent in the center, just back of the roof peak. This is for ventilating excess summer heat, and of course the fumes that are present year-round with chickens. Then I cut, primed, and installed all of the facia boards and soffit. I put two more top coats of paint on it and also framed and installed the two gable end vents and the sheathing there which had not yet been done. The soffit was installed so that it had a continuous 1" vent slot from end to end, just like you would want for a house, to extend the life of the shingles and to help ventilate fumes from the coop year-round. Then, I put on a 40 year roof. I am 68 years old and I do not want to do that roof again with all of that scaffolding to put up on that terrain. My son helped me with the roof shingles. The coop was in the dry and I was ready to install windows, the door, and the siding.
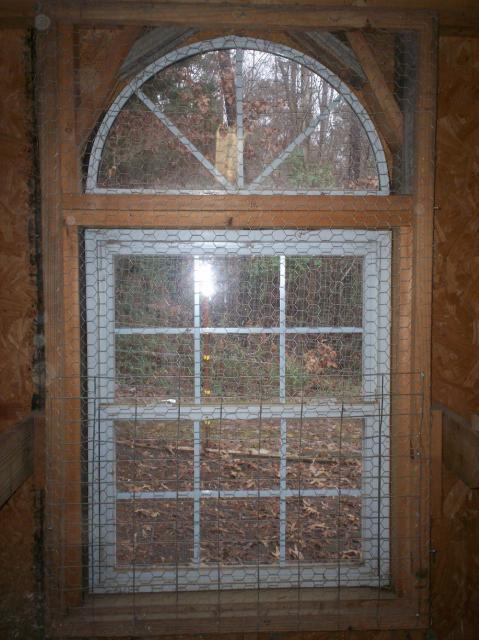
One of two end windows. Note screen on separate frame. Note also 2x4 welded wire reinforcing the lower portion of chicken wire screen for when windows are open at night.
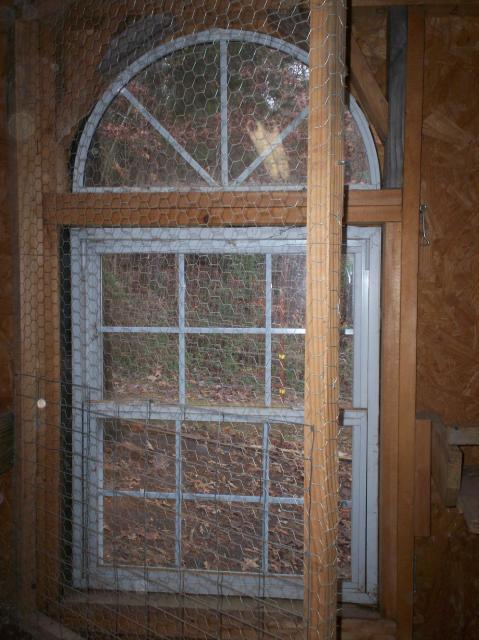
Screens are hinged so that when unhooked on side, they can be opened for cleaning and operation of the two end windows.
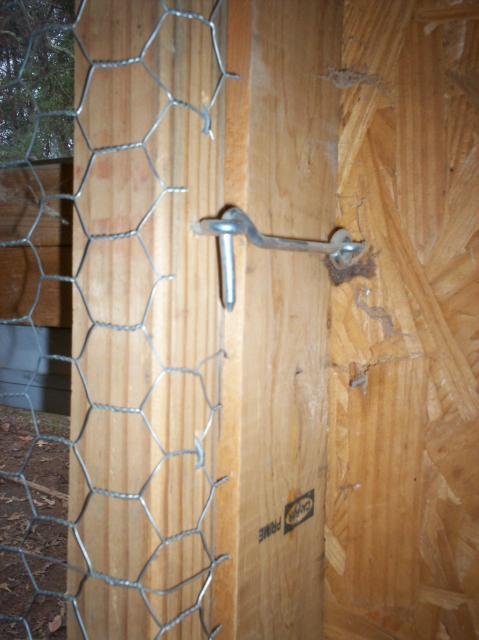
Large screen door hooks secure screens/frames in place for extra security in summertime when windows are open at night.
The four windows are a mix. I made the two front awning type windows and their windowcasings at home, using plexiglass for the glazing. They are top-hinged with dual screen-door type hooks for securing. I keep them cracked about 6" in summer, 2" in winter, and closed if below 25 degrees. They have fixed chicken wire screens inside, and those are reinforced ty 2 x 4 welded wire. The two end windows are recycled from a local salvage outfit in Knoxville. I built a hinged screen frame for each of them. They are screened with chicken wire reinforced with 2 x 4 welded wire like the two front window screens. They each have two screen door type hooks to secure them in the closed position. I have to open them to clean or open/close the end windows, so they had to be hinged. Those end windows are vinyl framed traditional double hung sash. While I was at that salvage store, I found two half-round windows that were just by chance, the exact same width. Those were tricky to frame for, but I was able to do it. I had to make curved, half-round outer casings for each one with a sabre saw, plate joiner, using 4 pieces of 1 x 6 for each one. I had to make both end window casings on site. Installed, they look like a single unit. The door I chose is a pre-hung 6-panel door, hollow-core interior unit, complete with casing. It was also bought at another salvage house in Knoxville for about $25. I was taking a chance installing an interior door, but it has lasted for a year and a half and shows no signs of coming apart. I primed and then painted two coats of really top grade exterior house paint on it, which may have helped.
Temporary fence that adjoins coop just to left of left pop door is no longer there. (Neither is the grass. LOL) In foreground is one of four outside perches for the inmates.
I decided to make four flower boxes just for the fun of it to dress it up a bit. I made those of recycled deck boards. The boxes and door are a cranberry red which goes well with the gray vinyl siding and white trim. I have a total of 6 sq ft permanent ventilation year round, plus what amount I add to that from time to time by having the windows and pop doors open. The pop doors are guillotine-style, using overhead steel stranded cables and pulleys. The cables terminate in loops about doorknob height. I simply pull them down in the AM and loop each over a roofing nail in the side of the door trim. We drop them down in place overnight in case something causes the fence charger to fail during the night. We have not yet lost one to a land predator. (I have lost one to a hawk recently though)
For the interior, I decided to do the entire back wall as a continuous row of nests; way too many. I have 12 and could easily have had enough with 6. Nests themselves are 14"X14"X3" deep parts bins. I had dozens on hand, and they are super easy to clean by simply blasting each out with a garden hose. I installed OSB separators between each nest, but left them open on top. Waste of time because I have seen two share the same nest when all other nests are empty. I have twice seen 3 in one nest, and once, I even saw a 3rd chook jump in on top of the other two and lay an egg on their backs! At that time there were 10 other nests empty. I did a full length walk board made of recycled decking boards. I did two ramps, but they are rarely used because the nests are only 2 ft above the floor.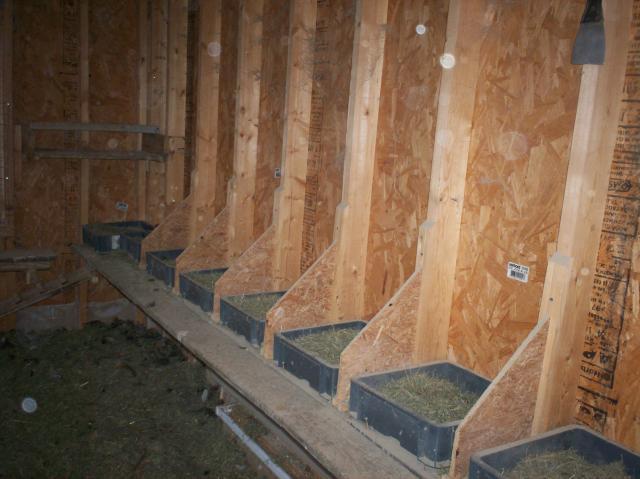
Nests with full-length walkway. Note one of two pvc plastic home gutter feed-troughs under walkway.Two 5 ft walkway boards are not fastened so as to easily move them out of way to fill troughs in morning and afternoon.
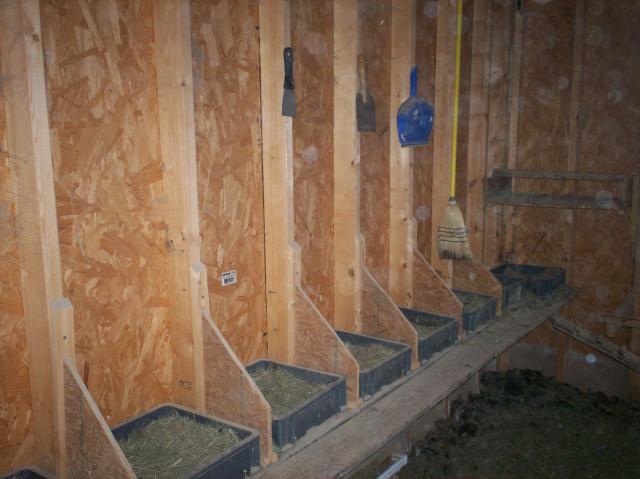
Ditto looking the other direction. Overflow corner roosts can be seen in background in both pictures.
East overflow roost with removeable poop board.
Ditto for west overflow roost.
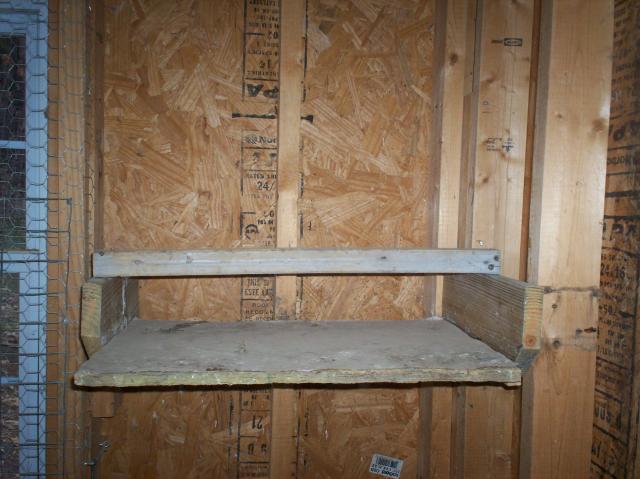
Concerning the roosts, I figured to have around 14 ft total to reduce any chances of fighting. Problem was, I did not have that much space along the remaining 16 ft front wall due to the door and pop doors. So I settled on a pair of 5 ft long roosts along the front wall, flanking the entrance, and two overflow roosts in the rear corners over the two end corner-nests. I installed the two main roosts at a ht of 4 ft, and put them 1 ft out from the front wall. Then I framed braces for the poop boards and made those. Tkey are removeable, being that they only sit on top of their braces. I put the poop boards at a height of 2 ft for the main roosts flanking the entrance. The chooks hop up to the poop boards, then hop up to the main roosts. Those are 2 ft wide, equal length to the roosts, OSB, and covered with linoleum for easier scraping/cleaning. For the two overflow roosts in the rear corners, I put the poop boards only 4 inches below those two roosts. They are also 24" deep, equal in length to the two corner roosts (approx 24"), OSB, and linoleum covered. They are built on mounts that I made to allow them to be slid out for easy scraping. That way I do not even need to use a dustpan. The chooks jump up to the nest walk, then to the rear corner roosts for the night. There are nearly always some in each corner roost, and squabbling over a perch just never happens in our flock. I also built two perches at the 2 ft ht, one in front of each end window. Those are sometimes used on rainy days, but rarely even then. There is a distance of 3 and a half ft between the roosts and the rafters, so I never have had a chook roost up there. That is good because then they would be crapping all over the floor instead of on the poop boards. Another reason that is good is because they could get into the ceiling fan I am going to install just below the turbine vent.
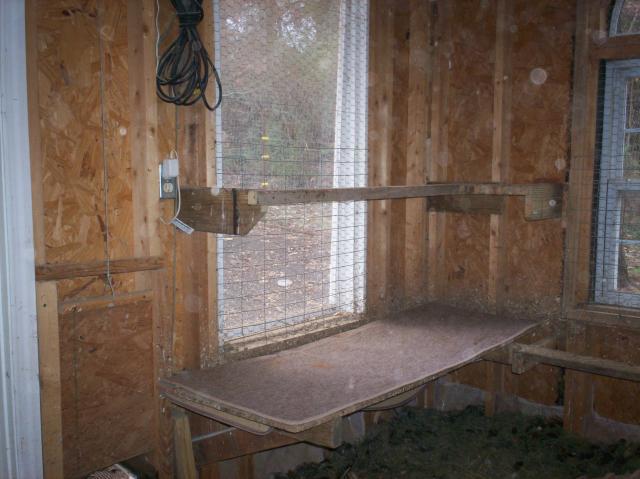
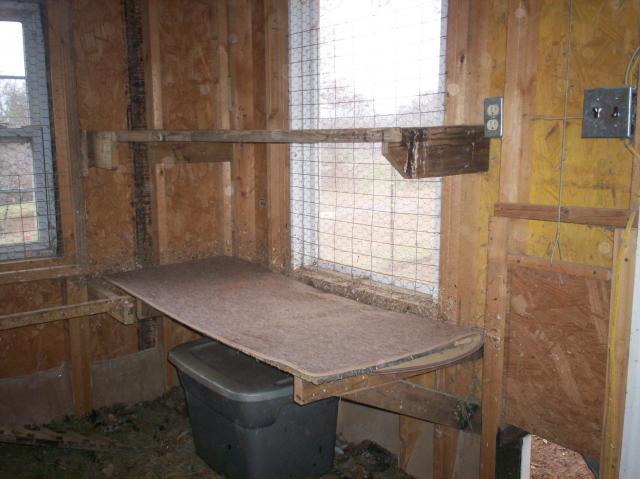
One of two main roosts with removeable poop board. Note that windows are awning type, able to be opened in warmer weather. Note fixed screen with 2x4 welded wire reinforcement for when windows are open at night.
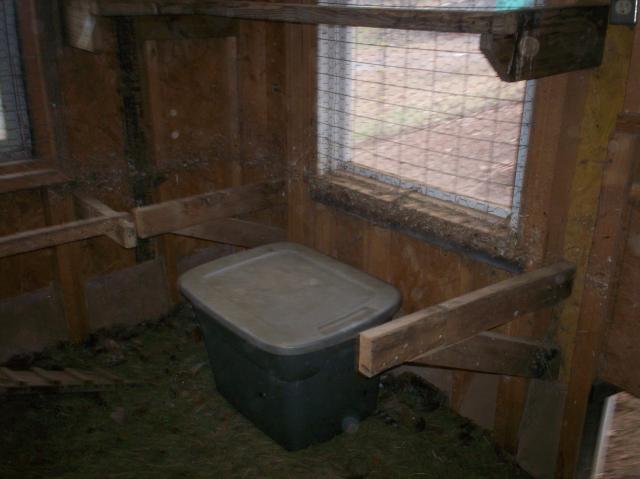
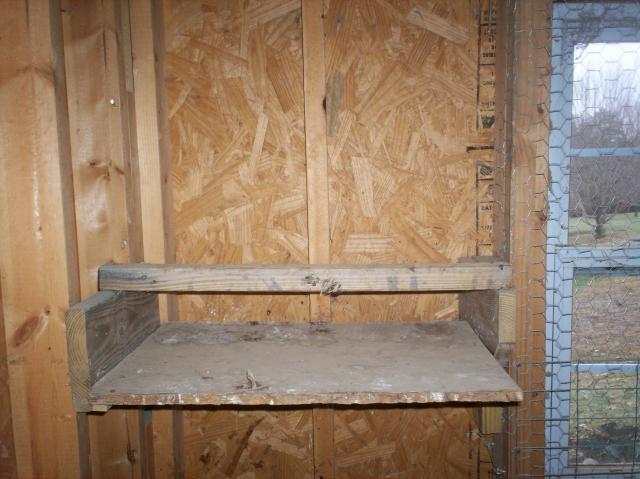
Other main roost with poop board removed to show support framing and how the 24" height lends itself well for storage under the poop boards. That plastic bin is where I store the poop until it goes to the garden or shrub beds.
Other main roost with poop board in place. note extra AC outlets that are on each side of entrance door. Handy for extra fans, etc in hot weather. The two switches visible on top right are for the two fluorescent 48" lights overhead, and for the future ceiling fan which will sit above the rafters up inside of the roof trusses.

Junction box/wiring for future ceiling fan to sit below turbine vent. Will be use on really hot days to aid the ventilation system with exhausting the excess heat.
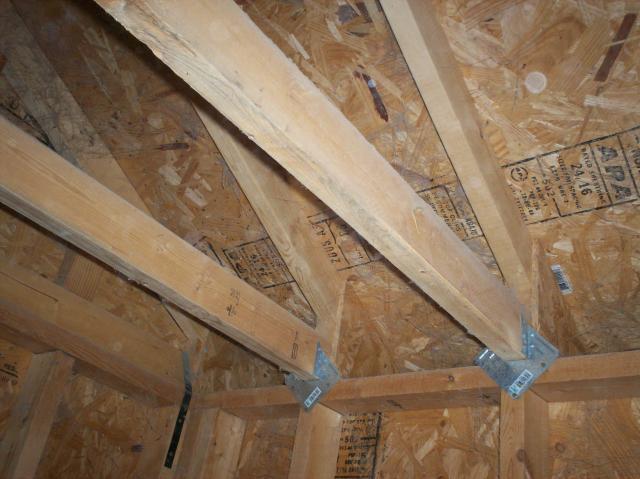
Three of the home made trusses. Note large heavy duty truss anchors. Note also the black steel tie-down strap at the left that anchors the gable frame to the top of the end wall. There are a pair of these on each end of the coop. They are a bit of extra high wind protection.
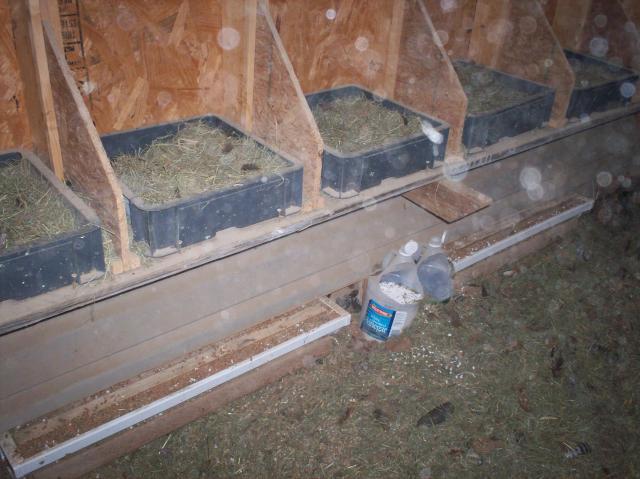
Nest row with two sections of the walkway boards removed to display the two home made feed troughs made of pvc house guttering with end caps. Plastic cutaway jugs contain crushed oyster shell for extra calcium. Litter is always minimum 6" deep. I had just knocked down a lot of cobwebs just before I took this pic. That might explain the spots in the photo.
I closed off access to part of the underside of the coop because I feared that some would begin to lay eggs way up in the farthest back part, where I could barely crawl to. I hated to do it because it was a popular place. I used chicken wire and some recycled hardware cloth mesh. Keeps out rodents. They have a little over 1/3 of the whole coop area to access underneath, at the taller end. I nailed up a recycled deck board diagonally through this area to make them a rainy day perch. That way more of them will be satisfied to remain outside longer when it is rainy. This makes for a cleaner coop. A spacious covered perch is a very important part of having a cleaner coop. I also put 3 other perches scattered around in their run. Two of these are around 16" tall and one is around 24" tall. I just welded some washers to some 1/4" rods and drove them into the dirt. Then I cut, drilled, and set firring strips on them. They are used every day, as is the big one under the coop. That one is a popular rainy-day hangout. I also set some cinder blocks around a young oak tree to make a place for a dust bath. It has sand and compost added and is a popular summertime spot.
The project came in at around $1800. I did not have a lot of free salvaged materials to work with. It is big enough to expand the flock, but we have no intention to do that. We wanted something that would not be an eyesore to us and big enough for a flock sufficient to supply eggs for us and for those of our kids who still live here in Tennessee.
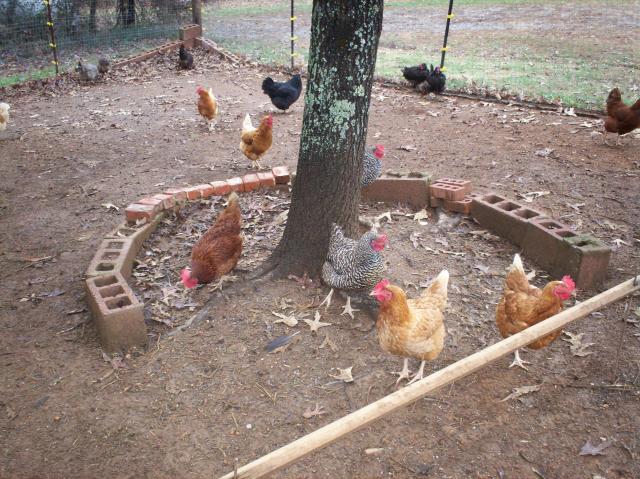
Dust bath area with one of four outside perches in foreground. These blocks will be re-set to be level as are the ones in the far corner.
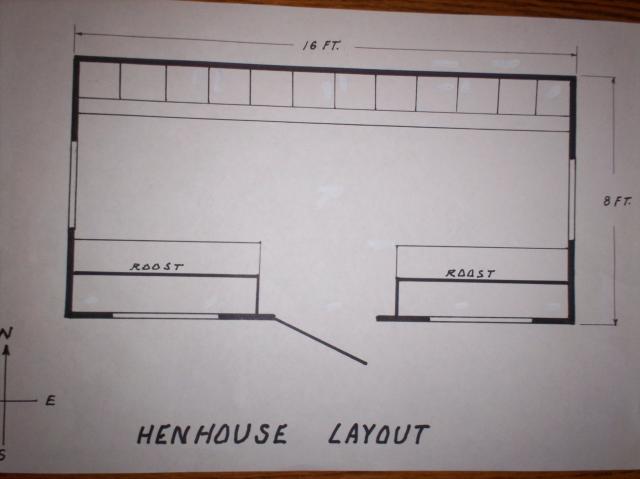
This is the floor plan for the coop.
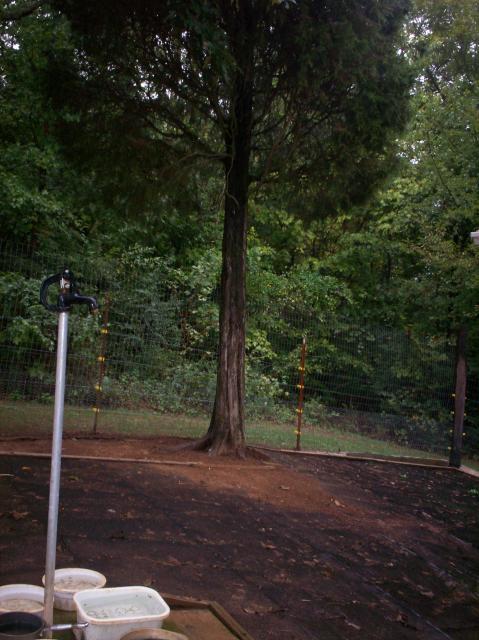
Yard hydrant and it's slab with one of three of the trees in the run in the background. Also visible is the plastic mesh that I put down for my failed grass-in-the-chicken's-run project.
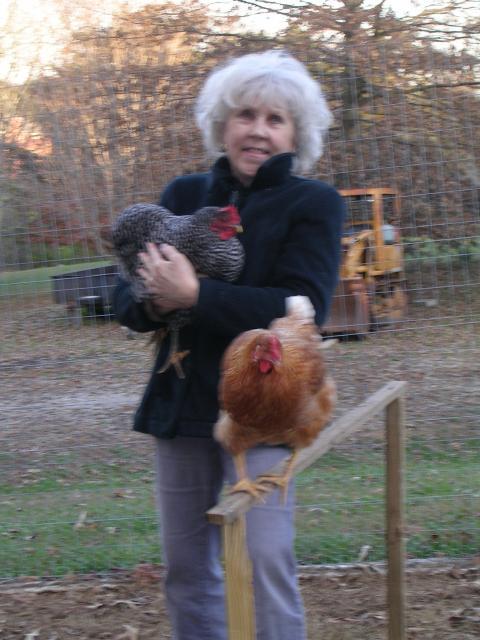
Flock mistress and my loving and helpful wife here with two of the inmates..

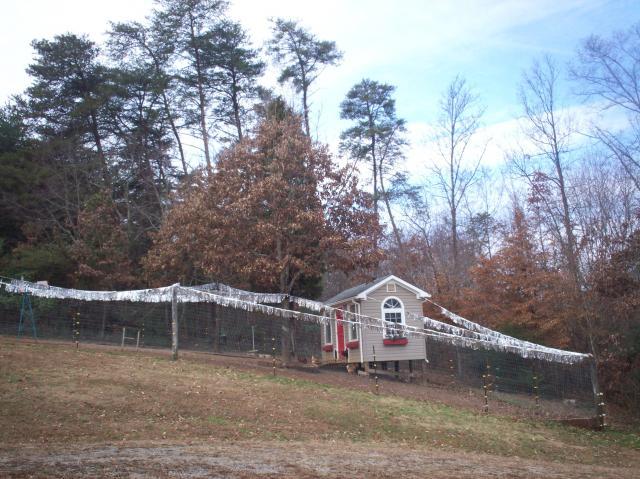
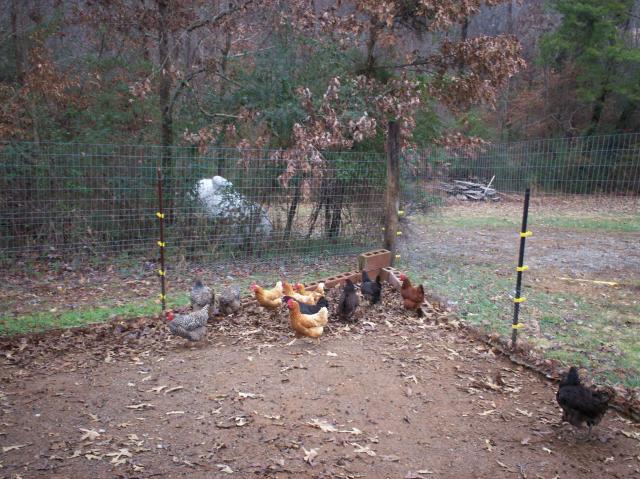
The above two photos were taken in late December, after we suffered a loss of one hen due to a hawk. He landed in the run, decapitating her. I bought the streamers online, and my wife and I installed them in 3 hrs. They cost a little under 50 cents a foot and come in 50 ft rolls. If the hawks eventually get them all, plan 'B' is a used car lot! LOL
What I would change:
1. Formica poop boards or galvanized steel sheet metal instead of linoleum over wood
2. Hardware cloth instead of chicken wire over 2x4 welded wire for the window-screens.
3. Possibly a few poles set in the ground with umbrella frame type tops for supporting bird netting, with.....
4. Bird netting over the corners and open areas to make entry/escape more difficult for airborne predators.
5. Terraces/berms in run to prevent soil erosion. Will be the first change done this year weather permitting. Lots of salvaged deck boards available to use.
Below are a few pix of our workshop bldg.
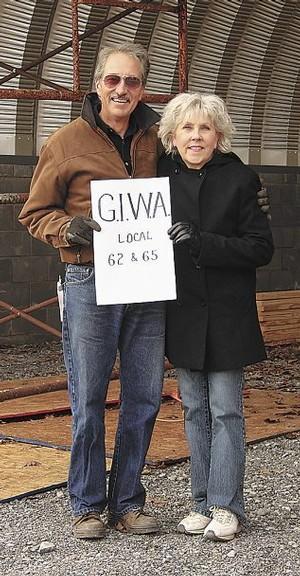
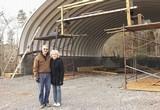
Here we are both standing in front of my partly complete shop building in Feb 2008. We have since completed the 40 x 40 building containing 120 steel panels and some 3500 nuts and bolts. The sign stands for "GERIATRIC IRON WORKERS of AMERICA" and the "local 62 & 65" stands for our age at that time.
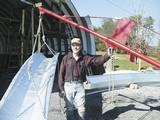
In this pic I am standing by my home made crane.
In this pic you can see how I made an elevated walk board in order to reach the upper parts of the arches. My wife worked atop it, threading nuts on to the bolts i pushed thru from the top of the structure.
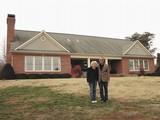
These 3 pics could not be expanded. They came from a local newspaper article about our workshop building project. The top one shows my home made rolling crane. I welded scrap steel together to make a 16 ft boom that could be bolted to the bucket of my track loader. That was the only way we could hang/mount the arch panels overhead. In the center picture, you can see the scaffolding that my wife stood on when we were bolting each overhead panel into place. (She did not want the job of going up on the roof, so she took the scaffold position instead) The house behind us is ours, begun around 1989. We lived in a house trailer behind it for the first two years, then moved into the basement while we finished it over 3 more years. It sits on 15 acres.
Below are three pictures of my workshop that did upload and transfer intact to 'My BYC page' . My wife and I built it, using a home made rolling crane. I welded scap steel to build a 16 ft boom pole to hang the arches. After bolting it to the bucket on my ancient International track loader, voila! I had a rolling crane to hoist the arch panels up overhead to bolt together. I have pics, but they will not transfer from 'uploads' to this page. My son-in-law, son, and a very good friend all helped us to get started putting the first few arches up beginning at the rear (left) of the building and ending at the front.
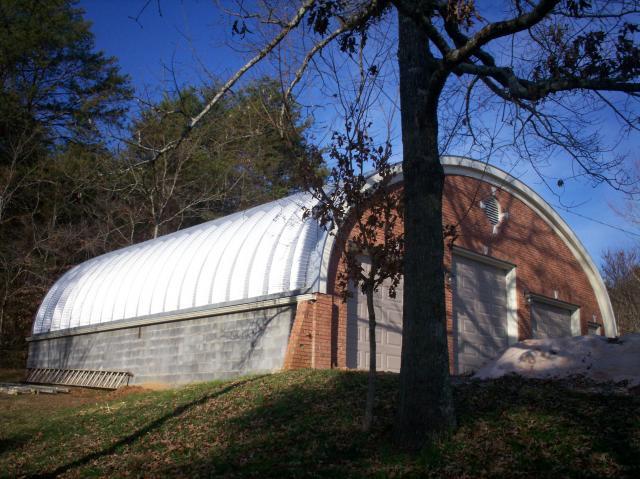
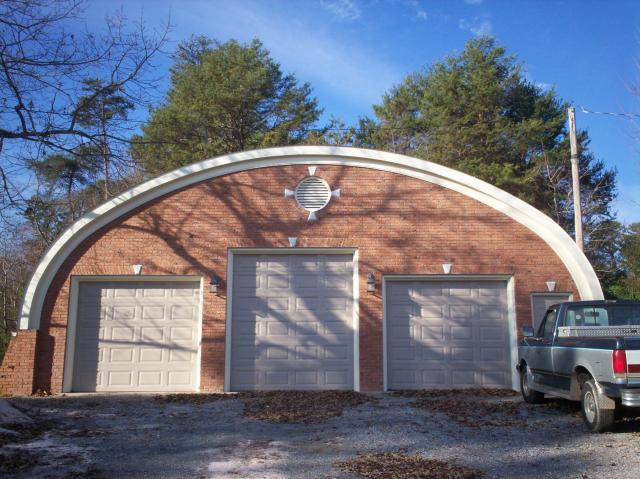
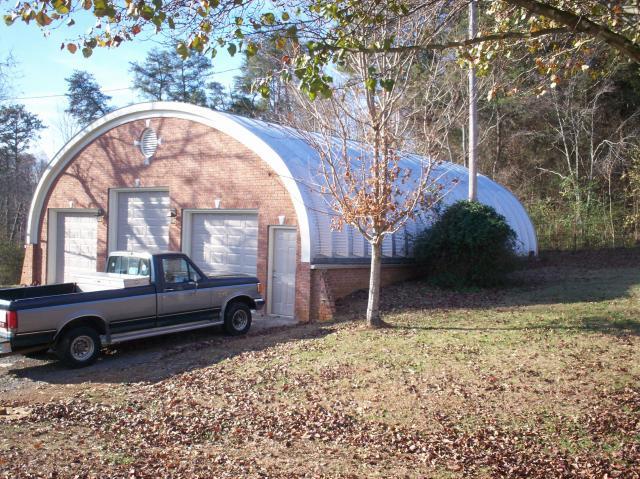
The above 3 pics are of the completed workshop bldg. I did not buy the complete pkg. I just bought the roof panels. The sidewalls and endwalls are home built. I decided to brick the front to match the house since the building is only 70 ft from it. The curved soffit/trim was quite a project in itself regarding the design. I did hire someone to pour the slab after rigging the forms and steel. I installed a hydraulic car hoist inside, which has been a dream of mine for over 40 years.

