Little Red Coop
(On a Farm Down in Indiana)

(On a Farm Down in Indiana)
...Okay, so "little" might be a bit outdated now... With a 26x8 footprint, plus 6x8 foot wing on the side, this coop is FAR from little anymore!
For years, my birds lived in a tiny, 4x8x4 foot tall coop that was as miserable for us to work with as it was crowded for them. There were so many flaws in this coop that it’s unbelievable how long we put up with it. Worst of all, though, the coop door was left open 24/7 because we just didn’t know any better. This was a tragedy waiting to happen, and sure enough, it did. Early July, 2009, after four years without issues, we had our first predator attack. The door had rotted away enough from sitting open that fixing it was going to be an issue. The coop would need to be replaced.
The next year, 2010, my parents bought for me an 8x10 shed kit as a birthday present and we set about putting it together. Regrettably, I have no pictures of the build. We simply followed the instructions and slapped it together, after which it was painted, modified for its chicken occupants, and then put into use as a coop. Originally, the floor plan left little to be desired. The nests, straw bales, and feed bins took up monumental amounts of floor space, and the hens simply refused to use the back 4 or 5 feet of the coop because of how the perches were set up with the lowest one at 1 foot in the front:
So we rearranged. We rebuilt the nests, the roosts, and changed to sand as their bedding. The feed bins were moved out into a little 3x6x4 foot tall storage shed, also known as the feed shed, which is the little beige building to the right in the very first picture on this page. Here is how the layout ended up after all this:
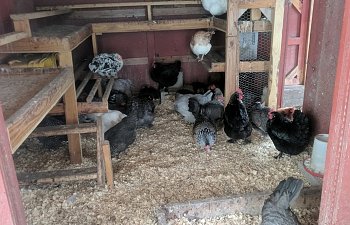
With the roosts as they are now, the hens are more willing to go underneath them, and it makes the coop seem roomier on the inside. They are also able to go underneath the nests, though I had to block the very back to prevent them from laying eggs back there.
Here are a couple pictures of the inside of the coop before the modifications in 2013 and 2014.
The perches, as they were when they were built (they are the same now, but there's more chicken poo than was shown in this picture, of course
 ). They are 3 feet long and there are at total of 9 spaced at about a foot apart when measured from the center of each perch:
The old nests. The buckets are convenient to pull out and hose off if any messes are made when someone steps on an egg or has an 'accident'. I have extras to pop back into place while others dry out after being cleaned. This design held 9 buckets as nests, but three of them were beneath the solid landing and harder than heck to get to, and so they ended up being blocked off and took up lots of floor space. That's the main reason for me replacing this setup with the new one, as is seen way, way below in the 2014 changes section. These are the six that were mainly used with this setup:
And I thought I had more pictures of the old coop, but I guess not!
 So on to the next modifications that were made to the coop!
2013: The Coop Addition
Of course, as it happens with chicken math, the coop was soon too small for the number of occupants I wanted it to hold. In 2013, we got the supplies together and began the coop addition build!
Most of the addition was built as we went along with minimal planning ahead of the time. We pretty much had the basics of building down at that point. Studs, siding, roof, door, done. But first came the foundation. I decided to have a dirt floor in the addition to allow the girls to dustbathe year round, so predator protection was key. We ended up digging out the entire area for the addition, setting two layers of cinderblocks in as the bottom portion of the wall, and filling the corners with concrete to sink in the bolts that would hold the wooden part of the wall down.
We began with something like a skeleton, which slowly evolved into the shape we desired:


Rafters went up:

The windows were framed in at this point, giving me my first look at the view my girls would have from their extended home. They have five windows total in this coop addition:


Then came a solid roof:

And finally, we started putting siding up:


The human door, which you can see in that last picture, is a little more than 4 feet tall, roughly the height of the wall without the rafters. I’ve already hit my head on it a number of times—but I can live with that. It’s about 3 feet wide and has a 2x2 stop on the inside to keep it from swinging too far in.
The opening for the chicken door is about 12x14 inches, and we put it beneath the window on the wall opposite from the human door (visible in the first of the four siding pictures above) to save us some time in framing it in. It opens out into the chicken yard, while the human door opens away from the chicken yard.
Painting! Don't mind the drips--it's just a chicken coop, after all! The dirt's pretty much covered any splatters up at this point, anyway.

The last big step was the predator proofing. The floor was most important to me. To keep out diggers, we laid out a layer of hardware cloth over the floor and attached it to the lowest part of the wooden wall using inch-long screws and washers:

After the hardware cloth went down, I filled the base with gravel as some added protection, and put 8x16 inch pavers over the seams, just in case:

Then, it was filled with the dirt that had been dug out of it before:

Hardware cloth was also applied to the windows:


And to the vents:

These vents are secured with hardware cloth and can be covered for wintertime or opened in the heat of summer:

We also can close the windows to let light in without letting cold air in. The vent that runs the length of the 8-foot wall is open year round for adequate air exchange with the vents that exist in the original coop.
Rafters went up:
The windows were framed in at this point, giving me my first look at the view my girls would have from their extended home. They have five windows total in this coop addition:
Then came a solid roof:
And finally, we started putting siding up:
The human door, which you can see in that last picture, is a little more than 4 feet tall, roughly the height of the wall without the rafters. I’ve already hit my head on it a number of times—but I can live with that. It’s about 3 feet wide and has a 2x2 stop on the inside to keep it from swinging too far in.
The opening for the chicken door is about 12x14 inches, and we put it beneath the window on the wall opposite from the human door (visible in the first of the four siding pictures above) to save us some time in framing it in. It opens out into the chicken yard, while the human door opens away from the chicken yard.
Painting! Don't mind the drips--it's just a chicken coop, after all!
 The dirt's pretty much covered any splatters up at this point, anyway.
The last big step was the predator proofing. The floor was most important to me. To keep out diggers, we laid out a layer of hardware cloth over the floor and attached it to the lowest part of the wooden wall using inch-long screws and washers:
After the hardware cloth went down, I filled the base with gravel as some added protection, and put 8x16 inch pavers over the seams, just in case:
Then, it was filled with the dirt that had been dug out of it before:
Hardware cloth was also applied to the windows:
And to the vents:
These vents are secured with hardware cloth and can be covered for wintertime or opened in the heat of summer:
We also can close the windows to let light in without letting cold air in. The vent that runs the length of the 8-foot wall is open year round for adequate air exchange with the vents that exist in the original coop.
Here is the finished project:
The human door on the addition:
The chicken door:
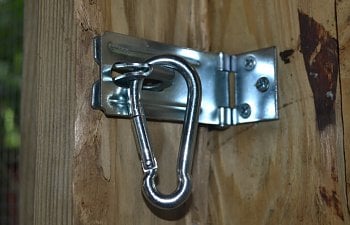
We got two latches for the chicken door, one to hold it open as the above picture shows, and one to hold it closed:
A carabiner fits through a hole on the latch to keep it from being opened in the night by something unsightly:
The completed inside of the addition. (It's kind of hard to see, but where the hen is sitting in the lower right corner of the picture is the step to the opening to the original part of the coop.)
And finally, the opening from the original coop to the addition. There isn't actually a door there, but I put that fence panel over it and had a broody hen in there, as was seen in the above picture. In 2017, we did add a door here that can keep the addition separated off for new birds or broodies, but is out of the way when opened.
For an idea of how it was set up, here is a basic floor plan. The dashes through the walls show where the windows are, the angled lines are doors, and the reddish line in the wall is the opening between the original coop and the addition:
Changes in 2014
Here's what we've been up to this year! First thing, we added another pop door to the coop addition and fenced in a sizable area as a second run. I use this for grazing when the girls aren't able to free-range as much in the day, or as a separate yard for new birds I'm trying to introduce into the flock.
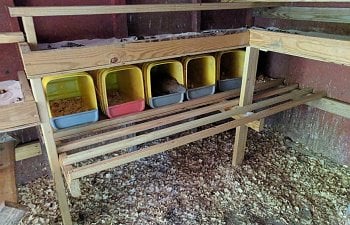
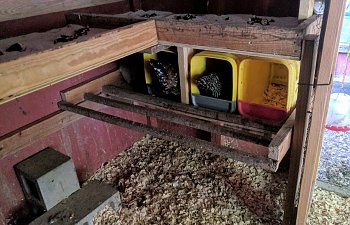
Next, we finally got my new nest boxes built! These are still cat litter buckets, which I can pull out and hose off if they get soiled in some way. The shelves they sit on are mostly reused materials. All that extra space underneath both allows for more room if the girls are snowed in this winter and discourages laying underneath! The shelves hold up to 8 boxes, but I like to keep it at 6 or 7.
Last, as you can probably see in the last picture with the nest boxes, we've switched from sand to shavings as bedding! I grew to hate the sand floor over time, having to hunch down to scoop it and the incredible amount of dust that it produced. Shavings take more work due to their weight versus just sifting out the droppings from sand, but are so much cleaner overall and smell so much fresher than sand did. I rarely detect an ammonia smell as I did from the sand whenever it got wet. I feel it's healthier for the hens to be on shavings, and that's more important to me than my own convenience. As will be discussed below in the 'Changes in 2018' section, however, I found a way to get the best of both bedding types!
So anyway, here is the updated floor plan for 2014. I moved a feeder into the addition area and have two feed pans outside during the day, rather than having one up in the main area of the coop. This spreads the feed out a bit and lets some of the younger and lower-ranking birds have a chance to eat. The white area of the floor in the main coop is where I have no bedding, and the dark brown line there is the shape of my kick board, which keeps bedding in the coop even if both doors are open and allows me to better bed the floor under all of the perches.
Changes in 2016
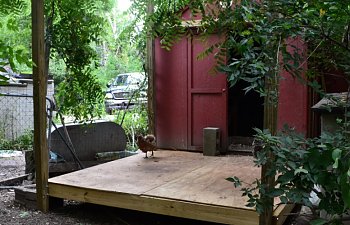
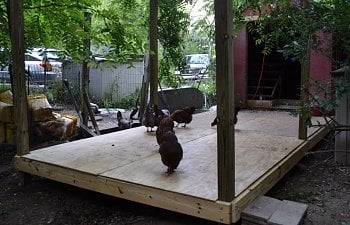
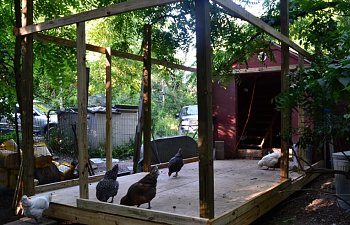
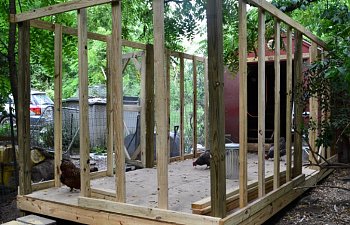
The following few pictures are just quick thumbnail images of the build progress. Don't mind our mess--it was a work in progress! Click to see them up close!
Here's a few shots of the completed deck! As close as I can get to a full view of it. We used tar paper to cover the roof until we could finish it. Unfortunately, the tar paper blew off almost immediately when we had bad weather, so the roof will be getting fixed up again soon (I hope!). We put a 2x4 edge around the base of it (except for at the doors) so that I could put some bedding down in this area during the winter for some extra comfort. The south and west walls also get covered in clear plastic sheeting for the winter, keeping out the snow and wind and allowing for a warming greenhouse effect on those few sunny winter days.
A look from inside the old coop. In the background, you can see our temporary fix for hawk cover, a shade cover that was on clearance at TSC. As you can also likely see, it was on clearance for a reason.

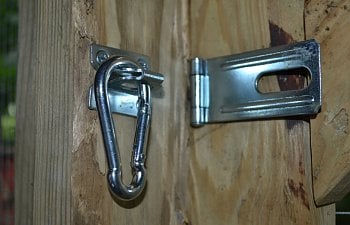
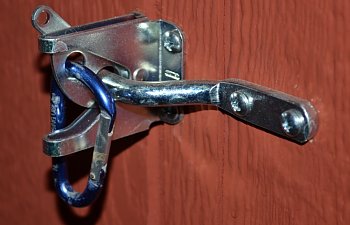
One problem we faced was getting the two doors that led from the deck to the yard to close securely because the locks had to be on the inside in order to be accessible. Our usual locks, swivel hasps and carabiners, were letting the doors move too much when latched. Our solution was simple--since the locks were on the inside anyway, we used the same type of hasp but without the swiveling loop. A carabiner holds it securely closed without letting the door move much at all when pulled on.
Because I'm so skilled at it (

 ), here is another floor plan I drew of the current layout. Some things (like feed barrels and pans) have moved around since this, but you get the idea.
We've now been through one winter with this, and I absolutely love this addition! I didn't have to do much snow shoveling at all, and we had a few occasions where predators tried to get themselves a chicken dinner without success thanks to my girls being closed in on their new deck. Hands down, my favorite addition to my coop!
Changes in 2017
This year, we mostly fixed roofs on various buildings and worked on other things that need a little help after all these years. However, we also put together rooster pens for all those extra roosters I wanted to keep, but that can't be kept in the main flock.
These three separate structures are each 4x8 feet in dimensions. Two doors on the front of each allows me to keep them as full 4x8 pens, or divide them into 2 4x4 pens to separate birds, as I've done with the pen on the left. A small yard was fenced in on the front of the middle and right pens so that the boys living there would have a little extra room. They flock together, so they all run together in that yard during the day. When snowed in, they will be divided between the pens so that they have plenty of room, and the fence wall between them will allow them to continue to mingle so that they *hopefully* remain buddies. You can also see in the below pictures that they have been winterized with tarps and plastic sheeting, and so once inside, no wind gets to the boys. Ventilation is maintained by leaving the doors mostly or completely uncovered, depending on the weather.
Here is a shot of the middle and right pens and their yard. A small wing is also fenced to the right of this picture for a little extra space. The green netting keeps the boys from flying up on top, while allowing me to walk in their small yard without stooping.
The boys roost on these free-standing perches made of scrap wood, which can be moved around as needed.
Changes in 2018
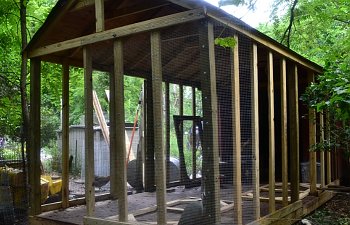
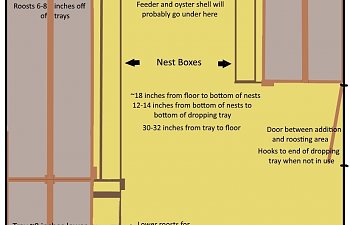
In 2018, we made the switch from a ladder-style roost to dropping trays, making the roosts all about the same level, plus a lower section for the birds to jump to in order to reach the higher section. Below is my quick 'Paint.net' drawing of the basic idea (click for the full view) :
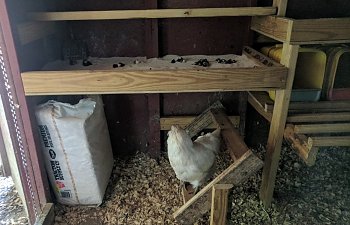
Most of the wood was either recycled or scraps that were laying around. The trays, themselves, are made from 1/2 inch plywood, notched to fit between the studs and caulked to prevent the Sweet PDZ filling from spilling out. The lip of the trays and the roosts themselves are 2x4s we had laying around. The roosts are 8 inches from the trays, except for the lower tray, which was mismeasured and so the roost is closer to 12 inches from the tray. This was actually somewhat of a happy mistake, as I much prefer the spacing on it as compared to the other trays! Here are just a few pictures of it after a night or two of use--I'm reasonably sure I have better pictures (or, at least, pictures before they were used
 ) somewhere, but am having trouble locating them.
I LOVE my dropping trays! Much less back break compared to shoveling out all those pine shavings on a weekly basis, and the girls have more use of the floor space beneath them than they did when their droppings would accumulate on the floor there! That said, the deck is still my favorite renovation to this old coop.

Here's a shot from January 2019 of the girls making use of that floor space during a snowstorm:
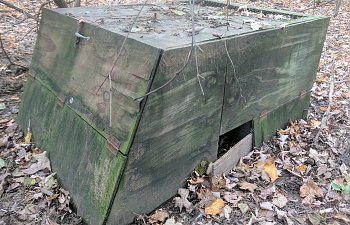
In 2019, I only have a few plans. Primarily, I want to build a new coop for my Old English Game bantam pair and any chicks of theirs that I hatch out of this old structure that's been laying around the chicken yard forever:
I'd also like to add an additional dropping tray in the coop, in the front right corner. And finally, I'm considering making a tractor-style coop, either a cattle panel hoop coop or just a small box and run that can be dragged around, as a means of raising out extra roosters from hatching for the freezer.
The Chicken Yard
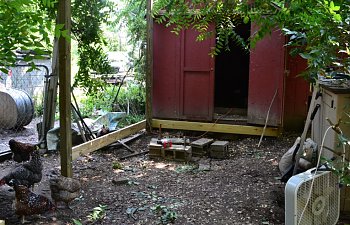
The chicken yard is approximately 50x100 feet. The fence is welded wire, 6 feet tall on the front half and 4 feet tall on the back half. I don’t have many pictures of the chicken yard because I rarely focus on anything but the chickens when I'm out there! However, here is what I have—the back section:
One thing that has been a staple of our chicken yard since before it was a chicken yard is the boat. The boat, as one might assume, is a boat that was old and leaky, and so it was put out in what was a dog yard at the time. The chickens inherited the boat and the Dogloo beneath it, and it has become a shelter and a place to put feed under if it rains:
This big old cedar tree provides some shelter as well, and the hens frequently duck under its low branches when hawks and vultures fly over. This is a view from beneath:
The only other thing worth noting is the chick yard. This is a convenient little area that I can just throw some fence up around if I have youngsters that need to go out. Then, when they’re old enough, the fence comes down, but the posts remain until next time. There is a makeshift tarp tent, a doghouse, and an ugly little shelter I slapped together with some scrap wood and an old rabbit hutch tray for the chicks to duck into if they need to. I also put up a perch or two for the little ones to play on. The chick yard was retired with the addition of the mini-yard, as mentioned in the 'Changes in 2013' section. I still sometimes throw some old fence up here if I need birds separated for one reason or another, though.
What Needs Work and What I Would Do Differently
So finally, we reach the point of the page where I talk about what I would do differently. The first thing that comes to mind is the old section of the coop needs more light and better ventilation. This is mostly resolved thanks to the deck allowing me to leave the big doors open on the front of the coop, but I would still like to add windows and more vents at the top of the walls.
Building the deck off the front of the coop has also solved a good portion of the problems I was having with mud and pooling water. However, during the wettest times, we still have some issues with the dirt floor of the addition getting soggy. One thing that should always be considered before building a coop--which I clearly didn't think of--is where water flows and sits on the land! Trust me, it's a lot easier to consider this BEFORE the coop is built and it's too late to move it!
The dropping trays are great, but I believe the roosts are too close to them. If I were to do it over (or fix it, which I may just do!), I would put 12 inches of space between the bottom of the roost and the dropping tray. Otherwise, I really like this system of dropping management.
And, of course, there's never, ever, ever enough space! Chicken math is a menace--the afflicted are always going to want to add more birds! Definitely build it as big as you can afford! Even if you don't ever add more birds later on, you'll be grateful for all that extra space, especially if you experience long winters where you live!
And that’s that. Thanks for checking out my Little Red Coop! 



 I came over here to find out about your call ducks
  still nicely done. I will look else where for the darling duckies.
 Great pictures.