Our Urban Coop - Cleveland, OH
One thing to keep in mind is that you should double your budget and double the time you think it's going to take you! Just ask my wife! I thought I could build this small coop for $250 or so... ha! NOT! I'm in about $500 total so far and still have a bit to go... But I'm doing it right and not cuting corners. Keep this in mind, this is no joke!
Here are some of the things you should think about:
- 2x4's..... I used a lot of them, and keep going back to buy more. They're about $2.40 each.
- Plywood - I used 3/8" - 2 or 3 sheets $13 a sheet or so?
- Furring Strips - I bought a ton of them... and used them for trim work & window trim.
- Nails - I seem to keep needing different nails.. longer, shorter, galvanized, staples, screws.... you name it. $3-4 a box
- OSB - 2 sheets for the roof - $7.50 each
- Hardware - So far I bout 8 sets of hinges $3 each set or so... not to mention locks & stuff
- Hardware cloth! - This is a big one! $95 for 75' of 24" at HD
- Sand - $25/yd (I have a trailer so I don't need to pay for delivery)
- Caulking - $2-3 a tube - used about 5
- Primer - $18/gal (x 2) (got lucky and found a gallon in my basement)
- Paint - $18/gal (x 2) I mean, you're not really going to paint it all one color right? Plan on two!
- Tar Paper - $20
- Shingles - Craigslist for $10 - got lucky, would have cost me $50
- Drip edge - 3pcs - $6/each
- Window - Garbage picked mine for $0! This saved me $50 at least! I made my own vents
- Feeder & Waterer for the coop? $20
- Wanna add a light? $25
- Insulation - $20
- Covered Run? I'm adding another $50 for roofing materials!
- More trips to HD??? YES! I'm still not finished!
Our Coop Progress as of 4/27/11
- 4ft x 4ft x 5ft H(front) x 4ft H(rear) (Coop sits over top of the run about 32" off the ground to allow a little room under coop
- 4ft x 8ft attached enclosed (1/2" Hardware Cloth) run - Roof will be over top of run as well. Total of 32 Sq.Ft attached run
- 21ft x 11ft free range area that will be sectioned off as well with bird netting over top for safety (total of 231Sq.Ft free range area)
- 3 External Nesting Boxes for easy access from rear of coop. boxes are about 14 x 14 x 14
- Insulated Roof with R-19 to keep heat down in summer and warmth in for winter months.
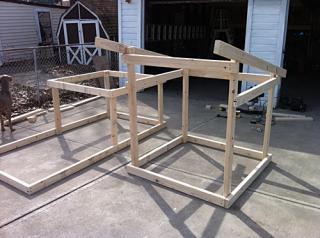
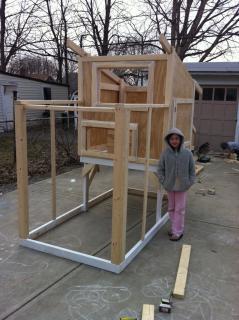
The frame: Made everyting 4ft x 8ft to make it easier for the cuts - All 2x4's untreated.
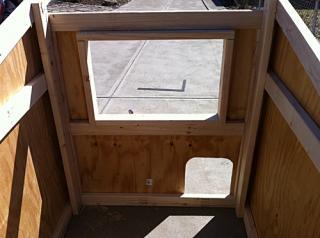
A view of the inside

Once I got the walls on, we used 2" furring strips on all edges - Caulked all joints with silicone caulking! They're cheap and worked perfect.
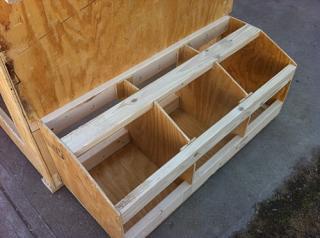
External Nesting box framing - Again, all 3/8" plywood ($12 a sheet or so?) Overall it is 44" wide and was nailed onto the outside
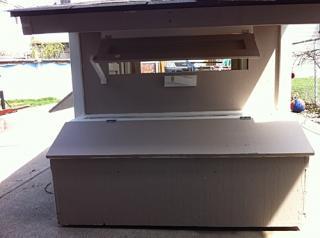
The "Dry Run"
Overall height is almost 8ft By code (abouth 7'11" to be exact) I needed to be under 8ft without a building permit from the city of Cleveland.
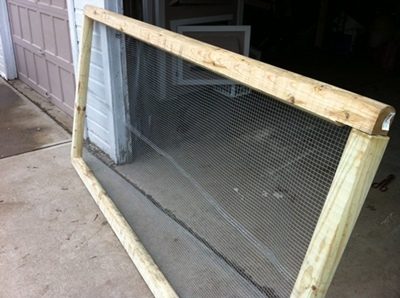
Since it's been raining for entire month of April, I took the unit apart and worked on it in the garage so we could work on it. You may notice the window is slightly larger than in earlier pictures - I decided to go larger for more airflow in the summer so I'd rather do it now! Garbage picked the window!
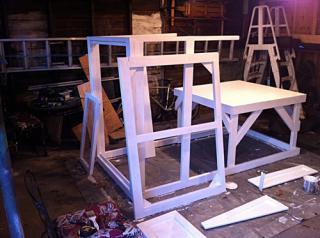
The frame - You can see we added supports for the legs in this pictures. All 45 degree cuts and nailed in. What a huge difference they made!
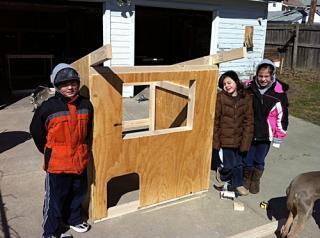
The kids did an amazing job priming and we all had a ton of fun!
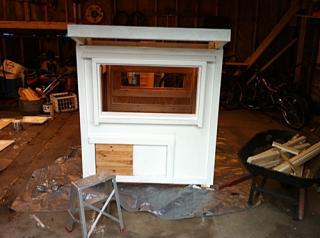
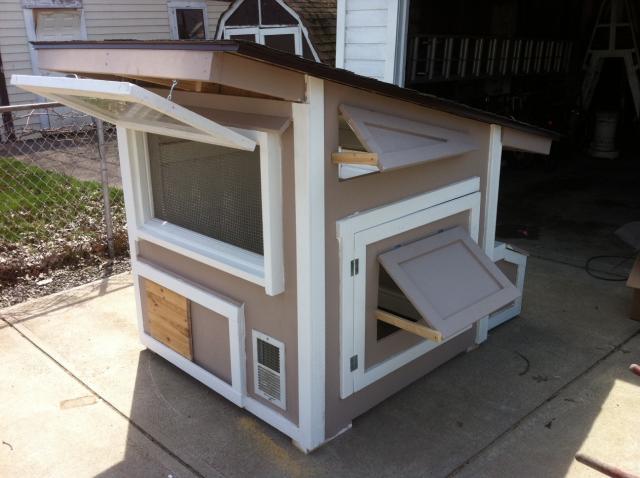
Painting completed! Window in, brackets on! Also, notice the soffits for airflow.
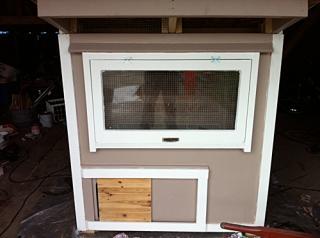
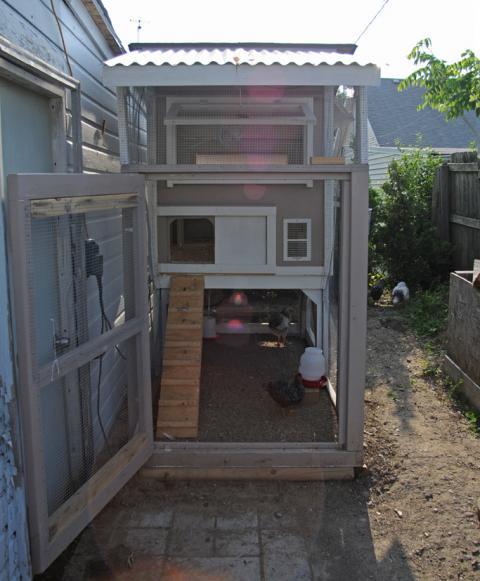
Looking at the coop from the back - Nesting box access and rear window. Roof overhangs the nesting box to prevent water
from dripping on top of it. I also used drip edge around all edges for extra measure. Drip edge prevents water from running back under the wood.
Bought the shingles off of craigslist for $10 for 45sq. ft! Juest enough, the roof is 5ft x 8ft.
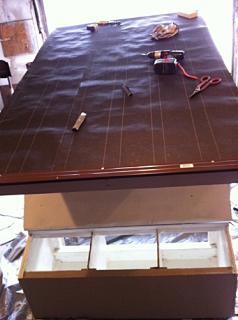
Nesting box open - I put two layers of roofing paper down, one the traditional way, and one long ways for added weather protection.
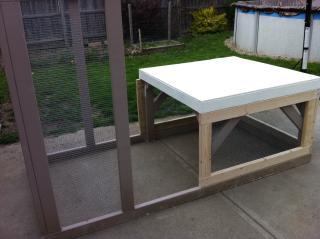
(Above - Top Section Almost Complete)
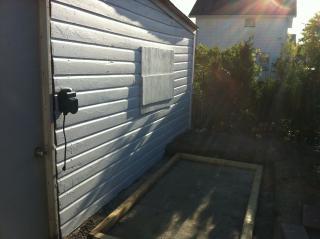
Chicken Run Foundation
The above picture is the foundation for the run area. It's 4' x 8' and made with
landscape timbers and 1/2" hardware cloth to keep animals from digging under the coop.
This will sit on the ground and the frame will be assembled on top of it - See below.
Just about all screened it with 1/2" hardware cloth! - Repaint Needed.
I had to build frames because the coop is 32" off the ground and the hardware closth is 24".
I can add hinges and use it as access if I choose?
5/9/2011 - We're moving the coop tonight!
5/10/2011 - Update - Coop has been moved into place!
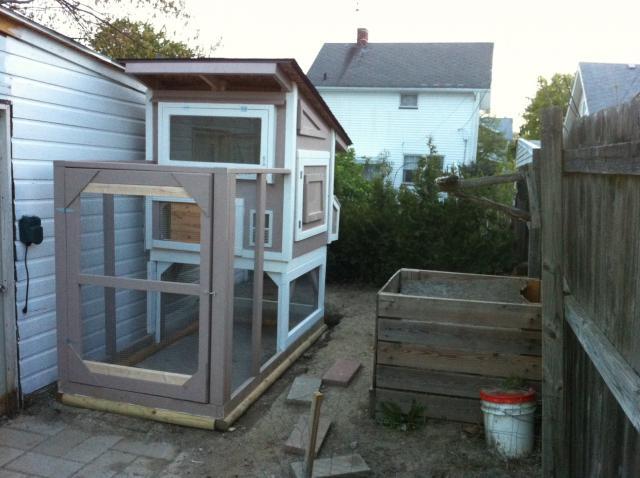
Update - 7/21/11
Added a roof over the run
*Although we started off with 6 chickens it seemed a bit cramped in there for them all.
We found out that our two Columbia Wyandottes were roosters and gave them away to a happy home.
This coop is perfect size for 4 chickens!!! (but 6 would work)
We're Almost Complete and the chicks are now 5 weeks old! Not long now!

