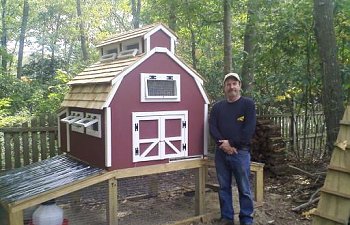
My coop is 4' x 4', and is sized for 3 - 4 chickens.
Since we were planning on building most of the coop in the garage and then assembling onsite, we decided to make this as modular as possible. We used a sandwich construction method to try to insulate this as much as possible, with 1/2" exterior plywood and 1" foam insulation board, and then lined the inside of each piece with 1/4" plywood. All walls, roof, and floor use this sandwich method. We painted the insides with heavy duty primer, and stained the outside with a latex exterior stain.
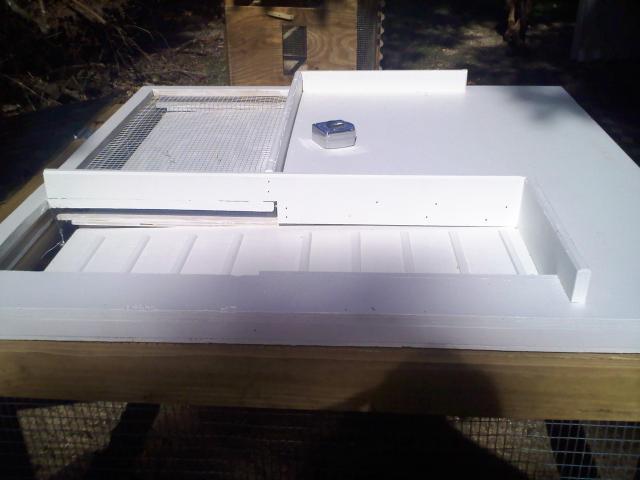
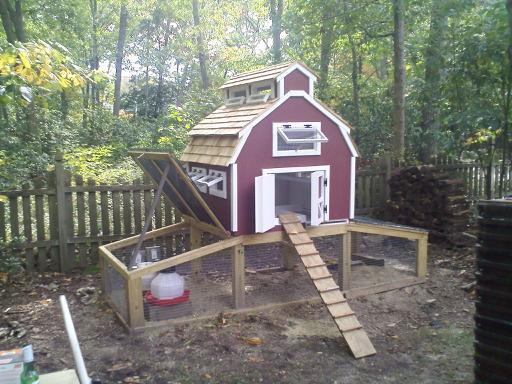
When we did the flooring, I decided that I wanted to try a pull out poop board, and just use hardware cloth during the summer to keep ventilation at the maximum, and cleaning effort at a minimum. Over this, we used a 2x4 for the roost, flat. There is a 'door' in the floor bottom that swings back and can be secured underneath in the summer, and in winter we close this up to have a solid floor, and use a plexiglass pull out board. We also designed the interior to use a pull up ramp to access the run, which you see in the front of this picture.

Our overall design was a mini-barn, which sits above the main pen. I let my chickens out about 3 or 4 days a week, but this keeps them happy most of the time. All of the windows are hand made using plexiglass and wood frames, and have hardware cloth screens that bolt to the inside of the walls. The long cupola on the top actually has hardware cloth on the bottom of the unit, since this was easier than trying to piece each window. I just use sticks to prop the windows open in hot weather, but since we didn't finish this until October, there wasn't too much of that...
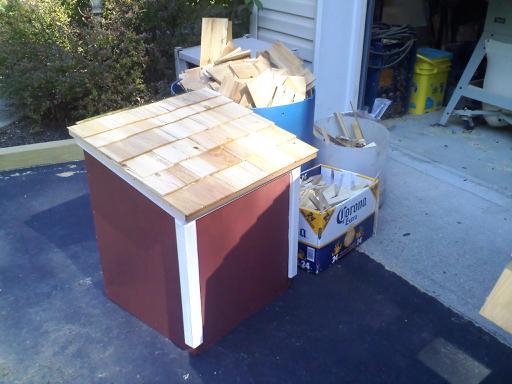
The nest box is slightly oversized, since I planned on getting Orpintons and Austrlorps, and I wanted them to fit in the box. Interior on this is 14" x 16".
Once all of the sides were done and stained, and roof was assembled, we moved each partition to the site. My husband included some 'tabs' to make assembly easier, shown here on the top of the side section. Here are all of the wall pieces, plus the cupola:
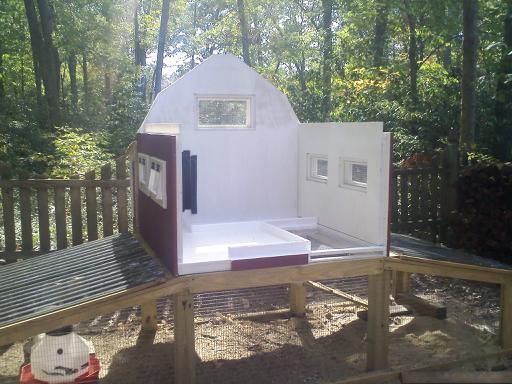
We secured the floor to the run first. The main supports are 4x4 posts on each corner, and we used 2x6 cross beams underneath the ends of the coop to bridge the two sides. Here is the partially constructed coop to show some of the interior details. The run opens on both sides for raking and filling the feed and water. We used plastic roofing to keep the floor of the run as dry as possible, and lined this with more hardware cloth. I keep food and water both in the run and inside the coop.
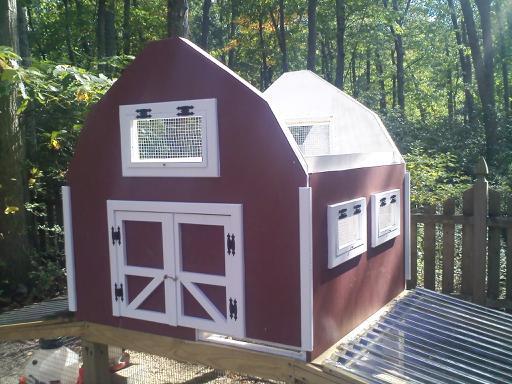
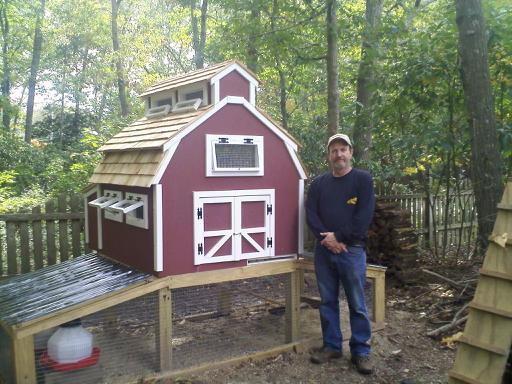
And now the front (shaping up!). The double doors can both be opened, but I included a stop on the one to secure it unless I am cleaning the coop.
Unfortunately, even doing this as a modular, the roof was way heavy! It took my husband and I and our two teenage daughters to lift this over the coop to get it in place (did I mention us girls are all short?). Really glad that we didn't have to move the whole thing... Note that the top of the roof is open where it is to be covered by the cupola.
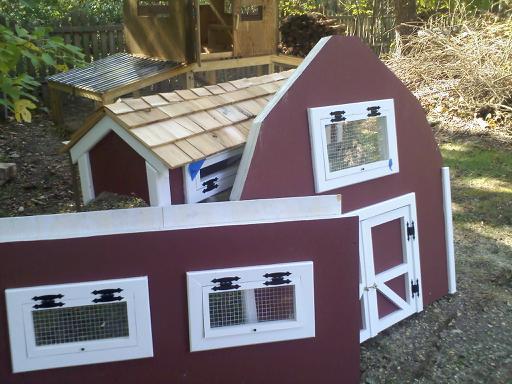
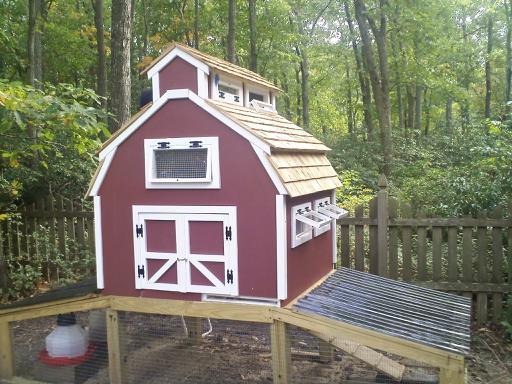
The cupola was the finishing touch. The entire top is open, so this filters a lot of light in, and provides great ventilation. The bottom of the cupola is lined with hardware cloth, which sits on an open slot in the roof.
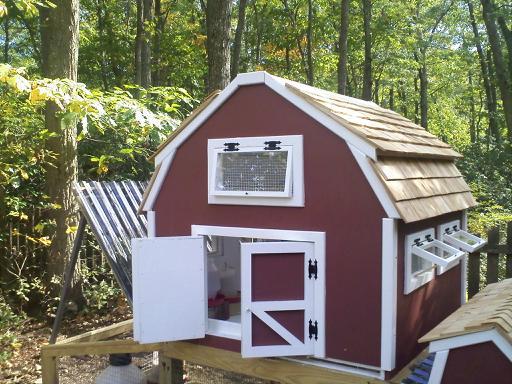
Here is the rear view showing the nest box:
Ramp for when they free range in the yard:
Special thanks to my dear hubby for giving up all those weekends to work on yet another honey do list project, and for doing such a great job...
What I would do different...
Since we were planning on building most of the coop in the garage and then assembling onsite, we decided to make this as modular as possible. We used a sandwich construction method to try to insulate this as much as possible, with 1/2" exterior plywood and 1" foam insulation board, and then lined the inside of each piece with 1/4" plywood. All walls, roof, and floor use this sandwich method. We painted the insides with heavy duty primer, and stained the outside with a latex exterior stain.
When we did the flooring, I decided that I wanted to try a pull out poop board, and just use hardware cloth during the summer to keep ventilation at the maximum, and cleaning effort at a minimum. Over this, we used a 2x4 for the roost, flat. There is a 'door' in the floor bottom that swings back and can be secured underneath in the summer, and in winter we close this up to have a solid floor, and use a plexiglass pull out board. We also designed the interior to use a pull up ramp to access the run, which you see in the front of this picture.
Our overall design was a mini-barn, which sits above the main pen. I let my chickens out about 3 or 4 days a week, but this keeps them happy most of the time. All of the windows are hand made using plexiglass and wood frames, and have hardware cloth screens that bolt to the inside of the walls. The long cupola on the top actually has hardware cloth on the bottom of the unit, since this was easier than trying to piece each window. I just use sticks to prop the windows open in hot weather, but since we didn't finish this until October, there wasn't too much of that...
The nest box is slightly oversized, since I planned on getting Orpintons and Austrlorps, and I wanted them to fit in the box. Interior on this is 14" x 16".
Once all of the sides were done and stained, and roof was assembled, we moved each partition to the site. My husband included some 'tabs' to make assembly easier, shown here on the top of the side section. Here are all of the wall pieces, plus the cupola:
We secured the floor to the run first. The main supports are 4x4 posts on each corner, and we used 2x6 cross beams underneath the ends of the coop to bridge the two sides. Here is the partially constructed coop to show some of the interior details. The run opens on both sides for raking and filling the feed and water. We used plastic roofing to keep the floor of the run as dry as possible, and lined this with more hardware cloth. I keep food and water both in the run and inside the coop.
And now the front (shaping up!). The double doors can both be opened, but I included a stop on the one to secure it unless I am cleaning the coop.
Unfortunately, even doing this as a modular, the roof was way heavy! It took my husband and I and our two teenage daughters to lift this over the coop to get it in place (did I mention us girls are all short?). Really glad that we didn't have to move the whole thing... Note that the top of the roof is open where it is to be covered by the cupola.
The cupola was the finishing touch. The entire top is open, so this filters a lot of light in, and provides great ventilation. The bottom of the cupola is lined with hardware cloth, which sits on an open slot in the roof.
Here is the rear view showing the nest box:

Ramp for when they free range in the yard:
Special thanks to my dear hubby for giving up all those weekends to work on yet another honey do list project, and for doing such a great job...
What I would do different...
- The inner ramp is nice because I don't have to be up at the crack of dawn to let the chickens out, but it wasted a lot of floor space, and it definitely makes the coop colder. I close this up when it is frigid out, but also added a heat lamp to try to keep the temps about freezing (runs about 6 degrees warmer than outside temps). If I could do this again, I would get rid of the internior ramp, and instead opt for an automatic door, and just extend the run to cover more of the front when I don't want to free range them.
- The hardware cloth under the roost worked great in the summer, but we should have used 1x1 hardware cloth. Too much gets hung up...
- Put the poop board OVER the hardware cloth!
- I should have argued better for a 4x6 coop... My husband thought this would be way too big, but I really want at least 2 more chickens, and think it might be too crowded fitting 5 of them all into a 4x4 coop.